


erikbojerik
-
Posts
3,869 -
Joined
-
Last visited
Content Type
Profiles
News and Information
Tutorials
Product Reviews
Supplier Listings
Articles
Guitar Of The Month
Links and Resources
Forums
Gallery
Downloads
Posts posted by erikbojerik
-
-
That's the coolest thing I've ever seen in my entire life.
The coolest thing I'll see in my life is when Haken takes this thing and makes a guitar-neck version bolted to a body.
-
This was posted over on the OLF and just thought I would share - great examples of what a good guitar top should sound like when you tap it (before bracing).
Then - the whole idea behind brace shaving is to get as close as you can back to that nice ring.
-
I've used both Allied and StewMac fretwire with no problems (I press mine). What do you mean when you say they "lift out"?
-
Yeah man - send it!
If you sell enough of these, you can afford to kick Vista and buy a Mac!

-
I have it desiged to where the bit potrudes 1/4" out of the table. My fingerboards could be up to .4" think and still work.
You should be good then.
You could certainly set this up for different radii at the ends, you just need to make sure the end gauges are the same distance above the beam surface along the centerline.
The amount of radius change is variable - I think 10" or 12" at the nut to 14-16" at #20 is a pretty "average" amount of compensation.
This could work really nicely with a vacuum clamping arrangement as well.
-
I've considered that as well, of all things! The big problem I foresee is the difference in height between the 110 and 74 gold Evo wires. I guess they could be levelled out along with the "drop off" from 12th or thereabouts, but it's a lot of height to dial out for someone of my experience.
Yeah you'd have some serious levelling to do - or you could try to build a step into the fretboard itself to avoid removing too much meat off the middle frets, then once its fretted knock it down when you do your scallop job.
I've never seen an 8-string TOM.
-
So the little red thing is the router bit sticking up from the table?
Looks like it should work just fine - I've seen a similar jig turned on edge and used on a long edge belt sander. If your beam is rigid enough, then the radius "gauges" at each end should only touch the table at one point - like rolling a cone (on its edge) on a table. Yeah you can get the angle wrong as you slide it over the bit, but just take multiple passes and it should even out.
The trick here is designing the end gauges so that the jig can accommodate different fretboard thicknesses while still keeping the beam parallel to the table - you almost want a separate jig just to set the end gauges correctly. Also, a router bit will tend to chip out brittle woods and tear out figured woods unless you're taking very small bites (bit height).
-
Why not just go with a maple neck and paint it black?
-
Bending the rims gets you into a whole 'nuther level of guitar building - the world of archtops - which it is (IMO) pointless to try until you've built some acoustic guitars first.
Instead, the thing to do is to start with a solid core and hollow out the wings, leaving the center block untouched - essentially a big chambered body core. Then glue on your top and back.
For carving the tops and backs, get the book by Robert Benedetto "Making an Archtop Guitar" - you can get it through your local library (via interlibrary loan if they don't have it on the shelf).
-
I like #1 and #4.
In addition to the upper-fret scallop, I recall Perry once using mandolin fretwire in the upper register. Makes a teeny bit more space for the fingers.
-
Take any standard wiring diagram that suits your pickups - make two separate ones - then instead of having two output jacks, run the 2 hots to a 3-way LP-style toggle switch (upper neck -> both necks -> bottom neck), and run the output of the switch to a single output jack.
It's no harder than that. If you're going Strat style, you don't even need two 5-way switches, you can just run off both sides of a StewMac super switch (which is what I did), and put the 3-way toggle in the hole where the 2nd tone control goes.
-
I think you can start to hear a difference around 1/4" - the thickness of a fretboard - and the thicker, the more.
-
Erik, got my fretboards today. They look amazing! Can't wait to use them, thanks for everything!
Cool beans - I'm keen to see what you come up with!
-
+1 radius dish
Buy one or make one.
-
I got this top piece of Bubinga from erikbojerik a few years ago, thanks Erik!
I was wondering if that was the V you were talking about - that's the body shape I remember, I like it.
-
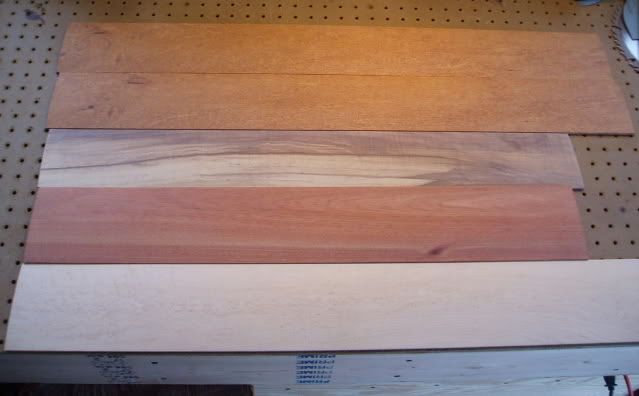
Mahogany and limba both have a similar warmth to them tone-wise - walnut has a little more bite IME. All are readily available in the thickness you need, which is around 1-1/2" (limba may be the hardest of the 3 to find).
-
Finally, some fretless fingerboards, extra-wide at 4"+. Top-to-bottom are 2 xylia lace (hard as nails but machines beautifully), acrylicized spalted maple, bloodwood and birdseye maple.
-
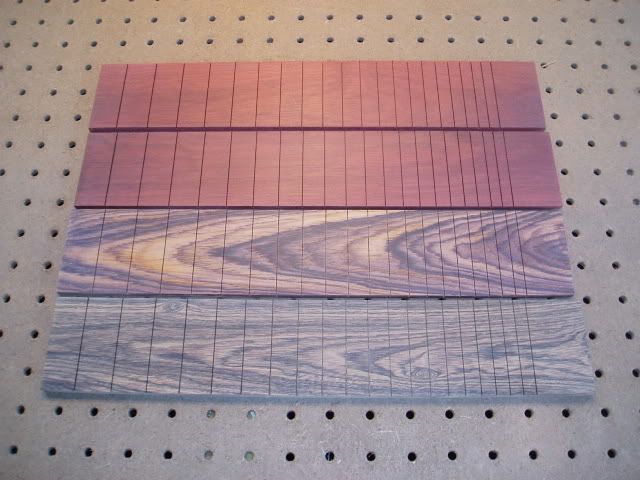
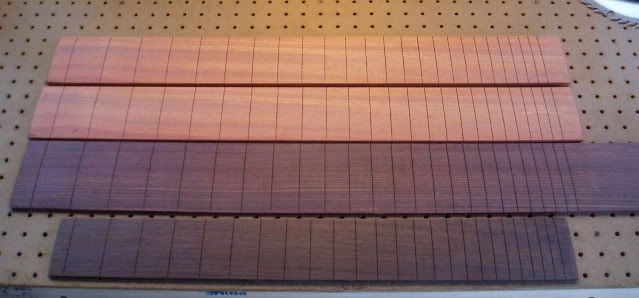
Some more fingerboards from the latest batch - opposite ends of the scale length range.
These are 17" scale (same as a tenor uke). Top-to-bottom are 2 bloodwoods, cocobolo and bocote.
These are 34" bass scale, except for bottom one (guitar scale). Top-to-bottom are 2 bloodwoods, east indian rosewood, and QS wenge (guitar).
-
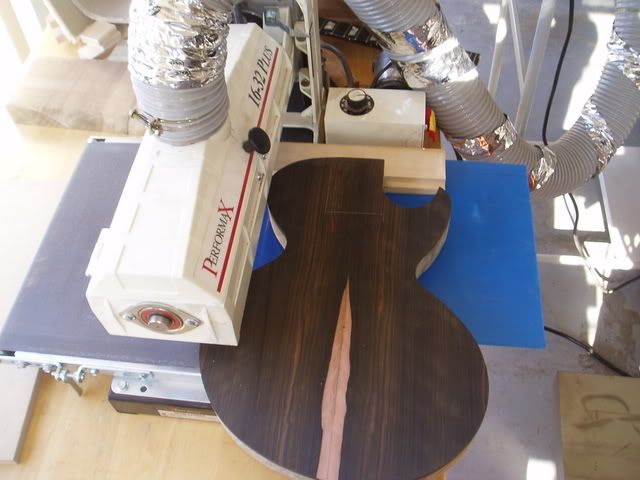
Performax 16-32 here - love it. You have to check and tweek the level on the drum if you use it a lot, but it's easy to do.
I've personally found more uses for an open-ended sander, like planing the Les Paul neck angle into the body:
-
No. A radiused top is just more stable over time. There are plenty of flat-tops out there, but except for the need for a radius dish, its not that much different from building a true flat-top (except possibly predicting the neck angle).
-
Two separate electronic circuits --one for each pickup. It will mean having two cables (or a stereo cable) dangling off the back of the guitar
I think Chris Squire (bassist for Yes) was the first person to do this - send the two signals from two pickups (via stereo cable) to two different amps. Lots of bassists, including Geddy Lee, followed in his footsteps.
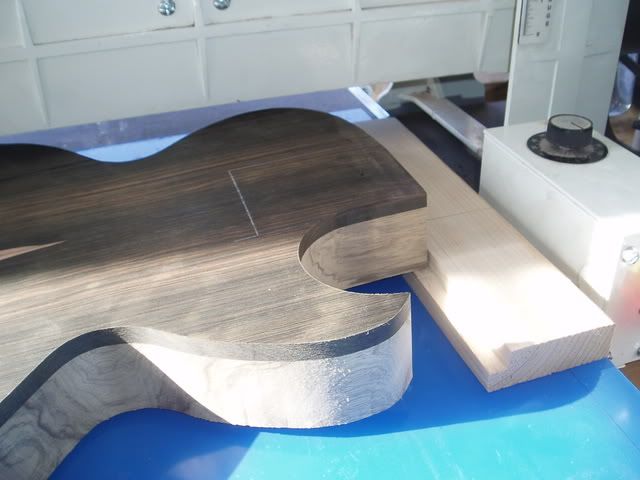
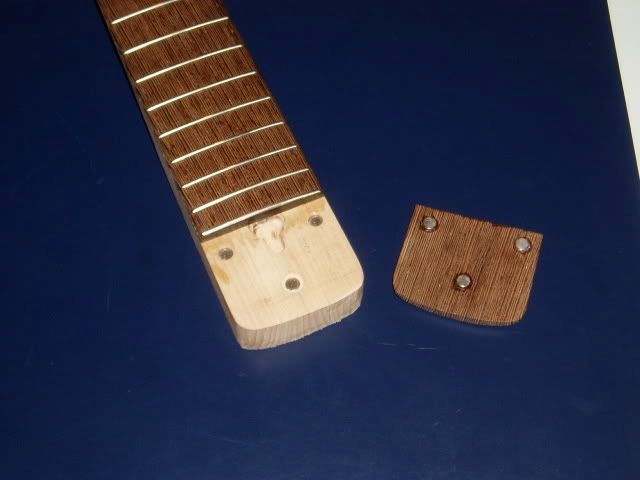
On the last bass I did, I hid the access for the truss rod adustment nut underneath a removable fretboard extension (frets #21-24). #20 was epoxied into place. It stays put with rare earth magnets as inserts (tight tolerances!), and plays and intonates just as well as the other 19 frets.
-
everyone says that because it's a neck trhough it has more sustain then a glue neck.
Bah - everyone knows that sustain comes from your compressor.
-
I am planning a bari right now - I'm going with basically a Strat layout but with a splittable humbucker in the bridge. Distorted, you want the lack of mud that a good bridge humbucker has - the neck-middle-split bridge combos are basically for the usual clean Stratty sounds a 4th down from normal. DiMarzio Area 58s in the neck & mid, Mo Joe in the bridge.
Then again, I'm also planning a baritone Tele - different beast altogether.
-
From a 3 or 4-piece body, the glue/wood ratio has a long way to go before it gets to plywood.
Most painted Strats are multipiece bodies, and sound just fine. But they're not saving $8 per body because Fender gets its wood a LOT cheaper than you do.
Whatever you do, just don't glue endgrain to endgrain...

8 String Guitar Parts
in Solidbody Guitar and Bass Chat
Posted
Any 6-string bass pickup will work as an 8-string guitar pickup.