


Littleman
-
Posts
15 -
Joined
-
Last visited
Content Type
Profiles
News and Information
Tutorials
Product Reviews
Supplier Listings
Articles
Guitar Of The Month
Links and Resources
Forums
Gallery
Downloads
Posts posted by Littleman
-
-
Are you going to have cross inlays as fret markers on the fretboard?
I am going to ask the customer what he would like on it today.
We will probably just do dots down one side of it and a cross on the 12th fret like we did on Daniel's acoustic.
-
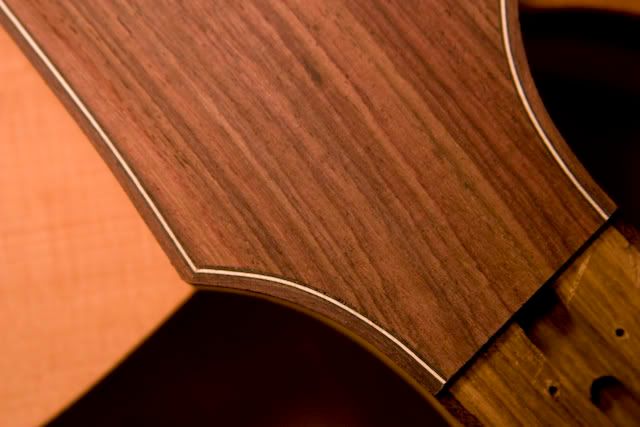
I like it. The head stock looks really clean...well done. And the Crown of Thorns inlay is awesome.
Look great. Can't wait to see some more pictures.
Thanks, I spent a ton of time on that rosette. I've looked around and there is nothing else like it out there.
The closest thing is the ugly "crown of thorns" carbon acoustic.
-
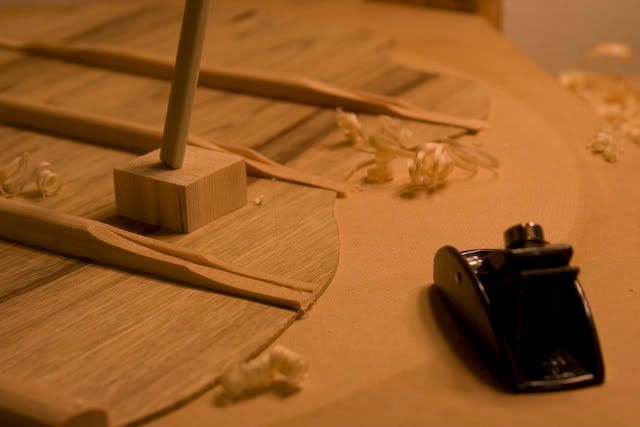
Dang you guys are kickin out some awesome guitars! I love that rosette. I was curious about the funky little notch carved in your back braces. Is it just for looks?
I was looking at the pics in your photobucket album and it looks like maybe you could stand to improve the dust collection on your router table! LOL
Thanks, the 'funky' notches in the bracing are there as a result of artistic freedom. They are just there for looks, I don't believe it will change the sound any... the only difference structurally would be it is slightly more rigid than if it were just carved down. I love the looks of them notched out.
I agree, the dust is pretty bad... but it doesn't really hinder our working since after each route we just vacuum it up. I'm not going to get a large dust collection system until we move to a larger shop.

-
I originally started this acoustic to be my personal guitar, but a friend of mine saw it and decided to buy it... I gave in.
He wants it ready before Christmas, so Daniel(Sorbera) & I decided to finish it up together since it's now a business guitar. I was working on it by myself because it was just going to be mine... I'll just have to start a different guitar for me.
The crown of thorns(shown below) was an inlay I chose because I was trying to do a theme of "The Blood of Christ". We strayed away from a lot of stuff I was going to do to the guitar when we sold it, but quite a bit of it is along those lines as you'll see.
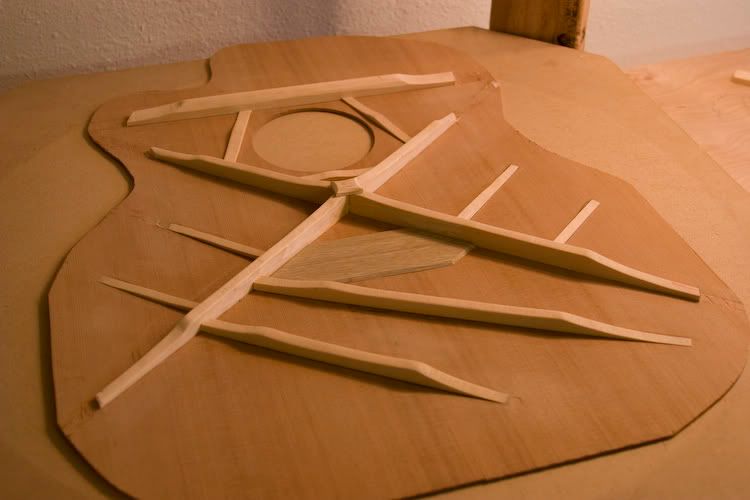
Here are a few photos of the build up 'till now:
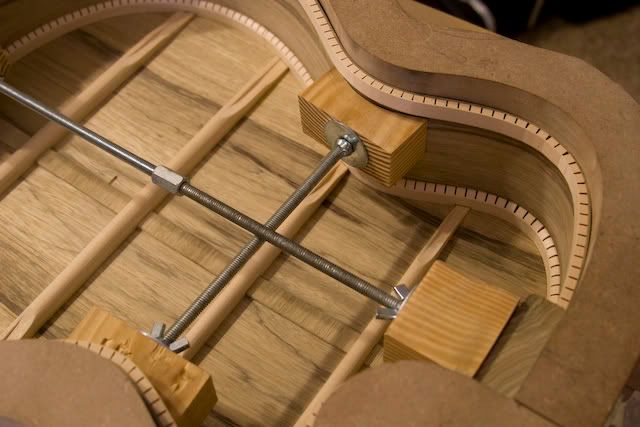
Details of the back bracing.
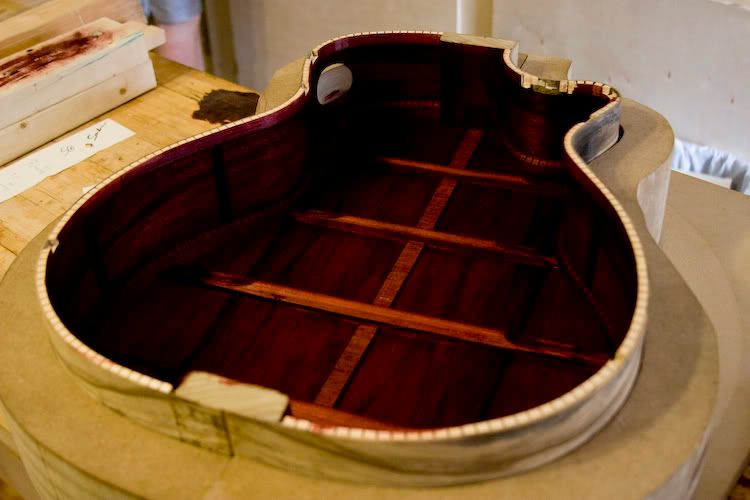
This is the body before we stained it.
After stain. We stained it red, it's not that dark in person. Red for the blood of Christ theme.
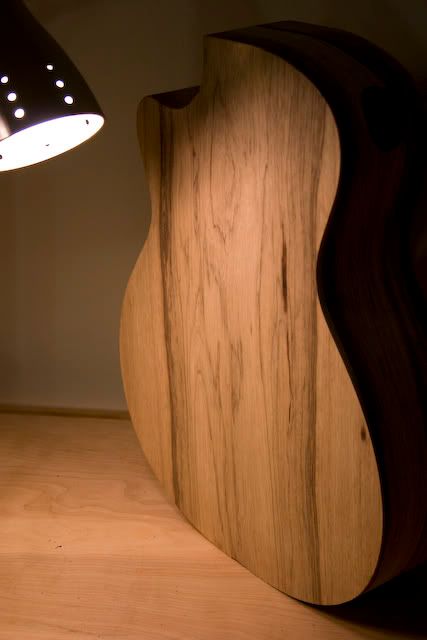
Black Limba back.
Top Bracing.
Crown of Thorns inlay. I used Black Limba for the inlay material. Each thorn was a separate inlay.

This is what I worked on today, we got the neck done enough so I could do the purfling & inlay. I'll be working on all the inlay next week.
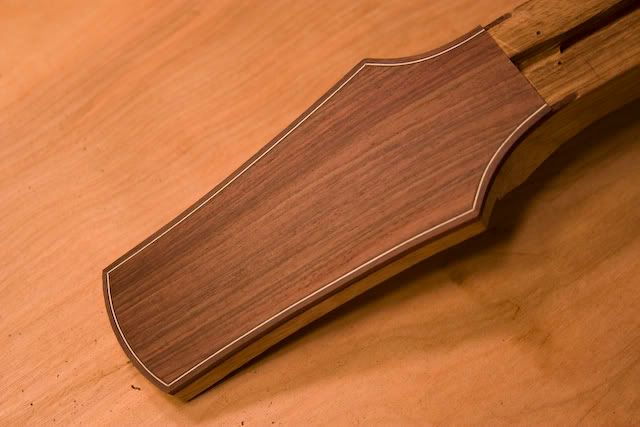
That purfling took a while to do, but it's well worth it! It was the first time we have ever put purfling on the headstock. I think we'll do this to all our acoustics from now on. Let me know what you think about the guitar so far!
Here are all the photos of it on our photobucket: PHOTOBUCKET
-Chris
-
http://ultimate-guitar.com/forum/showthrea...ght=carousel182
That's how i do it every time. it looks to me like you just didn't carve it deep enough and your carve didn't go far enough into the body.
+1
From the looks of your photo, that body is very thick. So you need a much more aggressive(deeper/sharper) carve.
I would also suggest working on keeping the lines where your carve meets the sides straight and sharp. Round them over for finishing after you've finished your carve.
Also remember to keep it all even as you're carving it, it's easy to make the top feel "wavey".
I would start with drawing a straight line where you'd like your carve to end on the side. (top of the guitar)
Take out the majority of the wood with something more aggressive than sandpaper/sanding.
Work your way down until it's nice and sharp.
One other thing I saw was that your belly cut doesn't extend far enough "up" towards the neck end of the guitar. Remember to keep that cut nice and sharp/even as well along the side of the guitar.
Good luck!
-
Before you do anything I would suggest that you make sure your new bone nut is the correct size/string spacing.
-
Great news!
We just recorded the guitar last night and should have some samples up after the mastering and editing is done sometime next week!
-
Godin,
this is the good money shot:
http://sorberaguitars.com/pics/guitars_2180.jpg
nice,
I like the upper bout shape the lower round is odd but interesting.
That body shape is disturbingly sexy.
we try our best.
-
........ Anyway, his --or their, he's working with his brother I think-- attention to detail is just getting better and better every day. ........
Thanks for the compliment!
Yes, you're correct. It was a two man build.
I'm his brother.
Thanks again,
peace out.
-
You're correct Greg,
You don't have to sand it level at all, in fact, I would suggest not sanding it since it would give a different sheen on the top rather than in the pores.
Just make sure you spray it on perfect and don't get any runs or dust...
But if you do, go ahead and hit it with sand paper and spray another coat to keep the sheen correct.
-
Great job everyone!
Love all the entries!
-
I'm going to PM an admin and see if I can email you since you aren't checking the forums...
-
bump... again, please PM me MATT.
I hope you haven't gotten rid of the violins...
-
-
I went ahead and made myself a username...
I'm Chris.
You can go ahead and PM me, I'll PM you back with my response.
Thanks
-
Hi all, I figured I'd sign up.
I am GodinSD(Daniel's) brother, Chris.
I'll see y'all around!
-Chris

Inlay Problems...
in Inlays and Finishing Chat
Posted
I just started inlay not too long ago, I've been doing pretty good... but when I route into the wood so it will accept the inlay I am finding it difficult not to have any gaps here and there. Is there a trick to doing it?
I'm using a dremel with the correct down cutting bit & the precision router base from Stew Mac.
I have been inlaying MoP and Abalone Shell mostly.
The method I use right now is after I cut out the piece, I set it on the wood and scribe around it with an exact knife showing the edges. Then I route away the wood inside those lines. But then to get it to fit, I have to make the route slightly larger here and there and I usually end up making gaps here and there.
Thanks in advance-