


hooglebug
-
Posts
669 -
Joined
-
Last visited
-
Days Won
4
Content Type
Profiles
News and Information
Tutorials
Product Reviews
Supplier Listings
Articles
Guitar Of The Month
Links and Resources
Forums
Gallery
Downloads
Posts posted by hooglebug
-
-
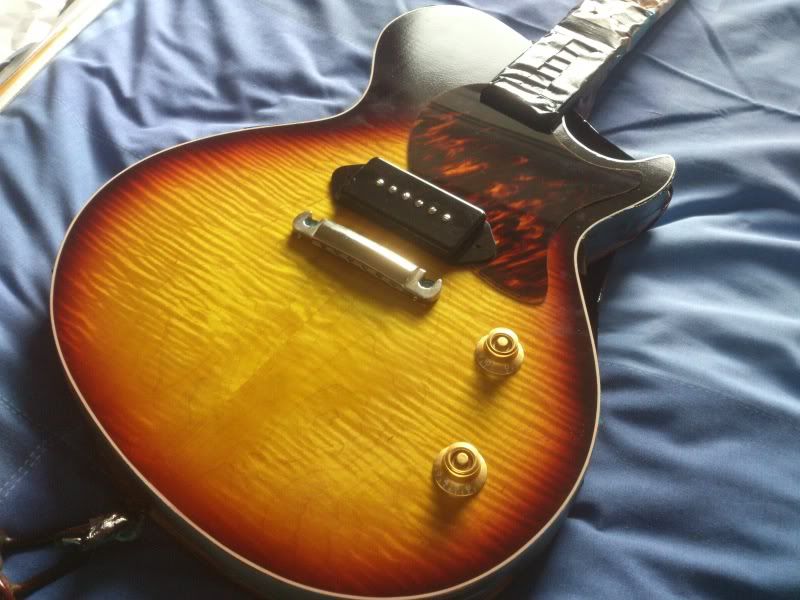
eep its been ages. i got the burst on the jnr+ done today and fancied a little mockup. its still going to be a while till these are finished as im preparing to do a chrome finish which might take a while
-
 1
1
-
-
well that seems to have worked. it doesnt have a nut yet so i cant test it properly, but theres sound coming out of it and no hum so thank you for that!
-
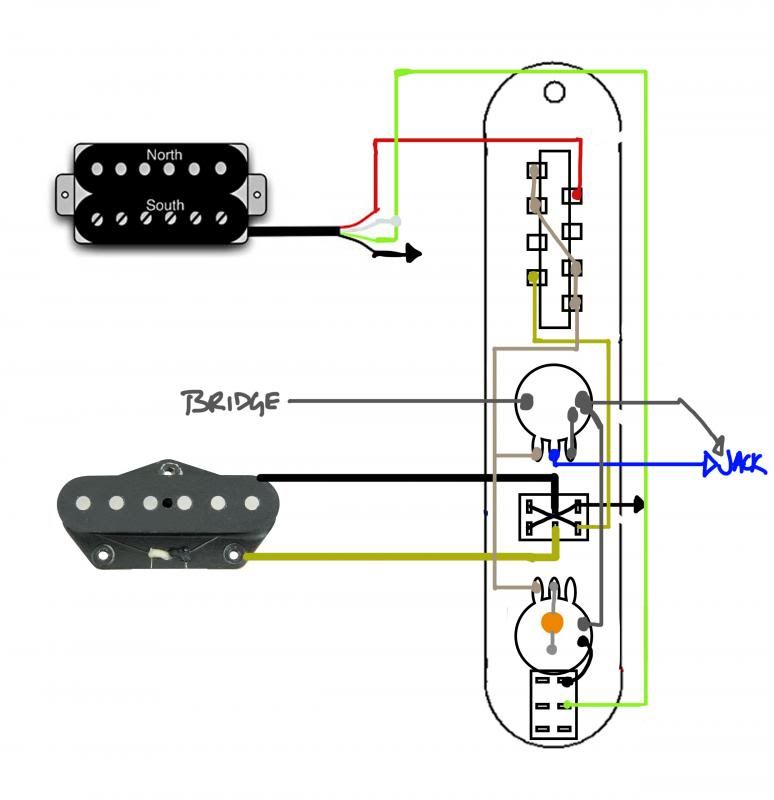
its probably something really obvious, but for the life of me my eyes just cant see it. the diagram below is self explanatory. everything works fine until i turn the phase switch on, then all output is lost. i took the bridge ground off and the whole circuit worked, but with the phase switch on was very very noisy. but only with the phase switch turned on. what am i missing here?
-
forgot i took these. havent done much for a while. need some more sandpaper and the tuners so i can get strings on and check the frets to see if they need anything done before finishing. also, going to be getting on with a commission so these will have to wait
-
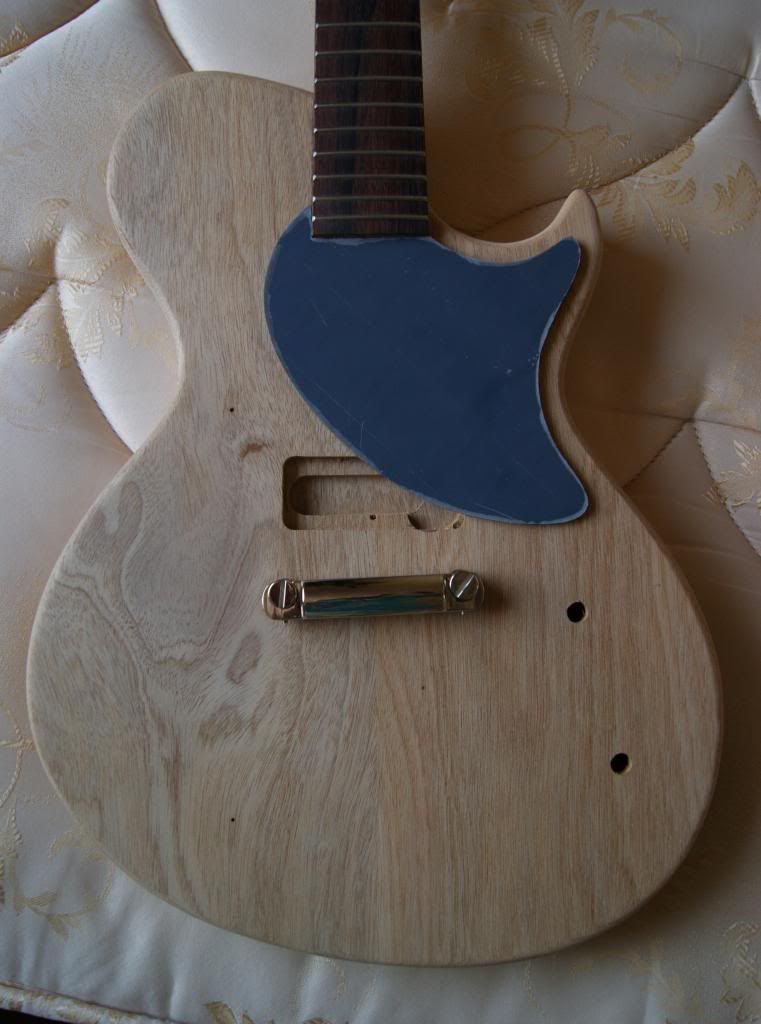
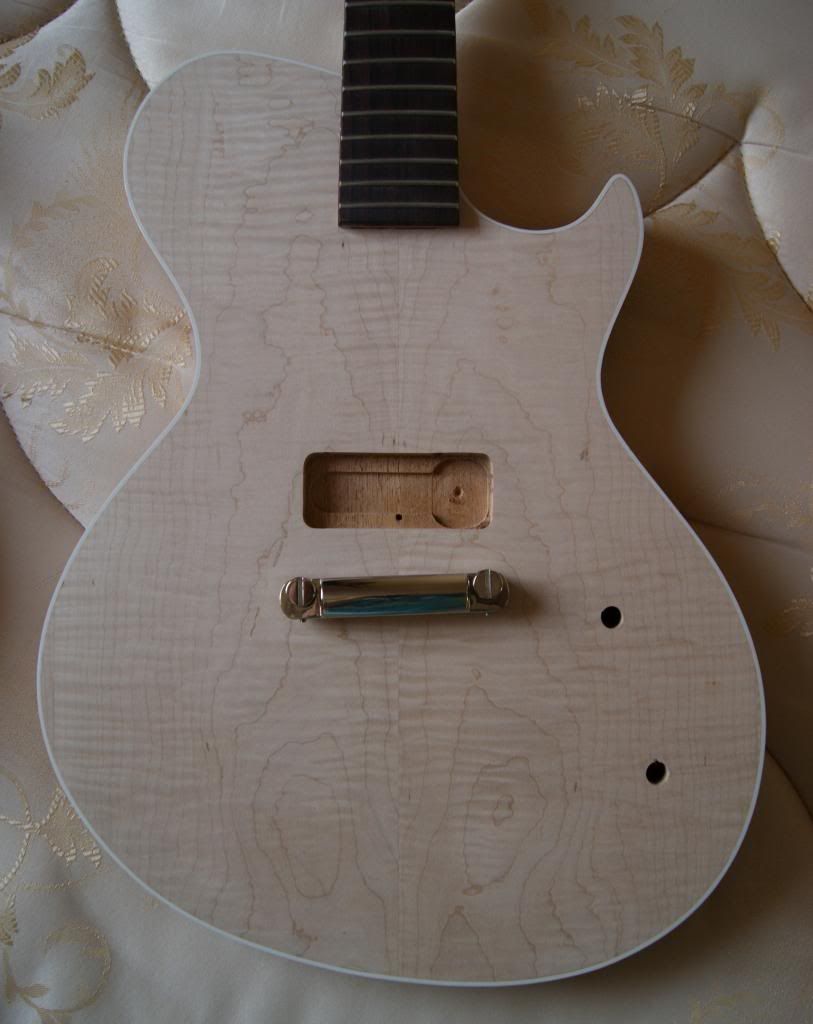
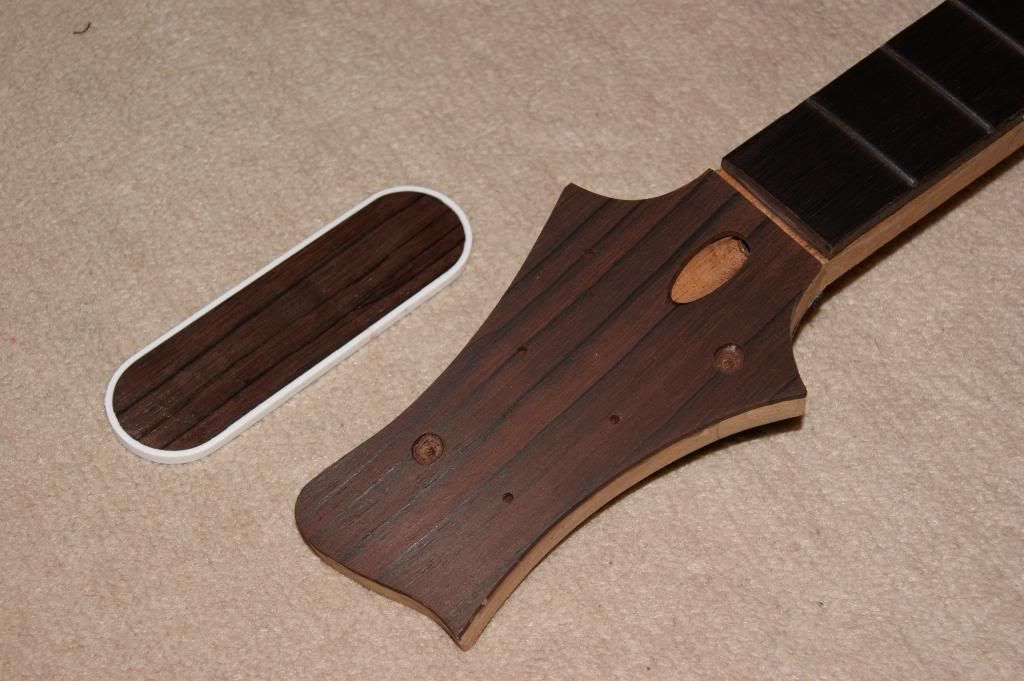
got the binding on and the neck glued in. neck shaping next
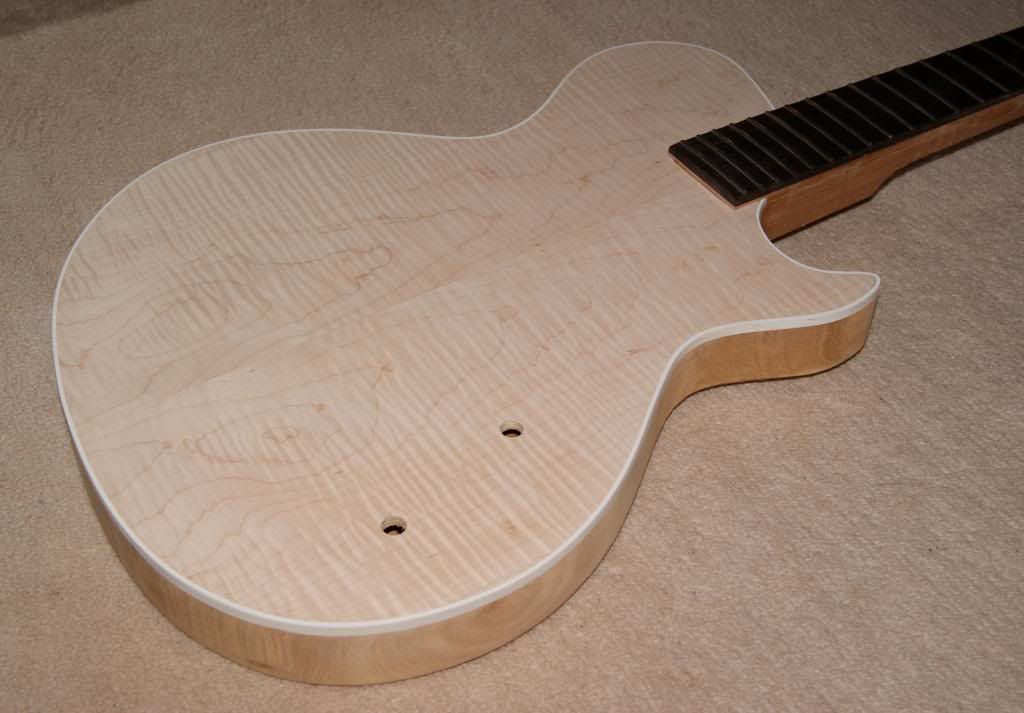
this is the backplate and headstock plate - they're made from off cuts of the fretboard (it was a long board) so they'll darken with a bit of sanding i imagine. annoyingly, i had to add the binding to the backplate because i drilled the holes for the pots with the wrong bit - one up from what i was going to use) and only noticed when i put the plate over it and could still see holes. bugger.
-
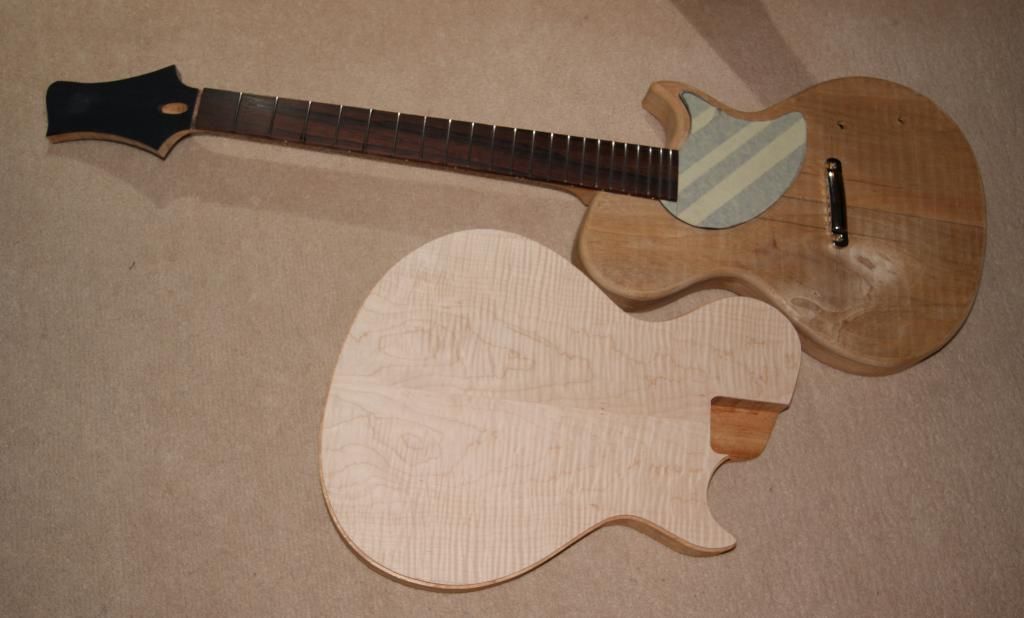
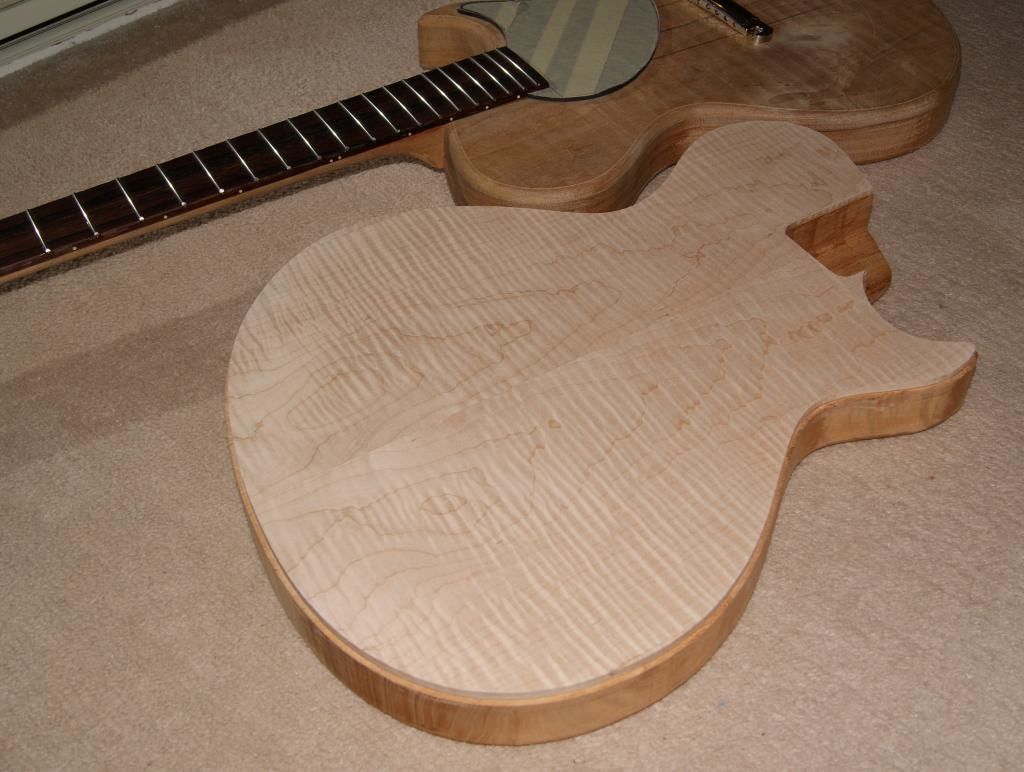
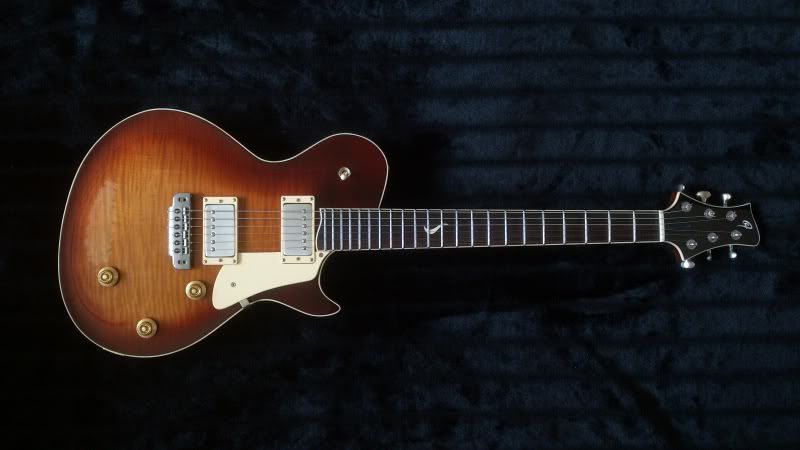
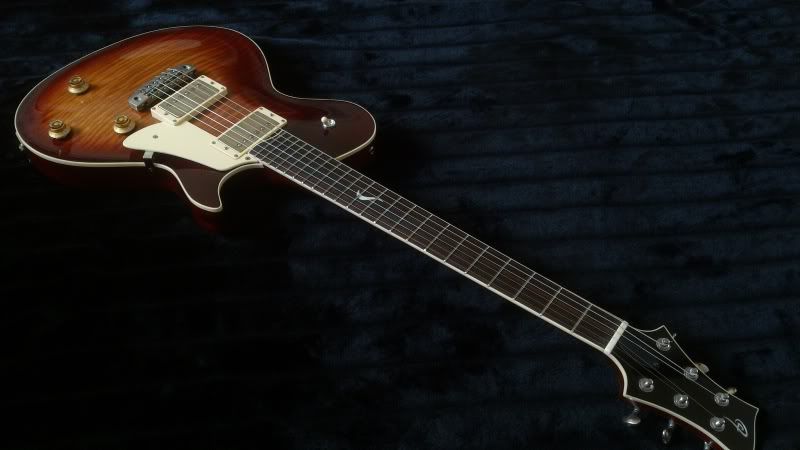
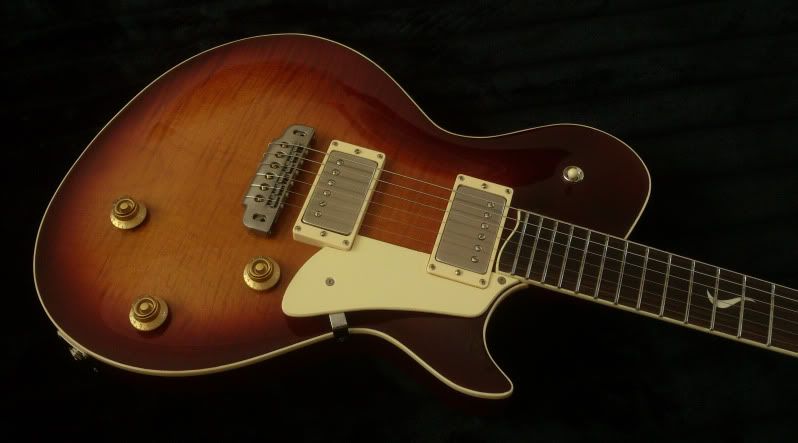
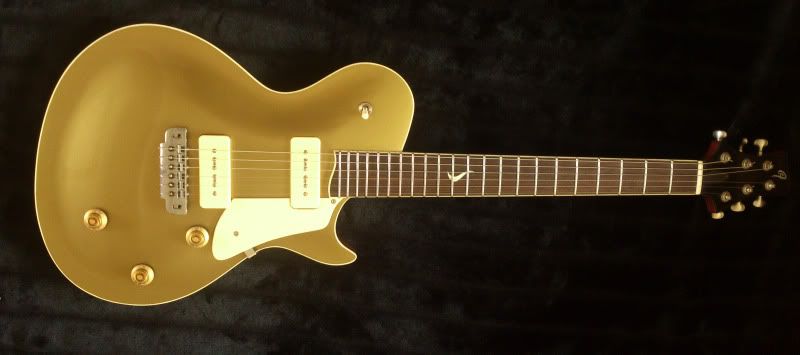
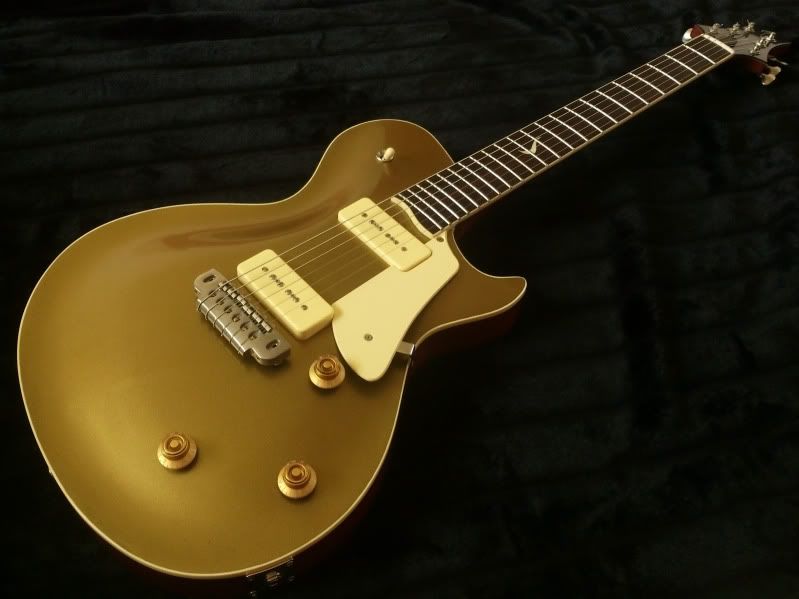
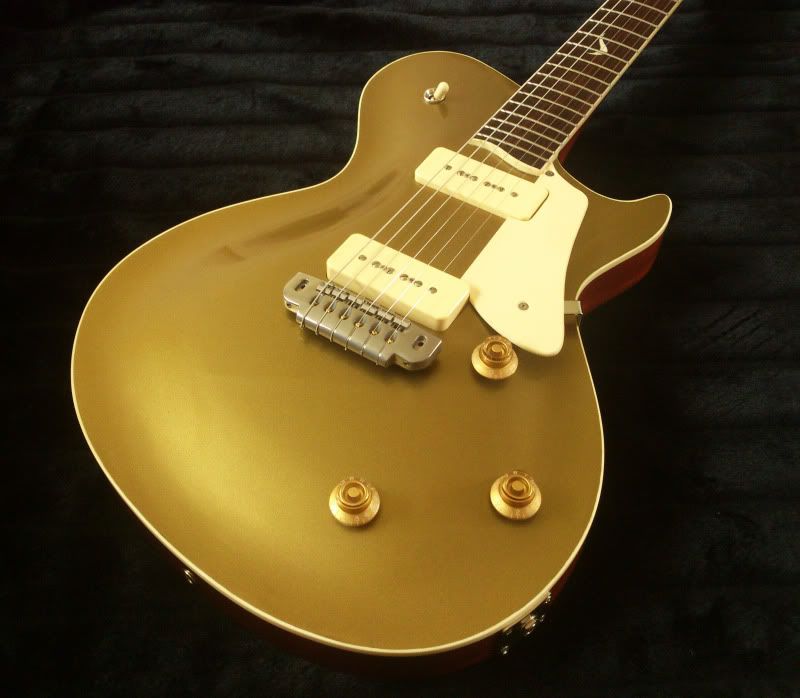
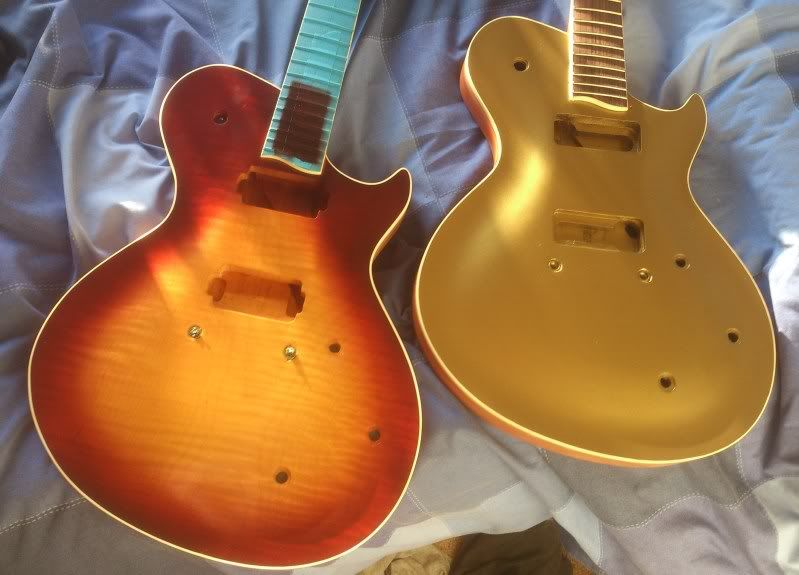
these are two Jnr version of my Classic design, only one is a tiny bit fancy, so its a Jnr+.
the jnr just needs routing for the pickup (both will get dogear p90s at bridge) and the bridge posts drilling then sanding.
the jnr+ will be bound tomorrow and then the neck can be glued and shaped.
-
yay another pukko build!!!!!!
-
maple apparently
-
i cant take the credit for that - its adapted from an inlay i saw on larry robinsons site
-
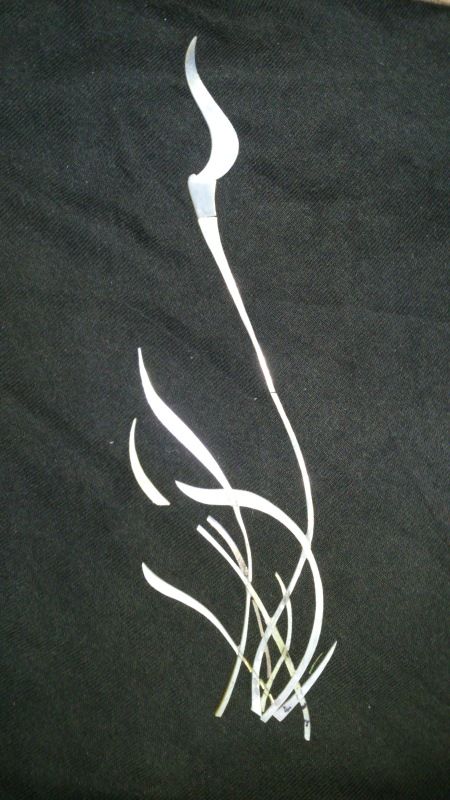
i bought some wood a few months ago and made this photoshop of what it would look like
then i realised its 5 years since i made the first of my own designs, so i thought i'd make it a little bit more special and add this inly to the bottom of the neck (there are ivory flowers to add)
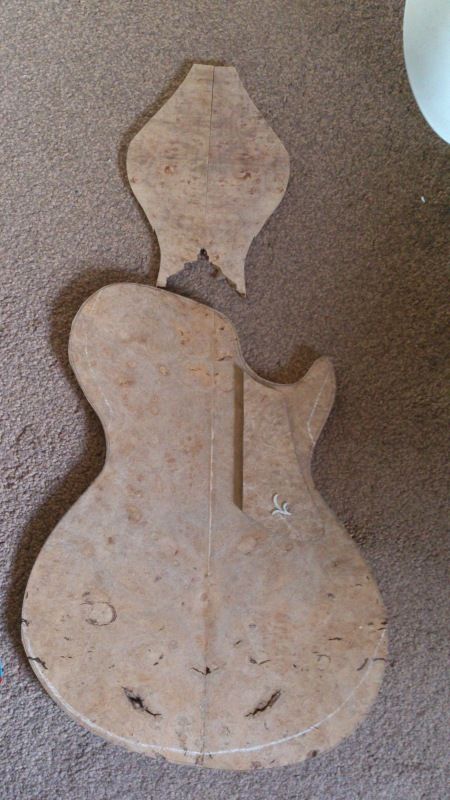
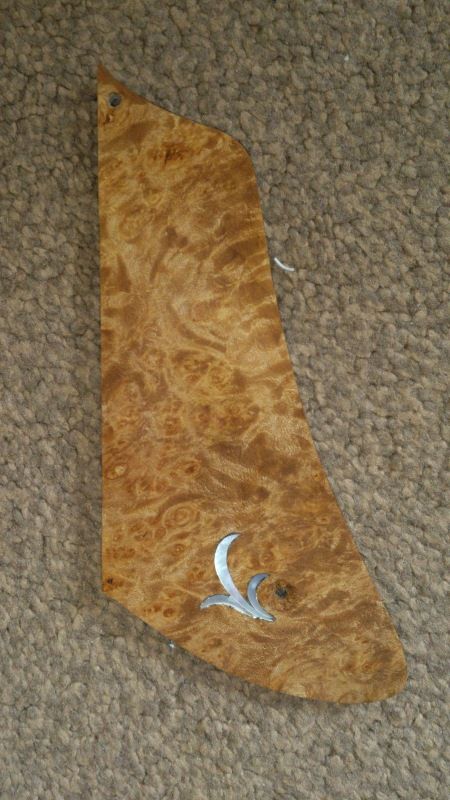
heres the top, headstock plate (i could only get bookmatched not one piece unfortunately) and scratchplate
and the scratchplate closer - obviously no binding yet
-
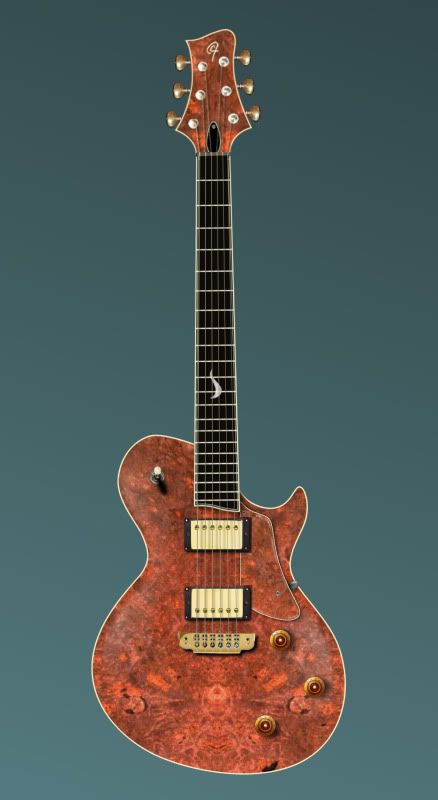
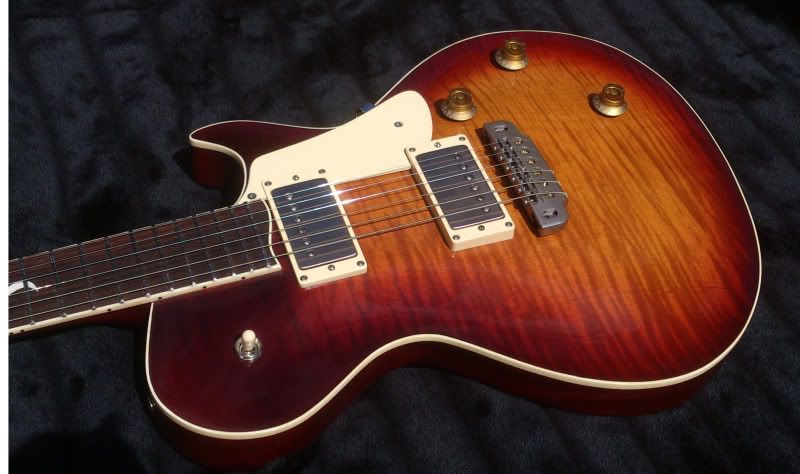
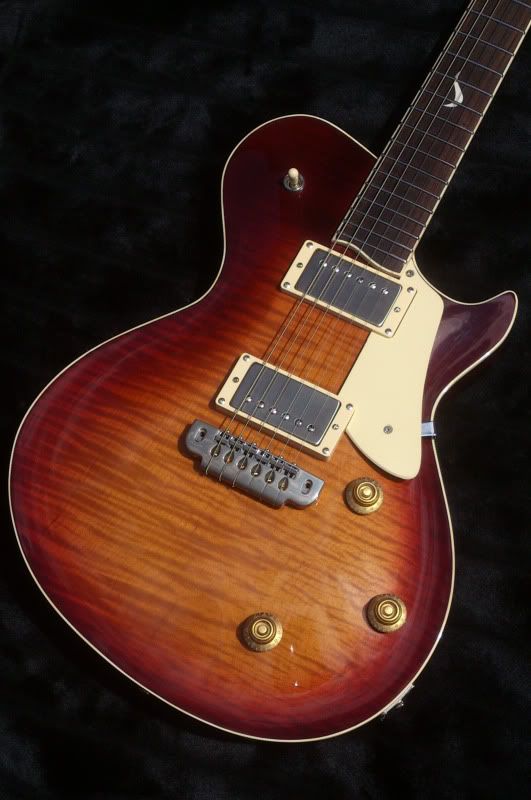
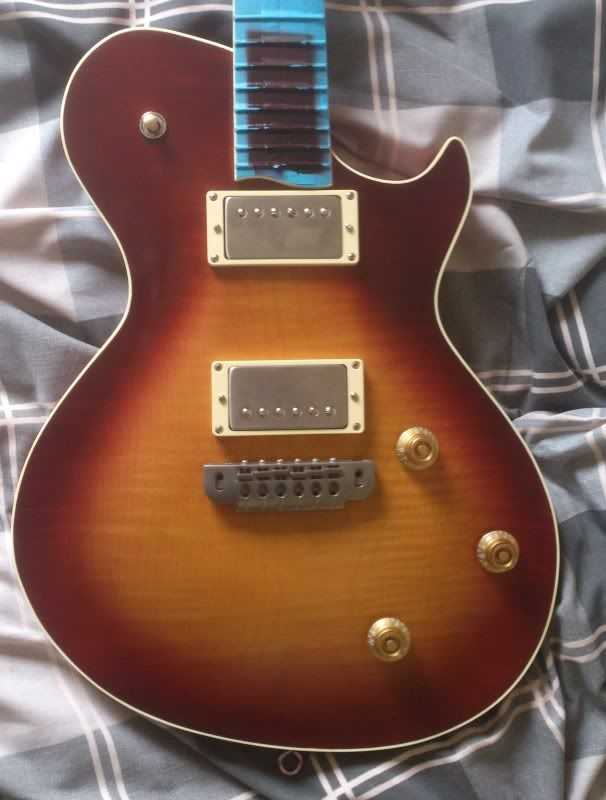
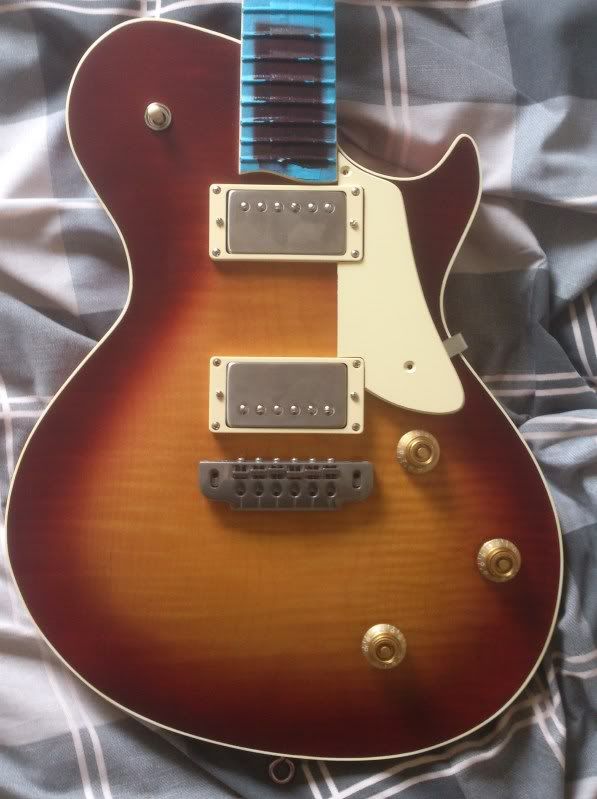
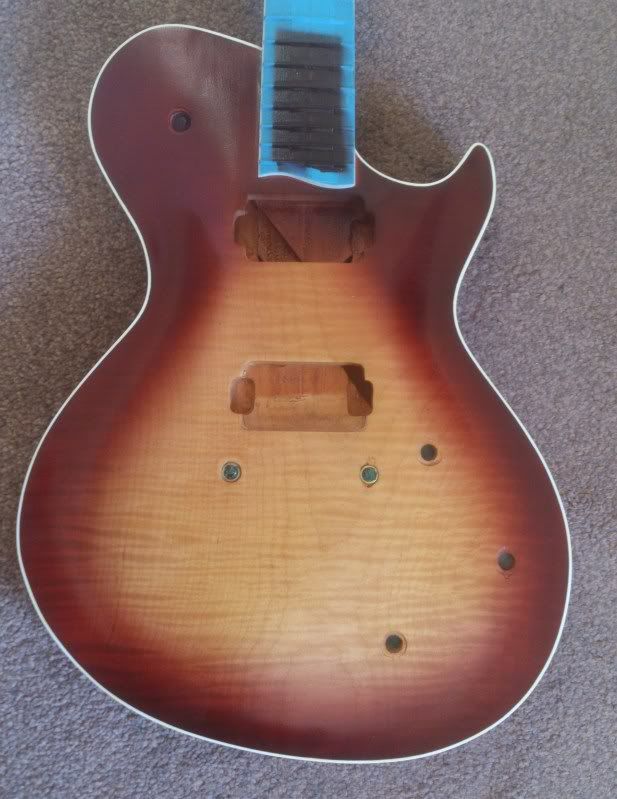
Classic '58
Central American Mahogany body with one piece maple top
Mahogany neck cut from same billet as body, rosewood f/b with ivory inlay
Sculptured heel
Bare Knuckle Abraxas humbuckers
Gotoh Hardware
-
Oh wow. Would I be right in thinking that this is the best yet from yourself, Hoogle? My only reservation is the rearmost control....just two would feel a little more balanced to me. Sweet little pickguard....!
yeah i think this is the best one iv done in every respect
-
i didnt like the finish of the burst so i redid it, hence it taking so much longer than the goldtop.
-
Classic '54
mahogany body and neck with sculptured heel.
sycamore top. rosewood fb with ivory inlay
ivoroid binding. gotoh hardware and bare knuckle p90s

-
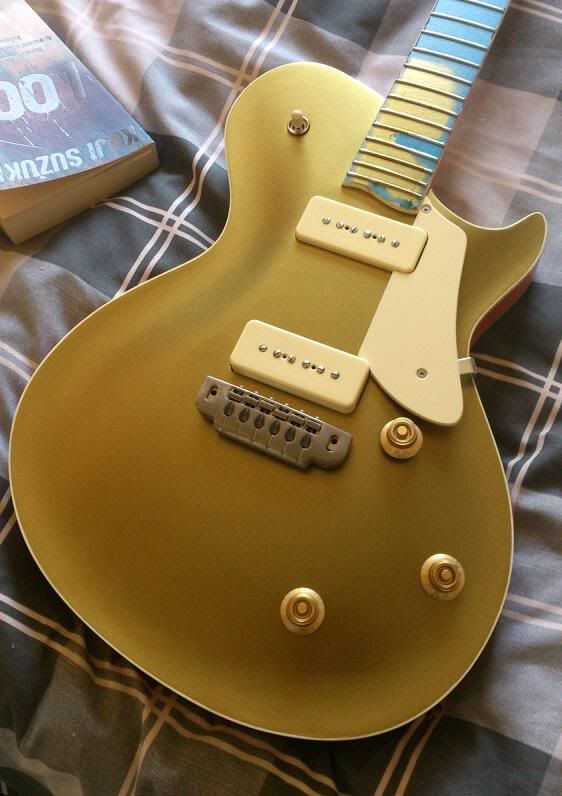
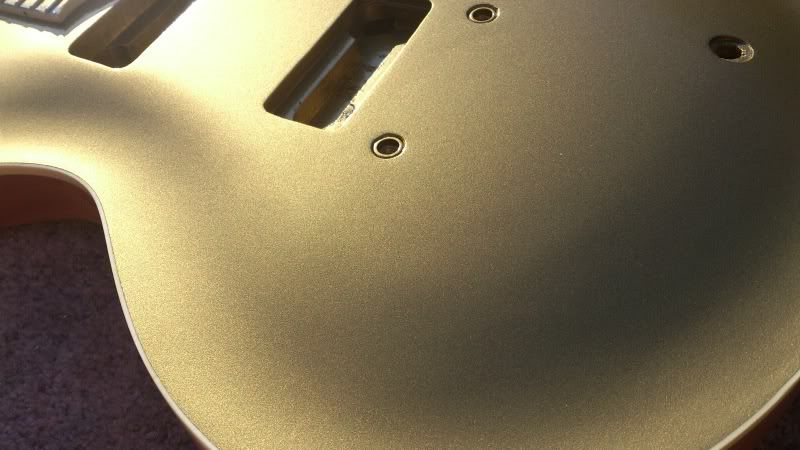
its so hard to get the gold top looking like it does in real life. its kind of a cross between the two

-
strange, i thought id like it better without the plate, but i think im liking it better with
-
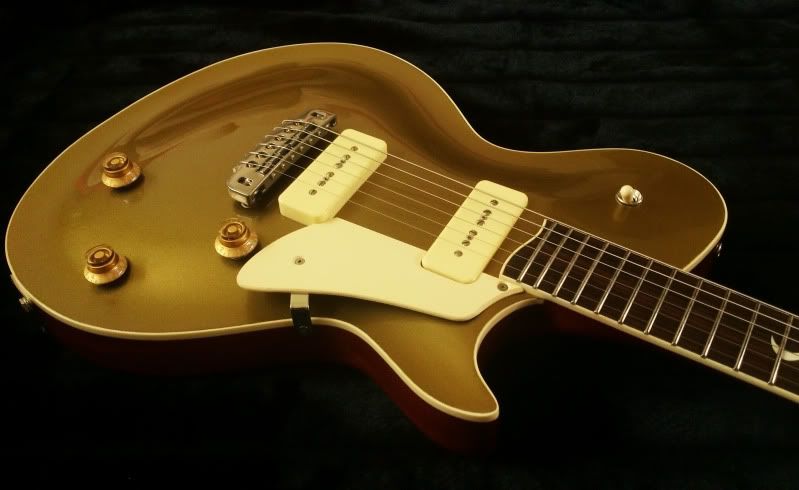
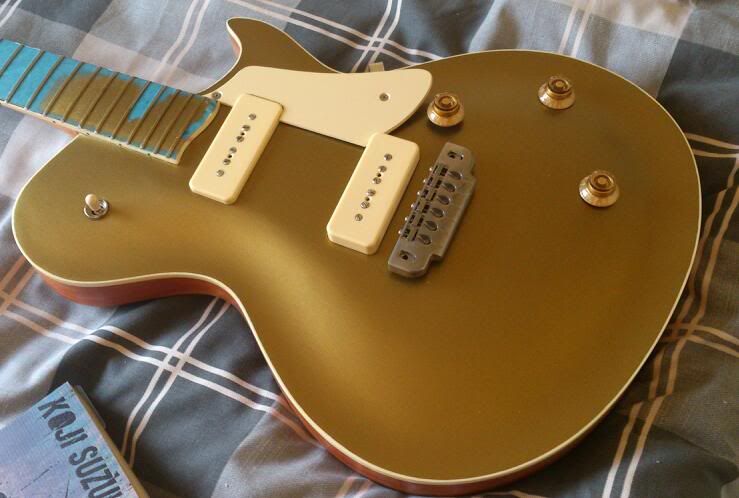
the only difference in these pics is the light. its crazy how much it changes

and together
-
i had to get these from japan as they're in x-nickel and i havent seen them anywhere else in anything other than chrome gold and black
-
i like it. and yes, they're straight rather than angled
-
iv been busy with a refinish and making a neck and reshaping a body for someone, but in the next couple of days hopefully i'll start finishing these two
-
haha i know! this was my second mix (the first had too much black in it) and it took a few goes to get the spraying right. and any mistakes and you're back to the beginning taking it all off and doing it again!
-
i couldnt resist a little mockup
-
1
-
-
just 400 i think. it might have been 600 on that top i cant remember. its only got two very light coats on it
-
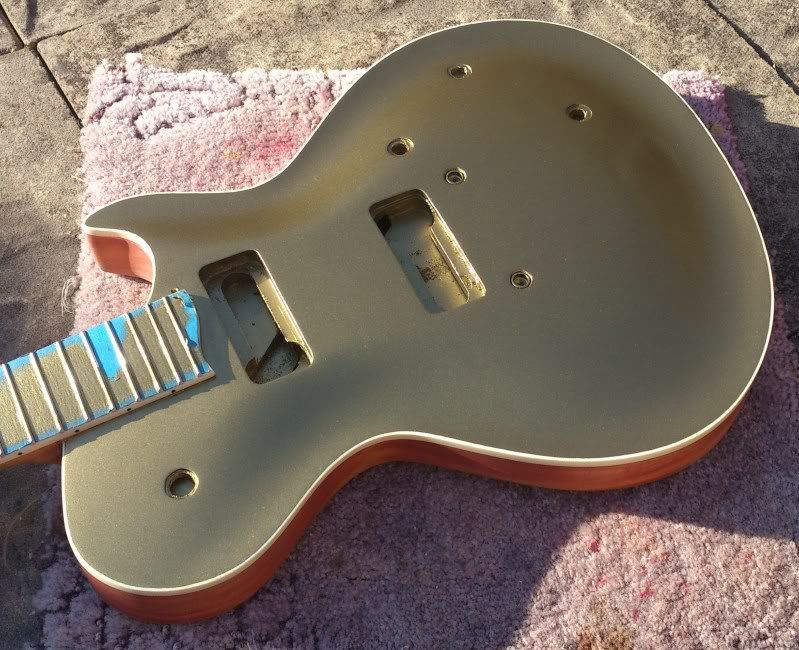
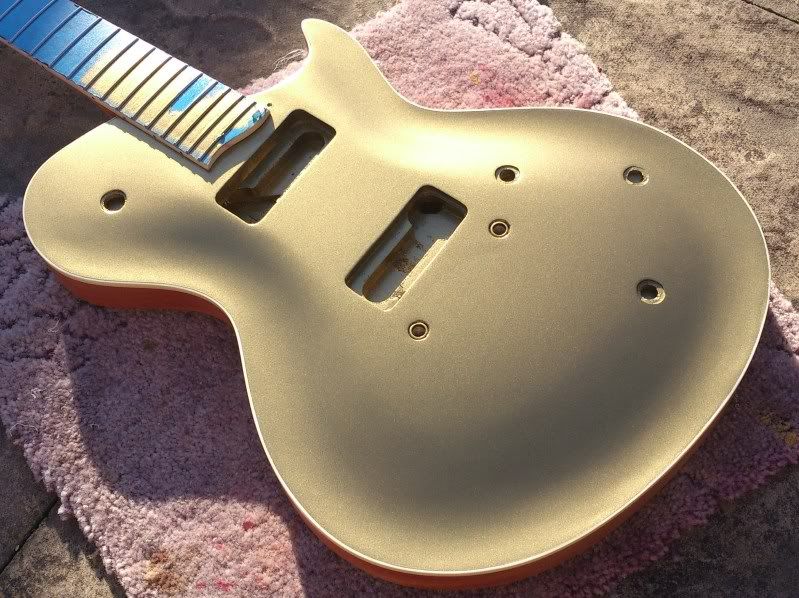
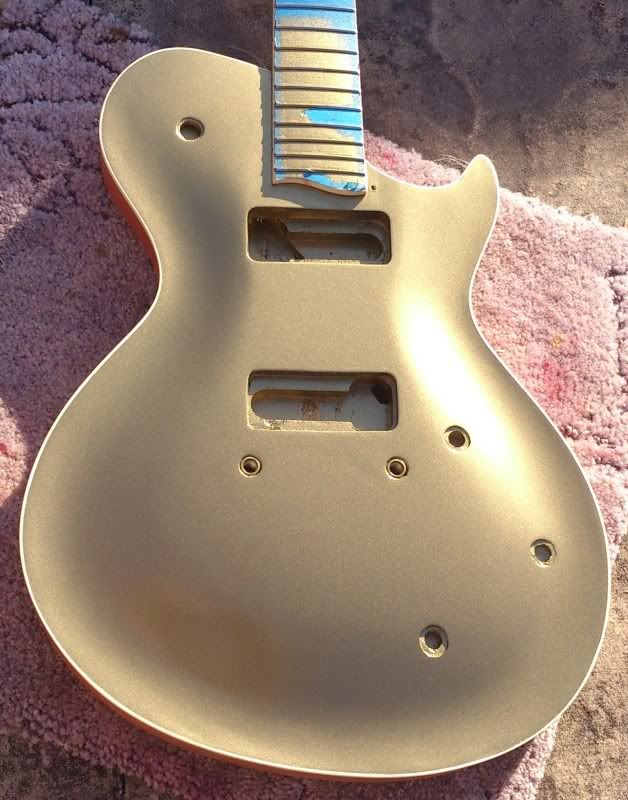
after refinishing a tele, reshaping a body and halfway to making a neck, i thought id get some sparkly action going


Jnr & Jnr+
in In Progress and Finished Work
Posted
hehe. someone got a body made and finished by a well known finishing company in the uk for a matt bellamy copy and had it sent to me to make the neck for it. well, the finish was covered in orange peel. and not only on the top coat, but it was on the base coats as well. the customer was annoyed but was kind of resigned to accepting it, so we went on with the neck. when i put the neck on the body, (bolt on) with as little pressure as is needed to fix a neck on, the finish on the body heel chipped. not only that, but on one of the pickup routes where the screw holes for the pickup surround are, the top coat looked like it was lifting.
i have used a paint company before for some thermal paint, and they also do a chrome system, so i told him about that and he agreed that since the original finish looked so bad, i would have a go at doing it. upon stripping the original finish, which i normally hate doing, i found that rather than having to sand and scrape and get annoyed, it just peeled off. in huge chunks. the top coat wasnt stuck to the base coats at all.
now they used the same finish system as im going to use (from the same place or not i dont know) in that there is a base coat (in my case black but in theirs white), the lots of preparation solutions sprayed on and washed off, then silver nitrate sprayed on top of the black, then a slightly tinted clear coat. the white base coat they had used was still soft, and i'd had it for at least six months so it had plenty of time to harden. it too just peeled off, along with what looked like a vinyl sealer underneath it. then under that there was a grey primer.
the primer was so thin you could still see grain and sanding marks through it. the vinyl sealer was really thick to compensate. in some places, the entire finish was almost 2mm thick. it was terrible.
but anyway!
i have the primer on now, and will be doing the black in a couple of days. you're not allowed to touch the black after because any fingerprints will show up when you spray the silver nitrate. eep.