


Ben
-
Posts
1,281 -
Joined
-
Last visited
Content Type
Profiles
News and Information
Tutorials
Product Reviews
Supplier Listings
Articles
Guitar Of The Month
Links and Resources
Forums
Gallery
Downloads
Posts posted by Ben
-
-
That neck looks veeery nice. I tried a similar headstock on one of my earlier projects (my first actually), but yours is much better exectuted than mine was. That little carve really sets it off.
And I dont doubt that it feels great too! I love the feel of the danish oiled wenge neck that I just made, and I'd imagine rosewood is probably smoother feeling.
...The inlays are great too
...the maple strip looks great
I've already made my opinion on the body clear

Its all looking great!
Looking forward to seeing it finished.
-
woohoo
Just switched the wires on the neck p90 and it now sounds awesome in all 6 positions!
Thank you everyone who replied.
-
Hey, I have to disagree the diagram is wrong... using seymore duncan wiring codes in position 1 the output from the south coil of the bridge humbucker is connected to the ouput of the north coil of the same humbucker ... neither of these are connected to the output ... in fact the only coil of the bridge humbucker which is connected to the output is the input side of the north pole of the bridge humbuker.. and this is connected to the output in parallel with the P90 ouput... all other switch positions are also incorrect
if you want I could draw up a diagram tomorrow sometime that would achieve what you want using the 4 pole 6-way when I have more time
Steve
I may have confused you by saying the wiring codes were seymour duncan... I read the leaflet that came with them closer, and while (as it states) the pickup would work with the SD coloured diagrams, the colours for each coil are actually interchanged. hard to explain in words... Basically Black on Seymour duncans = green for GFS/ green for SD = black for GFS, and red for sd= white for GFS and vice versa.
This may be why I ended up with my pickups out of phase actually...
Even though it turns out not to be needed, I appreciate the offer of the diagram.
-
Thanks for the replies,
Well, I decided to just go for it, and it worked!
Positions 1, 3, and 5 all sound great...
...but 2, 4, and 6 sound weirdly thin and nasal...
...so I figure I got the neck and bridge pickups out of phase, and I'm about to correct it once I've posted this. I'm 90% sure thats the cause... theres definitely a flaw somewhere, given that the bridge single coil is currently sounding fatter and louder than all 3 coils in series!
And Mike, both pickups do have metal covers, and when I tested the guitar it was almost completely silent. Noticably quieter with the distortion on than the store-bought guitars I have.
-
Its pretty hard... what everone else said is all true.
Its a bit of a pain to work with, but its worth it in the end (in my opinion)
-
Just one question before i answer, which humbucker are you using? Dimarzizo Seymore etc etc?
Steve
GFS, but the wiring colours are seymour duncan.
-
The guitar looks great and, Stewey said, your playing is great too ( I watched your Rock me baby video)
-
nope it wont work the way you think it will... infact is so far wrong I assumed it was a joke at first... but incase its not... in the first position you have the P90 going ot the output which is connected to the input wire of the neck side of the bridge humbucker... the two humbucker output wires are connected together and not to any output... plus the input wire of the P90 is ungrounded so it wont work..
Ah crap...
My thinking was that in position one, (which is intended to be just the bridge humbucker in series):
-The neck p90 was intended to have its input wire unconnected to keep it out of the circuit
-and the red and white wires of the humbucker were meant to be joining the 2 coils in series
-while the green from the humbucker is connected to ground and the black goes to the output (if you follow the blue wire)
I cant see why that wouldnt mean that the current would flow from ground, through the bridge coil of the HB, down the red wire, then the white wire, to the 2nd coil of the humbucker, then out of the black wire, down the blue wire, and then to the output...
Basically the bottom 2 poles of the switch on the diagram are meant to control whether the HB is tapped, in series or in parallel, and the top pole on the diagram is meant to contol whether the input of the p90 is in the circuit, and the remaining on is meant to control what happens to the output from the humbucker.
~now that all makes sense in my head... but if what you say is true then it obviously doesnt in reality
, where am I going wrong?Thanks for the reply
Ben
-
Don't take my word for it try it sometime.
I'm stringing up and setting up my baritone guitar tommorrow so I shall do just that! Thanks for sharing your secrets
-
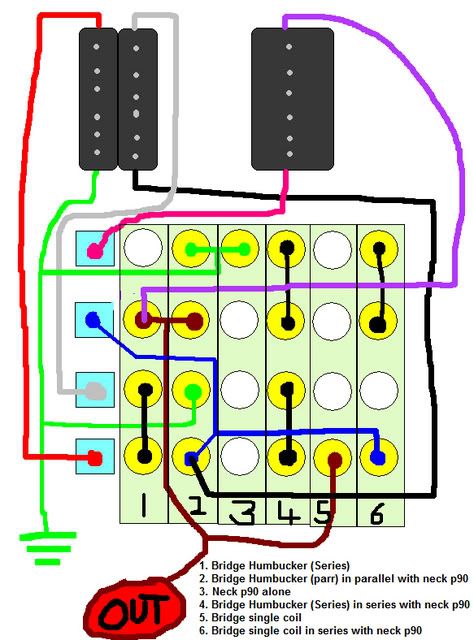
Its pretty complex, and I just want to confirm it will work before I start soldering. I've checked it over and over myself, but I'd appreciate it if someone could just glance over it to confirm that I havent made any of the stupid errors I tend to make.
Its for a 4 pole 6 way switch
The square boxes are the poles, the rows of circles are the corrseponding 'throws'. The numbered columns represent positions 1,2,3,4,5 and 6 on the switch.
If anything isnt clear about the diagram please ask, and thanks for your time.
-
reset the harmonics
oh arr, what's that then? Never heard that term.
it sounds like another phrase for intonation (?)
-
I vote for walnut.
-
Those are 2 of the best sunbursts I've ever seen! They look perfect.
-
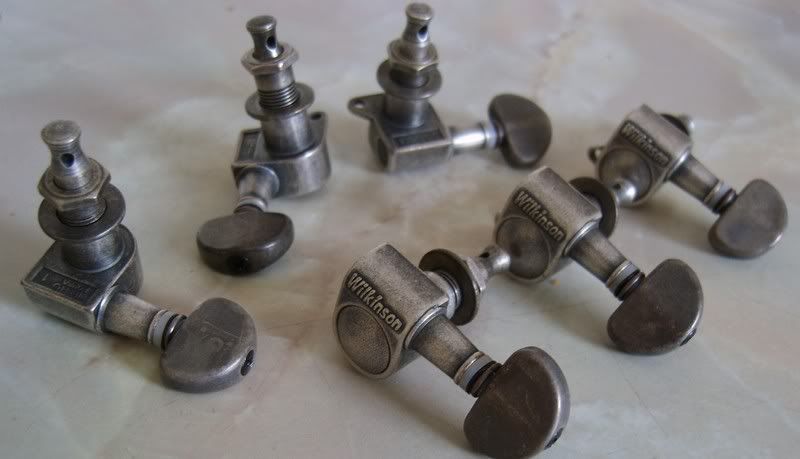
been distressing the hardware:

its not meant to be authenticly reliced or anything - just distressed and then aged!!
also got some wilkinson antiguity tuners that are already aged nickel - but its a bit disneyfied to i removed the buttons and aged them a little more

That hardware looks cool! This guitars going to look great when its all together.. I can just tell.
-
I just crossed my fingers and checked the first post to see what finish you are using, and was relieved to find out that you plan to oil it
It looks great in the pic and I imagine will look even nicer when oiled
Keep up the good work!
-
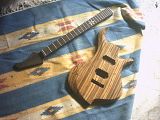
haven't been around for a bit, but damn this guitar is looking good now! can;t wait to see the whole thing together and oiled up! have you considered Tru-Oil for a finish? should be a bit more hard wearing than Danish and looks nice too. (I just made a Zebra door stopper out of a cut-off and sealed it with shellac and plan on whacking some Tru-Oil on it, looks great so far.)
keep up the good work!
Thanks,
I have considered tru-oil, but since I have a big can of danish oil, and I used it before with pleasing results, I decided to just use that.Also, Tru-oil isnt quite as easy to find over here in the UK as I imagine it probably is in the US - what with it being intended as a gun stock finish. I know a place where I can get it online, but I'm happy with the danish oil so I figured I may as well stick with it.
-
Today I drilled all the holes I had left to drill, did a little final sanding and oiled. The 6hrs drying time between coats slowed me down a little!
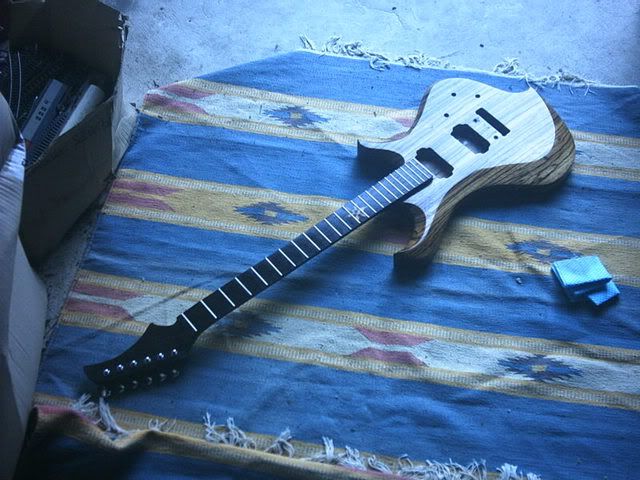
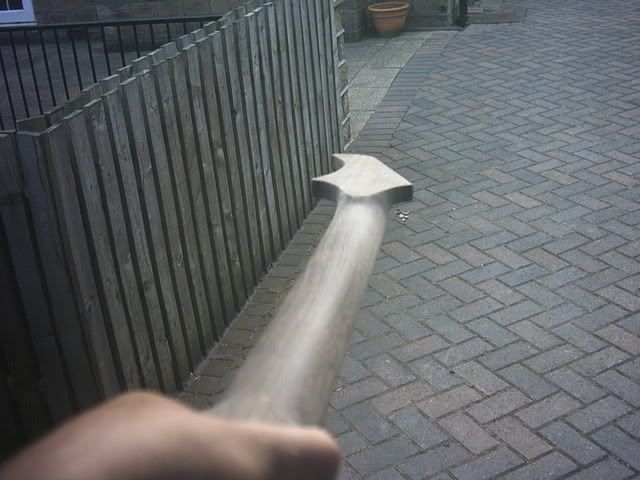
This picture shows the carving nicely^,
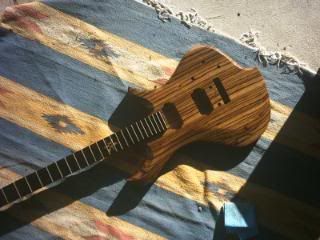
And this one shows the colour more accurately
Its nearing completion
The wiring may take a while though...
-
I checked out all your photos, and its all looking great!
-
What greg said- very nice!
-

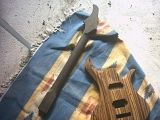
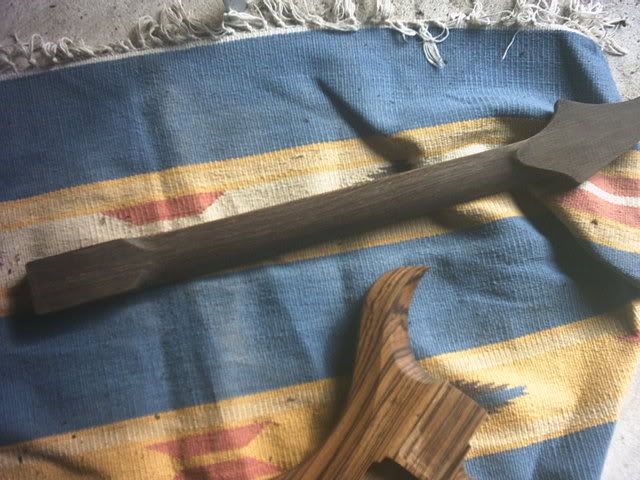
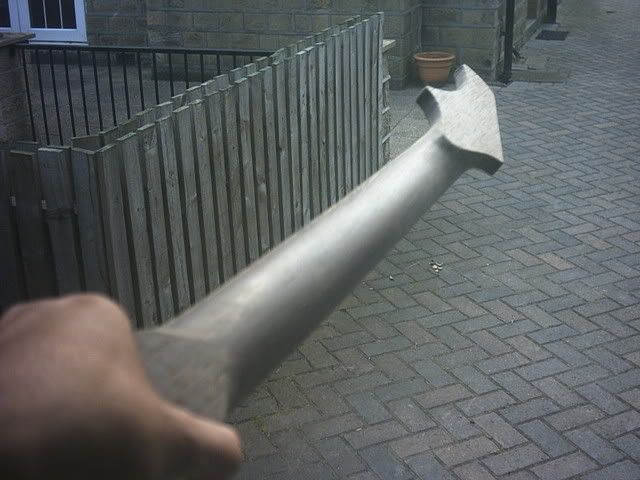
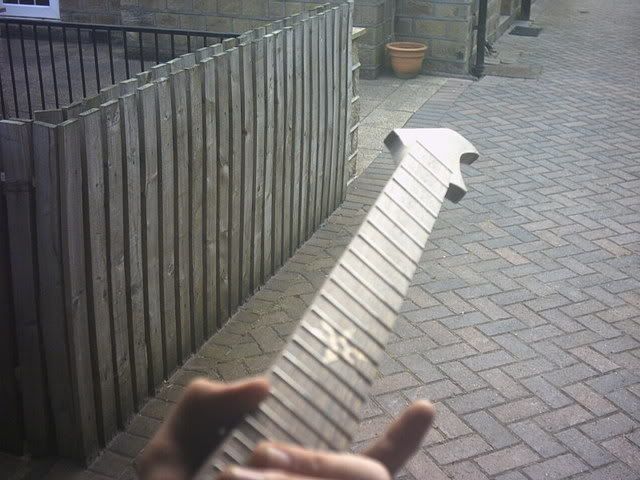
Rough carved

Nearing the end of carving

Frets
Oiled (still wet in pic)
-
You're moving along at an absolute breakneck pace, dude. Congrats!
If anything goes wrong with my neck now, I'm blaming you for tempting fate
I didnt get anything done today (went walking), but yeah, I seem to be working pretty fast lately!
Thanks for the comments.
-
Awesome as ever!
Amboyna burl is my current favourite- great wood choices!
-
I wouldn't want a solid wood cover any thinner than 1/4" - you're asking for all sorts of warping/cupping issues.
Hmmm.... I may have to consider reinforcing mine then.
-
And since those were posted, I've slotted, fretted, and just begun carving.


Zebrano Baritone With Wenge Neck
in In Progress and Finished Work
Posted
Thanks,
CMA: You know, I think I might go for it... nothing to lose, although I dont expect to win, given the amazing stuff that always ends up in GOTM. I might not make this month's though, since I'd need to take some decent photos, and it will be a few days until I manage to get the knobs I need from maplin. Might record a sound clip too.
Godin- thanks, I'm really pleased with how it turned out, the colour is exactly what I was hoping for.
--------------------------------------------
As progress goes; I've now pretty much finished. Still a few things to sort out... frets need leveling (plays well at the moment, even without the levelling, but theres a little bit of buzz on the 10th fret on one string), and the action could be a tad lower. I need those two knobs I mentioned too, and to add strap buttons.
Might do a headstock decal eventually too, but I cant be bothered at the moment
The wiring was a pain in the ass to figure out... had to draw my own schematic and it took a few attempts, but my final schematic worked fine.
And it sounds awesome! Not the most modest statement, but its true , I couldnt be happier with the sound. I currently have it strung up with a 12- 56 set, and tuned like a 'normal' guitar but a full step lower (ie to D)
The notes all sound so clear and defined, the low strings sound almost like a piano
I wasnt really sure how I was going to tune it when I built it to be honest ... I ended up just fiddling around until the tension felt 'right' to my fingers. I like the tension pretty high (I use 11s on my standard guitars).
I went with a 28" scale length btw in the end... (don't think I mentioned that. I think last time I mentioned scale length I said 27.5", but I changed my mind again )
)
For the wiring, I ended up settling on:
1. Bridge humbucker (series)
2. Bridge humbucker (parallel) + Neck P90 in parallel with bridge
3. Neck P-90 on its own.
4. Bridge humbucker (series) + Neck P90 in series with bridge
5. Bridge single coil (split humbucker) on its own
6. Bridge single coil (split humbucker) in series with the neck p90
(I used the options you suggested, tubab0y, and I dont regret it, so thanks)
The GFS pickups sound really good on their own, the bridge sounds great on clean as well as distortion, and the p90 is really clear as well as 'fat' sounding.
Position 3 (all parallel) sounds really nice on clean... its the most acoustic sounding setting.
I was worried that all in series may be too muddy to be useable, but my worries were unfounded, which was a relief.
Same for my worries that the bridge single coil may be too quiet- its plenty loud enough.
I was careful with my grounding to avoid loops and hum... its all star grounded to one point, and its very nearly silent. - Quiter than my factory made guitars- even in single coil mode.
I might change the capacitor on the tone pot. Its ok at the moment, but I'd like the difference in tone to be a little more dramatic than it currently is.
The neck feels really nice too.
~So basically [incase you hadnt deduced so from that big ego-trip of a post ], I'm VERY happy with the outcome!
Definitely the best guitar I've made so far, and a contender for 'favourite guitar that I own'... I'll have to play it a little more first.
I'll wait till its completely finished, with the knobs sorted and everything, then it will be pictures galore .
.