


Ben
-
Posts
1,281 -
Joined
-
Last visited
Content Type
Profiles
News and Information
Tutorials
Product Reviews
Supplier Listings
Articles
Guitar Of The Month
Links and Resources
Forums
Gallery
Downloads
Posts posted by Ben
-
-
I would saw of the cavity cover with a normal handsaw the give the body another levelling off to take care of any saw marks!
Mainly, I just want to keep as much thickness as I can on the cover. Russ was talking about 1/4" for his wood covers with the magnets, which is what I'd like to shoot for regardless, mainly because there isn't a replacement for this matching cover, this will be a one time deal and the thicker I can leave it the safer I would feel so I don't somehow end up splitting it or whatever.
FWIW, my zebrawood cavity cover is 2mm, and it seems plenty strong enough. Of course thicker can only mean stronger though, so if you can get extra thickness its probably sensible.
-
-
I doubt you would hear much (if any) difference in sound. New pickups, or even different strings, would make a more significant difference.
-
Oh yea Ben you live in the U.K right???
Where do you get your wood? And do you get a decent price?
Indeed I do- I got it from craft supplies (call / email them to get their full catalogue)
The zebrano was £40, the Wenge neck was something like £9 and the fretboard... maybe £5 or £6 (cant remember exactly but it was in that region)
I've read bad reviews of craft supplies before, but the wood I got was good... nice figuring on the zebrano and the wenge is perfectly quatersawn.
Ben, with your routing hole going into the trem cavity, at least you have a cheap route to wire your earth to your hardware....Hah, yeah that did cross my mind- one less hole to drill.
-
Wow man that guitar is looking insane =D
Want to post it to me once your done?
Thanks, and no.
 Wow, Ben! Nice job! I knew this guitar would be cool from the start, but this is just awesome!
Can't wait to see more.
CMA
Cheers,
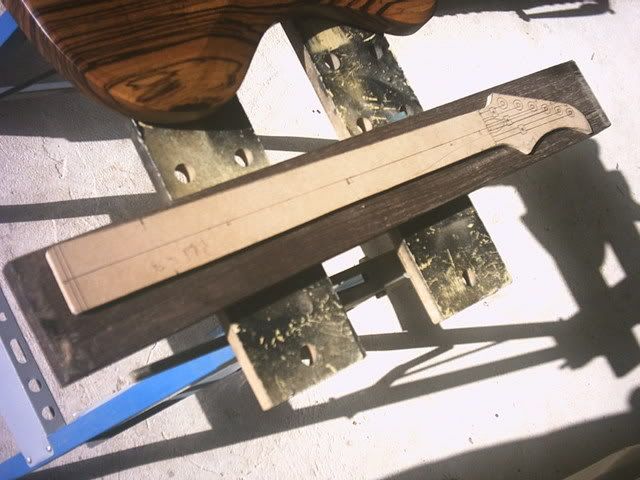
I cut out the neck today, and routed the drop down bit on the headstock and routed the truss rod slot. I forgot to take any pics though and I'm feeling lazy at the moment but I'll take some tomorrow.
-
Yeah the lacewood veneer I bought a bit ago looked exactly like the stuff on that strat... no fancy masking needed.
Although your idea sounds pretty cool in its own right GregP!
-
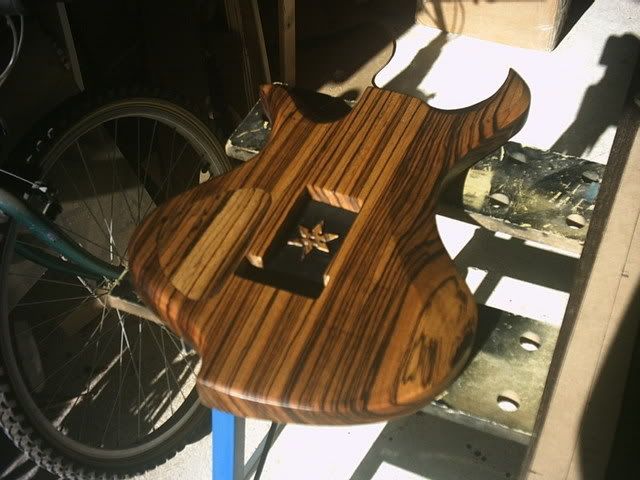
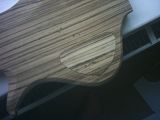
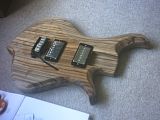
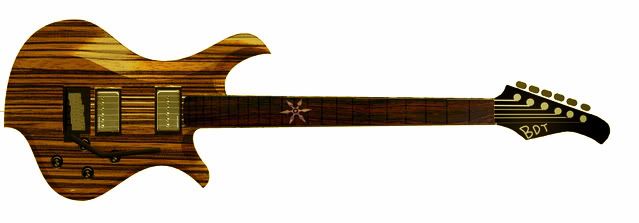
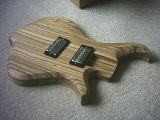
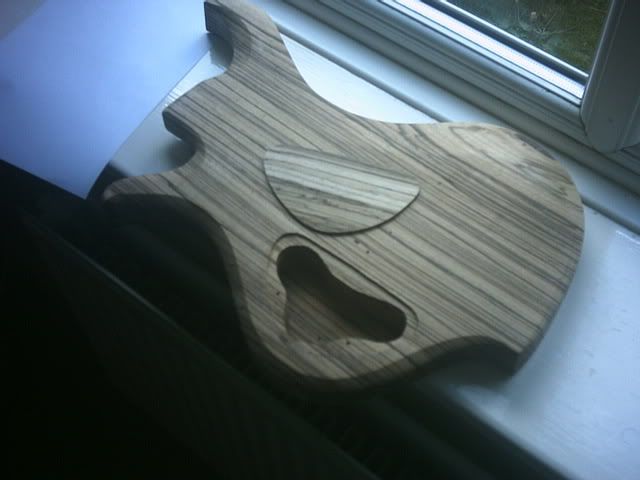
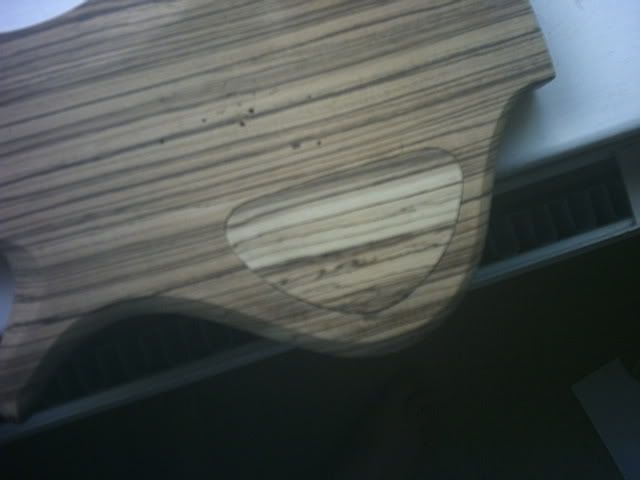
This is the lovely amber colour it goes when oiled
The thing in the trem cavity is my inlay (there's not many inlays you can cut out with an electric drill and a chisel!
)And for maiden69, heres some proof that I'm sharpening up those bevels:
That isnt the final finish in the photos btw, it still needs some sanding in places and stuff... but because I find sanding so damn tedious, I'm going to do it gradually bit-by-bit while I move onto...
expect progress soon
-
Looking great!
-
anyone else having problems with the pics - they are all on photobucket!!
I think it was just a temorary thing yesterday - they all disappeared for me too, but are back now
-
You should add a picture or sketch so we know what kind of design you mean.
All photobucket photos disappeared for a bit across the forum- and when I tried to log into my account it told me the site was under maintainence.
Same happened in WesV's thread
-
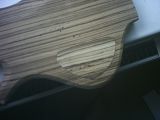
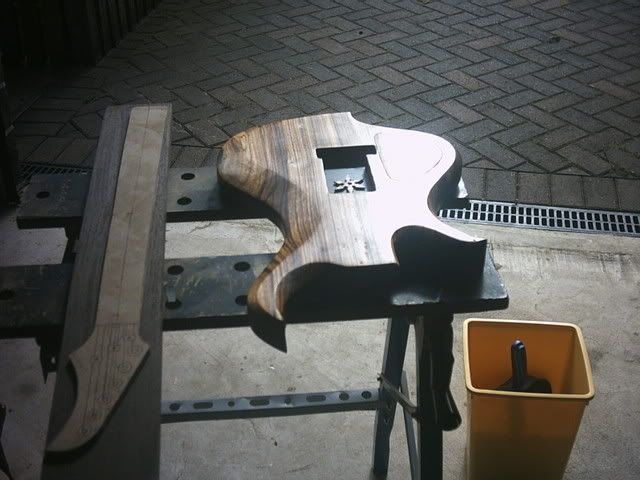
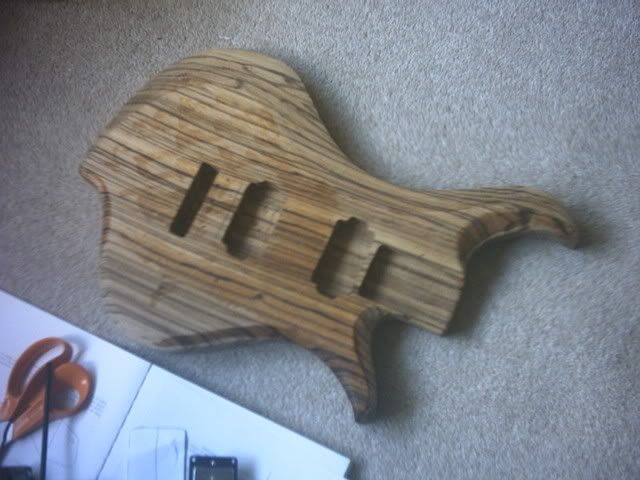
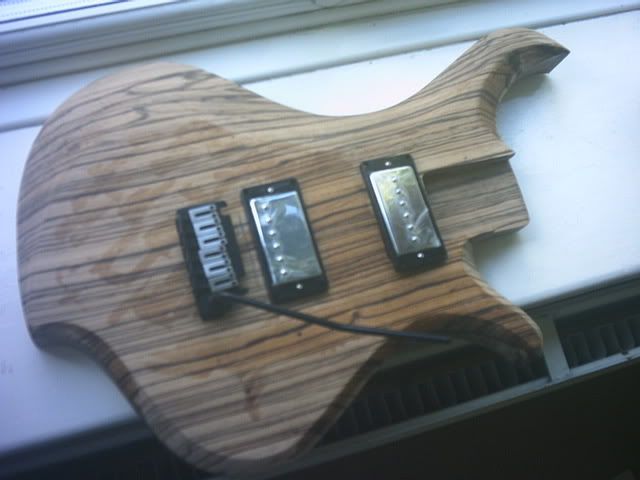
Minor screw up today... I was routing the trem cavity deeper than normal to relieve weight... but forgot that I had also routed the pickup cavities deeper to relieve weight!
So I ended up routing into the pickup cavity :S
I had a few ideas of what to do... either:
1. just clean up the hole and leave it... it just means a bit of the pickup will be visible... not the end of the world really.
2. Make a plate to cover the hole
3. Make a plate to cover the whole trem cavity
I tried option 2...

... and I think it hides my screw up pretty nicely!
Also, since I made the plate out of black anodised aluminium (I was going to make it from card, but something just seemed so cheap and half-assed about sticking a piece of card in there
) - at least I can ground the plate as well for extra sheilding.anyway- other than that, everything else went to plan. So now its onto sanding and fine tuning the carving, then finishing, then its time to move onto the neck!
-

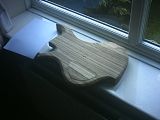
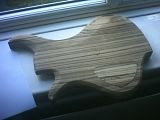


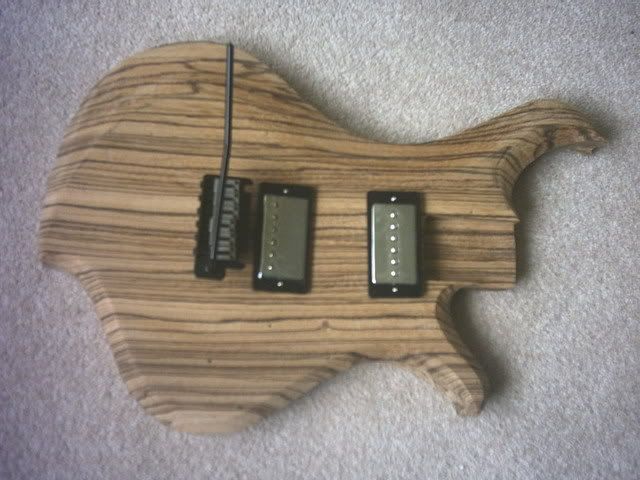
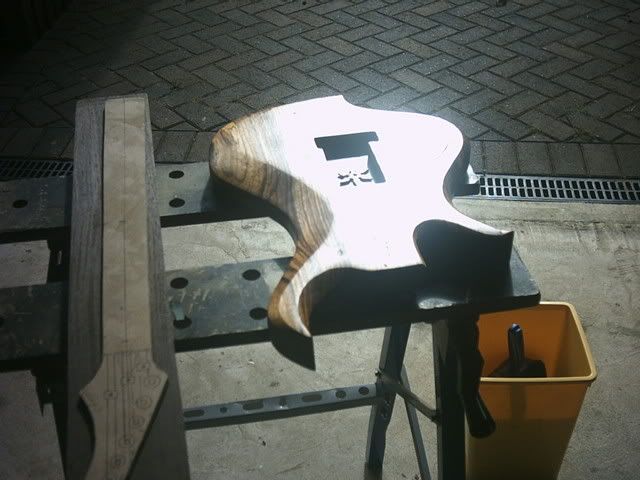
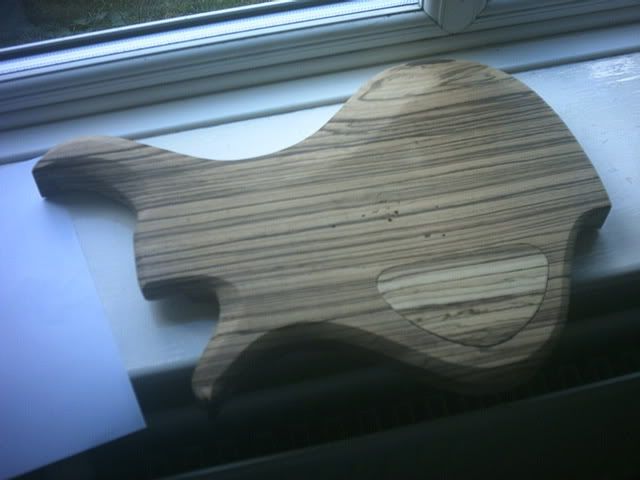
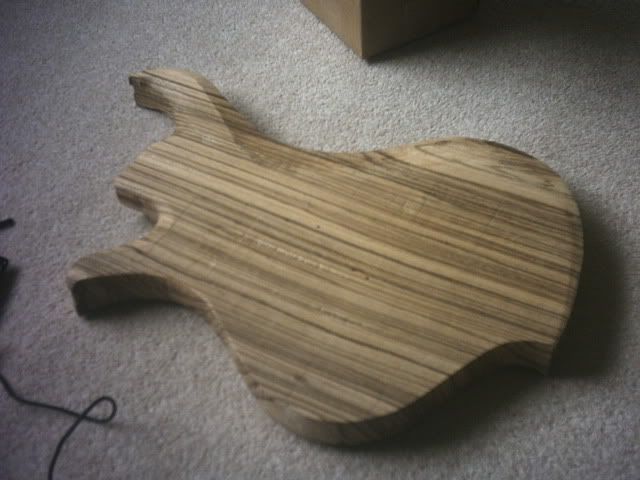
-Routed control cavity
-Made a cavity cover (Fits pretty nice and tight)
-Routed for tremolo on top surface ~ not done bottom yet.
Ignore the nail holes on the back and the blotchiness on the front.
I used nails to hold down my templates- but I made sure the nail holes fell in the areas that will be routed away anyway when I route for the trem- and the blotchy stuff on the front is just the remnents of some danish oil I put on there, which will be sanded off eventually.
-
Wow man looks awesome =D
I got to steal that shape lol
Thanks!
And feel free to use the shape if you like it!
I can even email you my cad drawing if you like.
-
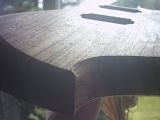
I think that you should work more on the top. Just to get the bevel like in the rendering. in the pics looks like if it is a little bit rounded, versus the rendering, they look sharp and flowing with the body.
Which bevel? the big one?
I'm not finished yet- I still have a fair bit more routing and sanding to do, and I will be scraping that bevel a little more too, but its pretty close to how it will be when finished.
-
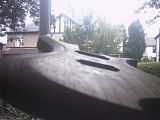
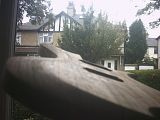

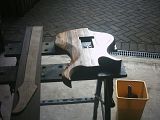
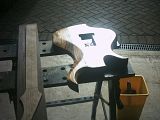
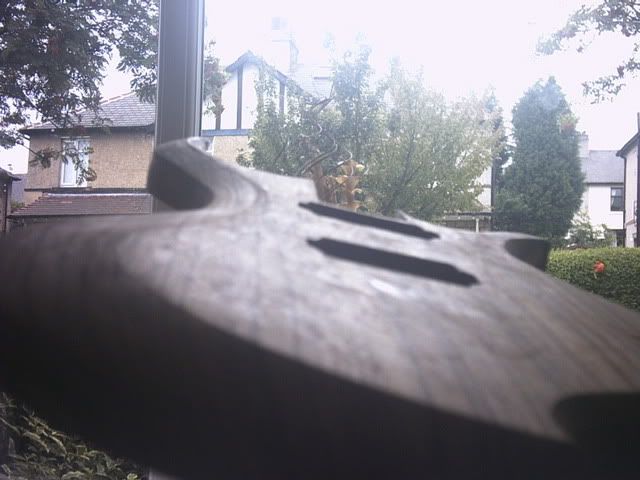
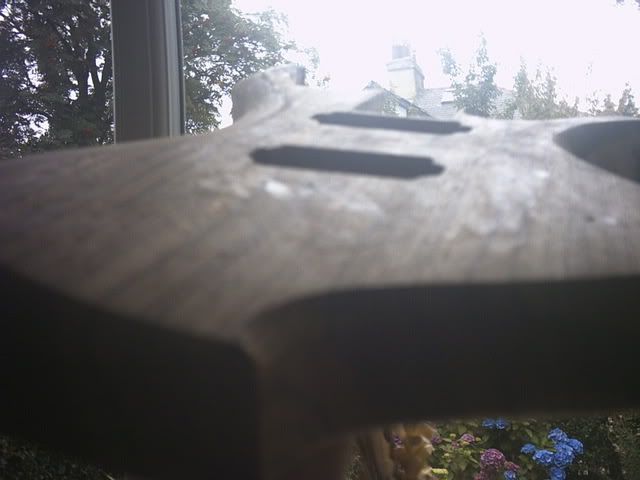
I thought I'd try to get a few photos that show the bevels a little better, but my camera decided to focus itsself on my neighbour's house in the background instead of on the guitar, so theyre pretty blurred. They still show the bevels better than the other photos though, so I thought I may as well post them anyway.
-
Man, I cannot wait to see what this thing looks like with some finish on it. As you said, you don't see the bevel like you would with the finish on. I can see it perfectly, but with the finish it will be so much more distinct and sharp.
Well I got a little curious and rubbed a little danish oil on the front, (I've sanded it off again now though), and I'm also optimistic about how it will look when finished- the danish oil gives it a nice, more amber-ish colour and really makes the figure stand out. The fact that it makes it shinier does indeed make the bevels more visible too.
Ben: lookin' good! How absurdly heavy is that, though, exactly?Cheers, its not that bad weight-wise thankfully. I was initially planning to plane it down to 1.5", but then I realised that it had to be at least 1.6/1.7" ish for the trem, so it ended up thicker, and I was worried about the weight.
The carving removed a lot of wood though, and there's still the trem cavity to route, so its only going to get lighter.
Obviously it will never be a light guitar, but its looking like it wont be uncomfortably heavy either.
And I too am now a scraper-convert. I'll definitely be buying more in future!
-
I'm stoked you decided to go with the single 12th fret inlay, given the wood and shape I think it looks best. I really like that inlay as well, it should be really cool looking once all completed. The project looks great so far and I can't believe how quick you whipped that body out, it looks perfect. Zebrawood is pretty tough, I find to be a strange wood as the grain seems to be going in all directions, lol. Once I find the right angle it planes great, but for every little section I have to find a different angle it for the grain, I dunno weird piece.
The way I carved out the larger sections quite rapidly was to draw the lines I was aiming for on the top and side of the body, and then take a saw and join the lines on the top with the ones on the side with a load of straight cuts (about 1.5-2 cm apart)(also I stopped a little short of the lines with the cuts so i didnt go too deep, then take a chisel and chisel out the bits inbetween the cuts. The cuts prevented the problem of tearout that zebrawood seems so prone to.
Then I used a fairly course rasp to tidy it up, and then I used a scraper to get it smooth. Also I was sure to hold the scraper constantly at the correct angle to get a flat surface on the carved surface.
I've been thinking more and more about scrapers, especially after spending a lot of time reseaching acoustic builds and great builders, it seems to be a very popular tool. I understand it, but honestly I just never saw that it could work well, but I was very far off the mark and I plan on trying one as well, where did you get yours and what brand and type is it?Keep the progress pics coming!! Lookin good! J
Mines from stewmac and it's the one thats flat on the 2 long sides, and curved on the other 2 , with one convex side and one concave.
-
The idea of a zebra did actually cross my mind- but I think I know what I'm going to do now. Thanks for the suggestion though.
What's your idea? (or is it a surprise?)
Nah no surprise;

I chose it because its small and simple and shouldnt distract from the design and also because it should be easy to cut out- its basically just a 6 pointed star with a few circles subtracted.
To cut it out of the zebrawood im just going to drill 7 holes for the circles, then its just a few more straight cuts and its finished. Should be fool-proof (hopefully).
-
what about a zebra ?
fits the guitar well
just a zebra on the 11 , 12 and 13th frets , maybe a little bigger
The idea of a zebra did actually cross my mind- but I think I know what I'm going to do now. Thanks for the suggestion though.
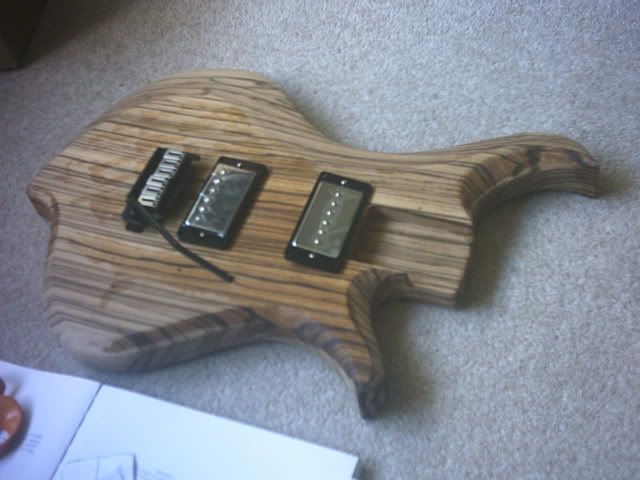
(I know the hardware isnt lined up accurately- just a mockup)
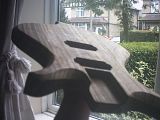
Got a lot done in a farily short space of time last night- cut/ routed the body.... some minor tearout (the new, more expensive bit I bought seems to tear out more than the old one
). Nothing some files, sandpaper and tired arms wont cure though.I've 90% finished the contouring on the front and back too. My arms are tired as hell now- zebrawood is a lot tougher than other woods I've worked with.
I varied the depth of the carving on the front and back, so that it had a deeper carve on the back where your stomach is (and a corresponding slightly shallower carve on the front in the same place), and a deeper carve on the front where your forearm is.
So basically it has a belly and forearm cut, but they blend in with the curves visually.
The curves dont really show up very well in the lighting in the photos, but I'm aiming to keep the lines as defined as possible, so when it's all polished and finished the curves should be nicely visible.
I'm not regretting buying a scraper btw- theyre way more useful than I would have imagined. I'm tempted to invest in a power sander at the moment too.
All seems to be going to plan, and progress is surprisingly rapid! I hope I can keep this up.
-
I get that often, but it always disappears in a few mins.
A couple of times I've even fallen asleep and cut off the blood supply to an arm for so long, that when I woke up my arm was cold to the touch and I was actually physically unable to move any of the muscles in my arm or fingers for a few mins until the blood got back in there.
Really freaked me out when that first happened!
I hope things are ok for you
-
yeah it was nice wood on that neck and i hope i can save it but theres no point being precious about it - the next neck will be even better
The neck looked great on its own, but IMHO I think that the rosewood will look better with that body.... I just think the rosewood compliments the spalted maple a little better somehow.
-
The question has come up on other forums and no one has even had any ideas that would stand up to discussion, not to say actually work.Seen the question at least half a dozen times, and it's never resulted in a supplier being identified. Me thinks that speaks volumes...
Not that I'm suggesting it would be easy or cheap, or even definitely possible, but one thing that comes to mind is this jet stone they have near whitby near(ish) where I live... Its black (hence the phrase 'jet black') and hard, and if people can shape it into intricate ornate jewelry, why not something fret-shaped?
http://en.wikipedia.org/wiki/Jet_%28lignite%29
Just an idea
-
The guitar would look awesome with no inlay at all IMO.
When I read this I fully agreed with it, no inlay would look cool, but the more I think about it, the more I think just a nice single 12th fret inlay would excellent, even just initials in nice handwriting or something. J
I was going to use some thin aluminium rod for the dots- its about 1/2 the diameter of normal dots, but I think you may be right- I'll see how it looks without them.
And I have been trying to come up with a suitable 12th fret inlay. I think something small could look good, but I've not really succeeded in finding anything I like. I like warmoth geko inlay a lot, but I'd rather have something original. I considered initials too in fact, but I'm going to have those on the headstock.
Anyone got any suggestions for a 12th fret inlay? I'd be interested to hear them.
-
i think it distracts from a great design, sorry!I can't say I'm a fan, either.
Y'know, the more I look, the more I think I agree...
I do like the design, but it just doesnt really fit with the overall look of this particular guitar... the body design is all 'streamlined' and minimalistic, and the inlay just distracts.
Less is more I guess in this case.
I can always save the design for future.
I spent a fair while making the original vector drawing, so on the offchance that anyone likes it enough that they would consider using it, I'd be happy to email the drawing.
I like it looks awsome =DThanks, I do still like the inlay design, just not for this particular guitar I dont think.


Zebrano Baritone With Wenge Neck
in In Progress and Finished Work
Posted