


low end fuzz
-
Posts
909 -
Joined
-
Last visited
Content Type
Profiles
News and Information
Tutorials
Product Reviews
Supplier Listings
Articles
Guitar Of The Month
Links and Resources
Forums
Gallery
Downloads
Posts posted by low end fuzz
-
-
if you are gonna thin grain filler, you might as well fill the pores with sanding sealer, before clearing; it will be a lot easier to sand; not that i recomend it for really porous wood but thinning filler seems like a lose situation
-
thank you; its died pear veneer; prolly the cheapest of what i could use; does an exelent job; but looks funny when its carved into, like a tummy cut or arm rest
-
ya what the hell?
i screwede up, im a post link virgin! i must of stuck it in the wrong slot; (does that sound dirty?)
-
the templates i made for this was my interpritation of a jazz bass, and i really dug it;
EDIT:i suck at somehting here; this is all the pics i tried putting in links
http://s68.photobucket.com/albums/i23/lowendfuzz/
can you guess what body wood that is? its common but now it smells like bbq;
the top is a popcorn quilt with a 'tone block' (i love when ppl say that!) of purpleheart;
the neck is lacewood with curly maple center; thought id try it
this is the other one; kind of ;just the neck; but the body is the exact same shape of alder and painted solid black; i have no photos, so use your imagination
this is the way i plan on doing the logo ,for awhile at least
TM
doing some fret work
this neck is a one piece flatsawn maple rw f.b.
totally unrelated
spalted sg
this is a piece i hope to use, its under survelience for the next while to see how its reacting; its a solid piece w/ wings so; it may not work; but i didnt want any more spalt tops, and it was just taunting me!
-
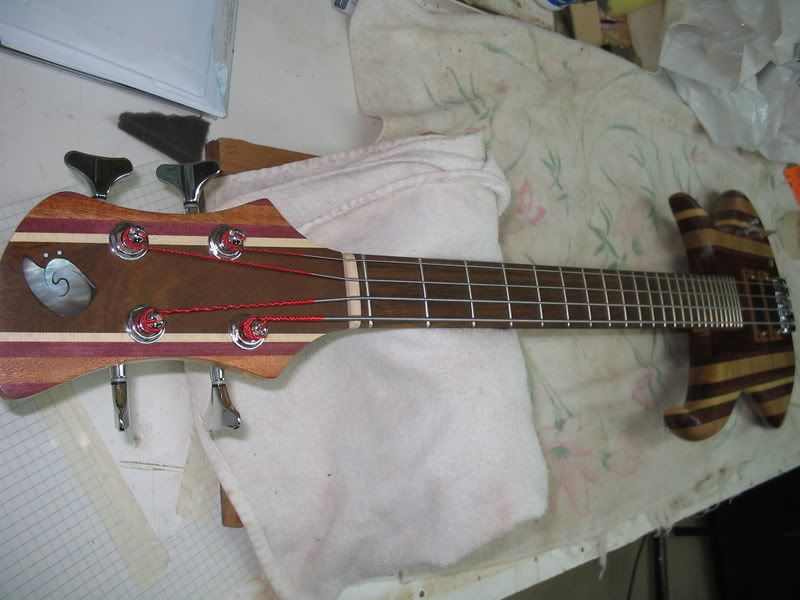
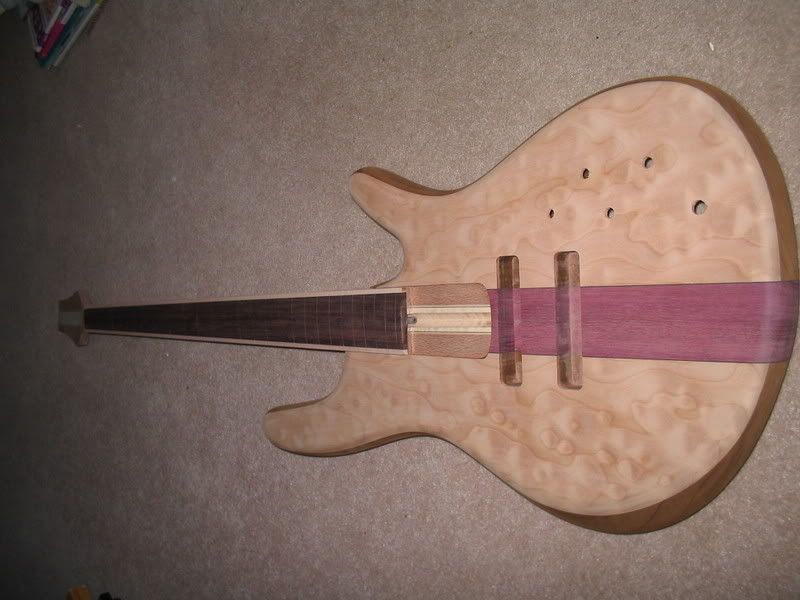
this is one i had i the booth a while back that ive been slowly assembling; i like it, but its been such a long project, i dont like the way ive done certain things which takes the thrill out of what i thought was gonna be a great lookin guitar;
but i'll keep those crtisisms to myself and hope you enjoy the colours.
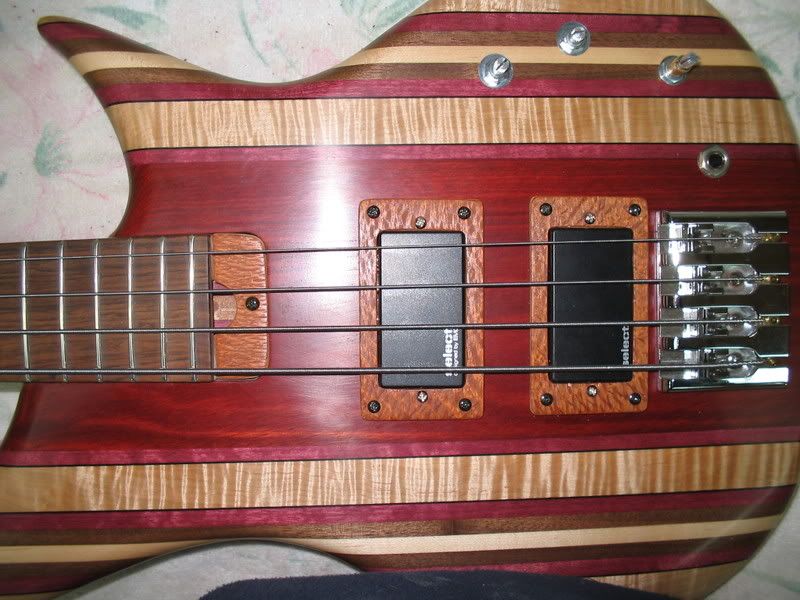
shot from headstock
another front shot
the body has everything from bloodwood center, and mahogany back, to p.h.and maple accents and black/white/purple pinstripes;
the neck is maple p.h. and mahog with a pau ferro board and lacewood accents;
i opted for the passive emgs (b-grade) for the time being due to personal dissapointment, and it has a 2 band bartolini preamp for the electronics
-
i would be tempted by a 3 piece top - a normal bookmatch on the outside with something else in the middle, possibly similar - possibly not. shouldnt be to hard to source an extra wide top if you go that way though
oh piss!
thats something i wanna do; and at least the outside pieces look more 'bookmatched' than a four piece
-
i think you got the idea of a 4 way consecutive bookmatch or a really wide bookmatch
-
chill, it was a joke; i know how serious you take those pinstripes;
id put our flag on a design, but its a freakin leaf!
-
I would not suggest any type of power sander unless you are REALLY good with them. File down the pearl close to the board and them radius block sand the rest. If you want to bring the shine back to the pearl, use 0-0-0-0 steel wool. Works like a charm.
I always leave a little shell over the top of the wood. I want to sand the shell down to the wood, not the wood down to the shell.
I agree with the .06" comment. For a fretboard always start with thicker material.
The piece pictured below had three different thicknesses of material on it. The brass was the thinnest .05, with the pearl and other shells at .06, and the stone being the thickest at .14. But, as you can see it all worked out right in the end.

that is awsome!
i mean, you ruined it w/ that hidious flag, but the work is astounding!
-
xanthus;
the guy who plays it, said its right on, but i dont play guitar (exept for my paul stanley ed. washburn!!)
it seemed small to me, but thats prolly cause im huge! (and play bass)
-
http://www.guitarbuildingtemplates.com/teletemplates.htm
I'm all for making my own templates but why do that when you can get a precision cut template for a good cost. When I decide to build a standard shape I just shell out the cash for this guy's stuff. I have his bass templates, tele and ES335 templates. All come with the correct positioning for the controls and really make life easier for me. The neck templates are great because they fit a standard fender neck so if you want to buy a carvin neck you can use this template with no issues.
Edit: just realized the link is a double post. Sorry but I've used these and they are top quality templates.
I've been asking this question all over these forums. How accurate is that guy? I've heard some nasty things about him, especially with the tele templates. I'm looking at getting an RG template over the summer, but I've heard enough negative press about him that I'm reconsidering my decision. I might grab an RG body off ebay and make a template off that, then I'll have a template and a beater body to mess with as well.
hes not perfect; i tried the sg plans and i also got a jem one; he forgot to send me some special add ons i asked for, but when i emailed him about it,he sent it out at his expense; the neck pockets and fb were not a tight fit/match; but i use all my own templates for the important stuff like that ,so it didnt bother me; but to expensive for my liking (you wont find cheaper) but +1 for plans and making your own, its a smarter solution for if you wanted the legit sizes and what not
-
ahh; just wrap some electric tape around it and press it in; i wont tell.
-
routers are the way to go, and a nescesity; id go that route, even if you had to buy a 60$ router you'll need it later for the pickups and cavities
-
a valient effort;
defnitly some cosmetic work could be done, but its suprisinly an intersting/intriging design, and pickguard;
kinda ghetto version of the victor wooten yingyang;
-
what kind of endorsment requires you to 'buy' a guitar?
free shirts maybe?
-
two thicknesses require 2 depths, imo
or if they are in the same structure (inlay) inlay it whole and sand them equal (already in the board)
any kind of thicknessing prior to setting in your piece seems to risky at least compared to when its epoxied in;
your pearl should shine fine if you sand it and the wood its in to like 220; but it can be much better, just keep sanding with higher grits; dont bother buffing i.e. compounds/pumice,
-
$$$
secondly all the cutting and radiussing;
and thats before you even find usable pieces;
are you sure that fb wasnt made from pearloid?
ive seen those ,but imo there hideous
-
thank you
-
are those chrome covers on vintage fender basses just asthetic; or is it suposed to capture/pickup the sound better being trapped in this metal box?
ive never played one with it on; and i was thinking of making a decorative wood one; but it felt like it was intrusive and an accident waiting to happen;
which got me wonderin, why the hell is it there in the first place?
my thinking with covers is that you wanna hide this piece of metal/plastic from abstructing a beutiful piece of wood; but to throw a piece of chrome twice the size ,throws that theory out the door;
and i know leo designed these 35 years or whatever before anyone thought of putting wood over instead, just curious;
g'night
-
hijacking con't
who is this andy guy?
website?
store name?
thanks much very;
-
BTW, I used epoxy for my inlays, which I was glad I did because after some sanding one of my inlays became see-through and I was able to cleanly remove the entire inlay with a heatgun and redo it, no problem.
One tip I picked up from Andy DePaul (great place to buy inlay blanks, BTW!) was to paint the backs of the inlay blanks with enamel or white/pearl colored fingernail polish. Then, if your inlays get a little on the thin side when sanding, it's a lot less noticable than having the dark colored epoxy or ebony board showing through. Worked great on mine!
thats sweet!
do you paint ti on the final shaped inlay prior to install or before the shape is cut?
im wondering if enamel would give real pearl more stability along the natural hairline crcks; or if it would make it so hard it would shatter trying to cut it.
-
Squeeze outs not a big deal, just make sure it does not squeeze out into a slot because thats tougher to clean up later, that is if its already slotted.
Practicing was key for me. What I preferred was tracing my inlay onto the fretboard itself, then taking a very sharp razorblade and cutting the shape of the inlay into the board and here was the key, I cut on the inside of my pencil marks instead of cutting on them, which gave me a perfect size route for my inlays. Doing an initial cut with a razorblade also helps to prevent you from routing outside the lines because it kinda chips away at those scribed lines, I believe it will also help prevent any chips from popping out in certain woods.
Sandpaper and files work to smooth inlays and epoxy down after you install them. I liked the file for most of the rough work because it doesn't cut wood well, so you avoid sanding grooves into your board, then I cleaned up with sandpaper. Do you have any little offcuts of ebony around? Seriously before doing my first board, I practiced cutting the route many times, my first few attempts were too big and would have been noticeable, however I soon got them nice and snug and these were fairly tough inlays. I was glad I practiced prior to installing for real. BTW, I used epoxy for my inlays, which I was glad I did because after some sanding one of my inlays became see-through and I was able to cleanly remove the entire inlay with a heatgun and redo it, no problem. There are some extremely talented inlays artists that visit and frequent this site, maybe some will find this thread. J
thats a cool little tip there about carveing the perimeter of the design for chip out!
my tip for after the cutting and shaping, is to tape off around all your inlays well, so you can smush and wipe off excess epoxy into all the crevases without covering your board making extra work and filled in fret slots
-
with no real idea what it is, i almost want to say they carved a square out of whatever wood, thats not mahogony;
and stuck a block of mahogany in it;
IF thats the case i would say why bother; if you think theres a wood out there that has the sound you want ,make the whole thing out of it; for sound purposes, the less glue the better;
-
i work today and tomorrow, but i will radius up a test board and slot it for you on sunday...video narroration and all, including what not to do

when using binding i put a drop or 2 of superglue under the part of the fret with no tang, and maybe 2 drops evenly spred in the slot basically with the glue, if it starts seeping you can wipe it away fast, no harm no foul since it dries completly clear, you might have trouble on rosewood if your doing this, but not ebony or maple. its just a trial and error type thing, i like mine in the middle and at the ends, but just see which works best for you
or wait till i make you a video before you continue
low end fuzz - i try doing it in one dead hit with the hard plastic side of my hammer and just cant get it to sit even and flat :-\
?
i hope you dont mean one big hit in the middle for each fret? do you?
if so (i hope not) hit the tang farthest from you in to place, now a 1/4 of the fret is in and the rest is sticking straight inthe air (not stright up, but you get it!) now just whack it firmly in a towards you fashion, 'folding' the tang into the slot maybe 1/4" at a time; easiest thing in the world; and you can do it on a blank carved or finished neck;
even if your one of those strange people that radius and fret their boards prior to gluing
 , with no special cauls or nothing; just remember that you are hammering and fret end cutoffs are much stronger than wood! so keep a clean area with some support so your not chasing your neck all over!

 , with no special cauls or nothing; just remember that you are hammering and fret end cutoffs are much stronger than wood! so keep a clean area with some support so your not chasing your neck all over!
Marquetry Foy Mr Father-in-law
in In Progress and Finished Work
Posted
after you got some finish on it, rub in one of those wax sticks or putty, for a cheap quik fix; should be fine, as opose to cutting a fillet and 'plugging' it