


Foggy
-
Posts
108 -
Joined
-
Last visited
Content Type
Profiles
News and Information
Tutorials
Product Reviews
Supplier Listings
Articles
Guitar Of The Month
Links and Resources
Forums
Gallery
Downloads
Posts posted by Foggy
-
-
Thanks to all...I ended up saying "to hell with it" and buying a 60 style swamp ash body for the build. I didn't think the work to sand off all that nasty finish would be worth it om the squire body...
Probably better off with that option - very possible that the wood beneath the paint on the Squire wouldn't have been that great anyway

Jim
-
Hello,
I'm looking to hire a Builder/Luthier in the Denver Colorado area to build me this guitar (minus the hardwares).
and with a Recessed Floyd Rose Cavity.
please contact me via eMail if interested.
Best Regards
-Brian J

The way the GB Pound is plumeting against the Dollar
, why just stick to luthiers in the Denver Colorado area, or even just the States ? -
Gold leaf isn't that difficult to work with, depending on the quality of the gold leaf and how pure it is. Some gold leaf is affected (bubbled) by 2k lacquers, but, if it's sealed with nail varnish first it takes 2k lacquers okay.
I'm working on a guitar at the moment using gold leaf, creates some amazing effects.

Jim
-
Neat piece of work...........was gonna say 'smokin', but thought that was just too corny even for me!
Interesting with the mandolins, my partner in crime (the brains of the outfit) is heavily into making mandolins, some, of the very quirky variety. Don't know if it's the done thing, but I'll stick a link up to Dicks site, you might be interested in taking a look.
Jim
-
Those are both closed grained woods, so I would say you should be able to go straight to primer. I am not a big fan of sanding sealer.
Yes, I'm with ihocky2 on this one. I'd be tempted to go straight to primer, though I have used sanding sealers before. I also used waterbased sealers under the solvent based primers and paints that I usually use with no problems, so as long as you prime with an appropriate primer for your basecoat you shouldn't have too many problems.
Jim
-
People who work on pottery and ceramics use a product called wax resist witch can be painted in very fine lines. The idea is that glazes (like paints) don't stick to it. You can paint very fine lines and intracite designs. You can clean it up with a damp rag if you make a mistake. I don't know if it would work on a laquer finish though. I will experiment the next time I spray.
Always be kinda wary of adding any kind of wax to a surface you're planning to clearcoat or lacquer afterwards, as it will also potentially act as a resist to the final finish you apply. Particularly around an inlay like this, as the resist will unneringly find a place to hide in the smallest gap in the surface (around the inlay) and regardless of how carefully you clean up afterwards, potentially cause you all kinds of problems when you come to shoot your finish coat.
Jim
-
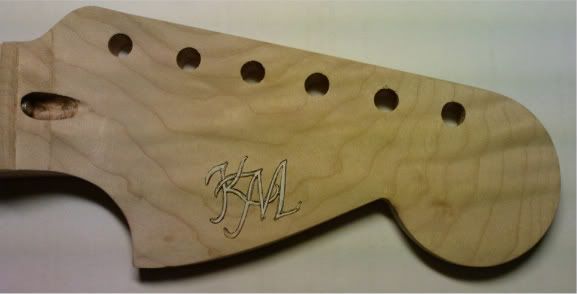
So I have this question on my current (and future) build.
I have made my initials in MOP on the headstock
To the question....
What's the best/easiest way to mask (is that the proper word for it...!?) the MOP before painting.
When I was a kid and building models there was this "paint" that created a thin coat that you could peel of....
Could something like that be used!?
How do you do it otherwise!?
Edit...
MOP not glued yet...
or this closeup:
http://i270.photobucket.com/albums/jj116/S...aster/Head3.jpg
/Kenneth
Frisk masking film is specifically designed for this kind of work. It's a low tack transparent film commonly used by airbrush artists, though it comes in a roll, so if you only want a very small amount it wouldn't be very economical to buy a whole roll.
I use it all the time so if it's any use to you, email me your postal address and I'll send you a piece in the post and see how you get on with it.
Jim
-
Really do appreciate the comments guys. Thank you
Jim
-
That is a beautiful guitar, classy.
Jim
-
I recently finished a custom body witha redish pinkish stain on a maple body. I put about 10 layers of clear lacquer on it and let dry for quite some time, but it now scratches very easily, i can take a guitar pick and scratch of the clear coats.
What kind of clear paint/lacquer can I use that will be relatively cheap?
Or could I have screwed up some where else?
If it was a premixed lacquer sprayed from an aerosol, then it's probably just the lacquer thats to blame (they do vary a lot between brands). If it was a two part lacquer that you mixed yourself and then either sprayed or brushed on, it could just be that you didn't mix it at the right ratio, lacquer to hardner.
The other possibility is that you maybe didn't let the coats dry out sufficiently before you applied the next coat, but without knowing a bit more about the lacquer and the application it's difficult to say. But you have my sympathy with this one, very few things more frustrating than when you get to the last stages of a finish and it doesn't turn out right.
Hope you get it sorted.
Jim
-
Just got off the phone with Mike Learn. The 2 prototypes are going to him for airbrush as soon as I get them base coated. If youve never seen his work, check it out...it's amazing:
I hadn't heard of Mike Learn until I checked out the link, some awesome artwork there. Neat guitar you got going on there too, look forward to seeing the end results after it's painted.
Jim
-
Well, we finally have the guitar together for a first fit and all wired up, it sounds awesome too even at this stage. Still a couple of mods to be done before the guitar is perfectly setup but couldn't resist taking some piccies, so thought I'd let you have a peek.

Jim
-
Thank you very much for your response Jim!!
I have a lot more clarity to reference from as far as what I should be doing . . .
A coupla quick questions come to mind:
--Why is it that you say I should know before having the body filled whether or not I will be stripping the whole thing?
--Should I strip the whole thing?
It seems that just scruffing up the existing poly could save me a lot of Time and Money
--Would there be a noticeable sacrifice made in terms of the guitar's tone by having the extra amount of paint
clinging to the wood?
(BTW -- It is not too late for me to change the course of the body-filling as my tech has not
started that yet -- Plus he offered to email photos of the 'before' condition! so...)
Thanks for all your tips -- I will definitely use as a reference!
Matt
How much clear coat should I buy? =)P
If your applying a solid colour to the guitar, then unless the paint already applied to it is either very thickly applied, very badly applied, or so much of it is damaged as to warrant removing whats left, then more often than not you're better off just rubbing the existing finish back, filling where necessary and priming prior to basecoating. To take the guitar right back to the wood is fine enough if that's the way you want to do it, but you'll then have to re-seal the wood and prime from scratch again - a process that has already been done once when the first paint was applied.
To work over the existing finish you'll have to rub it right back anyway to remove anything that might affect subsequent coats of paint and lacquer, as well as to give the new paint a rough enough surface to 'key' onto. This rubbing down will reduce the original paint layer(s) right back anyway, so your new paint and finish (applied properly) will only replace pretty much what you've removed. Remember, we're not plastering paint and finish on here - and there's lots of rubbing down between finish coats (and almost certainly before final polishing your first few times round), so the extra thickness of paint is miniscule. There will inevitably be those that disagree here, but personally I think that unless you have an incredibly fine ear for tone I'd very much doubt you'll perceive any difference at all if you do the job right. Plaster umpteen layers of paint and finish onto the guitar and then don't rub down properly during the finishing stages - yes there will likely be an effect, but bodged like that, the detrimental effect to the tone will simply just reflect the mess the guitar will look anyway.
Regarding the amount of finish you'll need - all depends on what finish you decide upon and how well you can apply it - but if it's you're first time I'd advise erring on the generous side, you then have enough to practice with (always adviseable) and - should it not go on right the first time - enough to redo the finish as necessary to get a good result.
Hope this helps
Jim
-
Hi Jim --
Thanks for your reply --
I cannot take picture at the moment as the body is being filled by my luthier --
However -- I am thinking that due to the extensive amount of filling he is going to have to do --
I intend to go with a SOLID WHITE COLOR finish . . .
Could anybody comment on:
1) Would it impact the sound of the instrument to just paint over the existing poly?
2) Should I strip it to bare wood?
3) As far as painting -- I do have access to a spray booth as my brother works for a kitchen manufacturer and they spray their own doors there ... I was thinking - one of their kitchen styles is called 'AUTOMOTIVE' -- and I believe they use actual automotive paint -- Could I spray my guitar with this???
Hmmmm.............where to start?
I think the best thing here is to go back to the beginning of the process and work through the options.
Starting with your beat up guitar - before any filling is done you ideally should have decided whether you were going to strip back to bare wood, seal, fill, and prime, OR, rub back the existing poly finish (removing any potential contaminants and roughing the whole surface with 800 wet and dry) before filling, rubbing the filler down and priming from there.
Once you're at the stage where the guitar body is primed and perfectly smooth (that will probably take a while), then automotive paints are fine if you have access to them (local autobody repair/sprayshops will often sell you some if not). Many factory guitars were traditionally finished with automotive paints anyway.
Then once the guitar is prepped, primed and basecoated, all you need to decide is what clear you're going to use to seal it. As you have access to a proper sprayshop you've no real problems here, you just need to decide which finish you're going to use and do a bit of homework on how to apply it - again, many, many threads and really good tutorials on that subject here.
One bit of advice though - the most important single factor to a really good finish is the preparation. Skimp on the prep and your going to end up with a duff finish almost guaranteed. So take the time getting your guitar filled, primed and rubbed down until it is 'perfectly' smooth. If you see any little blemishes at all in your primer coat as you rub it down, either rub them out if you can without going through your primer coat, or if not refill the mark, rub down and re-prime again. Very minor marks/scratches can sometimes be filled by simply shooting another primer coat alone - but never be tempted to think...........Ahhh well, it'll never be noticed anyway - 'It will' - and it will irritate the hell out of you if you take pride in what you do, so take the time to get it right, right from the start.
It'll be worth it in the end
Jim
-
Hi!
I have recently acquired a badly beat up Yamaha RGX A2.
My luthier is going to patch up all the holes in it and I would like to paint it myself.
Does anyone have a recommendation as far as type of paint -- how much stripping to do --
I would like to preserve the tone of this instrument --
Also I would like to preserve the horizontal and vertical lines on the body that seem to be part it's current poly finish --
Thanks for any help!
mattdude
=)
A picture of the guitar would help assess the degree of prep required
The finish you use will depend very much on the kit that you have (or are prepared to buy), where you live (regarding local regulations) and what facilities and basic knowledge you have, though there are already lots of very informative threads and tutorials on here covering the preparation, painting and finishing of guitars to guide you.
Jim
-
Thanks for the time and info you put into your comments Jim. Just hearing from someone in Orkney gets the Scottish/Viking part of my blood excited! (Ancestry from the Outer Hebrides[Morrison] and Sutherland[Mackay] amoung many others to the south).
I think I will try your method of "misting" and building gradually with the Poly Urethane. It also sounds like your method does not involve applying a lot of Poly overall, which appeals to me. I want to keep the finish thin, while having enough to get a good depth in the gloss.
I will reread your comments on the mask several times, and hopefully get some comments from others as well before I make a respirator mask purchase.
Thanks again, Robert
No problem at all - we fellow Celts have to stick together after all
Regarding the mask, positive pressure masks are the 'ideal' recomended form of mask, but then again, unless you have an industrial sized compressor it's unlikely that it would run a positive pressure mask and your spraygun too............mine certainly won't. So many people (and professional sprayshops too) often use a good quality filtered mask like the Gerson mask, 3M also do a slightly cheaper to buy, but still very good mask that works perfectly well. The beauty of the Gerson though, is that it has a two filter sytem (a pre filter and secondary filter), the pre filter being replaceable (unlike the filter on the 3M mask), so that by replacing the filters the mask can last a long time and reduce the overall cost. But I'm sure there are others who will chip in here with other possible alternatives.
Jim
-
The last four guitars I've refinished /finished have been done with Nitro lacquer, and I've had pretty good results. I used behlen nitro and sprayed through a DeVillbis Finishline III gun with a medium sized compressor. My latest project is almost finished - a flat top Dean Cadillac copy (slightly larger than a Dean) with a neck made for me by Doug Darling at Soulmate Guitars. A little final polishing on the lacquer and wiring left before I call it done. It looks pretty good so far. My biggest mistake was not grain filling the Black Limba body back before staining and finishing; so it took a LOT of nitro to get it level. I did not even lift the grain with water and sand back before staining either (Colortone w/alcohol), so that could have been part of the problem. Anyway, its almost a done deal. Live and learn!
However, I've been tempted to go for a polyurethane finish on my current project; an Eric Clapton cut Explorer - one piece mahogany back from Kalamazoo (1980) with a 1/4" curly maple flat top and black Limba neck with a couple of hard maple stripes for stiffness. I've read Jeremy's (LGM) tutorial and I'm convinced that I would probably really like a Poyurethane finish because of its ease in working, durability, stability and lack of shrinking, and still giving a deep gloss. I used to be afraid of poly u because I thought it made guitars sound "dull". But I've read enough now that I think the key with any finish is simply not to get it too thick, and then it will sound fine.
First, Jeremy said that he prefers to use a "gravity feed" gun, and not a HVLP. I am confused by this because I believe my DeVillbis Finishline III is both!...gravity feed and HVLP. What am I missing here?
Secondly, I plan to use a two part automotive type poly u, as he and others recommend. What type of prep, if any, should I use between the transparant dye and spraying the poly u clear finish?
Thirdly, Jeremy recommends multiple coats, then sanding to 800 grit, then spraying 3 more wet coats within 36 hours, then sanding up to about 3600 micro mesh, then two more wet soats, then micro mesh to 12,000, then buffing! Dave at McNaught Guitars told me that when he uses poly u, he just sprays on about 6 coats, waits until the next day, then sprays about 6 more coats, waits 24 to 36 hours, then sands to about 1000 to 1200 grit, and then polishes with a buffer. Noticing a pretty big difference between these two methods, I'm wondering what MY method should be. Any thoughts on this?
Last question: I've never used a respirator mask when spraying nitro in my garage or outdoor storage closet, and have only experienced minimal permanent brain da...dam...dam...dammmmage.
Jeremy says that poly u is DEADLY and that you MUST use one. So; how much will I have to spend on one that will be adequate and where is the best place to get one?Thanks for any comments.
Interesting reading this. The strangest thing about almost everyone who use poly finishes is that they nearly all have their own opinions and methods about how it should be done. Trouble is, someone else may try and use the exact same method and it won't always work for them quite the same. Likewise having tried various different methods along the way with varying degrees of success (and disaster), I ended up finding a method that works for me. But crucially - and this I think is the main point - a method that works for me with the particular kit that I've got, used where I use it.
When I'm applying poly I apply a really light 'misting' of finish to the surface of the guitar first with a 0.8 or 1mm nozzle, applied with the least pressure possible through the gun that will still atomise the finish for an even, very light 'misting' coat (basically just a quick sweep of the gun over the whole surface of the guitar body). I leave this for a couple of minutes, maybe five at most (I'm using a fast acting hardner), then apply a second slightly heavier - but still comparatively light - coat of finish. This I then leave for fifteen to twenty minutes and then apply another coat of lacquer, this time applying it in what I'd call a normal coat, heavy enough to cover evenly, but not so heavy as to risk runs or pooling. As this coat goes onto the guitar it doesn't generally go on looking perfectly shiney and smooth, it has a very slightly grainy looking effect when first applied. If you try and get it to look shiney straight out of the gun at this stage chances are you've applied too much. But leave this coat for another twenty to thirty minutes (leave the 'normal coats' slightly longer to flash dry before re-coating),and when you go back to apply the next coat it will have leveled out and should be starting to look fairly smooth and even. Once I've repeated this process until I've got three or four proper coats (and the original light misting coat), I then leave it for 24 - 48 hours to cure out.
Then I generally rub the finish back with 1000 grade wet until it's perfectly smooth and there's no shiney spots anywhere on the surface and then repeat the clearcoating process again. The second time through the process the finish should go on really nicely and unless you have major issues with the application, will often be good enough for a really nice finish when rubbed down and finish polished. It all depends on how the coats go on as to whether third session of finishing coat needs to be applied or not.
Rubbing back for polishing is another one where everyone has their own method that works for them. After my finish is to a standard that I'm happy with it, it'll at most need rubbing down with 1200 grade wet and dry, if it's gone on really well I'll sometimes just start straight in with 2000 grade wet and dry - but it's usually 1200!

I do have electric polishers and the various recommended cutting compounds, but again here, I'm not terribly trusting of electric polishers - far too easy to go through a finish and make a mess of my work - so I always polish my guitars totally by hand. Takes longer and it's a pain in the butt of a job, but the end results are worth it for me...........and it's safe!
Once I've got the whole body perfectly smooth and flaw free with 2000 wet and dry, I then normally just use T Cut, on a duster, by hand to finish my guitars. I know there will be people out there howling now that T Cut is far too aggressive a compound to be finishing a guitar with - but on a soft cloth with lot's of elbow grease it works for me. I too read LGM's tutorial and very informative it was too, in fact so much so that I ordered a full selection of Micro Mesh - and tried them out on the Guardian Guitar I'm polishing up now - it didn't work out for me though (obviously the way I was doing it), so I re-sanded with 2000 grade wet and dry and spent two days polishing with T Cut as I normally do. I do now have a finish that I'd challenge anybody to find a flaw in though. Basically, it's really all just down to personal preference and what works best for you with the kit and the knowledge that you've got.
A good quality mask is absolutely essential when spraying poly's, along with good ventilation, preferably filtered in and out of your spraying area - and no ignition sources from either electrical fittings or any other open flame around the spraying area (it's highly flammable as well as deadly on the lungs). Ideally it's recommended to use a positive pressure mask when spraying poly's, but the very least you need is a really good quality vapour filtering mask (merely dust filtering simply isn't enough!), I use a 'Gerson' mask most of the time.
HVLP stands for 'High Volume Low Pressure' as I'm sure you'll know. This means in very simple terms that the paint or finish used through the gun is atomised at the nozzle to give an even coat at the lowest pressure possible. This is a common advantage of gravity fed type guns, where because of the gravity feed, extra high pressure airflow isn't then necessary to create the low pressure area (via venturi effect) inside the gun, which in turn effectively sucks the paint or finish up to the nozzle from a bottom or side mounted resevoir. This means there is less air pressure being exhausted out of the nozzle along with the paint or finish, which greatly reduces overspray and wasted paint, but also reduces the risks of applying too much finish at too higher pressures - and the associated problems that can then arise.
Anyway, I'm rambling on and no doubt sending folks to sleep so I'm going to go do some work. But hope this helps rather than confuses the issue even further.
Jim
-
That is really beautiful work, never ceases to amaze me the craftsmanship that goes into building an instrument like this. If there was a channel on the telly just showing guitars like this one being built I'd never need the remote again!
Jim
-
Great - thanks for the tips, guys!
Normally, I wouldn't have thought of having a body shop paint a guitar, but I know this guy a bit and I've seen some other wood paint jobs he's done and they looked very good. Plus, I haven't found any luthiers that paint guitars locally. I'll follow your advice on prepping the body and will check with him to see what primer would be compatible with his paint.
Take care,
Bert
Bert
In many respects (with the exception of the initial preparation stages when painting from raw wood), the process is very similar between spraying a solid colour finish on a guitar and applying many two pack finishes (basecoat & clearcoat) on, say a car or a motorcycle. The main differences with a guitar body come in the initial preparation stages and the final finishing stages. I know of several very good airbrush artists who work quite regularly on guitars but who don't have their own spraybooths setup for applying their own clearcoat finishes. They regularly take their painted guitar bodies to 'good' car bodyshops to get their finish coats applied. They then simply take their clearcoated bodies and complete the all important final rubbing down and polishing work in house - their finished results are pretty good too.
The main difference between poly guitar finishes and most finishes on your average car is the attention to detail and time taken to ensure that the finish is as thin and as flawless as possible - you wouldn't tend to go over your average car with a jewelers eyepiece checking the finish for flaws, but on a professional, quality guitar finish it needs to stand up to just that kind of scrutiny.
As long as the finish is applied properly and evenly in the sprayshop doing the work for you, it's really then all down to the time taken and the attention to detail during the final rubbing down and polishing stages that will determine the end result - and I don't doubt that in this particular case, that work will be done with the greatest of care.
Jim
-
Hi,
I'm having a body shop repaint an old sunburst Ibanez body in surf green. The body is actually in very good shape, but there are a few small dents I should probably fill before dropping it off. After reading old posts, I've decided to leave the old finish and just have them paint right over the old clear coat. But I'm assuming I should still sand the old clear and was wondering what grit to use. Also, I'm wondering what type of product I should use to fill the small imperfections with. I have some wood filler, but I'm wondering if I need to sand down to raw wood before applying the filler. It seems like if there's old paint+clear in the gash, the filler might not bind well.
So to recap my questions:
1) What grit wet/dry for sanding the old clear?
2) How to fill/repair imperfections in the old finish before repainting?
Advice?
Thanks much,
Bert
If you rub the guitars finish back with 800 or 1000 grade wet and dry to start with you'll be able to clearly see any minor imperfections in the surface of the guitar. Obviously you're already aware of some of the worse ones, but you'll likely notice more once you've taken the shine off of the surface.
When you've identified the deeper marks, these I would normally fill with Davids Isopon P38 (autobody repair putty) if the guitar was to have a solid colour finish. Once the filler has hardened, rub it down again so that it is again as near smooth as you can possibly get it. Once you think it's all pretty smooth, I'd then apply a primer coat to the guitar. This will serve two purposes, filling many very minor scratches in the guitar that are too small to be filled with filler, but also showing out any imperfections remaining after you're filling/rubbing down. It might be adviseable to get some tins of aerosol primer for this very purpose (but make sure that they are compatible with the paint system your painter is going to use on your guitar).
It can't be stressed enough how essential it is to a really good finish to get the preparation stages as perfect as possible - probably 'THE' most important stage of any repaint/refinish. So time spent at this stage will pay dividends later on, even if it means repeating the rubbing down, filling, rubbing down, priming, rubbing down stages four or five times until the resulting primed body is absolutely perfectly smooth and uniform.
Incidentally, the guy who is going to be painting your guitar for you will think you're the best thing since sliced bread if you hand him a perfectly prepared guitar body..................I know I certainly would!
Jim
-
Even if you're spraying from rattlecans I'm fairly sure you'll be able to find an 'all in one' white paint that doesn't need any laquer coat to seal it in, I'd have thought this was a far better option for a straightforward white finish.
Jim
I am thinking that most automotive "touch-up" paints in rattle cans, are intended to be used without a clear coat over the top. My test piece now has a good thickness of just such a paint. I will let it cure for a day or so, and see how it comes up with some sanding/polishing.
Yes, you're probably right on that one, it's usually only the metallic finishes that require a lacquer coat out of touch up cans right enough. Just thinking that if you are using rattle cans and you're trying to get a high shine on the finish, as has already been advised by Mickguard micromesh might be your answer, then possibly a really good automotive polish - as it's automotive paint you're using.
-
As I mentioned in my other recent post, I am going to use white acrylic (automotive paint). I as wondering if people ALWAYS use a clear coat, or are alternatives possible, such as sanding, polishing, and maybe, waxing the white colour coat?
In the simplist of terms it all depends on the paint that you're using. Some paints are specifically designed be applied and then sealed with a lacquer or finish coat (these are commonly known as 'basecoat' paints), other paints are mixed specifically as one application paints and don't need any finishing after application. If you use a 2 pack basecoat white paint (designed for a lacquer finish coat) and then don't seal it in, it'll soon look very 'second hand' and I wouldn't imagine it'll last very long without the protection of lacquer. As for alternatives to clearcoating base paints - have to admit I don't know having only ever used lacquers over paints.
Even if you're spraying from rattlecans I'm fairly sure you'll be able to find an 'all in one' white paint that doesn't need any laquer coat to seal it in, I'd have thought this was a far better option for a straightforward white finish.
Jim
-
That's a neat piece of work, very clever - must've taken a while to put that together?
Some nice guitars there too
-
Serious luthiers should be looking at these finishes, not messing with laquers and urethanes.
Much of what you say is quite right and indicates a certain amount of knowledge on the subject, so generally I have no problem with most of it. However, I don't agree with everything you've said by any stretch.
There is indeed nothing at all wrong with oiled finishes or put another way, the older traditional techniques of finishing instruments. Some instruments are far better suited to this type of finishing and to finish them with modern lacquers and urethanes would take away from the feel and often the tone of the instrument - particularly acoustic instruments.
I would suggest however, that many, if not most 'serious' luthiers do already use, or have at some stage used oils for finishing their instruments. That said and a point I do take issue with, is the arguement that modern finishes are only used due to the ease of application, that is complete rubbish.
The fact of the matter is, that some solid bodied instruments are far better suited to and ideed benefit from modern lacquered and urethane finishes, both from a durability standpoint and the finish requirements of the instruments owner.
There is undoubtedly a place for all the different finishes both traditional and comparatively modern, depending on personal preference and the particular instruments involved, but to start making blanket statements about what 'serious' luthiers should or shouldn't be doing is, in my opinion, more than a little patronising.
Jim


Can Anybody Recreate This Finish?
in Inlays and Finishing Chat
Posted
The problem with spattering, either using something like a toothbrush as you suggested, or an airbrush, is that the spatter can be very uneven and you can end up with lots of little 'streaks' in amongst your spattering, not a pretty effect as a rule.
I think metz guitar paint is on the money with this one as to how it was done. It's a very easy effect to re-create so you should have no problem getting a decent sprayer to do it for you.
Jim