


J_48_Johnson
-
Posts
191 -
Joined
-
Last visited
Content Type
Profiles
News and Information
Tutorials
Product Reviews
Supplier Listings
Articles
Guitar Of The Month
Links and Resources
Forums
Gallery
Downloads
Posts posted by J_48_Johnson
-
-
Drak:
What brand and color dyes did you use for the top? It looks great to me, one of the nicest tops I have ever seen... period.
-
"Sensei"
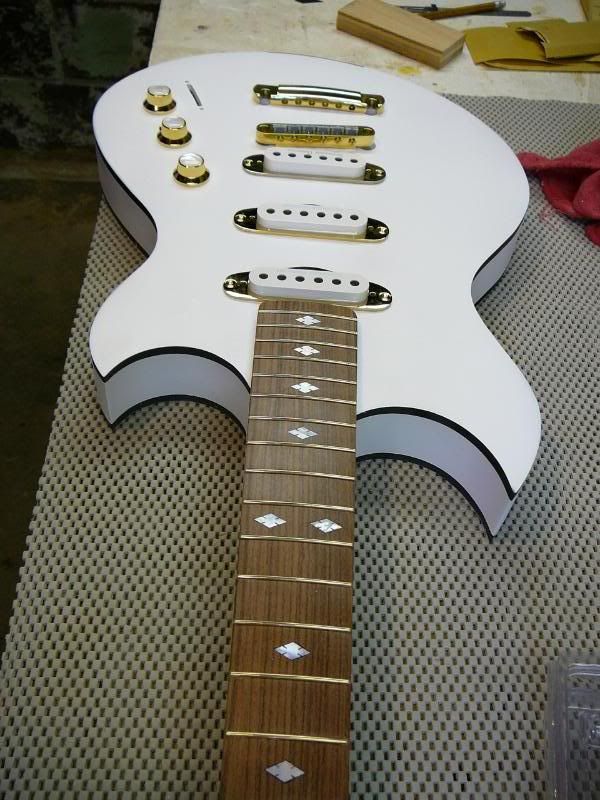
I built this guitar for my Nephew as a Christmas present.
He chose the body design he wanted, so I used a Reverend Guitar Sensei picture as a template.
He came up with a headstock design by looking at pictures of headstocks. He chose a PRS as what he wanted. I changed it up a little bit, offsetting it a tad.
He wanted a warm sounding guitar and it does not disappoint. It is warm and smooth and is hard to get into any distortion.
I have a lot of time in this, I sure hope he likes it. I guess Christmas morning I'll find out...
5 pc. maple neck
chambered body for weight reduction
Stratocaster wiring w/5 way switch
Build thread: http://projectguitar.ibforums.com/index.php?showtopic=43970
All gold hardware
ResoMax NVS T.O.M. Bridge 6mm Gold loaded with U.L.F. saddles
ResoMax NVT Locking Tailpiece Gold
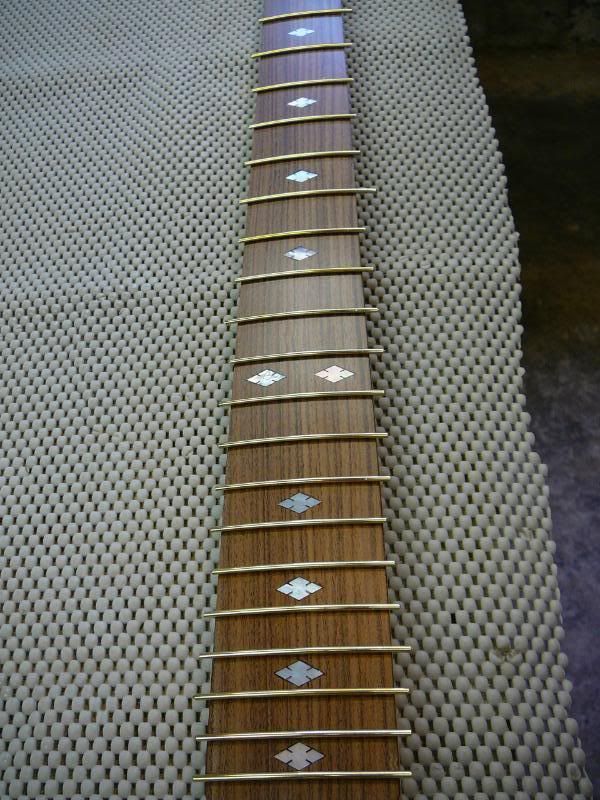
Pau Ferro fret board
med. med. gold fretwire
Olympic white lacquer
Honduran Mahogany tonewood
1/4" Maple (body cap)
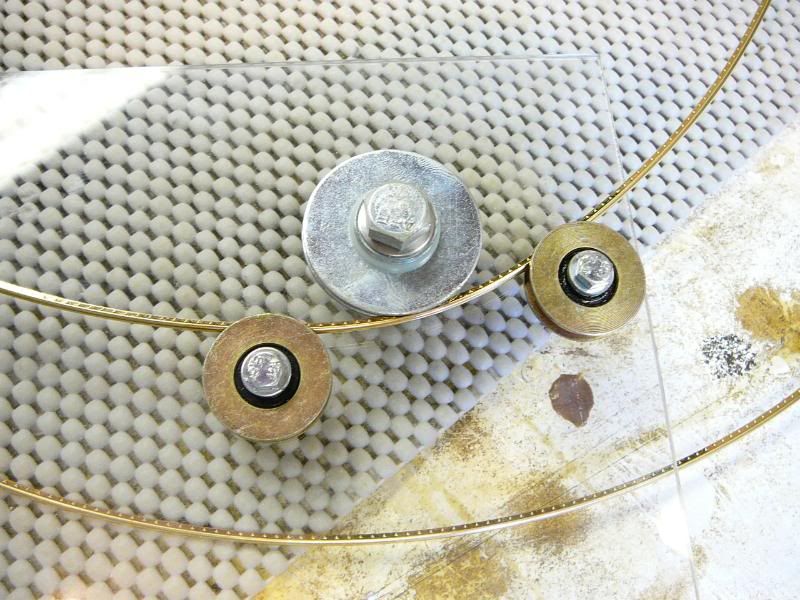
Skirted Solid Brass Gold Knobs with Mother of Pearl Tops
Gold pickup rings
Seymour Duncan alnico pro II flat pickups
Gold 5-way switch knob
(CTS) 250k Audio taper pots.
(Mallory) 0.022 uF /400 volt cap.
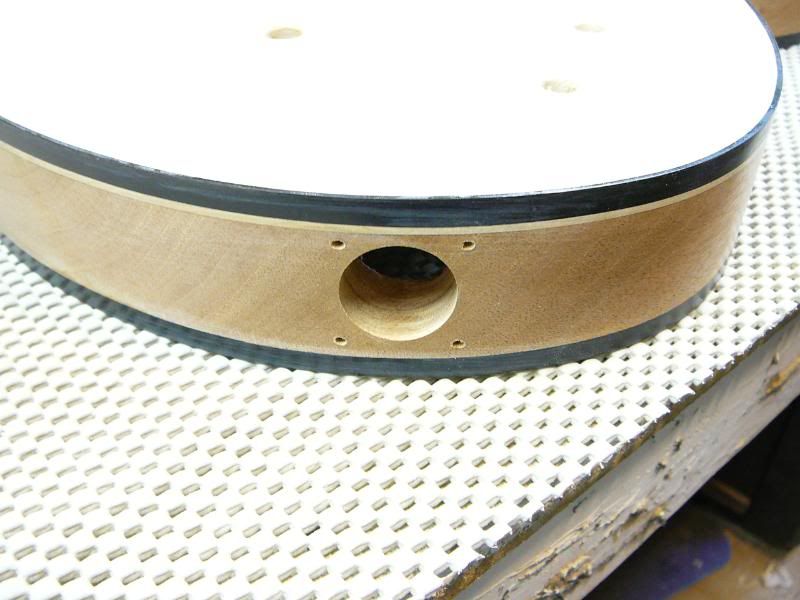
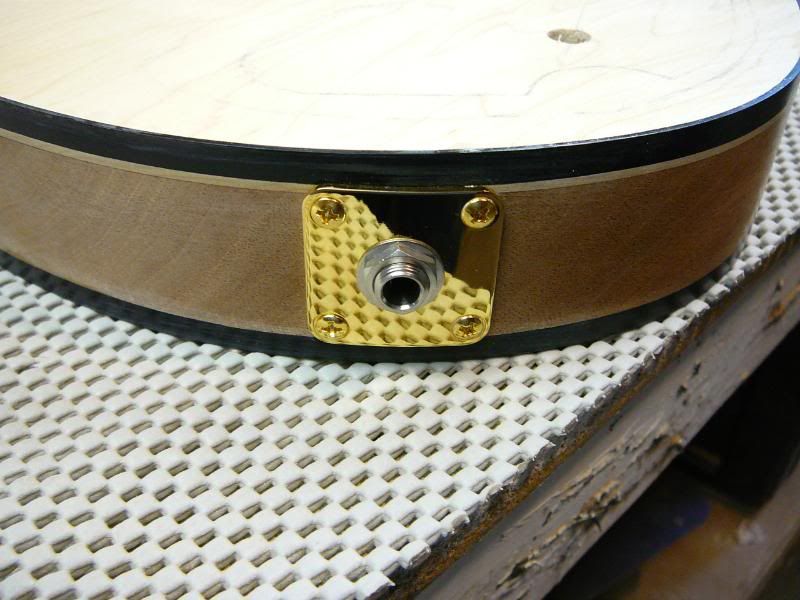
Gold L.P. style jack plate
(Switchcraft) output jack
Gold neck plate
Gold Dunlop strap buttons
Dual action truss rod
Gotoh med. gold tuners
Black Tusq XL nut
pearl diamond inlays
4-ply laminated tortoise pick guard, 4-ply laminated tortoise truss rod cover
White/black/white 3-ply laminated pickguard material rear cover material
3/32" Black side dots in white neck
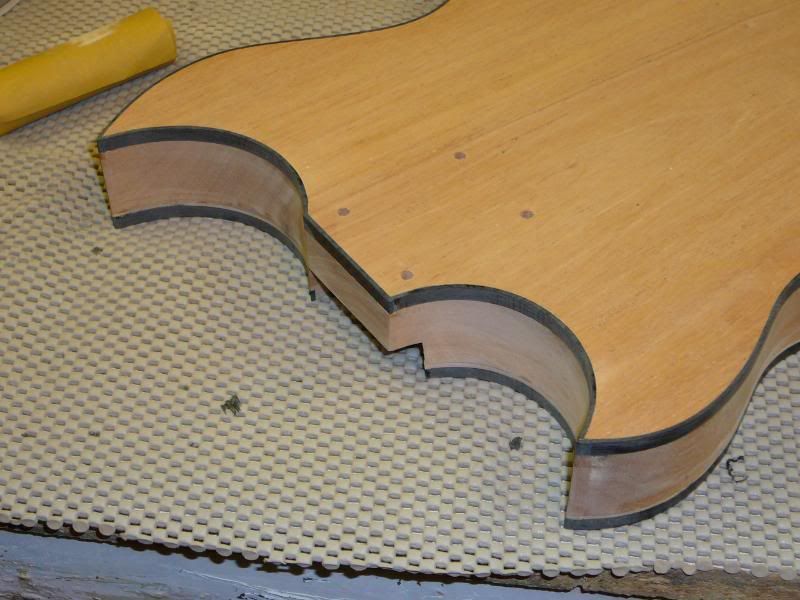
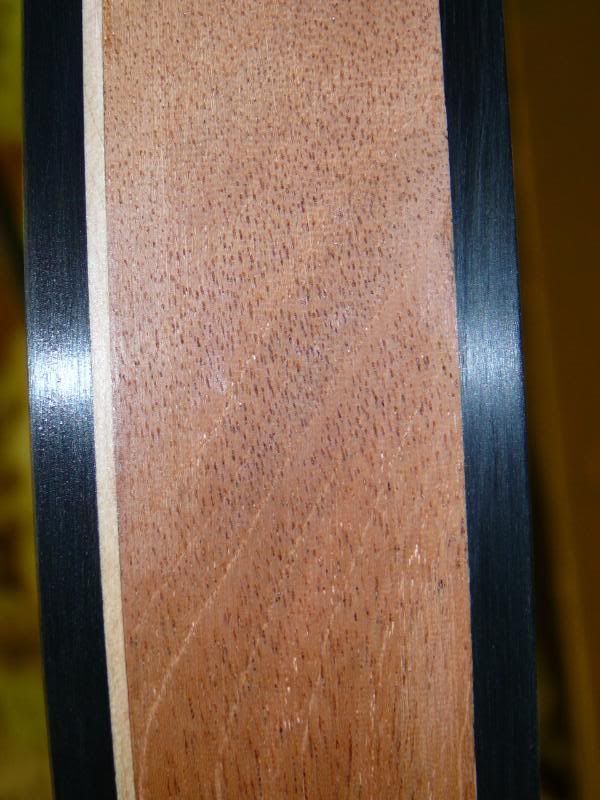
.060" x .250" black binding
-
That pick guard is really sweet. Good work, man.
If you look back at the very first picture it's the Reverend built Sensei.
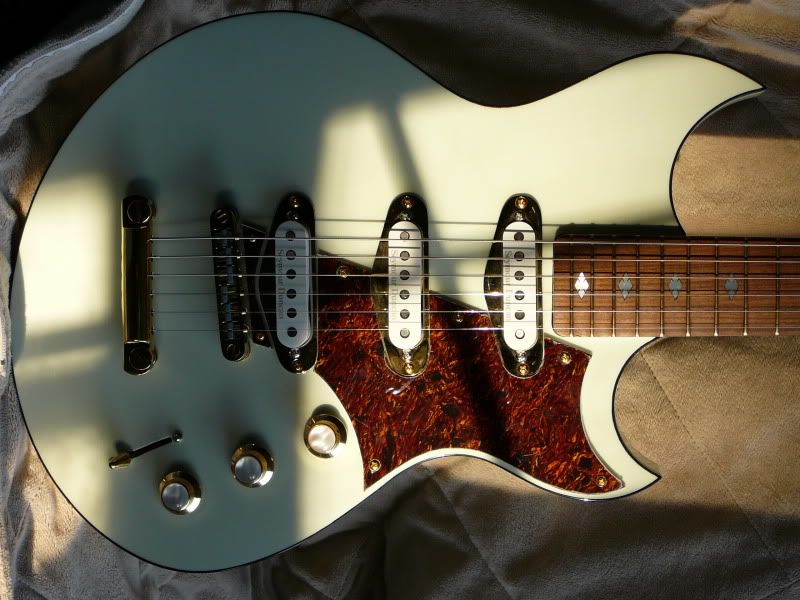
Look at the pickguard on it as compared to mine. There are differences since they used twin H.B.'ers, and I used three singles, but they are about the same. I copied the outline of the one they have, but between the bridge pickup and the bridge of both, I added that little sliver to finish off the lines. They however did not.
To me, IMHO, mine looks more finished. Now don't take that the wrong way, I don't have a big head about the whole thing because I would imagine they make a great guitar, but my pickguard looks more finished they the production model. To tell you the truth, when I layed mine out, I had a rough drawing of the one they made on a scrap piece of posterboard by my workbench. Pretty much where the lines met on the body to the neck to the pickups to the bridge. After that, I freehanded the design using their outline, (rough outline), as a guide.
-
Fantastic build J48, your attention to detail is amazing.
Thanks man, I appreciate that very much!
-
Very cool guitar man. I love the whole outcome.
Thank you very much. I think it came out for him very nice too. It looks good and plays better.
-
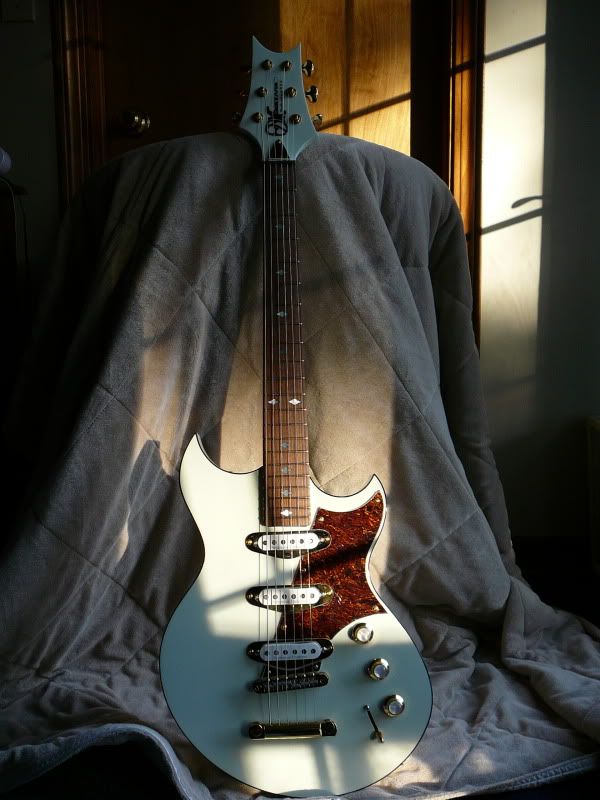
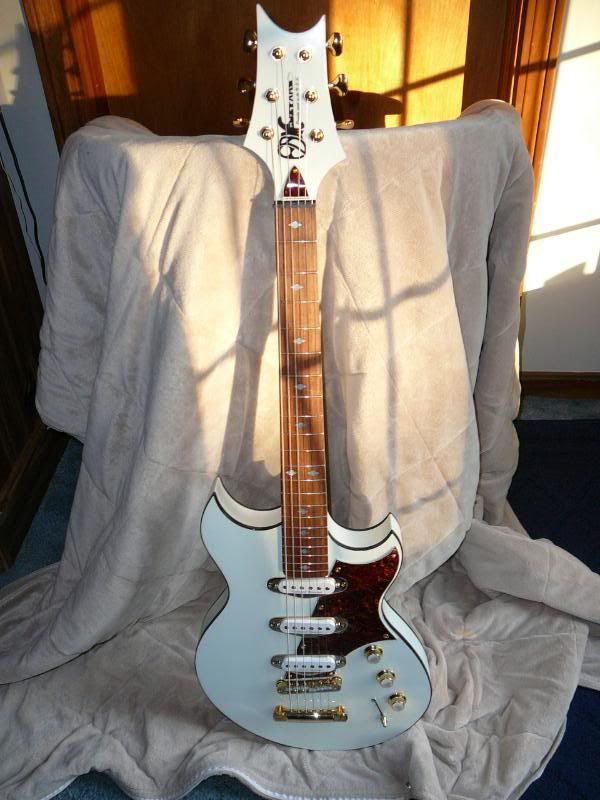
Once I got everything set up I took some shots inside under different light than outside in direct sun.
Since this build is for my Nephew for Christmas, his input was vital to what went into the build. He wanted a smooth rounded sound from the guitar, and that is exactly what he got. With the pickups we picked out in conjunction with the values of the electronics that I put in, this is far and away the smoothest sounding guitar I have ever built.
A buddy of mine is in a local band, (My Drunk'n Uncle). I took it over to thier practice location one night to see how it would sound on thier amps. Larry plugged it into his 100 watt Mesa Boggie rack unit going into a 4x12 Mesa cabinet. He set some things on the head, and I was blown away by the sound. He started inprovising some blues, and Tony, (drums), and Donnie, (bass), filled in. Since they don't play the blues I was kind of taken back by that was what he was improving. It sounded great! A little breakup, warm, fuzzy, awsome. With Tony and Donnie filling in with him, it was so cool! How nice it must be to have players that know you so well, they can jump in and stay together.
Once Eddie got there, he fired up his Marshall and gave it a test run. His amp is 30 watts, and is mic'ed for gigs, but in the rehersal area it's lound enough to hear him well over Tony's heavy handed playing, (which is fantastic). He wanted some distortion, but with his amp cranked, gain all the way up, there was no distortion to be had. He thought something was wrong with the amp, or the guitar, but it's just the sound of the guitar. lol Larry could dial some distortion in, but his Mesa Boogie rack unit has the capabilities to drive it hard enough to distort. The 30 watt Marshall on the other hand doesn't. I couldn't be happier with the way it came out, not only the looks, (white with black binding and gold hardware always screamed classy to me), but the sound as well. I can't wait till Christmas when he gets it!

-
Great build J48. With the black dots if it was me i would spray the colour coats, then drill and glue the dots in, flush cut them off with a sharp razor. A little area of scraping around the dots should not harm the white once the clear goes on. In fact you would probably be scuff sanding before the clear anyway so it should not be an issue. Its a hard one to nut out, but the way you have done it works, just think of it as tiny binding!
Chad.
I thought about that Chad and I didn't do it that way for a reason. I'm not sure if it's a good reason so here goes...
I'm not sure how "straight" the dots need to go in in order for them to not look crooked. What I mean is this; I could set the neck on the drill press table, get the side of the neck perpendicular to the drill bit but I wouldn't have a true flat edge to work against, (neck has been carved, fretboard has been radiused), to make sure I was drilling straight down behind the fretboard. If I were to drill in at an angle that was off a degree or two would it matter? Would it show? Would the side dot look oval or round? I don't know. That's why I didn't do it that way. Would it make a difference? I have no idea, but that's my reason I didn't do it that way. Have you done it that way in the passed? If so, how does it look?
The way I did it...
I installed the dots, super glued them in, nipped off, then when everything was dry sanded flush. When I sprayed the primer I was hoping to scrape the dots and all would be good. Didn't happen. I couldn't scrape a round mark. I left some of the black dot white with primer, and scraped into the maple surrounding the dot.
Solution...
I read somewhere that a guy made his own side dots by making a side dot punch using his drill press. I have a drill press and a piece of steel so I can do that too! lol I clamped the steel to the drill press table and drilled a 3/32" hole in it using the bit I drilled the side dot holes with. Once the hole was in the steel and without moving anything I unchucked the bit, ground the back end of it flat and rechucked it in the drill press upside down. Checked the bit in the hole in the steel...prefect fit. I got a piece of thin plastic I had, (one of the clamshell containers wood screws come in), cut the lid off of it and punched about 50 clear 3/32" round dots. I used a spray adhesive I have and sprayed it on the lid, layed one dot in it so the one face of the dot would be 100% covered in the adhesive and then layed the 3/32" clear dot over the 3/32" black dot in the neck. Once done, I masked off the fretboard and sprayed primer like normal. I think it worked like a charm! Once the primer is done, I may pull one of the dots off to see how much of a build up there is around the dots. I may have to do a little sanding, maybe not. What I do know its that my black dots are 100% covered with a clear dot and everything SHOULD be good to go. Stay tuned...
hmmm interesting technique at the end.
To me a round hole is a round hole is a round hole as long as the hole is drilled square to the face. Guessing that your fretboard edge would be unfinished is a straight line to work to. I haven't been in this circumstance though so my opinion is just speculative.
Im sure with the quality of your build the dots will look stella.
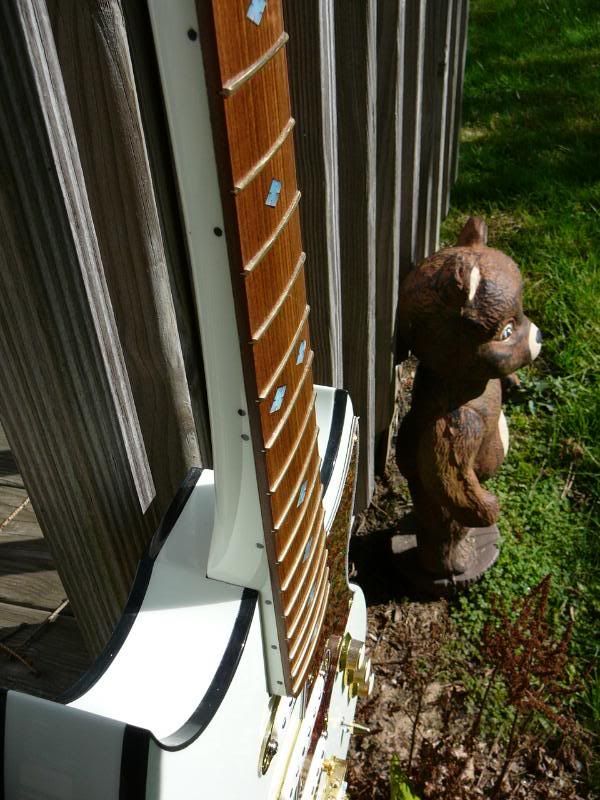
I reposted the above to set this up for some old and new pictures.
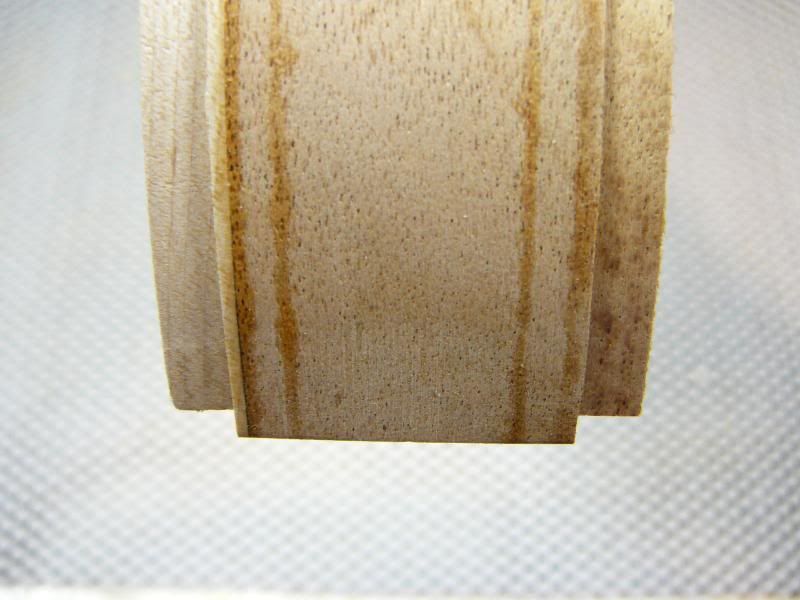
Here are the side dots covered by the "plugs" I'll call them made by the description above.
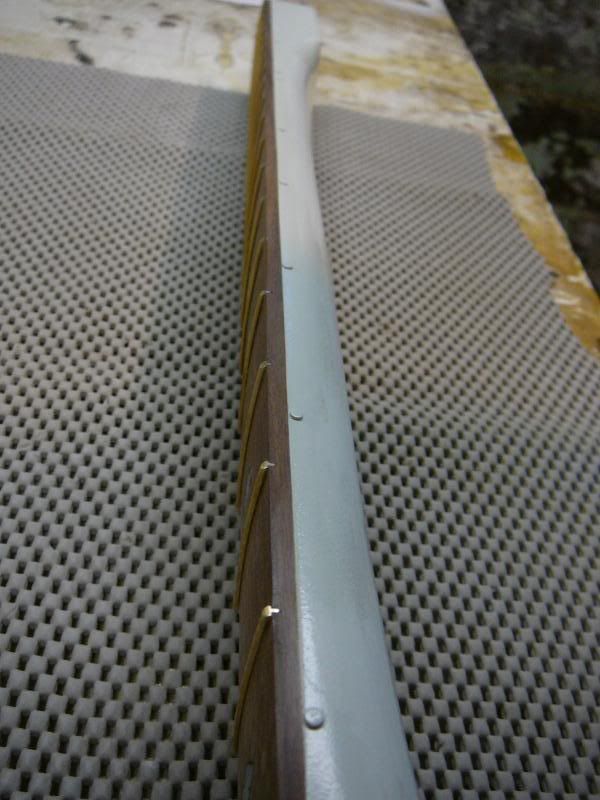
Side dots with two PASSES of clear. In this shot I wanted to get the light/shadow line on something you could refer to by catching it on the 12th. fret dots. It shows how much build up I'd need to get everything nice & flat.
Now for the new pictures.
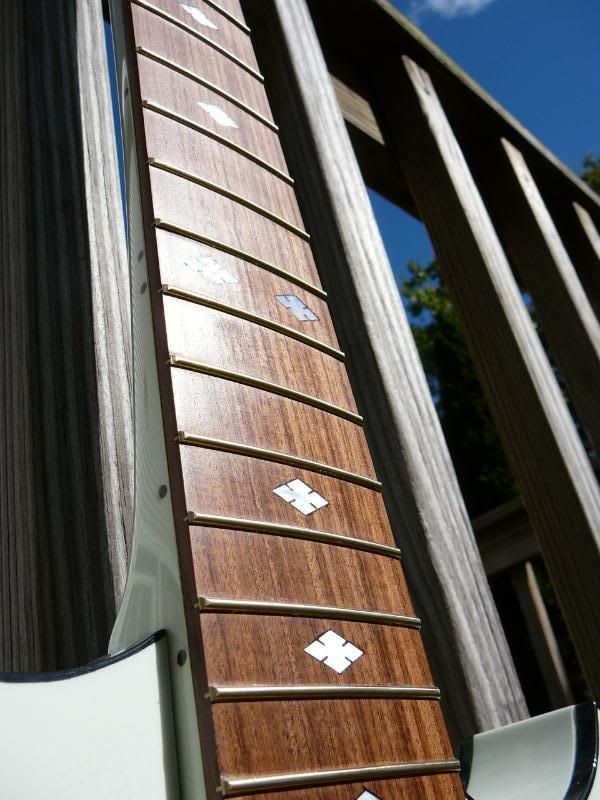
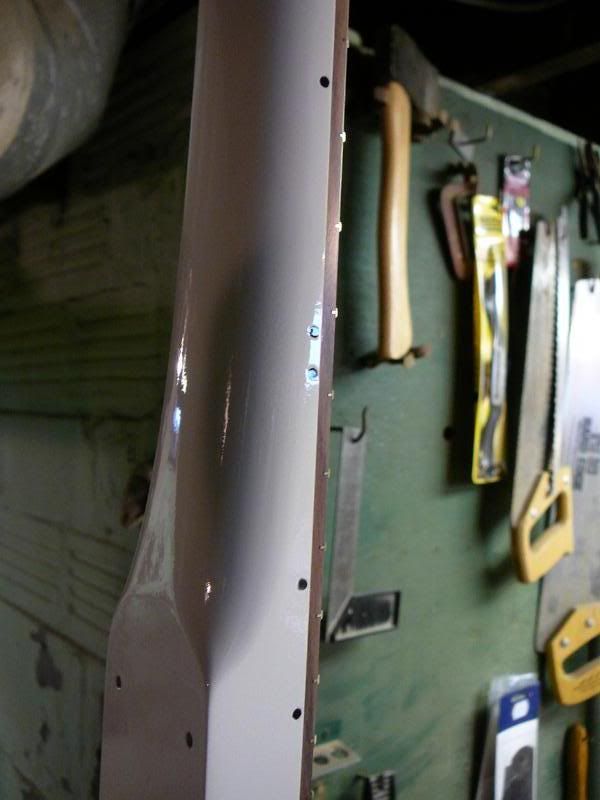
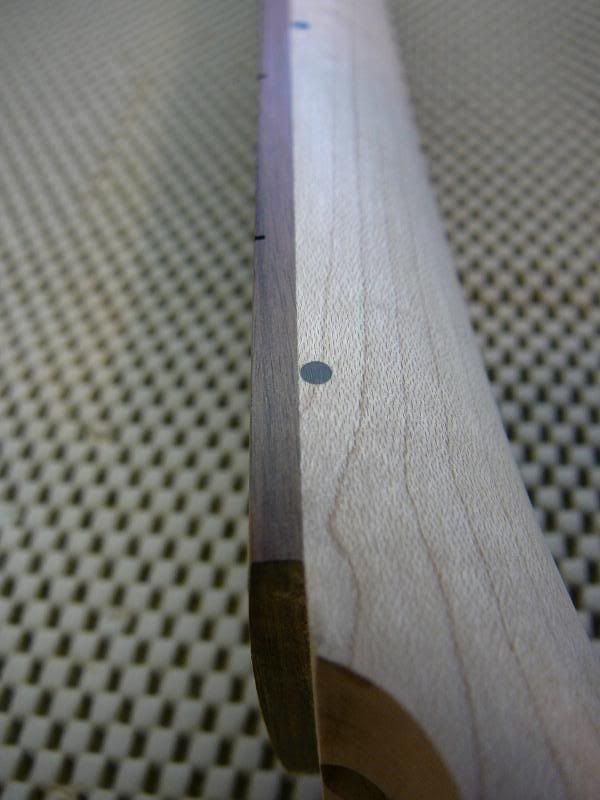
I took it outside to catch these pictures. I wanted to show the difference in the side dots from where it was to where it is. I tried to catch that same light/shadow line on the same 12th. fret side dots. You can see from that reflection line that everything turned out great.
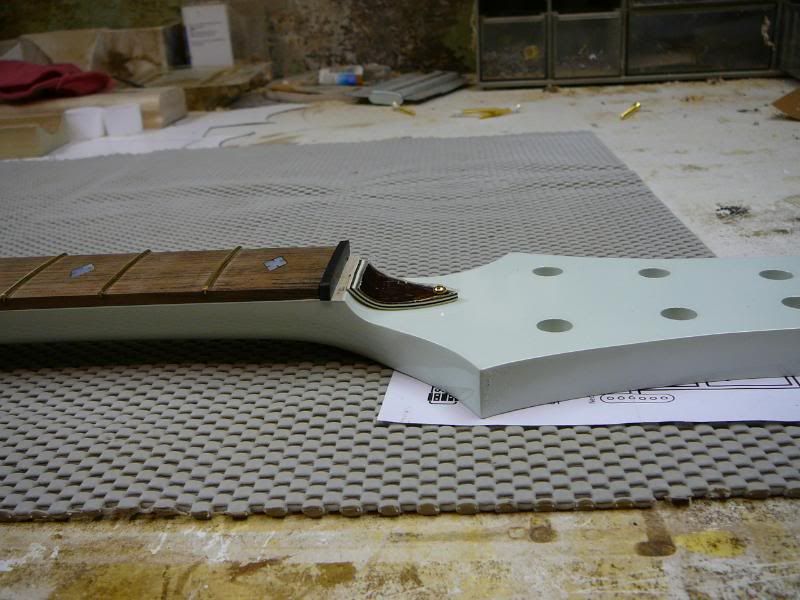
From this picture you can also see how high, (it looks much worse in this picture), the neck/fretboard is as compared to the body. The picture was taken with a shim in the pocket, much of which has been removed after I set the guitar up. Since I'm using a T.O.M. bridge/tailpiece, the neck sitting a little higher in the pocket won't, (and doesn't), hurt at all.
-
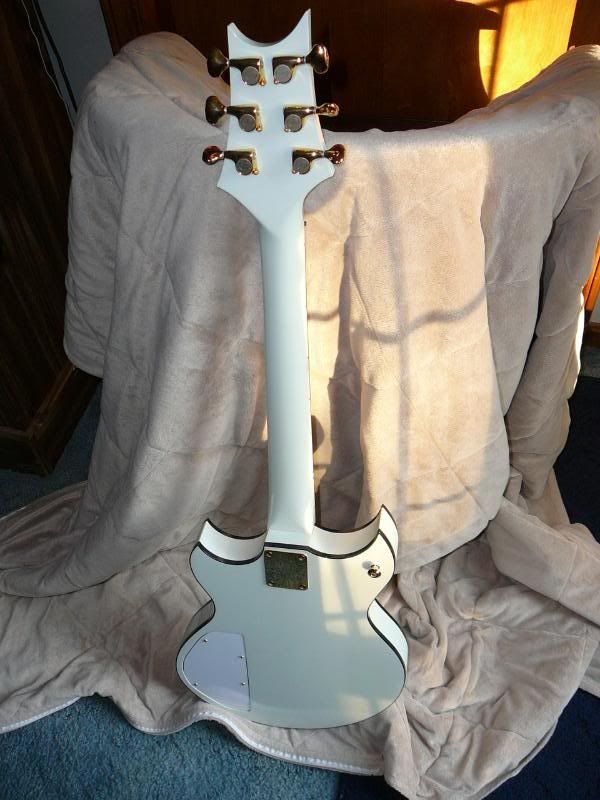
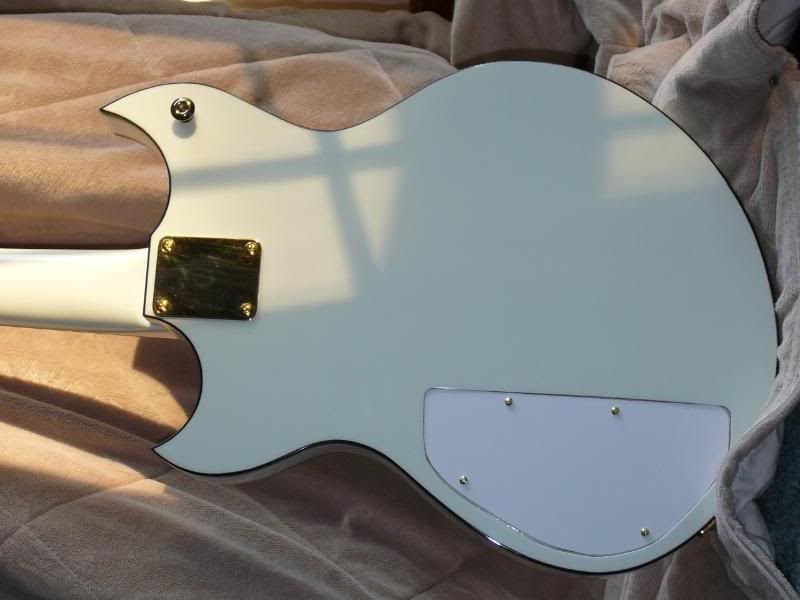
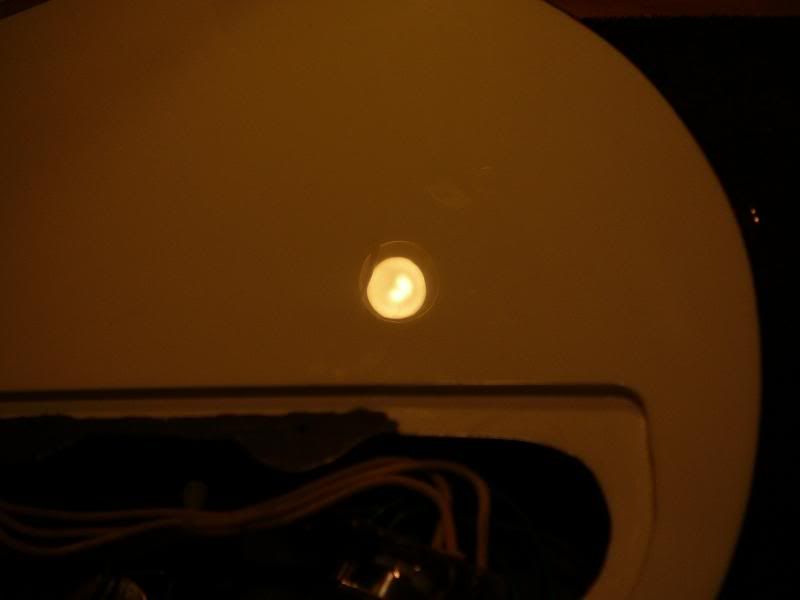
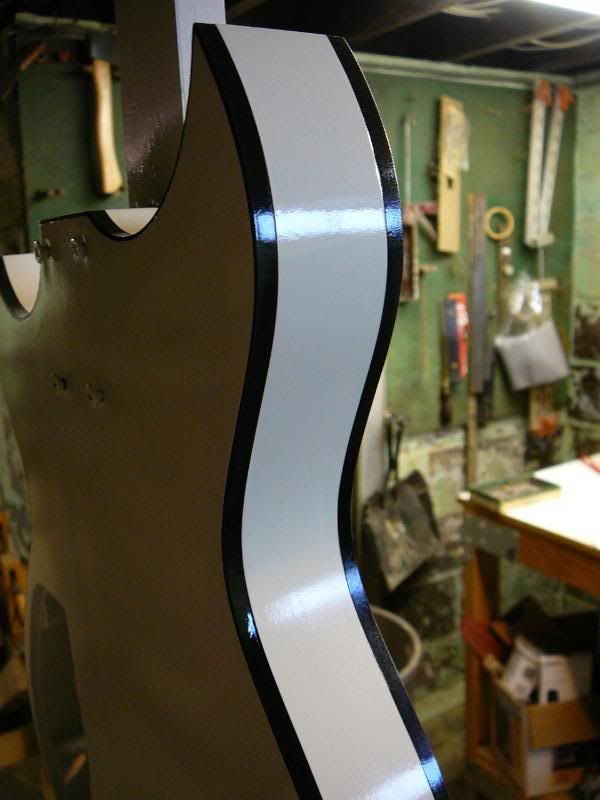
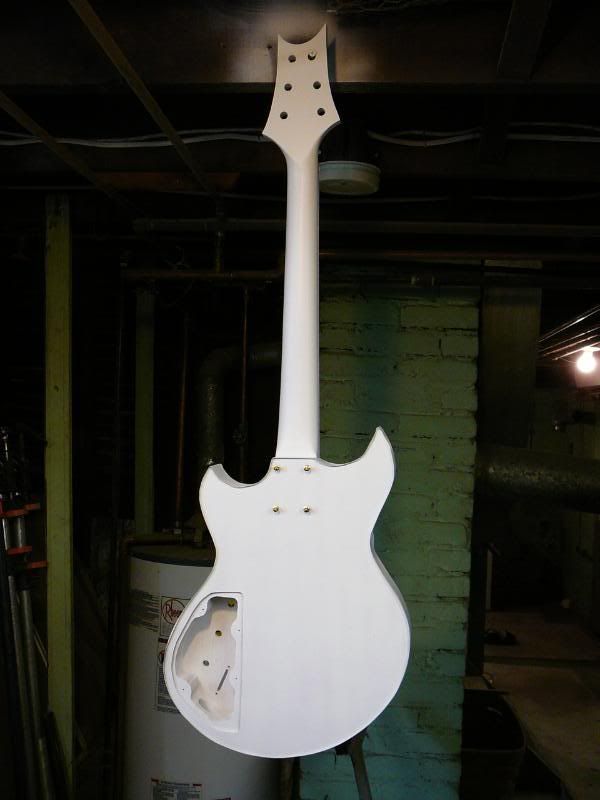
After getting the clear down and waiting six weeks for it to harden, (I usually wait four weeks but Minwax clear wouldn't harden), I got it sanded, wet sanded, buffed, and polished. Here's a shot of the rear of the body showing the reflection of my work light.
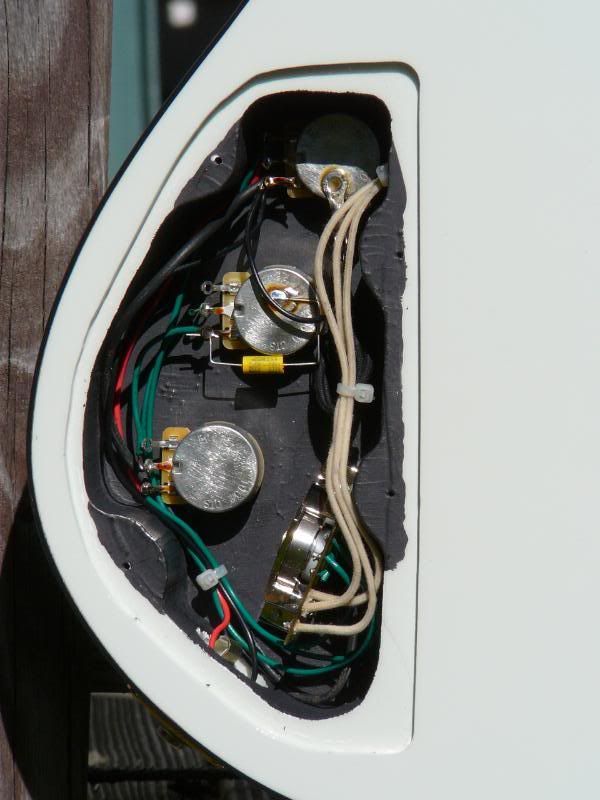
I used copper shielding tape on the inside of the cover, put down the shielding paint in the cavity, and did some wiring.
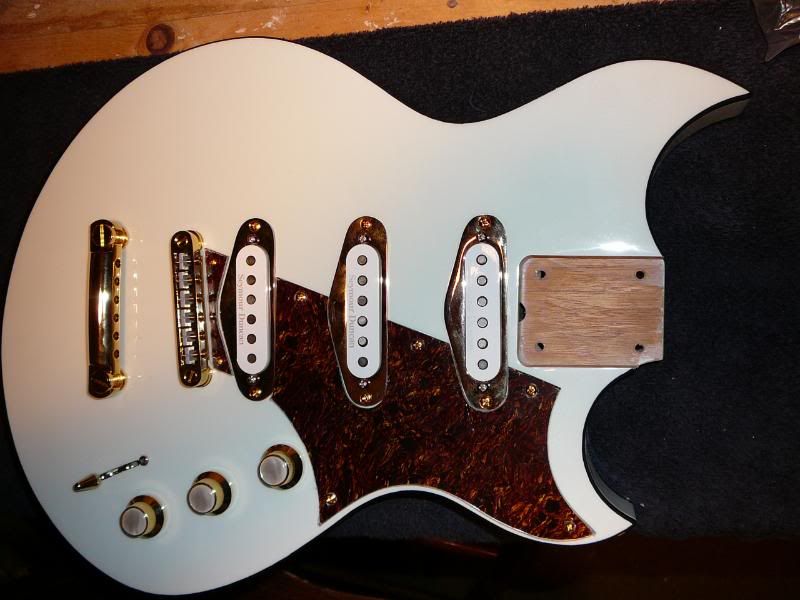
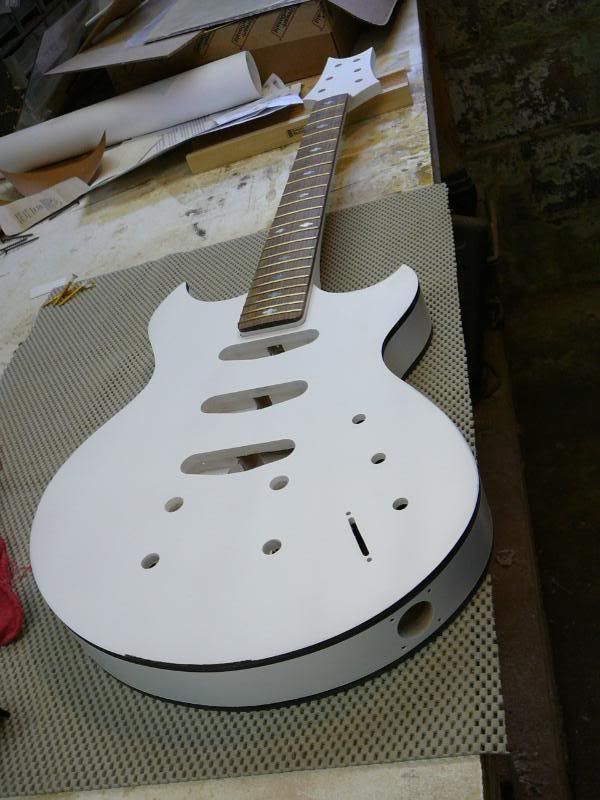
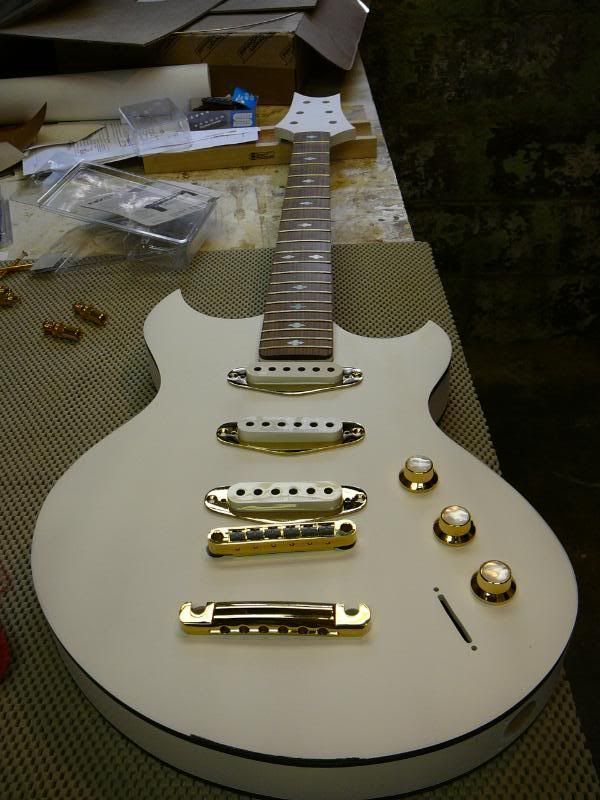
After that was done, I mounted all of the hardware for the first time. Now if you remember what it looked like before I made the pickguard and got it on...
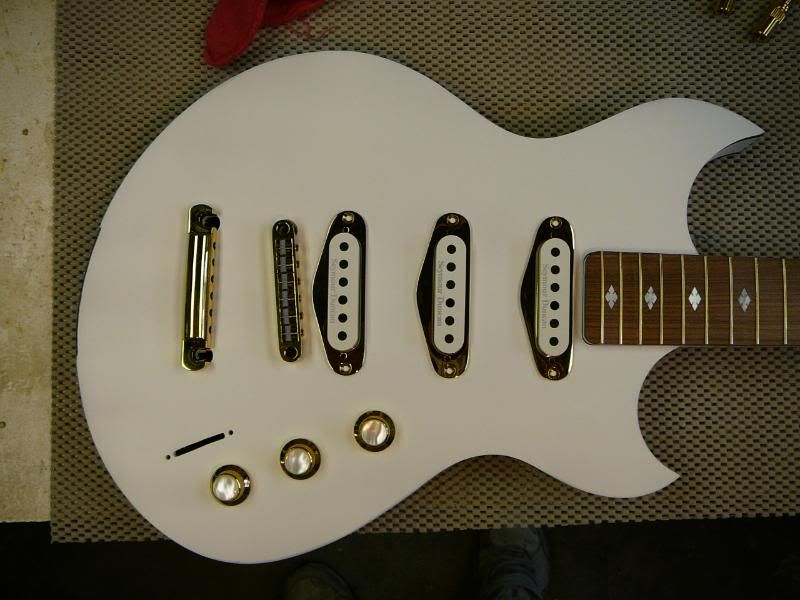
...I was very worried that it was too white and had too much gold on it and the body just didn't look right. After I made the pickguard and got it installed, somehow it brought everything together on the body.
The first picture of this thread, or one of the first shows what the Reverend Guitars Sensei looks like with two humbuckers. I wanted to keep the same basic lines as that pickguard, but I'd need to change it since I am using three singles.
If you look at the pickguard below, look at the little piece in between the bridge and the bridge pickup. It's only a 1/4" - 3/8" wide or so at its widest point, but without it, it looks unfinished and the lines don't flow nearly as well. It serves no purpose what so ever, but without it, the top straight line isn't as defining, and the bottom curve around the control knob doesn't flow.
-
To be honest I'm not a big fan of them. Like one of the previous posts said, they look unfinished or "brambly" for my taste, but that's just my humble opinion. I likes me a smooth guitar!
I do like, (and have used), the Hipshot Baby Grand bridge I saw one the one.
-
+1 on what ihocky2 said.
Mine was mahogany capped with 1/2" walnut and it is a warmer shade of brite as compared to maple.
Something I also noticed was that the pick attack seemed to be more pronounced than on maple capped guitars I've made. Maybe that was the pickups or a combination of other things, but the attack is strong with my walnut Strat.
-
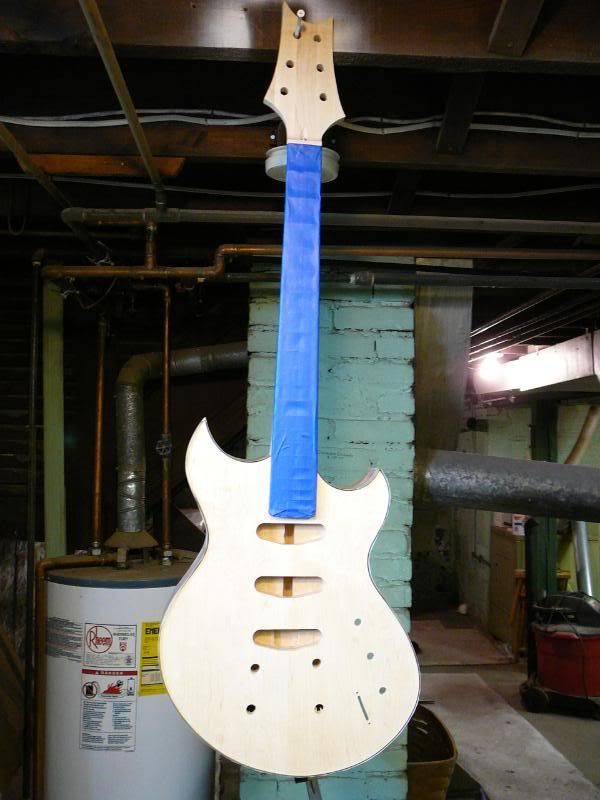
I just bought some of this tape to mask off my binding while spraying. It's the first time I've ever used the plastic tape. The guy behind the counter told me they had different widths AND different thicknesses. Green and blue are the colors of the different thickness tape. He said that if you are making a bunch of bends, use one color, (I think blue), and if you were doing straight lines use green. His thought pattern was the thinner tape will bend and still have the mastic stick to the object being sprayed without bunching up so it would make a clean line. Use heavier tape for straighter masking jobs because the extra thickness would help out giving the tape the body needed.
Sounded fair to me. I used it for pretty much straight lines so he set me up with green. Worked perfect.
-
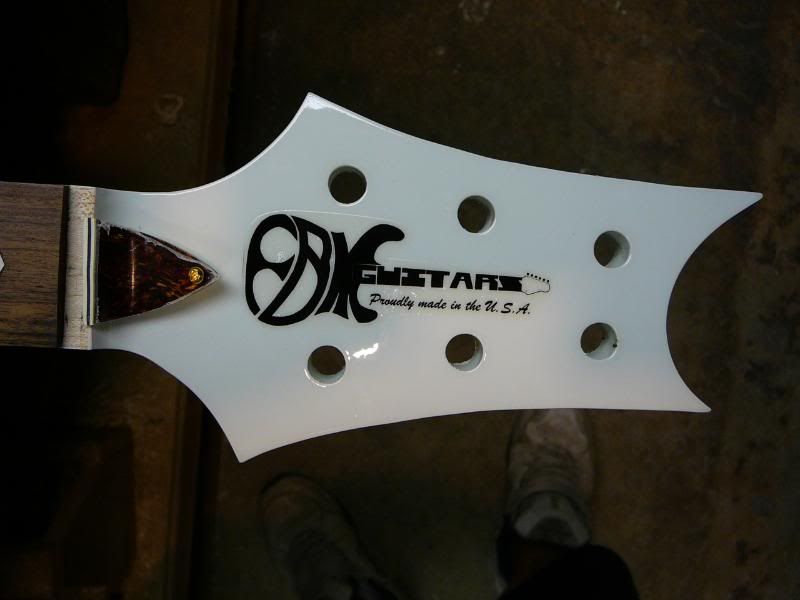
I made a truss rod cover, put on my logo, and sprayed more clear today.
-
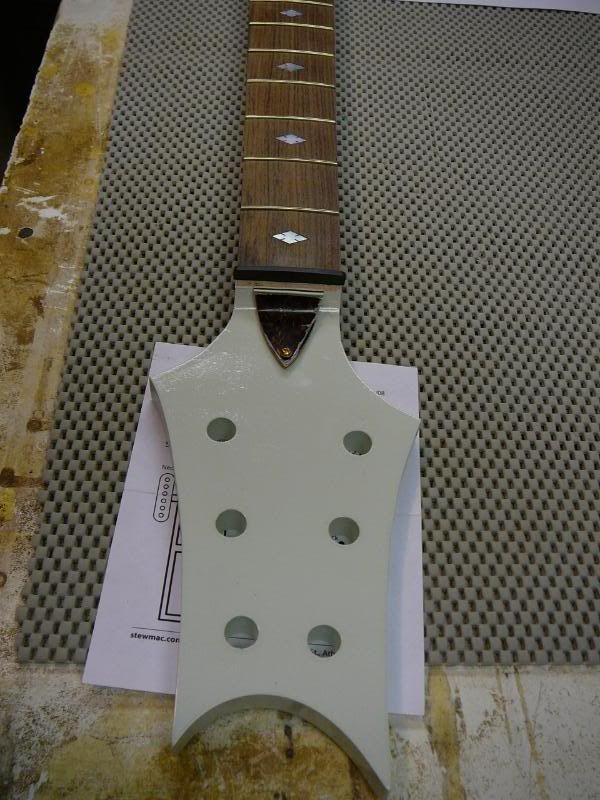
How are you accounting for not having a headstock angle with 3x3 tuners? Is there a special string tree that you are going to install, may be a bar like the ones used for floyds? Did you find tuners that are 3x3 with smaller posts for the longer strings? Is there something I am missing or am not seeing? I was just wondering if you were going to have nut break angle problems behind the nut with not headstock angle on a 3x3 tuner style headstock.
I don't think I'll have problems with the closest two. I have roller string trees for the other four if it's a problem.
-
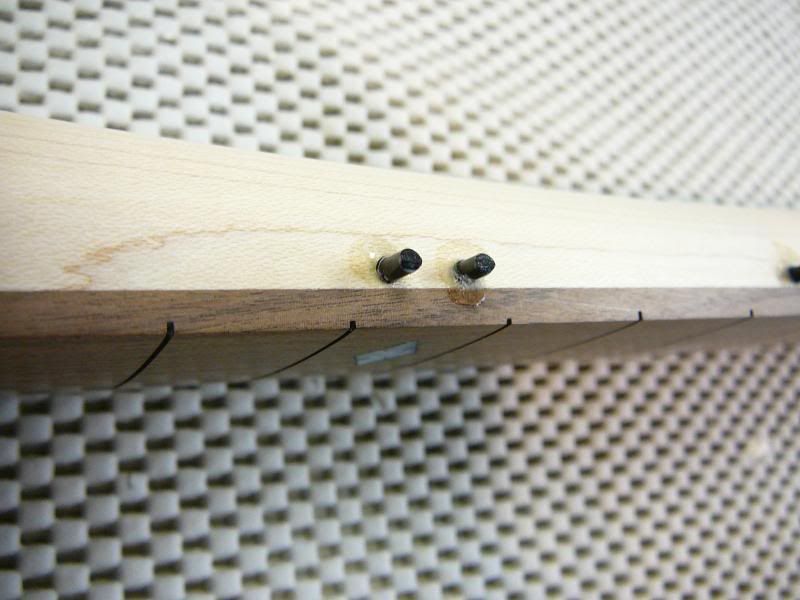
Here's a picture of the little dots I made to cover up the black dots in the neck. This is a picture of the dots with primer and paint over them.
Here's the same picture with the clear plastic dots removed and the black dots underneath cleaned up. I have to say it worked quite well.
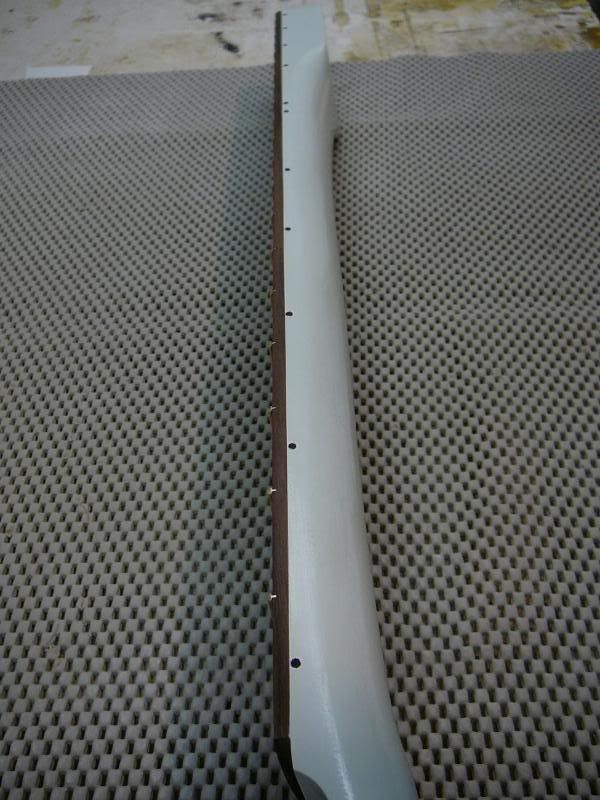
Same dots with two passes of clear. I tried to get the reflection of light on the 12th. fret dots to show how much build up I need to do with the clear over the black dots.
Body with two passes of clear.
-
Great build J48. With the black dots if it was me i would spray the colour coats, then drill and glue the dots in, flush cut them off with a sharp razor. A little area of scraping around the dots should not harm the white once the clear goes on. In fact you would probably be scuff sanding before the clear anyway so it should not be an issue. Its a hard one to nut out, but the way you have done it works, just think of it as tiny binding!
Chad.
I thought about that Chad and I didn't do it that way for a reason. I'm not sure if it's a good reason so here goes...
I'm not sure how "straight" the dots need to go in in order for them to not look crooked. What I mean is this; I could set the neck on the drill press table, get the side of the neck perpendicular to the drill bit but I wouldn't have a true flat edge to work against, (neck has been carved, fretboard has been radiused), to make sure I was drilling straight down behind the fretboard. If I were to drill in at an angle that was off a degree or two would it matter? Would it show? Would the side dot look oval or round? I don't know. That's why I didn't do it that way. Would it make a difference? I have no idea, but that's my reason I didn't do it that way. Have you done it that way in the passed? If so, how does it look?
The way I did it...
I installed the dots, super glued them in, nipped off, then when everything was dry sanded flush. When I sprayed the primer I was hoping to scrape the dots and all would be good. Didn't happen. I couldn't scrape a round mark. I left some of the black dot white with primer, and scraped into the maple surrounding the dot.
Solution...
I read somewhere that a guy made his own side dots by making a side dot punch using his drill press. I have a drill press and a piece of steel so I can do that too! lol I clamped the steel to the drill press table and drilled a 3/32" hole in it using the bit I drilled the side dot holes with. Once the hole was in the steel and without moving anything I unchucked the bit, ground the back end of it flat and rechucked it in the drill press upside down. Checked the bit in the hole in the steel...prefect fit. I got a piece of thin plastic I had, (one of the clamshell containers wood screws come in), cut the lid off of it and punched about 50 clear 3/32" round dots. I used a spray adhesive I have and sprayed it on the lid, layed one dot in it so the one face of the dot would be 100% covered in the adhesive and then layed the 3/32" clear dot over the 3/32" black dot in the neck. Once done, I masked off the fretboard and sprayed primer like normal. I think it worked like a charm! Once the primer is done, I may pull one of the dots off to see how much of a build up there is around the dots. I may have to do a little sanding, maybe not. What I do know its that my black dots are 100% covered with a clear dot and everything SHOULD be good to go. Stay tuned...
-
Thanks dude. I was wondering about that. No where did I find the answer. Everything I have read just says, "scrape the binding". Says nothing about when to do it, just to do it. lol
-
My question is pretty simple. I'm building my first guitar with binding. Do I scrape the binding after each coat of primer and color coats or just one time at the end before the clear starts going on?
-
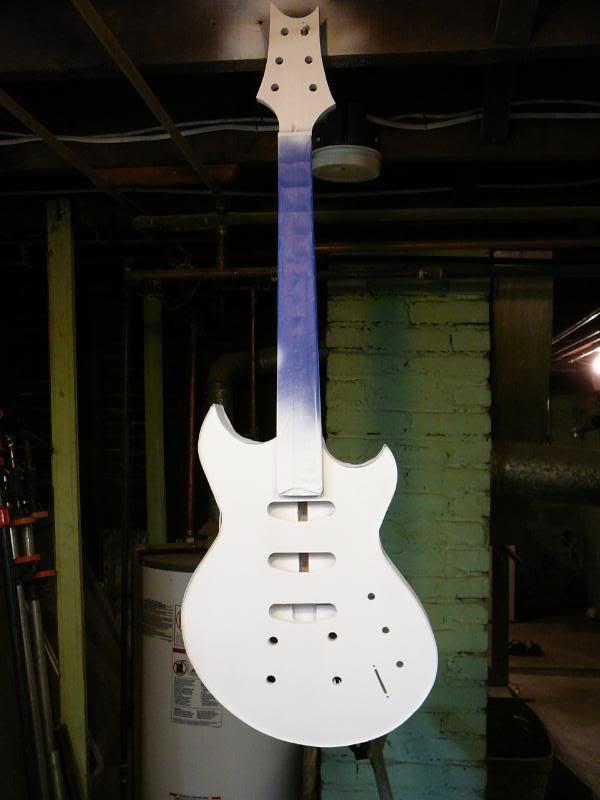
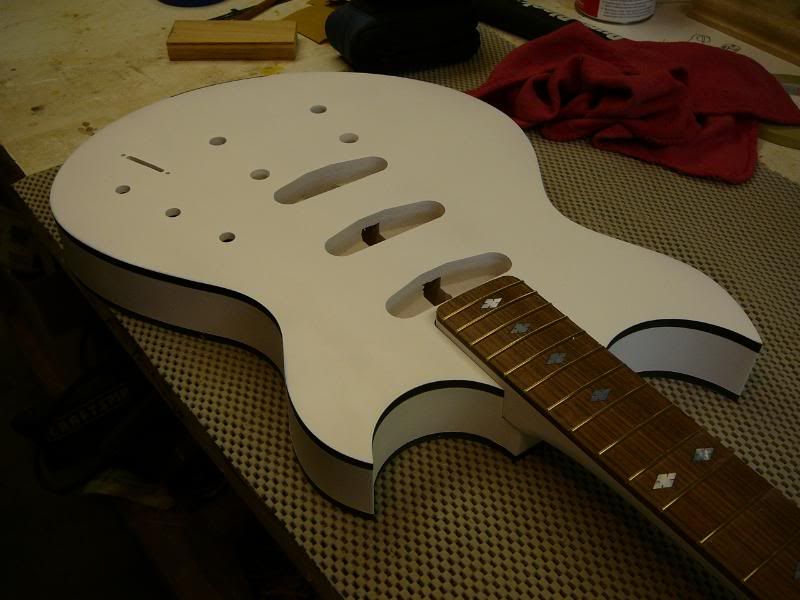
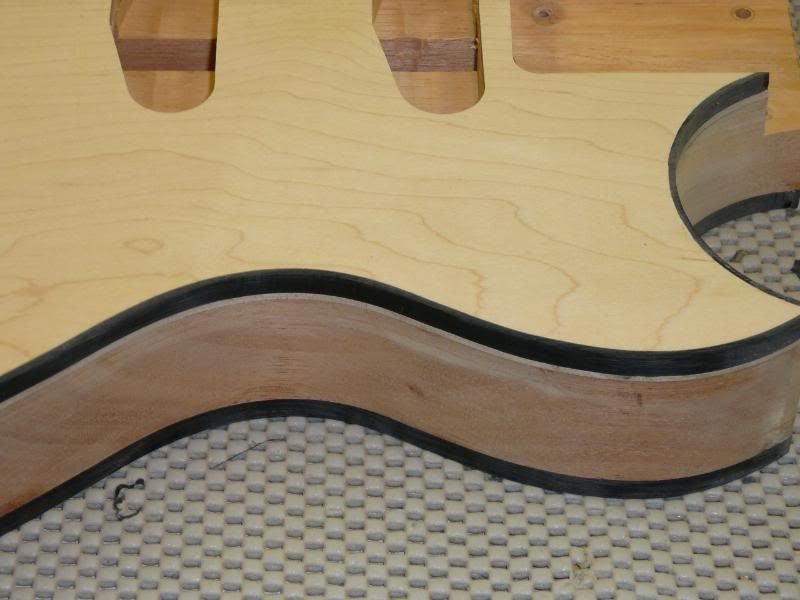
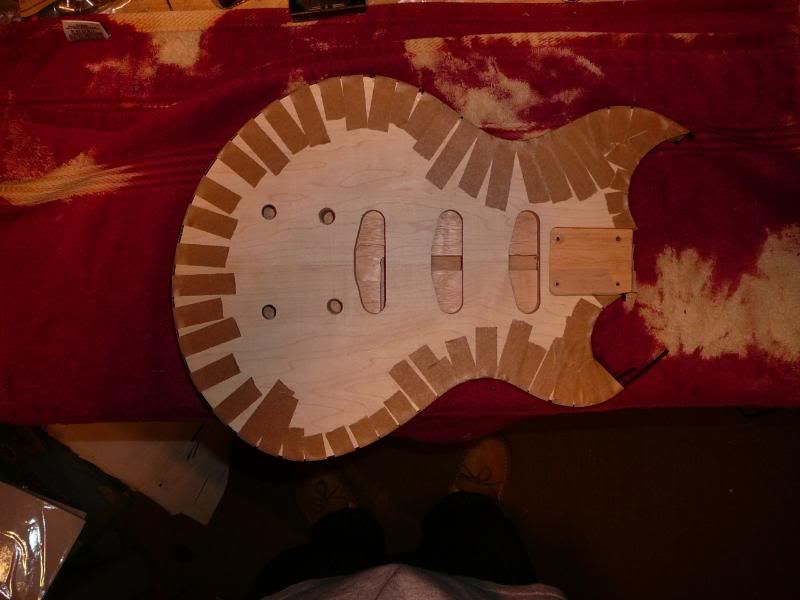
I got the binding and fretboard masked off, and sprayed the body and neck with primer. After that I set some of the hardware on the body to see what it would look like.
-
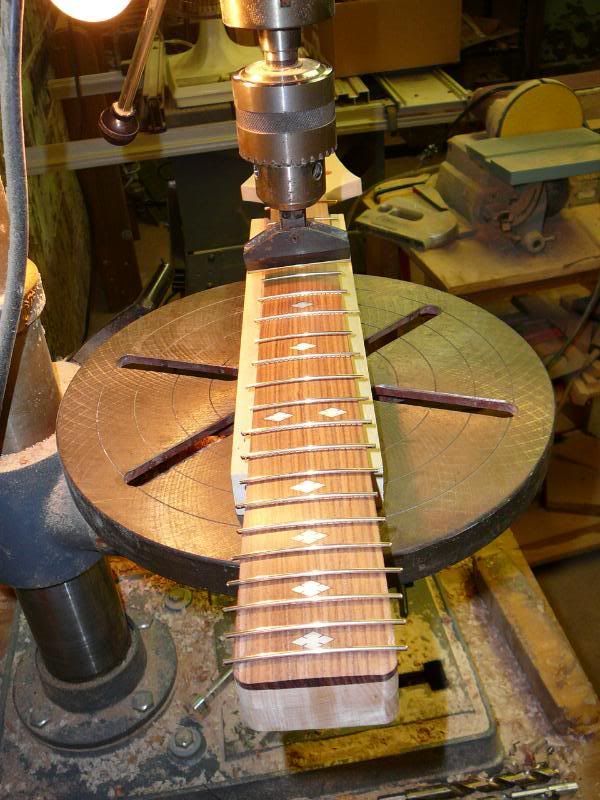
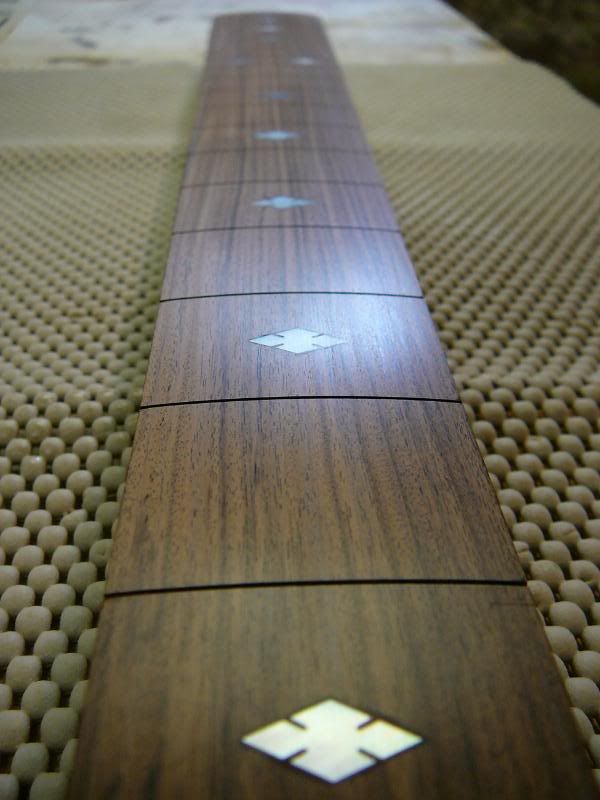
I got the rest of the frets pressed and glued in. After that I worked on grain filling two spots on the body. When I have more time, and the glue is dry, I'll clean up the fretboard and the fret wire.

-
That neck looks great. The binding is nice too. The side dots seem placed a bit weird to me, but they look good and just as functional.
Thanks dude. The reason the side dots are where they are is because the body and neck will be painted white. He wanted the side dots in the neck not the fretboard. This way the black dots will contrast with the white lacquer.
the problem i see with that is that the dots will get painted over
 .... should have left them longer & then sanded them back when levelling the paint... just my opinion, maybe you have something else planned...
Well, I wasn't sure how to do this. If I left them long and then tried to sand them flush with the paint, I was affraid of two things.
#1) Sanding them down and getting into the paint which would leave me with a flat side dot AND a paint repair.
#2) Sanding them down and leaving the black dust in the paint, which I would have to take the black dust away and that would leave me with problem #1.
I am planning to scrape the binding on the body. While I'm scraping it, I think I can scrape the dots the same way...I think. I'll use something small enough that I can scrape the dots w/o getting into the paint. I'll just have to build the clear enough to cover the difference in the dots and the paint.
That's my "plan". lol I'd like to hear from anyone that has seen this done or has done it before. How should I go about it?
-
That neck looks great. The binding is nice too. The side dots seem placed a bit weird to me, but they look good and just as functional.
Thanks dude. The reason the side dots are where they are is because the body and neck will be painted white. He wanted the side dots in the neck not the fretboard. This way the black dots will contrast with the white lacquer.
-
-
-
 .... should have left them longer & then sanded them back when levelling the paint... just my opinion, maybe you have something else planned...
Drak - Rising Sun Steerhead Telecaster
in In Progress and Finished Work
Posted
+1