


J_48_Johnson
-
Posts
191 -
Joined
-
Last visited
Content Type
Profiles
News and Information
Tutorials
Product Reviews
Supplier Listings
Articles
Guitar Of The Month
Links and Resources
Forums
Gallery
Downloads
Posts posted by J_48_Johnson
-
-
why did you paint such nice woods?
sorry, I'm a big fan of natural and translucent finishes.
I've never been a big fan of the look of a neck through that shows the neck through on the front. Since this has no cap on the front, and I've always wanted a Vintage Cream guitar, I thought this would be the best thing to do... paint the front while leaving the back natural to show the neck through there and to show off the flamed maple.
-
Is that TV Yellow, or is the lighting and flash messing with the color?
FWIW: I'm not digging the flamed maple with the light paint color. I'm not sure I'd like it with dark paint either, but with a light color, there's not enough contrast. But, you know, whatever floats your boat.

The color is Fender's Vintage cream, and the flash does mess with it as does all light but sunlight. I used the natural wood to match the back, and I also wanted something subtle not really a contrast.
-
It's been a long time since my last post, but I have been working out of town and have had almost no time to work on it. These are the first pictures of the mock-up. Here it is...
-
If you go over there, look for the ReRanch 101 tutorial, read it like 100 times, then print it out to keep while your doing your finish. Great stuff.
-
What kind of paint? Well, it isn't paint, it's pigmented nitro. lacquer. The primer, (white) was put down and sanded so I could find all of my flaws. I sprayed it again, scuffed it, then shot the color coats. All of the primer and "paint" were purchased from ReRanch; http://www.reranch.com
Bill's primer is the best I've ever used, and the color coats went on like nothing. If you get a chance, head on over to http://www.reranch.com/reranch/viewforum.p...5db86013959214e
As for the clear, it's Deft gloss nitro. lacquer from Lowes. On the first guitar I made, I used the gloss nitro. from Stewert MacDonald, but it is expensive, ($9.00 - 10.00 a can), and then you pay for shipping and if you live in Ohio with Stew Mac as I do, you have to pay tax as well.
The second guitar I made I used Minxax nitro. lacquer from Home Depot, and it was half the price as the Stew. Mac lacquer.
The Minwax and the Deft are both about $4.50 a can, and I see no difference in the two of them as compared to the $10.00 can from Stew Mac.
I'm not digging on Stew Mac., nor am I affiliated with either Home Depot or Lowes, but when I can buy two cans of nitro. lacquer from a well known store/source and it's a widely known brand such as Minwax or Deft and it's half the cost, well...
-
Thanks for the kind words. Just from tapping the guitar, the wood rings like a wooden bell.
As far as the pick-ups, all of the electronics for that matter are all Gibson, except for the three way switch, and it's a Switchcraft switch, (used by Gibson as O.E.). The pickups are '57 Classic Humbuckers. I used all authentic Gibson parts for the electronics in the correct range whether it be the Ohms for the pots., or the microfarads (sp?) for the resistors.
-
"Nice build, I like the wood appointments like pickup rings and stuff - just one question though - if you're just painting the top, why the sides as well? I would have thought if you're painting the top it's a highlight, with the sides and the top painted it's like the back is supposed to be the highlight, which just doesn't seem right - unless you're going to paint the back as well?"
I painted the sides as well as the top to cover the glue line that runs around the entire body where I glued the body sections, (wings), together. Also, I never was a big fan of neck through guitars that flaunt the look of being a neck through guitar.
The only thing you would have seen if I wouldn't have painted the sides would have been where the bottom strap button would have been, but I still never really cared for the neck through look, so I painted the front and sides to cover that up with a color that I've always liked.
I used the flamed maple because of the beauty of the wood. With the flamed maple trim on the front with the vintage cream colored paint, and the flamed maple back with the cream binding, it blends the front and the back together. If you're playing it, you know that the back is natural wood, anyone seeing the guitar from the front only won't see it unless you turn away from them so they can see the natural wood on the back. Hell, maybe it's just me, but I like the idea!
-
Love it... but why paint the front of the guitar?
I've always wanted a vintage cream guitar, but I love the look of figured maple. With what I've done, to me at least I get the best of both worlds.
-
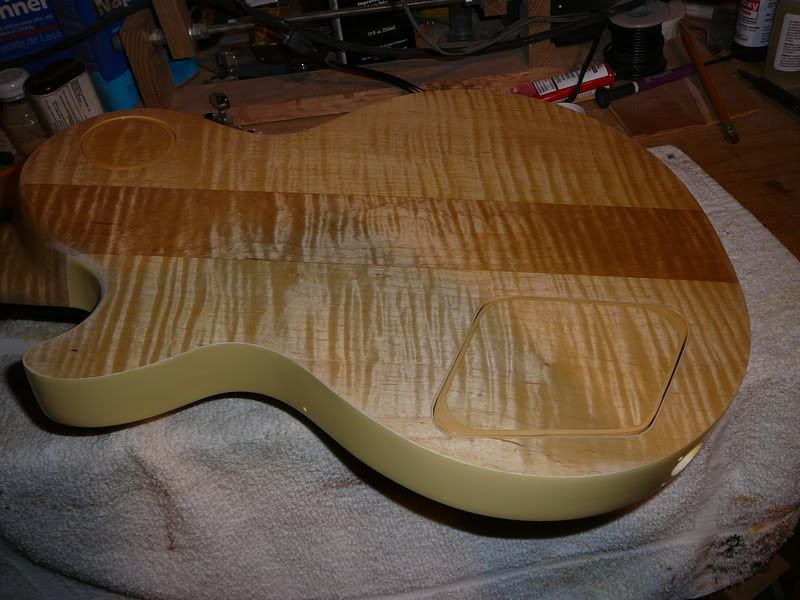
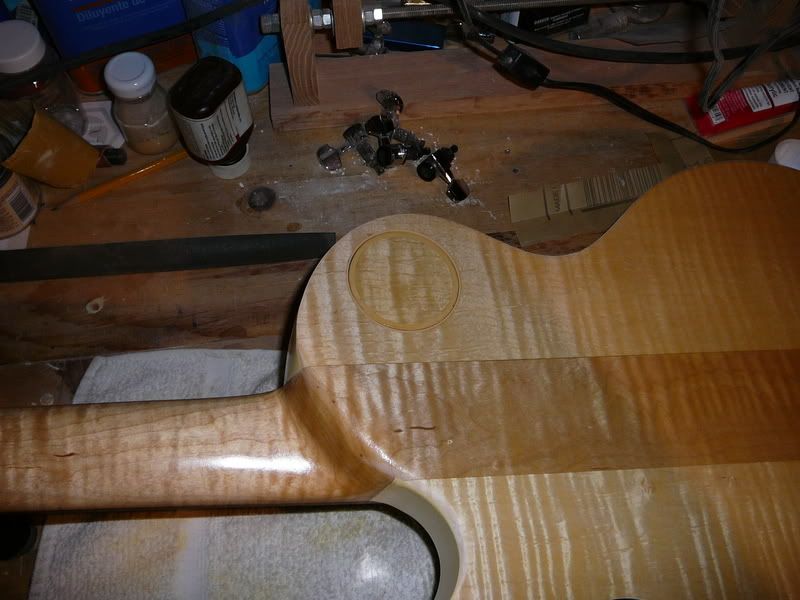
Here's the back of the body and the heel area of the neck in a couple coats of Tru-oil only. You can see the covers here as well, the are held in place with rare earth magnets same as the truss rod cover. I made it this way to make the back look cleaner than using screws.
Please don't laugh at my binding work as it's the first time I've worked with any. Hats off to people who can make binding look easy! I wanted to trim the inside of the cover hole, and the outside of the cover so there was no bare wood showing. I used the pieces of wood that came out of the holes so the grain would line up and be a perfect match.
The pot. cover didn't turn out quite the way I wanted it to, but it's okay. I had problems making the cut and as a result I had to stack the binding on itself to fill the cap in the corners. It turned out okay, but not like the 3 way switch cover. It turned out how I wanted, one piece of binding in the hole, one on the cover. I learned a lot about binding doing both of these covers. I learned how hard it could be with the pot. cover; layering and glueing, then melting pieces in acetone to blend everything together, and how easy it could be with the switch cover; cutting it, glueing in and done.
-
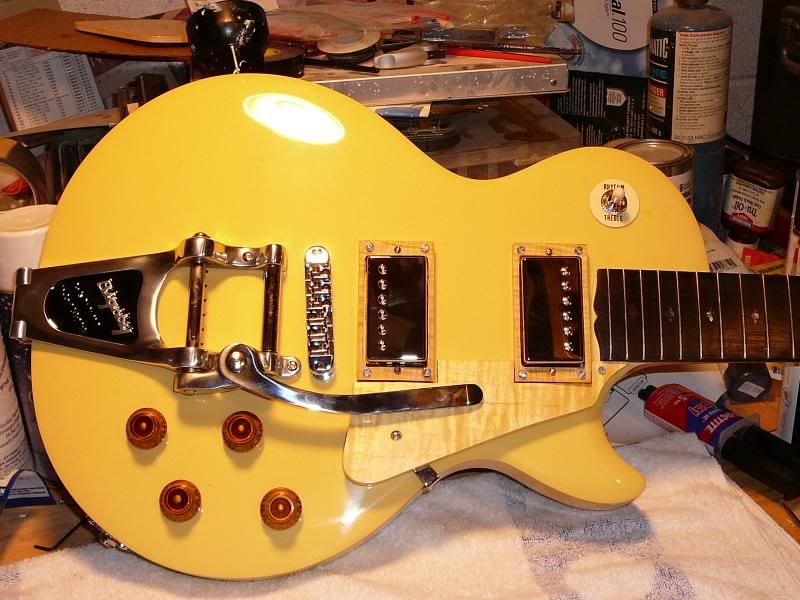
Here are two pictures of the body in paint only. I also layed the trim pieces in place to see what they look like... better than plastic I think. You can also see what I mean about the color difference in angle and lighting from my last post. The paint really has a nice color to it in direct sunlight, (no pictures).
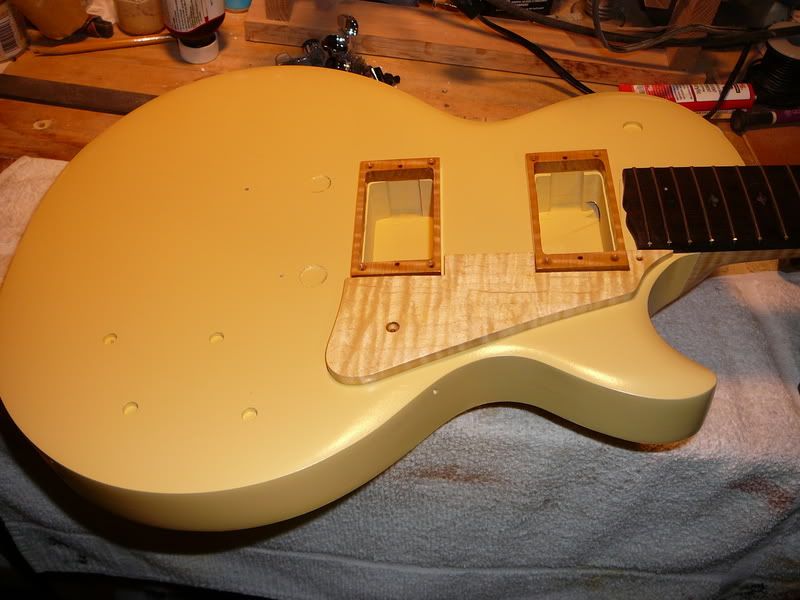
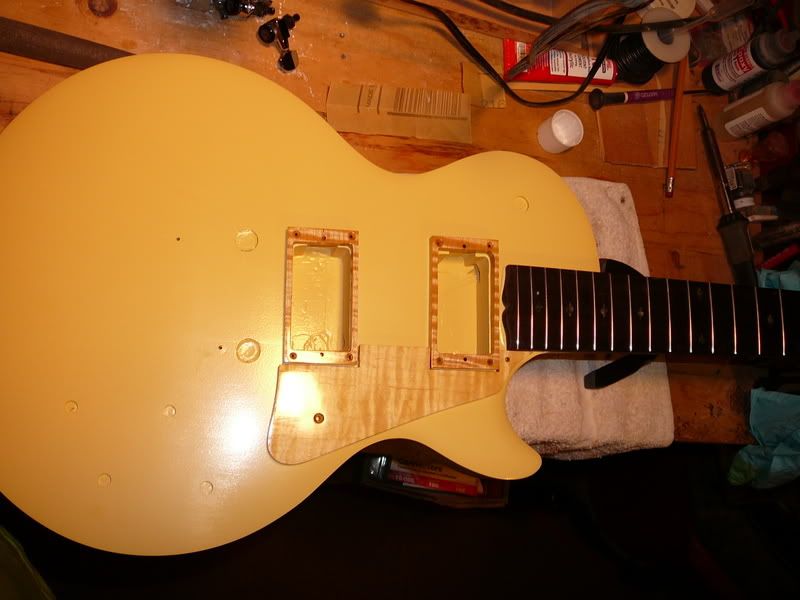
-
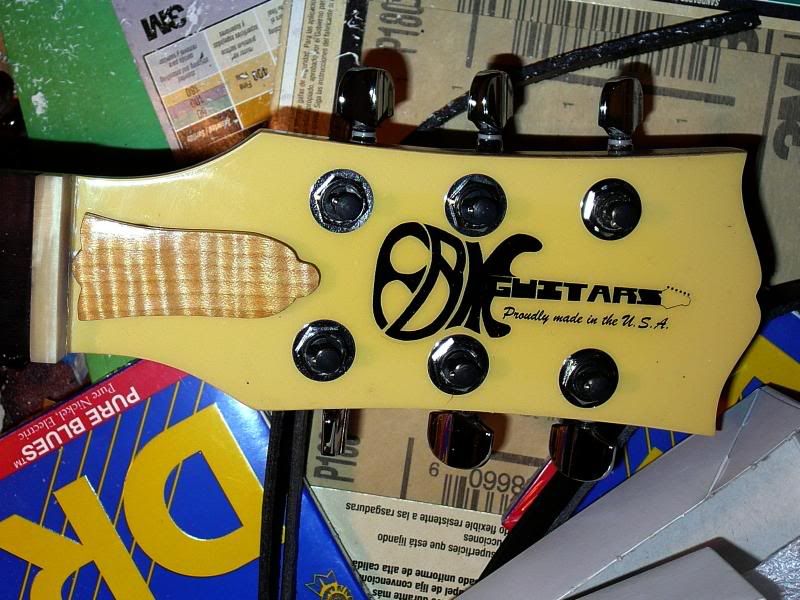
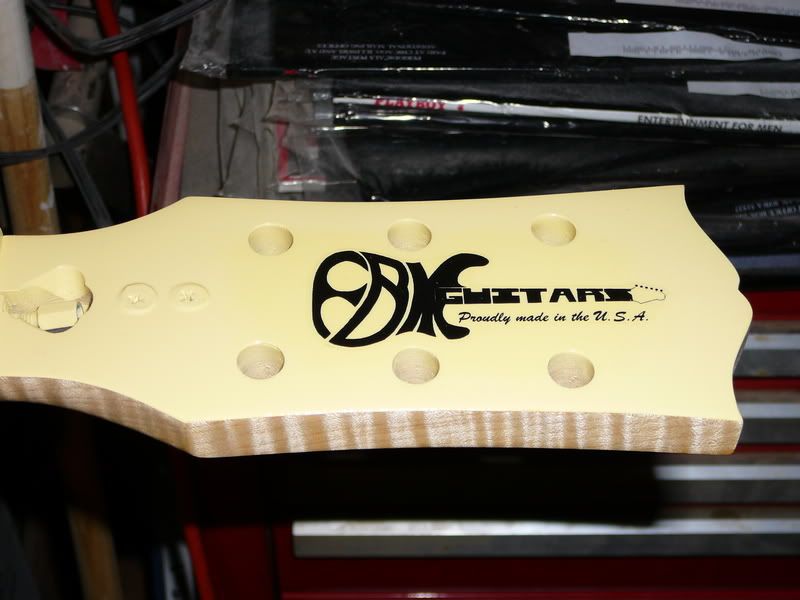
After finishing up with the primer, I started shooting the color coats. Here are a couple of the headstock.
The first one shows the flame in the neck wood, and the second shows the painted headstock face with the truss rod cover held in place with the rare earth magnets. I rushed the picture a little bit and didn't get it lined up so you can see under the cover a little bit in the picture, but it cover the truss rod hole all of the way normally.
Note; Just from these two pictures you can see that the color seems to shift depending if you are looking at it straight on or at an angle. It also varies greatly by the type of light you are looking at it by. In the next post you'll see what I mean when I show you the front of the body.

-
After shooting primer and sanding down the mistakes I made, here's what I had at that point
-
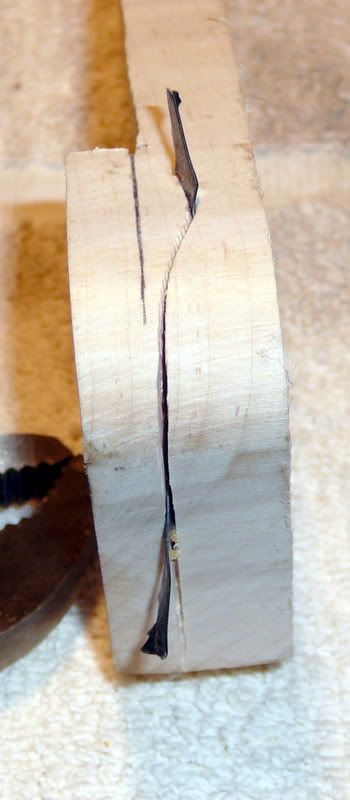
Sine the grain in the briar root goes in every direction it has to be the best. If it starts to crack from the heat/moisture, the next layer of grain stops it from checking very far and holds it together.
Fantastic work by the way.
-
A couple of years ago I made a pipe out of oak. I see why they make them out of briar now. I didn't make the stem, I used a stem from I pipe I already had, and made the pipe fit the stem.
After I smoked it for a while, the grain started to split, (heat/moisture), and I had a long hole in the side that followed the grain of the oak.
It smoked really well, but only laster a short time.
I didn't take any pictures of it or anything, but it turned out quite well.
-
O0o... that's sharp!
-
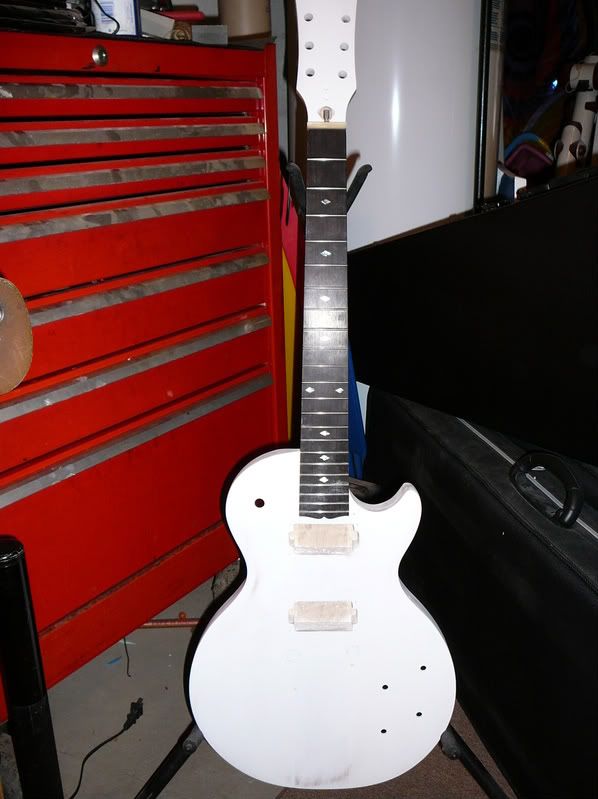
Things have been going a little slow on the build as of late, but I'm getting it done slowly.
I made a couple more pick up rings, a truss rod cover, and the pick guard, but I had a little problem with the pick guard. The band saw blade caught it and tried to drag it through the table. Needless to say; table won.
Once I bought a new blade I cut another pick guard, along with working on the cavity covers and I got the front/sides in primer.
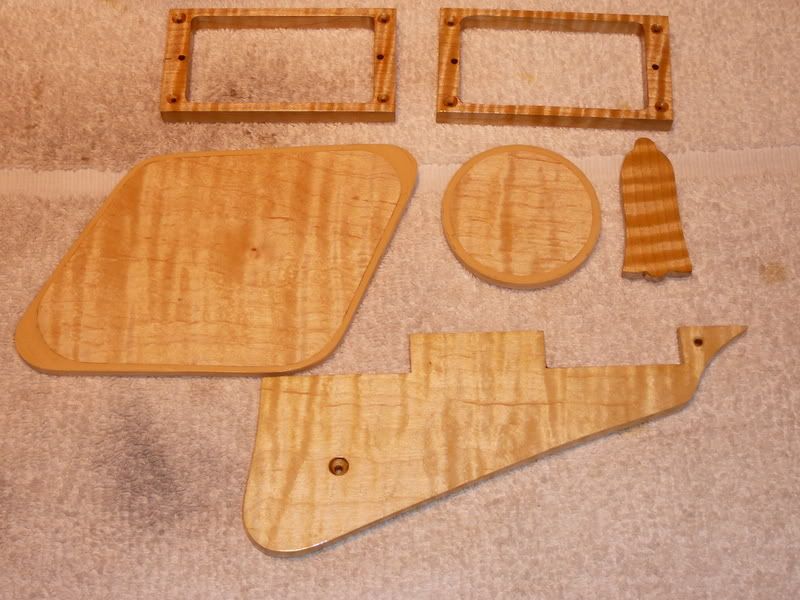
This is where it stands as of now.
-
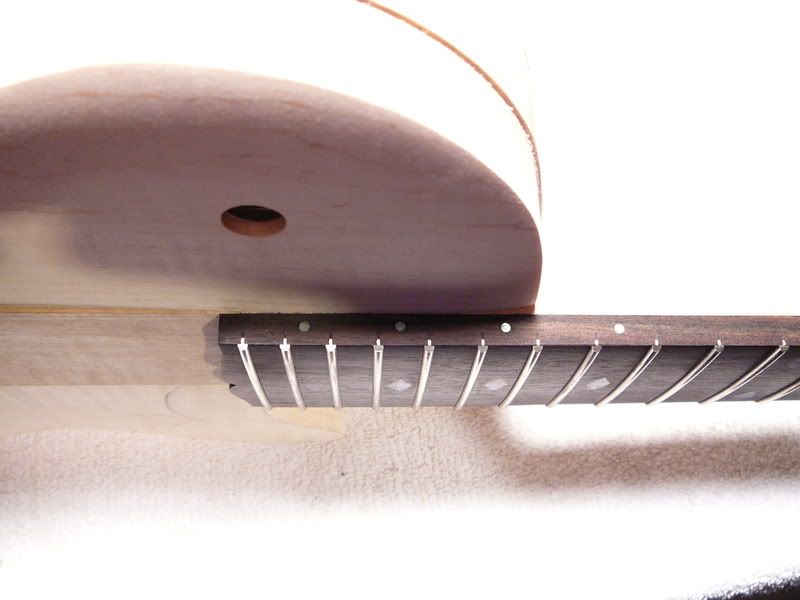
..."having the neck pickup separated from the neck end in a les paul looks kinda wrong."
I have to disagree Blackdog. The pickup is the exact distance from the last fret as in the blueprints I bought. In fact, all of the dimentions used in the blueprints are found on my guitar.
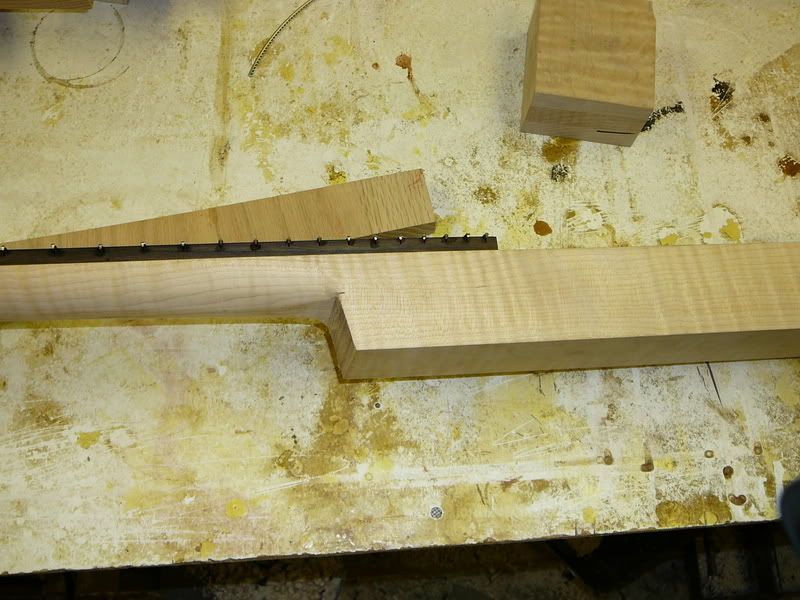
What may be throwing you off is this... After the last fret, I cut the open book in the remaining wood past the last fret wire. See?
And please don't think I'm digging on your for your opinion or what you think dude, that's why we all make different guitars right?
-
With the ebony being so dark, and the front being cream, it should stand out quite nicely to say the least.
-
Thank you for a name of the cut I made Blackdog, "open book" fits it perfectly. You don't like it huh? Man, I think that's one of the coolest things on it dude! lol
-
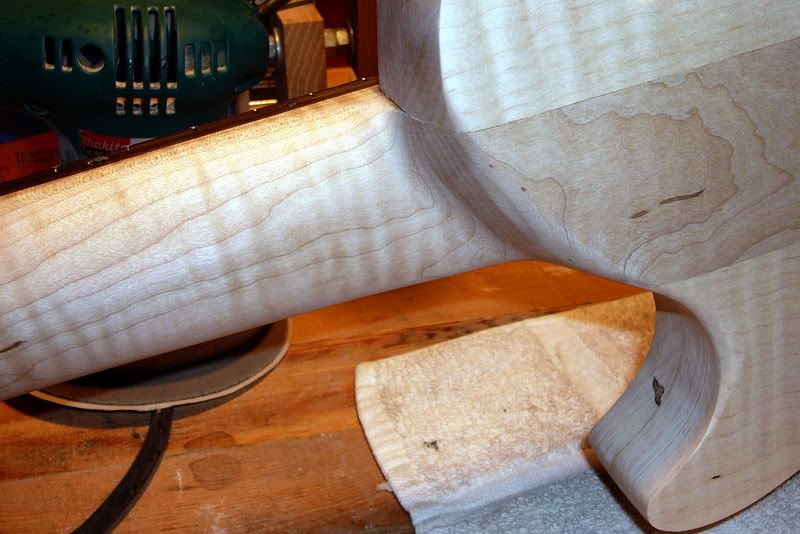
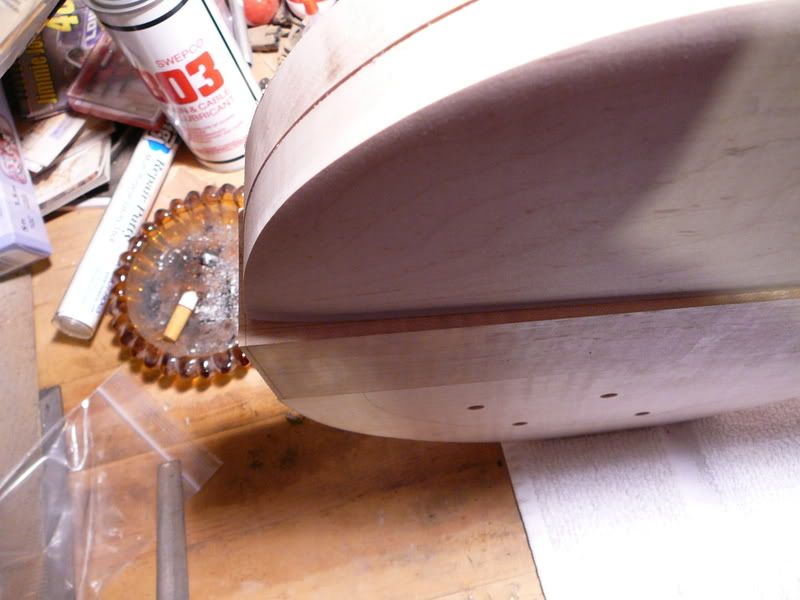
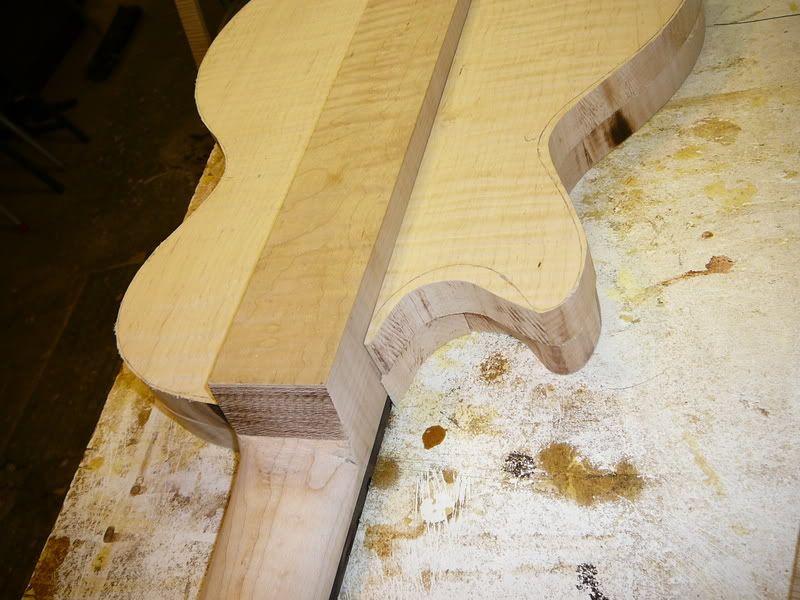
The neck/heel area is pretty sharp, but when you slide your hand into that area of the neck, like you are fretting a note at the top end of the fretboard, your hand doesn't even touch the heel. It seems strange to slide up there and not hit anything with the side of your hand. You can hit the last fret with your pointer, (first), finger and not hit the heel.
Like Pete said, even if I wanted to, I couldn't do much more with rounding out the heel because I run the risk of getting into the chamber of the wings.
What do you guys think of the 12th. side dot idea? It may look a bit odd in the picture, but when it's in place, it looks really good IMHO.
It will be Vintage Cream from ReRanch on the headstock front, body front and body sides, and natural on the back of the body and of course the neck. The natural will be done in Tru-oil with no stain, just the Tru-oil. I have cream colored pick up rings, pick guard, and truss rod cover to go on along with a chrome roller TOM, chrome Gibson PAF Classic H.B.'ers and a polished aluminum Bigsy B-7 unit. I'm not putting any F-holes in this one as I did that with my last build.
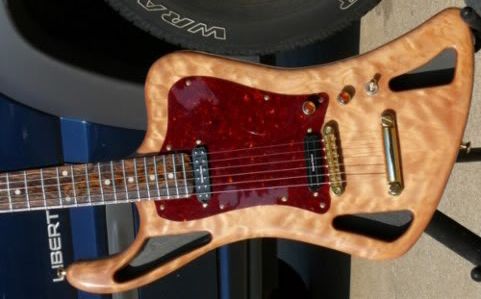
With all of that cream on the front it may seem like it will be a lot, which it might, but I hope that the plastic guard and the pup rings will be a shade different and kind of offset the paint color just enough. Let me run this by you guys...
I am using the wood I sawed out for the control covers as the control covers with binding around the edges to fill the gap of the saw blade and any smoothing it will need. Since the back will be natural maple with a hint of cream color, (the binding), what do you think about me making my own pup rings, truss rod cover and pick guard out of a scrap piece of flamed maple for the front? This way the natural flame maple will add highlights to the front and blend with the back bringing the whole thing front and back together
The main reason this is hollow is for weight reduction. The uncarved maple neck blank and the boards for the body wings after they were cut to close length tipped in at just over FOURTEEN POUNDS so I had to get rid of a lot of it.
The entire thing is maple so it may sound very brite when It's all said and done, but we'll see. With the pups., pots., and the caps. I bought, all OE Gibson per the print in thier values I'm thinking it won't be bad at all.
-
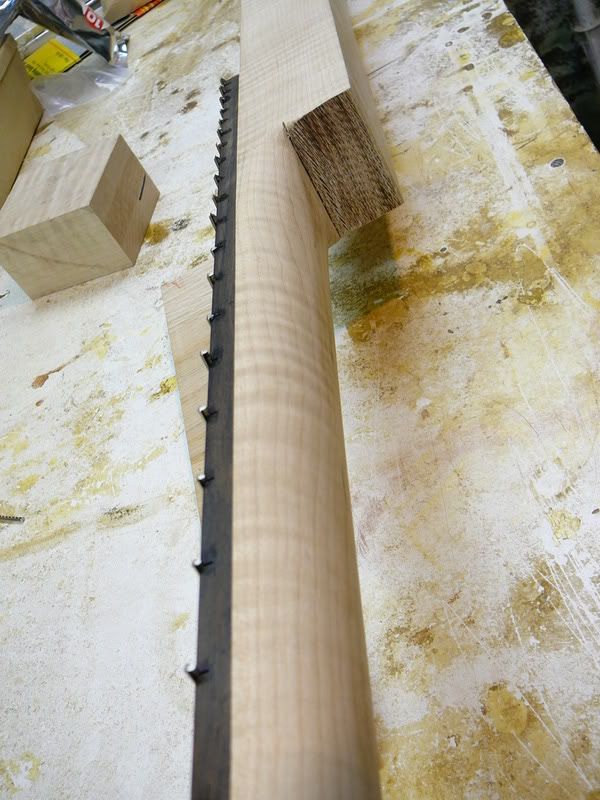
I glued the wings on, sanded everything down, worked on the heel area until I was happy with it.
I worked on it again today, routed the pick up cavities, and started working on the control covers. I wanted to get a little further, but I ran out of time, and I didn't take the camera with me. I'll post more pictures when I get them.
-
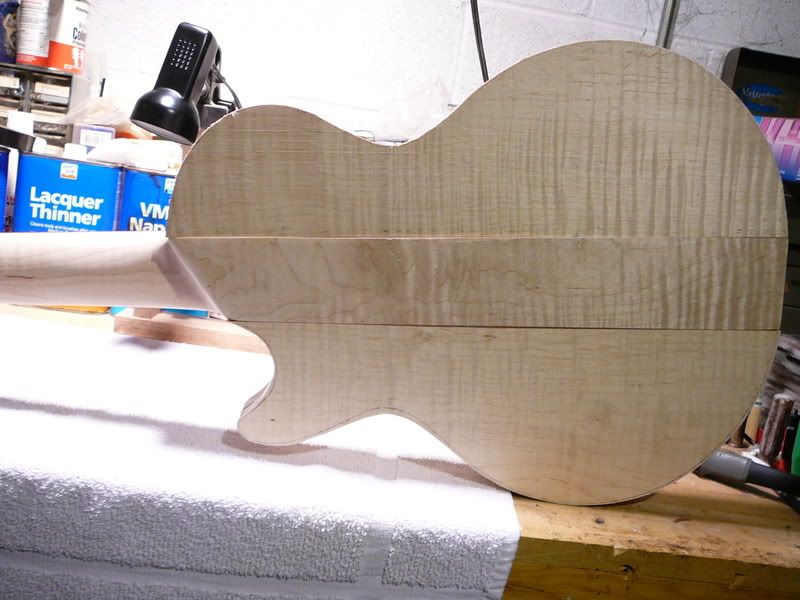
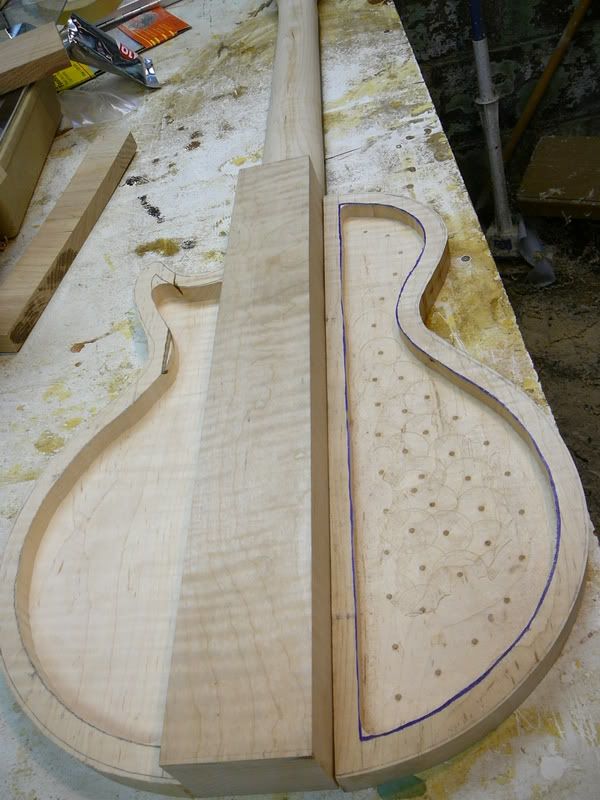
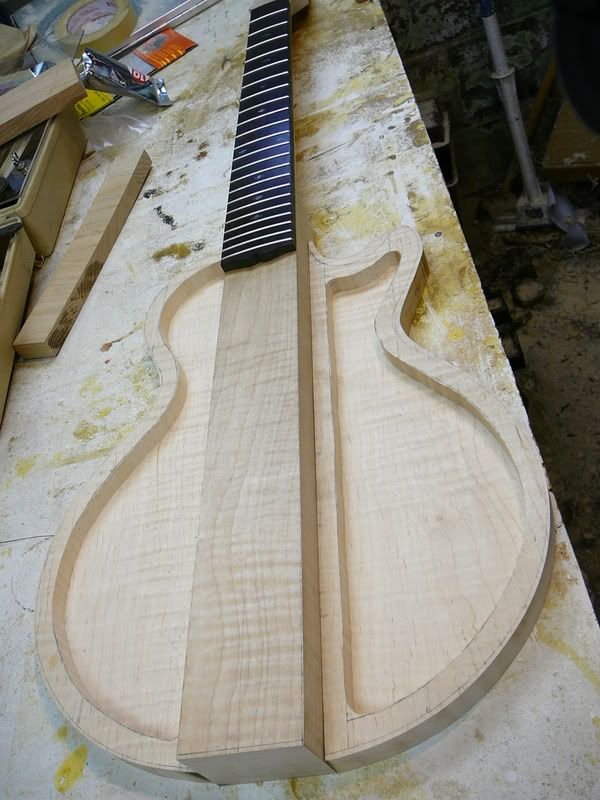
Before I glued the body wings on, I started the carve on the front with this...
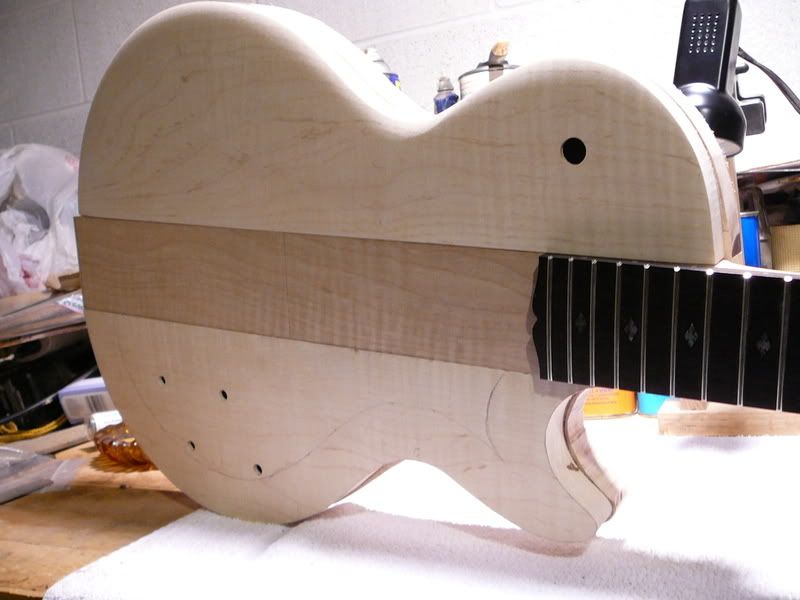
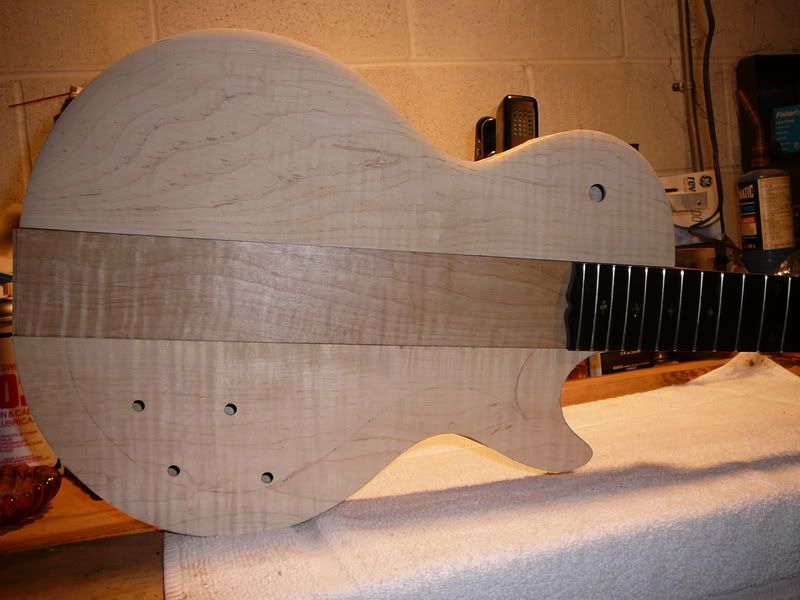
Once I started, the calipers said I was getting a bit thin, so I had to stop before I got it too thin. These next few pictures are with the wings just sitting where they will be glued on.
-
-
Once I had it pretty much roughed in, I started on the body wings. I cut them out, hollowed them out, drilled the holes for the three way switch, pots., and the internal channel for the wiring from the three way across to the pots. location. I also worked on roughing in the heel area.


Les Paul Hollow Body Scratch Build
in In Progress and Finished Work
Posted · Edited by J_48_Johnson
Here is a picture of the three that I've built so far.
In the middle is my son Dillon with my first build, the Flamecaster, my fiance's son Nick on the right with my second build, the Beatnick-Mojocaster, and me on the right with my newest build an L.P.