


Jaden
-
Posts
108 -
Joined
-
Last visited
Content Type
Profiles
News and Information
Tutorials
Product Reviews
Supplier Listings
Articles
Guitar Of The Month
Links and Resources
Forums
Gallery
Downloads
Posts posted by Jaden
-
-
J, got my guitarist sub yesterday - good stuff, pages of reviews & even sound clips on the CD - should be out in a few days

aaargh, this is horrible... folk are telling me this and im not a subbie so cant see it...
didnt know there were sound clips !
COOL !
-
what are you looking for ?
movac is a good place to start for lacquer supplies, dyes etc you could try any number of thousands of suppliers..
if you have looked for something specifica and cant find it, i may be able to point you in the right direction.
-
Minibuckers on an Rg look so nice. Especially with the carve...
Did you get time to look around at the other booths?
yes I looked around hall 4.0 and 4.1, I missed the real action in hall 3.0 though, too darn busy on the stand.
no joke, its pretty hard work.
mostly in my hall there were amps, laney, peavey, diezel, powerstate, elmwood, marshall etc etc etc etc and lots of chinese and korean guitar factories and parts businesses.
-
Hi Guys, the Musikmesse was just amazing, 4 days of standing upright as humanity flowed by and stopped to play guitars..
in total we made 20 guitars just for the show, as well as doing all the usual customer work
for those of you in the UK, look out for full review of 2 guitars in guitarist mag and keep an eye on the upcoming guitar shows, we will be there !
had a few new models there, pics are below.
had a great time !
Me and my Father on the stand.

Single-cut

Multiscale


The "Tommy"

the new minirocker range


the hieroglyph (flat top)

-
I can do it, its very dependent on the order and style of pocketing you use.
I cut an angle in all my pockets amounting to about 0.5mm end to end.
one solution is not to pocket at all but take "slices" from the pocket edges inwards in the long direction.
if you only cut in one direction, its more than feasable.
-
-
guys, im the UK dealer for true temperament, i have played them of course and like Perry says, its just not noticeable.
visit the TT website for more info, http://www.truetemperament.com/site/index.php?go=9&sgo=1
Jaden
-
Hello PG'rs
as some may know we are exhibiting at the upcoming Frankfurt Musikmesse, if you are planning to go, we would love to see ya !
we are in hall 4.0 stand B75 and will have somewhere near 20 guitars on the stand.
on another note, we are also featured in the UK's Guitarist magazine both this month for a "first play" feature, followed by a full review of 2 guitars next month !
rock on chaps !!

Jaden

-
I cut my multiscale frets with the cnc, perfect everytime
-
small amount of work today - waxed the body and buffed it up a bit, shielded the cavity and installed some of teh electricals.


-
great chaps !
jaycee got my vote this month but it was a close run thing with the tricaster..
the thing that tipped it for me is that I have an immense respect for anyone who can make a decent looking acoustic.
-
I was buying mahogany the other week and after I had already parted with a sackfull of money I was chatting to the guy about a stock of Afzelia he has..
It was expensive stuff and only 1 3/4" thick sawn boards but it sounded nice so I bought a metre to test it out !!!
This is the plank after a pass of the planer:

It looked good to me so I planed and jointed it up and decided to carve the top:

then added a coat of oil once it was all sanded up.

Decided on a wenge and purpleheart neck, exactly the same as my previous shadow guitar.

I originally cut a bloodwood fingerboard for this but it looked terrible so I made a pau ferro one (I call it santos rosewood usually) which was a better fit cosmetically...

then I put some of the hardware in to see how the finished article may look, because im a fulltime builder this has been done in the evening (zzzzzzzzz) but im hoping to get it finished for this months GOTM !!!

ive never played an afzelia guitar but im looking forward to hearing it..
-
I do it all the time, its how I keep the shop warm in winter...
-
the jems dont have a pearl vine stem, its a wood of some sort, I usually cut a strip of mahogany for the stem.
-
Andy T all the way for me !
I love something a little diferent plus im stuck in the 80's and 90's ! that guitar just appeals to every trace of magpie in me
-
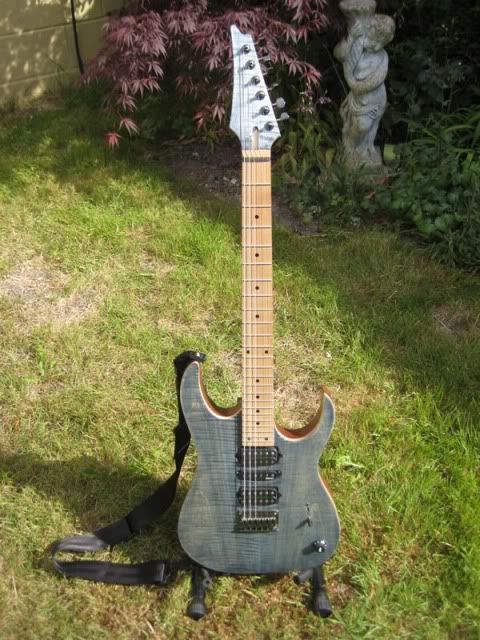
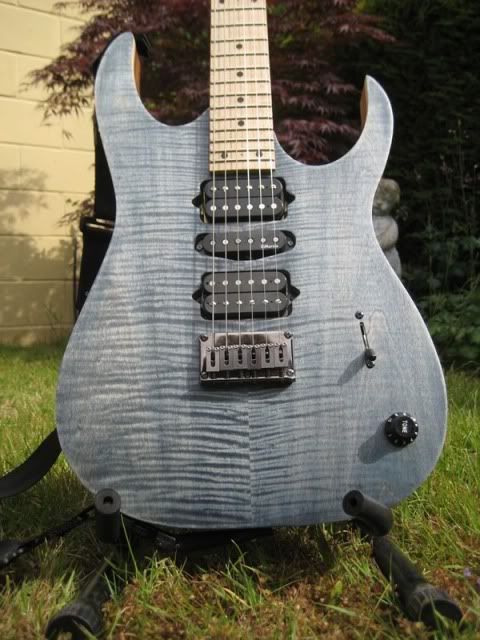
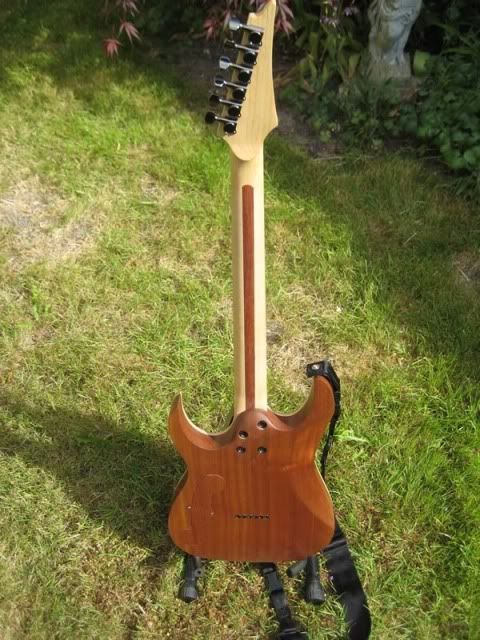
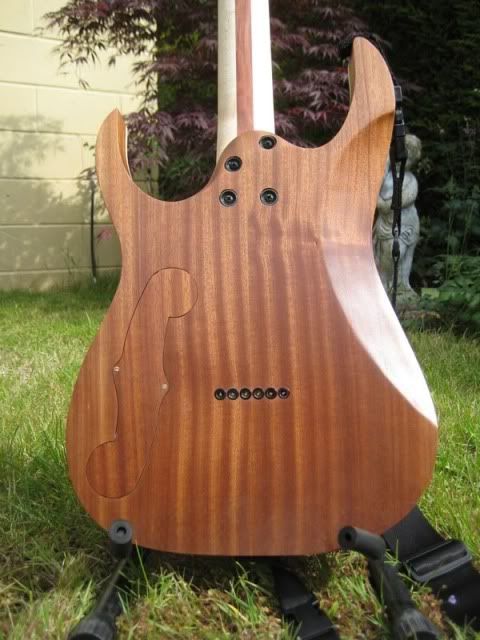
Ill call this one - Blue Jean
for a customer who wanted a "different PGM"
flamed maple and african mahogany body with blue over black finish and danish oil
3 piece neck with maple and bubinga, quartersawn maple board with nice simple dot inlays and a flamed maple (reverse) headstock laminate
gotoh GTC bridge, graphtech nut and SG381 tuners
dimarzio and bareknuckle pickups: VH2 - Air norton, true velvet
custom F-hole electrical cavity with matching cover.
-
ive had this problem, it ruined the neck because the rod would vibrate at certain frequencies.
you do need to sort it spoke, that was also because i didnt caulk.
the only way to be sure is to remove the board.
-
ive had this happen once to me recently, its only happened once and I couldnt get to the bottom of why, I make all my necks the same and it was one of a batch to a customer, it backbowed and others didnt.
I steamed off the board and used the board again, threw the neck on the fire.
-
I’m not sure how to respond to the notion of using the laser as a way of “cheating”. I know there are purists out there, and I can respect that. But, you have to qualify it. The question is, what qualifies as “cheating”. Is it acceptable to use a PC to surf the web for information, but not OK to use a PC to generate a toolpath?
What I have found is most craftsman that have a problem with a certain technology only have a problem with the technology they don’t have…until they get the machine, or tool in question. Then they suddenly don’t have a problem with it any more. One of the main misconceptions of CNC based machines is most people who have never operated one before think they program themselves. These machines still take knowledge to program & skill to operate. When there is artwork involved, it takes an additional level of ability. Bottom line is: it’s just another tool.

exactly, I use CNC, I wouldnt be without it.
most people think its some sort of magic bullet but like any other skill - making stuff entirely by hand for instance, it is a skillful job to properly program and set it up.
I love the look of your laser, but the cost is beyond me right now, I already fully equipped my workshop 2 years ago and the cost was horrible... once I recover from it however
-
ok..
came up with a great new method, not dissimilar to the stick from stewmac..
got 2 pieces of wood jointed together with a spring between them, cut some "belts" from sheets of mikra paper - looped and glued at the ends.
the sticks are like this:
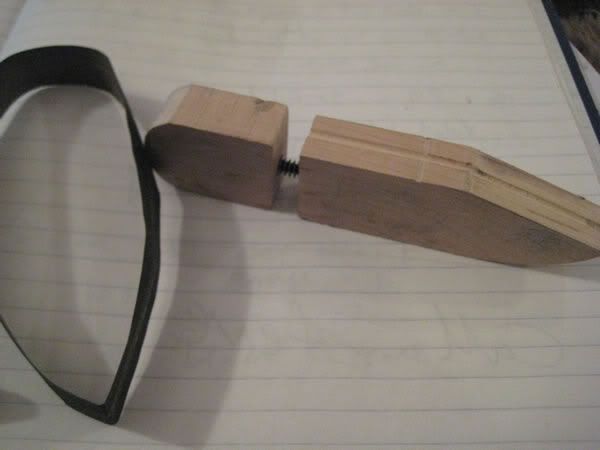
the groove is a hack saw cut followed by using a piece of wood with a piece of fretwire in it and cut off sharp to make a kind of scratch awl (if anyone knows what they are) I use the piece of fretwire to plough a groove to the exact profile of the fret...
then change belts as i work through the grits.
-
Yes I agree, very impressive.
Doug, what machine are you using ?
I was planning on getting a laser and that was impressive, I use my CNC for inlays right now and I think that the laser did a good job !
-
right, I have made up some shaped cauls and bonded micofilm finishing paper to them, ill try a few frets with this method and let you chaps know how I get on.
-
is it noraml to stop at around 600 ?
its seems to be the trend im seeing.
I have some microfilm finishing papers here, im going to bond them to several fret shaped cauls and check the results.
600 seems like a very low grit to stop polishing to me..
as far as compound goes, I did once try autosol but as spoke has said, it makes a horrible mess and even on rosewood it took a fair bit of cleaning up even though I was being very careful.
and yes, power sanding is so fraught with the danger of ruining the level its not worth it.
-
the way i do now without going into details is:
re-crown after levelling with a beam as someone said, I use a waverly type steel burr crowning file.
then I start getting the file marks out with 320 wet & dry paper
I move through the grits to 1200 wet & dry - I stop doing the sides of the frets at 800 grit.
then I use steel wool to finish.
this process takes quite some time and if I have been making plenty of necks it can easily take me a whole day.
I understand that mechanising the process would be expensive - I might as well buy a PLEK machine
all im looking for is a faster way to go through the grits really, I was thinking along the lines of using a very small detail sander that I could affix a shaped sander to (in the shape of the fret crown) and these shaped sanding pieces could be interchangeable all with different grits..
I was wondering if anyone had already made something like this ?

Uk Finishing Suppliers
in Inlays and Finishing Chat
Posted
the tonetech dyes are great, I use those as well as aniline dyes from behlen (I think)
there is a behlen brushing lacquer, available straight from behlen, ive used that too, pretty good ! available with flattener etc.
axminster do a whole host of finishes that are easily sprayed, I think the rub is, like the reset of us you have to buy the stuff and see what works for you.