


Andronico
-
Posts
235 -
Joined
-
Last visited
Content Type
Profiles
News and Information
Tutorials
Product Reviews
Supplier Listings
Articles
Guitar Of The Month
Links and Resources
Forums
Gallery
Downloads
Posts posted by Andronico
-
-

As you can see also, the neck builder came through with a new neck. I'll be inlaying the J and doing a test fit before I put a finish on it this week. I'll snap some pics of the inlay process and finished result.
I´m really happy hearing that you received the replacement neck from the builder and that it hasn´t any problems. We can now see you new tele in all her glory with the new switch knob and inlay !

-
loving this build more and more ...keep up the good work:)
Thank you friends for your support !
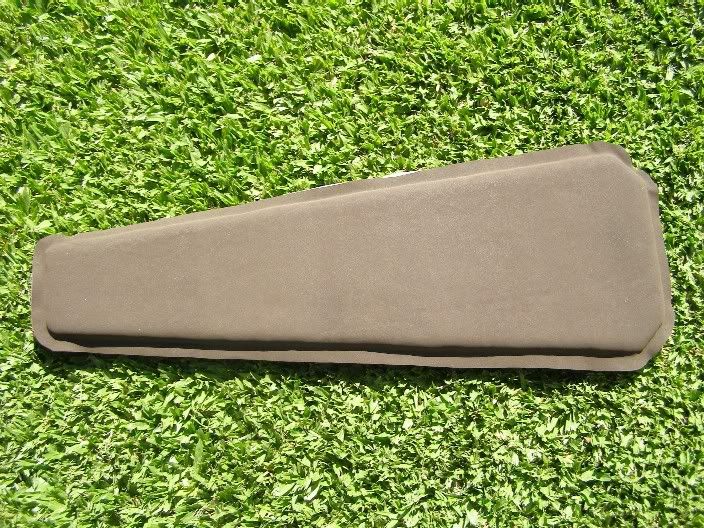
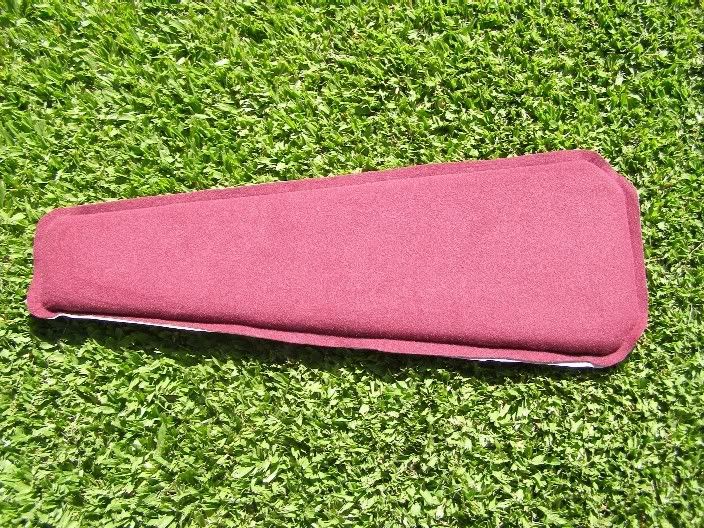
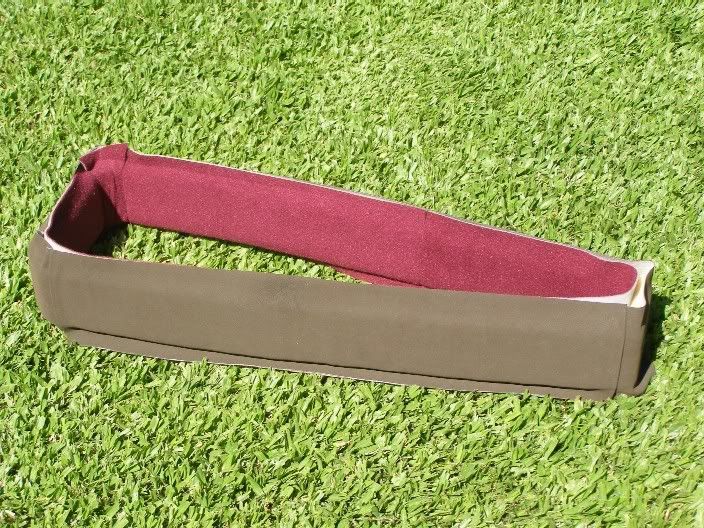
Yesterday I glued the vinyl leather and for the inside material I used plush.
The colour of the leather is chocolate and plush is a bit lighter than red wine.
Top / bottom pics :
Body pics :
http://i264.photobucket.com/albums/ii186/a...ar/Funda035.jpg
http://i264.photobucket.com/albums/ii186/a...ar/Funda036.jpg
I ended with the final sanding of the guitar body and begin with the stain and clear coat. The following days I´ll upload more pics showing this.
-
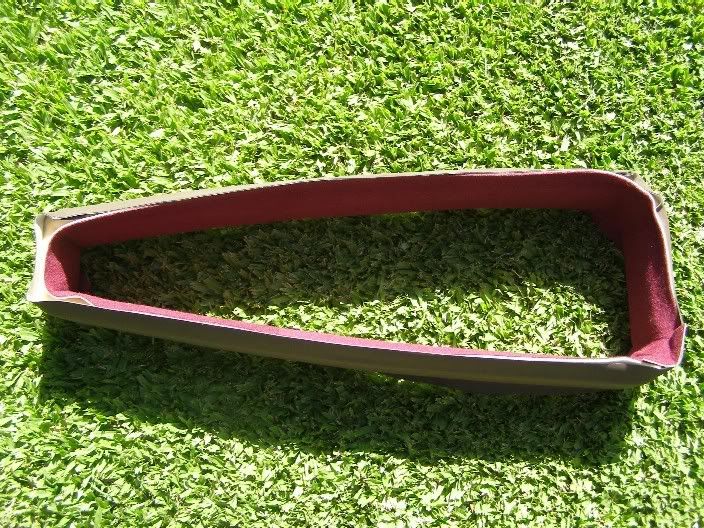
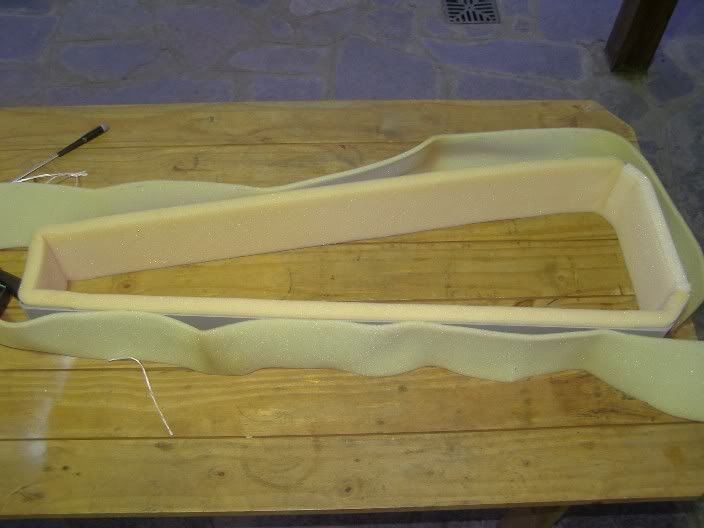
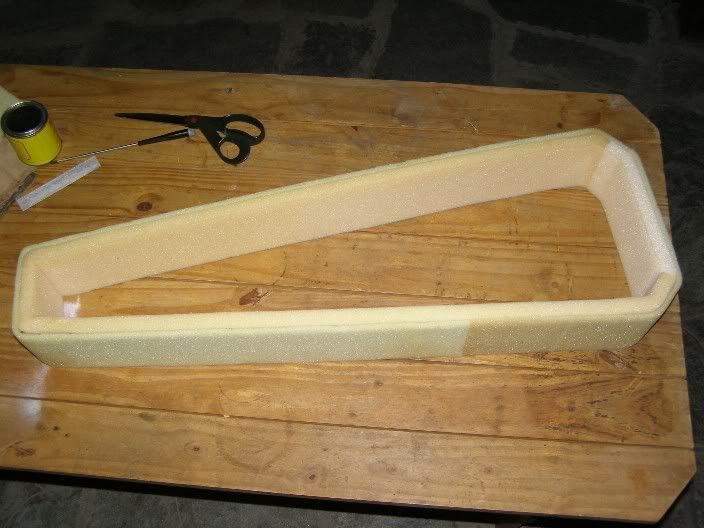
A little more progress to report about the case, I was building the sides :

More pics :
http://i264.photobucket.com/albums/ii186/a...ar/Funda021.jpg
http://i264.photobucket.com/albums/ii186/a...ar/Funda022.jpg
http://i264.photobucket.com/albums/ii186/a...ar/Funda026.jpg
http://i264.photobucket.com/albums/ii186/a...ar/Funda029.jpg
http://i264.photobucket.com/albums/ii186/a...ar/Funda031.jpg
Now I have to glue the vinyl leather and begin sewing all the parts together...
Please wish me luck !
-
Beautiful guitar ! Congratulations, please try to post some progress pics, I love them too.
-
Andronico forges the steel for his strings himself.
Very funny friend ! But I was thinking about the possibility of building the AX84 firefly valve amp and perhaps I can make the triodes... Look at these videos :
http://dailymotion.alice.it/video/x3wrzo_f...mpe-triode_tech
http://www.youtube.com/watch?v=8_eLO0exato
I´m joking of course !

-
So... is there anything you don't make from scratch?
Yea, a lot of things actually !
But I prefer to use my hands than visit the psychologist...
It´s a therapy for me and is more cheap ! -
Last days I began with the case for the travel guitar.
After thinking on different ideas I decided that will have the following specifications :
1) Must be light.
2) I´ll use foam, vinyl leather and some soft material for the inside.
3) With enough room for the guitar, portable amp, AC-DC adapter, MP3, tuner and cables.
4) Must follow the style lines of the guitar...
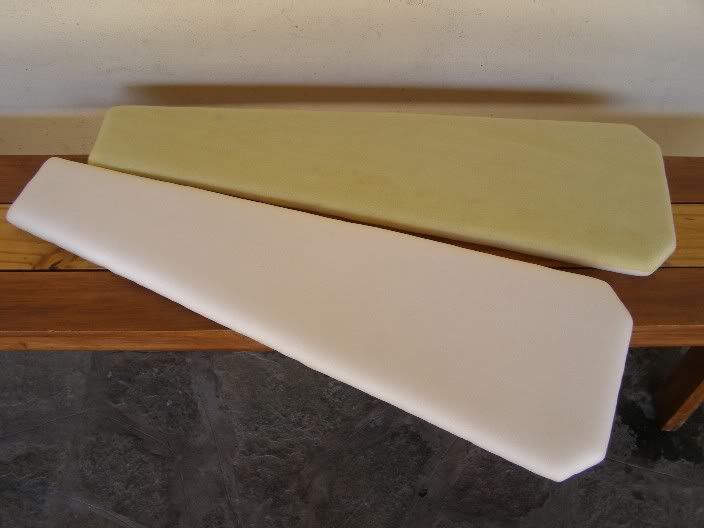
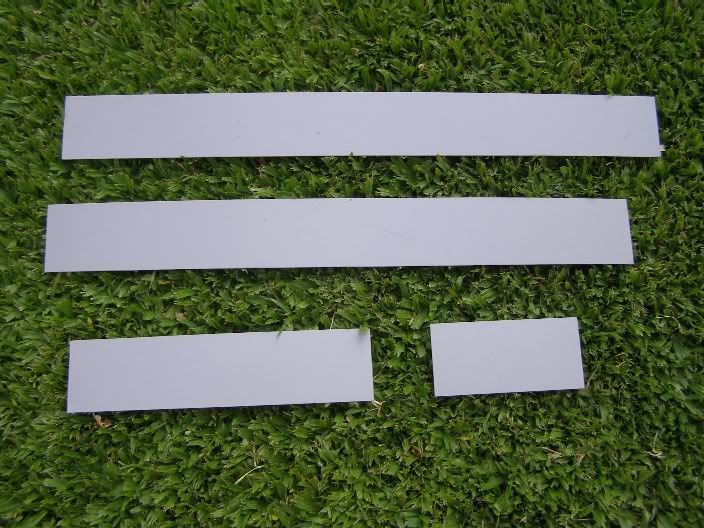
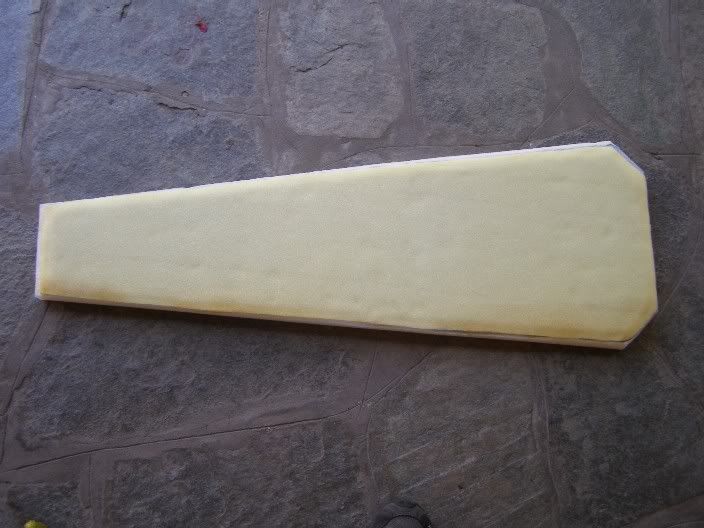
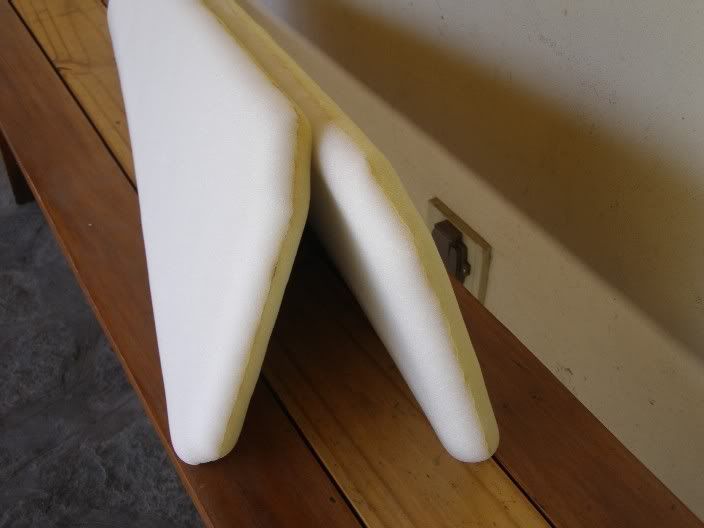
The idea is build a box; top, bottom and sides separately and then sew the bottom with the sides and with the cover.
Each part is made like a sandwich : a thin foam (5mm thickness) + PVC foam (3mm thickness) + thick foam (20mm thickness).
The PVC foam is very light but very strong and make the body semi rigid and is free because my father has enough for the case...
Ok, following is the top and bottom part ready to glue the vinyl leather and the inside soft material :
Step by step pics :
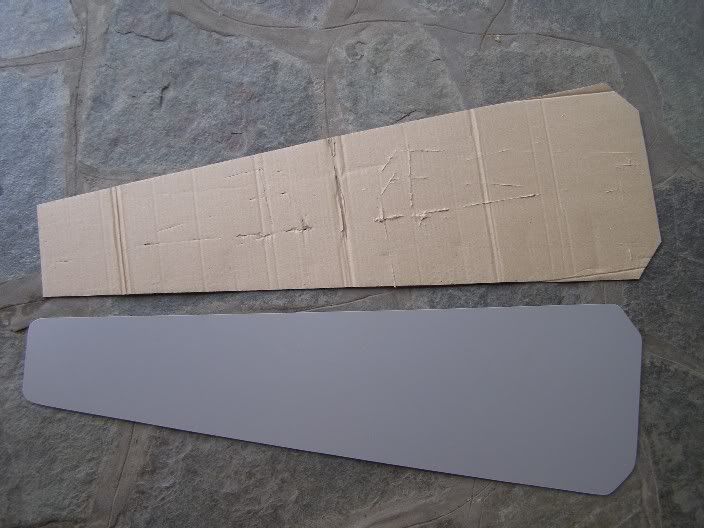
Cardboard mold and PVC foam top :
http://i264.photobucket.com/albums/ii186/a...ar/Funda005.jpg
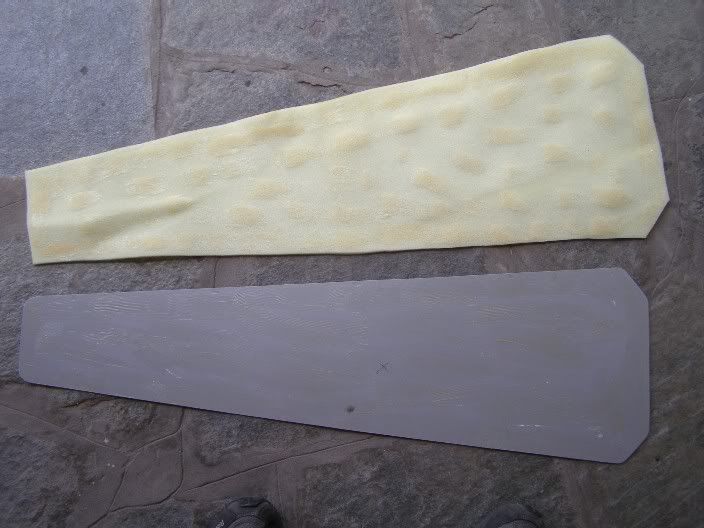
PVC top ready to glue the thin foam :
http://i264.photobucket.com/albums/ii186/a...ar/Funda008.jpg
PVC with thin foam glued and ready to glue the thick foam :
http://i264.photobucket.com/albums/ii186/a...ar/Funda010.jpg
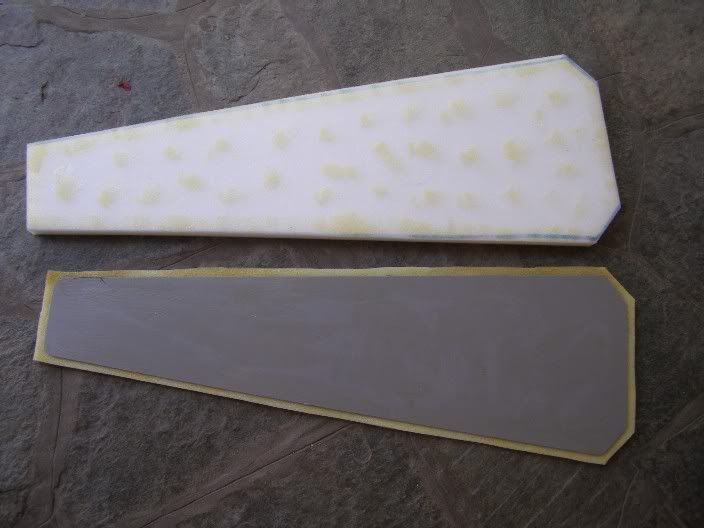
PVC with the foams glued :
http://i264.photobucket.com/albums/ii186/a...ar/Funda011.jpg
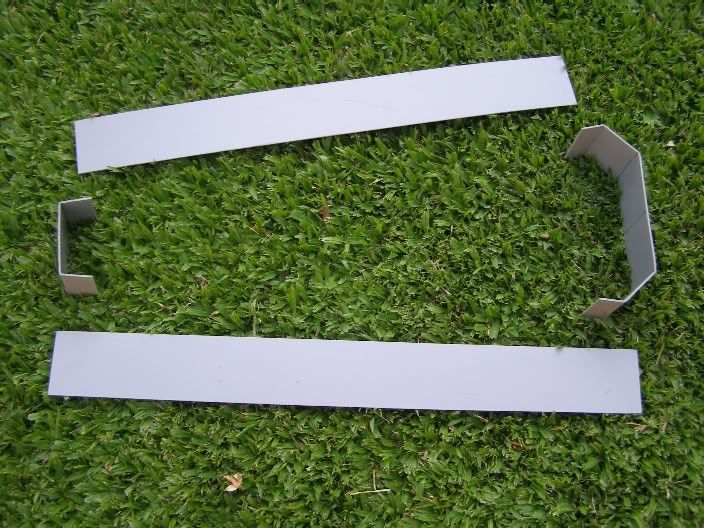
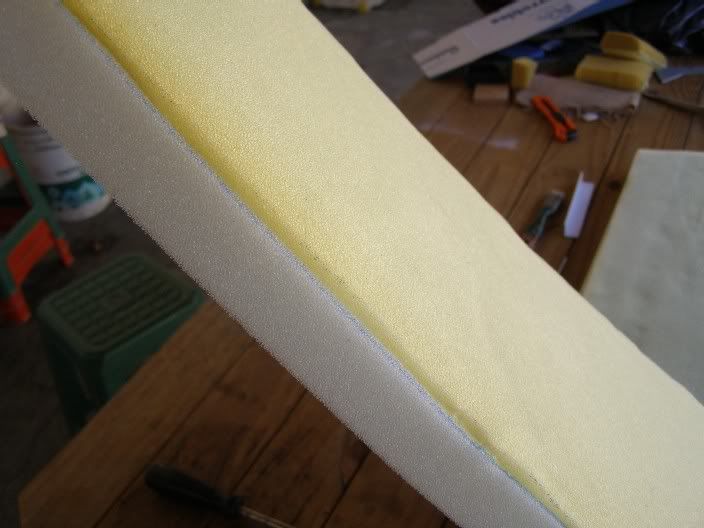
The top has straight sides :
http://i264.photobucket.com/albums/ii186/a...ar/Funda012.jpg
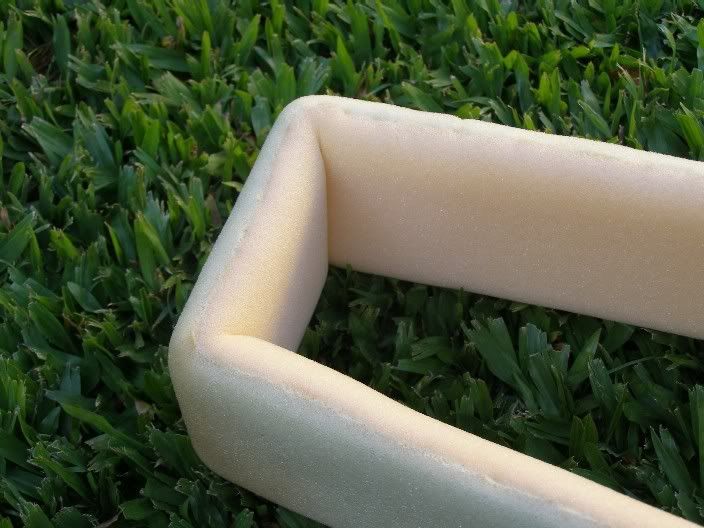
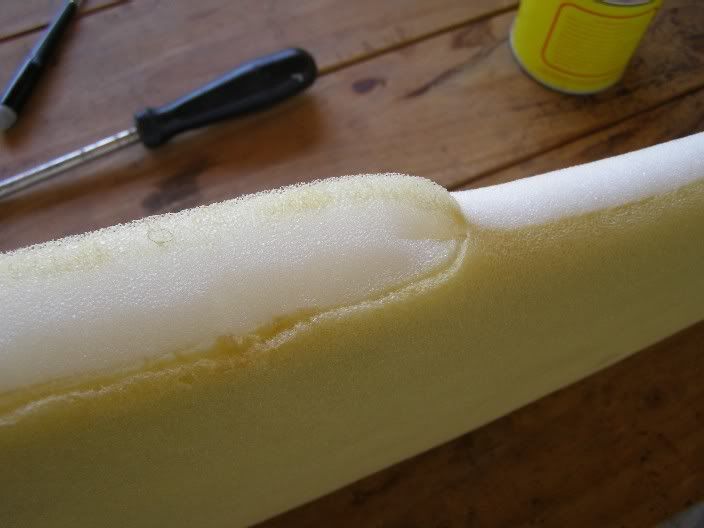
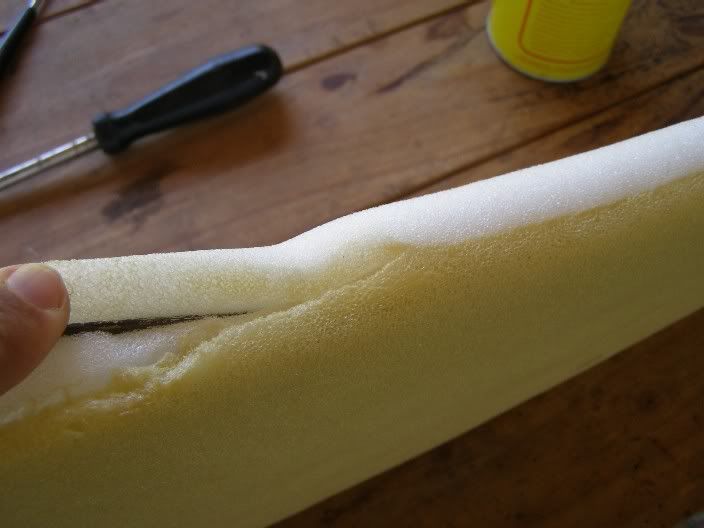
I need the sides rounded because is more easy to glue the vinyl leather. I thought that could be dificult to round them but was really easy :
http://i264.photobucket.com/albums/ii186/a...ar/Funda014.jpg
http://i264.photobucket.com/albums/ii186/a...ar/Funda015.jpg
http://i264.photobucket.com/albums/ii186/a...ar/Funda018.jpg
Now I have to begin with the sides...
-
and for those that dont like looking at lefties!!
Thank you man !
That a clasy beautiful guitar !
-
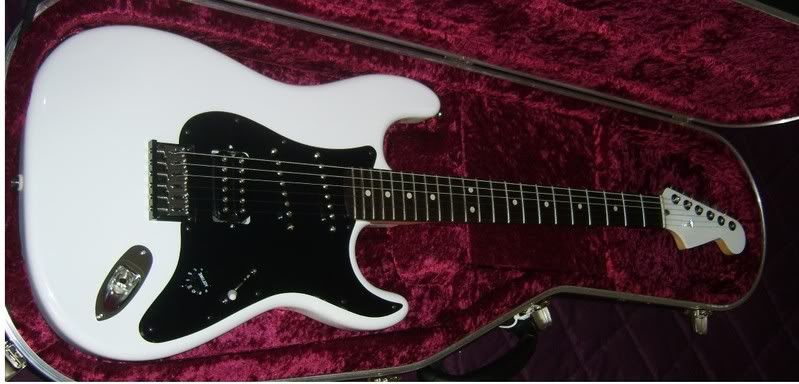
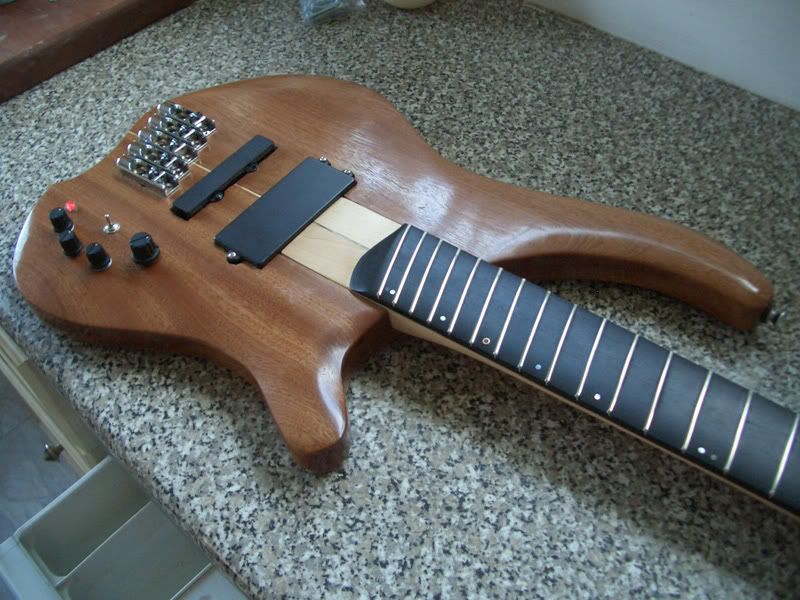
Some more progress this morning. Neck trimmed flush (pocket routed deeper) and the electrics all wired up.
Neck given a few wipes of Tru-Oiul - more to follow.
I also inlaid a little copper-ring bloodwood circle into the headstock.
Now just waiting for the machine heads, then the nut can be cut, and frets levelled. Then she's done
Here's another shot of the body/neck
Beautiful work man ! Congrats !
But the only thing are the knobs, these are the deffinitive ones ?
-
Nice work, Julian. For be the first time working with metal you made it really well.
Guys I invite you to the argentinian diyer web
It's a very nice web, with cool guys.
Thank you PTU, I´ll visit the diy site
-
Wow Andronico, you are one sharp guy! This is a really brilliant project, very impressive. I can't wait to see the end result. Nice work man.
Thank you man ! I can´t wait too. During these days I was testing some soft stain in several mahogany pieces and decide to use a little of peteribi stain (peteribi is a local type of wood). This color add some soft brown to the red of the mahogany. Today I will finish with the sanding and tomorrow I´ll begin with the custom case.
-
Beautiful guitar man, congratulations !
-
I worked for TIA in Don Torcuato, from 1977 to 1988, in the engineering department. During that time we devloped a few POST for specific applications. I remember now a Quiniela system for Chubut province (this must have been around 1982/83, in the times of the pre-punched cards). And around 1987 a restaurant terminal (adicioteca).
Ok Black Dog, you win, you´re older !
I began with the old E.C.R.s (electronic cash registers) when I was a teen because my father worked for NCR. Then we were distributors of the swedish brand Sweda (cash registers and POS terminals) for Argentina and then we developed our own products. Is not easy, remember that we live in Argentina and all is difficult here...
Now, regarding the travel guitar. During the last week the weather was rainy and wet, isn´t the best moment to begin with the finish... But first I have to complete the sanding and decide if use a clear finish or a soft stain with the mahogany.
-
Amazing coincidence.... I used to develop POST for Texas Instruments Argentina in a previous life, a looong time ago....
Wow, when ? I´m not a kid...
Sewing to relax is probably OK, knitting might still be. But if it comes to this I would start to worry:
-
Only one question, is there any incompatibility if a guy sews and plays rock with an electric guitar ?
Julián
No incompatibility at all. I cross-stitch when I'm watching a movie or TV. I find it very relaxing. It focuses my mind compeltely, thus forcing me NOT to think about whatever troubles the day has brought.
Good point !
-
Looking great !!!!
Really looking forward to seeing it finished. Obviously you have experience in electronics, that shows.
And you said you didn't have metal working experience ?? C'mon !!! Stop kidding us !!!
Great work so far !!!
Luis
Thank you Luis ! Yes I have experience in electronics, I develop point of same terminals (hardware and firmware). About metal working I know how to use a drill, a dremell or files but really this is my first time making a metal mechanism. Remember that the most visible part of the tuner are the pegs and they were made by a friend in his lathe.
This morning I was thinking about the case for this baby, the idea is something soft or almost to carry the guitar, amp, AC-DC converter, cable, etc. I asked to my wife and my mother and they said me that in order to maintain all this project mine I have to learn how to sew !
OK, another thing to learn !
Only one question, is there any incompatibility if a guy sews and plays rock with an electric guitar ?
Julián
-
Thank you for your support friends !
Bassisgreat : you can build a travel bass inspired in the same shape. The Riverhead Unicord guitar bass exist ! Look at this link :
http://www.handen.us/riverhead/miriverhead.html
anderekel and Xanthus : I´m excited too, I can´t wait the time to have this little baby finished !
But I´m 41 and I learned long time ago that if you want to run first you must learn to walk... and remember that this is my first DIY guitar.
That is really cool. I like how your making all the components yourself.Thank you Daniel, you are a very talented boy with a great future in guitar building ! But let me correct you, I haven´t made all the compoments, I bought the neck from Guitar Fetish.
-
Beautiful ! Have you a better pic of the fingerboard ? The cocobolo looks fantastic !
-
-
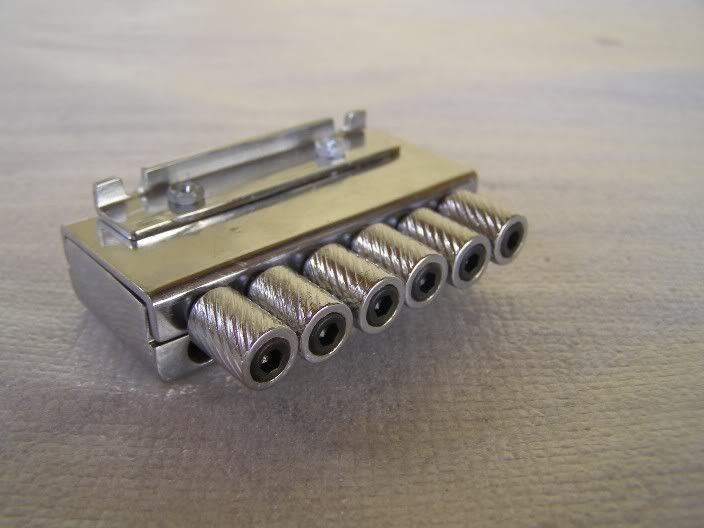
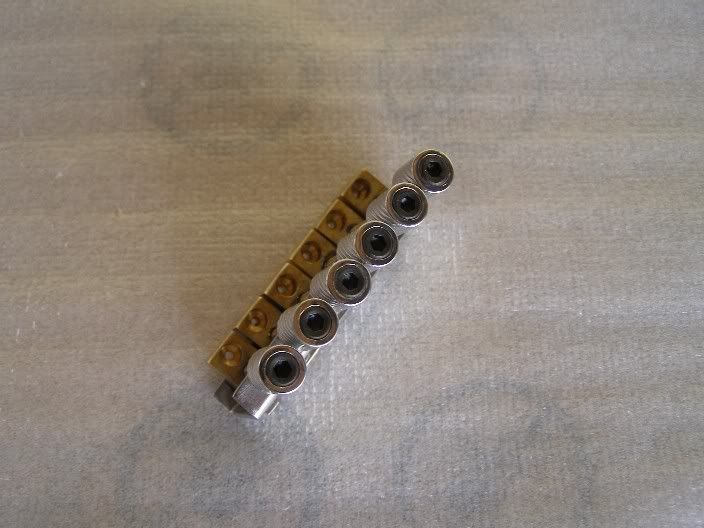
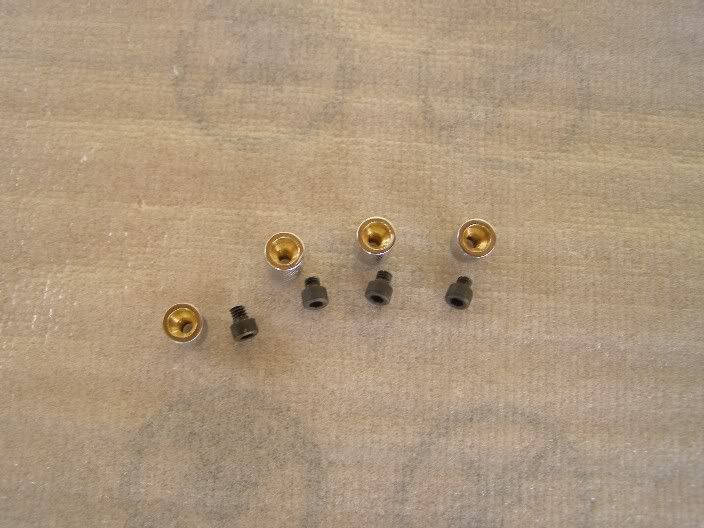
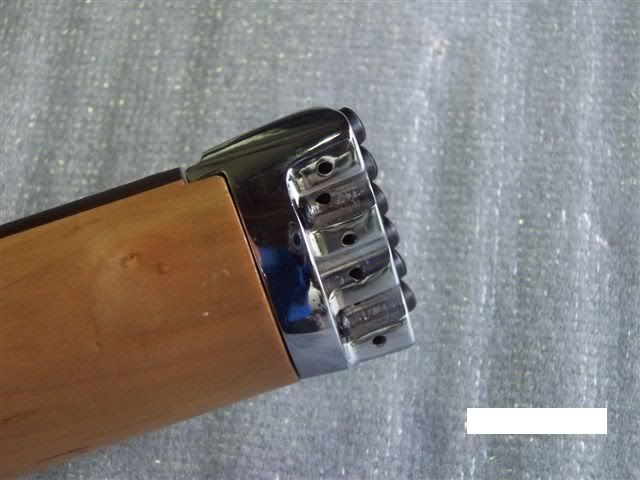
I changed something in the tuner pegs, I notice that the grooves around them were smooth after the chromium plate.
So I make the hole larger to fit a small screw like I use in the headpiece.
Then I can use my fingers or an allen key to tune the strings.
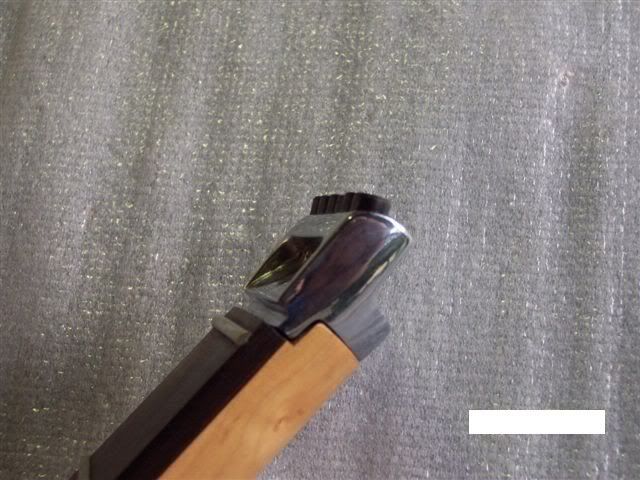
Here is the result :
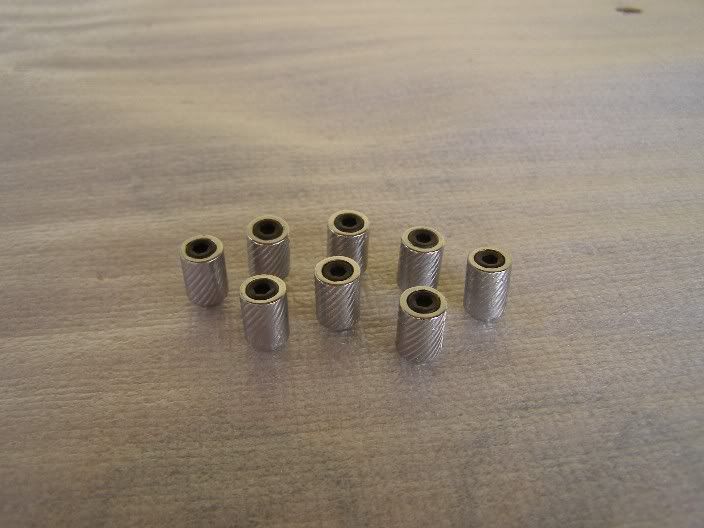
The pegs and the screws :
http://i264.photobucket.com/albums/ii186/a...tar/Tuner18.jpg
-
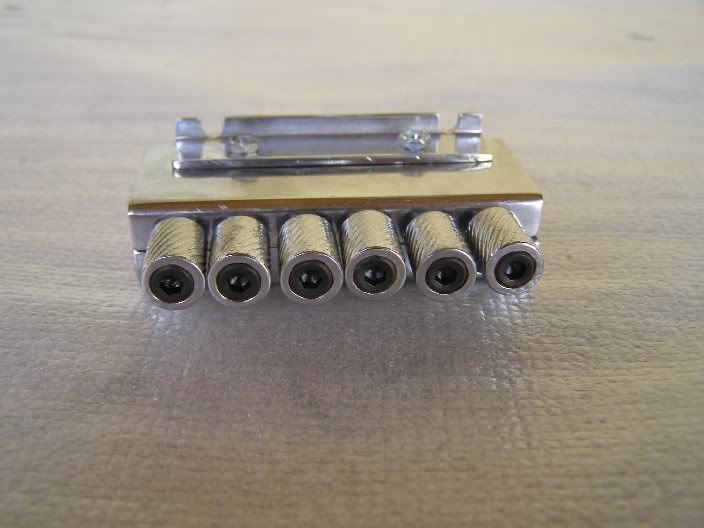
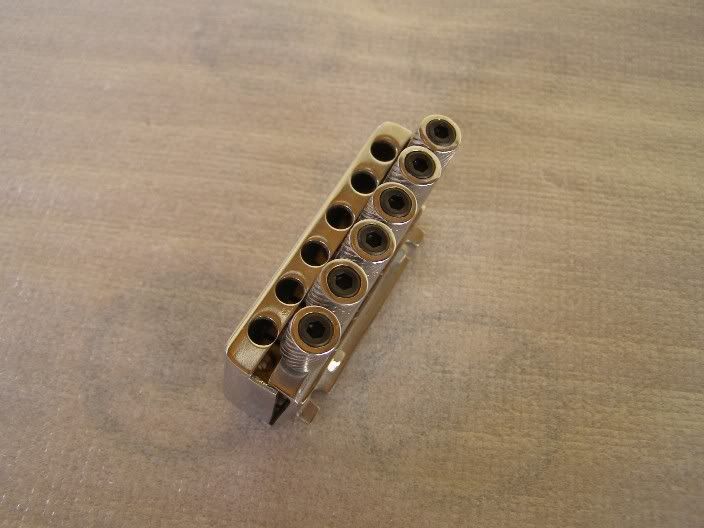
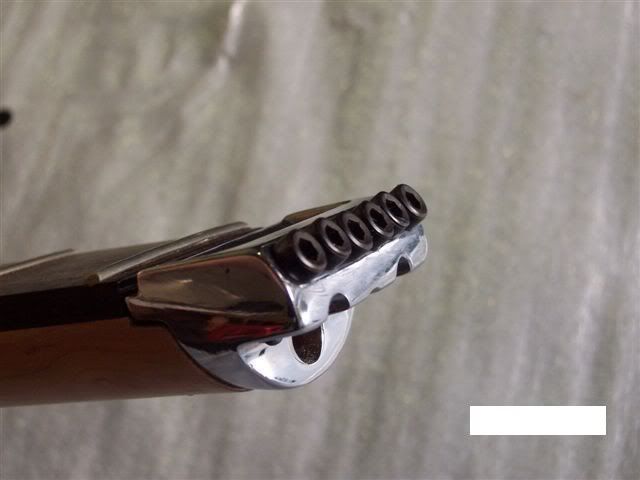
Yesterday I received the tuner hardware chromium plated.
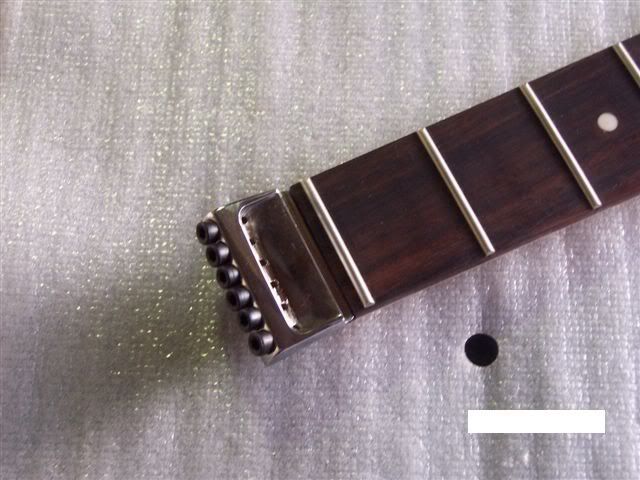
Following is the headpiece with the guide nut in place :
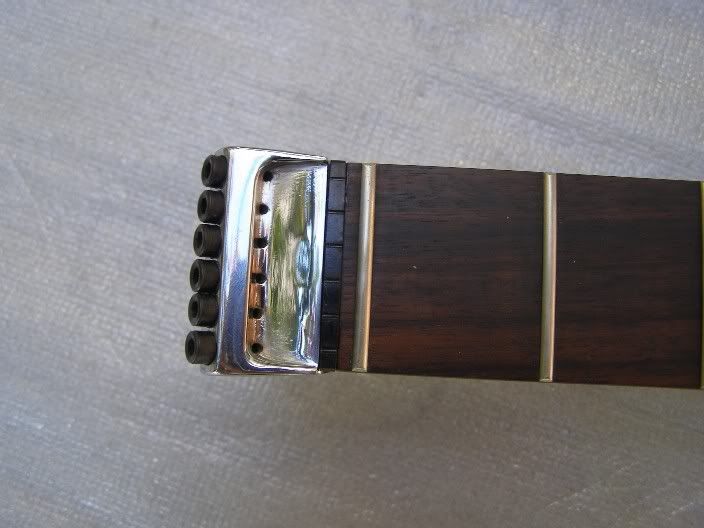
More pics :
http://i264.photobucket.com/albums/ii186/a...Headpiece13.jpg
http://i264.photobucket.com/albums/ii186/a...Headpiece14.jpg
http://i264.photobucket.com/albums/ii186/a...Headpiece15.jpg
http://i264.photobucket.com/albums/ii186/a...Headpiece16.jpg
-
Simply beautiful ! Your son must to be happy !
-
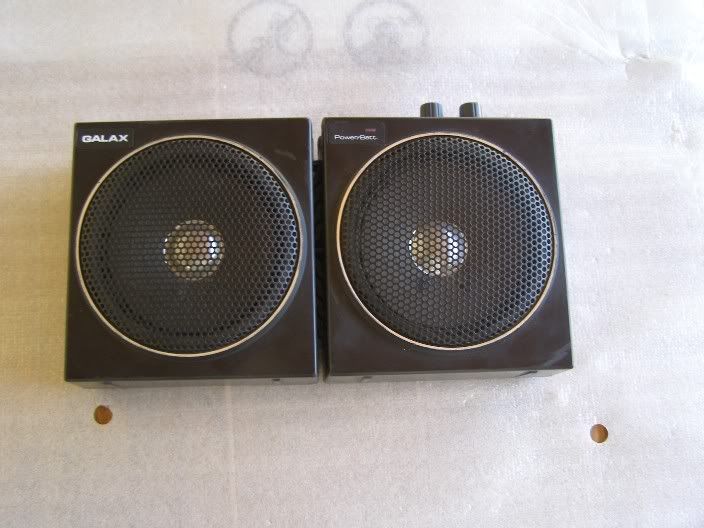
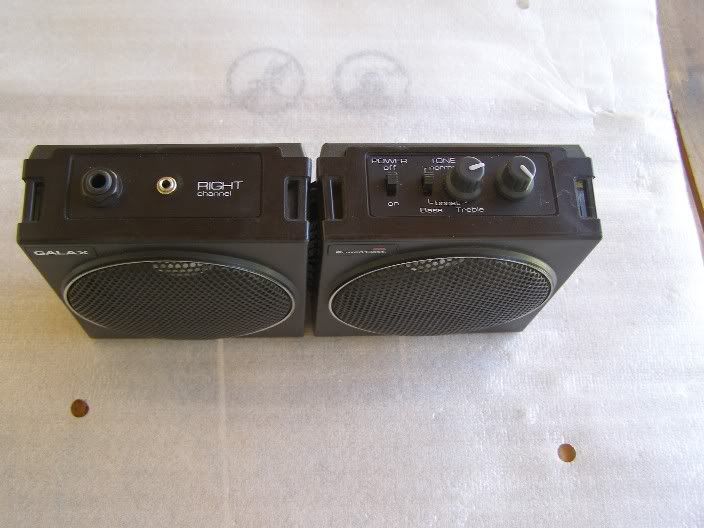
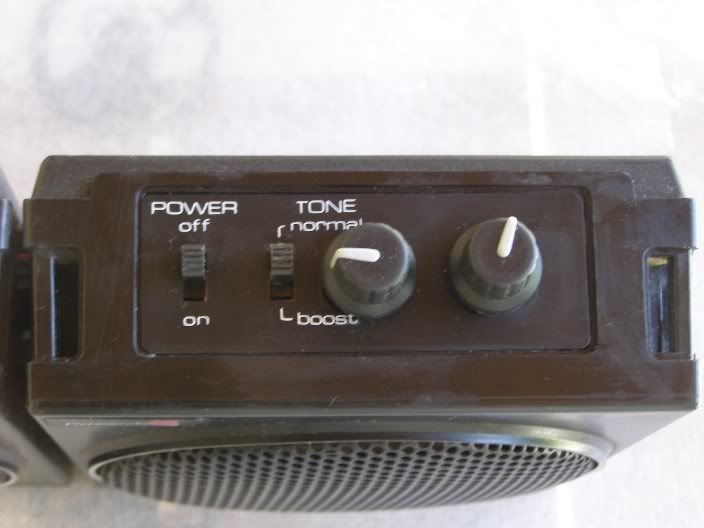
Time for the portable amp. I decided to make a Marshall MS2 clone using the following circuit diagram :
http://homepage.ntlworld.com/s.castledine/greenfuz/ms2.html
The problem was the box but the last weekend we went to my parent´s home and looking in an old drawer I found a little amp that I used with a keyboard when I was a teen.
This amp don´t work but has two 4 ohms speakers inside its black plastic box and switches that I can use.
Then I took the old amp board off and replace it with a DIY MS2 board.
I made a little modification to the circuit to include an input to connect a MP3 player and play the guitar using backing tracks.
Here are the results :
More Pics :
http://i264.photobucket.com/albums/ii186/a...itar/Amp002.jpg
http://i264.photobucket.com/albums/ii186/a...itar/Amp003.jpg
http://i264.photobucket.com/albums/ii186/a...itar/Amp004.jpg
http://i264.photobucket.com/albums/ii186/a...itar/Amp005.jpg
-
very nice! it looks great with the knobs.
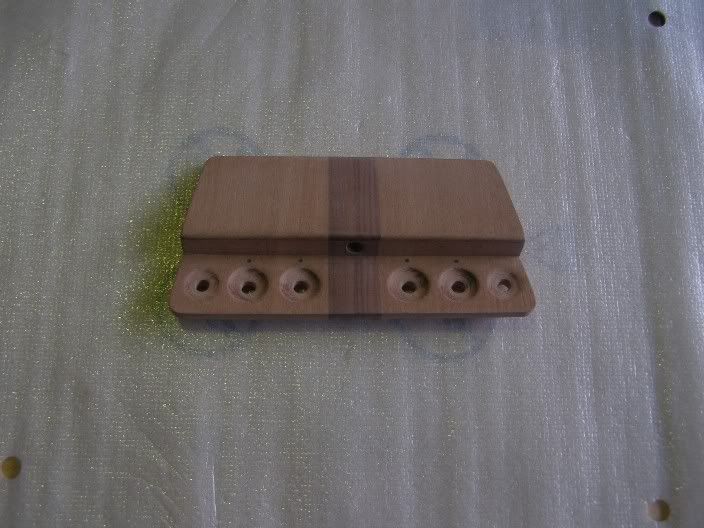
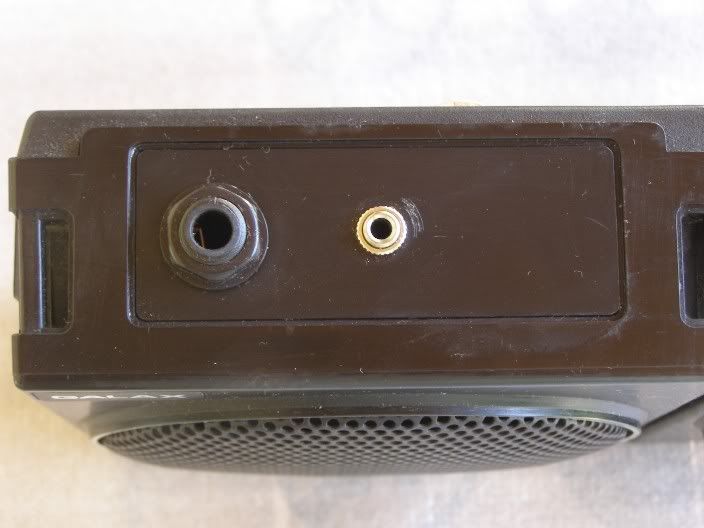
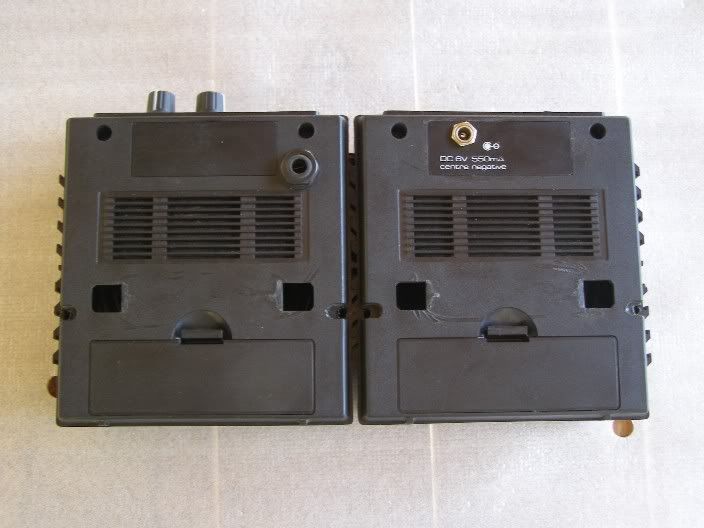
how it's fixed in the body? there are some screw, or what?
Thanks Kiki.
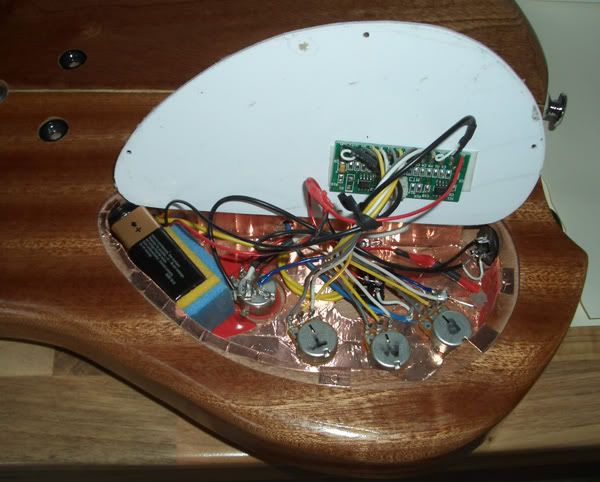
The first idea was to use four neo magnets insected in each corner support and small pieces of metal in each corner of the cover. But I´m not sure if will be safe enough because there are a board and a battery inside... The second idea (and think that I´ll use it) is to use the magnets and only one small screw in order to avoid that the cover opens. If you see with attention to the following picture you can see a hole in the middle of the jacaranda strip, this hole is for the AC-DC adapter input (to charge the battery). The idea is to drill a small hole at the left of that one for the battery charger status LED and a second one at the right to support the cover in place.


Colored Side Dots/bindings?
in Solidbody Guitar and Bass Chat
Posted
+1, Yes you are right these must be leds, because the 21th and 24th fret dots are reflected into the guitar body.