


Andronico
-
Posts
235 -
Joined
-
Last visited
Content Type
Profiles
News and Information
Tutorials
Product Reviews
Supplier Listings
Articles
Guitar Of The Month
Links and Resources
Forums
Gallery
Downloads
Posts posted by Andronico
-
-
Prostheta / Xanthus / Anderekel : I really appreciate your support. This site is a good place to learn a lot and to show our own ideas and results.
Prospheta : about the strap, I don´t know how to make a cow, do you ? Can you teach me ?

Xanthus : don´t worry about the heal joint, the mahogany is about 20mm thick, has a jacaranda strip and I´m using four screws with metal inserts. I think that is strong enough. About the pick ups, I´ll try to make a sample record in the future to show you. Regarding GOTM, I don´t know..., there are several guitars with better characteristics and details than mine.
Thanks again friends.
-
I have to admit I didn't really "get" your guitar at the start but i was impressed by the project!
But NOW having seen it finished...
...will I have the opportunity to flex my voting finger?
Do you have a picture of the guitar in it's case? And how are you going to make your own strap for it?
Thanks man, I´m glad that you changed your mind about this project. Tomorrow I´ll take some pics of the guitar in its case.
-
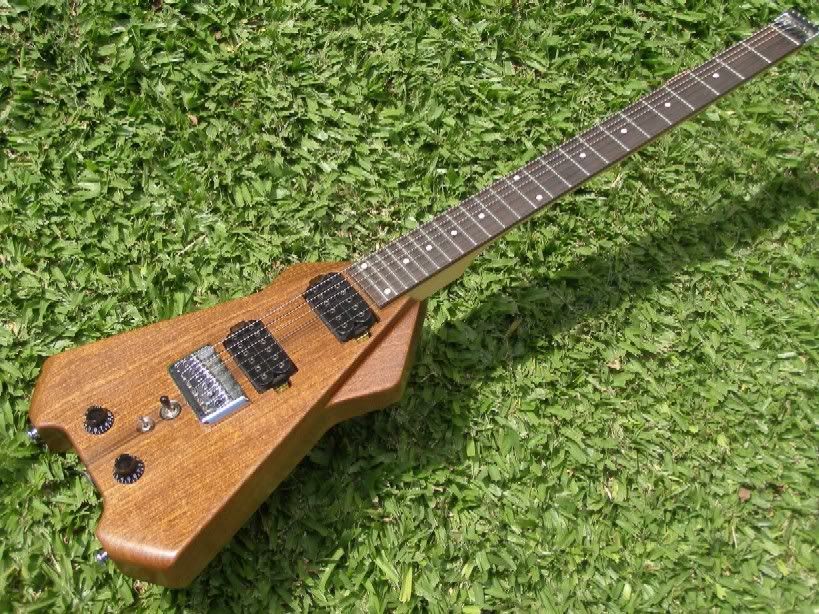
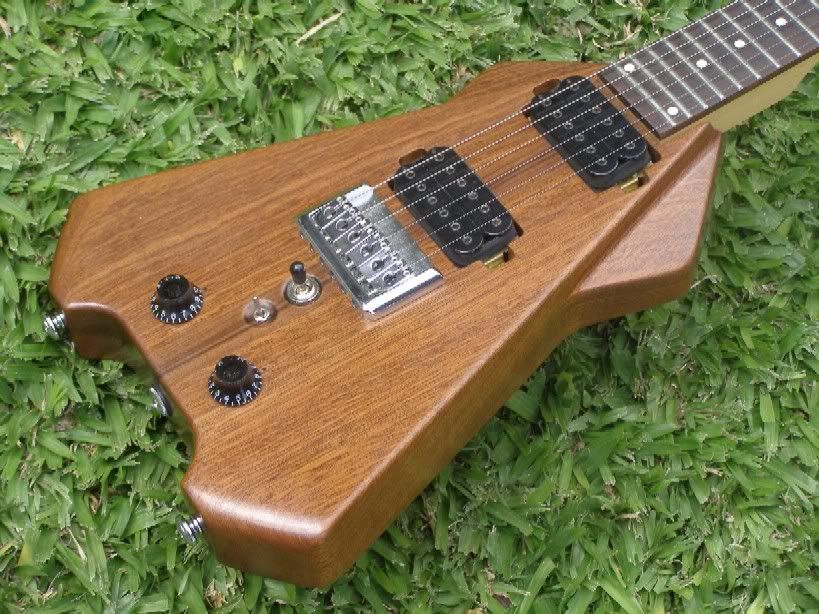
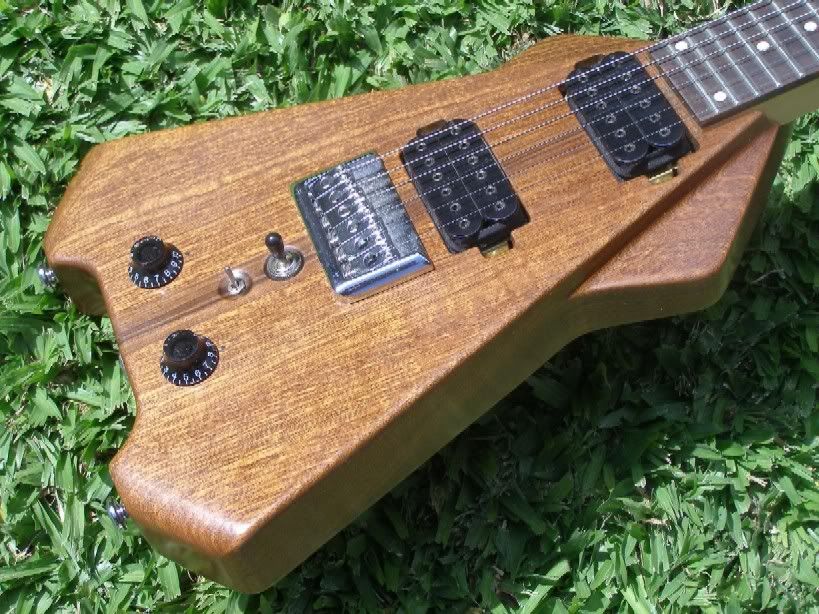
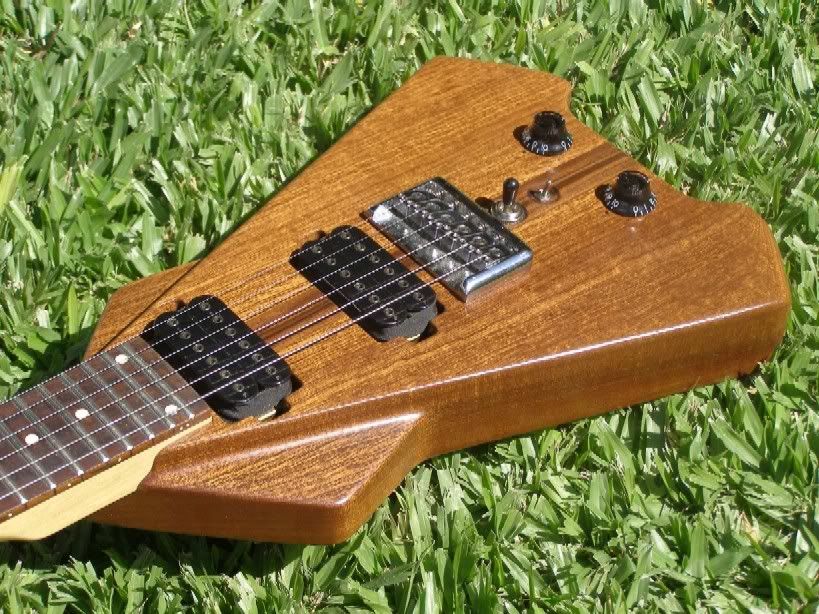
Here are more pics taken outside but with direct light :

More pics :
http://i264.photobucket.com/albums/ii186/a...velGuitar11.jpg
http://i264.photobucket.com/albums/ii186/a...velGuitar13.jpg
http://i264.photobucket.com/albums/ii186/a...velGuitar14.jpg
http://i264.photobucket.com/albums/ii186/a...velGuitar16.jpg
http://i264.photobucket.com/albums/ii186/a...velGuitar17.jpg
http://i264.photobucket.com/albums/ii186/a...velGuitar18.jpg
I feel like a child with a new toy... having all the Sunday to play.
-
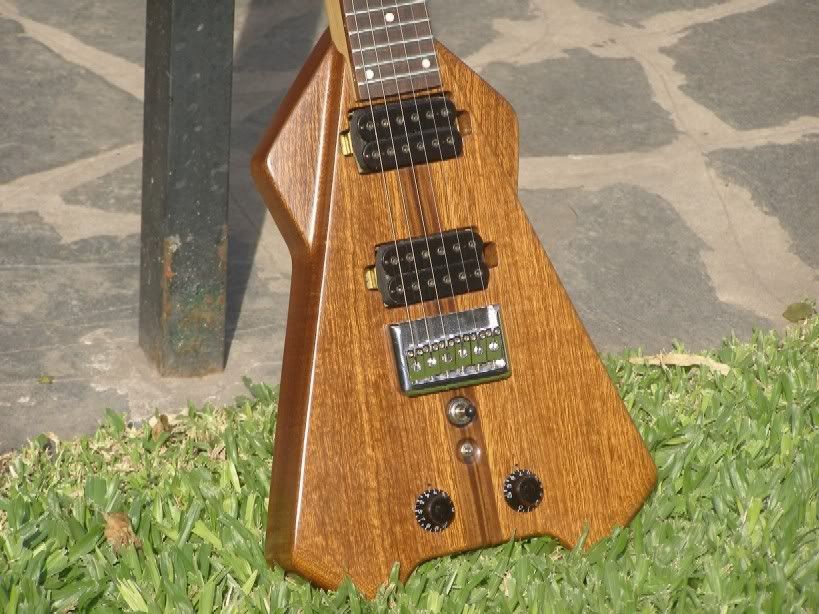
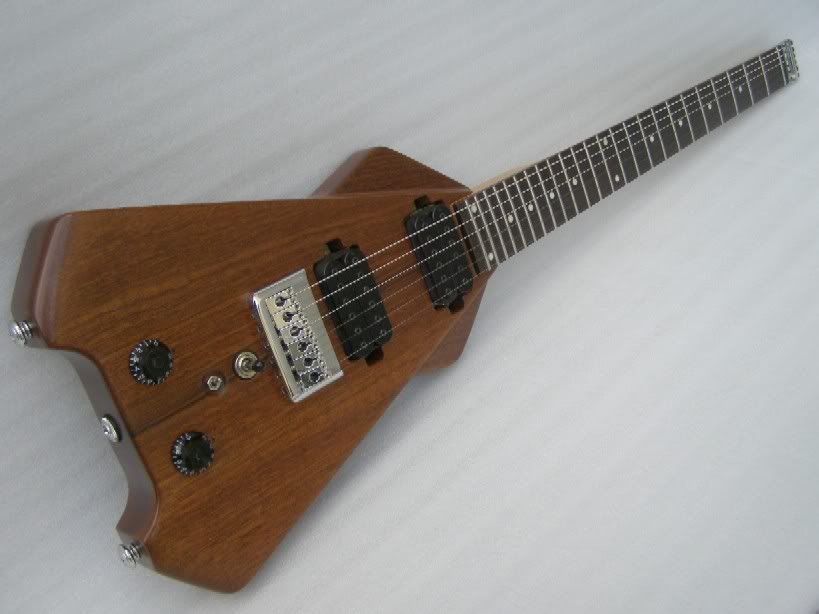
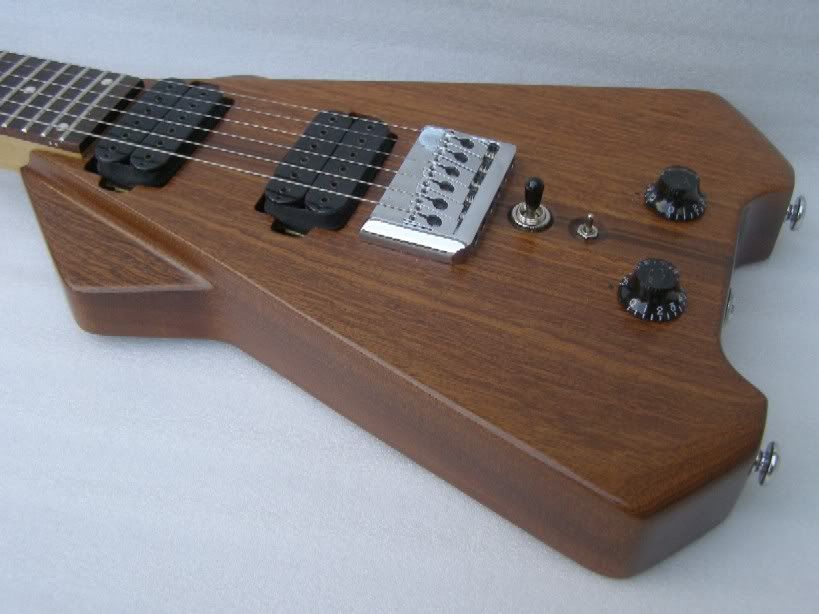
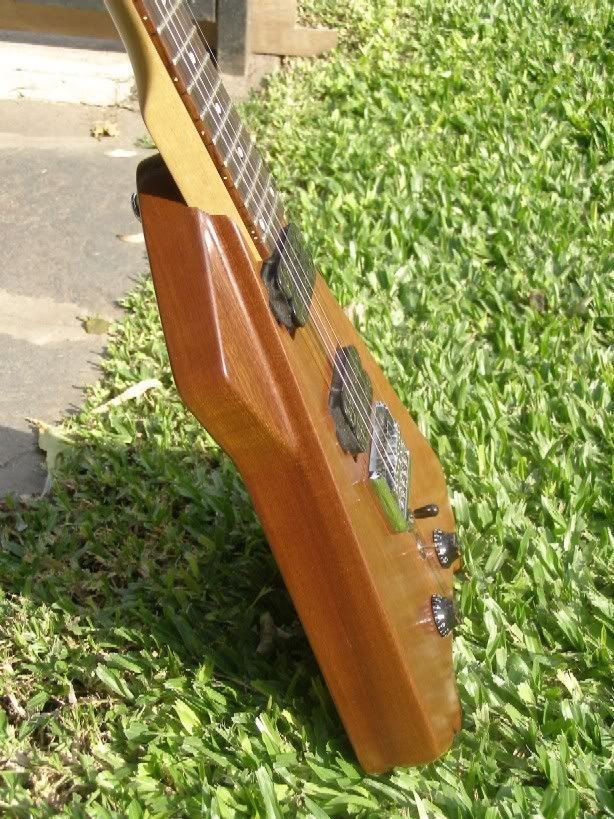
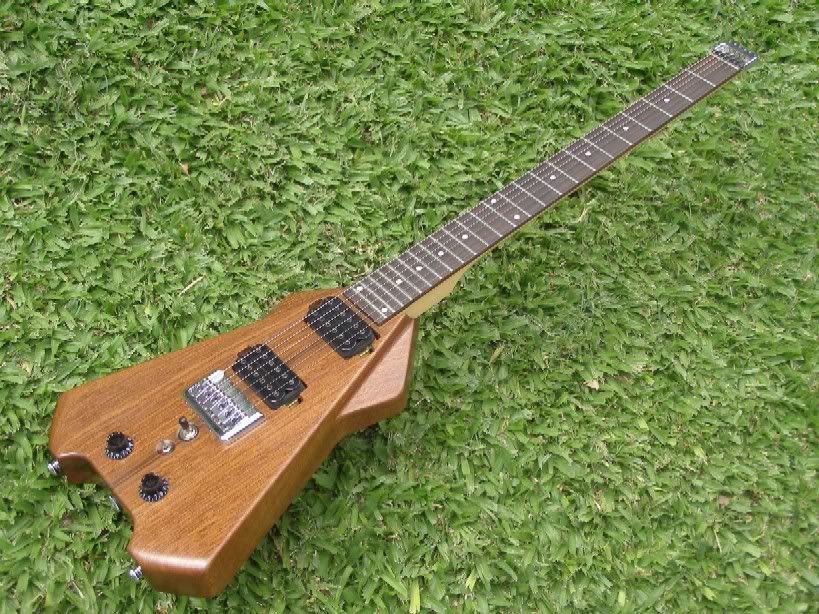
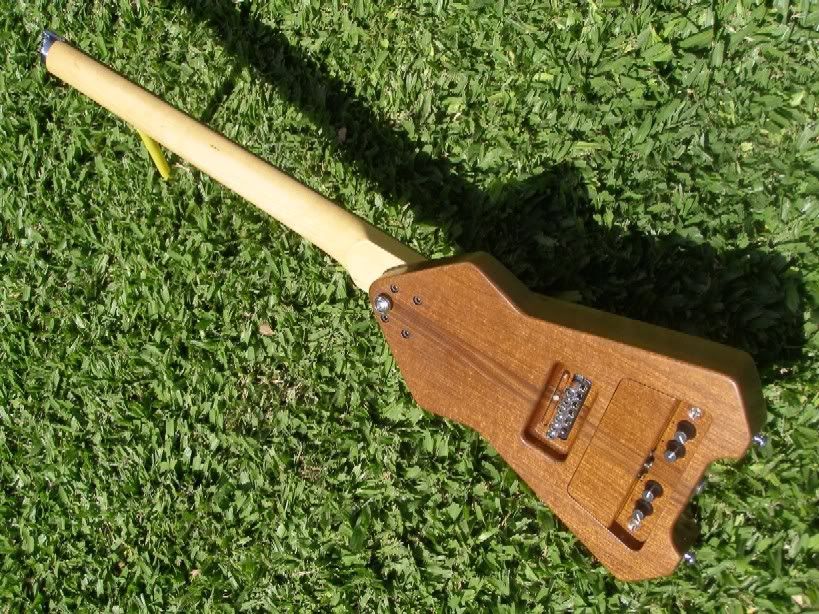
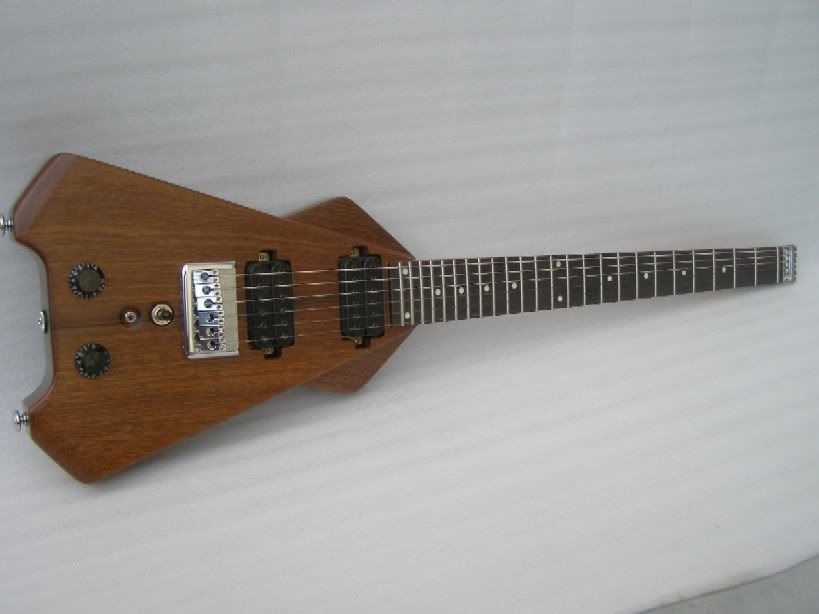
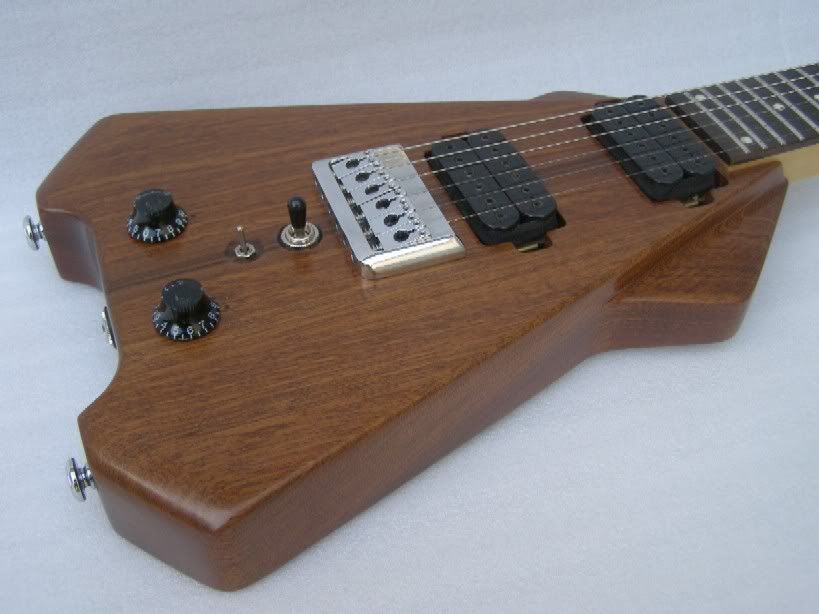
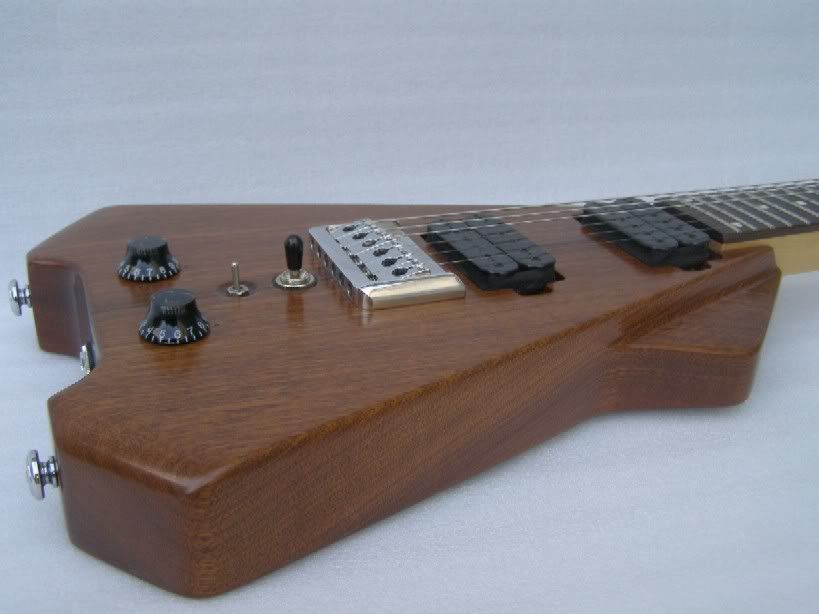
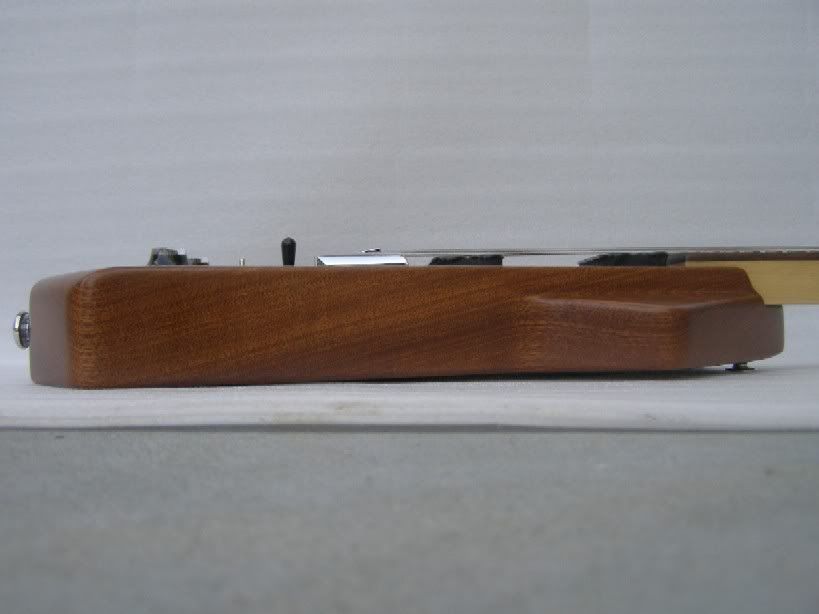
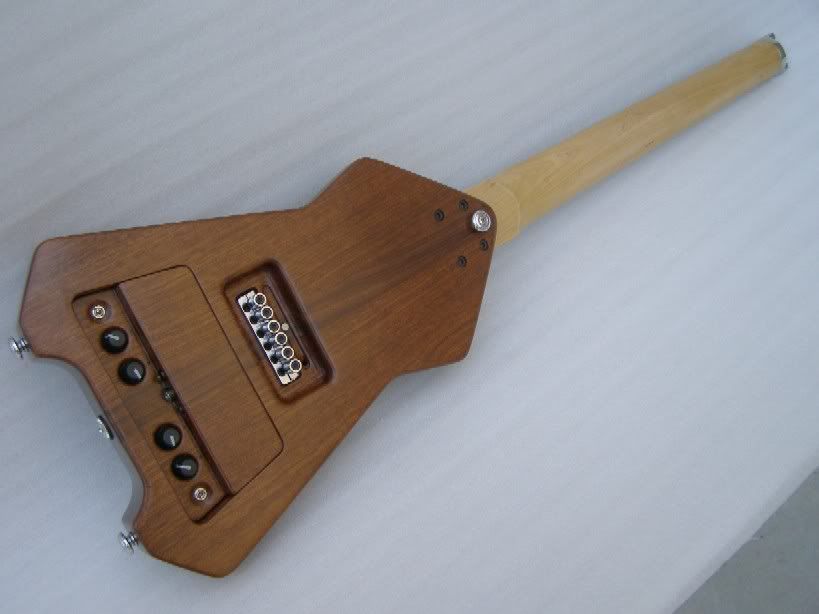
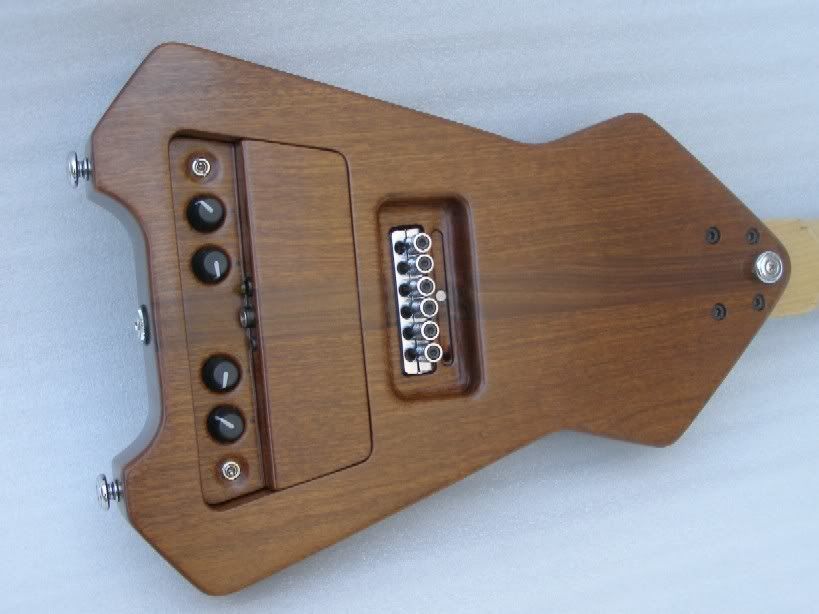
Hi friends, the baby is born !
I was testing the guitar and all works ok, she´s extremely quiet, more than my Gibson S-1 !
(I have to check the isolation of the S-1...)The balance is very well if you play standing and is very confortable to play seated too.
I´m very satisfied with the results. Here are some pictures taken outside without direct light :
More pics :
http://i264.photobucket.com/albums/ii186/a...velGuitar02.jpg
http://i264.photobucket.com/albums/ii186/a...velGuitar04.jpg
http://i264.photobucket.com/albums/ii186/a...velGuitar05.jpg
http://i264.photobucket.com/albums/ii186/a...velGuitar06.jpg
http://i264.photobucket.com/albums/ii186/a...velGuitar07.jpg
http://i264.photobucket.com/albums/ii186/a...velGuitar08.jpg
-
Welcome Steve ! Your first build looks very good and clasy !
-
Admirable work Andronico.
Thank you Prostheta, I´m waiting to see your biohazard guitar finished. She´ll looks beautiful !
-
I hope so, too! This is one of the more facinating builds I've seen, partly because of the unique shape, and partly because putting effects pedals into guitars is great to watch.
About those Hex pickups...... Let us know how you find them. I'm looking at the GF website and I found the ones you have. I'm also looking at the guitarheads website, and they also have a Hex pickup..... I want to know where these mystery pickups came from
Thank Xanthus ! About the pickups, I bought them at GF website about 18 months ago, the price was cheaper at that time. I don´t know who is the manufacturer really.
-
Very intelligent idea, removable cutaway pieces for the bender !
-
Thank you friends for your kind words.
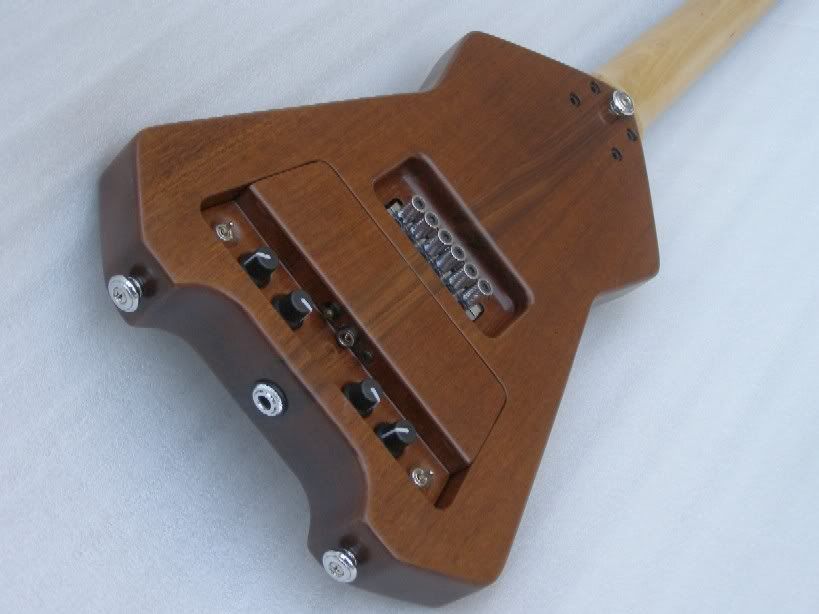
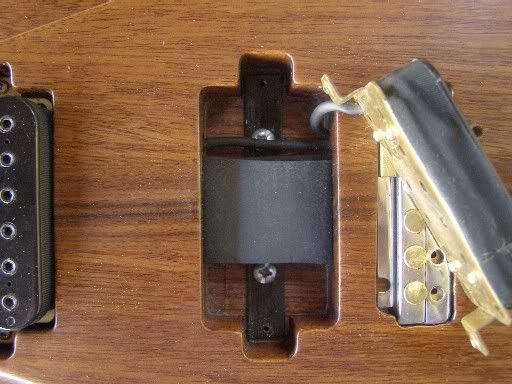
Yesterday during the morning of our legal holiday I made a little progress.I installed the pickups using a small piece of metal in order to screw them to this metal instead of the wood.
Then I used a piece of rubber foam as a spring to adjust the PU´s height.
I spent one hour checking and leveling the frets because the last four ones were a bit more taller than the others. Hope that next weekend I can finish this baby.
-
Beautiful !
-
Wow, that looks very nice, very profession job on the case. Now I'm just waitin' for pics of the finished guitar

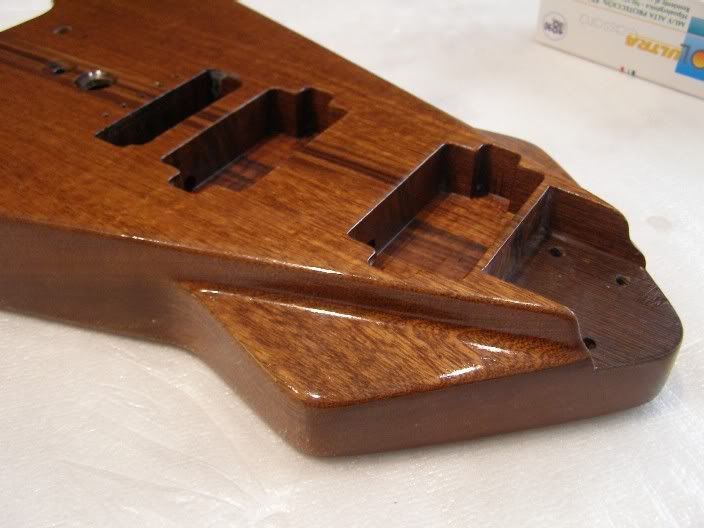
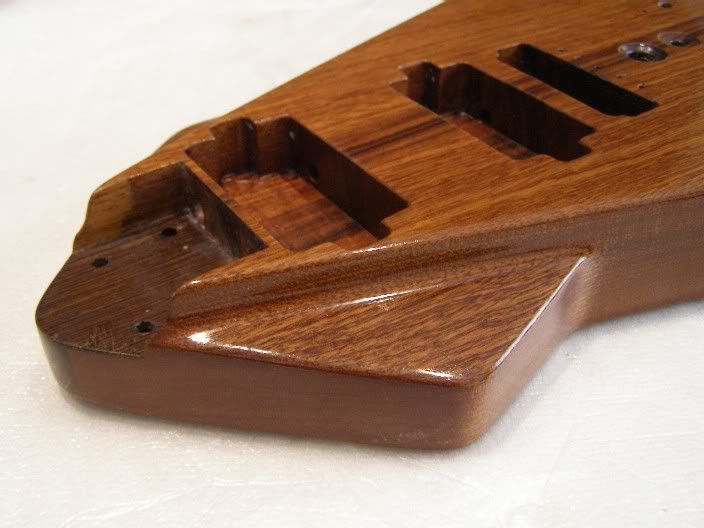
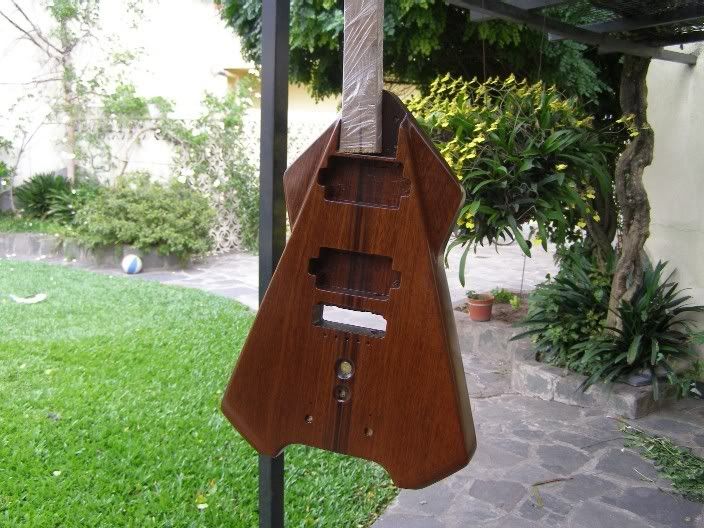
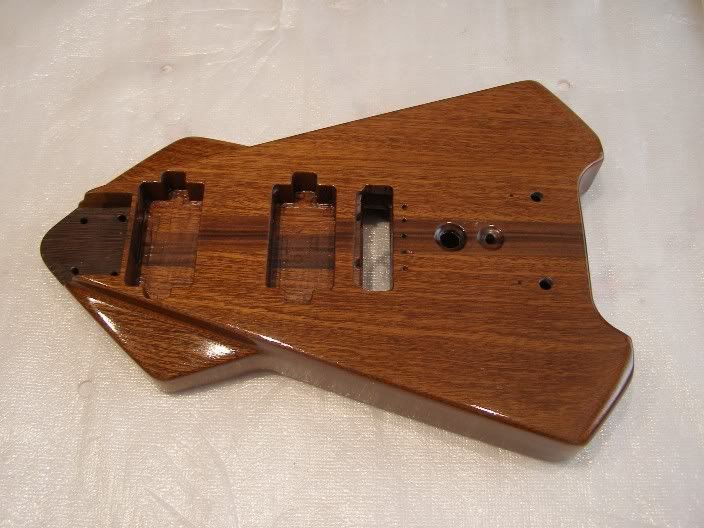
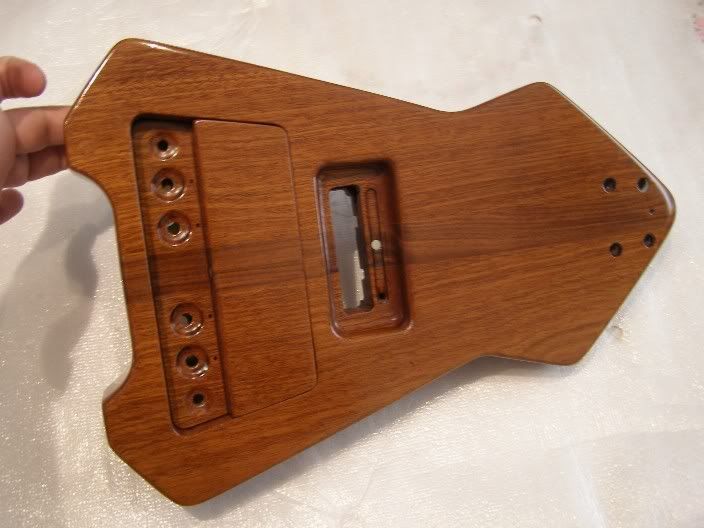
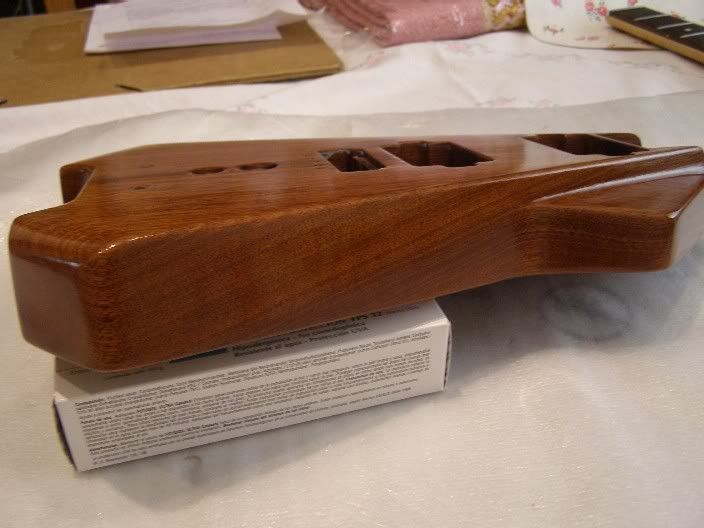
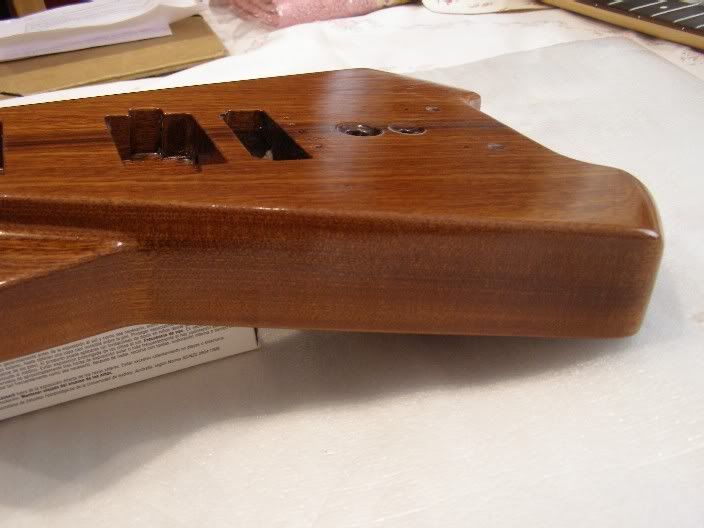
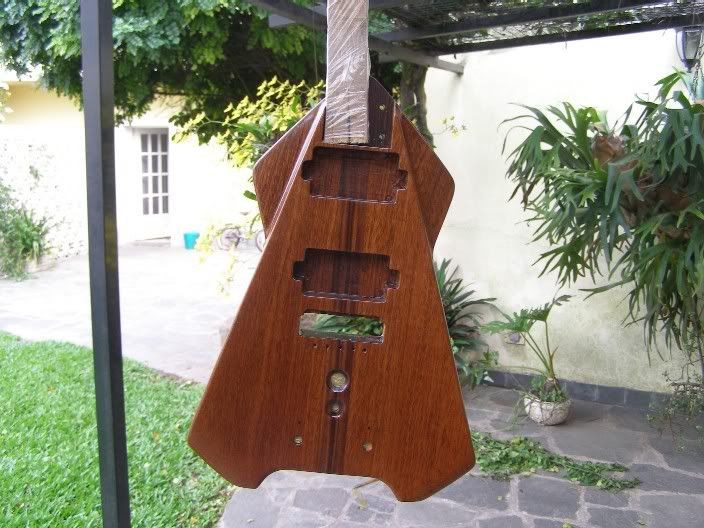
Well, not the finished guitar but the body is ready. The mahogany looks better in person, I don´t know if it´s my camera or I have to take pics outside.
More pics :
http://i264.photobucket.com/albums/ii186/a...tar/Paint06.jpg
http://i264.photobucket.com/albums/ii186/a...tar/Paint07.jpg
http://i264.photobucket.com/albums/ii186/a...tar/Paint10.jpg
http://i264.photobucket.com/albums/ii186/a...tar/Paint11.jpg
http://i264.photobucket.com/albums/ii186/a...tar/Paint12.jpg
Tomorrow is legal holiday in my country, so I´ll have some time to begin with the final joining.
-
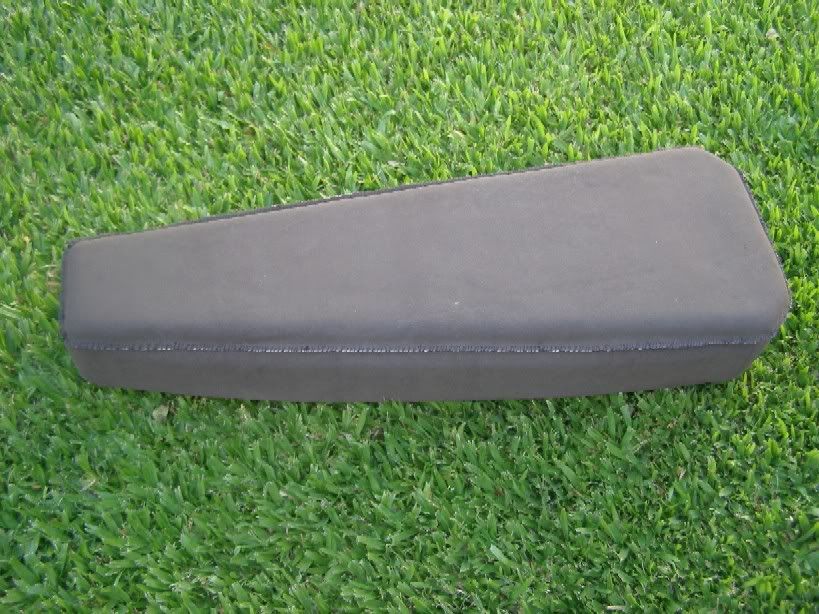
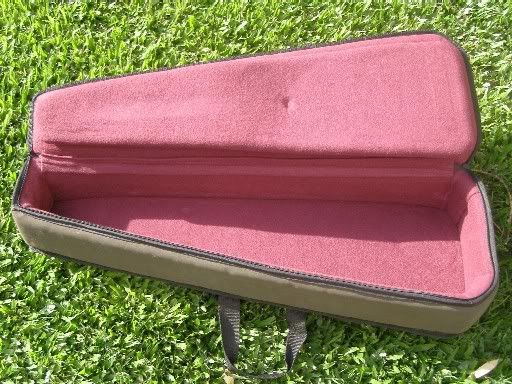
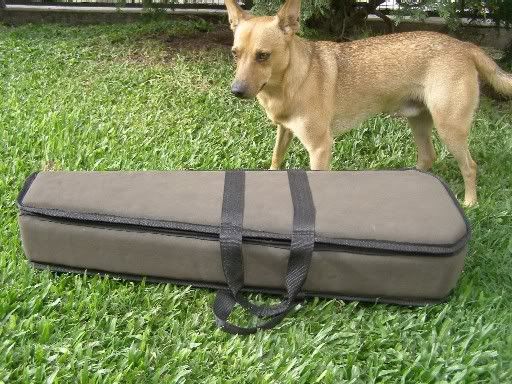
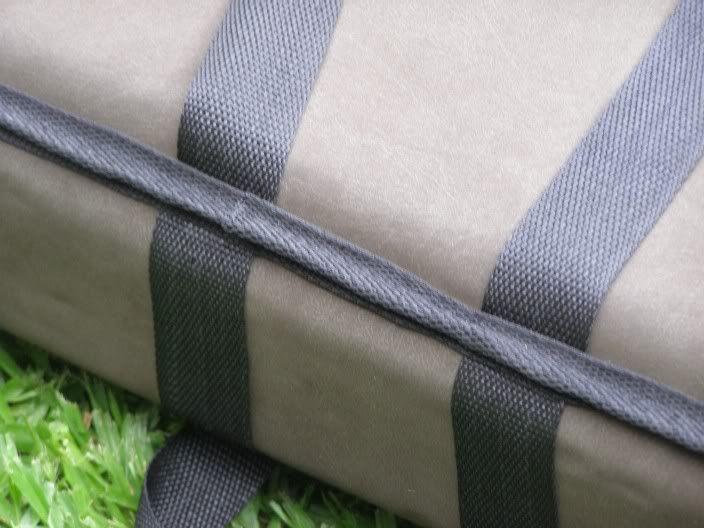
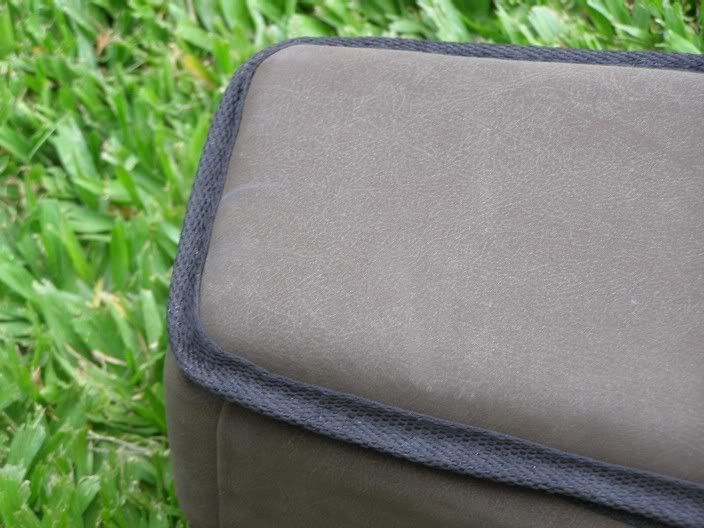
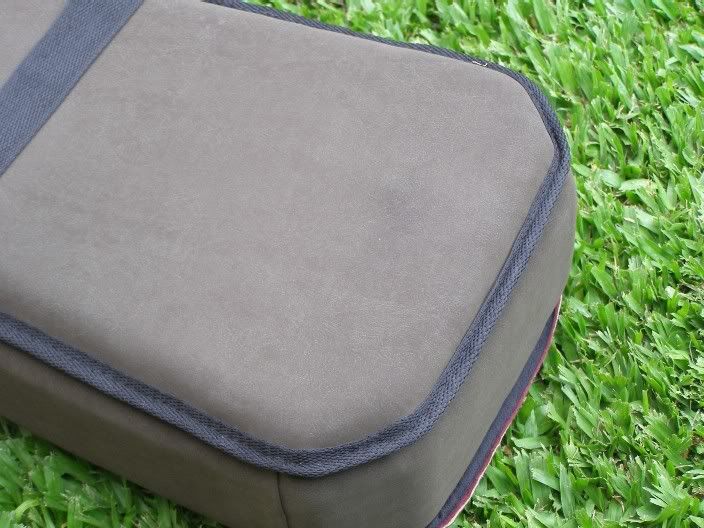
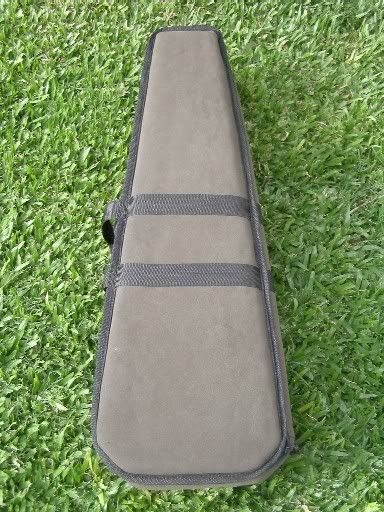
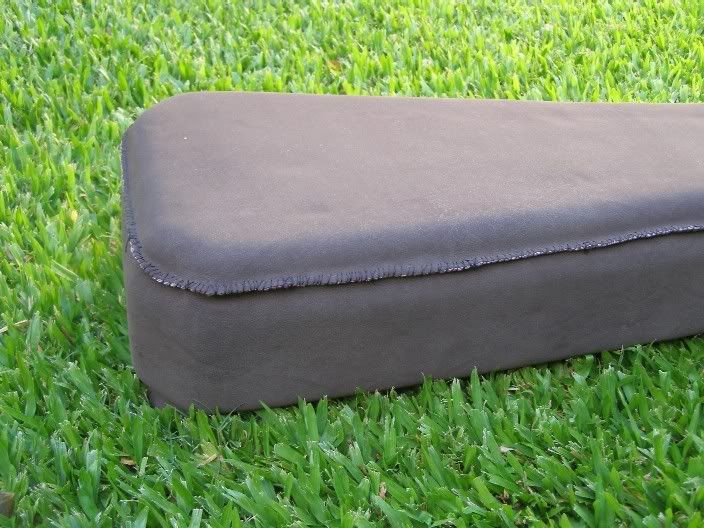
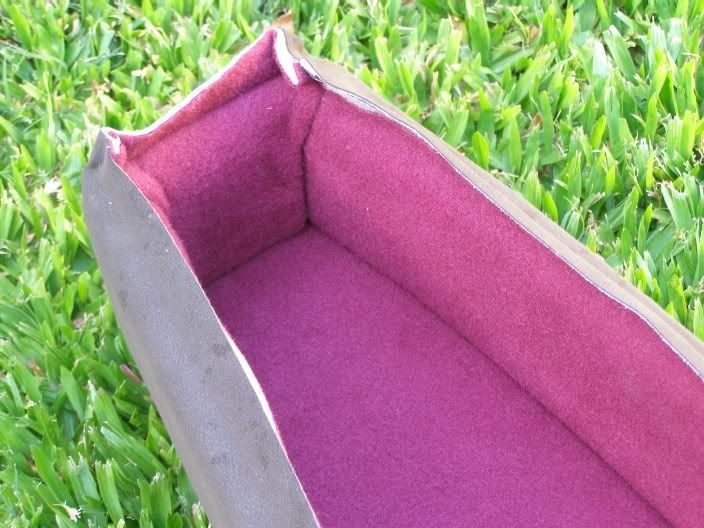
The case for my guitar is finished ! It was more difficult than I expect. Sewing was very difficult because the materials are too thick and I didn´t used the right tools to sew !
But I think that the result is fine.
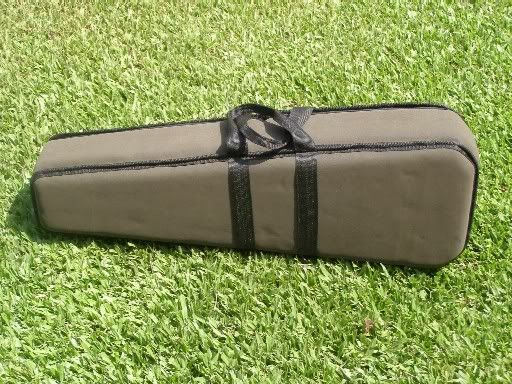
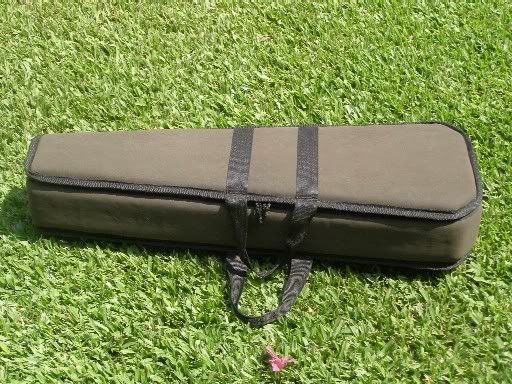
Inside the case :
http://i264.photobucket.com/albums/ii186/a...ar/Funda057.jpg
My friend TAZ examining my final job :
http://i264.photobucket.com/albums/ii186/a...ar/Funda052.jpg
Details of the plastic ribbon used to cover the ugly sewing :
http://i264.photobucket.com/albums/ii186/a...ar/Funda047.jpg
http://i264.photobucket.com/albums/ii186/a...ar/Funda048.jpg
http://i264.photobucket.com/albums/ii186/a...ar/Funda049.jpg
Another pic :
http://i264.photobucket.com/albums/ii186/a...ar/Funda055.jpg
-
Whenever I sew heavy duty stuff (leather, bookbinding, etc.) by hand (oh how I long for my old industrial sewing machine - sold before a move years ago) I used a stiching awl. I'm actually kind of surprised that the shoe repair-man didn't tell you about it - I've always thought it was a standard item for cobblers.
You can get them at hardware stores sometimes - at least in the US, I know I've seen them at Ace hardware and Aubuchon Hardware.
But very nice work all around! Love the total-DIY spirit of this thing.
BUAAAAAA !!!
Why I hadn´t this information before !!! Next time I´ll try to obtain this tool, thanks
-
Fantastic work ! It must be very special to build a guitar for your son and he looks happy too !
-
Thank you guys for the nice words (and bringing this thread back to life...).
Some progress has been made.
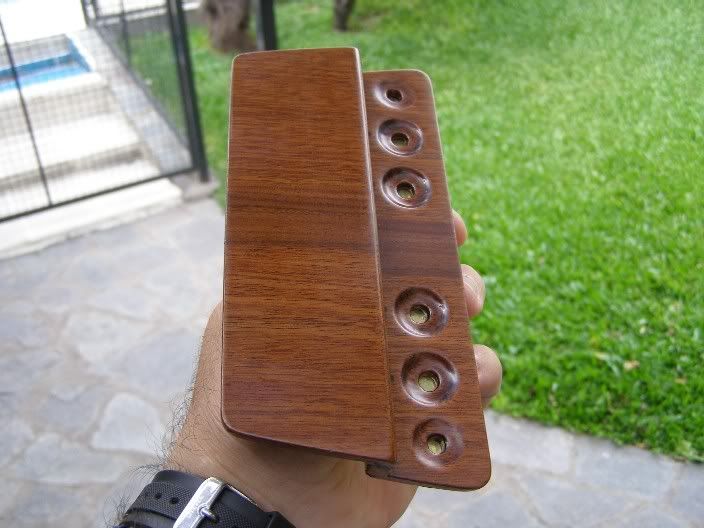
Geo: I'm glad you like the inlays, because there are more.... While my wife was busy with the inlay on the top I made a set of rosewood pickup rings and switch knob.
The rosewood knobs I bought from an ebay shop. Hopefully, with a few coats of Danish Oil, they'll all look similarly dark.
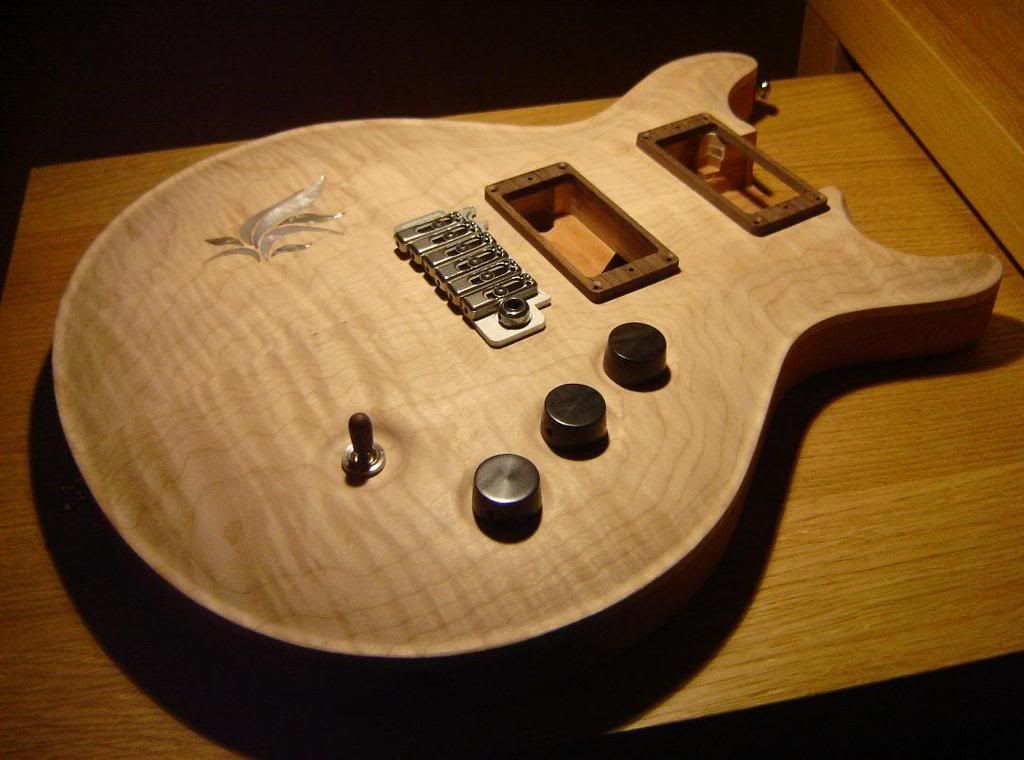
Right now the top and the back of the body are masked and the faux inlay has been lacquered. Next steps will be pore filling of the back and then staining of the top.
Maurits: Where are you located ??
Beautiful work Luis, the pickup rings and switch knob looks great, as usual !
But please congratulate your wife because her inlays are fantastic !
-
Beautiful, beautiful and beautiful !!!
That´s great, congratulations !
-
I really enjoy your thread....The art or guitar speaks for itself,you are a very talented person.I like the fact that you show,if you can think it you can do it.Truly outstanding work...I have been watching this thread sence the begining.It is fun and a insperation to all.Keep up the good work.
Thank you Dean, I really appreciate your kind words.
When I began this project I knew that some of the steps could be a small adventure because I haven´t worked in similar things. I know that my guitar is far away from the perfection but the important things for me are learn new skills and have fun during the process.
-
not really any progress, but I got my fretboard from lmii today
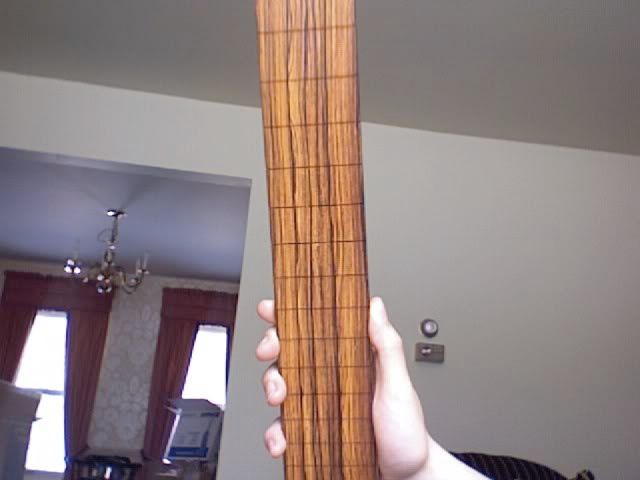
Oh, think I should radius before or after I glue it to the neck and get it final size and whatnot?
What a beautiful wood !
You can radius before glue and left a bit to adjust after the final shape.
-
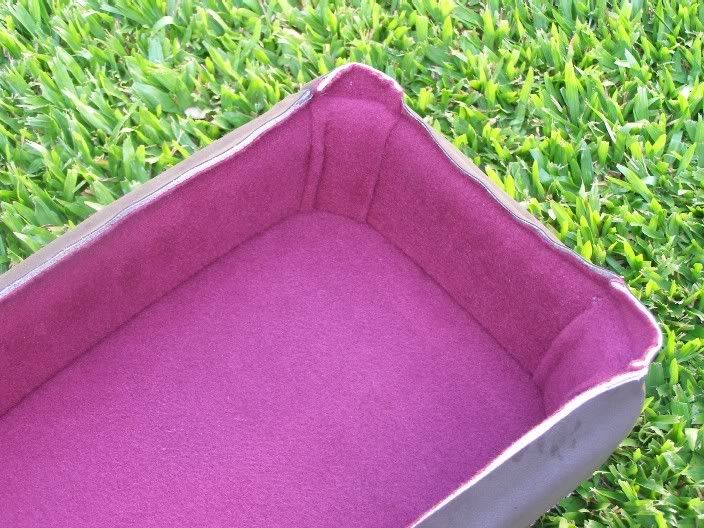
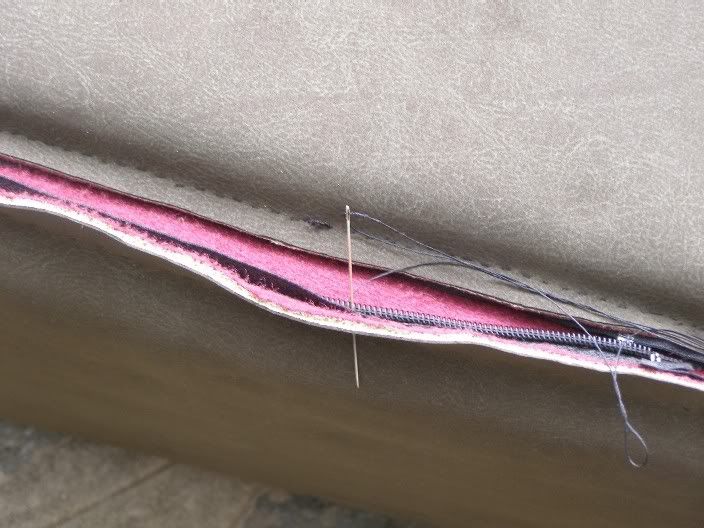
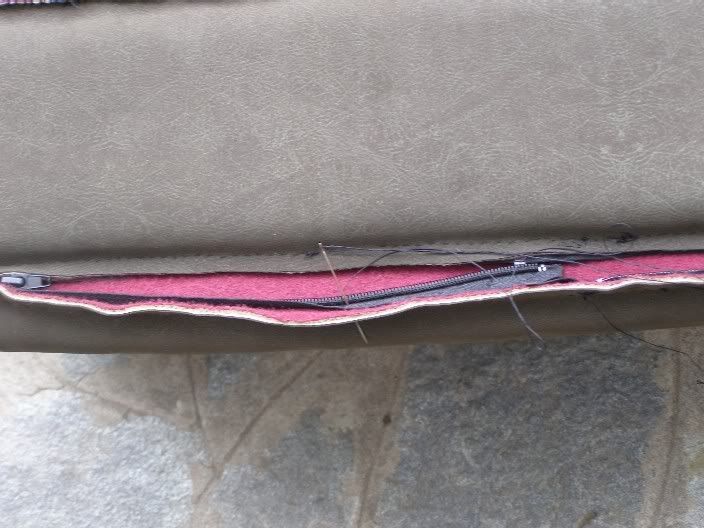
The last three days I was sewing the bottom, the sides and the top.
What a difficult task ! The layers to sew were too thick (vinyl leather + push + push + vinyl leather) and were impossible to use a domestic sewing machine !
I was talking with a shoe repairer and he told me talk the only solution was : sew manually using double polyamide linen, a thick needle and tweezers...
Well I tried this way and I have to say that is very difficult and slow, more than I thought.
The result is very ugly as you can see in the pics, but he told me that in this way the joint will be very strong and then I can cover the horrible sewing with a plastic ribbon.
More pics :
The ugly sewing in all its glory :
http://i264.photobucket.com/albums/ii186/a...ar/Funda038.jpg
http://i264.photobucket.com/albums/ii186/a...ar/Funda039.jpg
Inside the case :
http://i264.photobucket.com/albums/ii186/a...ar/Funda040.jpg
http://i264.photobucket.com/albums/ii186/a...ar/Funda041.jpg
Sewing the zippers :
http://i264.photobucket.com/albums/ii186/a...ar/Funda042.jpg
http://i264.photobucket.com/albums/ii186/a...ar/Funda045.jpg
I really hope that the zippers be strong enough because if I have to change them... I quit !!!
Now I have to put a ribbon all around the case, and the handles.
-
Oooooohhhhh, I like the color of the stain, I'm not a huge fan of staining wood, just me, but that one turned out very nicelyman, it's incredible how the colors of the wood changes with the finish...
it's always an unexpected reaction (for us, not for the professionals...)
it became very dark, but it still beautyful!
and the case is very nice too.
Thanks Anderekel and Kiki,
Yes the mahogany turns dark with the peteribi stain but is you look at it under the sun light or a strong light you can see the wood stripes very defined and the rest of the wood with a little honey colour.
These days I was working in the case, perhaps I can upload some pics later.
-
Apparently you are not sure about the colour code of your pickup, in order with this I suggest the following.
First try to test each coil separately to be sure if the colours of each coil are right. Begin with the green wire and test this wire with the other ones to determine the other extreme of this coil. In this way you can know the right colour of each coil and if both are working well separately. If this is the case you can join the end of the first coil to the beginning of the other one and test again. If works well the problem isn´t the pickup, perhaps the pot or toggle switch.
Thanks. I had not thought of it that way. I have done what you said and green + white is one coil, brown + yellow is the other coil. Both coils work separately for the neck pickup (which makes sense because it is working OK) but only brown + yellow work for the bridge pickup.
I guess this means that there is something wrong with one of the coils on the bridge pickup.
Any suggestions on how I go about fixing that coil?
You can try taking off the tape that protects the coils (please be very careful) and see if one wire is broken in the joint between the coil and the external wire. If the coil is broken inside, the only solution is replace the pickup or re-coil it (not easy for a first time...)
-
I have nearly finished my first build but my bridge humbucker has stopped working.
Both humbuckers are made by Schaller and have four wires - green, yellow, brown, white. Apparently, for standard humbucker green is hot, white and brown are joined together and yellow is ground.
I tested both humbuckers with a multimeter before putting them in and they were as expected but now the bridge one does not give a reading when using the meter across the green and yellow wires. It does give a reading across the brown and yellow.
Originally, both pickups worked correctly in the guitar which has a 3 way toggle switch, one volume and one tone.
Does anybody have any idea of what I am doing wrong or how I go about fixing the problem?
Many thanks!
Apparently you are not sure about the colour code of your pickup, in order with this I suggest the following.
First try to test each coil separately to be sure if the colours of each coil are right. Begin with the green wire and test this wire with the other ones to determine the other extreme of this coil. In this way you can know the right colour of each coil and if both are working well separately. If this is the case you can join the end of the first coil to the beginning of the other one and test again. If works well the problem isn´t the pickup, perhaps the pot or toggle switch.
-
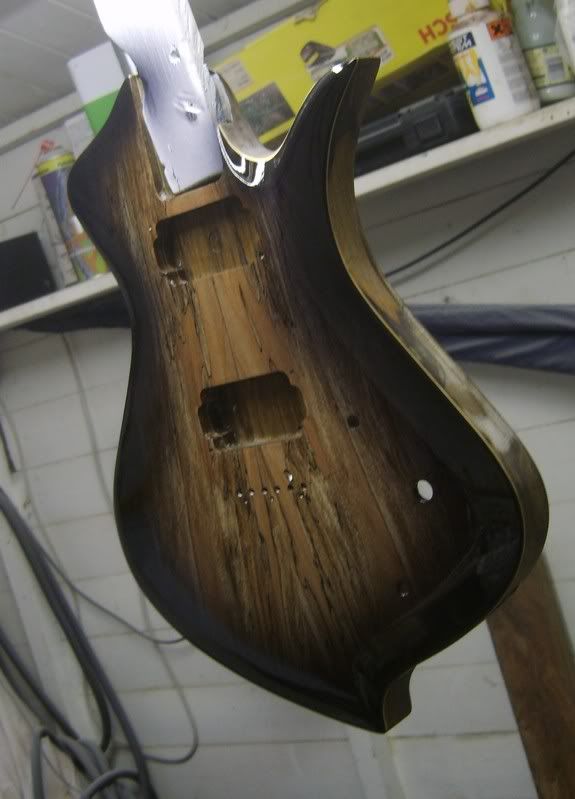
Last days I stained the guitar body and the GT2 cover. Then I began with the clear coat.
The following pictures shows the body and cover with the first four coats.
More pics :
http://i264.photobucket.com/albums/ii186/a...tar/Paint02.jpg
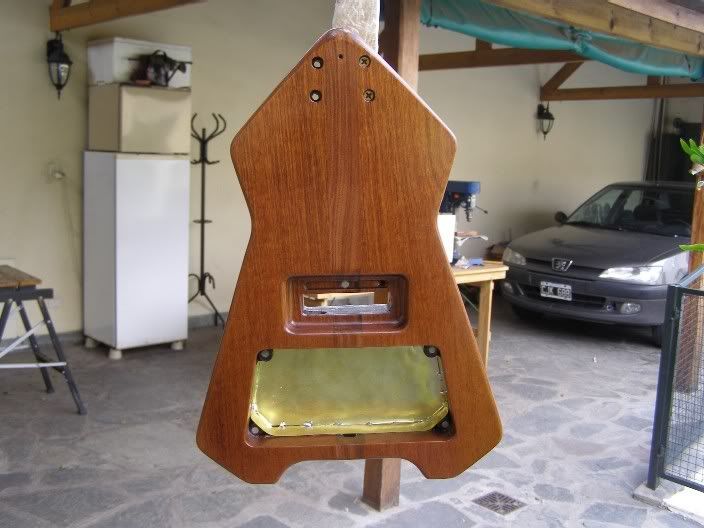
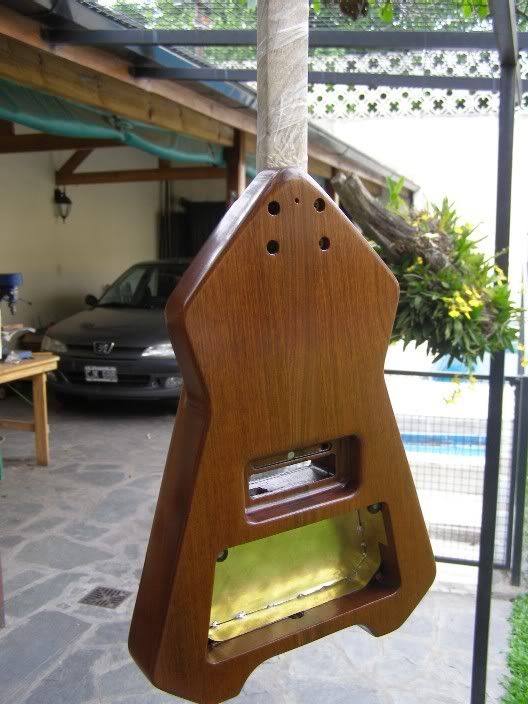
After the 4th coat I covered the GT2´s cavity with a brass sheet :
http://i264.photobucket.com/albums/ii186/a...tar/Paint03.jpg
http://i264.photobucket.com/albums/ii186/a...tar/Paint04.jpg
-
well the person having the vendetta said she loves the burst so we can proceed with the clear now. I think it was my distressed TOM strat that made her want this kind of finish so much... but this one will be shiny and not left in an unpolished state
looking forward to getting some clear on it - i dont think the back will be as colourfull as originally hoped for as the wood has faded - should still be pretty nice though
WezV, I love the shape of your Vendetta
Perhaps my second guitar will be inspired on her.


My First Acoustic Build A Reso Squareneck
in Acoustic and Hollowbody Guitar Chat
Posted
I´m sorry to hear about it Mike. This project was looking great.