


djhollowman
-
Posts
453 -
Joined
-
Last visited
Content Type
Profiles
News and Information
Tutorials
Product Reviews
Supplier Listings
Articles
Guitar Of The Month
Links and Resources
Forums
Gallery
Downloads
Posts posted by djhollowman
-
-
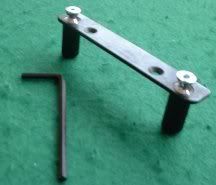
My major concern is those trem studs again - I have suspicions that MDF isn't going to hold those studs much better than the basswood, and you'll have those leaning again shortly.
Yeah, I'd have to agree. If you must persist with the MDF you should at least use one of these for extra strength:
DJ
-
Hello, and welcome!
Yup, I see nothing wrong with this for a project at all.
I have a pink BC Rich STIII superstrat, well, it's actually got a blue metallic flake for an interesting effect!
As for the body, I'd most likely go along with the others here and suggest not bothering to fill-in the pickup rout area - it makes for more possible pickup configuration options at a later date.
Filling up the trem rout (if you're never likely to use it) is a good option if you're considering a refinish anyway. Have you thought about the back rout? (The area where the springs are, I mean)
Where you going neck-wise? Standard strat?
DJ
-
I've seen those enormous brass blocks before on eBay.
Every time I look at them I just wonder if the extra girth would mean that you'd get less travel available with the bar, because the block would be more likely to come into contact with the guitar body and prevent movement.
Hmm.

Anyone here made the switch, and could comment?
DJ
-
Yeah, lots of nice touches there!
How does it ♫sound♫?
DJ
-
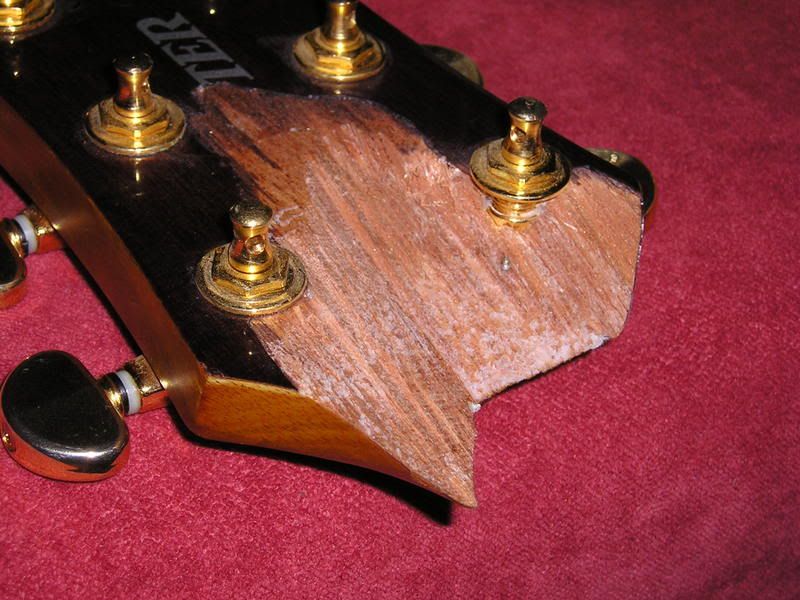
Chances are the original finish was amber coloured - the pale lines where you lost lacquer strongly suggest this, as does the pee-coloured slurry when wet sanding
However, you can't easily colour CA prior to drop filling, so that's why you need to stain/dye the light lines first. What you've got now looks pretty good, and you're unlikely to get an invisible repair on a poly finished instrument anyway. I'd call it done.
To buff out I use Meguiars scratch-X. You will need to sand to at least 1500 before buffing as the scratch X isn't abrasive enough to remove anything coarser than that without taking forever...
Thanks for your help! I'm pretty pleased to read that you think it looks pretty good - this is my first repair like this. I've learned a lot already with this one.
I made absolutely certain that it is structurally sound, because that's obviously the key thing - doesn't matter how pretty it is if the repair isn't strong enough.
I'll check out that Meguiars as well.
It's nearly done actually. Still have to thin down the front veneer a bit, then it's onto finishing the front. I have replacements made for the (cheesy) original stickers already.
Thanks again,
DJ
-
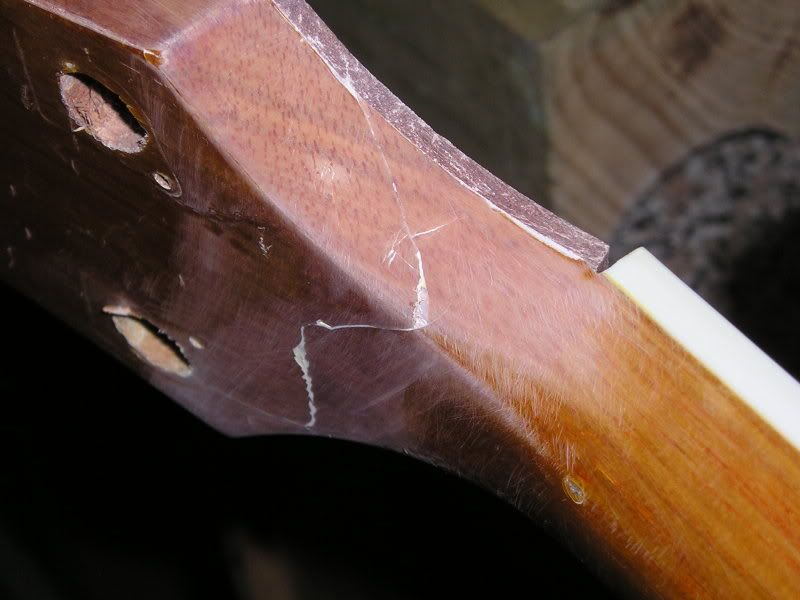
Here's a quick update:
It's getting much better now. I still don't have the colour match as accurate as I would like yet. I'm applying wood dye, but it needs to be more yellow.
There's still a visible line where the break was, but as I didn't have the broken chips to glue back in, I had to fill the slight crack with CA and sand flat. It's lovely and smooth, just wish I could make the line less visible!! (The straight line across the back of the headstock was always there - that's where the original headstock-to-neck joint is)
DJ
-
I considering 42, but my 12 is awesome because of ALT+NUM0176....."°".
I'd never heard of those ALT+NUM shortcuts! Cool! Thanks.
BTW - here's a nice one: ♫ (ALT+NUM14)
Sorry for the hijack.
DJ
-
Oh yeah, PSW: I reckon inlaying the back would be a serious amount of extra work!
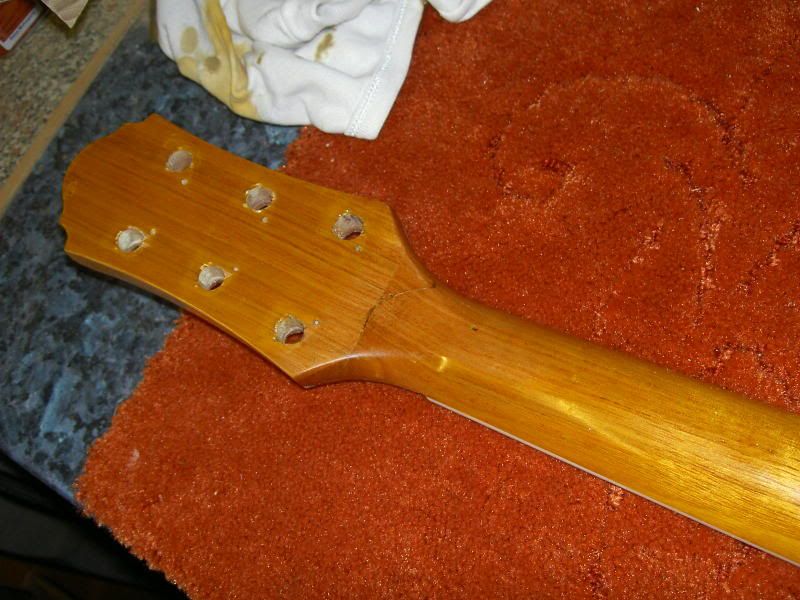
I have veneered the front, and it's come up really well. I deliberately went for quite a thick veneer, thinking it will add strength to the repair. It's thicker than I would have liked, to be honest, but I suppose I can always sand it thinner!! I've already had to shape it at the area where the nut sits.
This was how it looked when I got it:

The original veneer on the front was really thin, <1mm. My new one is about 2.5mm. I had to take some of the front off before glueing the new one on. I think I will sand the new one a bit thinner though!
DJ
-
Aha! OK, thanks! Makes sense.
I have no dyes or stains. What kind would I need? Does it matter if it's oil or water based?
(BTW, don't know if this is significant here or not, but - when I was sanding the existing finish, the dust was coming off in a distinctly yellow colour. To my mind this would suggest a coloured finish was originally used, as opposed to a clear finish over coloured wood.)
I'm comfortable with the CA/laquer drop fills part. Done that before.
Finally, what buffing compound(s) would you recommend? There's a bewildering array of them available!!
Thanks again,
DJ
-
Right, that's the area sanded level with 600 grit - what's next please?
DJ
-
I had this problem once, I bought a brand new "used" Floyd from eBay. The seller said he couldn't install it on his guitar. Whatever it was cheap so I got it. The problem was the block was installed backwards. So instead of the springs going into the block facing \ way and staying in they were sliding out because they were going into the block / way. I have a spare Floyd block I will sell if you need one.
Hmm, that's interesting! Looks like the one in the photo could have this problem too - notice the holes on the side of the block are facing away from the springs?
DJ
-
Could maybe the cavity not be deep enough and so the angle of the springs isn't steep enough for them to stay in place?
...was exactly my first thought.
I had a similar problem recently, when replacing a non-recessed trem with a Floyd copy. Because the copy Floyd was designed to sit in a recess, the springs were actually touching the underside of the guitar at the bottom of the spring cavity.
I ended up routering a little wood from the spring cavity area next to the trem block (the bit just in front of where the springs join the block) which helped, but is by no means a satifactory conclusion! When strung to pitch, the springs are not sitting in their inteded correct shape.
Pretty sure a larger block which goes deeper into the guitar body would sort your/our problem.
Interesting to see what the other guys suggest, though.
DJ
-
Yep, what neil said, they are trademarked. Your best bet might be to buy some pearl, a jewelers saw and blades and cut out your own.
Yup, or find someone with a CNC machine!
DJ
-
"Real Tree" - lol!
Anyway, it might be worth pointing out, possibly for the benefit of the original poster, that an Ibanez RG body is used in the tutorial on this site. This is, of course, in itself a reference to the Ibanez Jem FP series. The Jem FPs were factory-finished in a floral pattern (hence "FP") which was actual cloth material (patterned to match the curtains/drapes of Steve Vai's home!), not a painted effect. The cloth was glued to the body, clear coated and polished to a high gloss. It is my assumption that the intention of the tutorial onsite here is to demonstrate how you can replicate that effect yourself.
I have followed a few build threads (on other sites too, like Jemsite and sevenstring.org) where folks have indeed used this method, and achieved some remarkable guitars.
Personally, I think the original FP Jems look beautiful (not so sure about the blue ones
), and I fully intend to try something very similar next year! DJ
-
Hmm....
B or C.
B could look good if the "sweep" of the dots kinda mimicked the sweep of the body shape??
C already looks good!
BTW - I think you'll all find that Washburn have been using that dot pattern (like C) for years! My WR150 is like that.
Like so:
DJ
Why is "the administrator not allow"ing links to photobucket?????
-
The pickup rings are from Fretsonthenet - really great customer service and as you say a classy match to the EMG's
I have a pair of those wrapped around the EMGs on my Aria 7 string. I, too, was well impressed with the quality and service, and can also recommend fretsonthenet.com.
especially in dropped D which this guitar looks like it wants to be played at! )Dropped D on a 7?? You sure??
Dropped A maybe.Anyway, I really like this guitar! Today I've just seen on this forum alone: a white Tele with black binding, and this black guitar with white binding. Both look fantastic! Conclusion: my next build will have contrasting binding! I've been toying with the idea for a while, but these make me wanna go for it.
Nice work!
DJ
-
Nice! I'm not the world's biggest Tele fan, but I do dig this baby! Love that contrasting binding - very nice touch!
On a related note:
I'm assuming you've all seen the Slipknot Jim Root Tele?

Heavy Metal Tele - now you're talking!!!
DJ
-
BTW, is that nut a Graphtec Carvin one?
Looks mighty similar to the one I used on my R7t.
DJ
-
Prostheta, you been looking at this page? It shows an inlay like the one you just suggested.
I remember you starting a topic a while back about those fret ends too!
I'm going to use this approach on my wife's Les Paul as I think it gives it a really finessed look to the neck. Those are particularly well done! I think glueing the piece back on will expose the difference in grain as it's pretty straight to start out with, unless it's planed and offset to match. Difficult! I would splice something in. Perhaps even a centreline? Cut the fingerboard in two and splice in a central piece? It was discussed briefly a while back on the initial spec for my wife's Les Paul that I was going to laminate a fingerboard for inlaying, and Fryovanni pointed out it might weaken the wood over the trussrod. It was agreed that a good joint shouldn't fail in these circumstances anyway, so it's an option perhaps.
In answer to the original question - let's see what happens when you unclamp and radius it...you may get lucky! Please update.
Yeah, I wondered about that issue of having a join over the truss rod.
In the case of the O.P. here, would glueing on a bit at the side of the 'board not work well enough, strength-wise?
Well, assuming you could get a nice grain match of course!
DJ
-
Excellent choice, sir! I was obviously on the right track then!
That's gonna look great, what are the specs - woods, finish, electrics etc?
You should start a topic in the "In Progress and Finished" forum, with lots of tasty photos! We all love a bit of guitar porn here!! You could include some pics of the fretting with the ball ends as well, though. I'm sure the guys would be interested.
And did you notice that those are stainless steel frets?
DJ
-
I defer, of course, to the more experienced members here, but I'm thinking that simply glueing the cut part back on should work. Strength-wise would it not be just as good? I'm assuming you can make it look decent again, by disguising the join etc?
Hmm, interesting....
I think I might have chickened out, used that one for a six-er at a later date, and bought a replacement.
I would like to see a 'board with a contrasting stripe through the centre; tapered to match the edges. Ebony maybe? You would open up some cool ideas for contrasting marker dots and/or inlays. This idea might be more suited to a natural-finish neckthrough perhaps......and maybe even a *gulp* bass??
only teasing.... Prostheta, you been looking at this page? It shows an inlay like the one you just suggested.
I remember you starting a topic a while back about those fret ends too!

DJ
-
Before:

After:
-
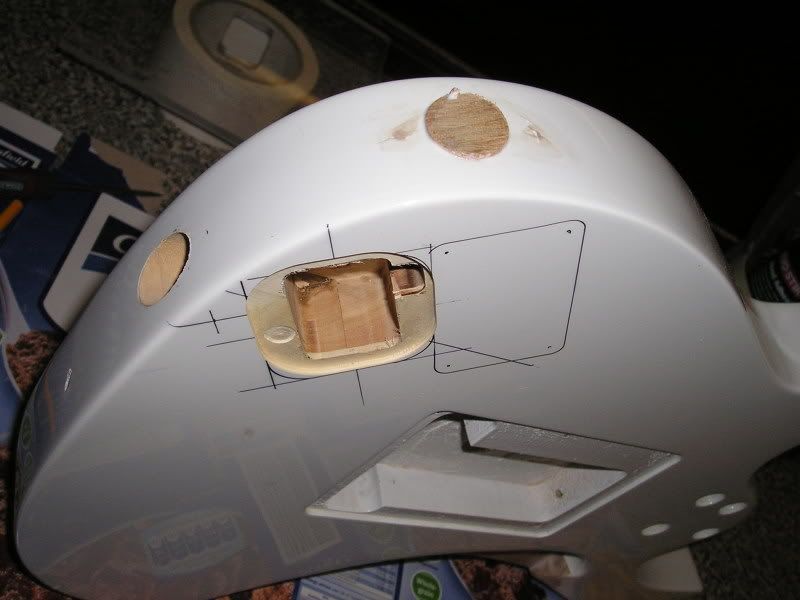
Jack cavity made, old jack hole plugged, battery box position marked
DJ
-
Hurry up and finish the work and make sure you do it well, so I can do a bit of breaking and entering to steal it :-\
Do you realise that's the second time you've mentioned your intention to steal my guitars in this topic alone?
I'm starting to worry about you, man.......
So, I'll post up some photos soon, but I have been making a little progress.
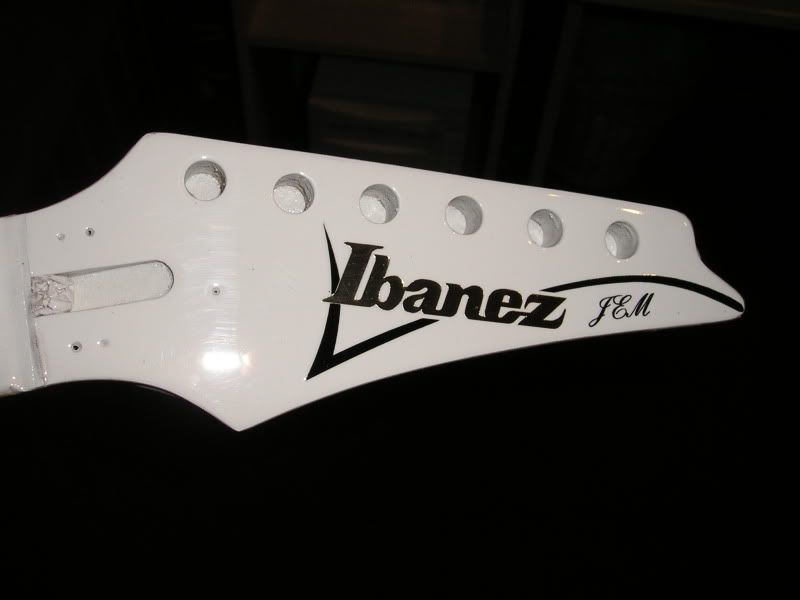
The headstock has been re-logo-ed and repainted, and is looking very good!
I've finished making the jack socket cavity, and re-routing the jack socket hole.
Next I'll be routing a battery compartment (for the sustainer pickup that it will sport at some time in the future!)
Oh, so little time! Working full-time, 2 kids, plenty other guitar projects etc etc. I try not to get too demotivated during winters cold and dark months.
Must rebuild my computer this weekend as well. Scored a 500GB USB2 harddrive for £40 delivered, yay! Isn't it amazing how much hdd space you take up with all these guitar work photos??
DJ


Installing A Locking Nut On A Neck Not Designed For One
in Solidbody Guitar and Bass Chat
Posted
..and cutting it out a bit more there would make it look better too. As a rule, I find exactly-symmetrical body designs don't appeal visually.
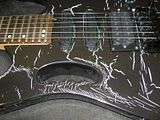
I have some experience regarding the locking nut scenario. I have 2 guitars where the locking nut sits behind the nut, one has an angled headstock, the other has a flat headstock. Both work well. But I've also converted a neck by adding a locking nut behind the main nut. One problem I encountered during this method was that unless you have a bar or similar to pull the strings down into line with the original nut (similar to the 3rd photo shown earlier), you end up sharpening the pitch of each string when you attempt the lockdown. Even if your bridge has fine tuners, your string could be out of tune by a greater amount than the travel of the fine tuners can compensate for! Something to think about!
I have also converted another neck by (as mentioned earlier) adding a thin wooden wedge to make a nice flat platform for the locking nut. This method worked perfectly, since the locking nut replaced the original nut at the correct height:
(Obviously it has been cosmetically improved after this photo was taken!! This was just a basic mock-up.)
I think it's worth going down the double locking route myself. If you can successfully set-up a Floyd (or similar) bridge, then that's a skill some folks don't have!!
Hope this helps!
DJ