


gpcustomguitars
-
Posts
757 -
Joined
-
Last visited
-
Days Won
23
Content Type
Profiles
News and Information
Tutorials
Product Reviews
Supplier Listings
Articles
Guitar Of The Month
Links and Resources
Forums
Gallery
Downloads
Posts posted by gpcustomguitars
-
-
Nice clean work as usual! Hope the frets won't give you any more trouble. Could you perhaps explain a bit more your procedure for going from chiseling to smooth when carving? You probably explained it at some point, but can't remember where...
-
Yes, the crack is there since the start of this build. Didn't expand any so far luckily. I was planing to flood it with warm epoxy later on, but I took your advice and flooded it with CA from pocket side first. Put some masking tape on the other side of the crack, and will repeat from outside later. Thanks for the advice again, better safe than sorry
")
I would also like to flood the seams with epoxy, and cover them with 2 MOP lines, I think I could have enough small pieces to put together.
After the cracks, reapplied the black dye to the fretboard sides, and glued in the neck with PVA. This will stop any warping the body might attempt after routing out such a large neck pocket, which was one of my concerns.
I found a really nice video on relicing with a part on aging plastic parts. I found a piece of white pickguard material, so I might experiment a little to get a more ivory/cream color. Made 2 cardboard props to help me figure out the pup locations and whether I can fit them on my piece of plastic.
Next puzzle to solve is the minimum depth of the spring cavity route - the body is 41mm at it's thickest, and with tenon depth being 24mm, I would like to keep it to 10 mm, and perhaps do 3 separate routes for the springs, or one narrower route. The cover will not be recessed.
-
...and some more work today - found my original templates, straightened a few details and first routed the top side, drilled trough, and routed from the back side. Prior to routing for the spring cavity, I want to decide on the best possible route depth. As I said, I'm thinking of replacing the claw with a brass block to add some mass. Also, that way I could make the route about 10mm deep only. If that goes well, I might attempt to replace the trem block with brass one too.
I'll try to scrape together enough MOP to hide the seams before applying the gold paste.
-
Went well - here are some pics of last night's session:
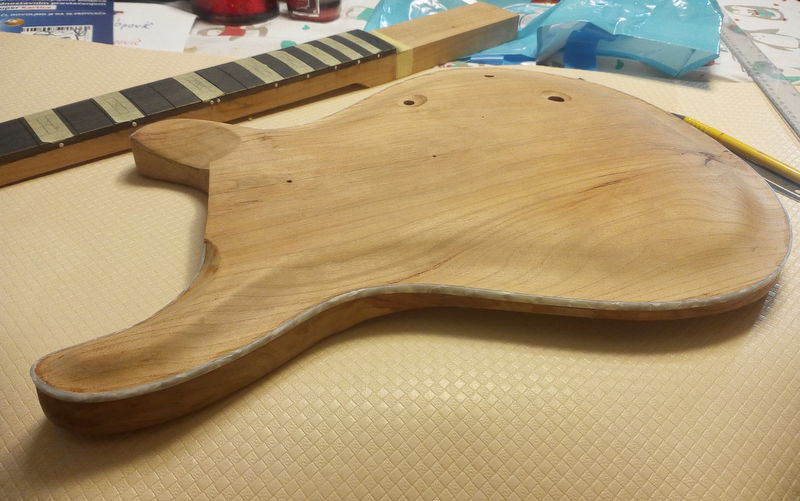
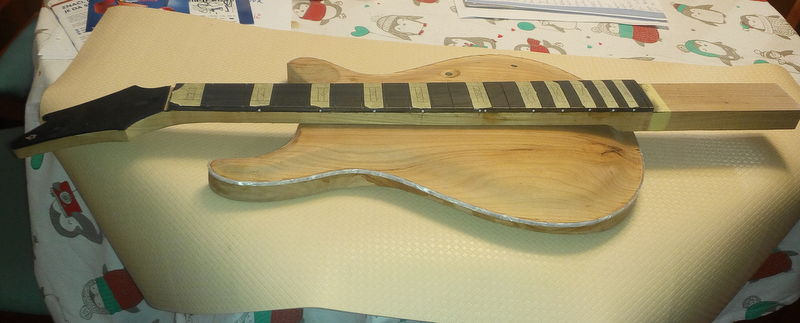
Made the neck pocket template, rough routed with a wider bit, re-routed with the template and the bit with the bearing, and the neck fits just right
Clamped overnight to make sure there is no warpage.
-
Thanks!
Well, I prefer to have one continuous surface for carving, since it involves scraping, sanding and finger planes, and a large hole like this neck pocket, extending all the way to the bridge or the pup holes could force some mistakes, like dips near their edges etc. It might not be a problem, but I feel safer this way. This top is fairly flat, so fixing the routing template with some tape should not be a big problem.
Also, this is a one-piece body, so it could warp a bit. I will in fact clamp it down after routing just in case.
I do my LP tops the same way, even though they have a more pronounced carve, and the pocket is much smaller. There are other approaches, but I feel safer with this one. BTW, you should definitely try to carve a top!
I'll try to take a pic of my first try, semi hollow LP shaped monster
Baseball bat neck, Bigsby, P90's...plays horribly, I should strip it and dress the frets, re-carve the neck etc.
-
 1
1
-
-
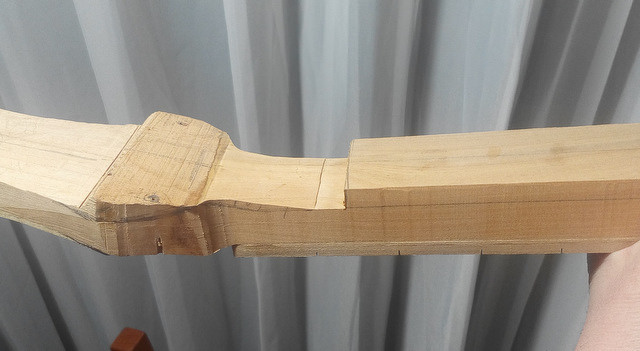
Well, back to building! Didn't have much time to spend in the shop, and additionally, it's time for the scary part - routing a huge neck slot in the finished and unsuspecting top...
 I prepared a detailed plan for the slot and cut the neck to size. It will actually form one side of the vibrato route. I plan to route that after the neck has been safely glued in place, so that I can check the centerline.
So, routing is next, template is drawn, my new short routing bit is ready, and I'm a bit nervous about it
-
Hi!
Thanks a lot, it's always nice to hear that the pics (and the mistakes
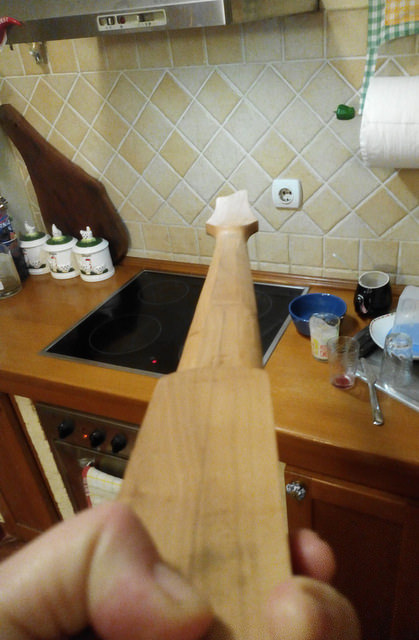
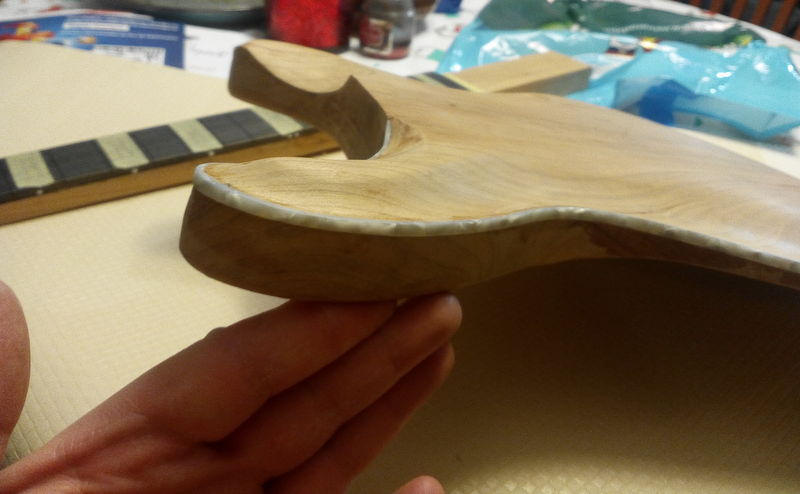
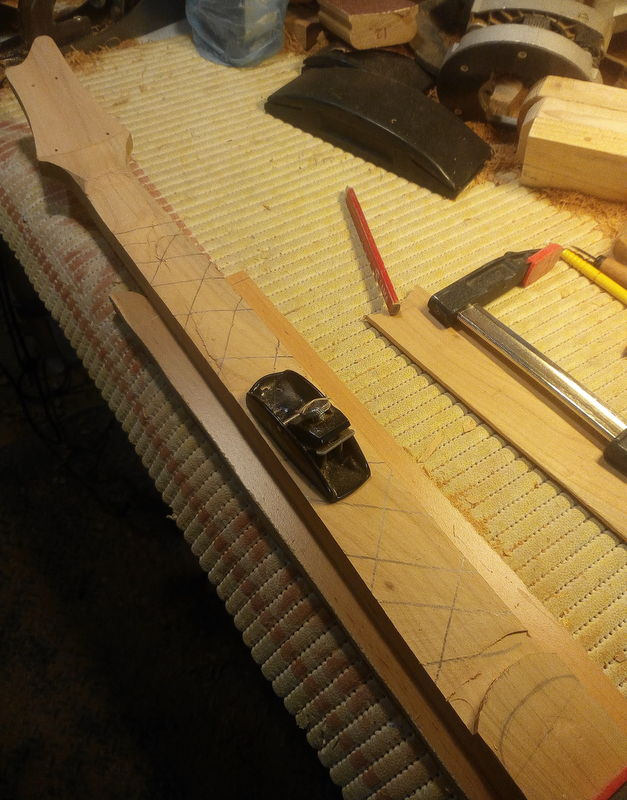
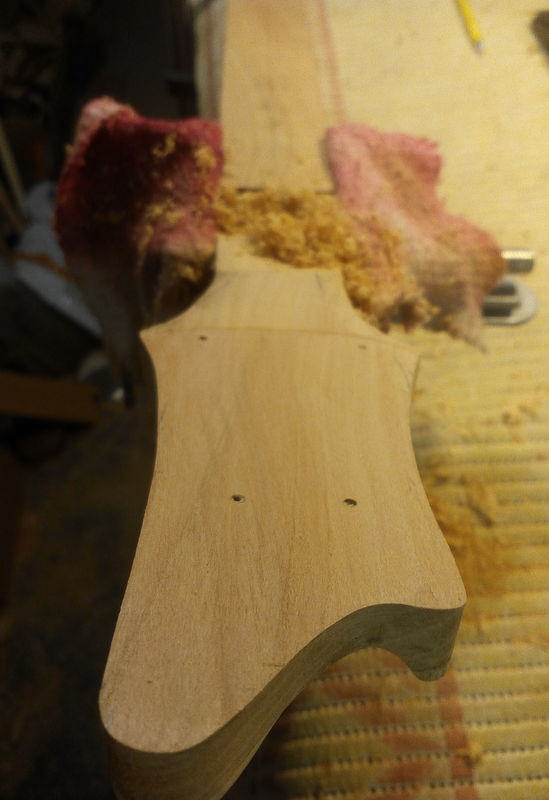
) were of help! Here is some update on the neck, I have finished this stage a few days ago, but haven't touched a computer for a few days. I made a simple sanding surface to help me in the shaping the neck without dips or high spots and the results are really nice. It's in the pics. Length is roughly distance between the volute and the heel, with ends half rounded, with some 60 grit paper. After rough shaping, this made sure that its all straight.
I will fine tune the profile some more while progressing trough the grits, but it's basically done.
The locking tuners arrived in the mail, so I can drill the headstock, and various bits and pieces are on their way. I decided on 2 mini hums for this guitar, and since I was unable to source the cream rings for them, I will have to make them. Cream or ivory colored plastic is not that easy to find locally, so I'm looking into all kinds of options...
-
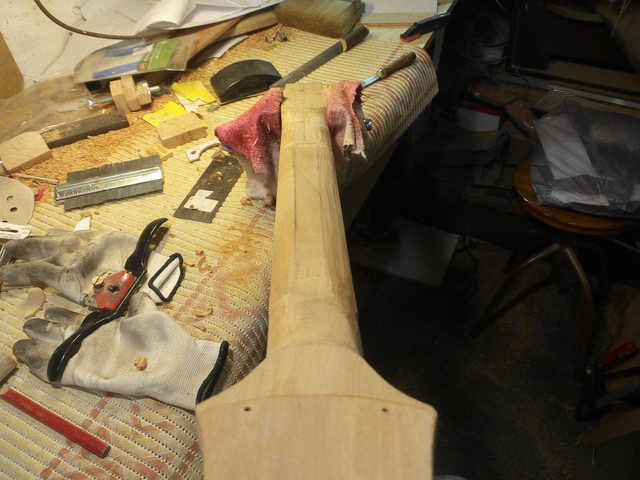
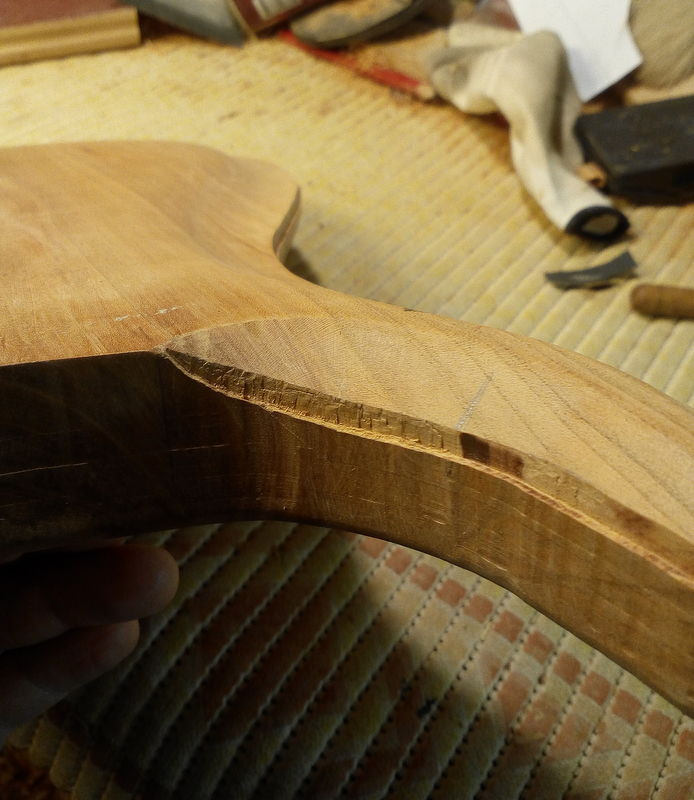
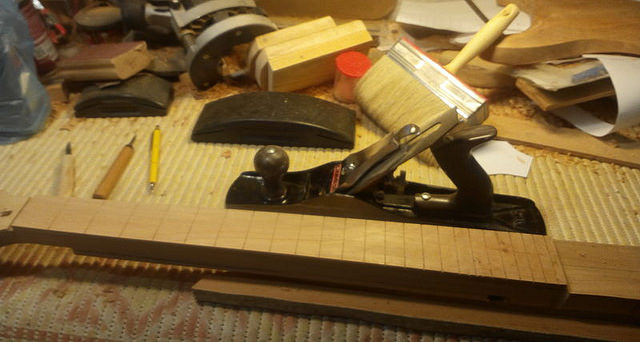
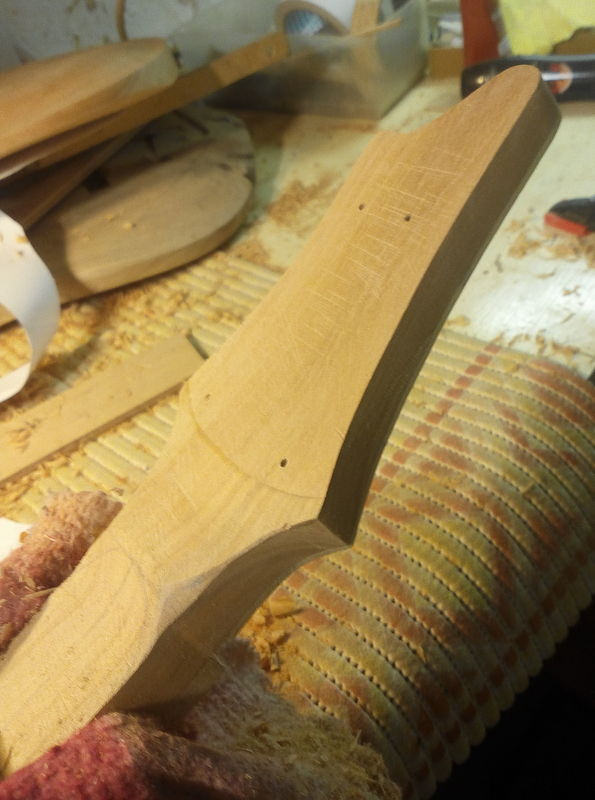
Second part of shaping the neck, roughed in the 1st, 12th and the heel, and removed most of the bulk. I'm done with the spokeshave I think, scraper is next. I'll make a sanding board to ensure evenness of the neck, with rounded sides and length roughly like the area between the volute and the heel.
-
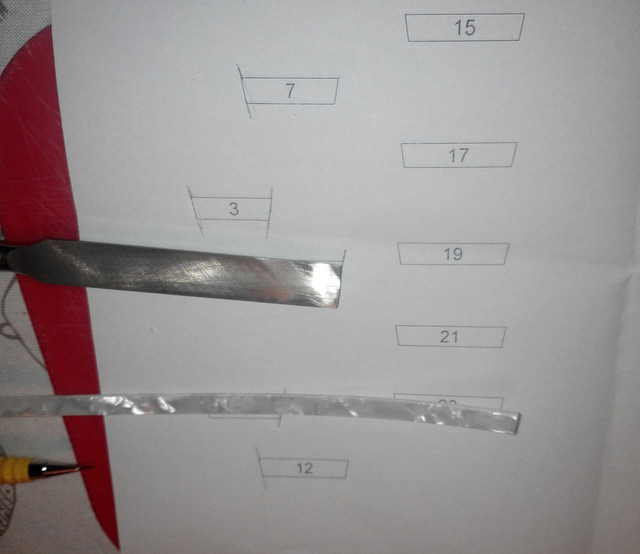
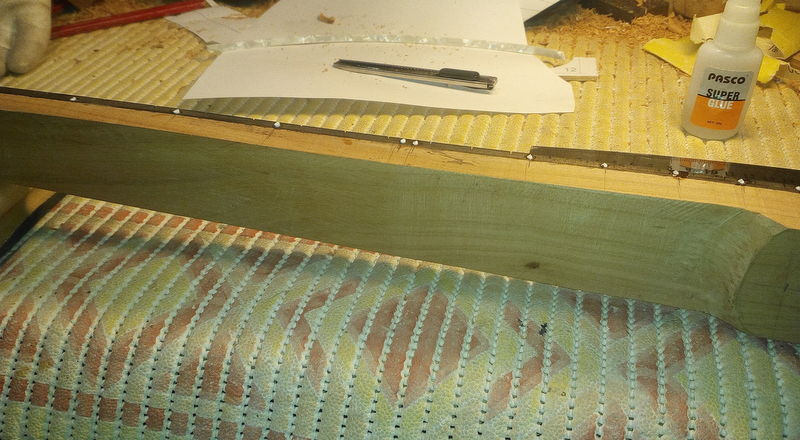
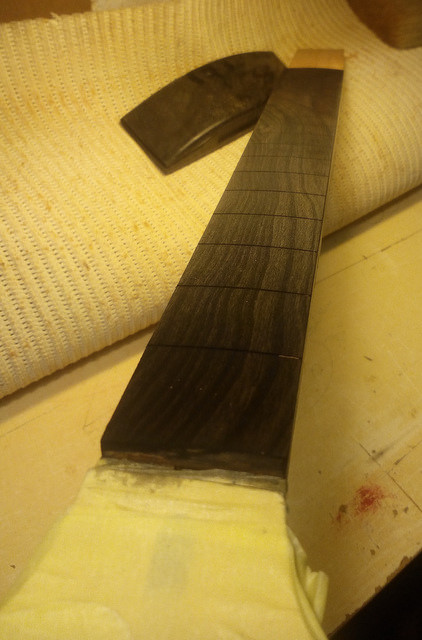
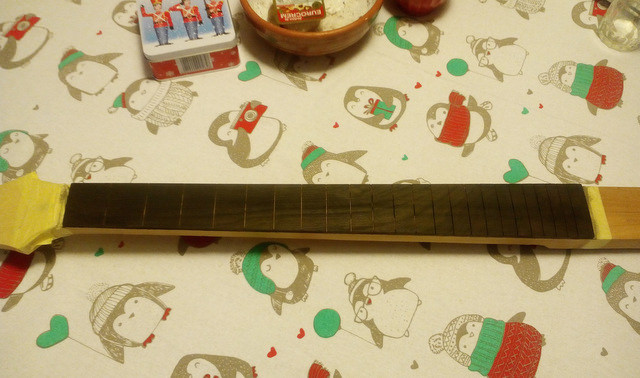
Finished the frets, sides were trimmed, angled to about 60deg, and started to shape the 1st fret profile and the transition to headstock. I'll take my time with this, no hurry, hope to get a nice comfy neck, a bit thinner on the treble side to get a played in feel. I made one silly mistake, which will remain as a feature :), placing the side dot on the 23rd. Added the 24th, and thought of drilling out the dot and filling with a cherry toothpick :), but I kinda like it for now. Almost put the inlay on the 23rd too, but a friend pointed it out.
Weirdly warm weather, the nature will not like it I'm sure, but I can work in the shop without heating for now...
-
Thanks a lot!!!
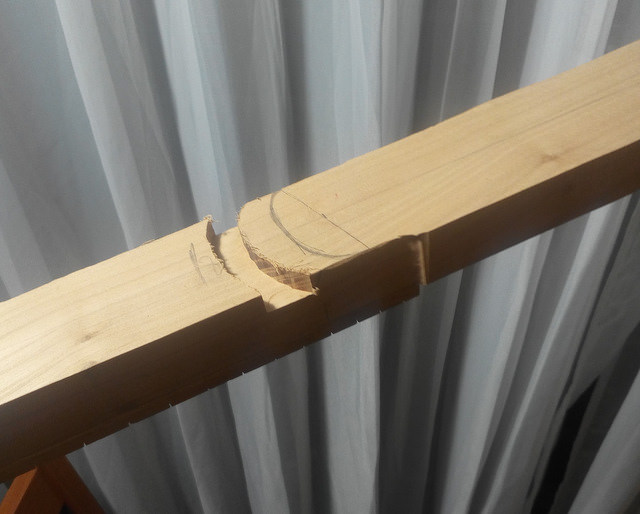
I used a scaled down template for the body with a enlarged template for the cavity, and completely forgot to check whether it gets too close to the slope of the top. You are too kind, the repair is visible, but it will be completely hidden. The piece already had a few spots so I can live with it
I had a panic attack when it happened and started digging for a appropriate piece the same second  , found it and started scraping to make it conform to the cavity shape. Didn't stop until it was glued in
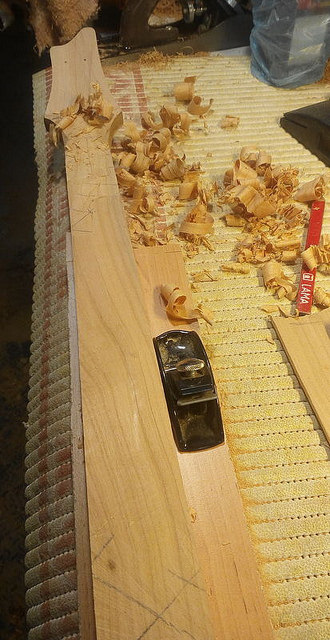
I started learning to sharpen chisels some years ago, can't say it's perfect yet, but they are nice and sharp. I've disassembled my Stanley, sharpened it to the best of my knowledge and youtube wisdom
and started to fiddle with controlling the depth of the cut, holding the plane etc, and now that I have some predictable results, I'm really starting to like it.
I'm still just dulling my scrapers from the factory sharpness point, there is some contradictions on info to be found on the net, so any advice would be much appreciated!
I've since rubbed in one coat of tru oil, chamfered the slots and started fretting. Hoping to rough shape the neck soon.
-
-
Thanks Scott!!! I'll have to think on how will my top finish react to seams it will leave. I could have used the remaining binding to inlay over the glue lines, but I've just spent it on neck markers.
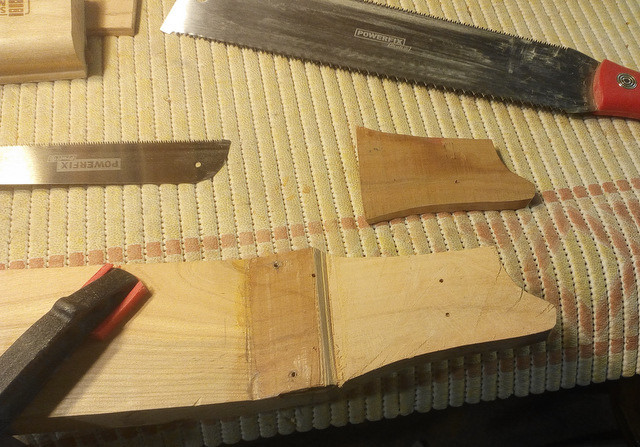
Cut with the chisel with printout for guide, went pretty nice. I even have a few scraps left
I should inlay it next and start fretting.
-
A little more photos today! Managed to route the binding ledge with mu real-ugly-contraption that actually works, will take a pic later. Main problem (or fun) were the horns, I wanted to follow the line and taper the binding so it sort of tapers out, so I used the marking knife and a small carving chisel. Used CA to glue the binding, and a hairdryer to bend a few sharp bends. I got nervous that it will be too thin when scraped, but after scraping it still looks as intended
My fingers didn't appreciate the CA choice though...
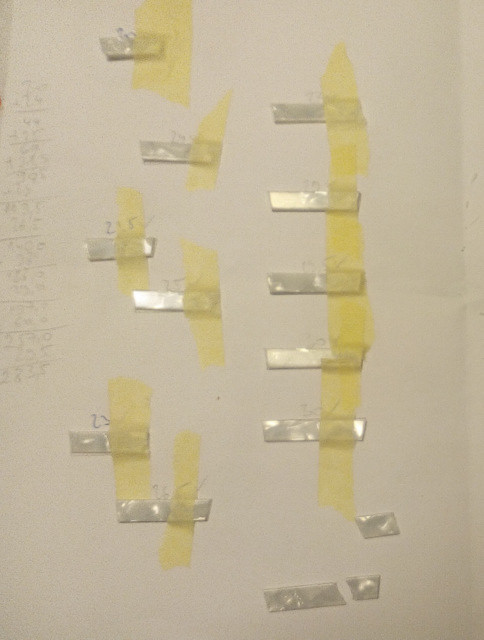
Drilled and glued the side dots, and decided to use remaining 29cm of binding to make inlays, just tiny strips. Taped the fretboard parts to be routed and drawn a rough estimate to see what it would look like, and whether I could fit it in remaining binding.
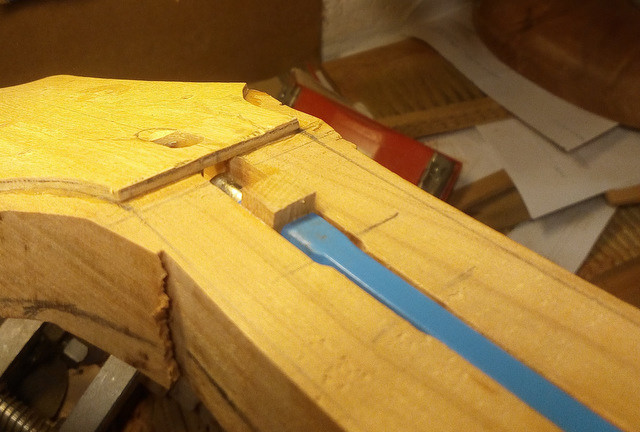
I left the neck blank long enough to have the bridge pivot almost on it, but I'm having second thoughts, seems like a lot of wood to remove from the body (56x24x185mm). I could have the tenon run up to the bridge pup?
-
Thanks! Yes, I would like to apply max 2 coats of tru oil, even if this stuff is supposed to be penetrating the wood a few mm's, but it should look really nice. The rest of the guitar will probably be sprayed, if I manage, if not, tru oil
I'll stain it mahogany brown, same line of stains. Should look nice with MOP binding and rubbed goldtop.
-
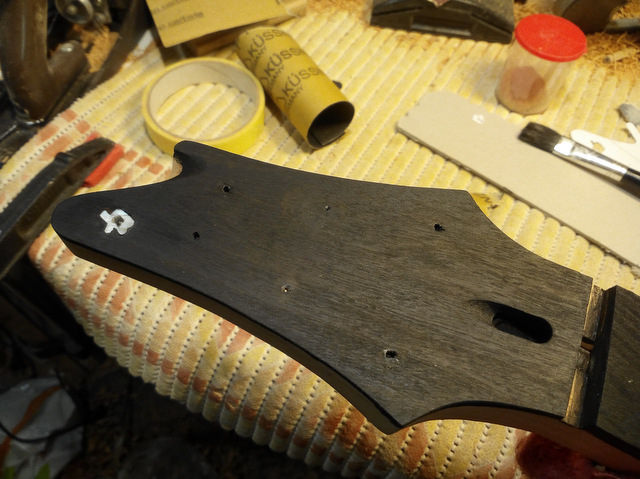
Not much to show, finished logo inlay, need to clean up the details later, and first coat of black. Applied the second coat on the fretboard, grain raised, so I'll reapply if needed after sanding. I'll try staining the fretboard before gluing next time, that might be better...
-
Thanks, I'll mix a batch when it gets warmer. In the meanwhile, I tested the waterbased dye on a piece of headstock offcuts and it seems OK. The paper says to apply 2 coats, so I'll repeat after installing the dots, but I did the fretboard and it looks promising. Also, started the MOP logo. I almost always use the vice to cut inlays now, it prevents breaks and is much more comfortable to hold. Works great for a few simple things I do.
I'll try to route/glue in the logo today, not enough time yesterday, and then I'll stain the headstock too.
-
1
-
-
The body part of the work should be OK, I will have regular binding on, and I got a water-based dye, I'm worried about the headstock plate and the fingerboard bleeding onto the wood under it. I could staing the neck first, then sealing and then masking and staining the fretboard and the headplate.
Thanks FINEFUZZ, I have heard of the vinegar&steel wool but have never tried it, will give it a try! It's supposed to work really well with tanin-rich woods like cherry?
Since my dye is water-based, I was thinking to try spraying it on, with airbrush or even a plastic spray bottle, to minimize leaks. I could apply 3-4 light coats, or as much as necessary.
-
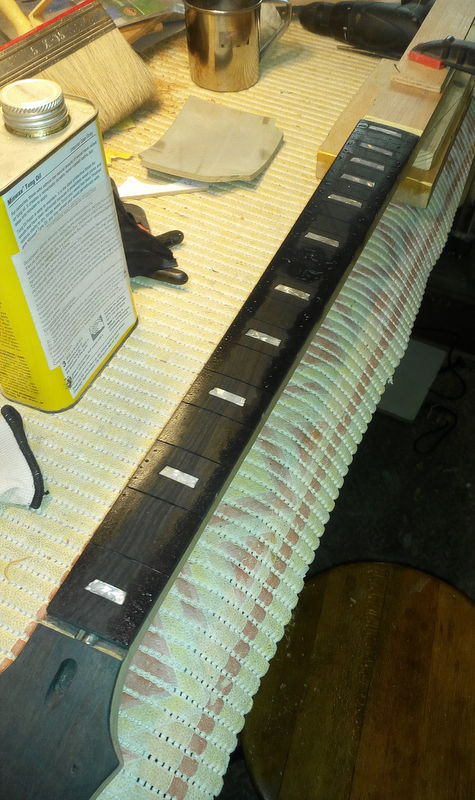
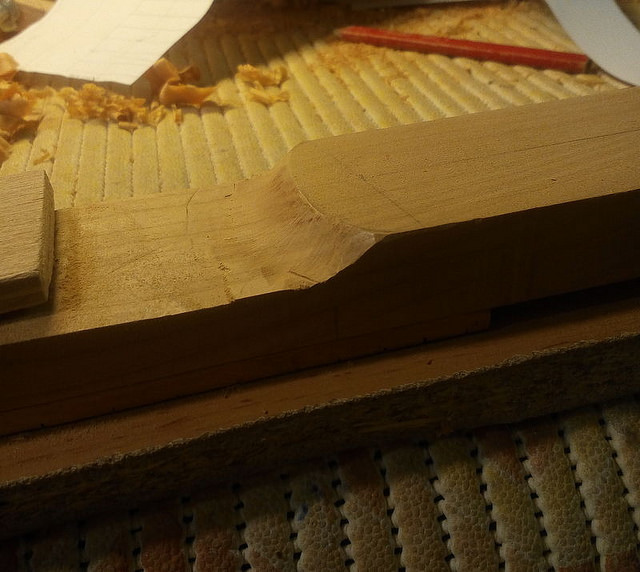
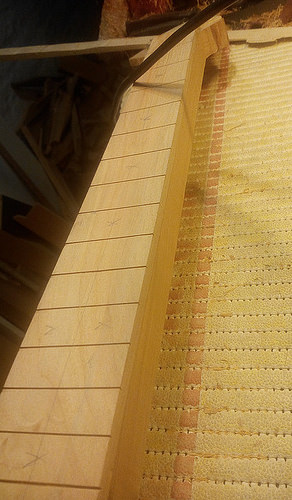
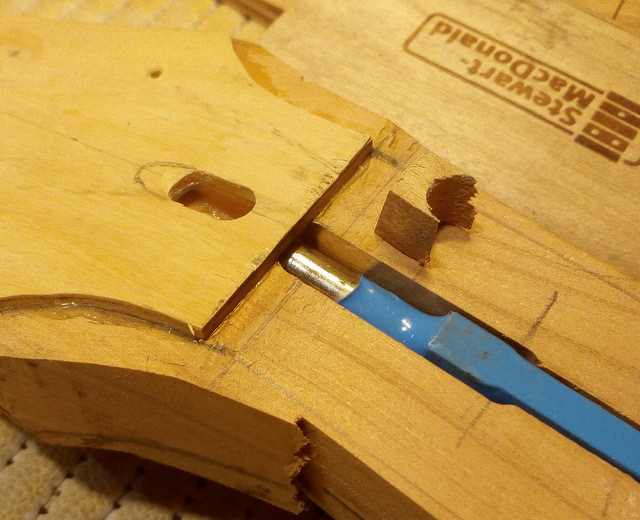
Managed to plane down the fretboard to 6mm, sawed off the excess thickness of the neck (should've routed it off, but wanted to save that little piece of wood) and planed it clean and flat with my new mini plane. Used the chisel to remove the bulk of excess at the heel, routed the tenon part of the neck to width. Finally, radiused the fretboard and re-cut the fret slots.
I've tested 2 different black dyes so far, and neither is what I want, so I got a bottle of waterbased black dye today to try tomorrow. I want to blacken the headstock and faceplate sides, and the fretboard. After that it's time for dots or strips of MOP, I have both so I'll do a mockup and decide. What worries me a bit is the possibility of leak of black into the neck wood, but I'll mask heavily and go really light.
All in all, a good day!
-
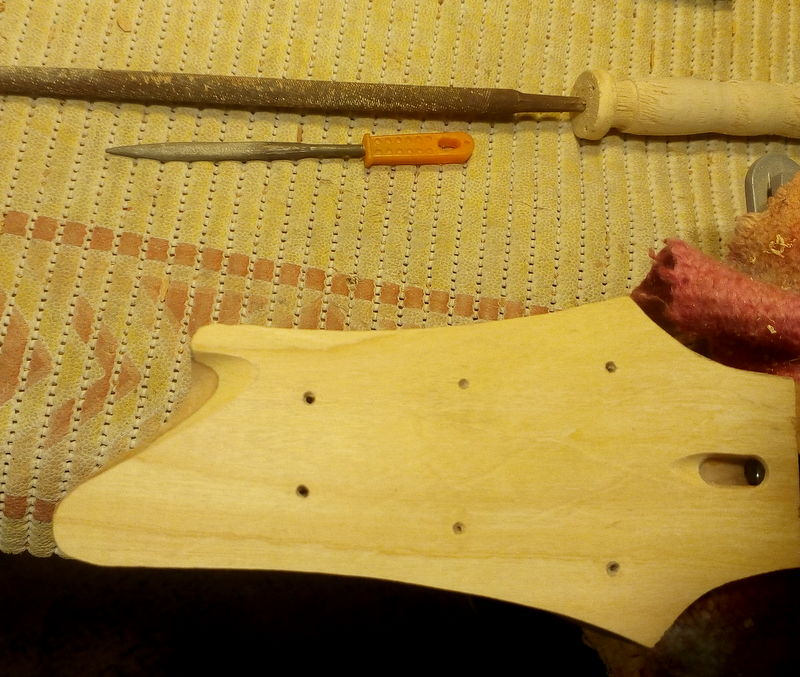
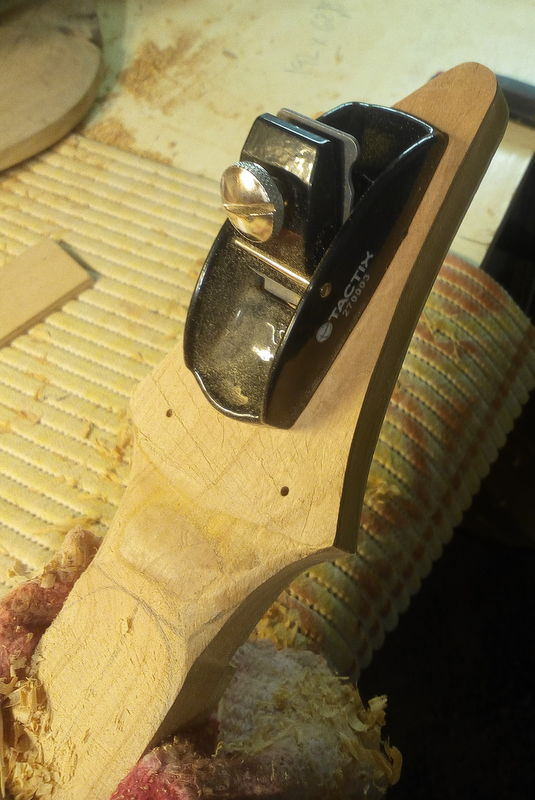
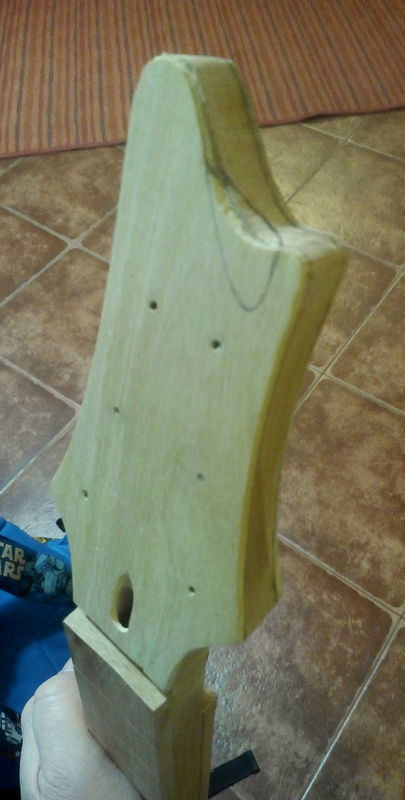
The little scoop is done, roughed in with the big rattail, fine details with the smaller one. My new toy arrived in the mail! Used the mini plane right away to plane down the back of the headstock to thickness, went over with a file to make sure it's flat, and scraped. I thought to make a sled for the router for this job, but this was really quick and simple!
-
Thanks a lot! It's easier to describe what I'm doing in the shop than to properly react to such kind words, but they are much appreciated!
I used to use more heavy tools in the old shop, bandsaw, pin router and the stationary disc sander, but the Yamaha and the BillyBo builds were sort of a turning point. Now it's more about the freedom, hand drawing, including materials not commonly used, different hardware etc and it's so much fun!
-
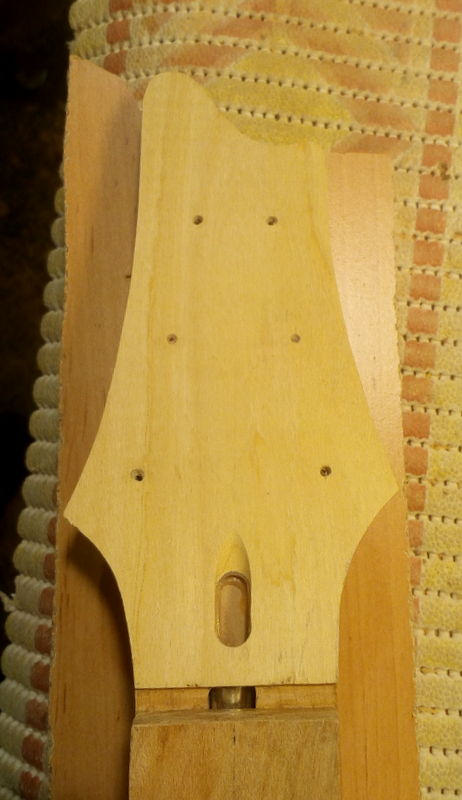
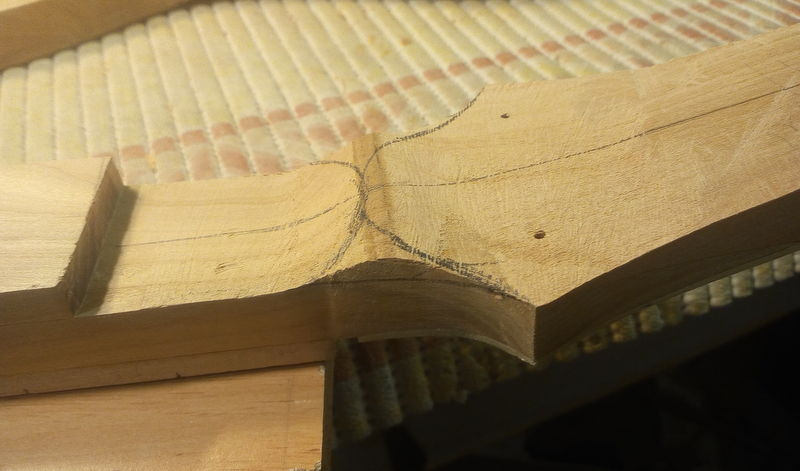
Continued with shaping the headstock, first cut the outline with coping saw, refined with a file, and finalized with a scraper. Then chiseled both slopes of the future volute and refined with a file and scraper. A tiny bit of volute shaping done, and marked both the final thickness of the headstock and the scoop shape and max depth. All in all, nicely spent one hour. The scoop and the planing down the fretboard to thickness is next.
-
Looking forward to this!!!
-
The snow is gone, but the cold remains...should ask Santa for a heater for the shop... Anyway, between the work and driving my son to basketball I trimmed the neck taper and set the neck thickness at 15mm (+fretboard of course) at the 1st and 16.5mm at 12th fret. Marked the volute and the heel, and started cutting the volute with a chisel. The tenon part of the neck is not trimmed, I should perhaps make a template for that, as it's sides are parallel (56mm wide). Need to plane down the fretboard 1mm too and start the radius.
Ordered the pearloid dots, and experimenting with ways of ebonising the fretboard. For the headstock inlay, I bought some liquid pearl material, will test it first. Could come in handy for a signature or thin lines.
My bridge arrived yesterday, looks pretty good, will post some pics, but it's block seems too light. I could perhaps machine a brass one or have one made. I already wanted to make a brass block claw for it anyway.
-
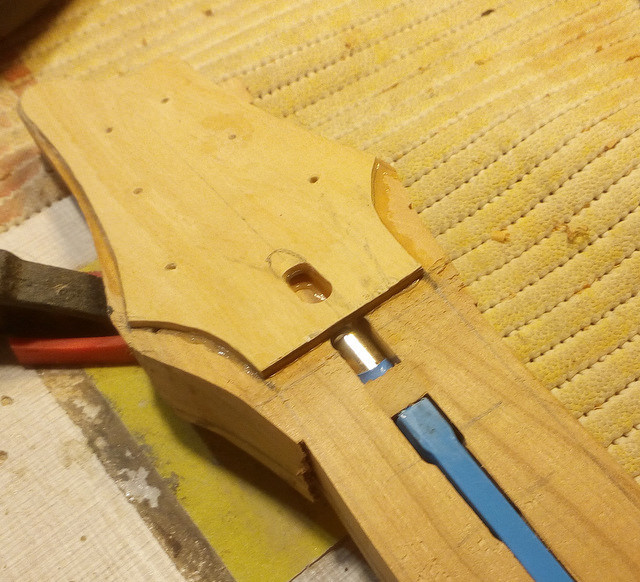
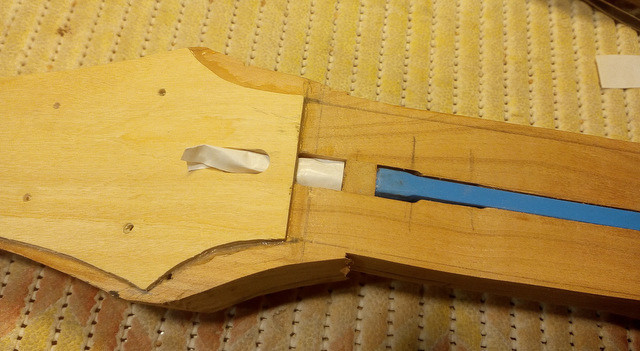
We've had the first snow of the season this weekend, but I still managed to make some small progress. Rough cut the headstock to thickness with some material to spare, rough cut the neck taper and glued the fretboard on. It's probably an overkill, but I like to glue a small filler piece over the adjuster nut, I just don't like the feeling of fretboard having a hollow spot that close to the nut.
I opted not to plane the face plate flush with the neck fretboard surface, instead I used a file to get the edge to 90 degress , so it holds the nut. A piece of wax paper is protecting the adjuster nut from the excess glue.
-
1
-


PRS-like project(s)
in In Progress and Finished Work
Posted
I think I have the puzzle solved, preparing to route it out. The springs require 9mm in diameter, and since I want 3 only, I can get away with using 2 center holes on the block, and the 5th (where the arm is, with 3 center pins on the claw. That has significantly smaller footprint that the standard cavity. Routing later today I hope.
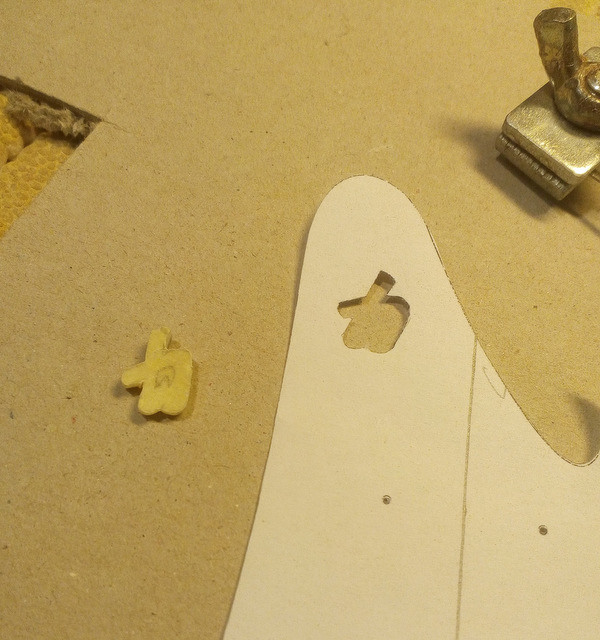
Also, finalized my cardboard pup rings, and used them to draw out the prep for laser cutter. I will go with milky white, 5mm thick, and do...something to it if the color is too off") Sawing these out by hand seems a bit too much, as I would probably crack something a number of times.
Sawing these out by hand seems a bit too much, as I would probably crack something a number of times.
Neck one has that extension as to avoid the cutout area of the lower horn.