


DGW
-
Posts
131 -
Joined
-
Last visited
Content Type
Profiles
News and Information
Tutorials
Product Reviews
Supplier Listings
Articles
Guitar Of The Month
Links and Resources
Forums
Gallery
Downloads
Posts posted by DGW
-
-
I've been using urethane for awhile now and I've tried everything from buying traps, different nozzels, different techniques, different temperature rated reducers, and different brand clearcoat altogether ..... NOTHING helps.

I'm now thinking of switching to Nitro ...
Is this type of paint more forgiving for solvent pop?
Or will I be faced with the same problems?
Before you suggest "lighter coats" and all the obvious stuff, please know that I've tried EVERYTHING.
Thanks
-
I'd like to add covers ...
Can someone tell me where to get the wax and how to do it?
Do I need a melting pot or is there another way?
-
-
Thanks for all the responses guys, looks like it might be worth me investigating car body shops as acrylic seems to be the least favourable option. 3 Cans of nitro (primer, colour, clear) comes to £45, (about $90) over here, so i'll see if a bodyshop can come close to that.
Yep ...
And you also have to remember that you're still using spray cans!
You're not going to have the flexibility of air/paint/fan adjustents for true professional results IMO.
-
Acrylic is SUPPOSED to cure faster. But it usually doesn't. It cures to a useable hardness for other projects, but the kind of cure and shine we are looking to get for a guitar takes longer than they say. Nitro is usually 1 month cure and you are ready to wetsand. Acrylic doesn't cure as hard as nitro, people have a lot of problems shipping guitars finished in acrylic laquer because it usually imprints with the packing material. Nitro is a better bet.
You're obviously refering to rattlecan paintjobs ...
Use a 2-pack product with a catylist and you won't have those problems.
-
I did the rattlecan thing for many years ...
It sucked ... don't waste your time.
Nowdays, I only shoot acrylic urethane (car paint).
Cures in hours (not months or years) and the finish looks as professional and is as durable as you're gonna get.
-
What's up with that fretboard?
-
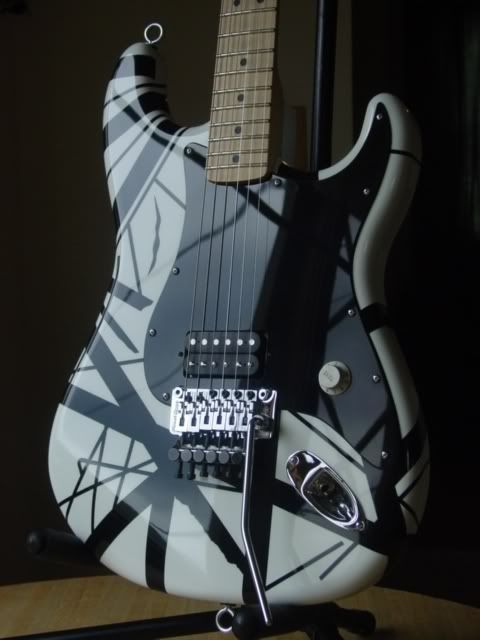
Wow, I dig it! What's so special about that tummy cut? Other than the fact that it's absurdly large? Not a criticism, just wondering what the tummy cut had to do to get referred to by a proper name
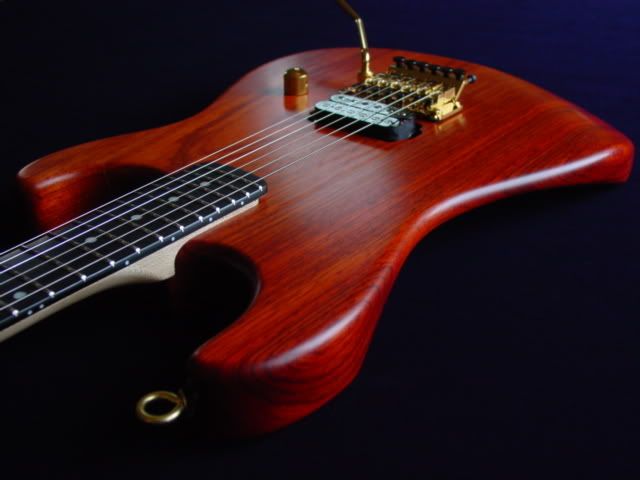
The tummy cut was done to help replicate the bodys that Linn Ellsworth cut for EvH early on.
It can be seen cut in the guitar at the bottom of the pic and on the Black and yellow guitar.

It may look "absurd", but the cut adds comfort and brings the guitar closer in to your body.
I like the overall EVH feel. And I love the look of uncovered trem cavities. Almost as good as no cavity at all! Oh did I just say that.....?Was the body a found item, or a refinish? It looks pretty beat up in the "before" pics.
The body was purchased from a friend ... I just finished it up and completed the build.
I'd have liked to see a matching headstock, but that's just me. I know you can't do much with a Mighty Mite neck.I hear what you're say'n, but the Mighty Mite neck is actually pretty nice.
And beeswax, you say? How did you apply it? I'm doing a build right now with tru-oil, and wondered what one would do to do the final buffing/finishing. And that's all 0000 steel wool? No sandpaper during the finishing? It looks snazzy!One great build here.
Thanks,
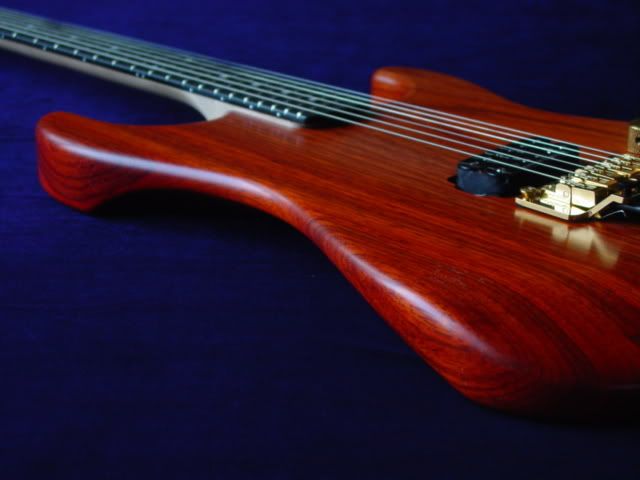
I initially had to steam out dents and do alot of sanding, but yeah ... several coats of tru-oil using 0000 super fine steel wool between coats. Then I went over the whole body with bees wax. It helped condition the wood and really made the color "pop".
-
So sweet!
I'm currently building a padauk topped sapelle back cherry neck through guitar and i hope the padauk will turn out at least half as good as that!!
What kind of finish did you use.
That's GOTM material right there.
Thanks!
I did alot of sanding and used several coats of tru-oil sanding with 0000 steel wool between coats.
Then rubbed it down with bees wax.
-
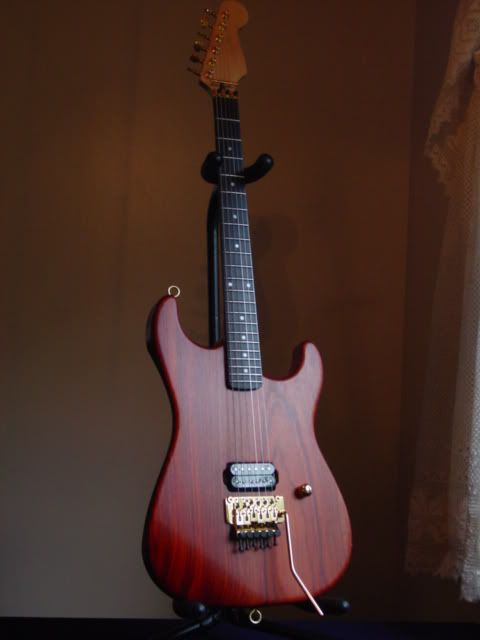
Here's my latest build ...
Thanks for looking.
Before:

After:
* One piece Padauk, San Dimas style body with Ellsworth style tummycut
* Mighty Mite maple neck with ebony fretboard
* Gold Original Floyd Rose tremolo
* Brass Big Block upgrade
* Gold Schaller style tuners
* Gold Custom Logo Neckplate
* Seymour Duncan '59 Trembucker
* 500k volume pot
* Solid brass EvH style eyelet hooks
Pictures really don't do this guitar justice.
The guitar looks even better in person.
And the tone of this one piece Padauk is incredible!
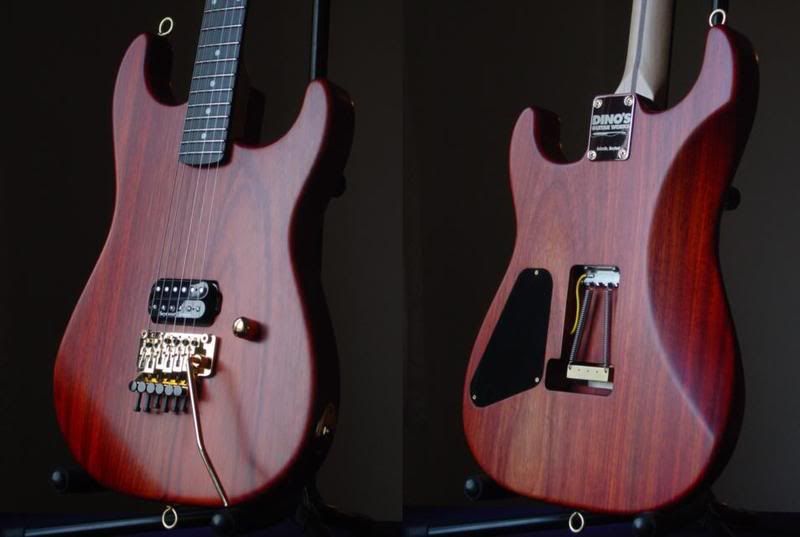
Note the Linn Ellsworth style tummycut ... it's extremely comfortable.
-
That turned out nice, but isn't 800 grit a bit aggressive to start with?
I leveled mine with 320 and started wetsanding with 400. It turned out fine. It'd depend on the thicknes of the finish if you'd sand through or not. I suppose I'm fortunate I laid it kinda thick.
Holy crap!
-
For giggles I did one completely by hand with no compounds. I started wetsanding with 800 grit paper (& soapy water) and worked up to 2000, then switched to Micromesh pads going up to 12000. It only took about an hour and a half sitting in front of the TV. It turned out pretty well I think.
click
You can see the reflection of the bridge in the top.
That turned out nice, but isn't 800 grit a bit aggressive to start with?
-
..just that StewMac no longer sells it.
Sorry ... I didn't realize that.
-
I've done it by hand with really good results, but it's a real workout.
I then tried one of those foam pads but it left alot of swirl marks and didn't work as well as doing it by hand.
Easier yes ... good results, no.
I finally decided to go with the StewMac buffing arbor setup and I'm glad I did.
If you're just doing one guitar, you should be fine doing it by hand.
But if you do alot of guitars, I'd recommend the StewMac buffing arbor.

-
Could be witness lines, from sanding through coats.
What type of poly are you using?
Is there an echo in here?
-
for the time being, I shot another coat of poly over it and will wetsand again because I went through the clear on a few spots. I need to prepare for this in case it happens again. If I get the same marks tomorrow I will post pics. I am going to wipe off water before it dries to try to prevent these spots. What I thought was very weird was that sanding would not get rid of them. I read that vinegar is supposed to nuetralize the chemical makeup of the spots? I may try that
I had this happen once ...
Turns out it wasn't water spots at all.
What had happened was I waited too long between coats of clearcoat.
Then when I went to wetsand, I sanded through the first layer in some areas and it looked just like "water spots".
Could this be your problem?
-
Base coats won't hold up with out a clear, they have no hardener in them. Sealers, some primers and single stage paints with a hardener will. The Kustom Shop stuff is a single stage paint with a flattener added to it.
I agree .. your basecoat will be trashed without some sort of protection.
btw ... I may have used a different Kustom Shop "Flatz".
The one I used was 2-part and it worked really well.
But again, anything with a flattening agent will become shiney with contact.
-
I have 3 quarts of it. In the end its pretty crappy paint and hard to apply, imho.
Why is it crappy?
1. Hard to apply, it just doesn't flow great.
2. It's not a kustom quality paint like HOK, its a relabeled production paint. I have heard its either Matrix or PPG's entry level.
3. The pearls come out either rough or shinny.
4. It's expensive compared to some of the other options out there.
5. The black every time I've tried to use it comes out glossy, I think they left out the flattening agent.
I've used this same stuff and have had absolutely no problems.
The flow was great and the quality equal to HOK, Dupont, and every other acrylic urethane I've used.
The only thing I caution with using ANY flattening agents is that they will become shiney with wear or areas that you may come into contact with.
Another option I've used successfully on guitars is to shoot gloss and then buff it out with 0000 extra fine steel wool to give it a dull sheen.
-
Your "painter" used Krylon.
Krylon is crap ... I know first hand.


It's an acrylic lacquer and can take up to a year to fully cure.
I painted this guitar with Krylon and let it cure for 8 months before wetsanding and buffing the finish.
It looked awesome at first, though the paint was really soft and really suseptable to damage ...
Approximately 3-6 months later, it looked like the first pics shown above.
I wish I had better news, but your guitar will only continue to look worse and worse.
I will never use that crap again.
-
Just measure the scale length from the nut to the saddle of the bridge?
which will be twice the distance from nut to 12th fret so you should be around the right place but really you measure 12th fret to nut to detrmine the scale length and as neil say once you know the scale length measure from the nut.
Okay, so it is in fact the same way you would determine the bridge placement on a guitar.
- in what way does it 'look way off' - they do need slightly more compensation than a guitar but if you set the saddles most of the way forward and put them bang on the scale length measurment you should have enough backwards adjustment to intonate properly.. all depends what bridge you are using though - that will work with most fender style bass bridges on the market.I'm restoring an old Ibanez beater ...
I removed all the hardware, including the bridge because I was going to replace it.
I didn't really think twice about filling all the holes during the body prep stages and I've since sprayed it with an epoxy primer/sealer.
I purchased a Wilkenson replacement, and when I measured exactly how you guys are telling me it's done, it looked ALOT closer towards the neck than where the original bridge was mounted. I also took into account the actual saddle placements and not just the mounting holes.
I even compared it to pictures I had taken prior to disassembling the bass and it's way off.
Weird.
-
For a guitar, I think you determine the bridge placement by measuring the distance from the front edge of the nut to the 12th fret, then use that measurement from the 12th fret on to determine the bridge placement.
I used this theory in trying to determine the bridge placement on a bass and it looks way off.
Can anyone give me a little guidance here?
Thanks!
-
I've got a second hand guitar that has a color stained finish that has been clearcoated in lacquer.
The previous owner said he can't remember what he used to "clean it", but it caused the clearcoat to become cloudy.
Any idea what he may have used and what the best way to fix it would be?
Thanks.
-
Shielding paint requires SEVERAL applications in order to really be effective.
Put a meter to the cavity and check for continuity to make sure it's doing it's job.
If shielding is a problem, I'd recommend copper foil over shielding paint.
JMO
-
That really looks good! Did you put a shim under the neck to give you a slight neck angle? What is your string height at the body where the fretboard ends?
Jeff
Thanks guys.
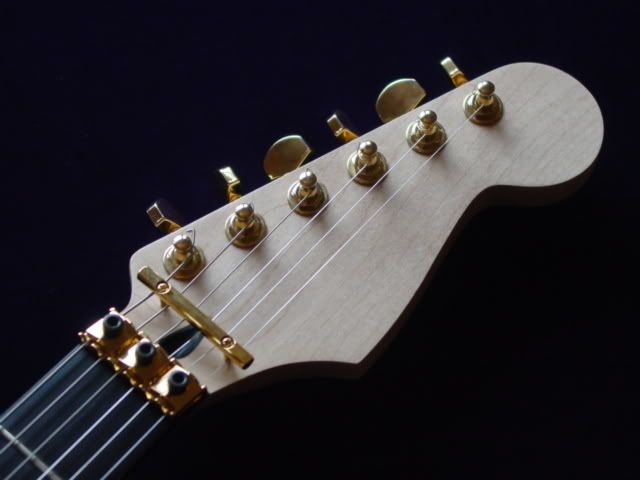
The neck is a Mighty Mite...
* 22 medium jumbo frets
* "C" Shape Profile
* 9.5 radius to 12 compound radius
* 1-5/8" at the nut (R2)
I shimmed the neck, and the string height is about 2mm from fret to string at the last fret.
I'm going to let all the adjustments "settle" for a day or so, then go back and tweak it.


Solvent Pop Issues
in Inlays and Finishing Chat
Posted
Yeah, I've drained my compressor and do so frequently.
I've used Dupont Chroma Clear and a few other cheaper brands.
I'm not sure what you mean by "complete system" ...
I have a compressor, water/oil separator, pressure gauge, and gun.
I do follow the spec sheets every time due to my poor memory.
I'm located on the east coast ... yeah, high humidity but I shoot indoors in a climate controlled environment.
Is there something else I need to consider adding to my "system"?
This only happens when shooting clearcoat and only when I wetsand is the solvent pop really apparent (residue gets trapped in the crators).
Pretty frustrating.
I was thinking that me and urethane just may not be compatible.
That's why I ask about Nitro.
Would really prefer to stick with urethane, but I need to get this figured out.