


Narcissism
-
Posts
672 -
Joined
-
Last visited
Content Type
Profiles
News and Information
Tutorials
Product Reviews
Supplier Listings
Articles
Guitar Of The Month
Links and Resources
Forums
Gallery
Downloads
Posts posted by Narcissism
-
-
I've put white paper inlays, and fake fretwire on this to get an idea of what the final product is gonna look like, and the bloodwood is just not going to work with this build. The bloodwood needs a darker wood to work with, and the limba needs a darker wood to work with.
I'm going to do the right thing and get an ebony/darker fretboard.
I'm probably going to end up using gold hardware, as I like that the most with natural finishes. You've all convinced me to keep the natural top!
Now I just have to figure out what to bind with... or if I'm going to bind...
-
True, build quality can totally ruin a guitar. The new body on mine was probably joined, routed, and overall built better than the indonesian one that came before it.
GAAAAAHHHH!!!! Play that bird!Sorry, I burnt it

-
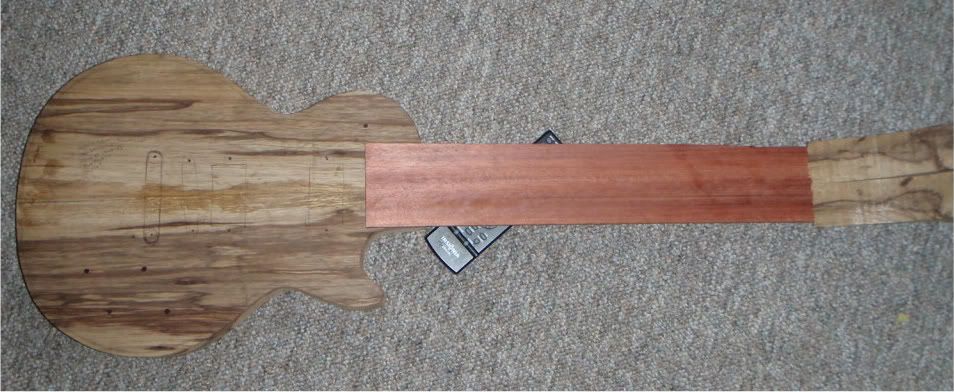
I decided to take a pic with the bloodwood fretboard blank layed on it and some scrap limba where the headstock might be.
Hmm
-
After making a new body for a guitar out of different wood, I can honestly say that the difference is like Korn vs. Metallica, soundwise.
But what do I know, i've only built 3
(corvus doesn't count because I never plugged it in) -
Are you going to make this one for yourself?
-
I just spray a ton of automotive primer until its level
That works. The sanding sealer we have at work is basically resin that you can stain.
So what's this Lex Luthier method?Oops, my bad! I ment LGM Guitars
Here's a link from the tutorial section.
-
I think it depends who's painting methods you're using. I use lex luthier's method in the tutorial section. So in my case you're right. However, the home depot method is to just prime and hen paint... Which will result in wicked bad grain showthrough.
How do you do yours?
(edit)
actually, both ways have their grain problems. They just get solved at different steps
-
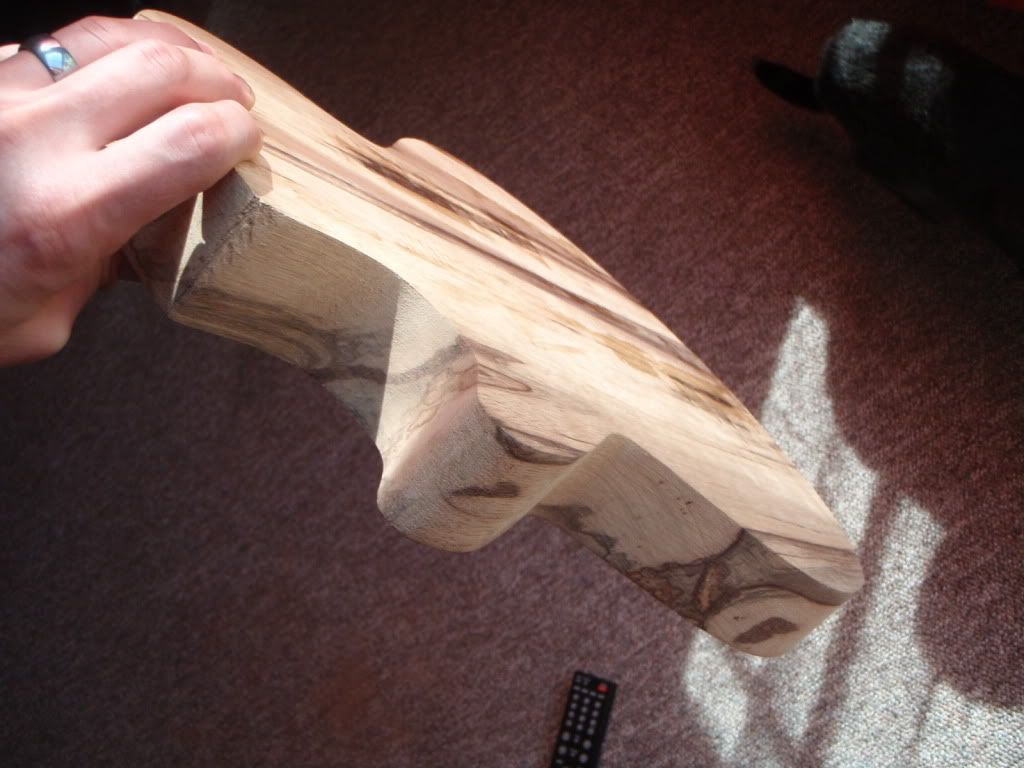
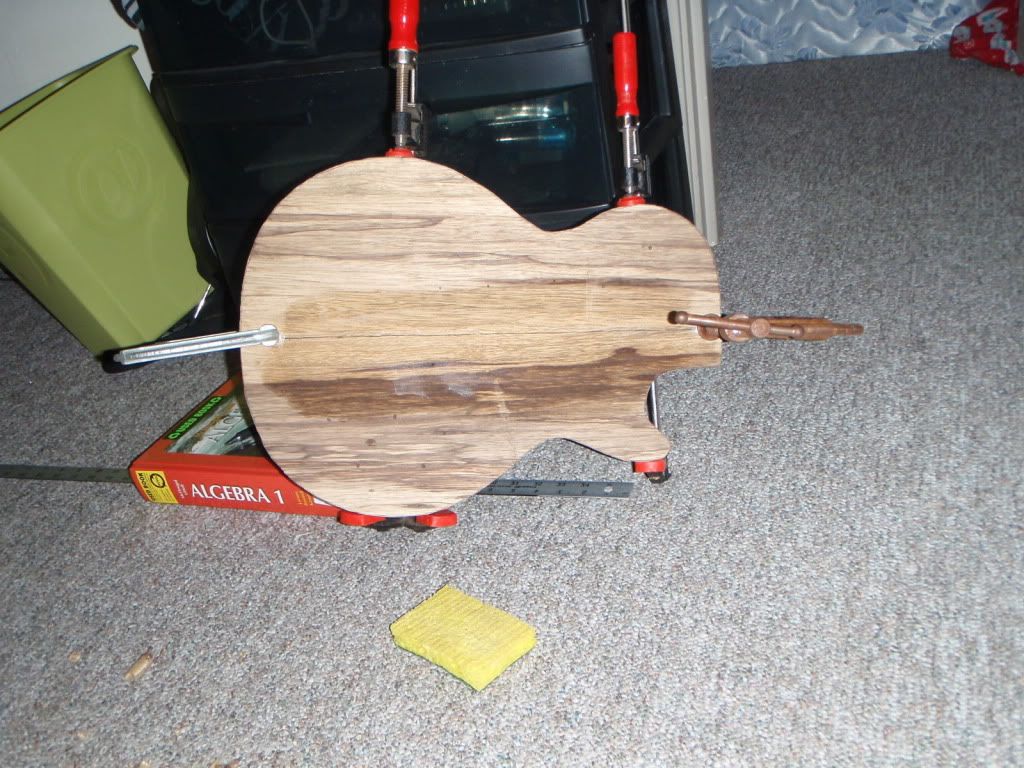
Muzz, I would have used a router & template to clean up the edges, but I tried that with an SG, and got a lot of tear out... Mostly because my hands are unsteady and the router kept tipping. I suppose a piece of wood of the same thickness next to the stock I was cutting would have prevented that... Luckily, the natural carved edges of the SG took away any of that, but I really didn't want to have that happen with the LP. I really want this to be a clean build with no mistakes.
I started carving the edges up with a mini handplane. Then I went with my "sandpaper wrapped around a drumstick" method to clear up any unevenness or spots missed by the plane. Its a little more difficult to get the perfect roundness that I was going for, but with attention to detail (and glasses) it works out pretty well!

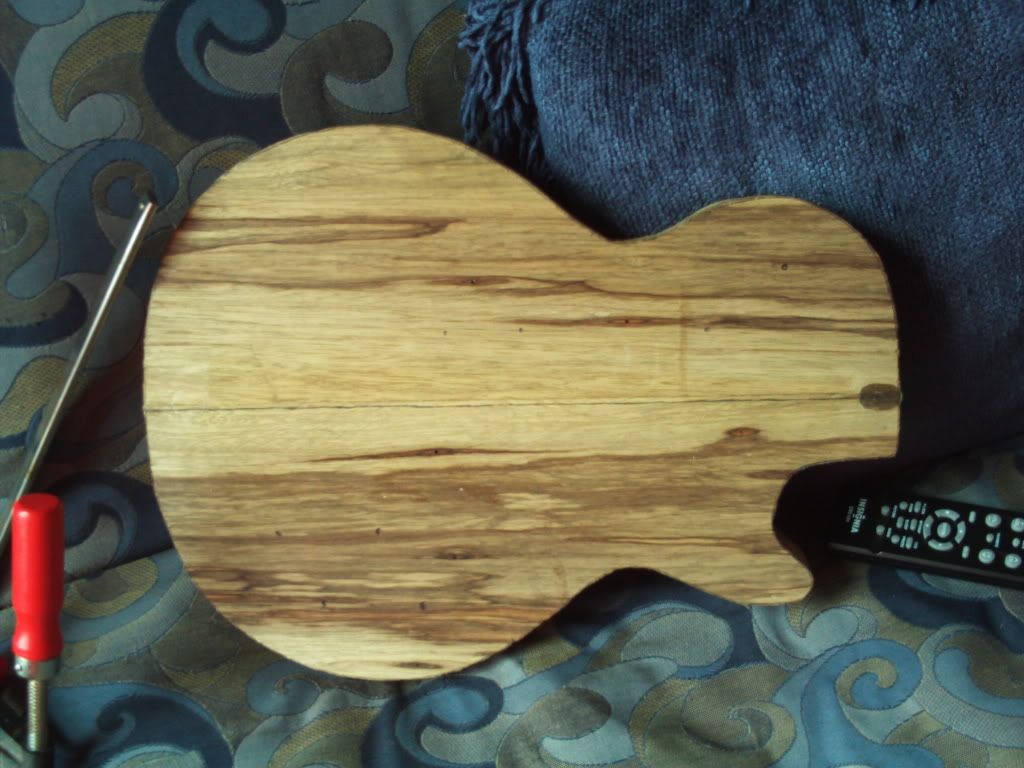
Somehow, my remote always manages to bomb my photos...
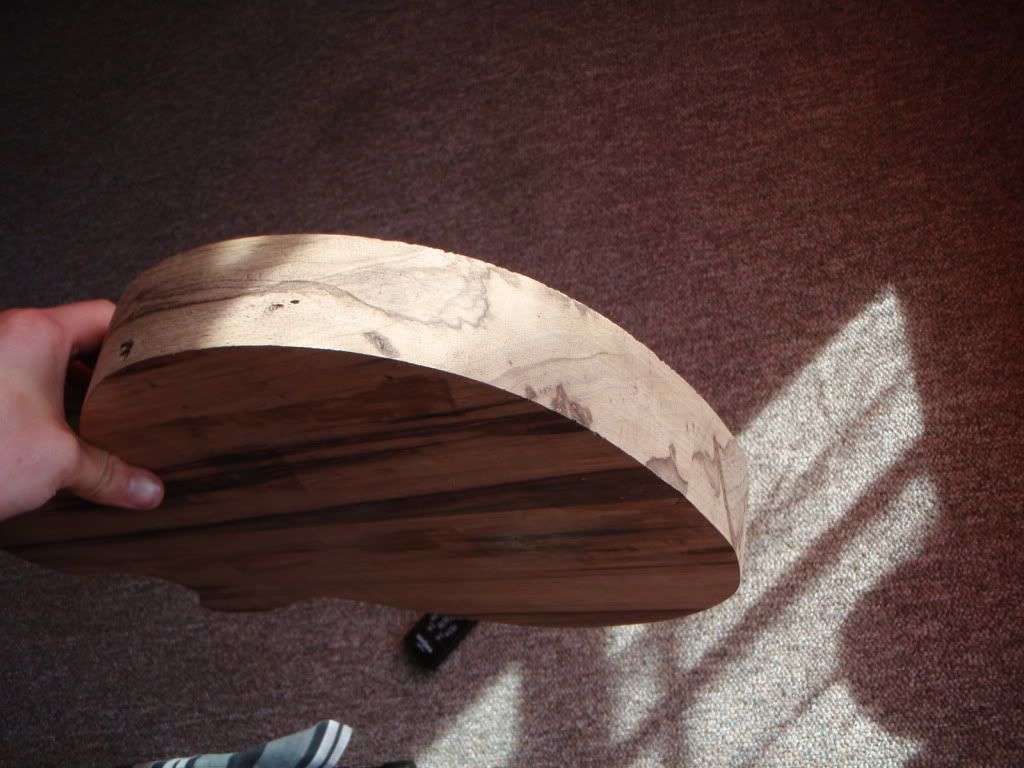
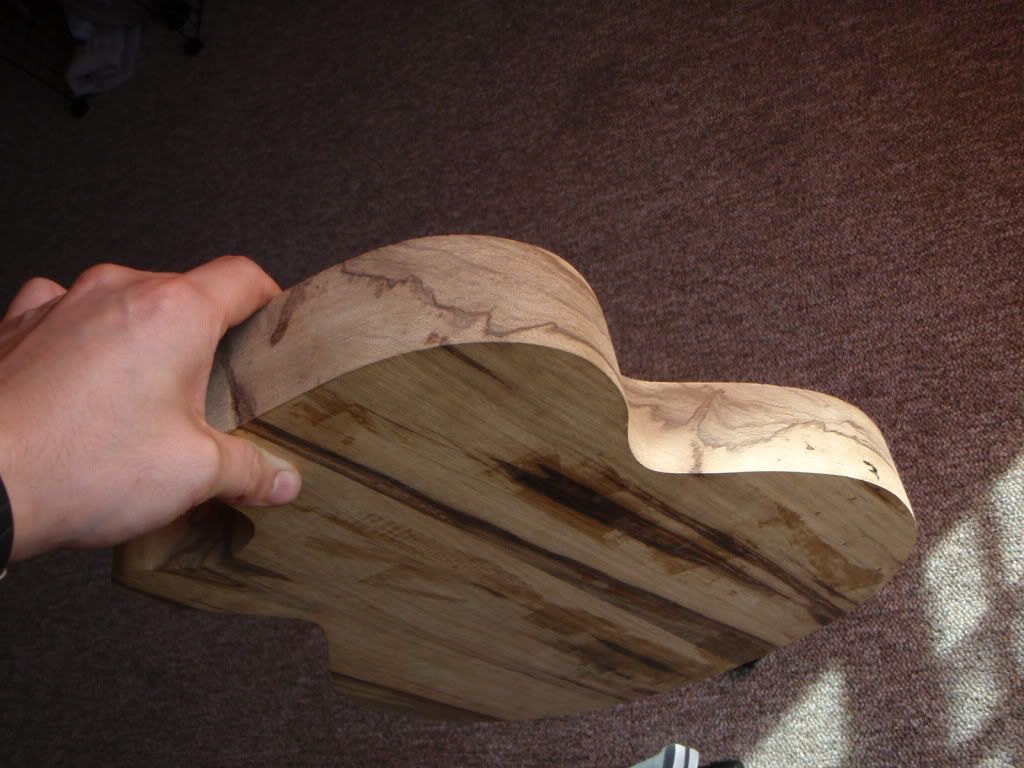
I'm not too worried about that rough edge, because I'm pretty sure its going to get routed off with the set neck pocket. I'm going to try to get the grain to match up with the neck as best as possible with this.
As you can see, there's some very interesting grain on the sides here. The back has quite a bit going on with it as far as contrast between white and dark. I am still undecided on the top, so I'll get some mineral spirits out and see what happens!
I'm pretty rough with my instruments, as far as travel and touring goes. A good case will probably prevent any of that kind of damage though. I still need to make cases for the bass, and the RG-RR... Better cases will allow me to expand my finishing options.
Anyway, I was thinking of grainfilling with epoxy, and then clearing with poly... I might go with something other than poly this time though... I really like killemall's clear finishes...
-
Hmm, I probably would have kept it if it weren't for the runs. I've never swirled though, so I can't offer any advice on how to prevent the runs.
-
Very nice!
-
I gave an evil laugh when I painted my rhoads body, because I knew people on here would be saying "HOW COULD YOU-" bla bla bla lol. IMO, this guitar deserves to be white. I sooo want to paint my limba LP white, but my wife said she'd divorce me if i did
-
I'm assuming cricket is like baseball, only with a canoe paddle, shin guards, and an accent
-
I started working on this in February. I knew I wanted to build a les paul shape, but as far as colors and hardware go, I'm stumped. There's lots of things I want to do: maple top, chambered body, carved top, recessed controls, binding, natural binding, natural control plates, etc. Can't do em' all.
But here's what I got for specs so far:
Black Limba body
Black Limba neck (quartersawn, reinforced with carbon fiber rods)
I have bloodwood that I can use as a fretboard, but I'm not too sure how I feel about it.
I also have some bookmatched flamed maple that I can use as a top, but I don't know how i feel about it. I'm a metal guitarist, and I'd like this guitar to have a sort of darker personality to it. I'm just having a hard time giving it that with the materials given. I do like black Limba for the weight and sound. It has a pretty neat grain to it as well, so I'm not sure if i want to paint it. I could just go ahead and carve it up, not put a top on it or anything and have it with a natural finish... but I'm not sure.
All I know for sure is that I want the les paul shape, and the entire guitar is going to be made from the same plank of wood. Here's where I'm at
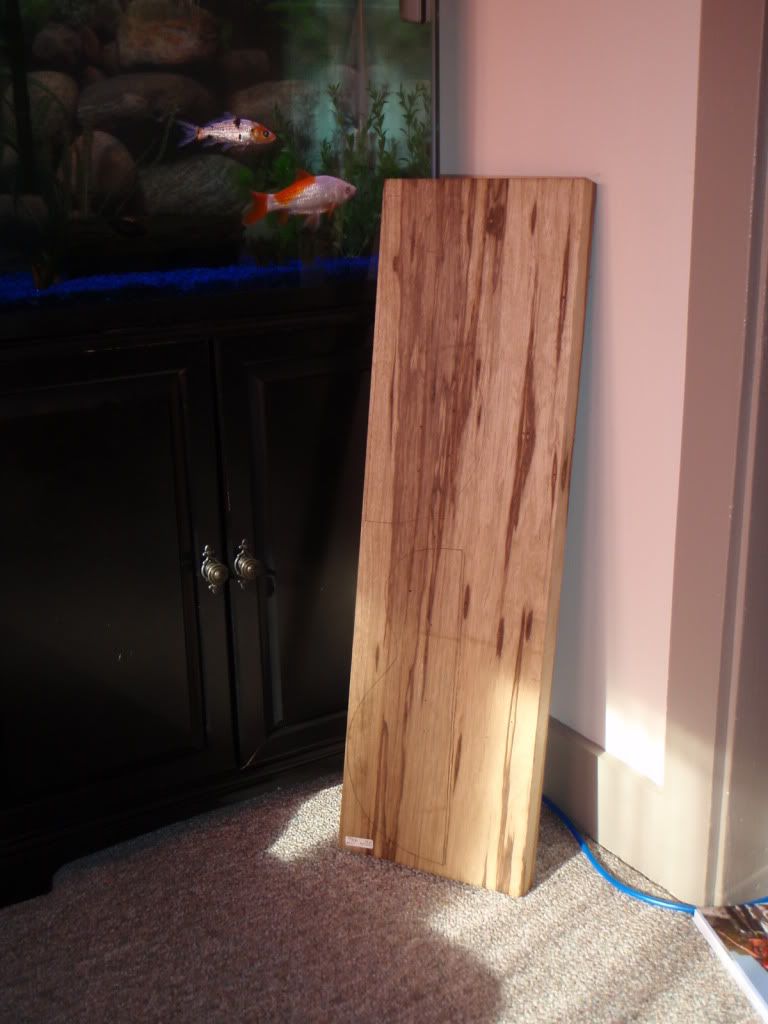
Blank
body cut & glued
The line is a pencle line, not a glue line. The glue line is invisible!
Oh, and please excuse the junk. We were in the process of moving in when these pics were taken!
Any ideas for the build are completely welcome and encouraged! I'm not too terribly interested in the top. I am very interested in the back and sides though! I'll update with some pictures of that once I have the basic outline shape sanded out.
-
lol yeah you made it clear from the beginning. I tend to state the obivous though
-
I guess you gotta experiment sometimes... I'll be honest, I wouldn't have shown this lol. I would have worked on it, f-ed up a few times and then showed the final ones off to make it look like I was just awesome for trying it out for the first time.
But seeing a professional screw around is kinda interesting. I'm curious to see what your final desired result is. Right now it looks like you're just kinda trying things.
-
Niiiiiiiiice!
I was looking forward to seeing this one completed!
-
Hey John,
I think that Crackle is pretty freakin sweet!
-
Herro. I so ronery.
LMFAO
-
Beautiful work Simo!
-
Pickups Recieved! They came today, I installed them, and they sound AWESOME! Good clean transaction, and gives you a little background before you buy, which is very helpful. Thank you very much, Crafty!
-
I know shellac works too.
The reason I asked is because I read up on your attempt at mixing with superglue. It gave me ideas of using other things as a base.
But you gave me the answer I needed! Thanks!
-
I was just wondering if it works.
-
I don't know if you clear your necks, but if you do, then that flame is gonna jump out pretty nicely.
-
He's lucky I work at a deer farm.

Les Paul Style Build
in In Progress and Finished Work
Posted
Here's the neck blank. This side will be the headstock, and the back side.
On the other side, its a lot lighter and a lot more like the back of the guitar. If i plan things out right, I can get the grain to match almost seemlessly
But I'm caught in a bit of a trap right now. The darker side goes more with the body, so it should be the side with the headstock. However, once I turn it around and the dark side becomes the back of the neck (because i'm scarfing it), the side that matches up with the body will end up under the fingerboard. Also, the dark part of the grain is pretty thin, as you can see in the following picture:
So, if i carve correctly, I can get the grain to match up anyway... maybe...
I'm gonna play around and see what I come up with.
Ooten, I checked out Ziricote. it looks pretty sweet! Unfortunately, the hardwood supplier in my area doesn't stock it... I'll have to try my hand at Evil-Bay I guess.
ScottR, I'm glad you agree. That raises my confidence a lot, as I'm not usually good with anything besides black & white as far as patterns and colors go! I'm not too crazy about black binding & hardware though... But hey, I'll give it a shot, and if you're right, then that's what I'll go with! Otherwise, I'll have some new hardware for my renovation of the RG-RR (I'm gonna remake it, neck and all.)