


Ripthorn
-
Posts
604 -
Joined
-
Last visited
-
Days Won
7
Content Type
Profiles
News and Information
Tutorials
Product Reviews
Supplier Listings
Articles
Guitar Of The Month
Links and Resources
Forums
Gallery
Downloads
Posts posted by Ripthorn
-
-
I like the headstock, but have to say that the body shape is not my cup of tea. Doesn't mean the workmanship isn't fantastic, though, because it always is. I'm wanting to get my hands on some macassar. I've also got a nice piece of ambrosia maple just waiting to be put to use, probably on the upcoming prototype build I have for a new body shape. What kind of finished weight are you shooting for with these guys?
-
You can, but household bleach won't do the trick, it's much to weak. There are three kinds of bleach that could possibly be used, with household bleach being one, but the least useful, if I recall. The good stuff is not cheap and is getting harder to find due to restrictions. As long as you neutralize the bleach properly, there should be no problems with finish compatibilities. Just as a side note, I personally love the variation in natural wood, so don't think that you ncessarily have to get your wood to a blank canvas state.
-
The tele tone wiring is actually fairly notorious for doing what you described. One common modification is to put the cap between lug 3 of volume and lug 1 of tone (instead of the jumper wire) and then connect lug 2 of tone to ground. Since the resistor and cap are in series, you can swap places. The end effect is that the tone knob is more usable. Of course, if you found a cap you like, then go with it. As for the treble bleed, you can keep or lose it, it's up to you. It simply lets some treble bypass the volume control so that when you roll volume down, it doesn't sound so muddy.
-
 1
1
-
-
Funny you should post this today, as Popular Woodworking just sent out an email with free plans for something in the same vein, here: http://www.popularwoodworking.com/projects/german_work_box?et_mid=588362&rid=232283229
-
As I understand it, true temperament is also something that is a little different for each scale you intend to play, so I personally don't think it is a good idea for a guitar, but that is just me.
-
Thanks for the advice everyone. Just a note, this is lacquer that fully burns into itself, but I will still have a go at the top and see what I can do. I think I will just need to step back for a few days and not think about it, then approach it with a level head again.
-
I shaped the top with a grinder, but obviously didn't do as well as I hoped. I am thinking maybe I will start off with a cork block and some 220 and work on the problem areas and see where that takes me. Thoughts?
-
I did shoot several coats of sealer over the wood, so the color is not directly on the wood. I just didn't use primer.
As for stopping the paint work, that's what I will do. I'm just a little disappointed that I wasn't able to get it right before getting going on the finish work. I suppose my question is whether I should just treat the trouble spots, or if I should strip it all off (not what I would prefer). Any advice is welcome, as I have never done this kind of carved top before.
-
When I was doing all the sanding, I set up a work light to give me a really harsh raking light to try and get all the minor imperfections out, but you are right that there are still some there. By not too late, do you mean sand back potentially through the color coat and get everything? This poplar seems kind of tough to carve because it is so soft. I do agree that the lumps need to come out, I'm just a little bummed that this won't get finished until May (starting tomorrow, it is not likely that we will hit 60 degrees again for a very long time). But you guys are right, I won't be happy until it is all squared away and looking right. I just have to figure out how to do it....
-
I've never shot automotive stuff before, so pardon my ignorance, but what does the grey primer accomplish, aside from requiring fewer coats to get a full hide? I was under the impression that several coats of color over any base color will eventually get to the same color. Is this not so? In any case, it's too late, I kind of got caught in that case where I can spray without the primer now, or wait 7 months before the weather will good enough to spray again.
-
Alright, so I have been working on this, but it has mostly been prep work for finishing. I put down some sealer, and got my lacquer. I'm using Duplicolor paint shop deep blue. This is interesting stuff, very thin, but a very nice color. It was finally a decent day to spray (tomorrow is likely the last one until spring, so I had to start today, so I can level it out tomorrow and put one or two light coats on to even it out). Anyway, The photos thus far:
One coat:
Another couple:

And after several:
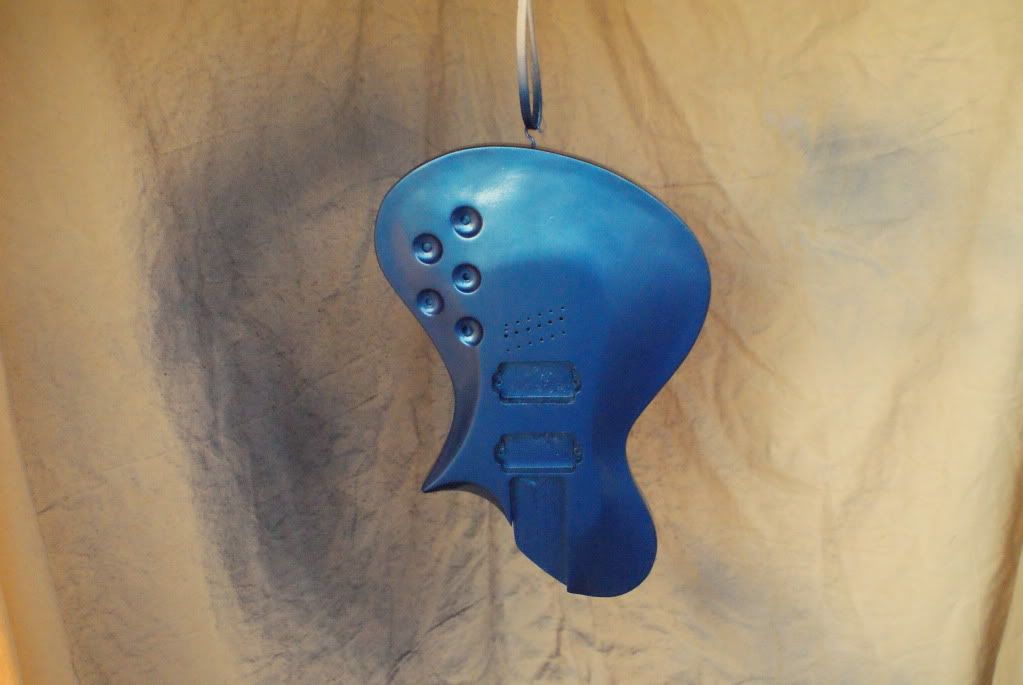
Well, that is it for now.
-
The guitarfetish tuners are surprisingly good. Hipshot makes ones that will get you everything but black (only chrome, but incredibly nice, I'm using them on my current build). Other than that, you will likely have to go more expensive.
-
1 -Ritchie Blackmore
2 -
3 - Slash
4 - Jimi hendrix
5 -
6 -Jimmy Paige
7 - Stevie Ray Vaughan
8 - Eric clapton
9 -Mark Knopfler
10 -
11 -
12 -
13 -The Edge
14 - Chuck Berry
15 - Angus Young
16 -
17 -
18 -Eddie Van Halen
19 -
20 - Ace Frehley
21 -
22 -Tom Petty
23 -Kirk Hammett
24 -Santana
25 -Jeff Beck
26 -Yngwie Malmsteen
27 - Kurt Cobain
28 -
29 -
30 -
31 - Bo Diddly
32 -
33 -
34 -
35 -
-
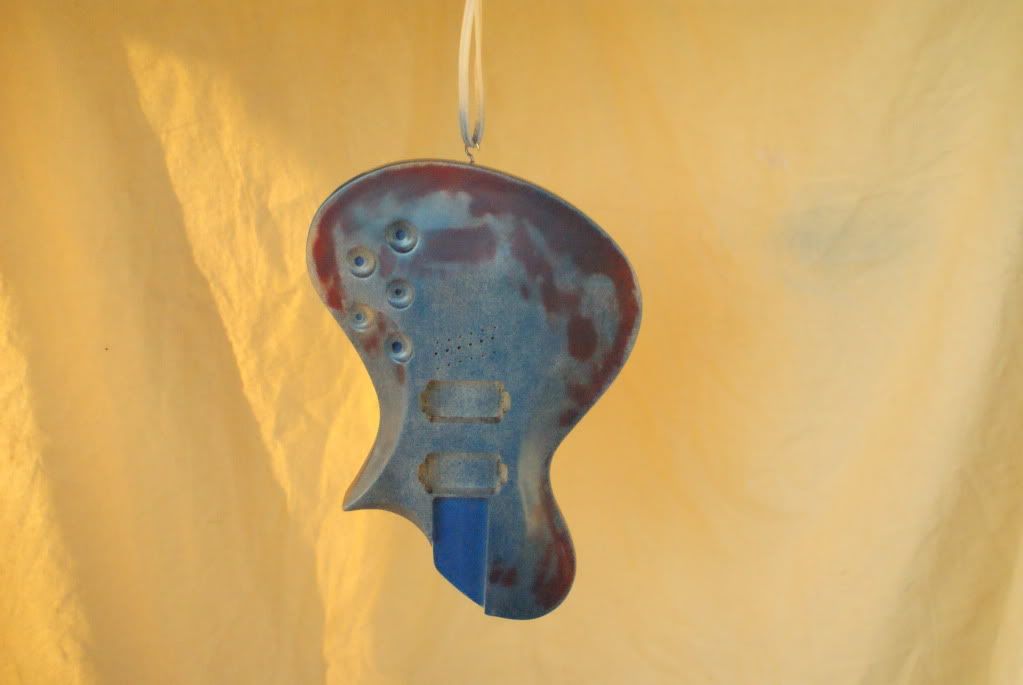
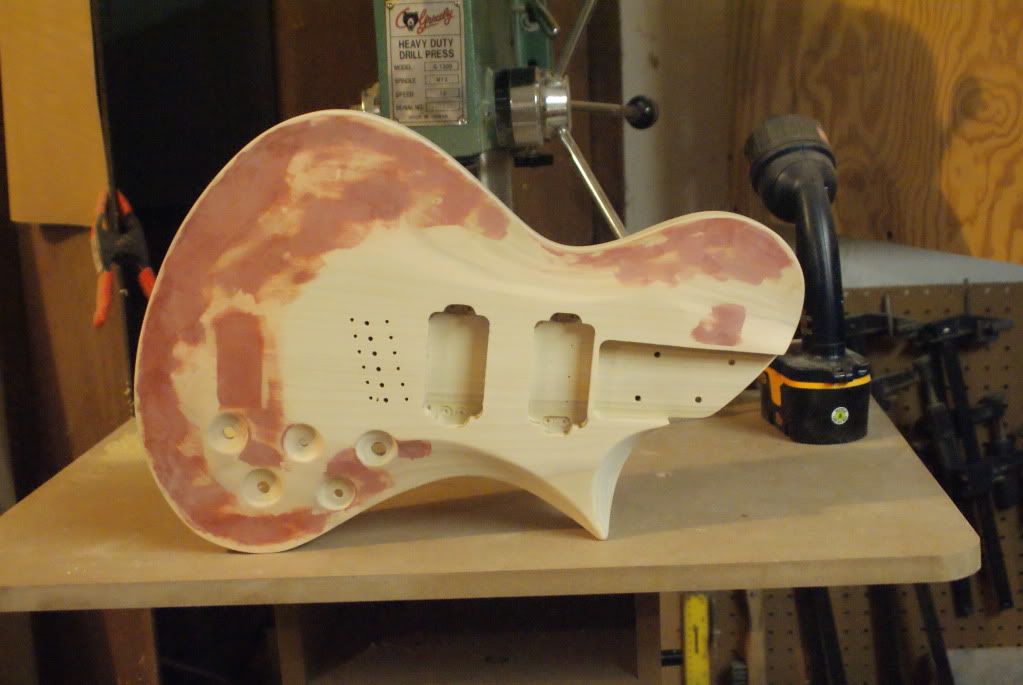
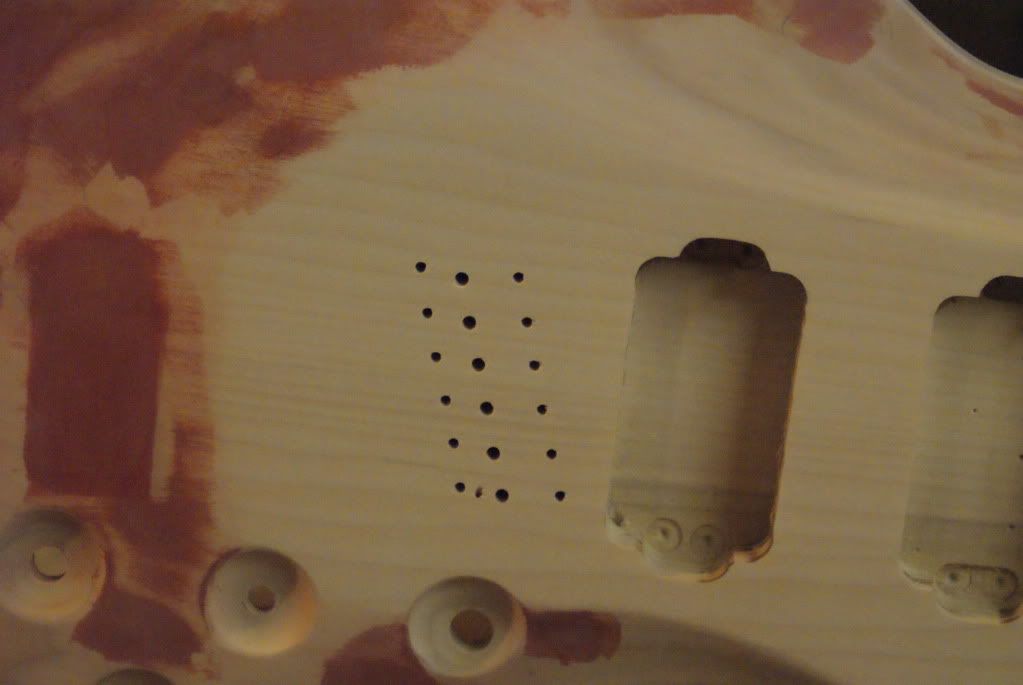
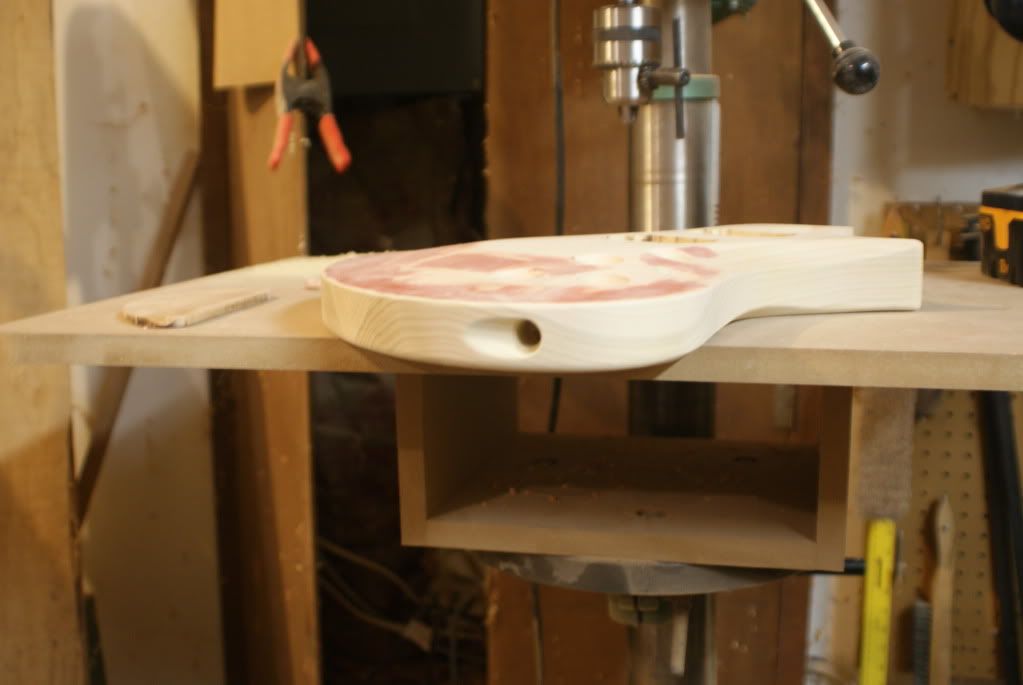
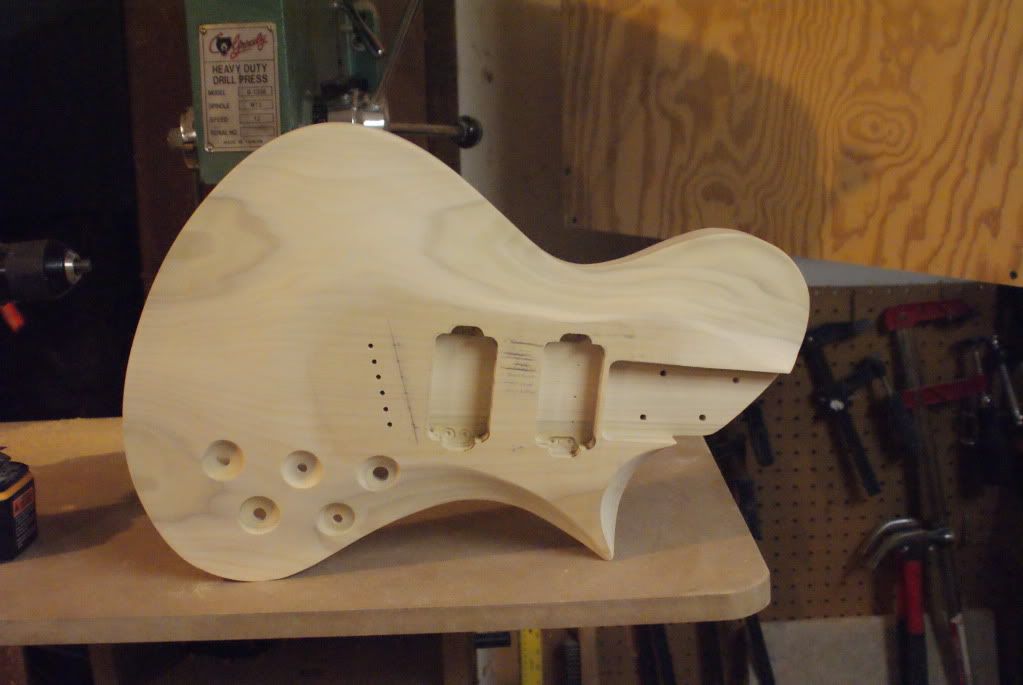
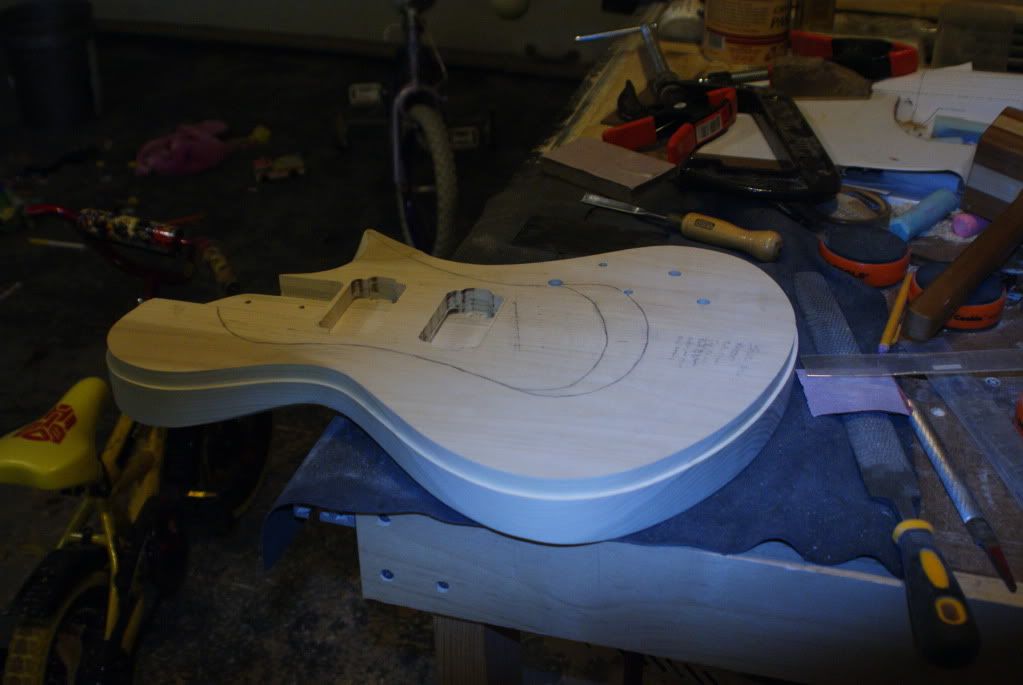
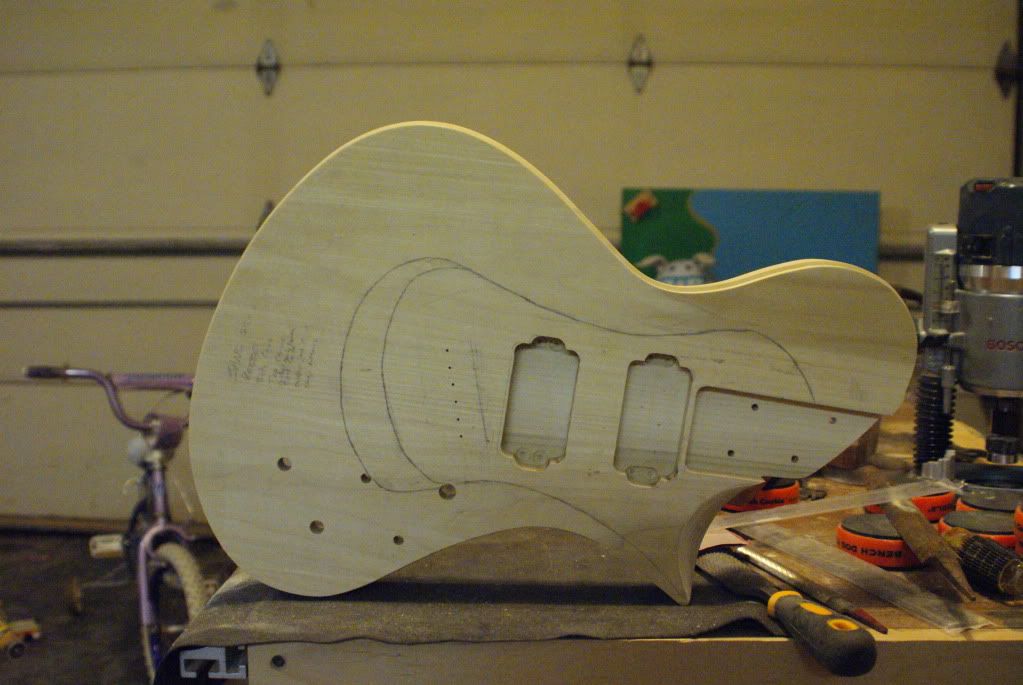
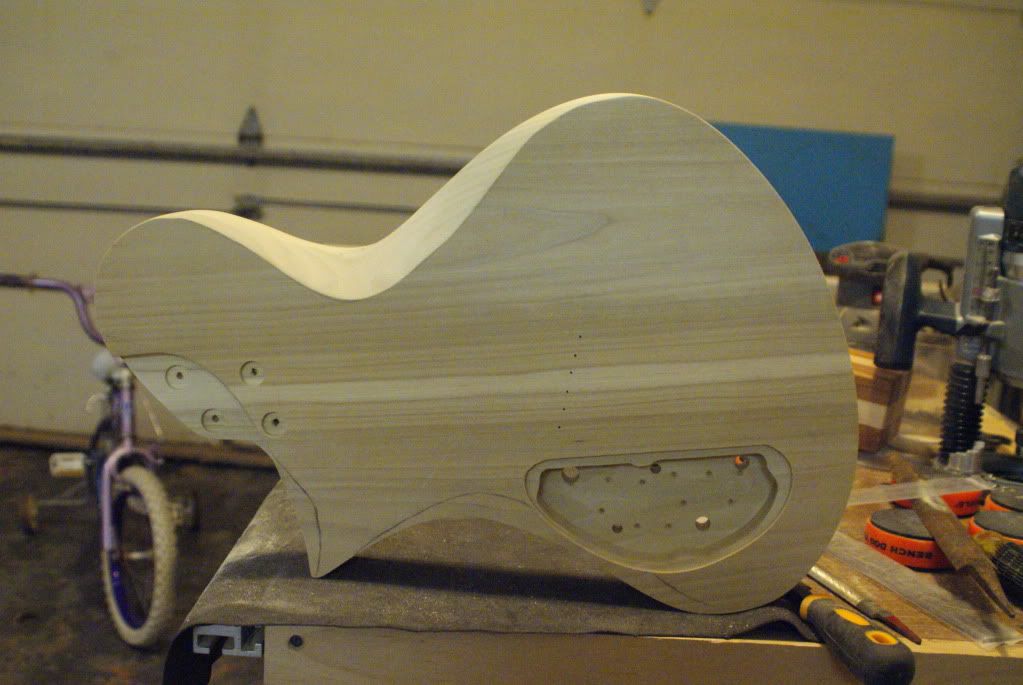
Alright, finally took the camera out and so it's update time! I have made quite a bit of progress, but with my wife's camera (which I am too stupid to operate), I can only get certain pictures (no close ups or anything like that). So here is a little rundown of what I have been up to. First, I have been trying to refine the top carve. There were some areas where the ROS made very slight low spots. I used some glazing putty to even them out. It's the red stuff, and though it looks like there is a lot, there really isn't all that much on there.
I double stick taped the individual bridges down and used a hinge drilling bit to drill the mounting holes. As you will notice, the string through holes were not drilled dead on center. That is because I marked those holes while the bridges were not parallel to the center line. But that's alright, with the bridges on and all, I don't think it will be noticeable.
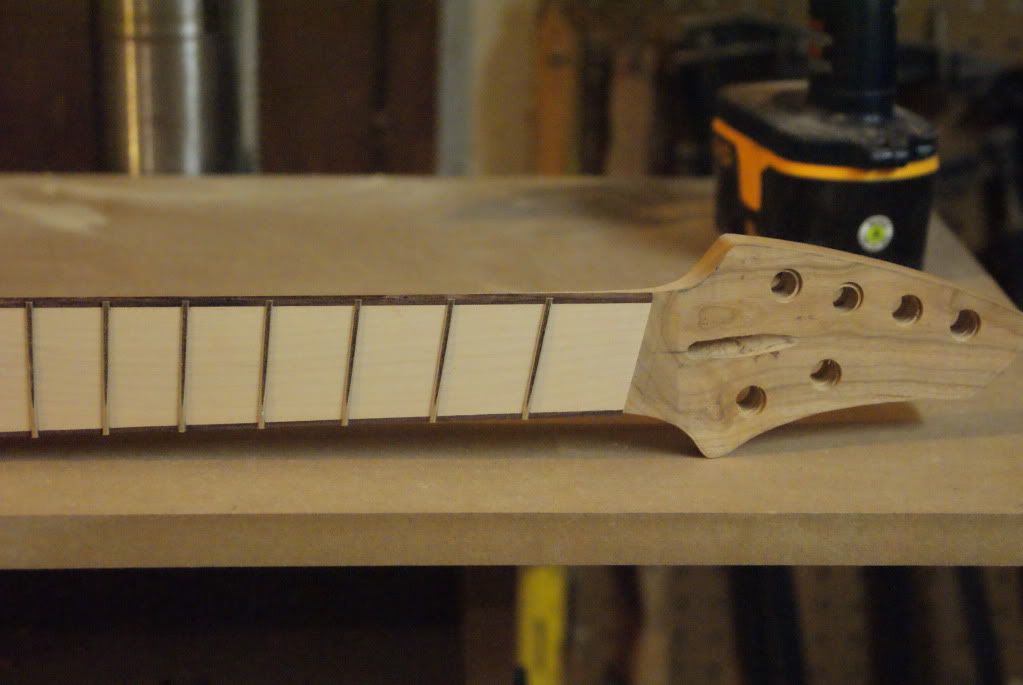
I also fretted the neck. I had some issues with it that were explained and subsequently resolved here: http://projectguitar.ibforums.com/index.php?showtopic=46906. Here is what we have thus far:
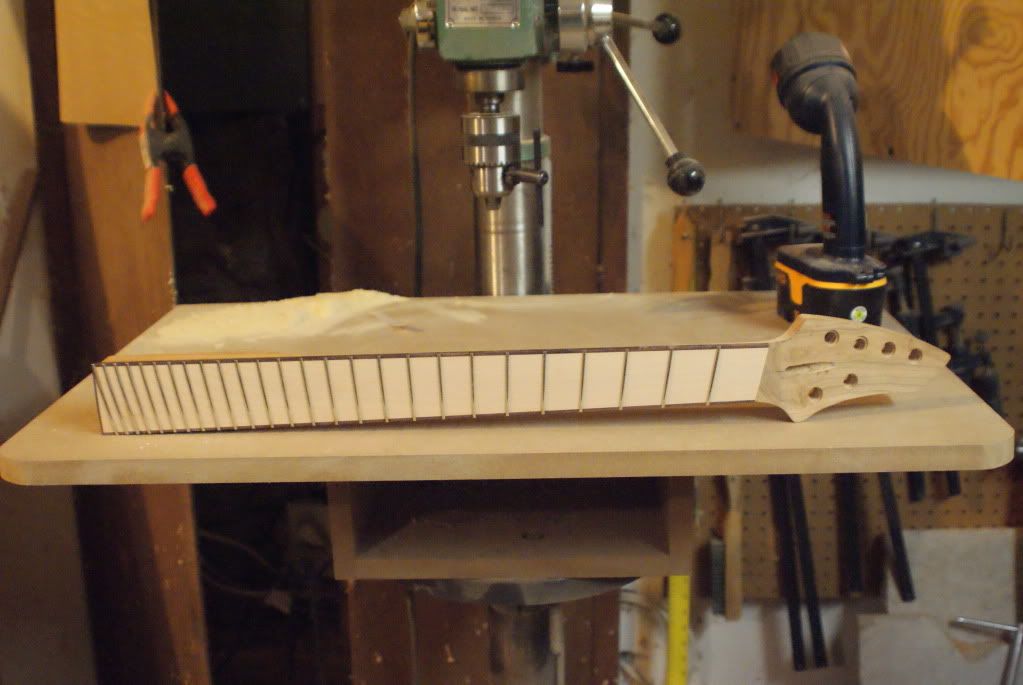
And I drilled the side dots. One or two are off line so I will plug and re-drill.

I also carved some bevels into the back. The one along the bottom also goes onto the control cavity cover. I spent quite a bit of time refining the transitions and such with sandpaper by hand, and now they all flow very nicely.
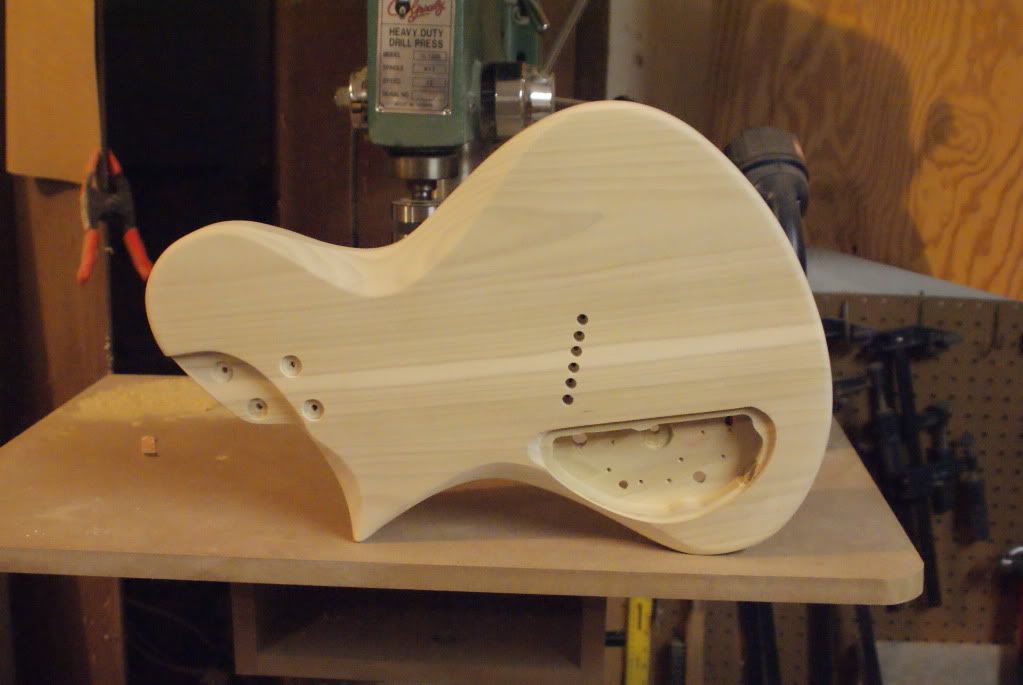
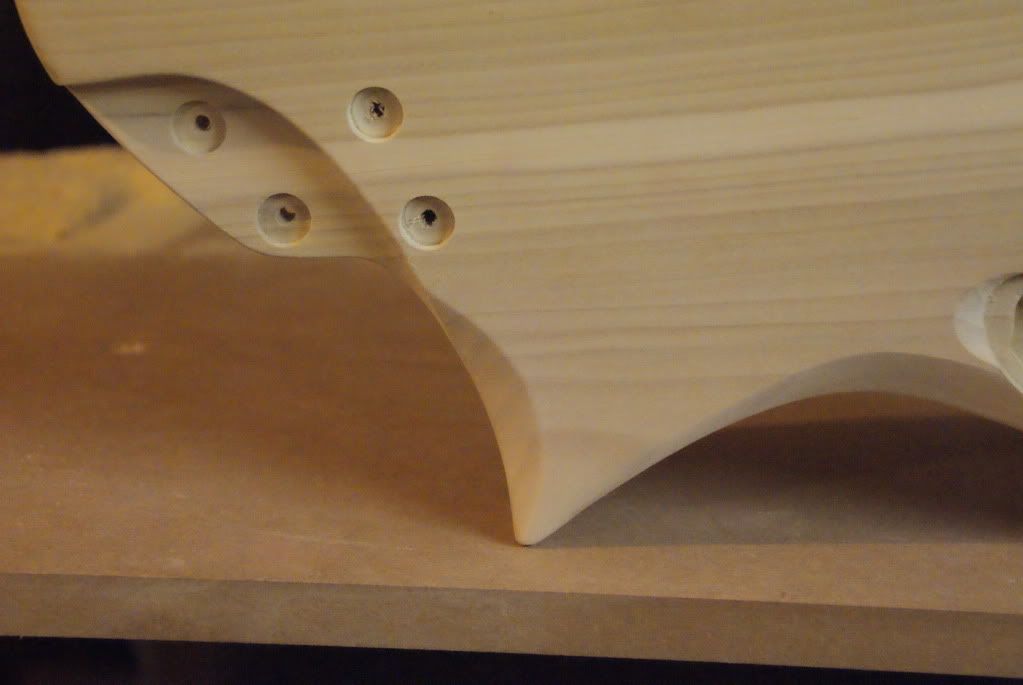

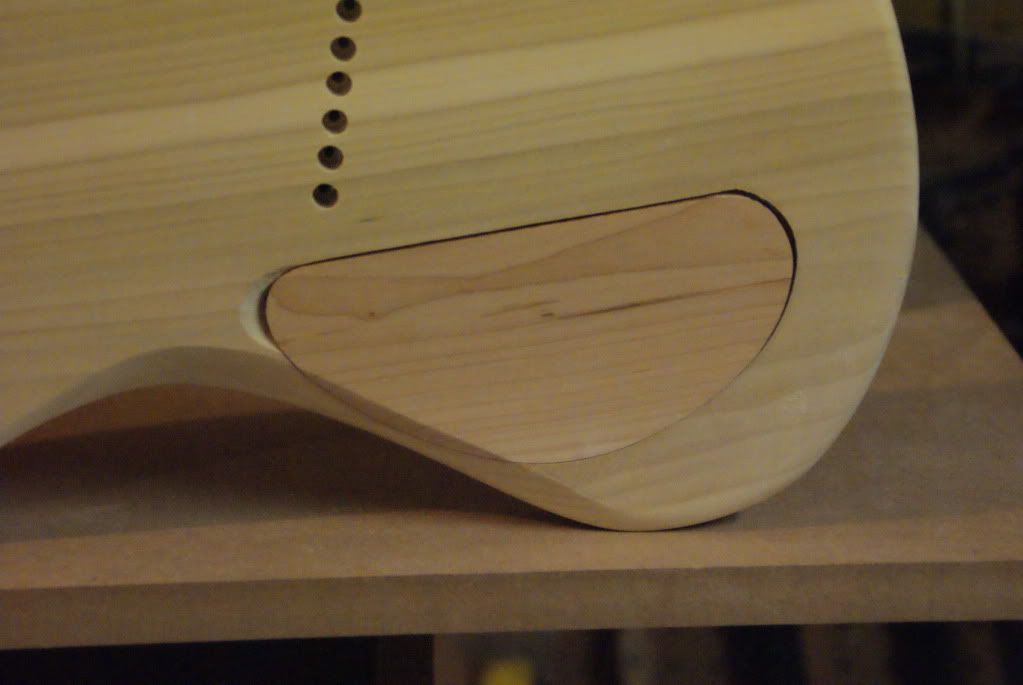
The cavity cover is going to attach with magnets, so I carved out a little access place for a finger to easily get in there and pry it out:
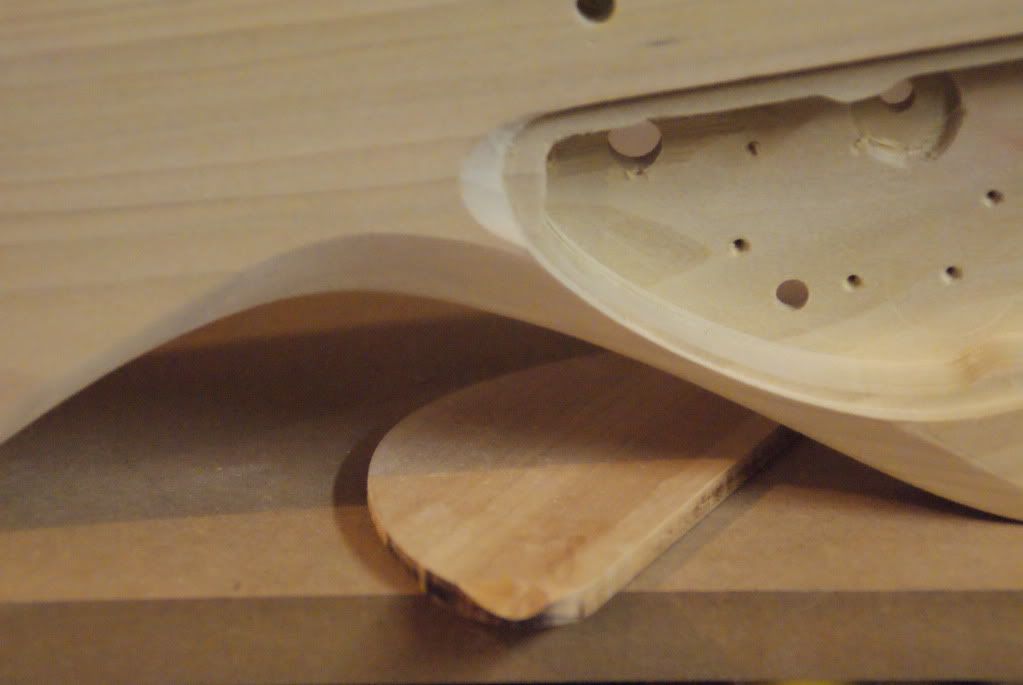
I am using a barrel jack, but because the place where I wanted to put it is fairly thick, I had to drill a recess for it. And because I anticipate using right angle plugged cables at some point, I carved out a nice little contour, I think it adds a nice touch. Allow me to say how much I love the flex shaft attachment for my dremel. It makes it like a foredom. Use the 1/2" sanding drum, and voila, we have:

And that is it for this fine evening. I'm hoping to finish the last of the sanding and such tomorrow and shoot a couple of sealer coats on the body. The neck needs the fret job finished (beveled and leveled, etc.) and finish sanding, then it can be sprayed too. We're making progress, that is for certain!
-
Glad you think so! I have made plenty of progress, just having an issue with cameras right now. I will post pictures soon. The neck has been fretted and the carve is being finessed (had to use some glazing putty in some of the low areas from the ROS). If all goes well, I hope to be spraying early next week.
-
I agree, the looks are to die for, but the logistics are a pain with binding.
-
Well, after some trial and error, I had reasonable success. Here is what I ended up doing:
- bevel fret slots
- over-radius fretwire
- use modified nibblers to remove fret tang
- file off remainder of fret tang
- put a small dab of thick CA (what I had) on the binding at each edge
- hammer in fret wire from center out to each side
- test each end by pushing down, if any of the CA was displaced or moved, used a caul and a clamp to keep ends down until glue set
- flush trim the over hanging fretwire
It seemed to work pretty well. It is fairly time consuming, especially when you have frets that need to be clamped down (it was cold, so the glue took longer to set). However, the results are much better than I was getting before. I now have high hopes for this fret job, though the maple is significantly softer than what I am used to using. I likely won't use it for a fretboard again. If I need really light fretboards, I have a nice large board of wamara sapwood (which happens to be just as dense and hard as the heartwood, just a very light maple color). Thanks to Wes and RAD for the help.
-
Ahh, yes, got it. That makes much more sense now. I only put four frets in, so I think I will yank them tonight and start over doing it thusly:
- Over-radius fretwire
- hammer in from one side
- put glue under fret ends
- clamp with caul
Does this sound like a reasonable schedule? This seems much more promising.
-
My one concern about a radiused caul is that the effective radius of each fret is different. Or are you suggesting something that is not the width of the fretboard? On a regular board I use one of the stewmac brass inserts in a block of wood and it works beautifully, but since all but one of the frets have a radius flatter than the fretboard radius, I'm finding it a little difficult (and for that reason I'm not going to try the epoxy idea). I think that I can use the brass insert to clamp down the ends after putting in some glue, I will just have to be careful getting the glue in there since this is a bound board.
Another idea I had, but I don't know if I like, is to just slot up the binding, undercut the fretwire a little bit, then fill the slots back in using the old dust and glue trick. It is less appealing to me for reasons of aesthetics, but it would allo for some extra tang near the edge of the board to help keep the ends down. I'll try Wes' trick first, though.
-
Well, so I tried to put in a few frets on my multi scale this evening and it was a massive failure. Since the board is bound, I don't have tangs out to the edge of the board. Couple that with the fact that the radius is funky on a multi scale, and I can't get the fret ends to sit down well. Also, the maple board is softer than I am used to working with, so I am afraid of the frets getting down a little too low in the board, which will result in a lot of leveling. I actually damaged the binding on one end of one fret, which I should be able to fix, but still, it was tough.
Just as a note, my board is radiused to 12", I radius my wire to about 11", put the fret in and tap down the ends with a hammer and then work my way in. The ends like to pop up after this though. I am wondering if I will need to do the superglue thing to keep the ends down. Any ideas? This is stumping me. Please help...

-
A stoptail would be awesome, perhaps on a future build, but that's not what I've got cooking up. It's not knobs either...Hopefully I can make some progress with it tonight and post some updated pictures to see if you guys can figure it out. It's going to be fun, I think!
-
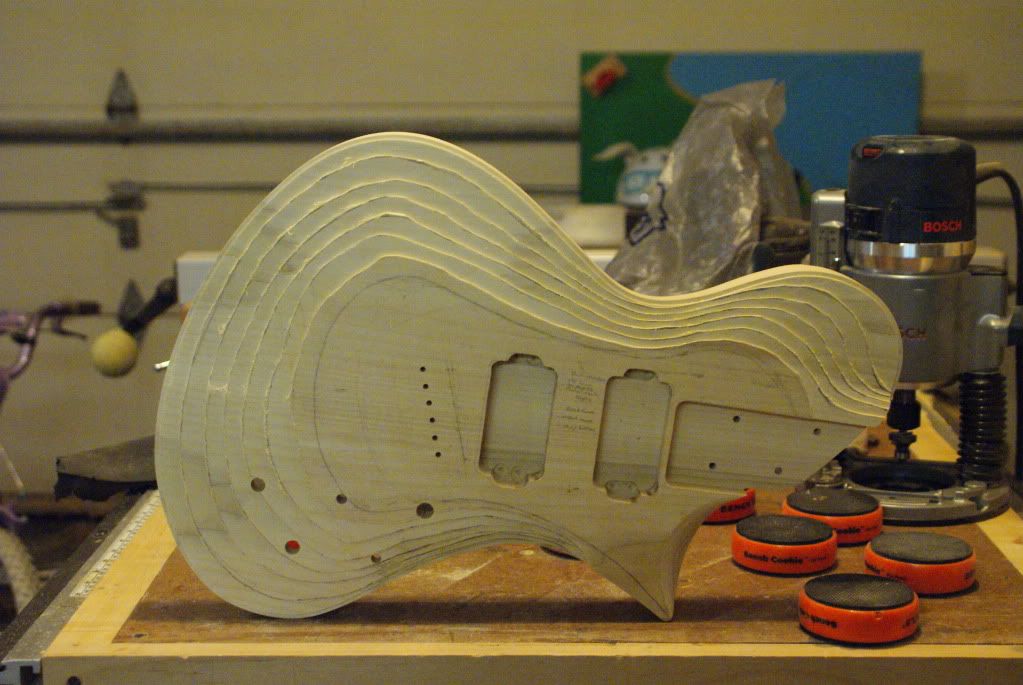
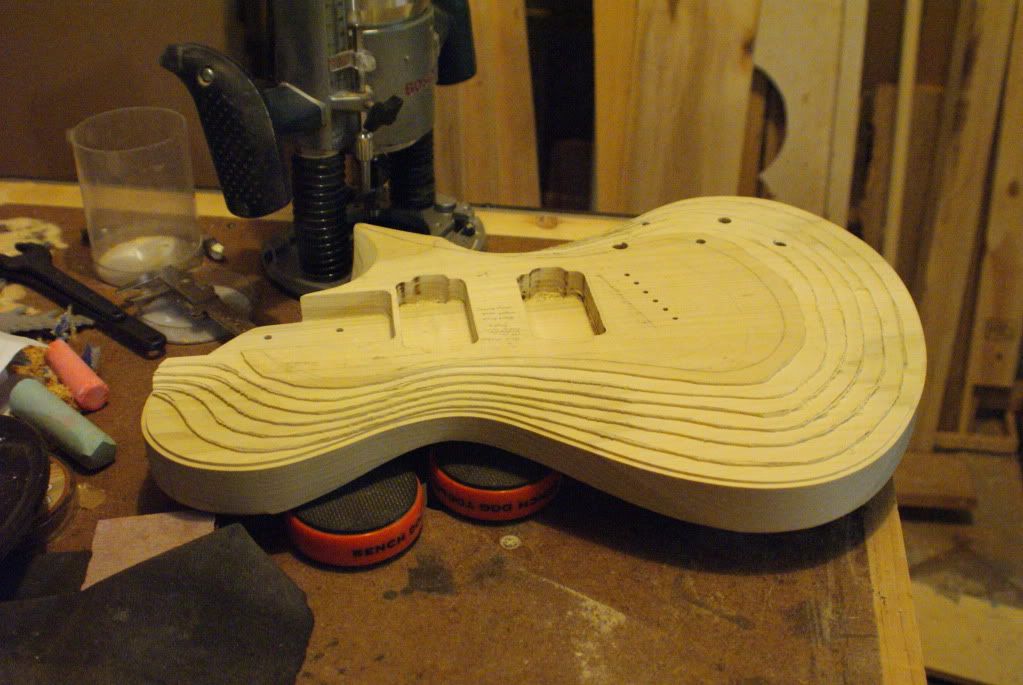
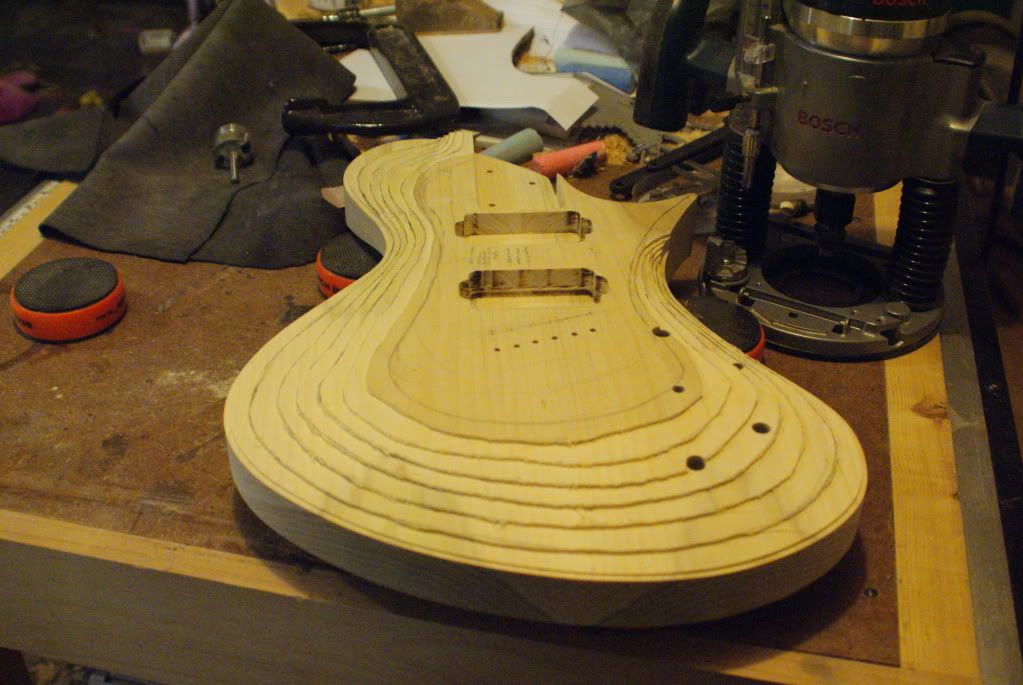
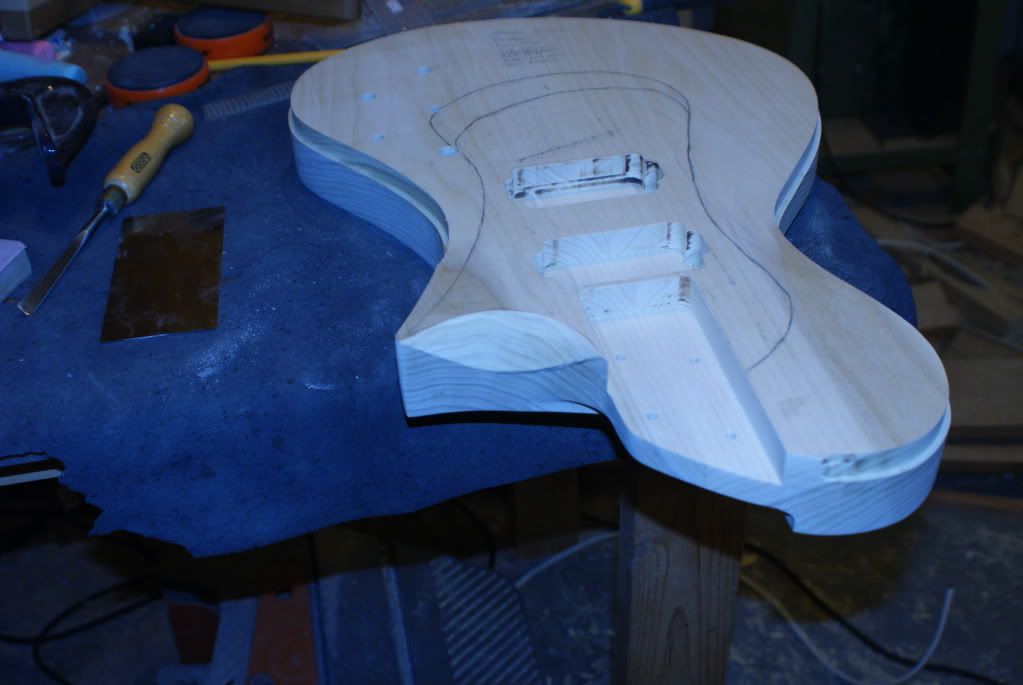
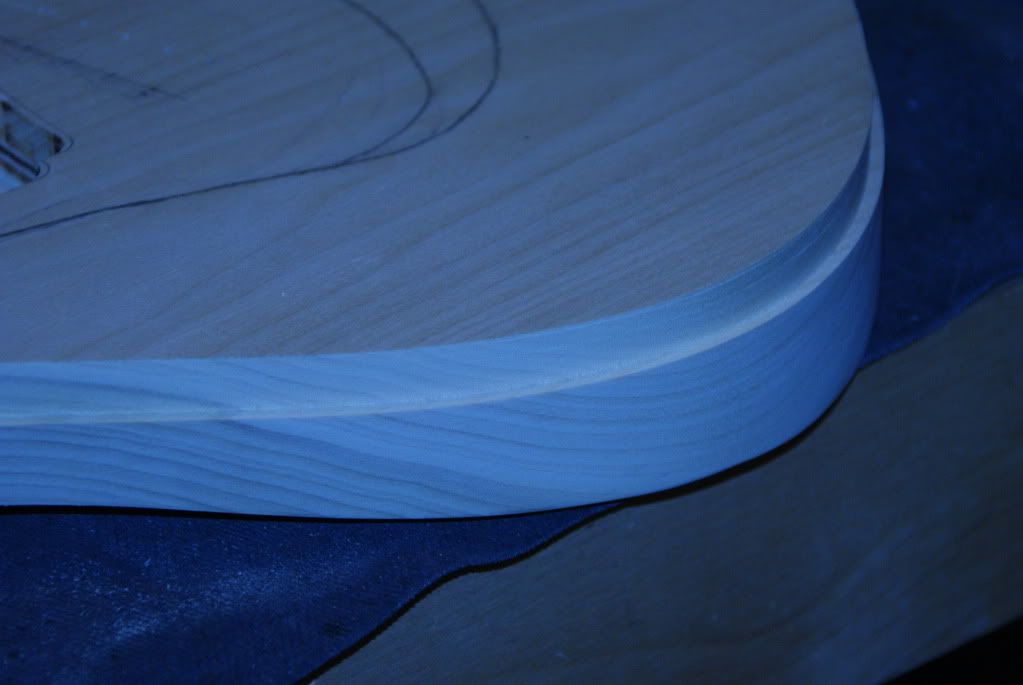
The work continues on. The carve is coming along, but after the angle grinder and ROS, it still needs work, but is looking decent. I did the dishouts using the cove bit in a drill press trick, then moved on to the neck. The profile is similar to Rick Toone's trapezoidal profile, but I tweak it a little. Anyway, roughed it out with a 12" coarse rasp, then moved on to Iwasaki files, then scrapers. Can I just say how much I love my Iwasaki files? They are awesome. Anyway, since it didn't happen if there aren't photos, enjoy:
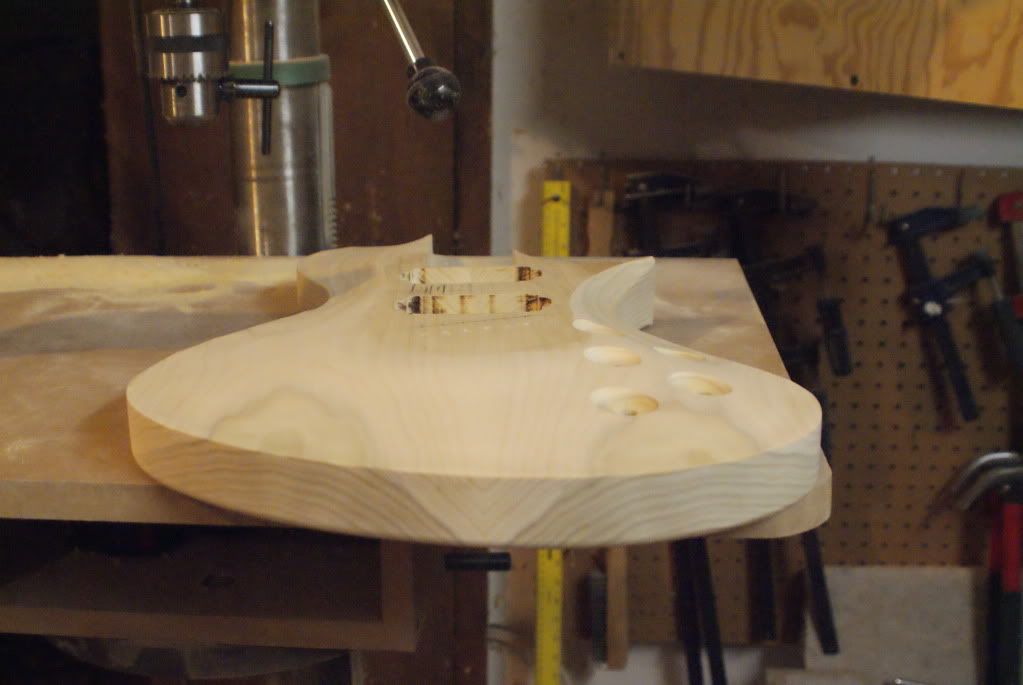
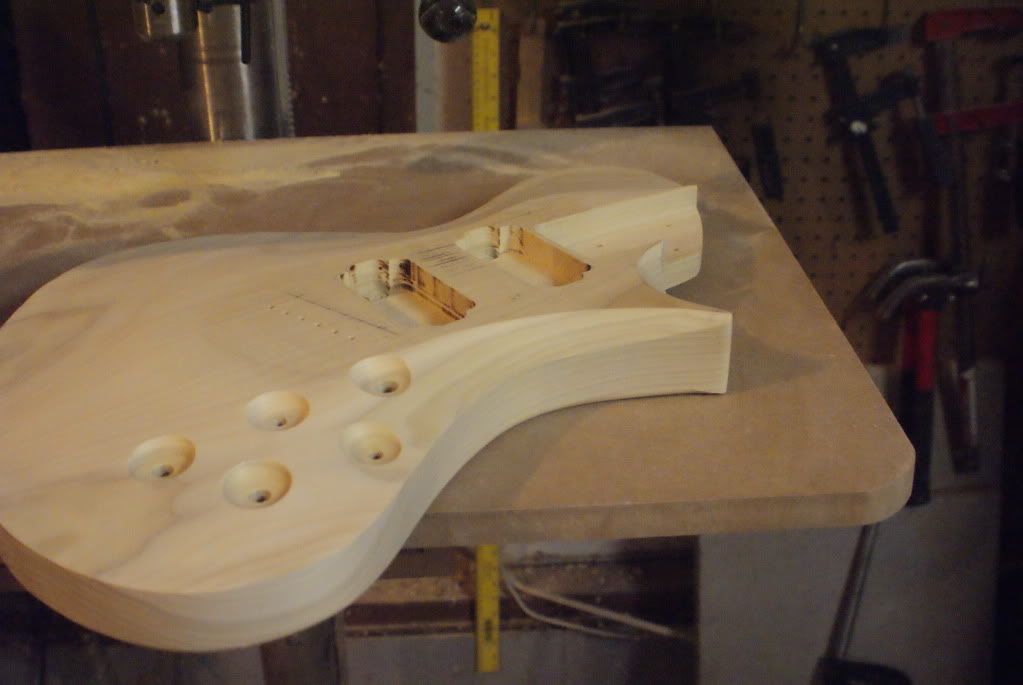
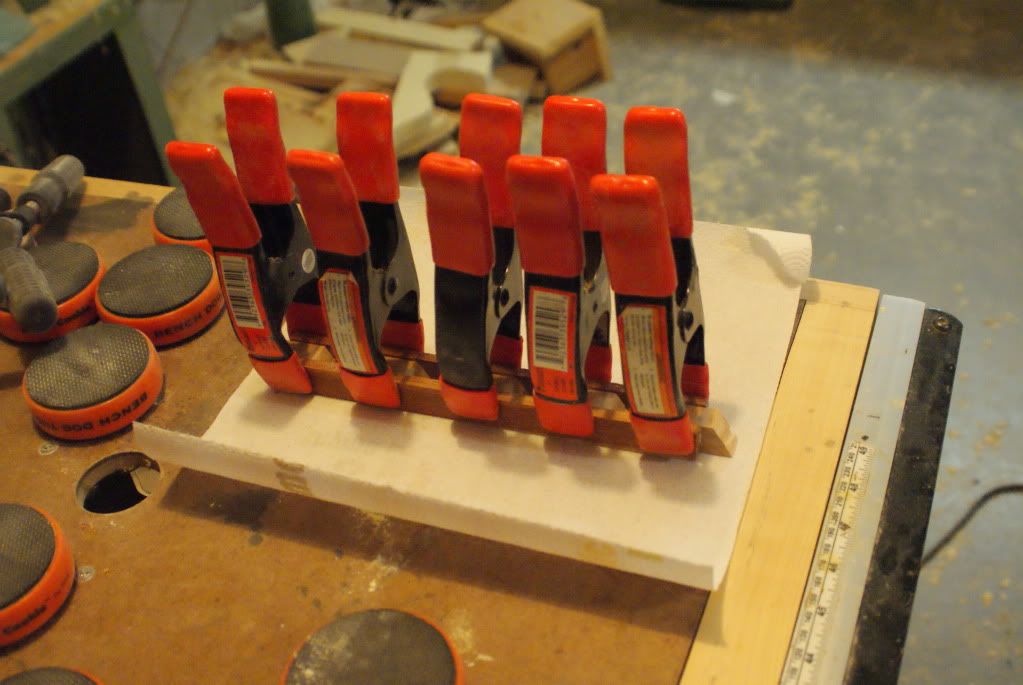
Now, here's a bonus question. What do you think these could be? Hint: my carve top still needs some help...
-
Alrighty, another update. I really only did one thing this evening, and that was rough in the carve using the saf-t-planer. Well, I did do the roundover on the back and drilled for the string through ferrules, but I forgot pictures. Needless to say, roughing in the carve was labor intensive, but that could be because I took lots of measurements to make sure I didn't screw it up, as this is my first deep carve top. Anyway, enough with the yapping, time for some pictures:
-
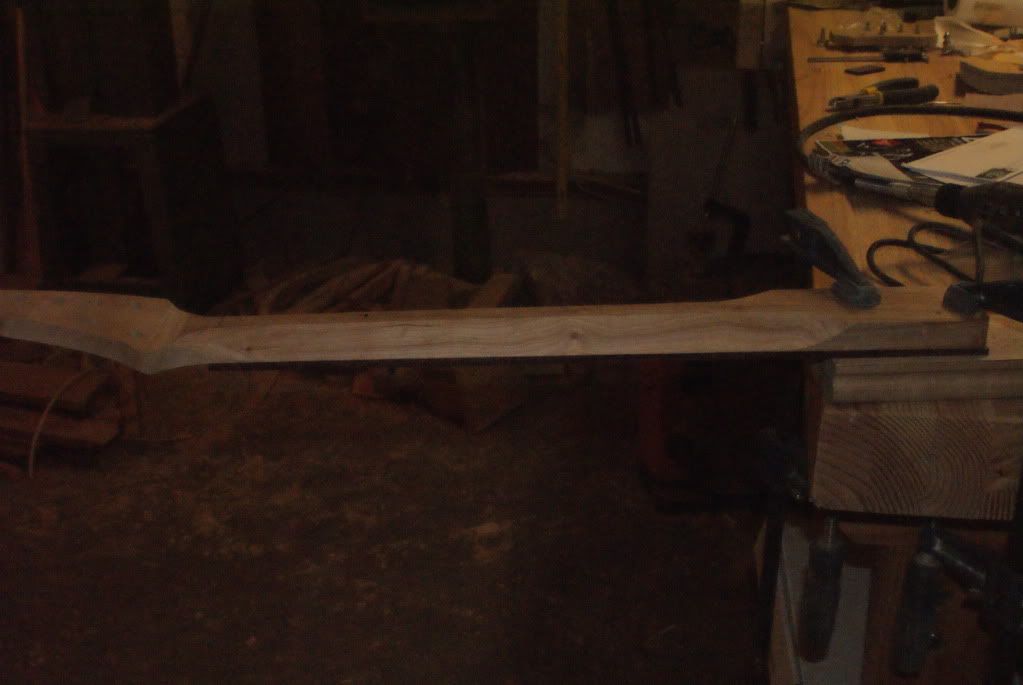
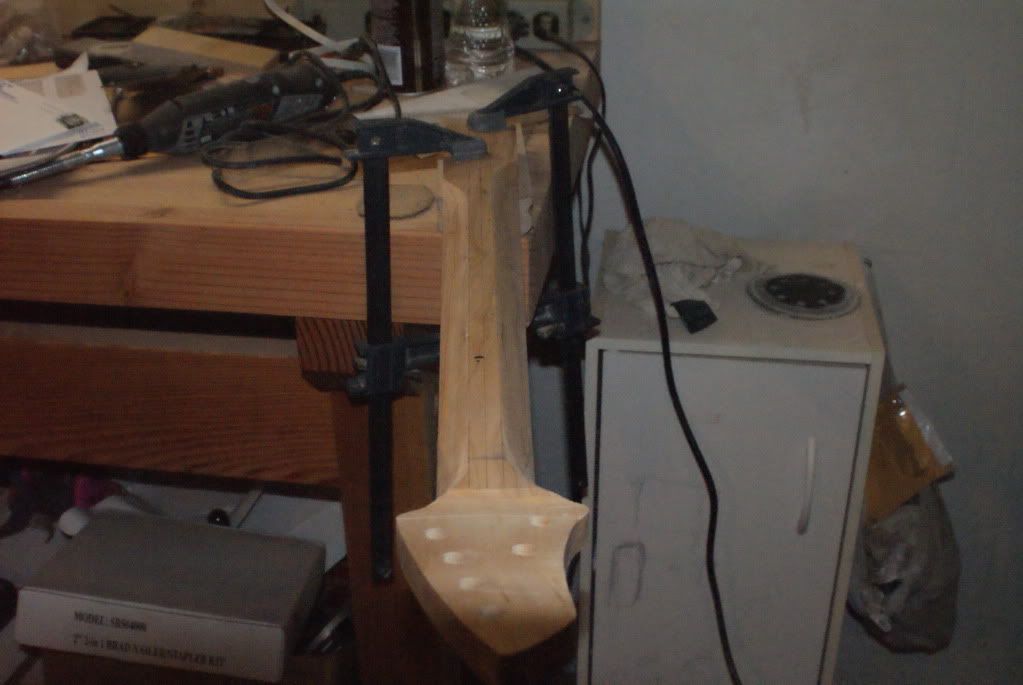
Alright, update time. I have risked life and limb to update this, seeing as how I absconded with my wife's really nice camera since the batteries in mine died. Well, I have made some significant progress. I got my beautiful new hipshot open back tuners, so I worked on the headstock, like so:

Which brings the neck as a whole to look like so:
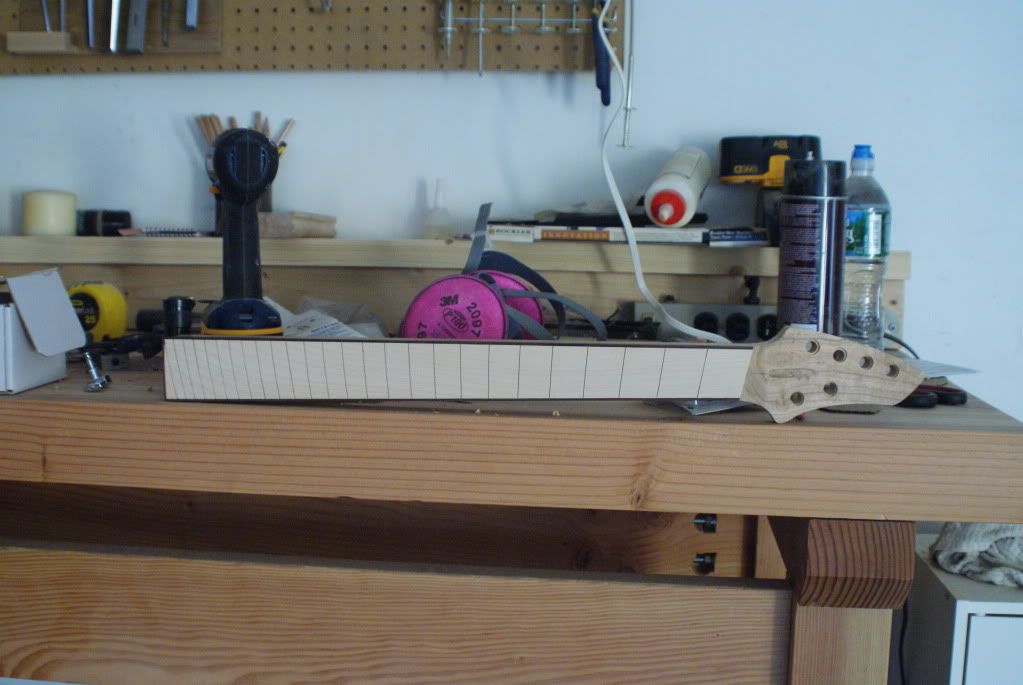
I am thinking that I really like the look of the fretboard with no inlays whatsoever. Thoughts?
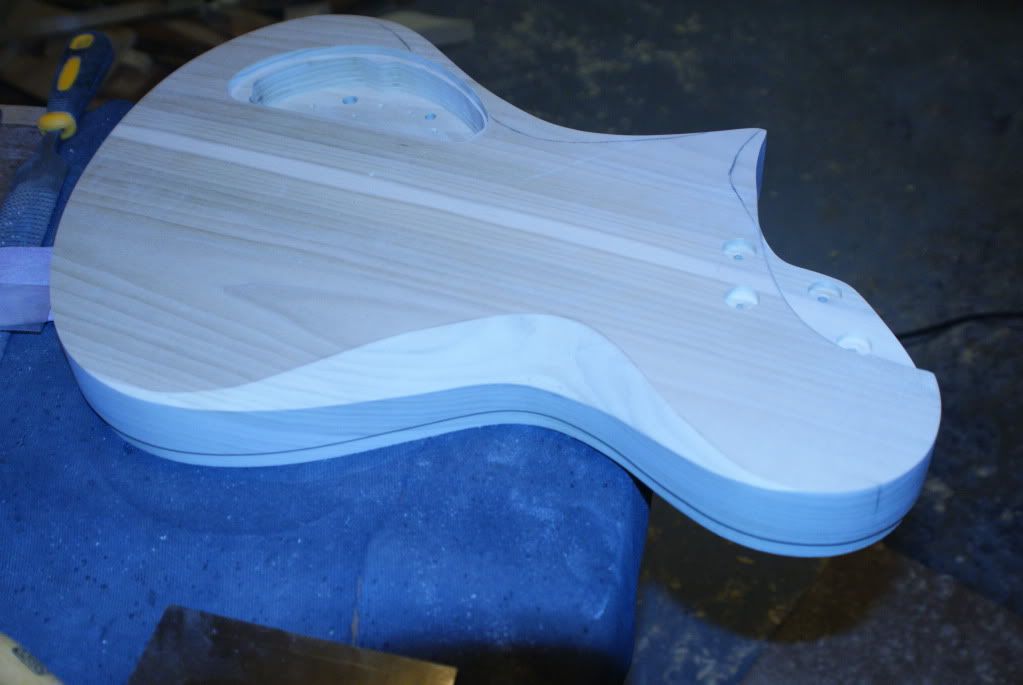
Continuing on, the body has had the bridge humbucker cavity routed, the depth of carve established with a rabbet around the edges, the belly carve roughed out, and the carve on the lower horn was also roughed in. Additionally, the neck heel section of the body has been sculpted (I personally love the look). A couple of photos of the progress:

-
1
-


On The Workbench - A Thread For Guitar Work That Doesn't Require A
in Solidbody Guitar and Bass Chat
Posted
My multiscale build is awaiting the right combination of time and willpower. I don't look forward to sanding off all the color on the top, but it needs it. Oh well.
I recently tried a new neck profile that I have handed off to a friend at work. All signs point to it being a very cool ergonomic design. If it pans out, I'll post more about it.
Next on the radar after the multiscale build is a pair of 5 string multi scale basses. Think dingwall prima artist meets pre-Gibson Tobias. Should be fun. Bartolini's, home made preamps, really nice woods. I can't wait to start, but I'll have to since the schedule and wallet dictate otherwise.