


robmarch
-
Posts
22 -
Joined
-
Last visited
Content Type
Profiles
News and Information
Tutorials
Product Reviews
Supplier Listings
Articles
Guitar Of The Month
Links and Resources
Forums
Gallery
Downloads
Posts posted by robmarch
-
-
you could take this as an opportunity to learn how to do fingerboard binding?
mistakes happen, and you've got a great attitude about moving on. It's still going to end up a killer piece.
-
great tools and jigs...I'm starting a shopping list.
-
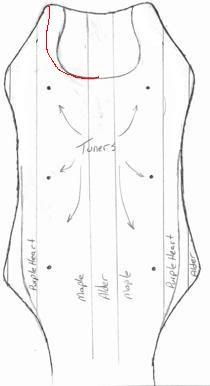
this is what I was thinking (the red) but the black looks ok to me too. leaving the bottom and the rest of the outline as is, just adding the interior relief cut.
ebony veneer on top would look nice too, maybe binding the headstock edge too?
-
inlaid butter knife would be even better. most people would have attacked the paint with a razor blade, right?
-
The thickness of the top is only a factor if the TOM is being mounted on a segment that's been carved down. A flat plane is a flat plane.
Greg
as long as the flat plane is far enough below the level of the strings, sure.
with no neck angle, it's pretty easy to figure out.
-
you don't need neck angle with it, but depending on how thick your top is, and how much fingerboard extension you have, you may or may not need to recess it.
-
I checked yesterday, and it's definitely a gotoh bridge. I have some pics I can upload at home. the spacing appeared to be around 2 1/16"
-
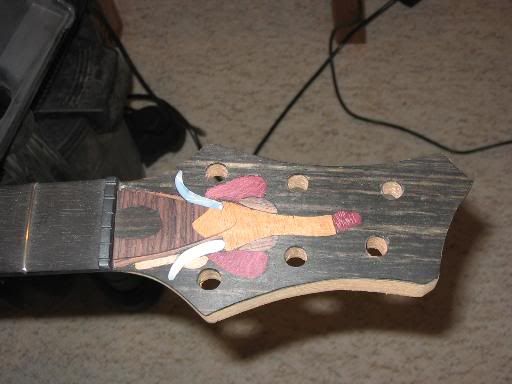
Agreed I will be more carefull in the future. As to the intent of the original thread I have redone the drawing of the headstock to emphasise the body better. Here it is, as always all comments and or suggestions are very welcome.

thanks again for the input fellas
why not leave the headstock outside edges alone, but take your interior "flame" cutout all the way to the edges? I hope you understand, I can't draw it right now. I think it would look great if you just made a "flame" relief cut on the top side, leaving everthing else the same.
-
the low profile bridges do still come with 12" in radius. filing them down to match their flatter radius is a factory assembly step.
for those that want to recess, you'd be asking for their "M" bridge. those that want the no neck angle part would be asking for the low profile TOM.
-
I routed a fair amount, but I also am running a small gap between the strings and the body. without a neck angle, going for the big thick maple top look without making the body really thick requires some compromises. the top is around 7/8" thick.
I didn't have a chance to measure everything last night, unfortunately, but I'll try to tonight. I had some house stuff pop up at the last minute.
Also, the carvin CT series features a recessed tom, but their previous guitars with the shallow TOM didn't recess, and didn't have neck angle. the ct's are recessed, and use a different TOM bridge.
I'll try to get you guys some pics and measurements tonight.
-
maybe binding on it, or maybe even a veneer? you'd still see the signs of the construction technique on the back of the neck, but you'd have a blank canvas on the front to work with.
-
agreed. reroute your neck pocket until you can do that while keeping your pickup rout intact.
make sure you understand what this means before starting, because this will be pretty much your last hope at salvaging this neck/body combo into something playable.
-
I'll try to take some pictures too.
-
Hey Rob, good to see you showed up here. It's Dave F. from the Carvin site. BTW, did you use any grain filler? Sanding sealer?
Dave
not on the maple top. it's straight nitro up there.
I used spray can sanding sealer on the mahogany back, but ended up sanding most of it off, making it essentially a "grain filler." I'm sure this wasn't the most efficient way of doing this, but with spray cans, it was all I had. And, I didn't want to try grain filling with one of the usual suspects because I was worried that it wouldn't look natural with my skills

thanks for the comments, everyone. I can't wait to buff this one out and assemble it and see how it sounds. the test stringing unplugged sounded crazy, but I guess the finish will change it a little.
-
I'll measure it and get back to you. I'm not sure if it's listed on their website?
it looks to me like it's a gotoh tom that's been milled down on the back. I'll double check for you, though.
-
looks really nice, very classy. I've been thinking about building a bass for a future project, and if it turned out that nice, I'd be very happy.
-
I have one on my current project. they mill the bottom of the bridge flatter to lower the minimum saddle height off the body.
depends what you're looking for, but if you need a low profile tom bridge for a guitar without neck angle, there you go.
-
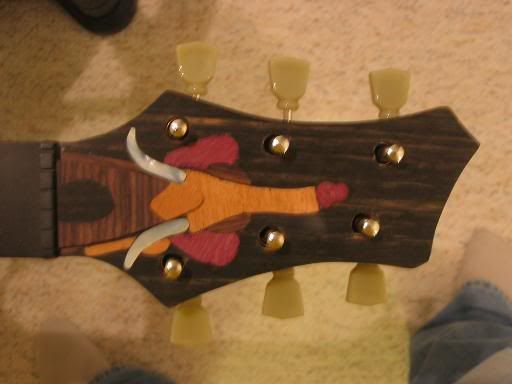
hard to get a decent picture, but I guess it's definitely a little abstract
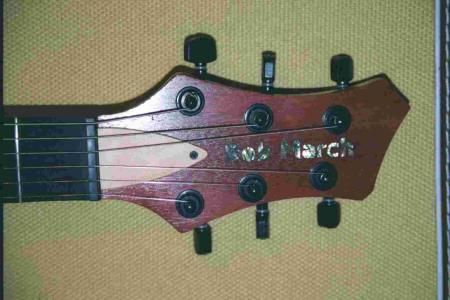
it's an upgrade over my last headstock, I think
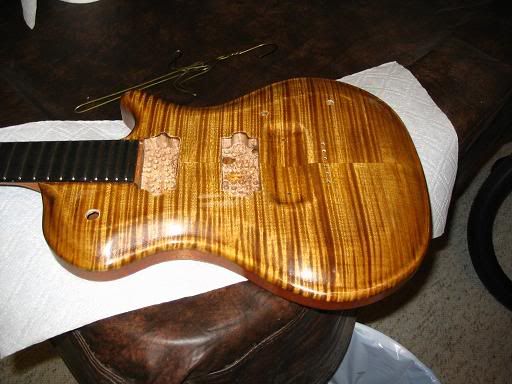
finish step one: deep brown all over the top:
finish step two: sand back
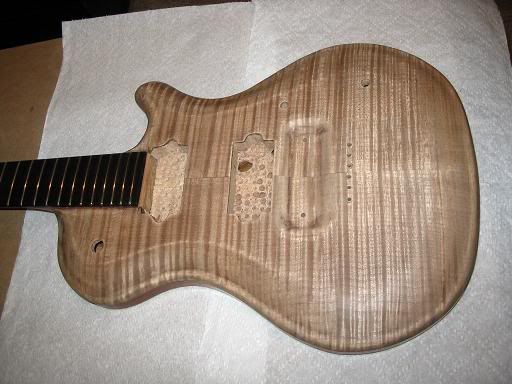
finish step three: amber dye on top
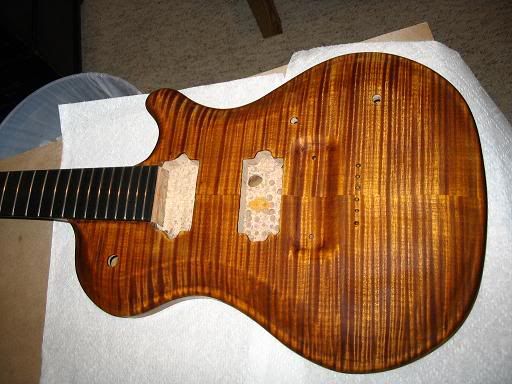
then it was all spray can nitro from there
the carve was done with various scraping devices. it's a typical carved top, with a rounded edge like a flat top for forearm comfort. I don't see myself going through this pain again any time soon

-
Yeah, it's an elephant with raised trunk. It's a silhouette made from various different woods, and m.o.p. for the tusks. It wasn't supposed to be ultra realistic, but I have been getting an awful lot of "what is the inlay supposed to be" questions, so it may have missed it's mark.
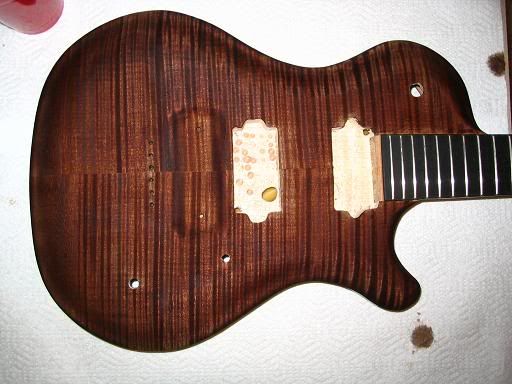
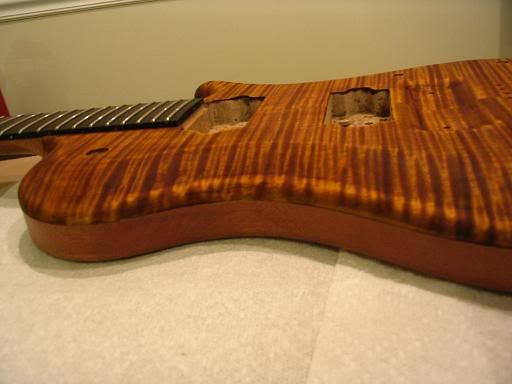
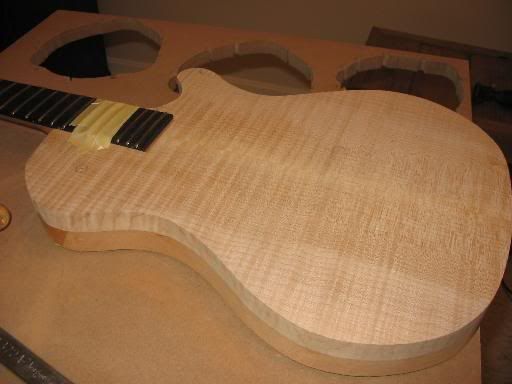
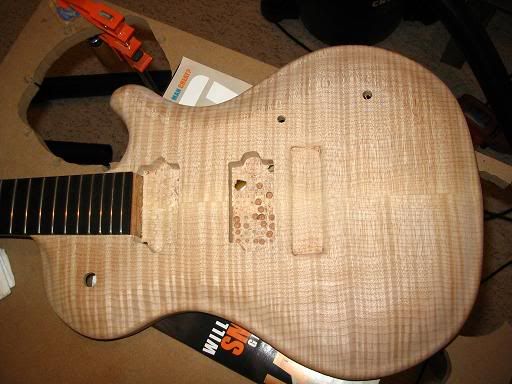
The body and neck are mahogany, the top is 7/8" bookmatched flamed maple. The body was chambered a decent amount, as was the top, in some spots. The top has pretty amazing flame, the pictures don't really capture it. The price for that was that it turned into a potato chip while it was being shipped to me, so I fought it a lot to get it glued on (part of the reason the top was chambered in some spots).
The through body neck was bought from carvin, 24 frets, ebony board with no inlay, and blank headstock options. bought before they offered stainless frets, or I probably would have gone with them too.
The pickups are going to be Dimarzio Air Norton in the neck and Tone Zone in the bridge, with a push pull volume knob to tap coils.
I'll add some pics of the finish next post.
-
I've been lurking on here for a while, and posted recently when I found another builder in my neighborhood
Here's a couple of pictures of my most recent build, which is finally at the end of nitro cure, and ready for final polish. It's my 3rd guitar, but this one was built in my finished basement without many tools, just in case anyone here was letting that stop them
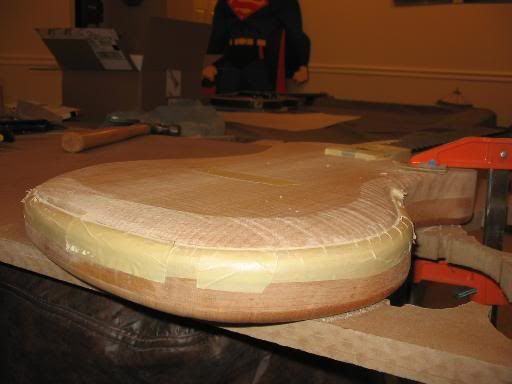
before carving
mid carve
after drilling pickup cavities (and chiseling) and drilling knobs
test string
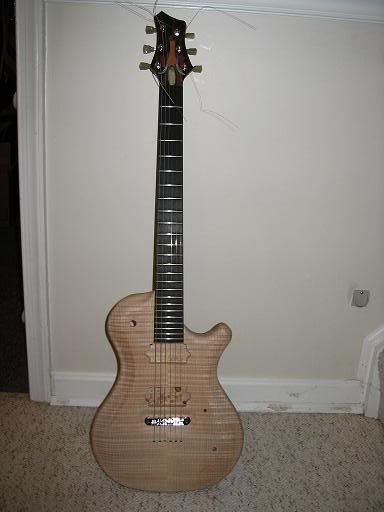
and after finishing (but not polishing)
headstock inlay
I have a couple more pics of the double dye, if anyone's interested. Hope these pics aren't too big for the forum, I'll resize if necessary.
-


Cud's Explorer Project
in In Progress and Finished Work
Posted
I'd like to see a picture of that. I will also be building some of these jigs in the future, since I now know how hard it is to build these things by hand
looks good, dave. I'll have to check out how your other guitar ended up too