


gibsonboy
-
Posts
37 -
Joined
-
Last visited
Content Type
Profiles
News and Information
Tutorials
Product Reviews
Supplier Listings
Articles
Guitar Of The Month
Links and Resources
Forums
Gallery
Downloads
Posts posted by gibsonboy
-
-
anybody ever used a dremell , those thin cutting disc look good for the job, but was wondering if anyones ever used one on m.o.p or abalone, im just about to start and mop and abalone faced flying v project, alternate mop/abalone rings in a bullseye, so lots of shell blanks to cut.
-
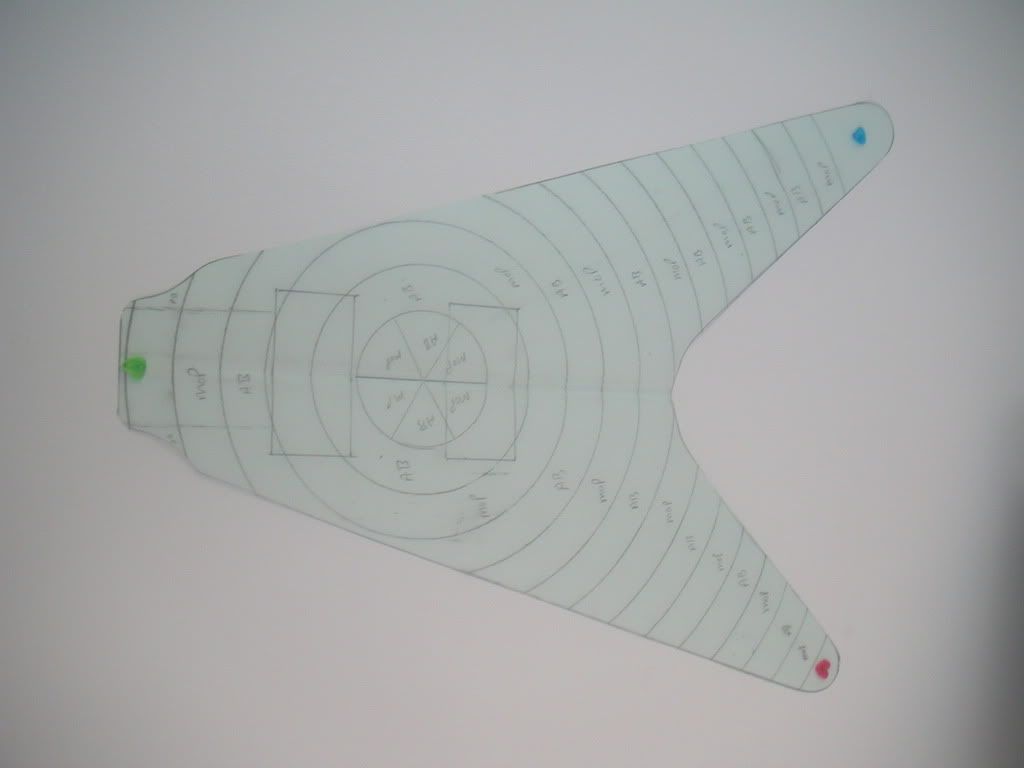
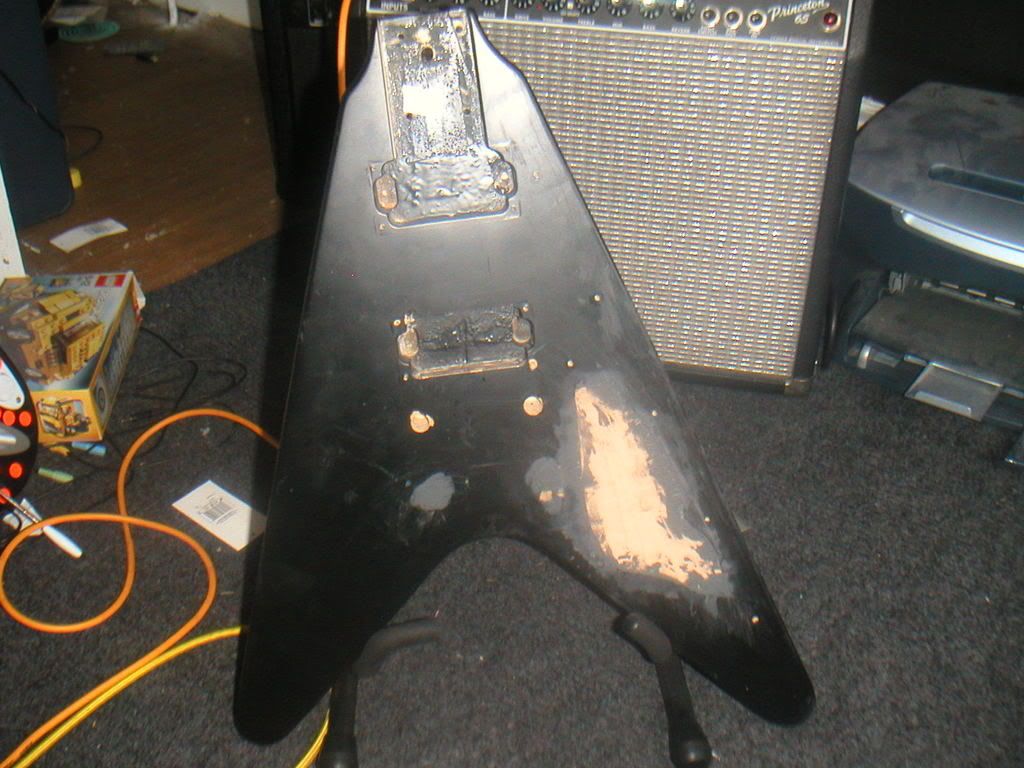
a couple more pics 1st one the template for cutting the mop and abalone to shape before sticking on the body, the 2nd showing the body stripped down and the tail post holes filled and the control cavity filled with wood and epoxy filler ready to be sanded down so we can have the pots rear routed .
-

just thought id post a pic of what the donor guitar looks like before we start.
-
thanks so much for all you advice, the body isnt curved, its a flying v so no problems there, what type of glue did you use on yours, i was thinking of an epoxy resin of some sorts, and some kind of epoxy filler inbetween any joints .
I use 20 minute epoxy from super glue corp. pretty much exclusively now. Best stuff I have ever used, but hard to find. Very solid bonding and filling and colors well with sawdust. Highly recommended.
cool, i will look into that, many thanks.

-
Thanks
Ok good, now I know how to help you.
The first problem you are going to have is getting pieces of MOP big enough for 2" strips. SOOOO ... I would just suggest making thin vertical stripes that are two inches tall. You may want to use MOP abalam. In tall, thin stripes that should look pretty good and you can get that in sheets for 9-1/2"x5-1/4". You can get big pieces out of that.
Second possible problem, is your guitar body carved? (e.g. like a Les Paul) If so, the 2" pieces would be a big problem when you had to inlay them over the curves of the body. Flat pieces vs. curved body, that will be a problem. You may have to make the rings from smaller pieces so you can contour them over the curves like I did with the sun rays.
Feel free to ask any other questions you want. PS, be prepaid to spend a lot of time getting this right. This sun was a pain.
thanks so much for all you advice, the body isnt curved, its a flying v so no problems there, what type of glue did you use on yours, i was thinking of an epoxy resin of some sorts, and some kind of epoxy filler inbetween any joints .
-
You mean something like this?

wow,,,,,,, very much like that only the full face of the guitar with alternate rings of m.o.p and abalone about 2" wide rings, without the "sunray" effect round the outside,,,,,, thats a great pic by the way.
-
It might just be worth taking in mind that by the time you've stuck it on and buried the pearl in clear you may be adding another 2-3mm to the front of the guitar which may, or may not, give rise to some playing issue's....just a thought.
was thinking about that, might have to shim the neck joint as it is a bolt on. at the moment the underside of the fingerboard does stand a little proud of the body already and the bridge and tail are raised up a tad as well, so hopefully by the time the finish goes on , the bridge and tail will not have to be raised up as much,,,, if at all,,,, and only a little shimming will have to be done to the neck joint, thanks for comment.
-
having had a look at the zemaitis seeing the pieces of m.o.p cut to different shapes etc, i thought it would be the case that i too would have to cut the blanks i can get to the right size and shape, great idea with regards to the cutting out a template,,,, i will bear that in mind. and i will also look into creating some cavities under the new finish to reduce weight,,,, its not the heaviest guitar to start with, i will see what the weight of the guitar is and add the weight of the m.o.p pieces to see what the finished item may weigh then think about making any weight saving alterations. many thanks for all your suggestions. keep you posted.
-
That sounds very unique and beautiful.....
If the pieces don't mate perfectly it would probably be best to use some type of epoxy, as it will fill the gaps easily. I don't know what color you plan on having the spaces between the pieces, but you can add things to the epoxy to color it to suit you needs.
Just curious, are you using solid shell blanks? Or some type of laminated shell or veneer?
I'm very excited to how this turns out!
we will be using 1.6mm solid shell blanks to do this one,,,,,, so the guitar should weigh a bl**dy ton, lol
but thanks for the info on the epoxy to fill in the gaps,,,, as i say, if we do go ahead with this we will be posting pics. its the first time ive done this sort of thing so god knows what it will turn out like,,,,
-
something a bit like the zemaitis, but this would be a flying v with a zakk wylde bullseye design with rings in mother of pearl and abalone.
http://www.zemaitis.net/zemaitis-s22st-ring-guitar-image.htm
i need to know a good way to fill inbetween the m.o.p pieces , best kind of glue, etc etc.
-
hi all, i need info on applying a mother of pearl veneer mosaic to my sons flying v.
has anyone seen or done this themselves, i have seen a few guitars with this type of finish and would like any info available, many thanks., if we go ahead with this project, we will be posting pics on this site.

Mother Of Pearl Mosaic Finish
in In Progress and Finished Work
Posted · Edited by gibsonboy
rear routing complete, if you are wondering what the grey line from one cavity to the other is, its where i had to bury a tube in the body for the wire to the new toggle switch position ( on the top leg of the v) this is also where the new "strat" style jack plug is going (on the side face of the top leg) . also we have decided to not have the vol and tone controls on the face of the guitar but on the side face of the bottom leg of the v. just as a matter of interests, i used a pillar drill with a router bit to do all the routing, no templates, all done by hand,,,lol