


XBIGJIMX
-
Posts
124 -
Joined
-
Last visited
Content Type
Profiles
News and Information
Tutorials
Product Reviews
Supplier Listings
Articles
Guitar Of The Month
Links and Resources
Forums
Gallery
Downloads
Posts posted by XBIGJIMX
-
-
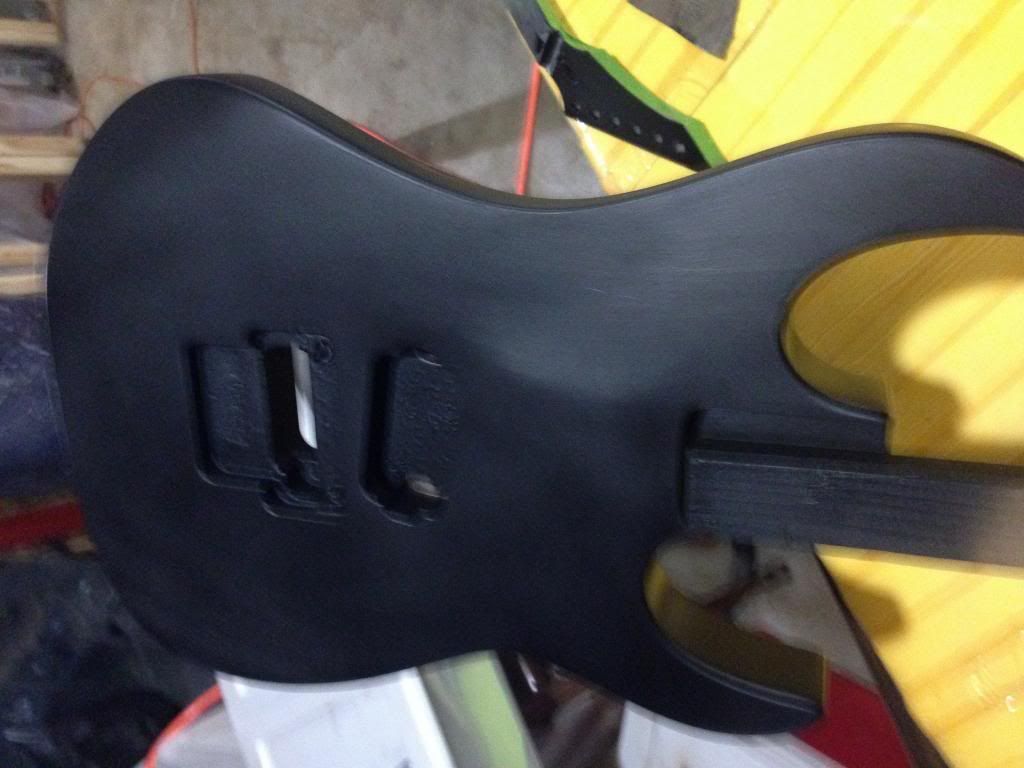
Well I let the clear coat fly last night with 3 coats.
Now this was the only spot i made a mistake. The clear coat only takes about 10 minutes to set up, so I flipped the tuners to get the underside. Which was dry but the box was not it was tacky so it actually pulled some paint. So then will take some touch up. So no big deal
Next was i had a brass block lying around that did not fit any tremelo own. So I marked out the holes for the floyd (btw this pretty much the way to make a big brass block upgrade as well.)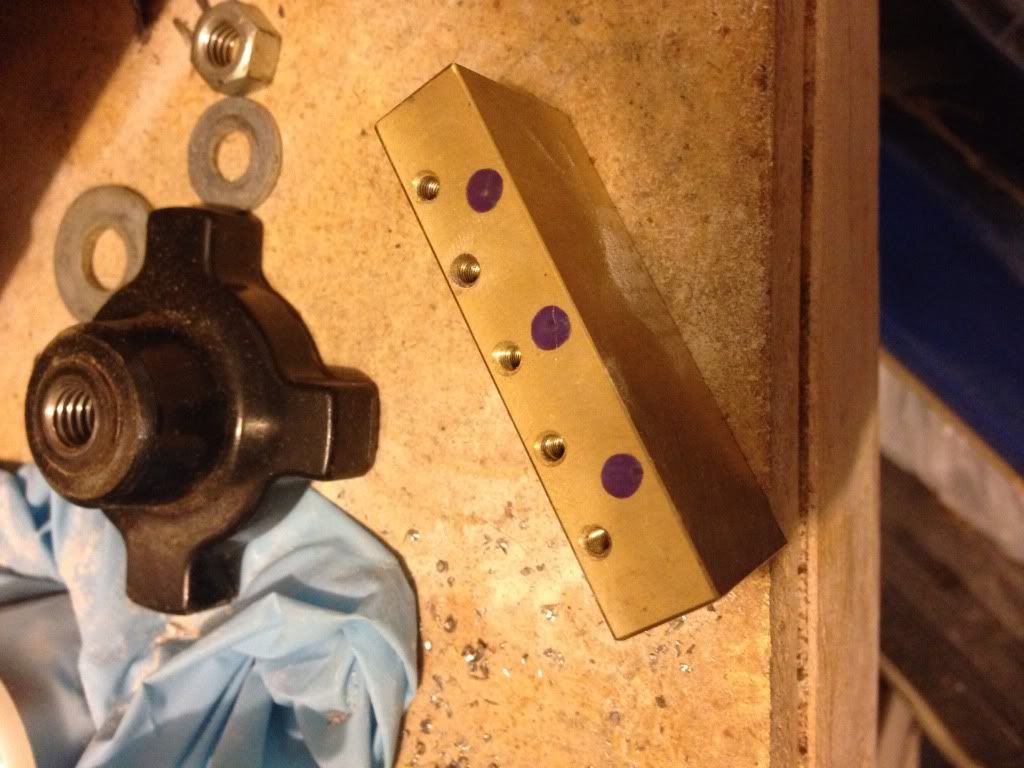
Then I tapped a center dot in each mark so the drill bit would not drift. Then 3 holes with the drill press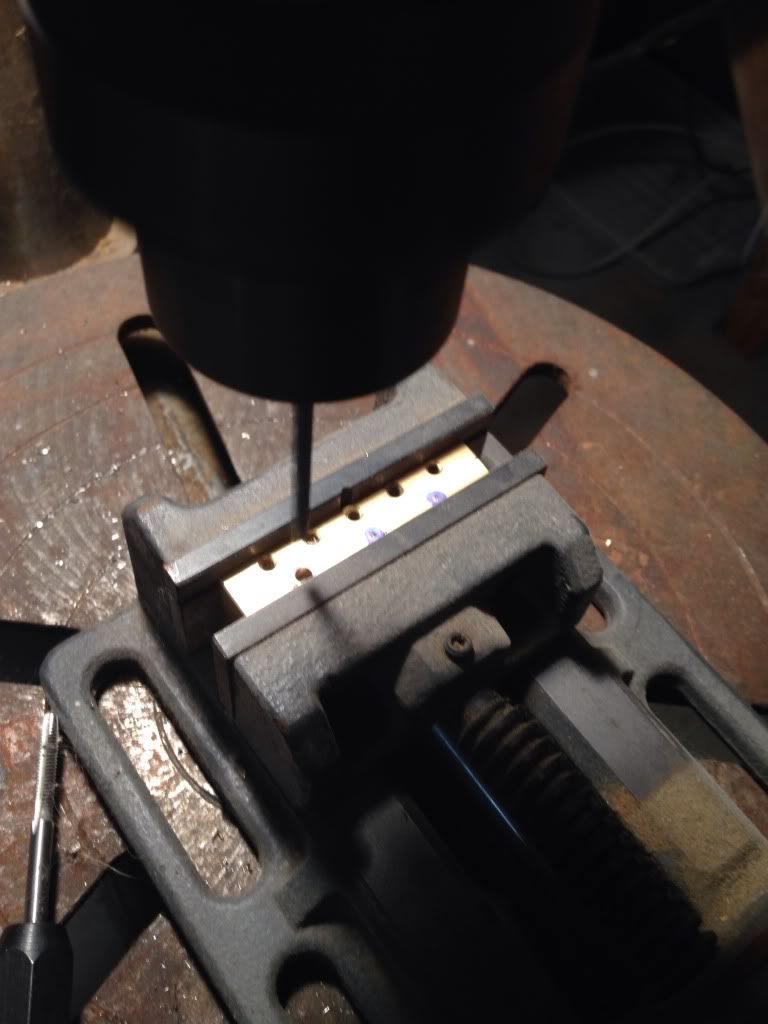
Then a few twists of the tap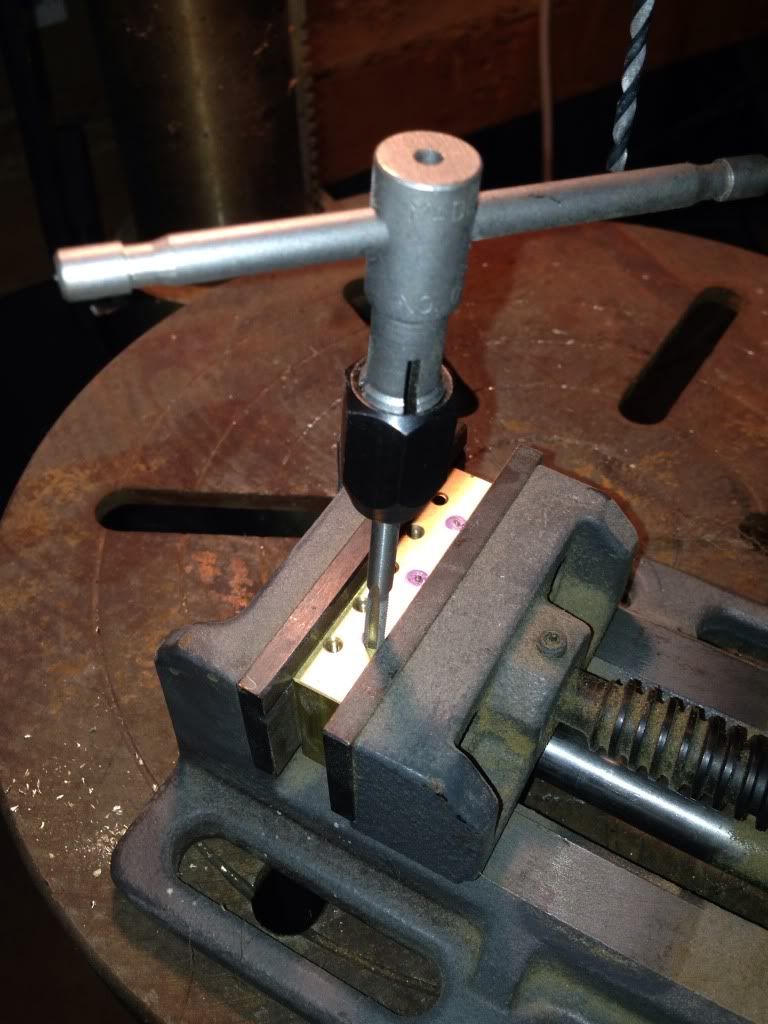
So then it was just a matter of a reassembly and its done.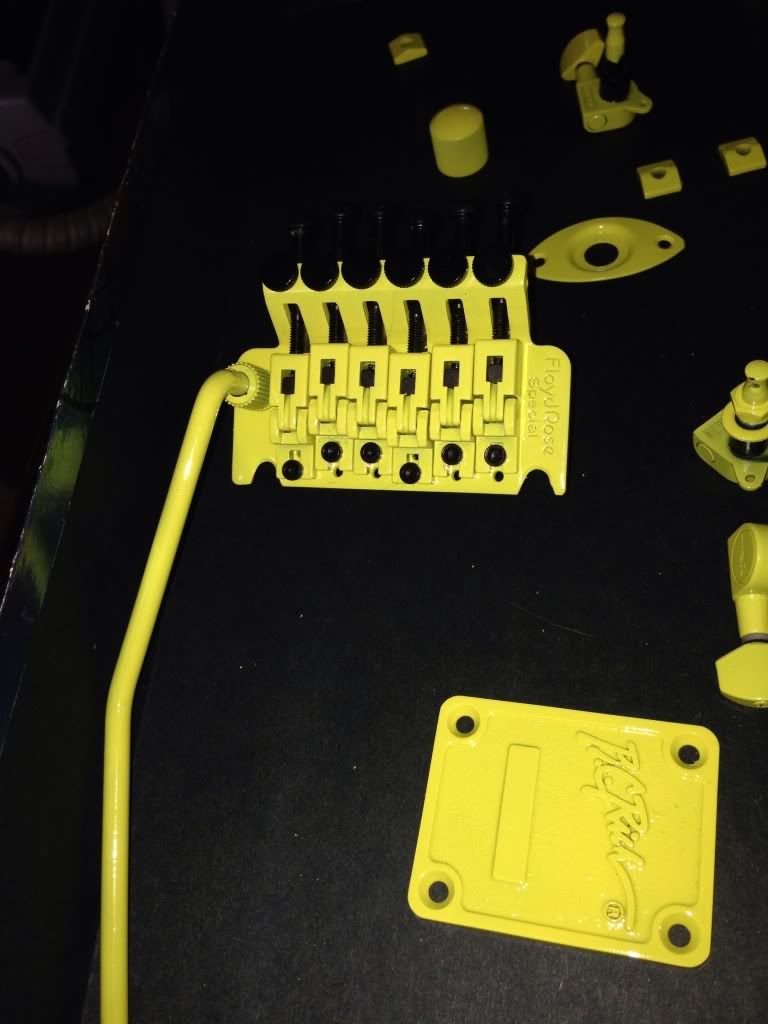
-
I can guarantee that is going to flake off or peel off, even though you scuffed it. I have tried that before on other metal parts.
Well if it does its worth a shot and then spend some quality time in the sand blaster
-
I through this in a seperate thread becaus ei know a lot of people were interested if this will work. I knew on the new build I did not want the black FR and being its metal I didnt see any reason why it could not be painted.
So i started with a black FR and took it apart. Now on floyds the fine tuners do not back out all the way so you have to "cut the thread" so it will back out all the way.
After disassemble its on to the scotch bright pad. All paint has to have something to grab on to. So you start by roughing up all the parts. Now you would be surprised how easy you burn though the paint even with a scotch bright pad.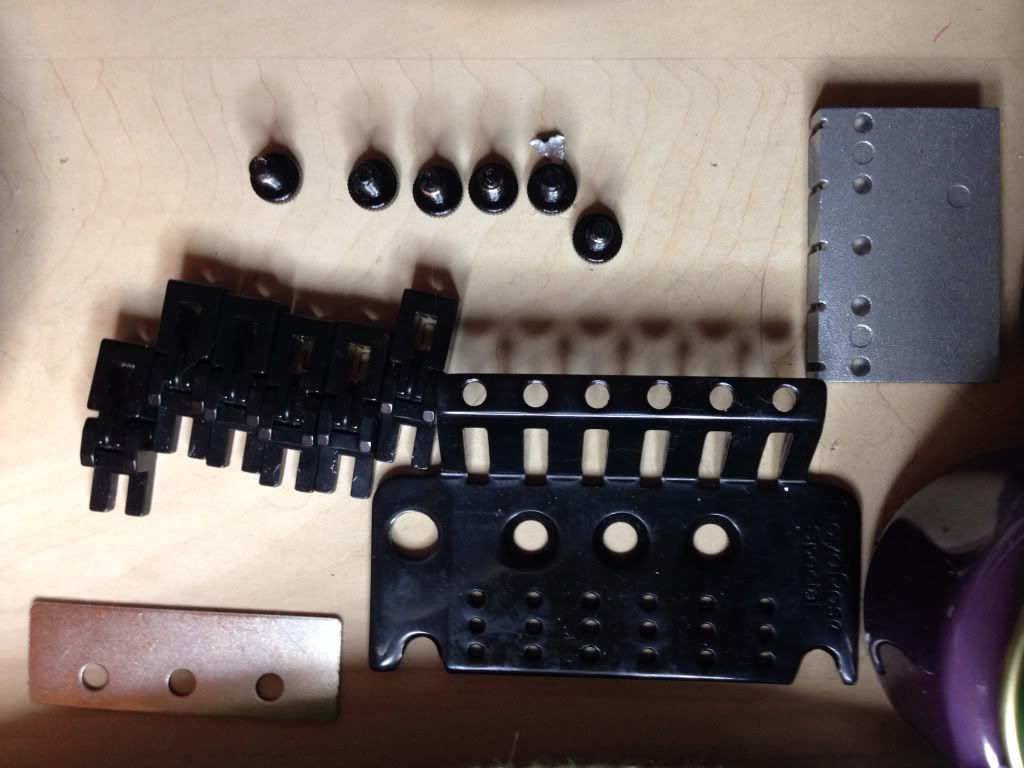
After the rough up I covered the open parts of the tuners and and made sure the parts I didn't want painted were masked or laid flat. ( the bottom of the tremolo arm, the bottoms of the saddles. You would be surprised how much a layer of paint will cause something not to fit any more or screw up action.
I placed all the pieces in a pizza box which worked out really well to hold things at angles i needed. I installed the floyd bar in the box to hold it as well.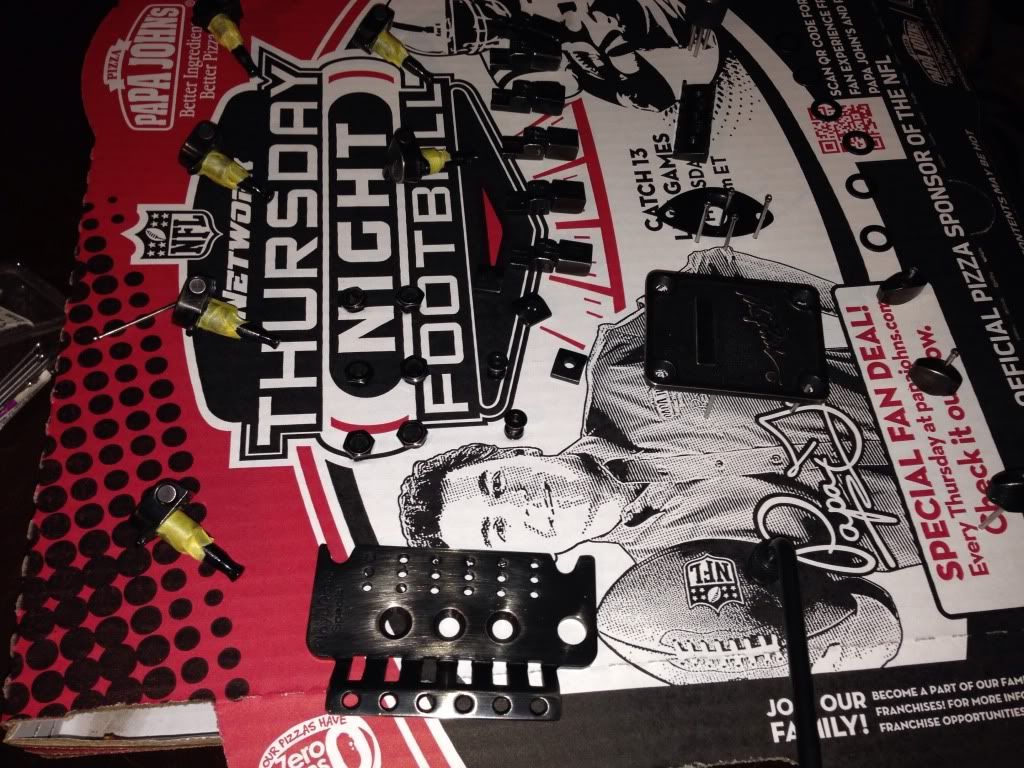
Then I put on a layer of adhesion binder. It helps paint to stick to anything you put it on. Then 3 coats of yellow. The only reason i did 3 was to make sure it was all covered .
coat 1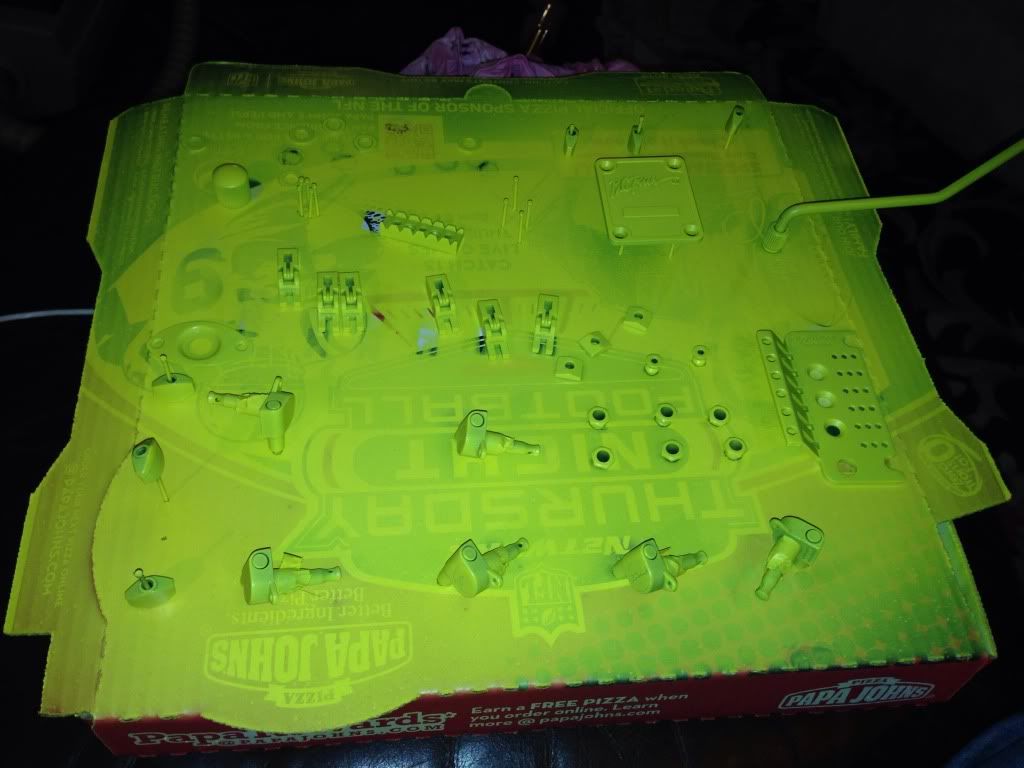
coat 2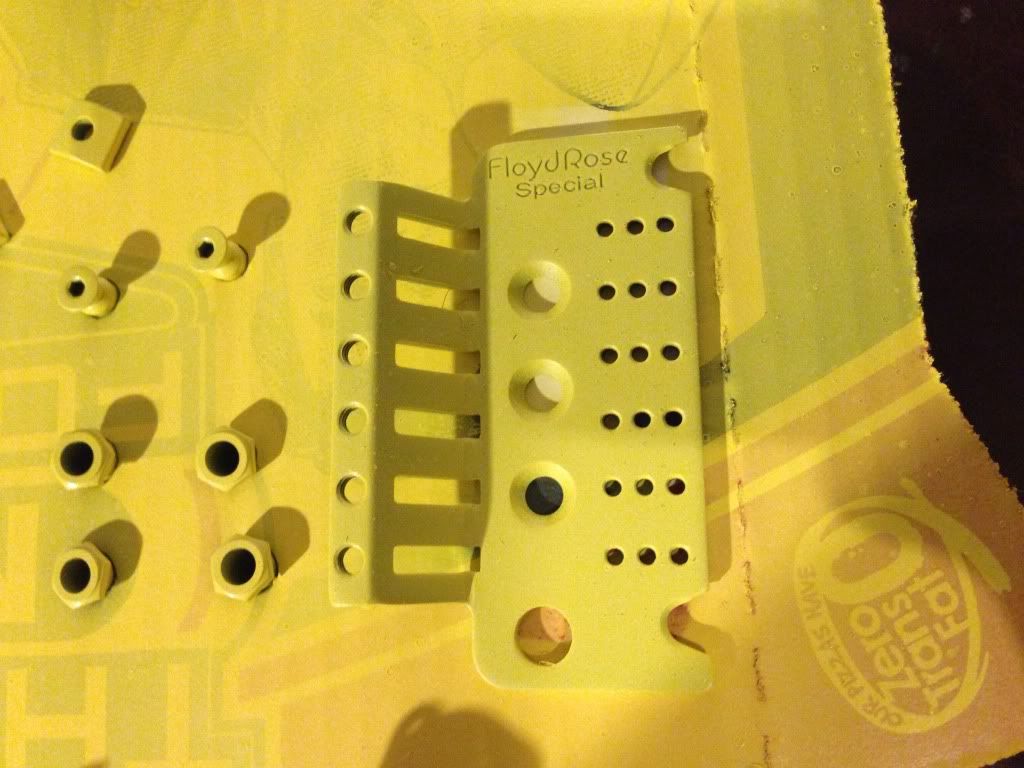
Now at this point you could be done. But i think clear will not hurt. I usually use a 2 part clear, but i think it will be to thick when done so i am just putting on a light rattle can clear. now waiting for the drying -
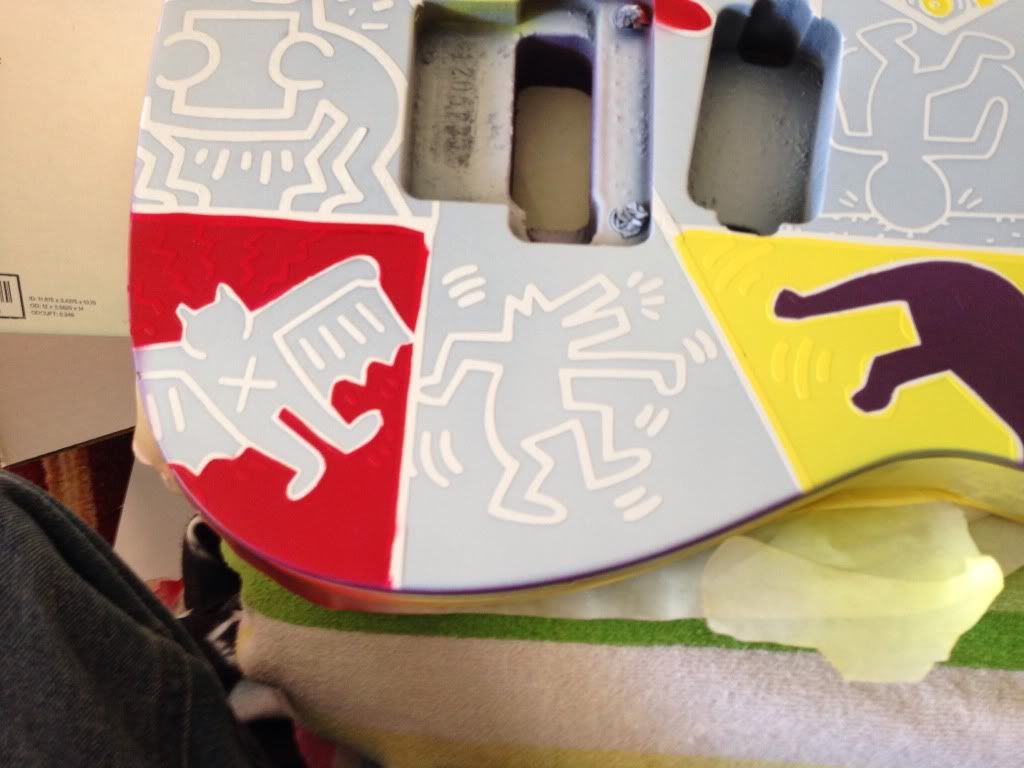
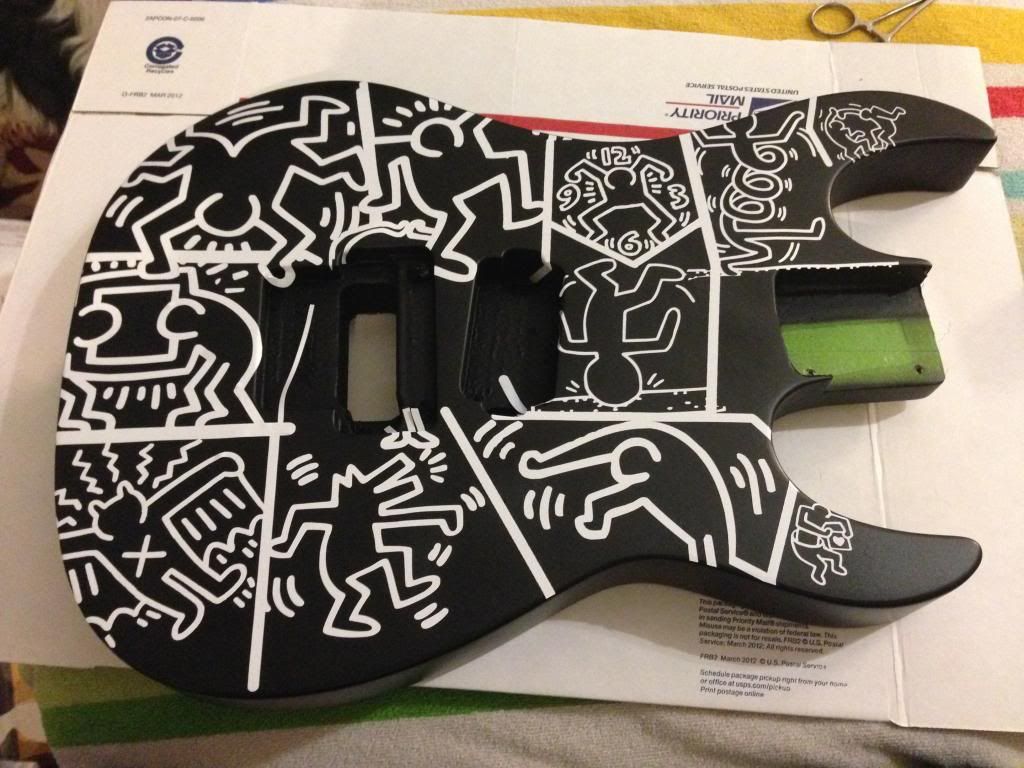
Well threw the missing yellow down and reapplied the white to make it more solid and the orange. They went down with out a hitch. I did the drop shadow on the back type, which I did not like after doing it. So most likely I will just respray it and cover it up no harm no foul.
SO now comes the fun part peeling off the line mask.....
4 episodes of duck dynasty later they are peeled and for the most part came off well. Some of the black lifted which I expected since I did not put on an intercoat clear inbetween colors and i probley should of scuffed the original finish more. Not that big of a deal just have to go back and do some touch ups.
but all in all it turned out pretty good for never trying this concept before. Next step repair than clear, and the hardware
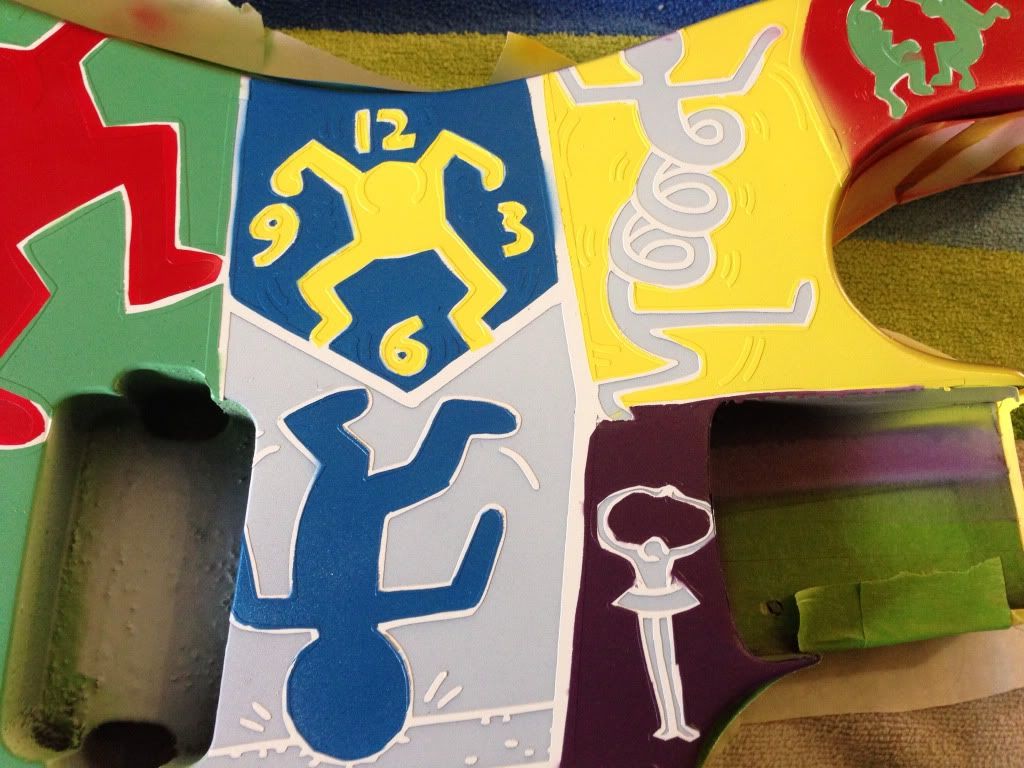
If you look around the clock there was some lift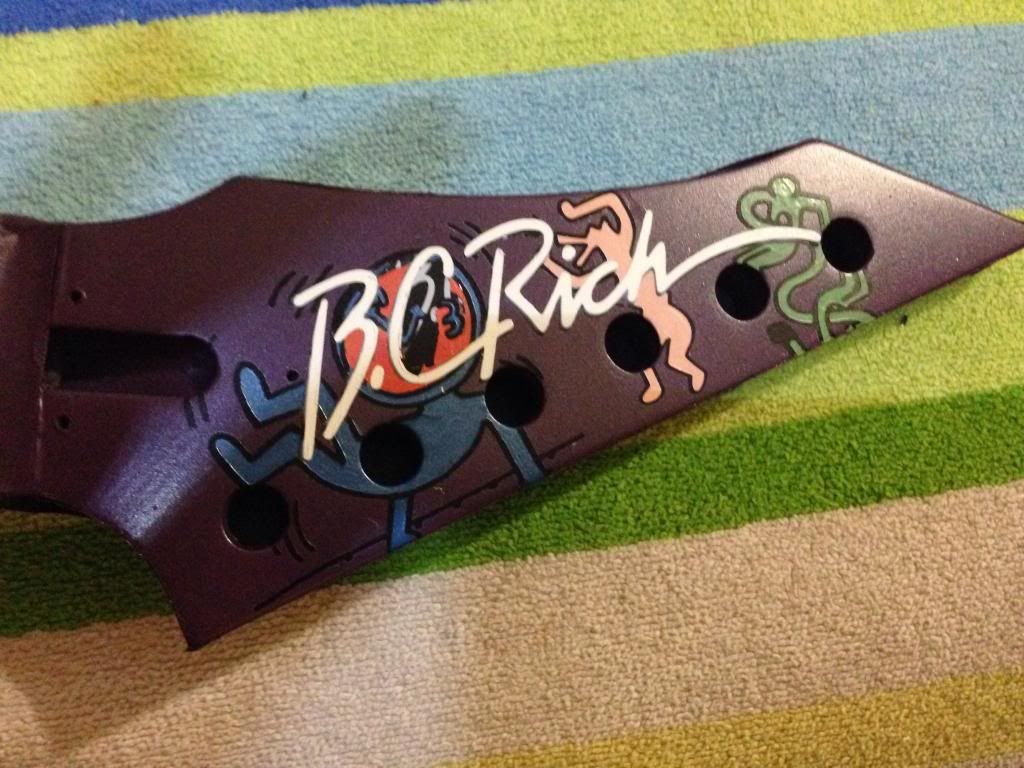
the body with lines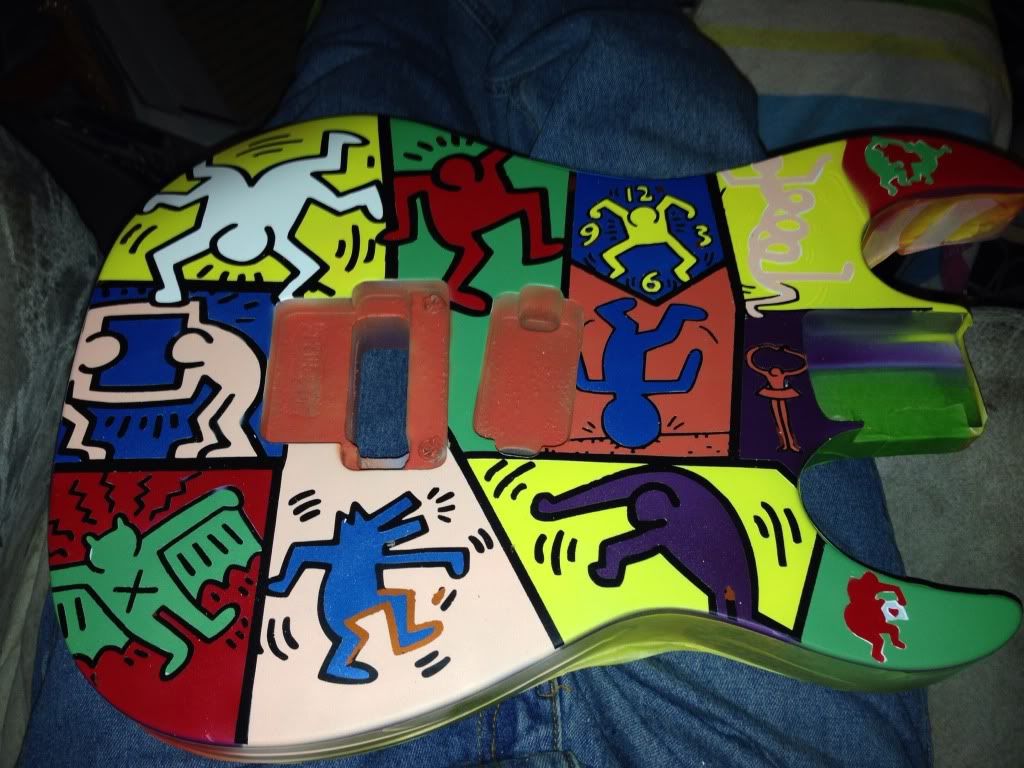
I did not peel some of the mask casue I saw some over spray and it will be easier to fix with the mask on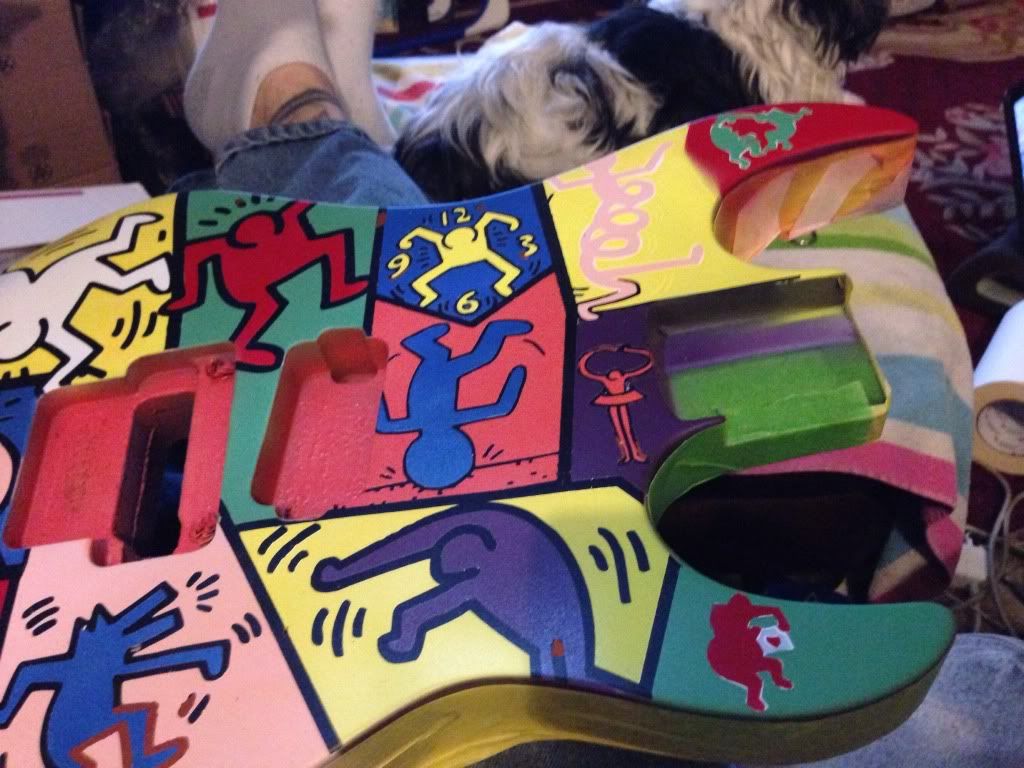
-
Ok pinks down getting ready for the final color shot. No I noticed a mistake I dot pull all the mask out for the yellow on the spring guy so I'll have to redo that.
Whats going on with the back you ask well I put a great qoute from the artist on the back which is getting the hightlight done on the next spray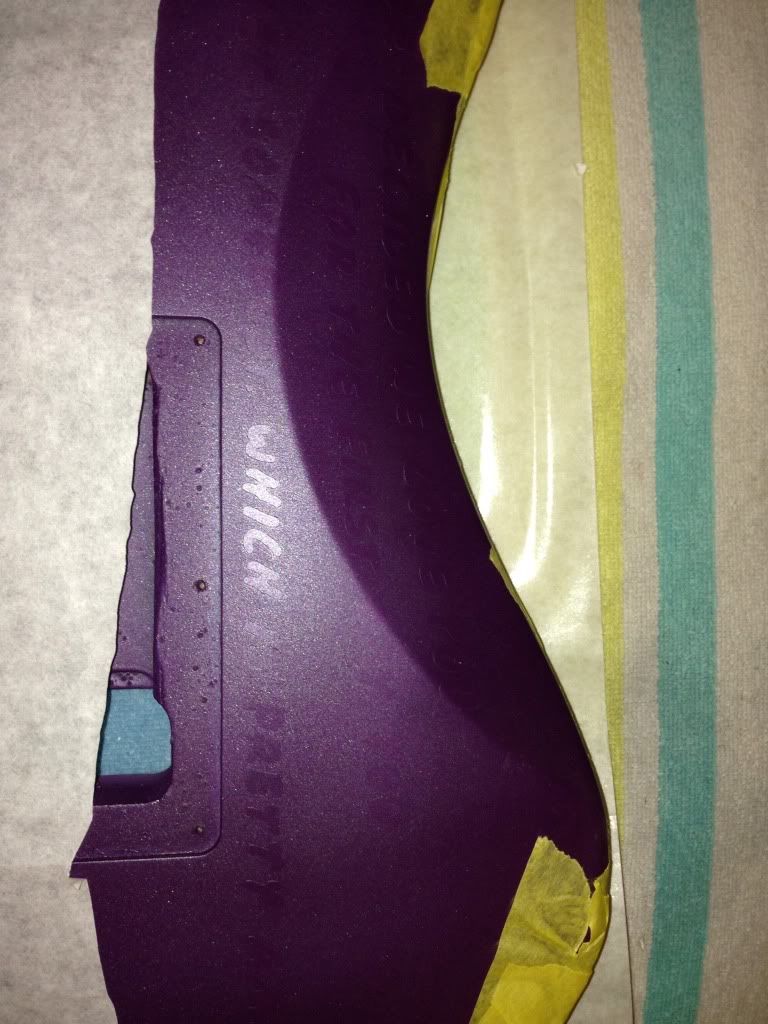
All the brush work done and dryed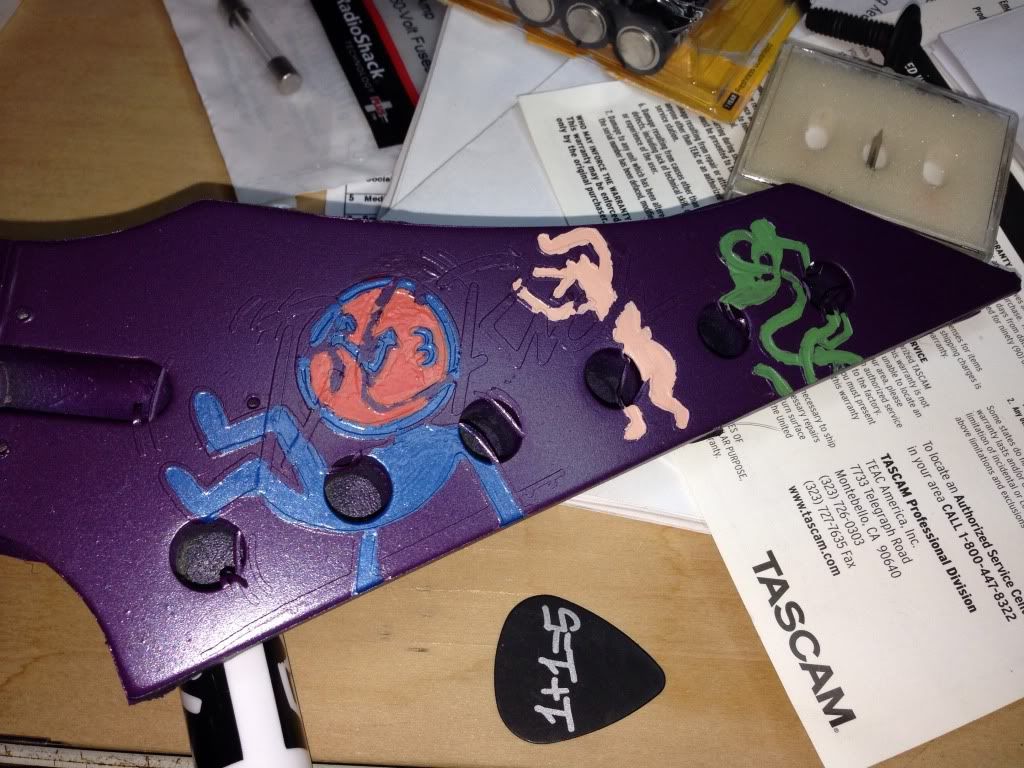
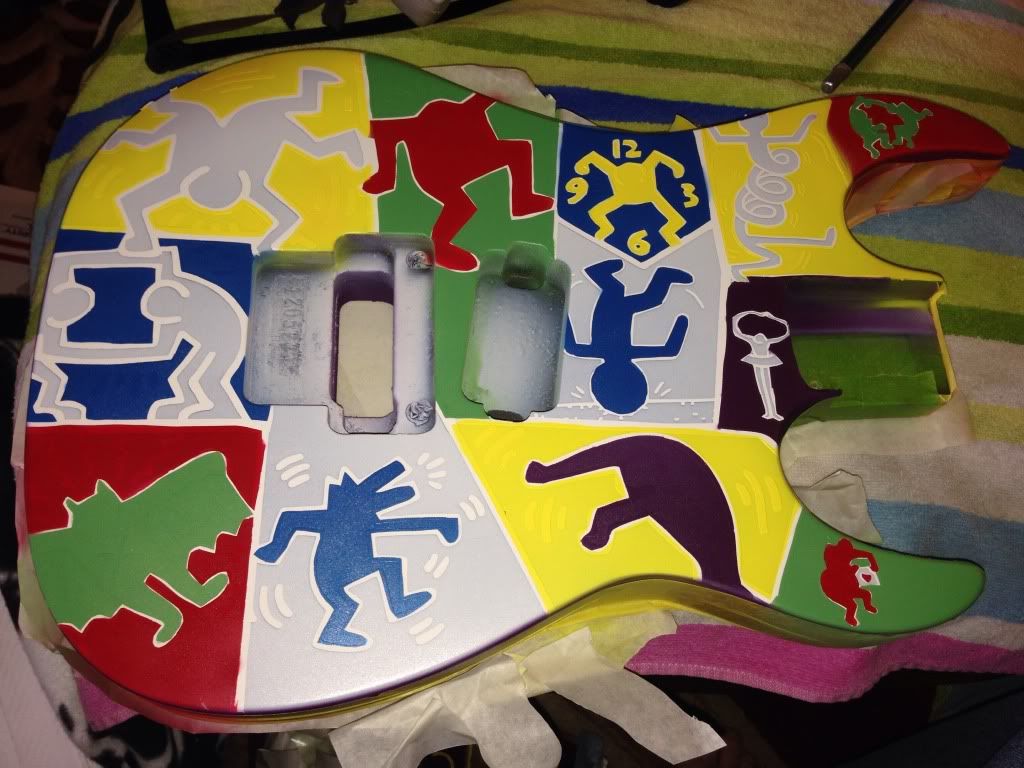
WELL HOLY **** THE THEROY WORKED!!! Pulling off the mask to put on the black lines
Now to put the white logo on which was a hell of alot harder to put on and line up with the black drop shadow than you can imagine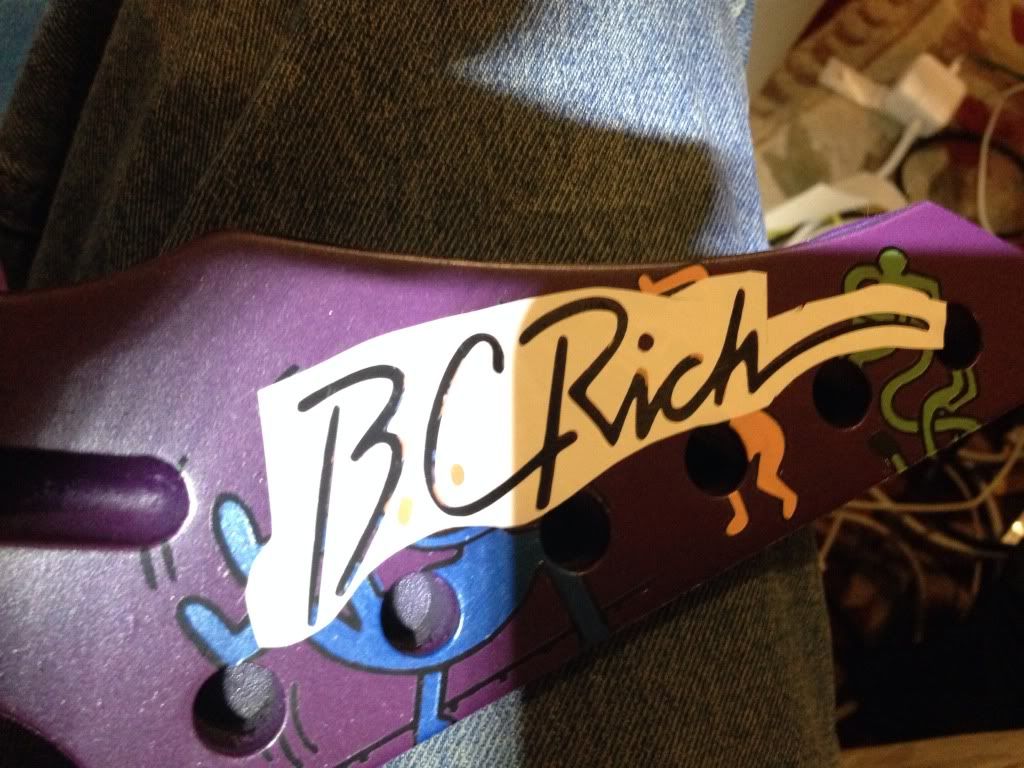
-
Good morning everyone what does the morning bring? Well, it brings a new tool, the brush. I know what your thinking "brush what the hell you dont use a brush on guitars" but for the small quick detail of the headstock the brush is faster and easier than masking and spraying. Plus after clear and wet sand you'll never know. There are tricks to get the paint to flow ( ask any pinstriper)
I dont think i mentioned this abotu what kind of paint and gear I am using. For paint I use auto paint Mason to be exact. I found a local Auto body paint shop in town and ever ator paint store has the screw up cart. THis is the place where the orders not picked up or miss mixed end up. THis is where I but all my color. your talking $5-10 a quart which is much better than $60. and face it your not painting cars so be flexable. As far as colors, remember the basic crayola box that will get you threw anything. Even les get a Blue, Red and Yellow and a white and black. You can make anything except metallic colors from this. On this project I mixed the green, orange, purple and the lighter blue. Just remember the color wheel and black for darker white for lighter.
Now when I spray with auto paint ( or any paint for that matter) you have to reduce the paint or thin it out. The paint store should give you a mixing cup and filters. I mix 1:1 with reducer. ( reducer is fancy talk for better quality thinner). THen pour through the filter. I can't stress this enough use the filter trust me there are clumps and bits in there.
For Spray guns I use the cheap harbor freight guns. THey work fine if you keep them clean and like I said were not painting cars. Also I like them for if the clear does not clean out and drys in the gun , well it was $20 go get a new one:)
now on to the latest
the tools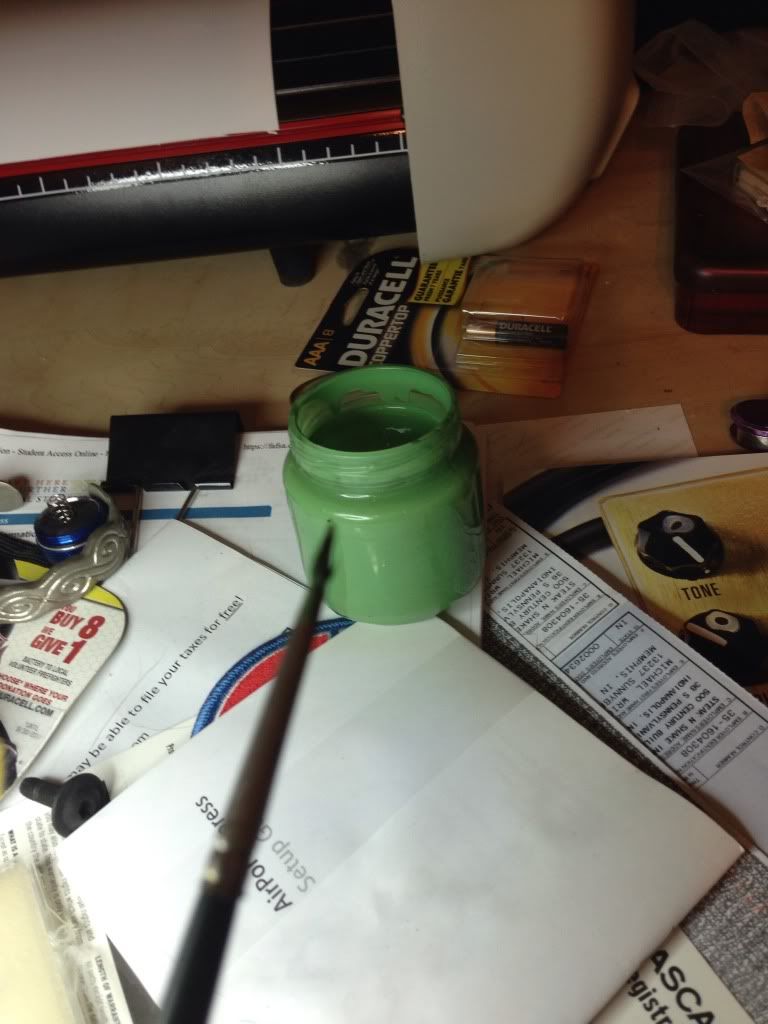
Working through the old man glass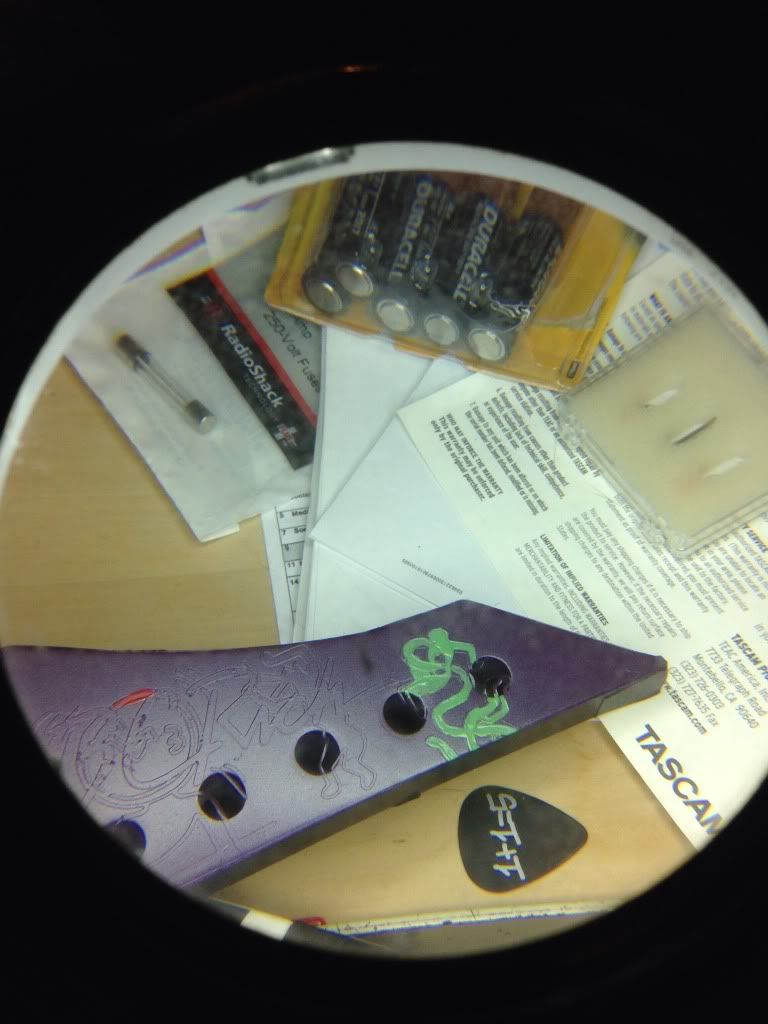
Green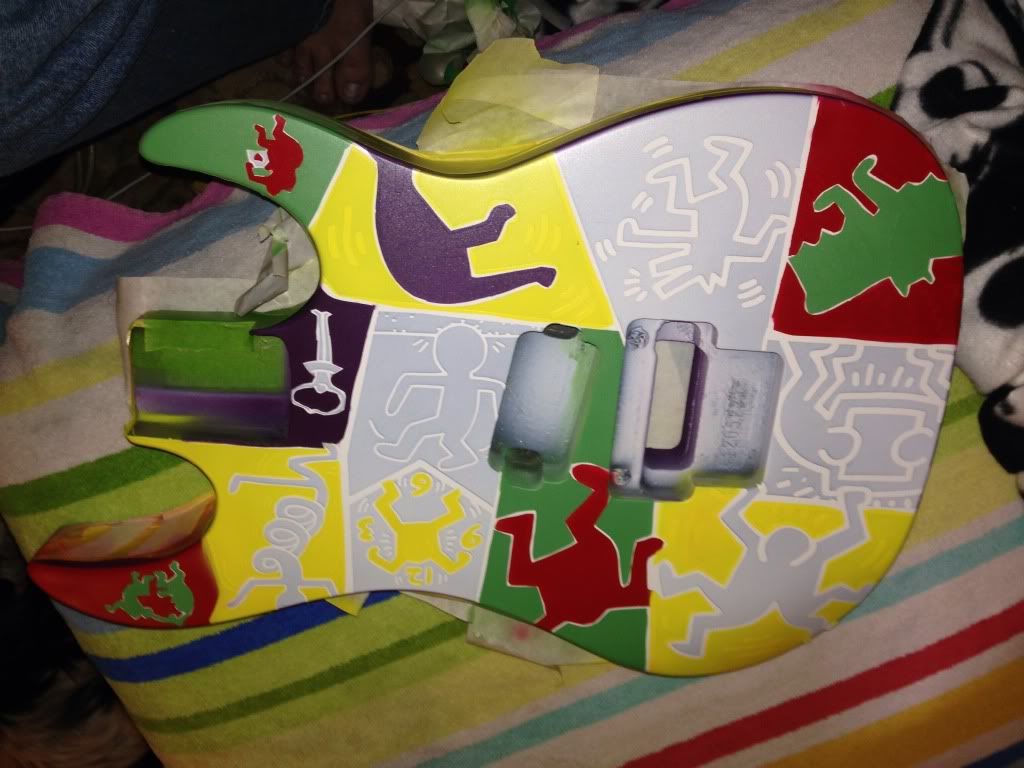
Blue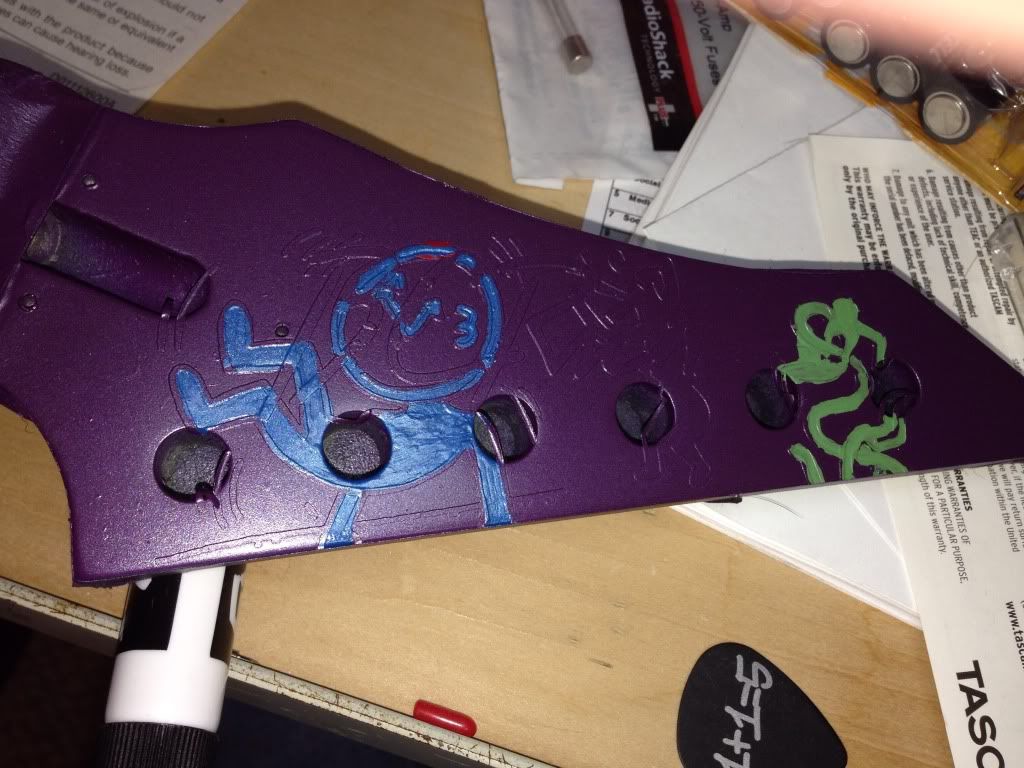
-
I really like it. Painting it looks like it could be a project in itself!
I don't think I'd have the patience for painting that, I just stick to solid colours cause I'm lazy!
 Someday I may just stretch to doing a burst lol.
If it wasn't for the fact i am doing most of the work while sitting in front of the TV I proably would of gone with a solid color
-
Added a new respirator last night cause the old one was just not cutting it. BTW if any of you are painting with out a respirator seriously stop, go get one and then continue.
The next color throwdown Red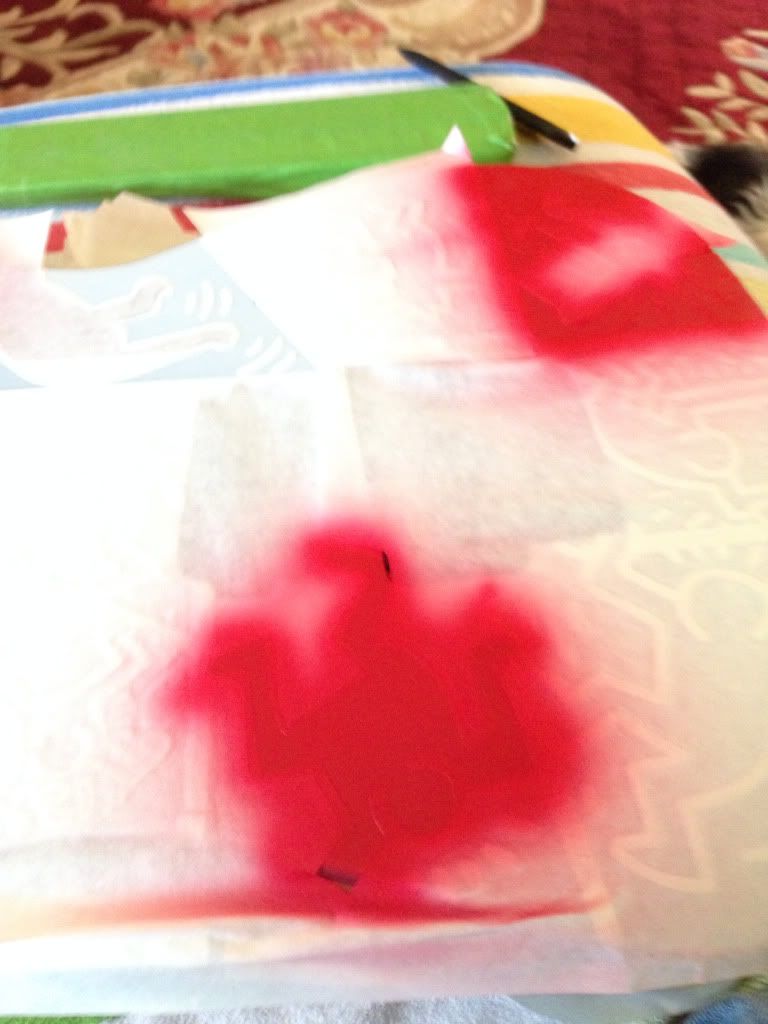
Now this would put down with an air brush and then fast dryed it with a heatgun. then covered lightly with mask and moved on.
The yellow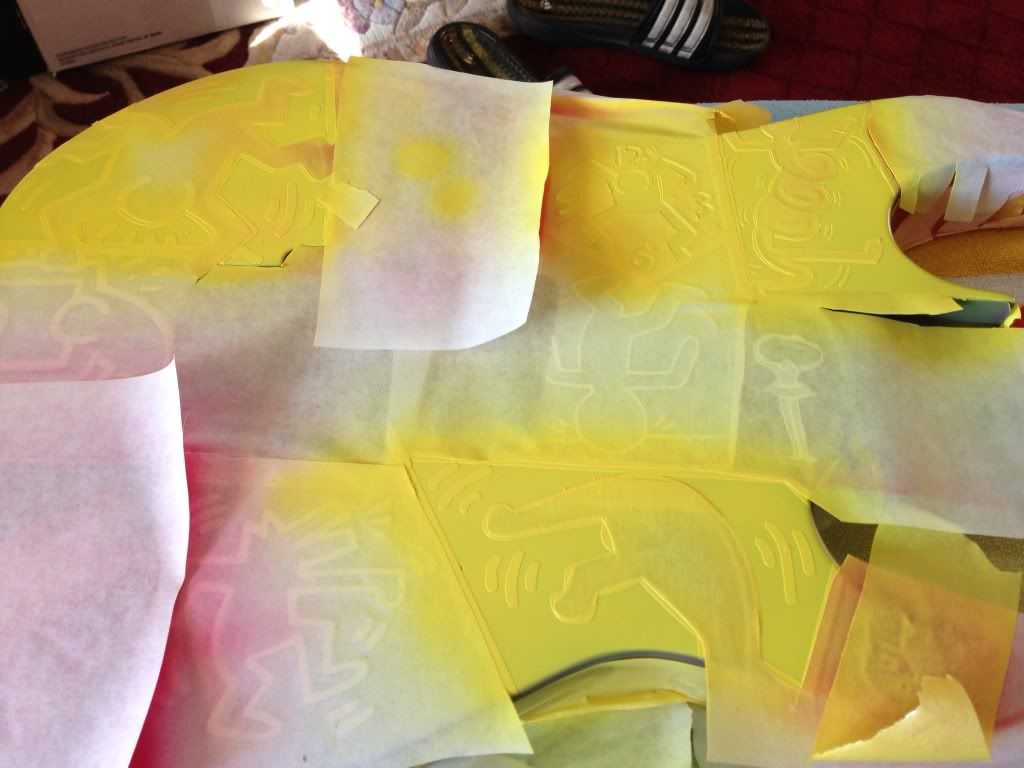
The yellow took 2 coats
Now to pull the mask, its not necessary to pull the mask but you start to fight yourself at some point so its easier to pull it. Now I would recommend letting the paint cure alittle before remasking to avoid the color pulling off
4 colors down if you count white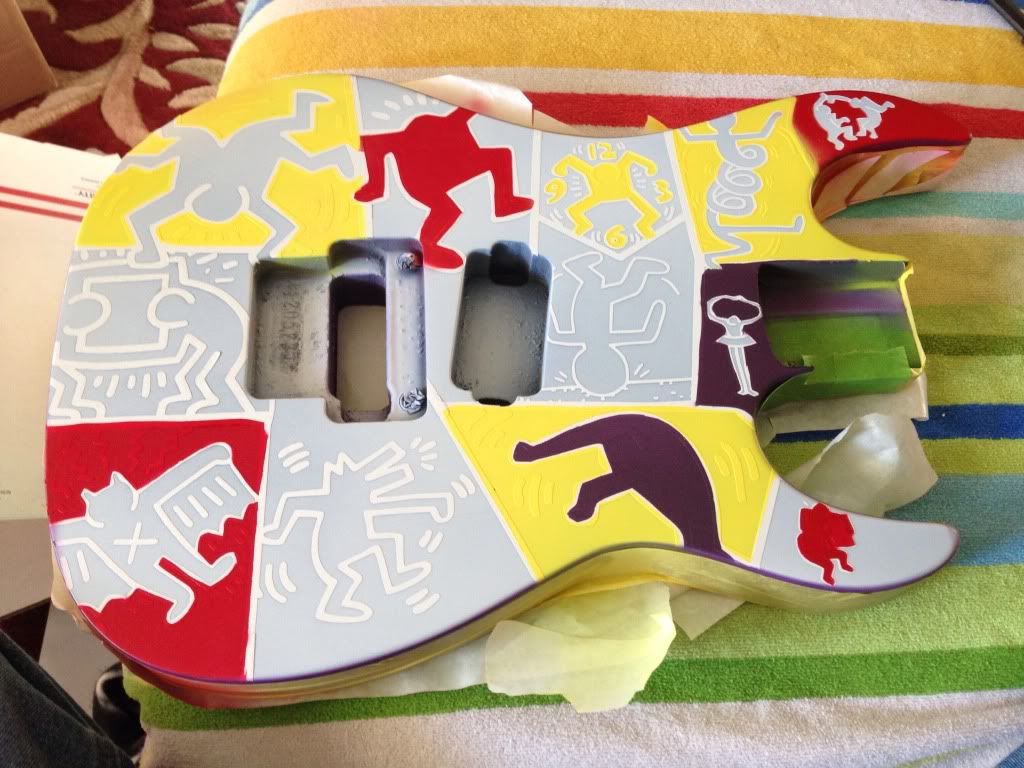
-
Well the black dried so next step was to throw down a light coat of white. Now this is not the final white this is more to give the colors a even playing surface and to make them pop.
Now my biggest fight with the painting is the dame dust and dog hair in the air but its amazing what 400 grit sandpaper can even out
Next step is the main back color of the guitar and the first front color. So i masked off the entire front and xacto out the purple parts. Now this it theroy behind the putting on the black first. By putting on the "outline mask" over the black and leaving it there I have these lines to trap the colors to so at the end when i pull them up all the lines are perfect with the color. Plus it makes it easy to cut the color masks.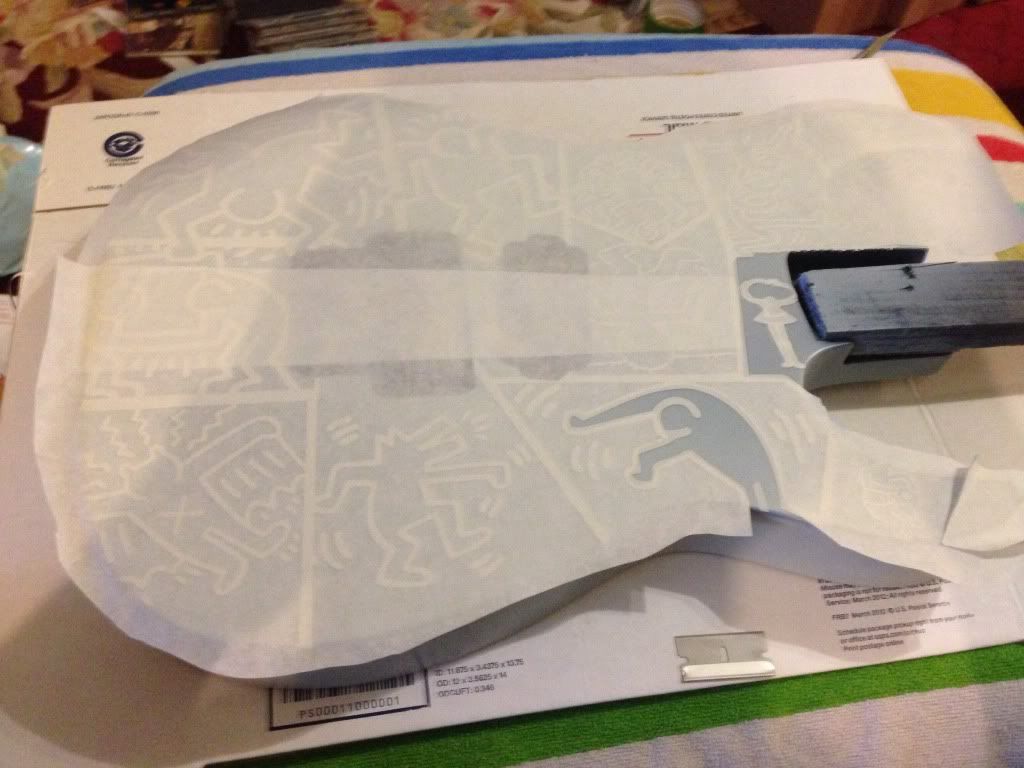
Now I do not have any purple so I dumped some red , blue and some white to get the right shade and instant purple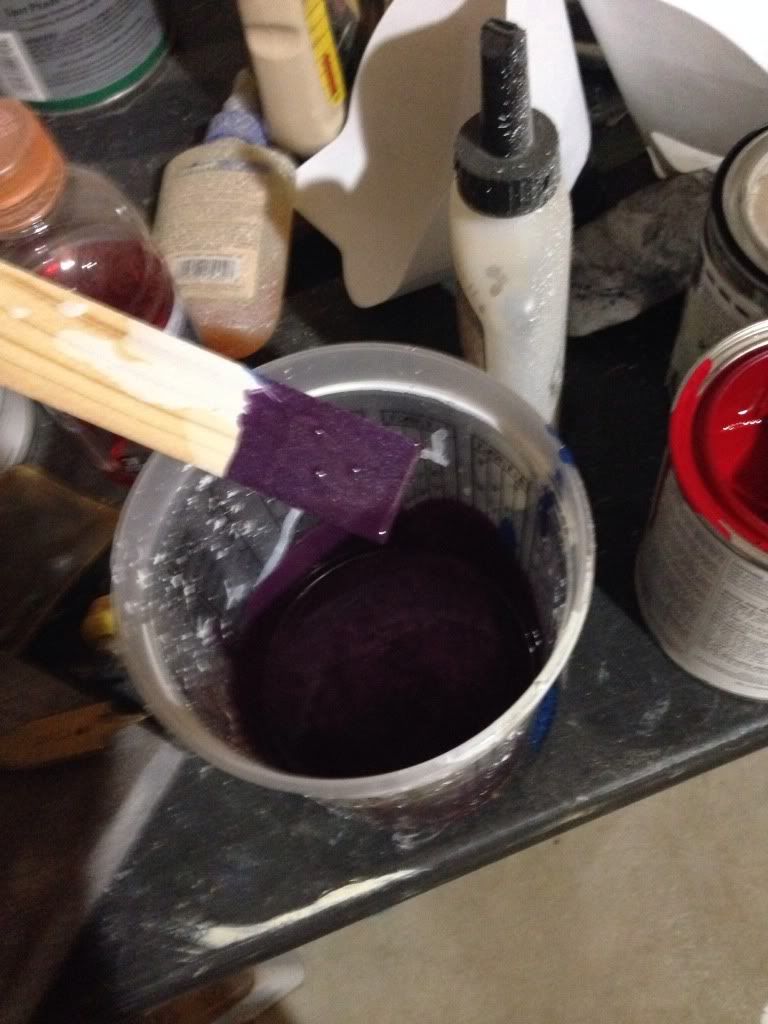
Hit it with the spray gun and let dry about 2 hours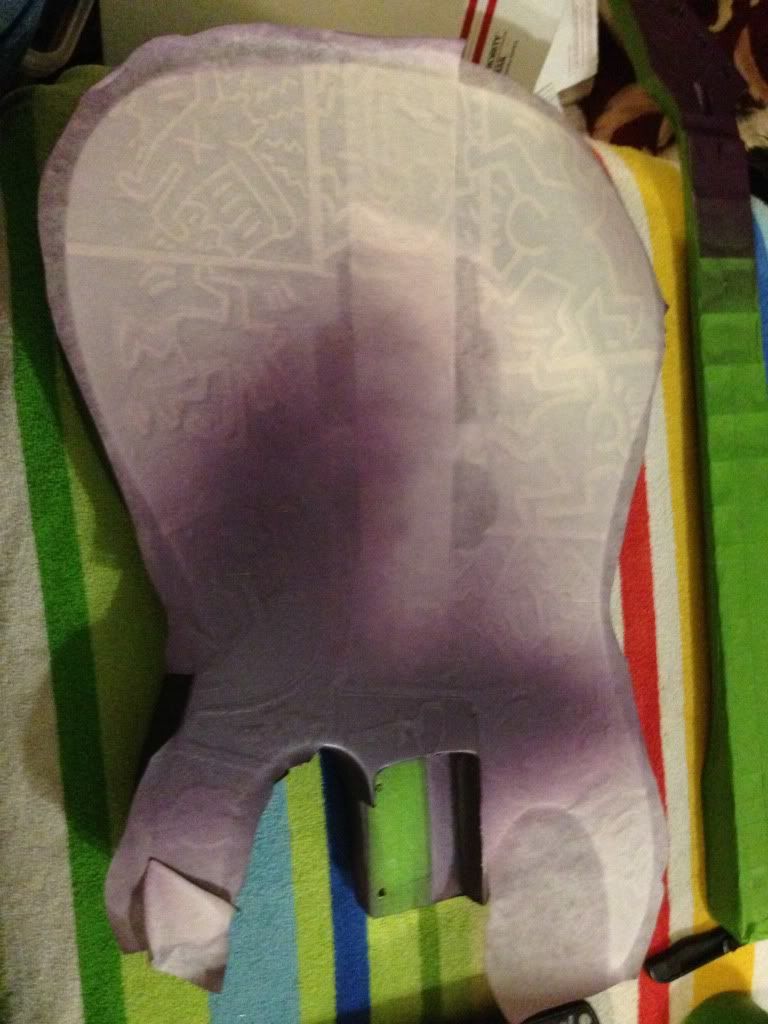
Now i peeled of the mask and put a fresh one on to rinse and repeat with the next color.
At this point i will move to the air brush more to save on paint and cleaning the gun then ease of use.
I also masked off the sides and back to keep the purple. -
I'm a little confused......you positive weeded those images. Is your intent to spray a color over everything and then peel your graphics to leave back images on a colored background? If so it's all good except that black doesn't cover well with colors. I presume you have a lighter coat planned first?
SR
Yes , I am leaving the mask over the black so i have bigger lines to trap the color to. With my lack of art skill I found it easier to build it backwards if you will.
And yes the white coat is going on next
How do you break pickup rings???
God I wish I knew . I break everything but I'll play a show and sure enough half the ring is missing .I'll have to get a pic
-
Well it only took me half a year to get started but thats how it goes.
Found my self with some free time off work, I had a stroke while at work so I am off for awhile so this is filling my time.
After hitting the body and the headstock with a scotch brite pad so the paint would stick. I fixed the dent by the volume control with some bondo and sanded flat then off to the paint room
First coat was black.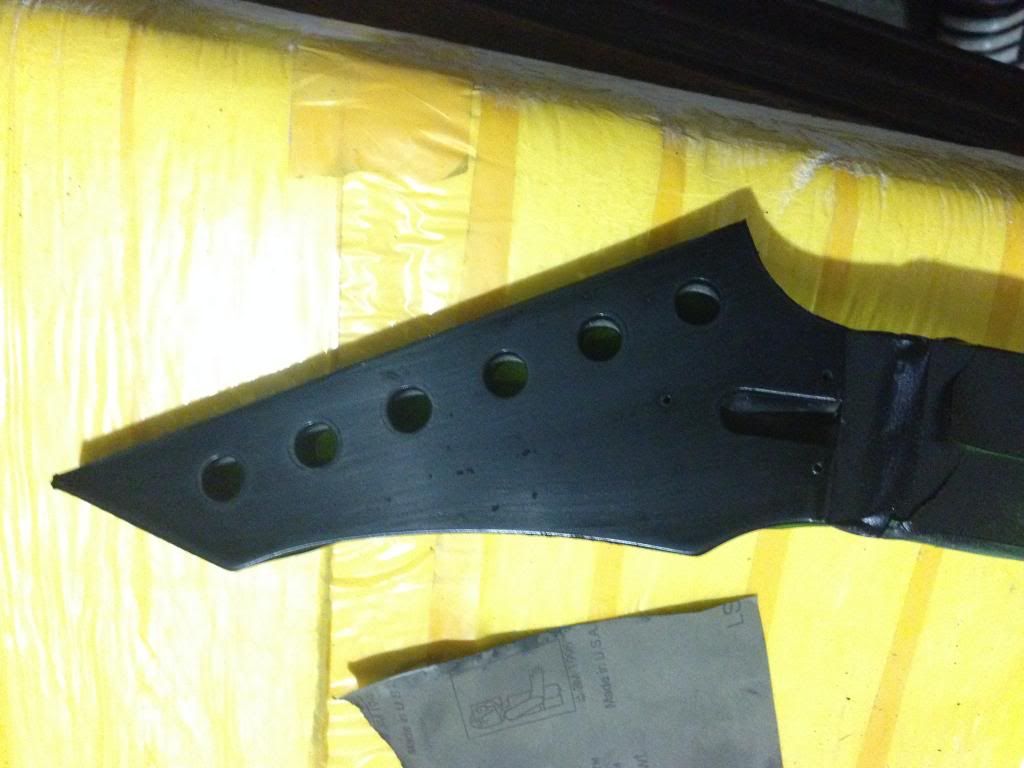
Now being the dumb bastard I am I forgot to mix the original paint before reducing so it went on like crap and was thin as hell so I had a few runs. So after some 400 grit to fix the area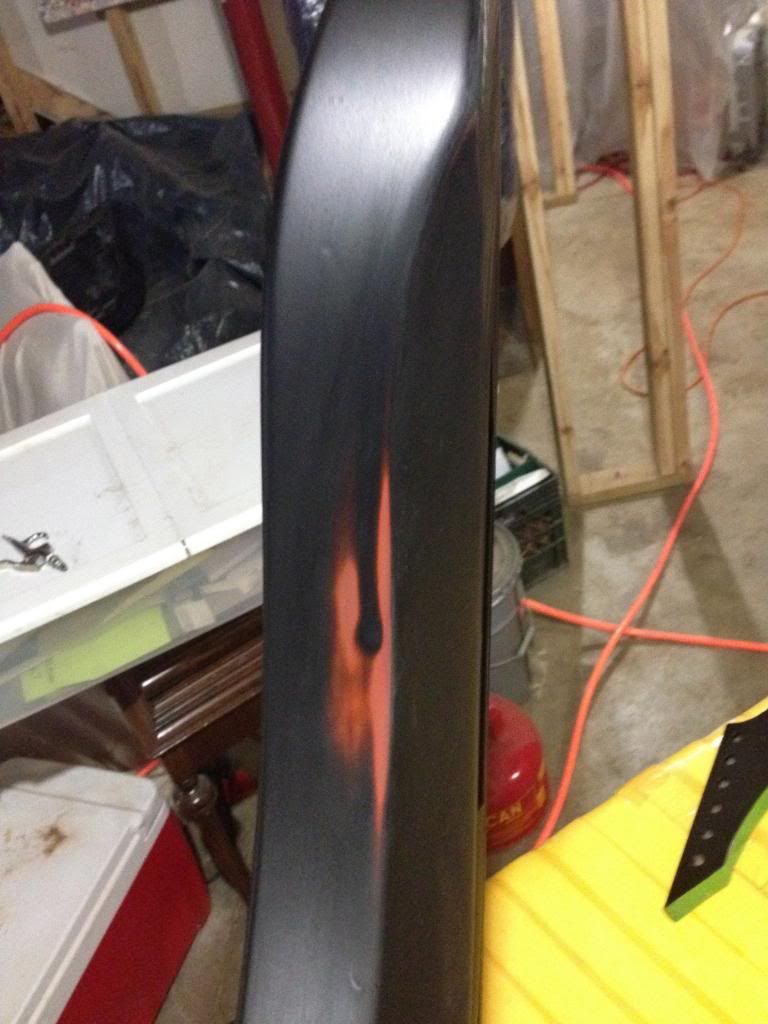
So next step was to get the black out line to stay to trap all the other colors to. So it is off to the vinyl plotter.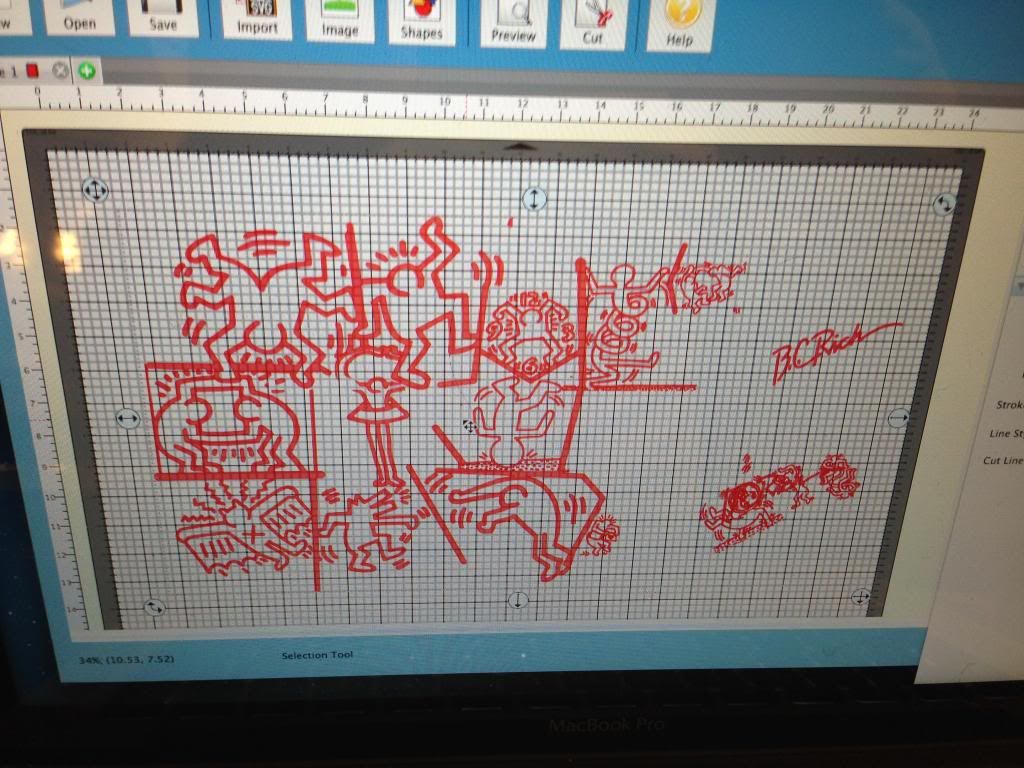
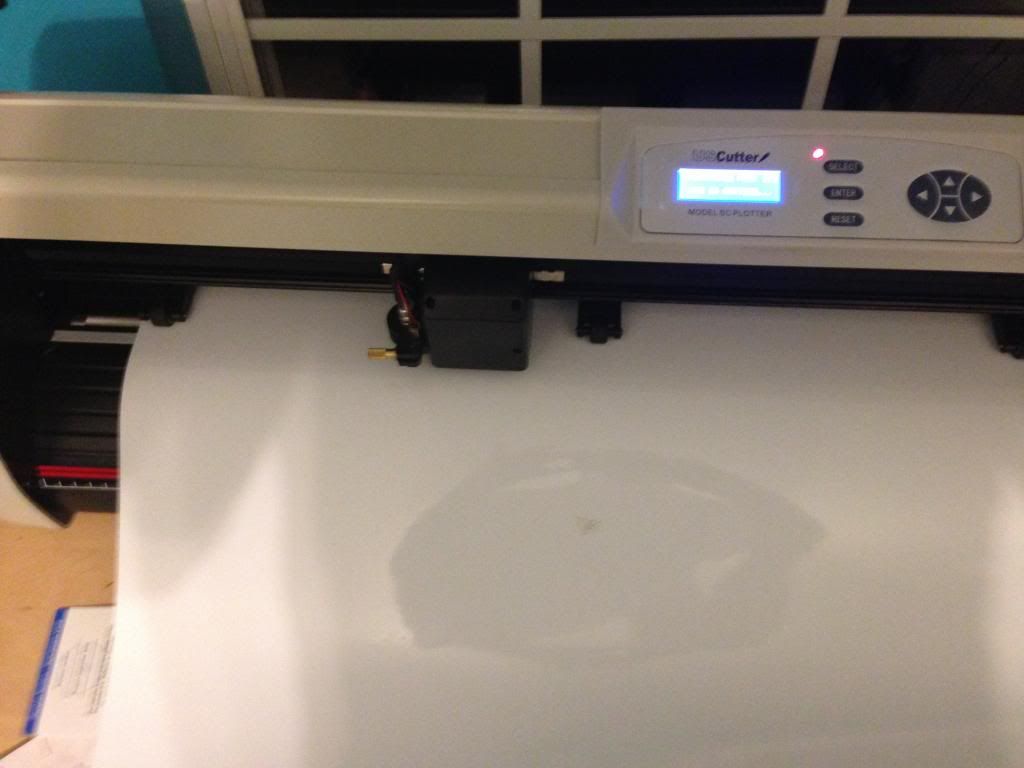
Now after the printing I pulled out all the unused bits.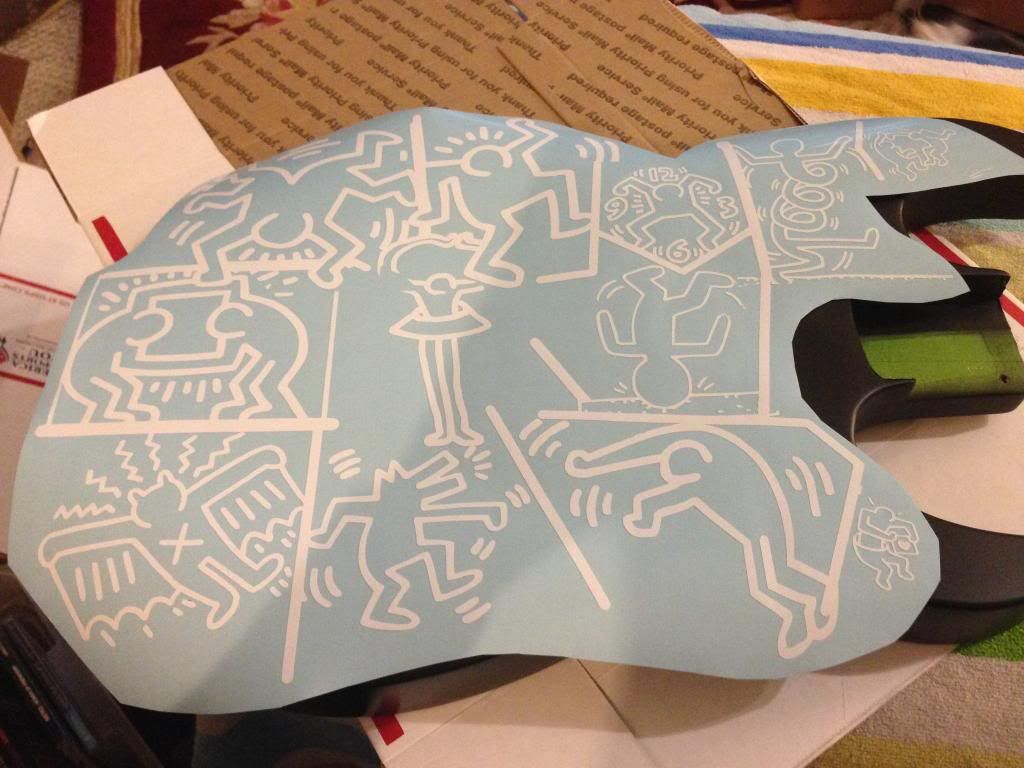
After you apply the mask to transfer it to the body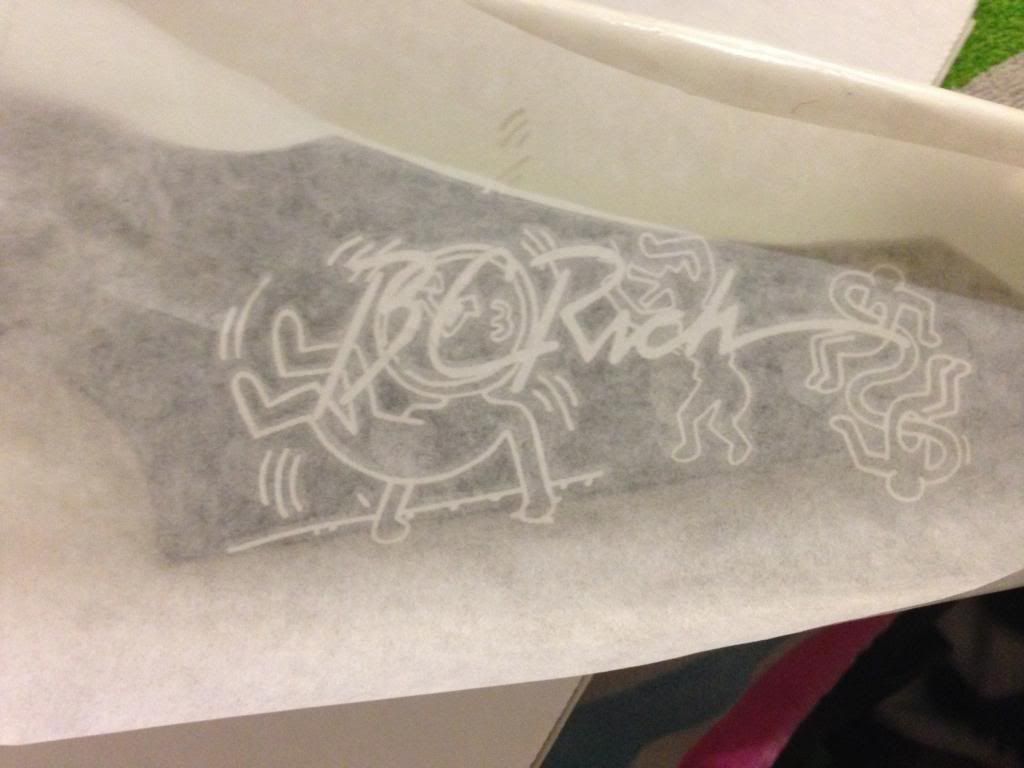
Then peel back the mask and its time for the next coat and color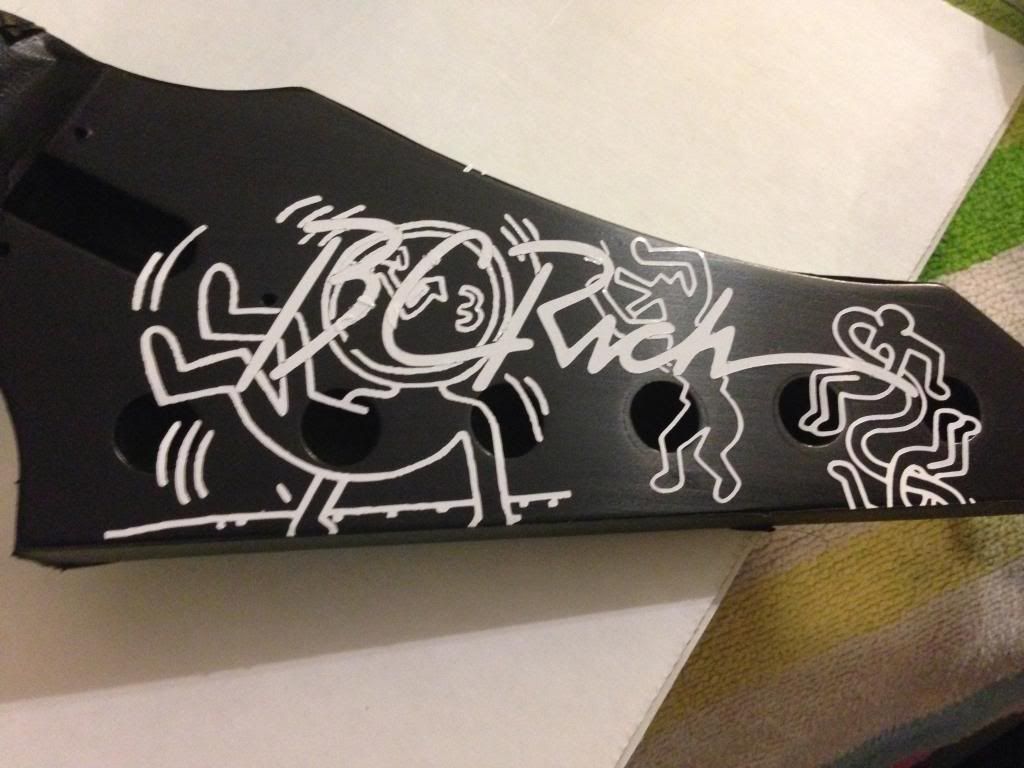
-
consider my mind blown !
-
You guys pretty much have me talked into the spiral head

thanks for the input
-
is the helix the spiral cutter ?
-
A 6" Jointer vs an 8" ? Is it worth the money for the extra size?
Same deal on Band saw 14 vs 16 or 17" and does anyone have good idea on middle ground HP. WIll be doing resawing at some point
and Planer vs thickness sander? If I can have only one whats the more useful?
As someone who has way to many tools I'd really only like to buy these items once and not have to "upgrade in a few years"
-
Fun fact: when i read this, the voice in my head has a Finnish accent. I like the humor in the posts as well as the mystery! I wanna know what that mysterious chamber is all about! Its like... a chamber of secrets...
This is where the new "Basalisk" tone control is going -
I got the frankenstrat/5150 on deck after this
the To do list of paint jobs I have waiting in shop
the 5150
A walking Dead themed Lynch ESP
A sky camo
a flame job V
and Refinish on my 84 explorer
I am in paint hell hahahaha
-
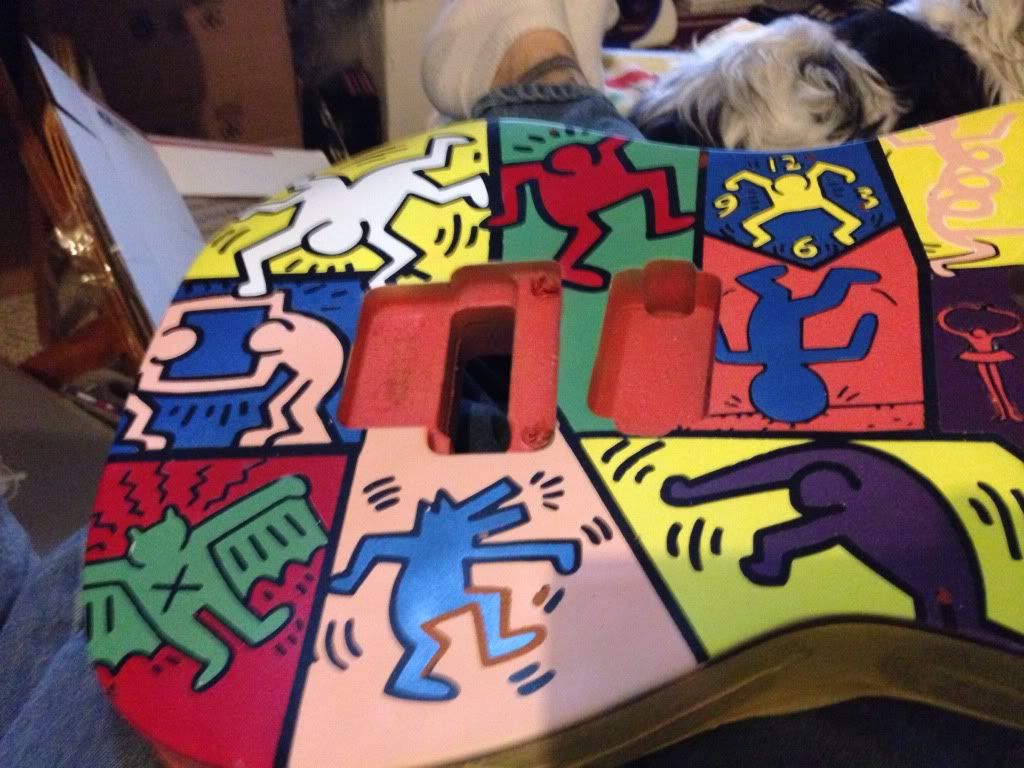
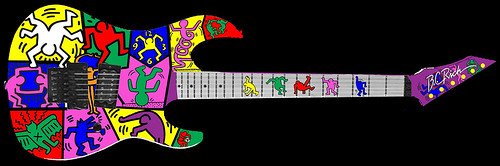
So when i was a young pup Mtv blasted me with images of rockstars and cool looking guitars. Admit it for flashy guitars you can't beat the West coast in the 80's. So one of the guitars of my child hood I remember was good ol C.C. Devill from poison. Say what you will I always liked the guy and thought he had some great guitars. So in my late night Ebay searching i came across this diamond in the rough. I Brand new B.C. Rich gunslinger with a crack in the body. So with a quick bid and a oh hell I can fix that and $100 later it was mine. Now.... what to do with it well it starts with this.
Untitled by XBIGJIMX, on Flickr
Untitled by XBIGJIMX, on FlickrNow here is the crack which is our main problem
Untitled by XBIGJIMX, on FlickrNow what am i going to do with this, well my main reason is i want to try some stuff i have never done before and either knock it out of the park or...screw it up so bad i learn something from it so with that the list
1. New kick ass paint job
2. Big block brass upgrade to the Floyd
3. Paint the floyd (I have seen alot of discussion on if this can be done, well were gonna find out)
4. Brass neck insert mod for the bolt on.
5. New updated inlay work
6. direct mount the pick ups cause I break pick up rings like its going out of style.
I did do a mock up because the paint will need a go by.
Here is the original insperation from mr. CC

ccharingguitar by XBIGJIMX, on FlickrNow I have always been a fan of Keith Haring and so this definatly caught my eye. Now that i am older I realize this was not actually Keith Haring but that neither here or there. But it gives me a launch point.
So which leads to my start point
my version
let see how this goes.
-
When I was in college, I loved a song by the Bouncing Souls. It's called Gone and I think it is a great tune, I still love listening to it. Congrats on playing with them, and that bass seems to have produced a lot of music.
It was a lot of fun they are such great guys, but we played after them and I so did not want to play after them haha
-
Had to share this. I had the pleasure of playing with a band called the Bouncing Souls last month and got a look at Brian's Bass and it would be the most worn guitar i have seen.
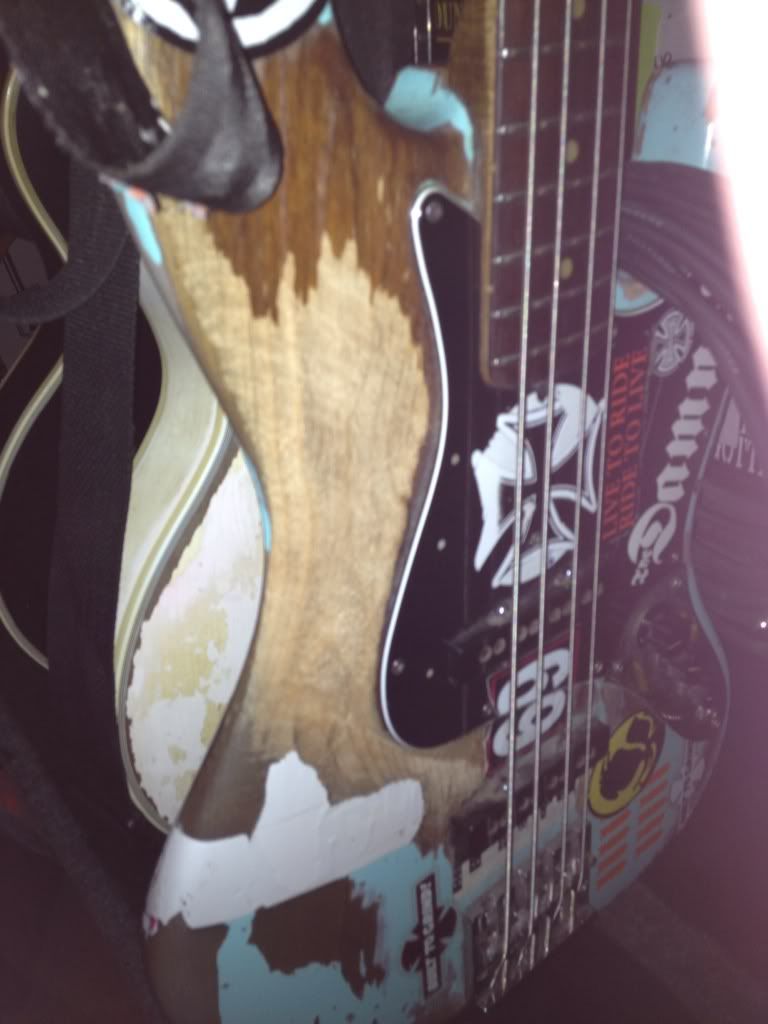
The side view is the real kicker look by the pic guard of where the body has been rubbed away and look at the thickness at the belly curve
-
Awesome project! any time you can bond with your kids is great. Plus your never to early to learn how to work with your hands:)
I second the safety glasses and dust mask. I would also take off the rubber bracelets just to be safe. Going to the emergency room always sucks, but taking your kid that a whole different world of things i don't want to do
-
I agree with Buter I have one of those in my shop. It is a 2 car garage and it work perfect
-
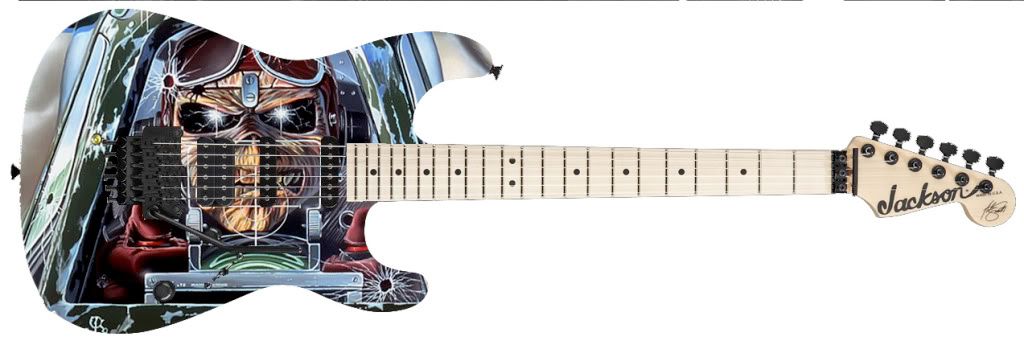
HOW DARE YOU?!?!! lol Those are cool! I really like the Aces High one! If you want the templates I made I can post them up in the downloads section of the forum... I think you should make one too! We all should!!!
In other news, I got my Floyd the other day, so I will be drilling the last few holes before finish sanding, then its primer for this baby! Ill be working on the necks at the same time, so dont expect anything too soon. Ill finish up one of them first since Im running short on time for my other projects. The other will be on the back burner for a few months I think.
THe templates would be awesome, i'd would totally appreciate it. I think your right everyone should build one as a right of passage I mean who does not love eddie
-
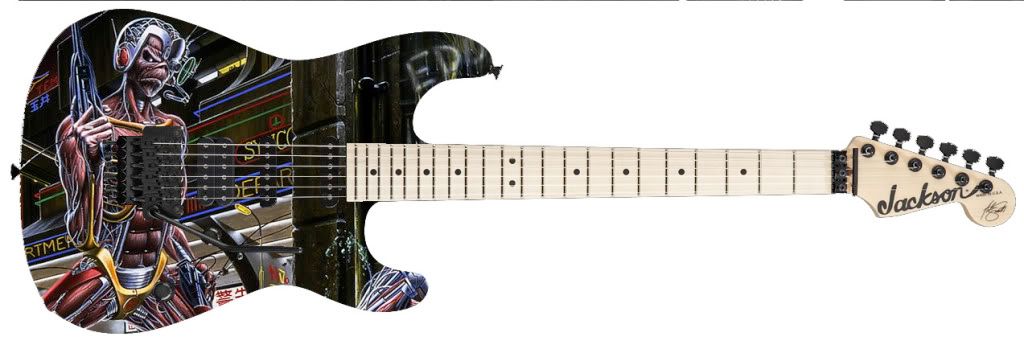
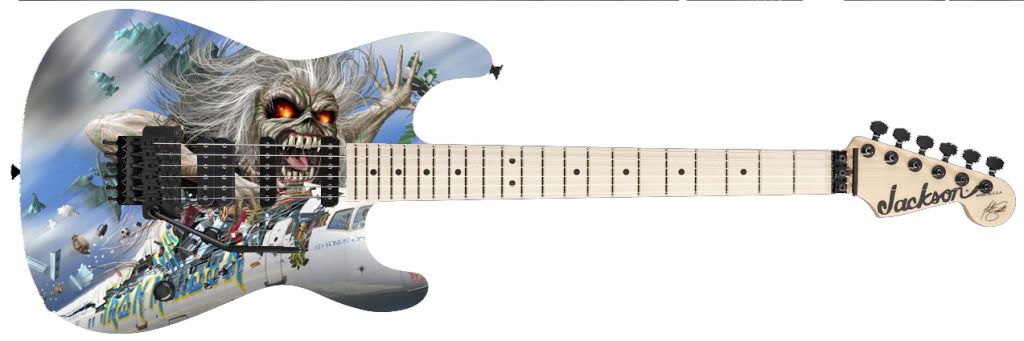
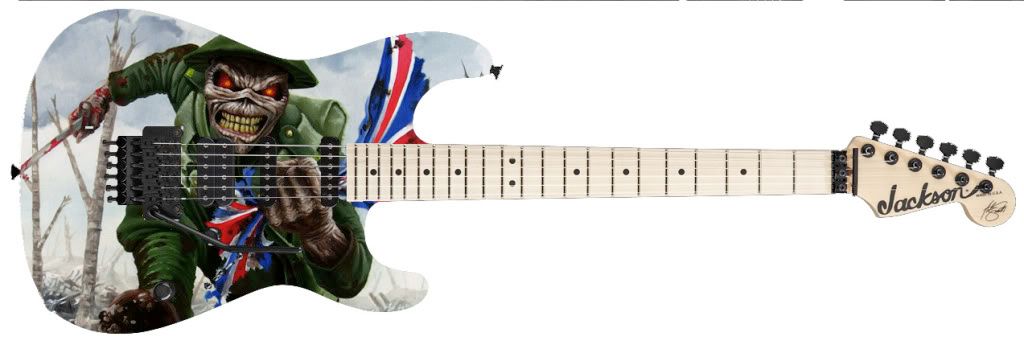
hope no one minds i did a few more of these myself these for fun


 Someday I may just stretch to doing a burst lol.


Updating And Moding A Gunslinger, Or How Can I Make $100 Guitar B
in In Progress and Finished Work
Posted
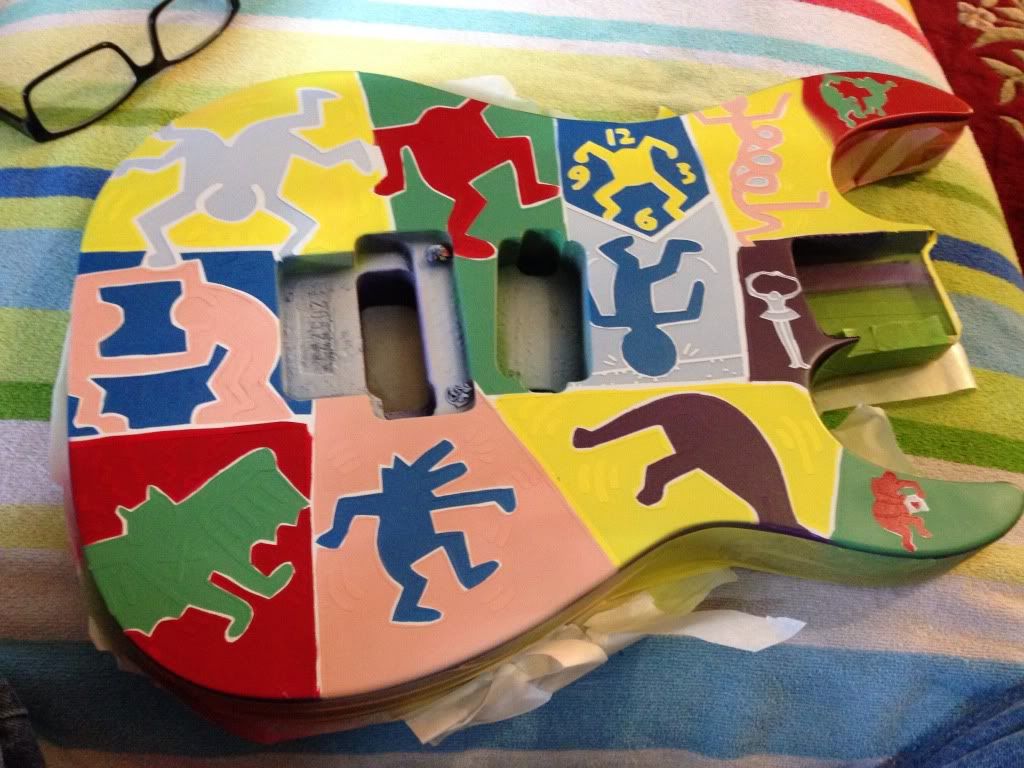
After a little break to let the paint cure & get some smaller brushes. It was time to do the touch ups for the peel up spots and and other imperfections.

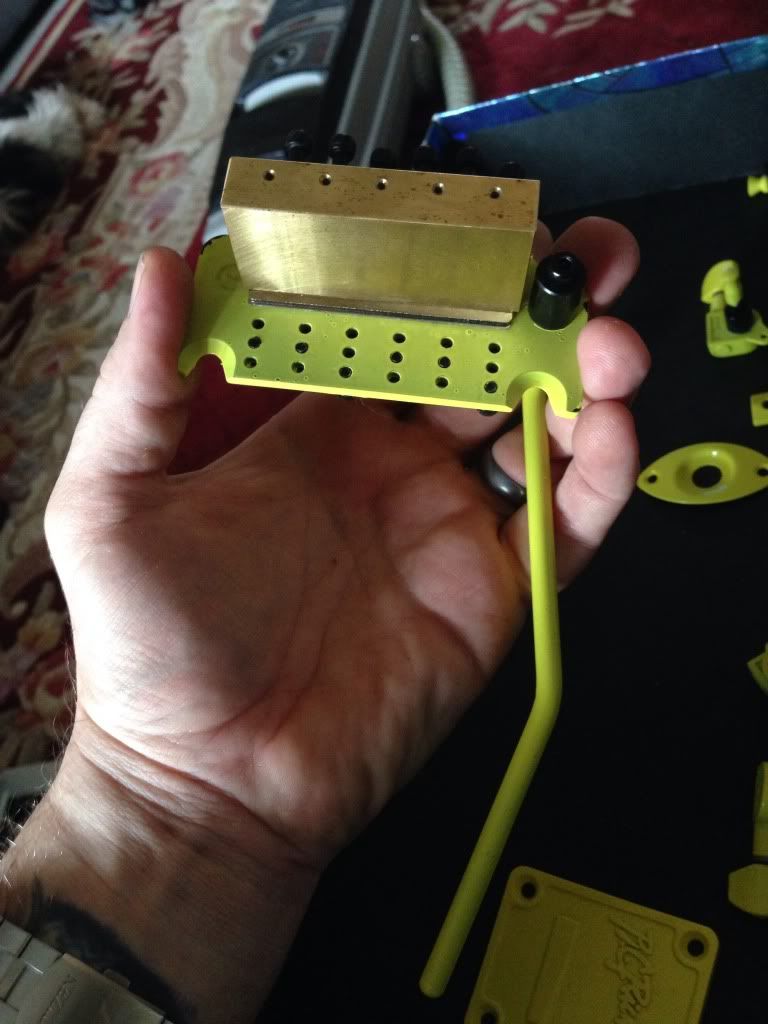
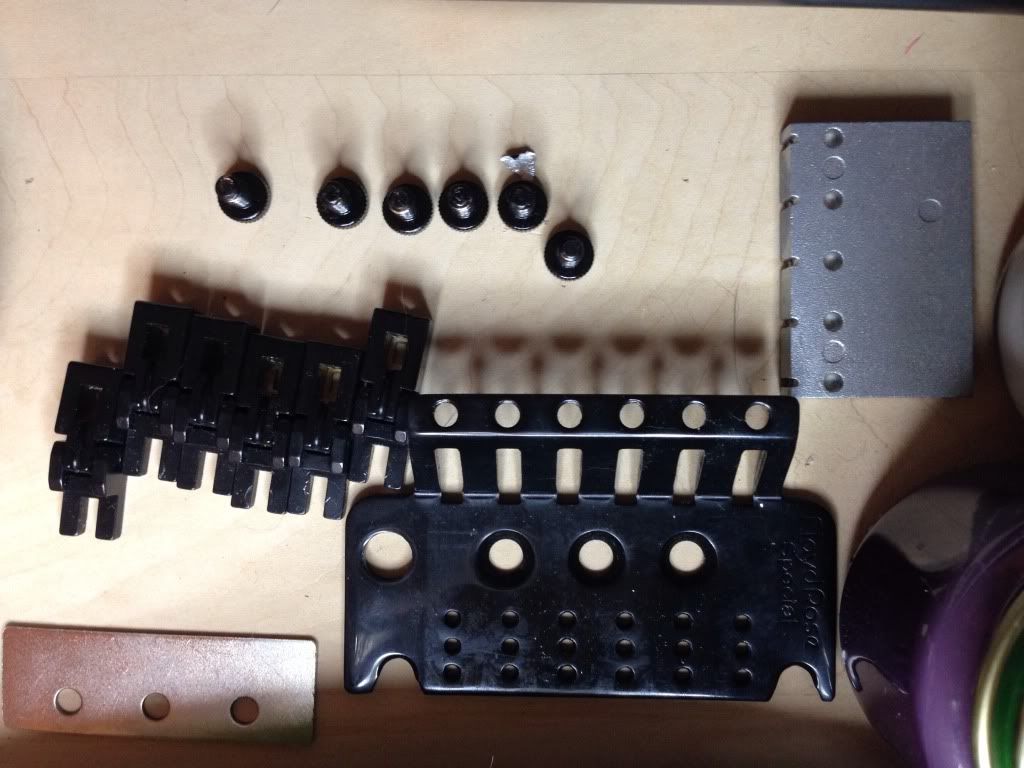
 Also I started prep for painting the Floyd. Pulled it apart so i could scuff them so the new paint sticks. Now for those who dont know. Floyd fine tuners are not designed to be removed. But they can with a little talking to
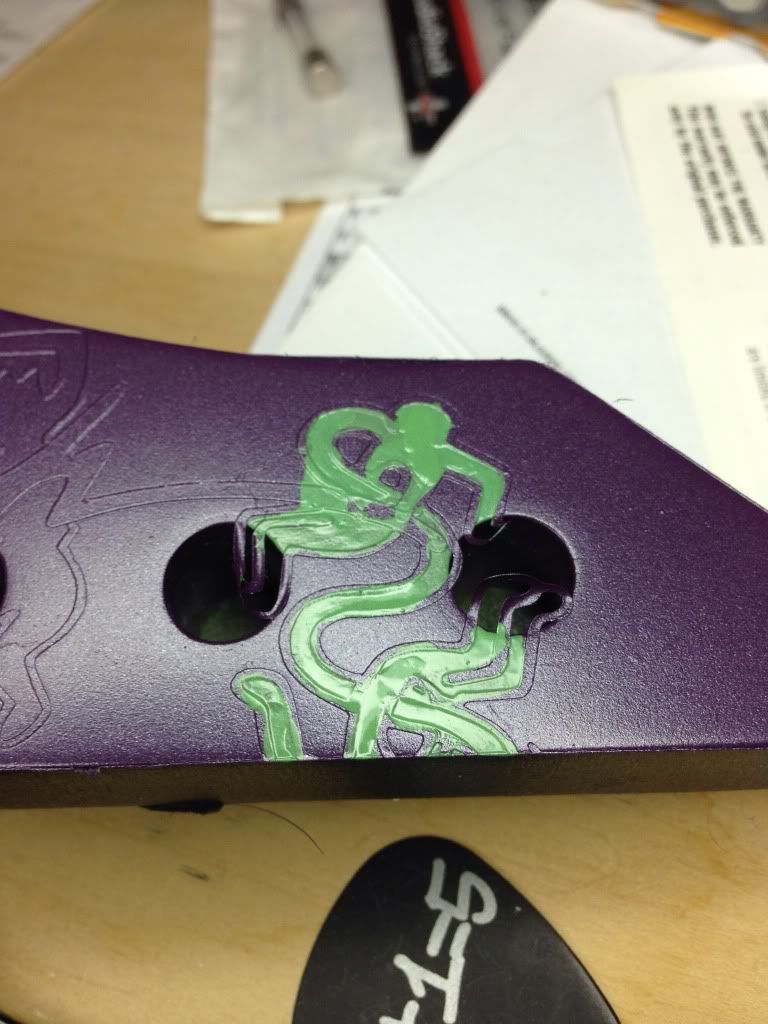
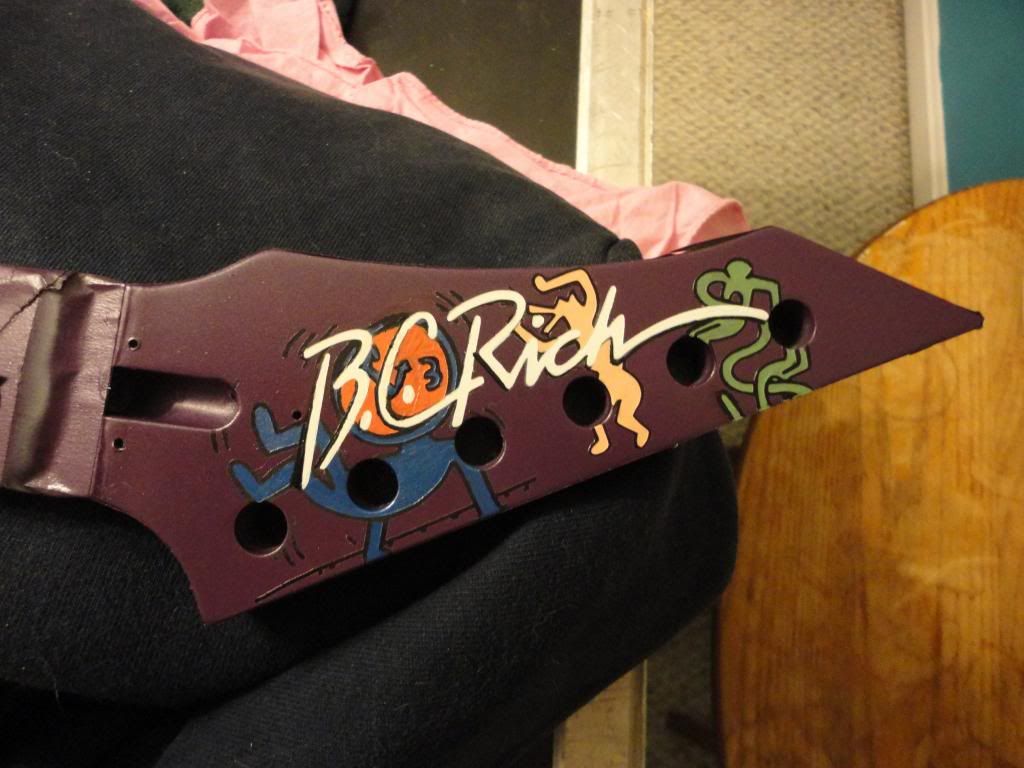
I started with the head stock. Went though most of the colors. I did make some bad strokes but I just let it dry and painted over it. no big deal. So the headstock is ready for clear
BEFORE:
AFTER touch ups: Might still adjust the blue