


XBIGJIMX
-
Posts
124 -
Joined
-
Last visited
Content Type
Profiles
News and Information
Tutorials
Product Reviews
Supplier Listings
Articles
Guitar Of The Month
Links and Resources
Forums
Gallery
Downloads
Posts posted by XBIGJIMX
-
-

Too bad I was on the wrong side of the stage, not a bad pic for an iPhone though
 Good show as always though!
Where did you see them? That was about where i was at the Chicago show
-
Looks great I love this whole project! I was wondering how are you planing to to do the graphics themselves?
-
looks awesome as all your explorers do. Question though did the customer request mahogany cause as far as I know the 84's were Adler with Maple necks (which oddly enough Gibson did not use when they did the 84 reissue). I am still kicking my own ass for selling mine (the only guitar i regret selling)
-
Great looking jem. I love your make due with what you have tool approach! I never would of thought to use a vise as a fret press
-
for a first build this is looking great. excellent job on the detail
-
I’m not sure how to respond to the notion of using the laser as a way of “cheating”. I know there are purists out there, and I can respect that. But, you have to qualify it. The question is, what qualifies as “cheating”. Is it acceptable to use a PC to surf the web for information, but not OK to use a PC to generate a toolpath?
What I have found is most craftsman that have a problem with a certain technology only have a problem with the technology they don’t have…until they get the machine, or tool in question. Then they suddenly don’t have a problem with it any more. One of the main misconceptions of CNC based machines is most people who have never operated one before think they program themselves. These machines still take knowledge to program & skill to operate. When there is artwork involved, it takes an additional level of ability. Bottom line is: it’s just another tool.

First off let me say that was completly amazing! I watched it twice and then called my wife to see it!
I agree after watching it is definatly something tool wise "I WANT!"
What i think they mean by "cheating" is by seeing it work it's like learning how a magic trick works. After you learn and see how it's done it takes the mystery away and your left with "aww I can do that" feeling. But if you got on stage the girl would get cut in half for real and the ambulance is on the way.
Mind you we are watching a timelapse you tube video so you don't see the cad programing or the actual time to cut all those inlays or the glue in process, or the 2nd one you cut in scrap to keep the pieces straight.
I am very pro computers/cnc/laser because these things make possible many things that would be possible for me art wise that would normally be out of my reach. I do desktop design and layout and have a "art" based mind but my hands can not quite draw whats in my mind but with being able scan, twist, point by point click mirror and invert i have been able to "draw" things needed. So it is like you said it is a tool to use and sir let me say you use that tool with grace and skill so I tip my hat to you on wonderful job done and look forward to any videos you post
Jim
-
wow I can't get over the beauty of the b&w Ebony! I am new here and your posts are quite inspiring
-
Incredible looking wood I am curious what a slab of perfect wood like thaats costs when you can get it locally
-
I would go with the EMG 81 is has really been really good to me as far as an aggressive pick up goes.
My advice as far as your first build would be go with Warmoth parts. THey do all the hard work as far as drilling and building the hard parts. I would compare it to a snap together model kit vs 500 piece advanced model. You can get a great guitar that is very custom but with out investing in alot of tools. But if you go the full build route just remember to relax and take your time. You will feel the excitment to rush but take your time and enjoy it
-
...me too. Im a fan of that guitar.
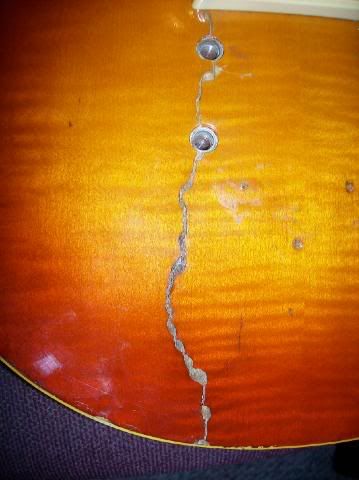
I wonder how that veneer got cracked like that..
From what i could tell is they had it on the floor in a basement or in a garage leaning against the way and it got wet and the veneer swelled with the moisture and it just lifted and cracked. If you look at the half way removed pic you can see what looks like a water stain
-
Ok here are some brighter pics I just took along with a link to an mp3 so you can here what it sounded like recorded
http://www.myspace.com/casketandflower
THe solder shows up pretty good it has dulled a little due to use and sweat
-
I really like option 3 for the necks but i think tuning would be a problem so I would go with one.
Pickup I agree that H&H on the fixed and H-S-S on the floyd. I think it will look hot either way
-
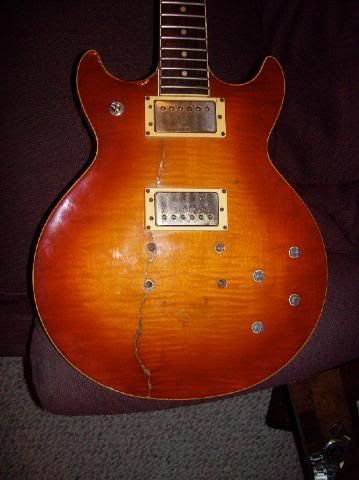
I picked this up on Ebay for $120 last year. I had been looking for some time but I was not willing to pay alot for it. So it ws sold as is with a cracked top. Once I got it home I saw that it was just a split in the veneer and some melted binding. So it is off to remove the old and start with the new
Using the heat gun and flat knife i slowly lifted the veneer. I'll say one thing when you burn the binding or the finish it is super toxic. A resperator is a must
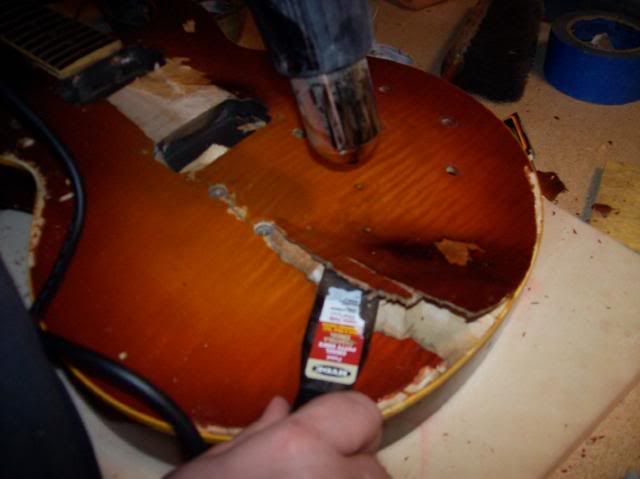
Binding removal
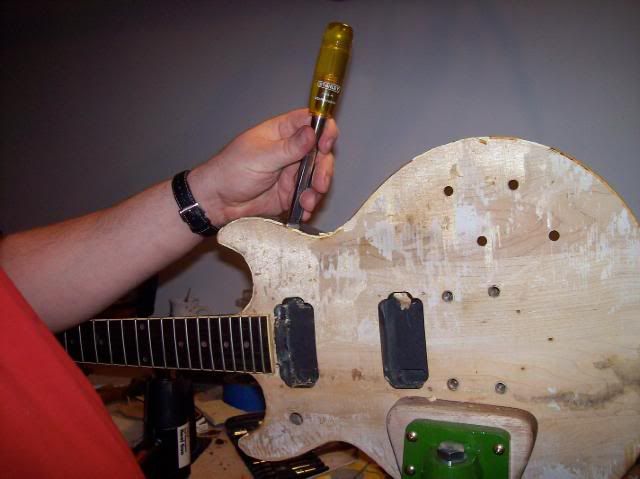
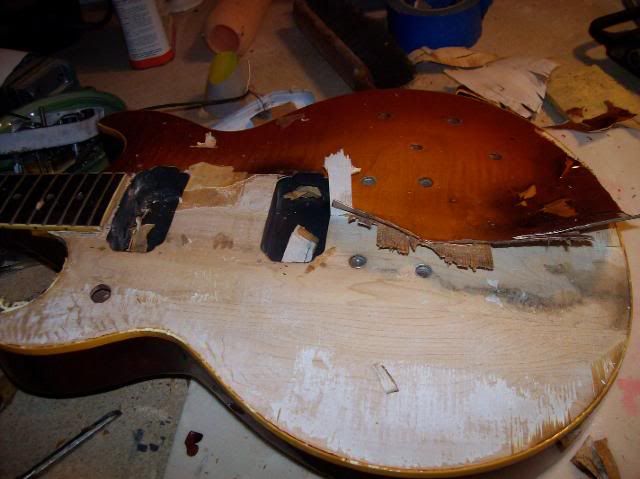
For the rest of the finish I used a chemical stripper
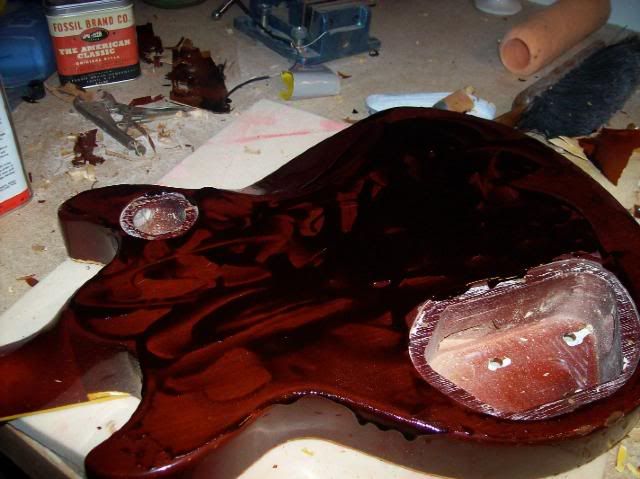
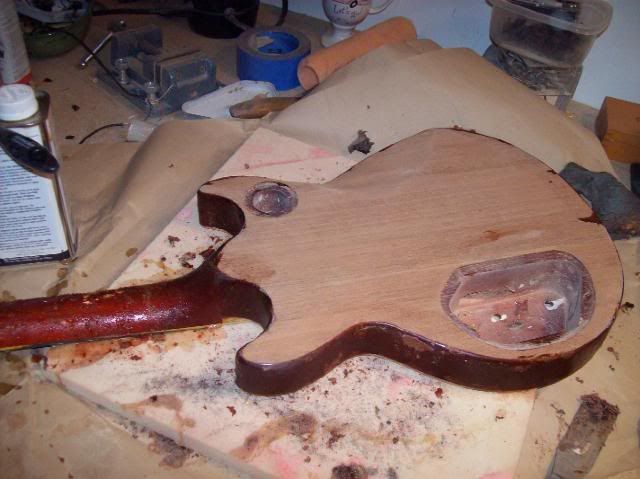
All Clean
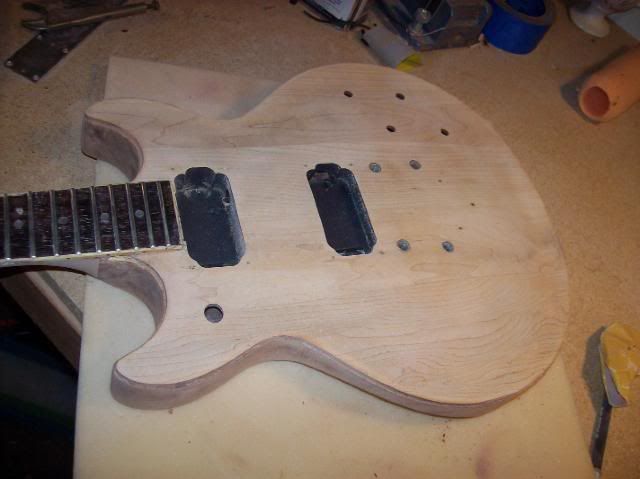
I am planing on doing a green sunburst in to black i think for the refinish
-
Awesome cause, awesome looking guitar
-
Very nice. I like the creative neck join. How's the sustain with it?
Thanks, the sustain is very good it is along the lines of my Les Paul
-
Next hit em with the torch to melt the solder
Now with a little filling , sanding and polishing...
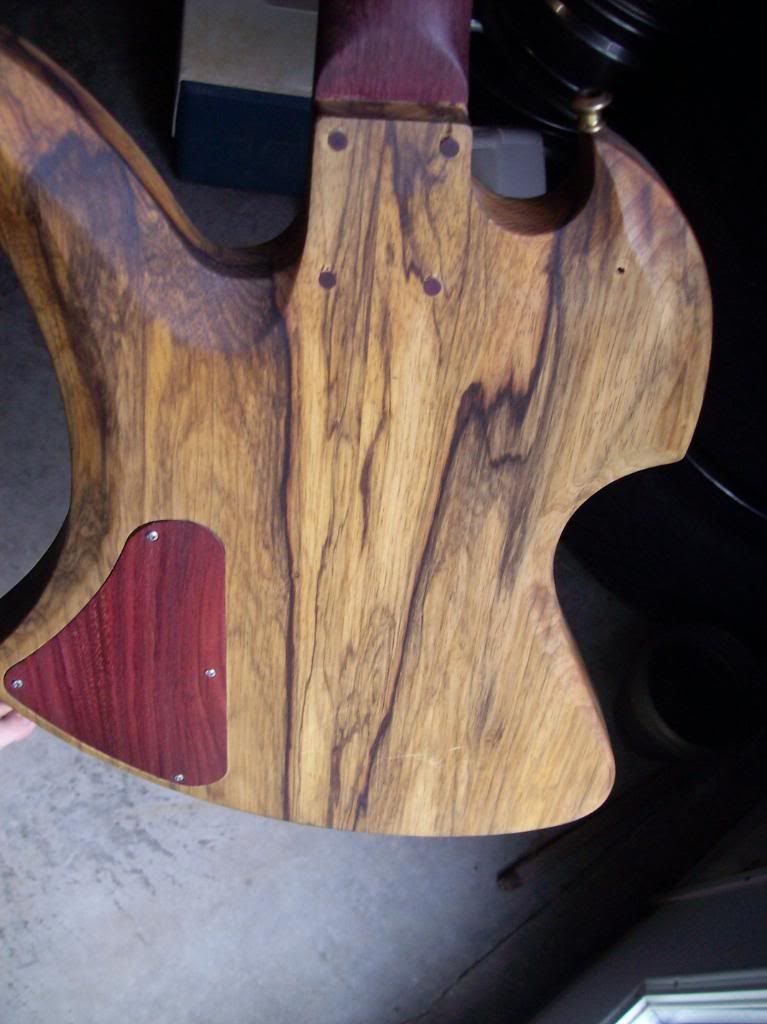
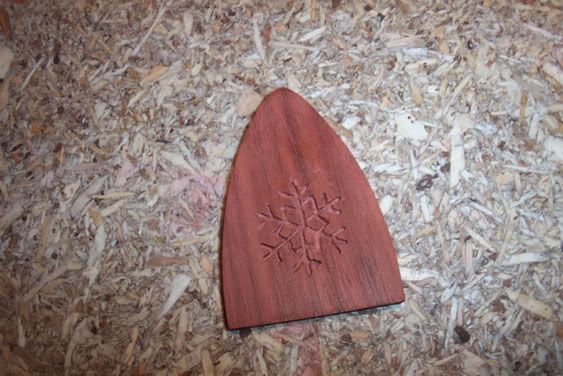
The control cover was made from 2 pieces of 1/8" purple heart glued together
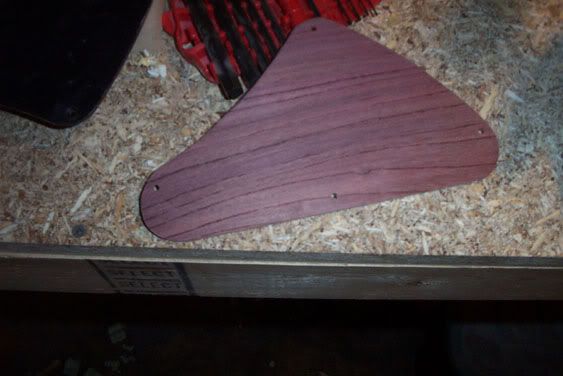
The truss rod cover
now for some finish
The finished project
-
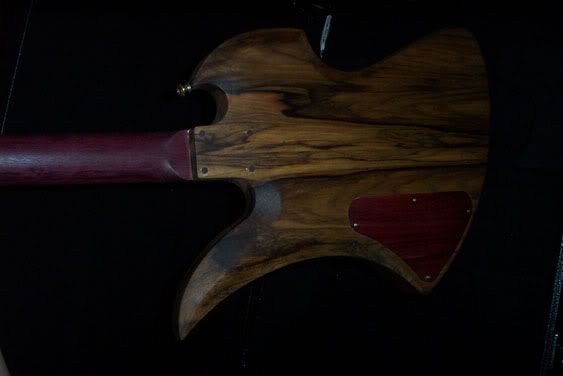
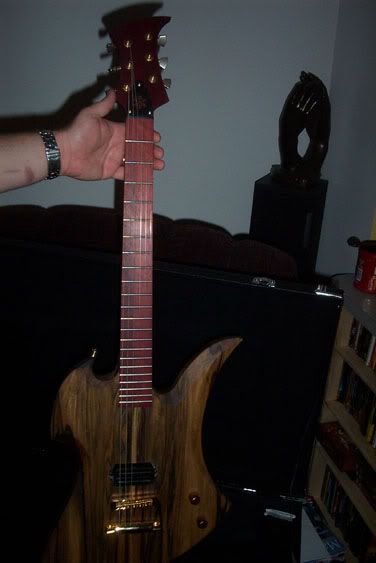
Hey everyone this was my first "build" it was more of the snap together model kit but i tried some different stuff with warmoth parts
the Details:
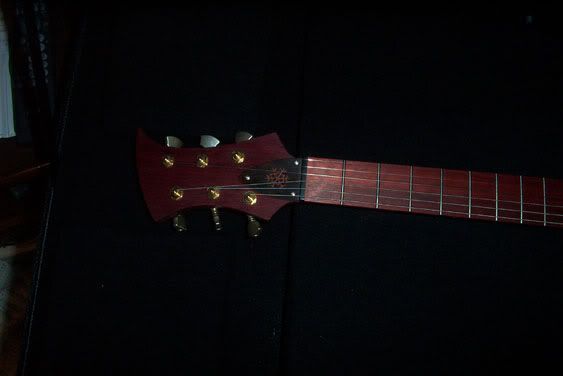
25 1/2 scale
Body Black Korina
Neck: Purpleheart
Fretboard :Satine
With a tung oil finish
Pick up Original Bill Lawrence xl500
I hope there is not picture limit if so I am sorry
I ordered the body and the neck from warmoth and told them I would be a clear finish so if they could pick out something nice and they came though in my opinion

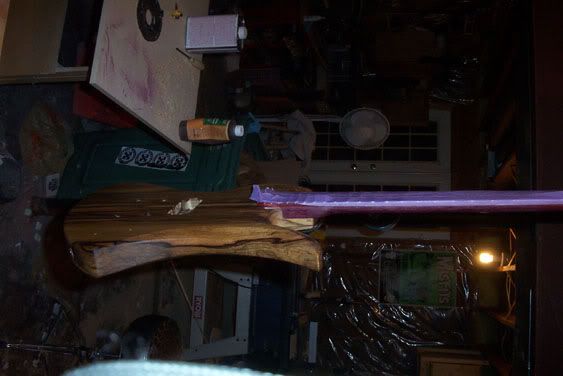
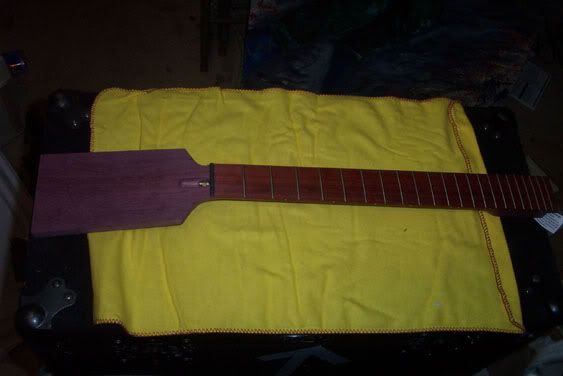
THe neck with the paddle blank
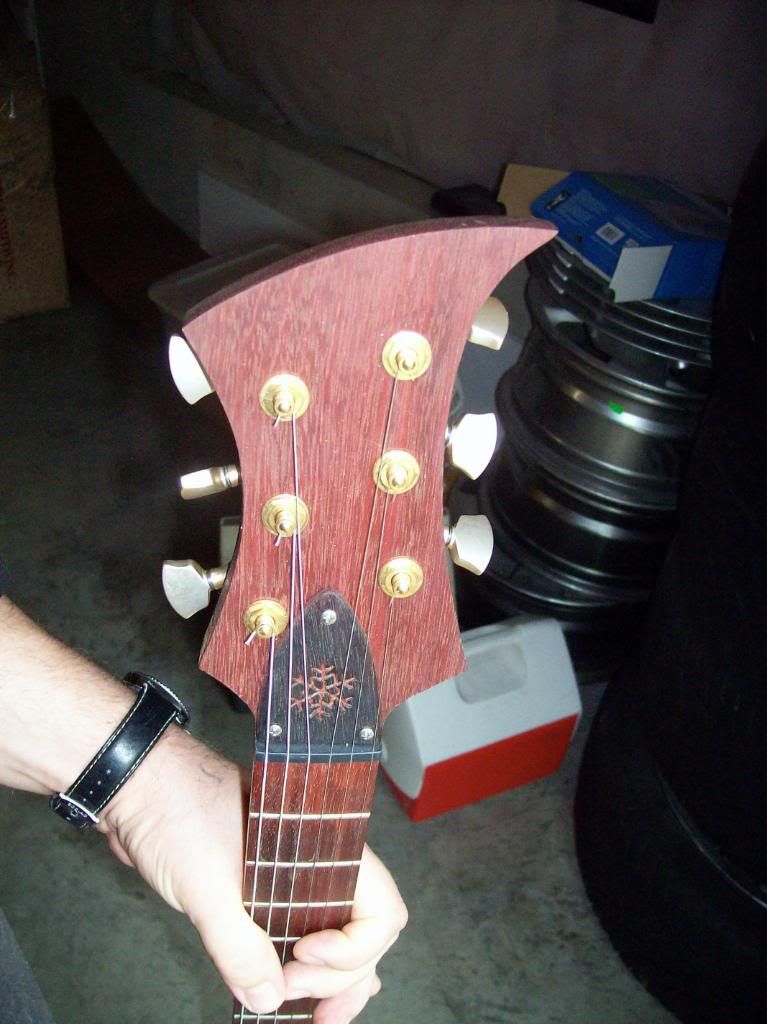
My headstock template
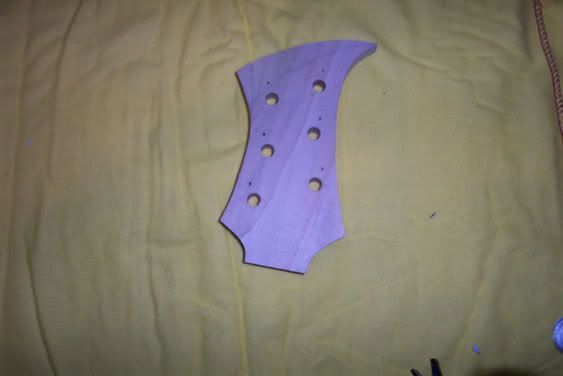
Cut and drilled for tuners
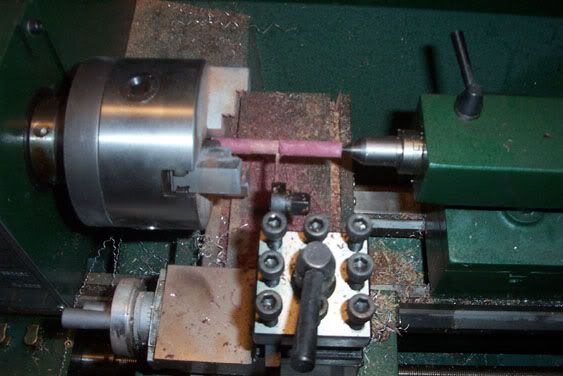
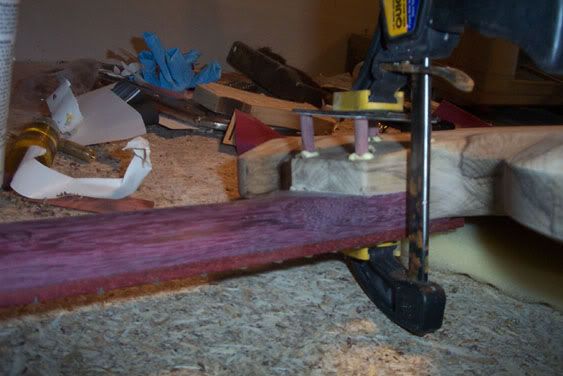
Turning down the Purpleheart dowel for the neck setting
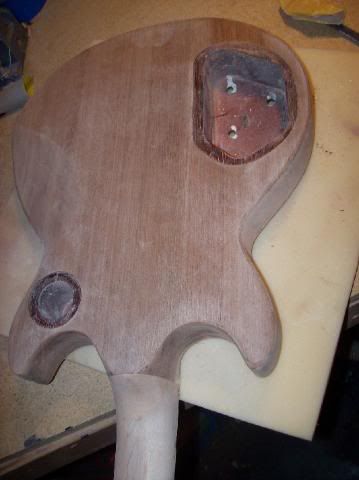
I am not a real fan of bolt on necks. I like neck through and set necks but since warmoth are pre drilled for bolt on we have to modify so i made a pin set neck
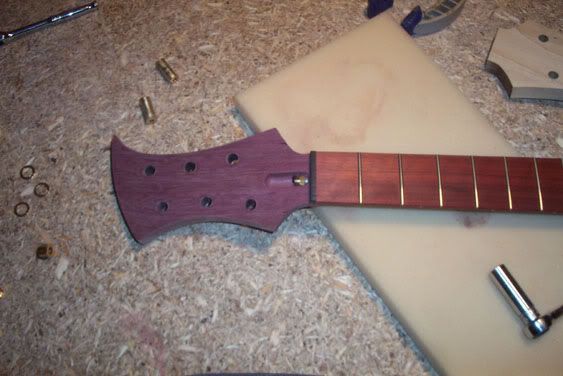
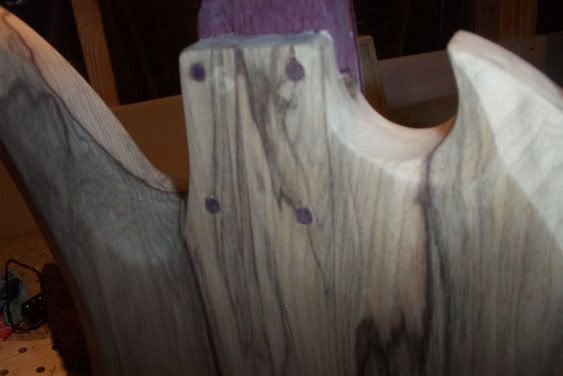
The setting of the pins
The neck pin system done and sanded
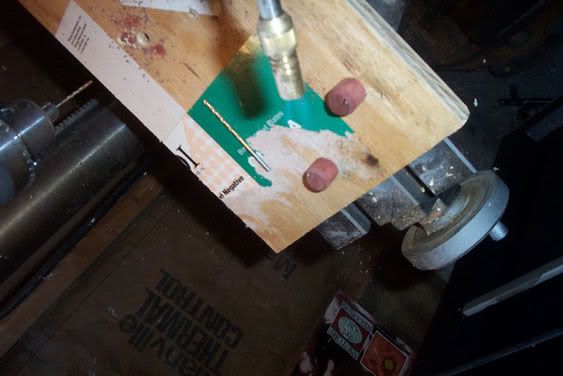
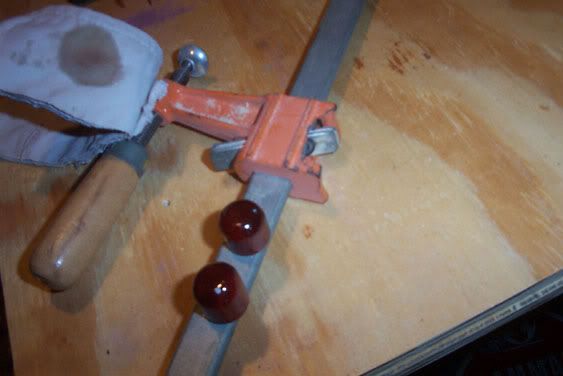
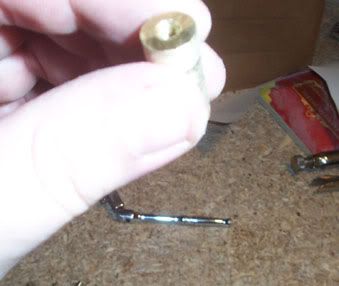
This is me turning down solid brass for the body bridge inserts. I don't like the ones that come with schaller roller ball bridges but I love the bridge. I just turn down new ones and tap them
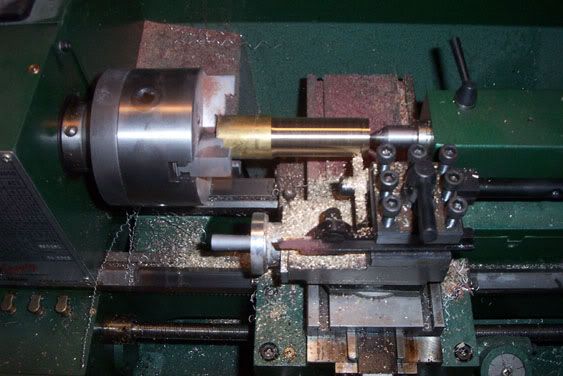
The finished insert
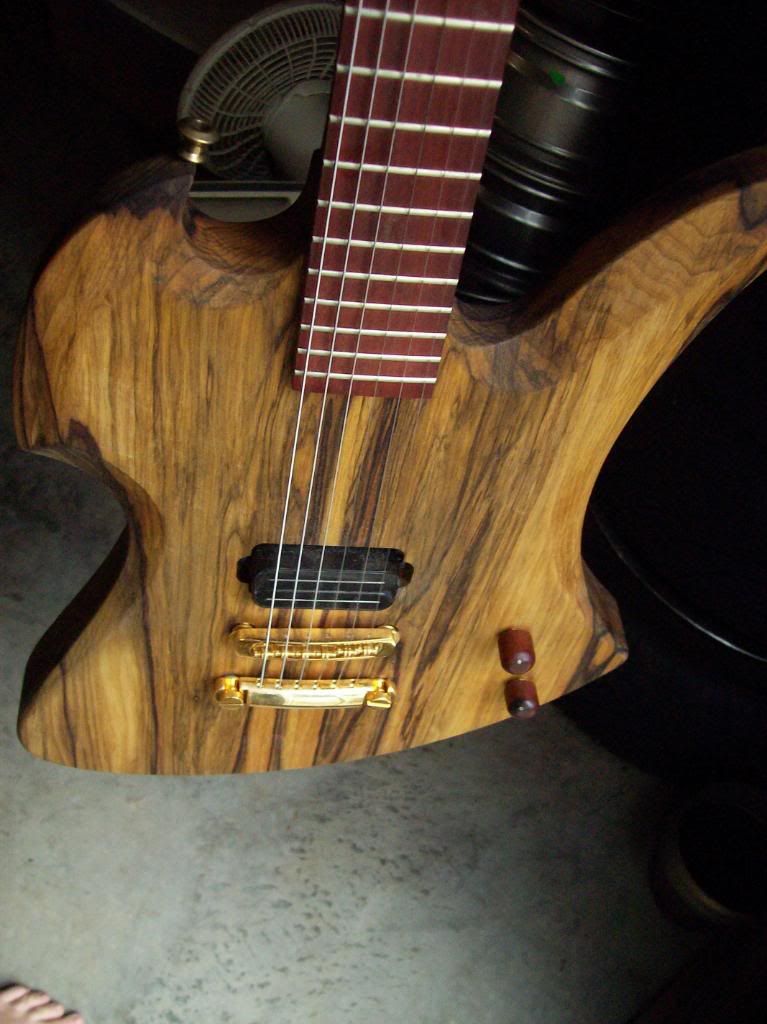
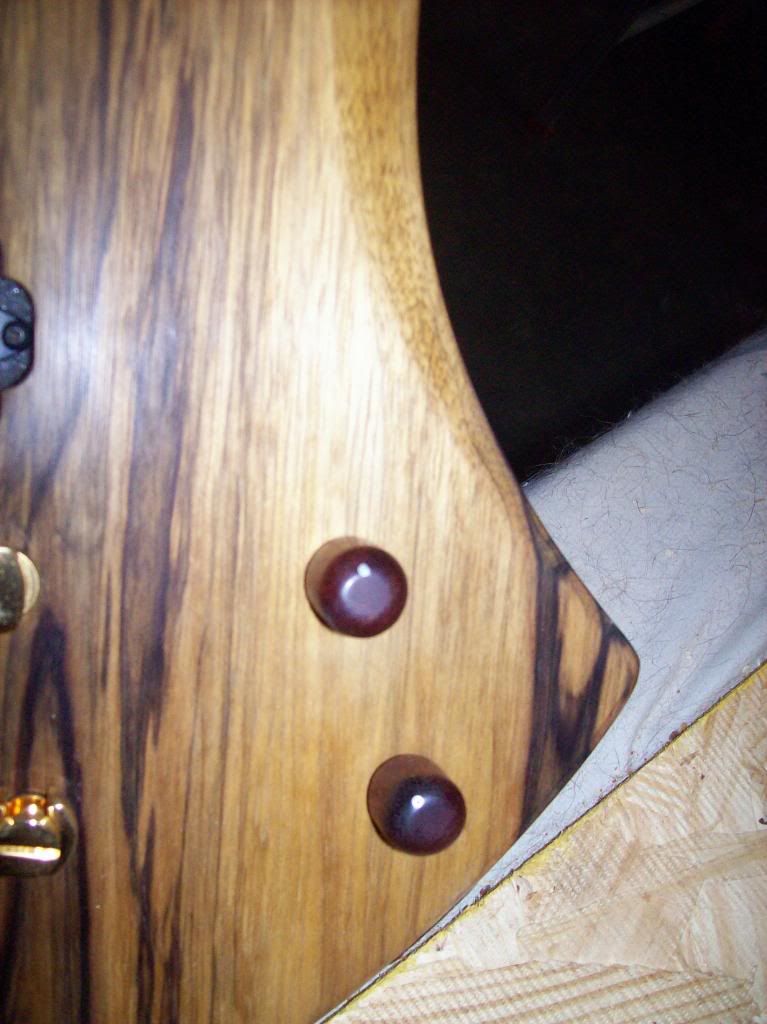
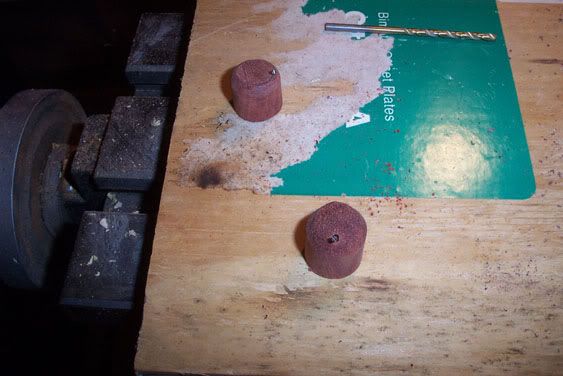
The knobs are made of Satine. I started out with square stock and turned them to round. then shaped them on the sander and drilled out marker holes. Then Filled them with solder
-
Thanks:)
-
I am sure this has been asked but i did not see it in the search. I know there are alot of factors that factor in on this but, on average how many board feet does it take for the average body blank and a neck
-
I agree on having a fat neck I had an 80's SG that had the almost a perfect neck but it was big and round. I also have tried the Warmoth Boat style neck...Awesome
-
Great Work!!!!
I see you are from Kentucky? What part?
 Good show as always though!
Adrian Smith Sandimas Copy With A Twist
in In Progress and Finished Work
Posted
I just looked into this, this really looks like the way to go