


Our Souls inc.
-
Posts
1,094 -
Joined
-
Last visited
-
Days Won
3
Content Type
Profiles
News and Information
Tutorials
Product Reviews
Supplier Listings
Articles
Guitar Of The Month
Links and Resources
Forums
Gallery
Downloads
Posts posted by Our Souls inc.
-
-
Many thanks for the tutorial on FB removal. It taught me the right way to recycle fretboards and truss rods out of a broken neck. http://www.projectguitar.com/tut/removal.htm
Thats not what the tute was intended for , but thats what I gleaned from it.
Broken necks can be had for mad cheap. sometimes they can be repaired , but when they're beyond repair - the FB and truss rod can be re-used to save some $$.
I got this neck for free , it was broken badly @ the HS/neck/scarf but the frets and board look great.
hey - why's the rod on the outside of the neck ??????

lol
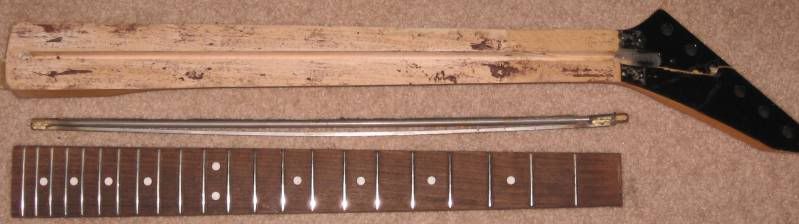
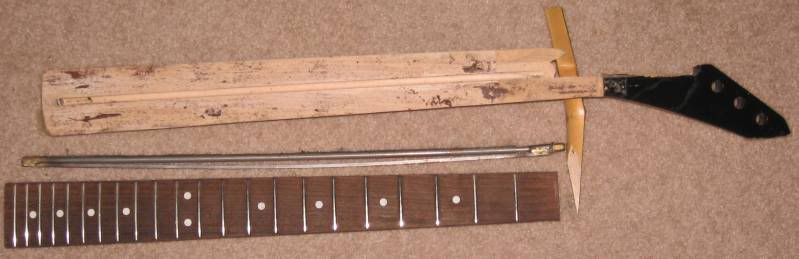
Here's what I got for free , just an hour of my time .
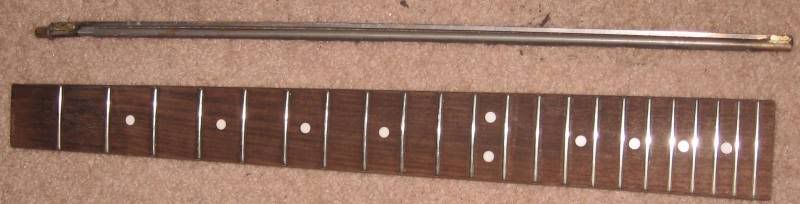
Estimated savings of $45 + time spent . No I didn't make it myself , but it sure beats tossing them in the trash.

-
you could use bondo instead of wood filler........
I kinda dig the 'natural' relic look. At least these geets EARNED their scars.
but whatever you do - best of luck with them !
-
They are not. Ibanez have square heels, warmoth uses round...
You are not going to find a new Ibanez neck... Maybe off a new guitar... but not a new neck alone thats never been installed, Ibanez, or any company wont let them leave like that.
I know this is a few months old but ..........
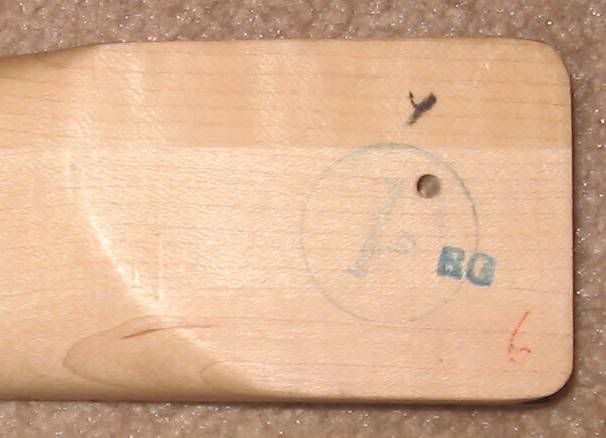
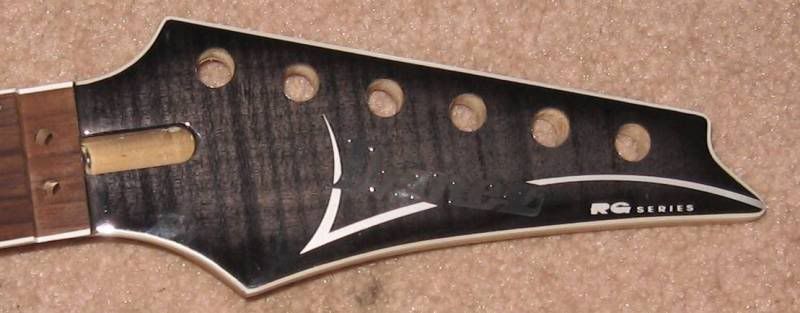
I bought a new - unused Ibanez neck.
I don't know who let it out of the factory , but here it is just off the UPS truck ............
Now I need a project to use it on.


-
No problem , glad I aint the only one who's out there glueing picture to guitars !
The "trim it so the binding shows" is a great idea ! Go for it - it shouldn't be a problem , although you'll have that paper-thick transition at the edge of your binding. Clear it smooth and you'll be fine. If youre doing a whole different color , by all means , remove what you need to. lolAnd you can, can paint a guitar by scuffing up the old finish and going over that , but now you're getting kinda thick in the paint area . Thats entirely a personal choice , though.
Best of luck - post pix.
-
Hey guys,
I'm new here, and have a new project idea I'm ready to kick off -
What I'm doing is taking a guitar, and stripping all the finish off of it so that I can apply a graphic pattern to the front of the guitar. The patterns are on paper cutouts... What I'm hoping to do is adhere the paper to the front of the guitar when it is unfinished, and than seal over the top of it with some clear finish. A couple things I was wondering - First, would it be safe to assume that the clear coat will take well to the paper? And secondly, one of the guitars I'm contemplating getting for this project has binding on the body. Would the procedure for stripping down the finish be any different, or would I have to worry about breaking through the binding?
Thanks in advance if anyone has advice,
Dalton
Dalton ,
welcome to the forum !
I bolded one part of your post that makes me scratch my head. I'm trying to figure out if you're removing the finish for a specific reason or if you just want to do it the hard way , lol.
I personally leave the finish on guitars that already have one when I'm doing the paper graphic thang. Scuff it with 600 or 800 grit paper just to dull down any shininess and remove any oils or wax that might inhibit adhesion.
Rubber cement is the absolute best product I've tried on these apps. a thin coat on the guitar surface AND the graphic works like a champ.
Clear coats are done in a normal fashion with no adverse consequences due to the paper.
The guitar with binding will be easier to do than a rounded edge guitar. Run the graphic out to the edge and trim flush with a razor blade. Hides the binding from the top , but not the sides.
Any other questions , feel free to ask.
Tim37 - thanks for the vote of confidence !
-
that Tutorial is awesome. I'm just about to do a FB transfer and that helped a TON.
BTW - didn't know you were a fellow 'banger.
Cool live shots.
-
Is that the tortoise sheet from Grizzly?
yep
Interesting headstock idea, how does it feel to tune?It feels GREAT to tune. Your hand & wrist are at a very natural angle.
Coolest.
Headstock.
Ever.
I dig this one a bunch.
_/\_(GOTM?)_/\_
-
.... I had something to add , but I've been told to keep my mouth shut by a Mod.
-
ilike to make cool effects. like a manual reverb. and others.
oh right. lol
you know what would be good for that?
put in a momentary push button on your guitar as a KILLSWITCH!
that would be sick!
See "Spaced Invaders" in this months GOTM ........... momentary interupt button ! fun fun fun.
-
Well ..... I have made a Padauk neck blank , one piece with no scarf , and I've made a neck blank out of the scrap mahogany from the tombstone thingy .....
So/\/\/\/\/\/\/\/
Mahogany all around or Mahogany body/Padauk neck?
FB material is still up in the air.
Fret dots could be cut from the plugs that they used as nails on this thing. I removed 5 or 6 of them and will be able to make little round mahogany dots out of them. but that wouldn't contrast well with a dark FB.
I have : Teak , Willow , Maple, or Padauk ....
what would you do?
( order an ebony board you say ??? )
-

^^
Thats a nice looking neck . If it's your first - you did a schweet job ! If it's your twentieth , it's just as schweet. Looks factory.
-
build it as carefully as you built your drawing and you'll be fine.
-
Wow ! Thanks for all the ideas and tips y'all . I'm wanting to be as traditional as possible ( banana HS ) but I do love to fook with stuff. The Zebra skin is an awesome idea - I'll likely mask off the pattern and spray it. If I come across some real animal hide form an African creature , that would be awesome , but it'll probably be paint. I'm shooting for traditional looking so as much as I love the spear HS idea , it's not really an "up-front" theme guitar , so I'll keep it subtle. Probably a nice spear inlay , or tribal shield @ the 12th fret spot. I've been looking at African tribal patterns and design work and will probably burn something into the edges of the body in that vein. I'm shooting for a 10 footer - from 10 feet away it'll look normal enough , but upon closer inspection , the uniqueness will show through better.
I will give up this hint - There will be no cavity covers on the front or back but the switch and knobs are all in the traditional locations. Silly fun stuff like that I'll change up but the silhouette/knob layout/HS and such should all say; Explorer.
Pics as they happen.
p.s. -
feel free to throw ideas out there ~~I'm prone to change paths mid-stream if it benefits the build.
-
My first go at doodling around with a logo


That is Classeek ,Mang.
-
Not to start a debate here , but anyone who fixes this guitar will do so with abrasives. If it was buzzing on 2 consecutive frets , I'd call TR , but the 17th and 19th ? doubt theres a correctable bow that would cause that.
I still vote for a fine nail file - taken in 3 or 4 stroke incriments. He said the nearest tech was 4 hours away and its 2 frets , not his whole board...........
spot fix it. Its worked for me more than once.
BTW - when I say use the "fine" side I mean that. They go up to 12,000 grit and they're just the right size for working small areas.
not to argue how to fix it but it all depends whats up with the guitar, we havent seen pictures of it so it could be a bad setup or the neck angle could be slightly off, i dont know.
if the truss rod was bowed all you need is a straight edge to check, and a small ruler or string action gauge to set the string height and fret out any buzz, what im saying is a basic setup could probably fix this, but without seeing it, its hard to say but if the frets were that bad wouldnt it be buzzing all over the place ?
Thats pretty much what I was saying .... If it needed a setup , it'd be buzzing in more than two spots.......
We're all just guessing - I'm just offering up a DIY approach instead of 8 hours of travel to stop 2 buzzing spots. If he fixes it himself - WIN. If he doesn't fix it - no change.
He can only go up by trying.
-
"hard part" ....
Hardest part..Jeez dood,you have it right there quoted above it...hardest part...not hard for a soldering king like me.
I won the '97 soldering olympics,then refused to enter again to give someone else a chance.
I once soldered a house out of beer cans...
When I don't have food in the house,I just eat solder and drink flux...
I pity the fool!
Aint that every week ?
JK - I took the gold in Sarajevo back in '36 but I don't like to brag about it ......
-
Not to start a debate here , but anyone who fixes this guitar will do so with abrasives. If it was buzzing on 2 consecutive frets , I'd call TR , but the 17th and 19th ? doubt theres a correctable bow that would cause that.
I still vote for a fine nail file - taken in 3 or 4 stroke incriments. He said the nearest tech was 4 hours away and its 2 frets , not his whole board...........
spot fix it. Its worked for me more than once.
BTW - when I say use the "fine" side I mean that. They go up to 12,000 grit and they're just the right size for working small areas.
-
You guys are the devil.
I hate the fake musicians/rock band in general so I'm not a good gauge.
-
the hardest part is soldering the ground braid to the back of the pot without burning the interior wire
...
That's what a heat-sink is for.Good for you...want a cookie?
There is a fool proof method of doing it flawlessly every time...but it requires practice and patience,so I don't know if it is up your alley...but if you put a solder "pool" on the back of the pot,then season the braid itself with solder,then hold the braided wire to the pool of solder and solder the two things together,it makes a very nice,pretty connection.
And clean your dang tip...tin it as well before you even start the work.
You talkin da me?
You da foo what said that was the "hard part" ....
my sink and solder sucker come out any time my soldering iron does. - Hey- you're talking to a "master" solderer here.
-
Good stuf. Thats a solid "Win" if ever there was one.
-
entertaining and looks good on the wall ?!?!?!?!?!?!?
If I was keeping it as art , I would've definitely made the front more of a "painting" lol ....
or at least reposition the neck so its right for playing .
-
The neck's the hard/more importantest part of the build. You did great from what I can see. Treat the body with as much care and you'll have a winner !!
Carry on.
-
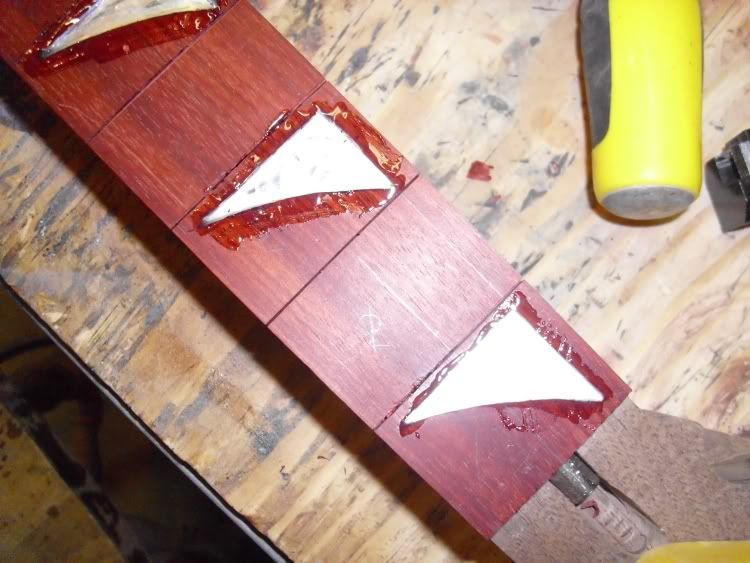
I made the rough-cut of the mirror top yesterday. The manufacturer suggests a 12+ TPI blade, so I elected to do it on the scroll saw. With some scrap of both the mirrored acrylic and the top wood I tested gluing it on with epoxy. The mfgr only recommends ONE product to glue it on, and it ain't available locally. (At least not where I know to get it). Well, there's always more than one way to skin a cat, so I gave it a test. I'm not concerned about adhesion. I'm concerned about the solvent dissolving the mirrored backing. So....
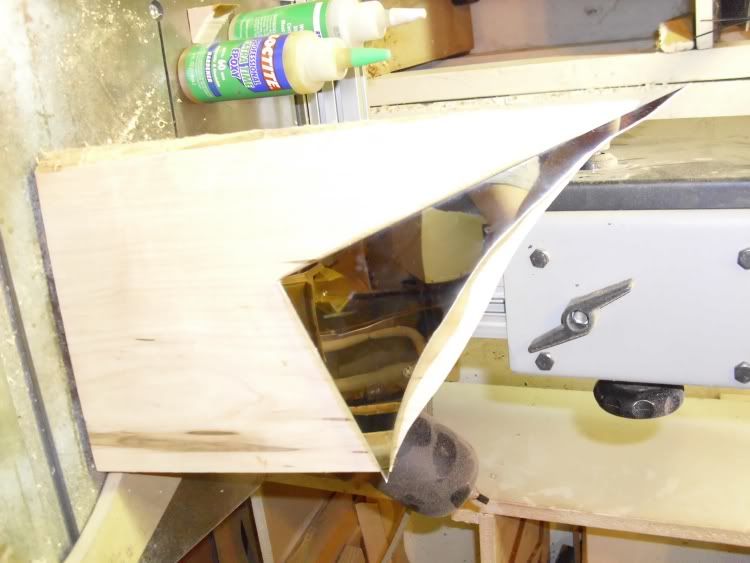
I forgot to rotate the pic. Oh well.
Like I said, I glued it on last night. It's dry and stuck on there good, but I'm gonna leave this to sit for a while until I give it the official thumbs-up.
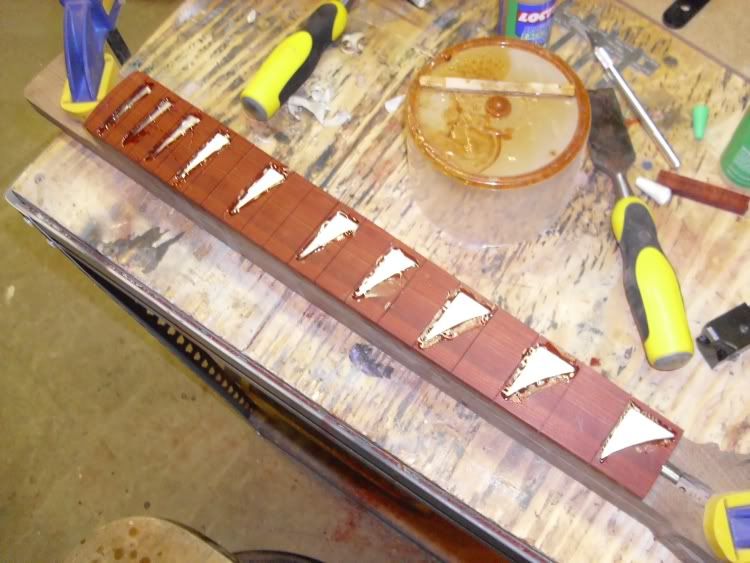
The dude I bought the inlays from said that epoxy is what HE used for the inlays, so I went for it. If these get a little mit swirly on the bottom, it won't be nearly as noticeable.
Nice stuff !
-
the hardest part is soldering the ground braid to the back of the pot without burning the interior wire
That's what a heat-sink is for.


My David Gilmour Replica Build Started
in In Progress and Finished Work
Posted
How bout making a belly pad and mittens/gloves with brillo pad and "playing" it for an hour to wear out some spots?? Maybe chuck pebbles at it or drag it around the yard for a while.
  Do the gardening and then play it with your hands unwashed. Don't forget to put some salt water on it with a spray bottle to mimic sweat from your body.
Or....
You could put around 12-15 THOUSAND hours (or so) playing/touring/gigging/writing/rehearsing with it and let it EARN its scars.
6 of one / half a dozen of another .......
BTW - the above comment was in no way reflected at this build in particular - it's looking like its intended target , so it's going well .... I just don't shine on fake relics.
Real deal mojo-laced , hand~lubbed ,worn down axes make me weak in the knees. The silicone counter-parts , not so much.