


guitarnut
-
Posts
518 -
Joined
-
Last visited
-
Days Won
1
Content Type
Profiles
News and Information
Tutorials
Product Reviews
Supplier Listings
Articles
Guitar Of The Month
Links and Resources
Forums
Gallery
Downloads
Posts posted by guitarnut
-
-
Beautiful, as usual.
Thanks Jimmy G.
-
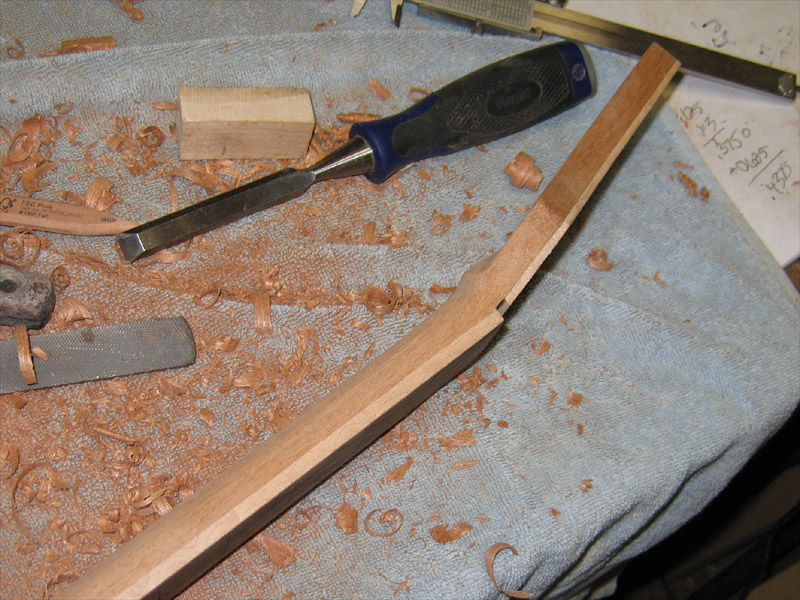
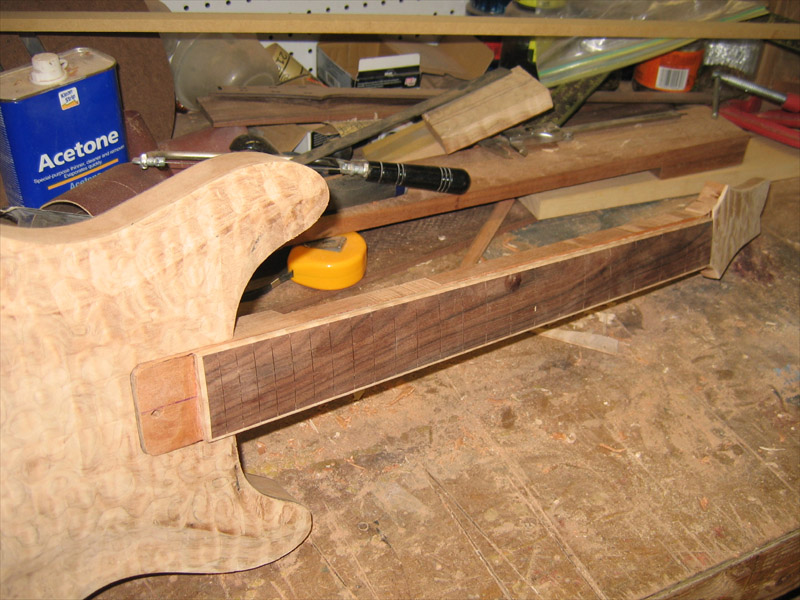
Some more progress today. I used a rasp to take the neck to thickness at 3 points. .865" at the nut, .880" in the middle and .900" at the heel.
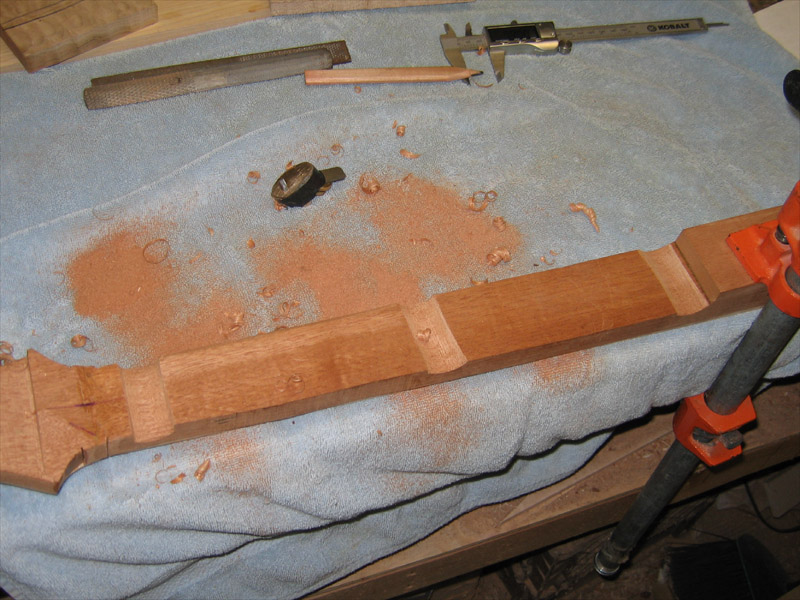
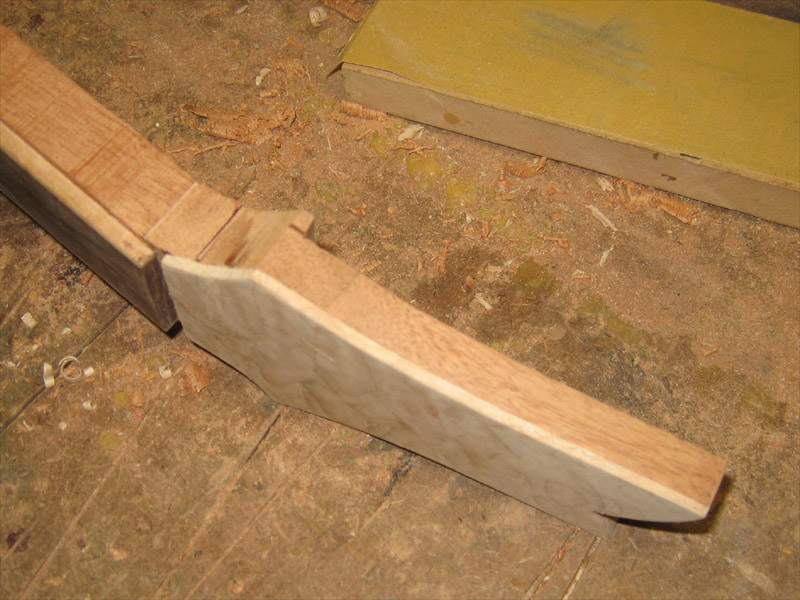
Carving progress...
I've never carved a volute before...thought it would fun to try. It's sort of a combination of the scooped carve that some builders use with a more defined shape on the headstock side. I have it roughed in and I'll narrow it out some but the main shape is there.
Peace,
Mark
-
Looking tidy as usual. You are always a good builder to watch, doing nothing wrong which is why the comments have dried up I guess.
Cheers
Stewey
Thanks Stewey. It's more likely that folks got bored with my less than regular updates. I'm finding it more difficult to keep the build pace that I started a few years ago...life has a way of taking me off task.
Peace,
Mark
-
On to the headstock veneer. I used a cutoff from the top...one of the areas that had the deep checks but was usable to the .030" that I needed. I made it a bit thick since I wanted to do a faux binding effect on the headstock as well as the body. It's coming together!
Peace,
Mark
-
-
I had a couple of afternoons to work on the build and made some good progress.
The TR access jig didn;t work out...it works but the friction on the bit is so great that it squeaks like a stuck pig. Not wanting to add any lubricants to the equation, I bailed on it for now.
On to the neck build. I had little time to work so I didn't take many pics until I started to hit my stride. Here are some shots of the day's effort.
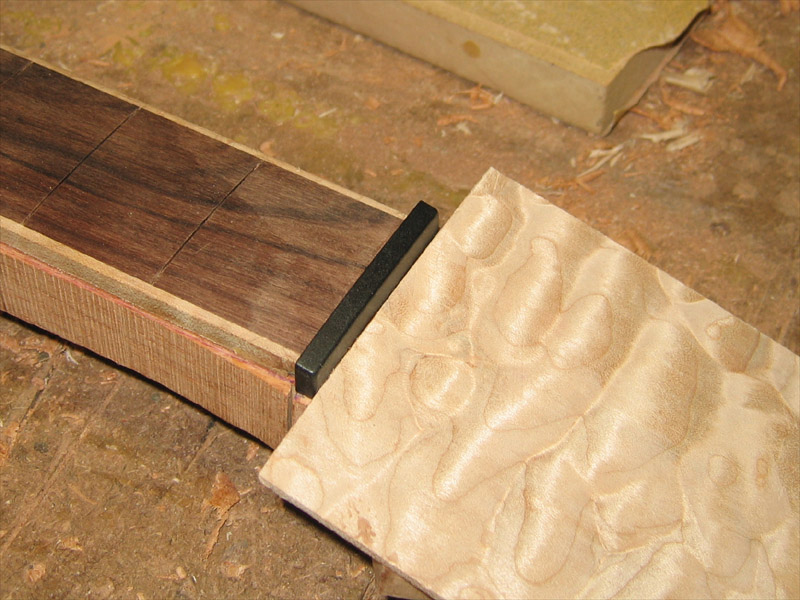
Quilted maple binding on the fretboard and fretboard glued up.
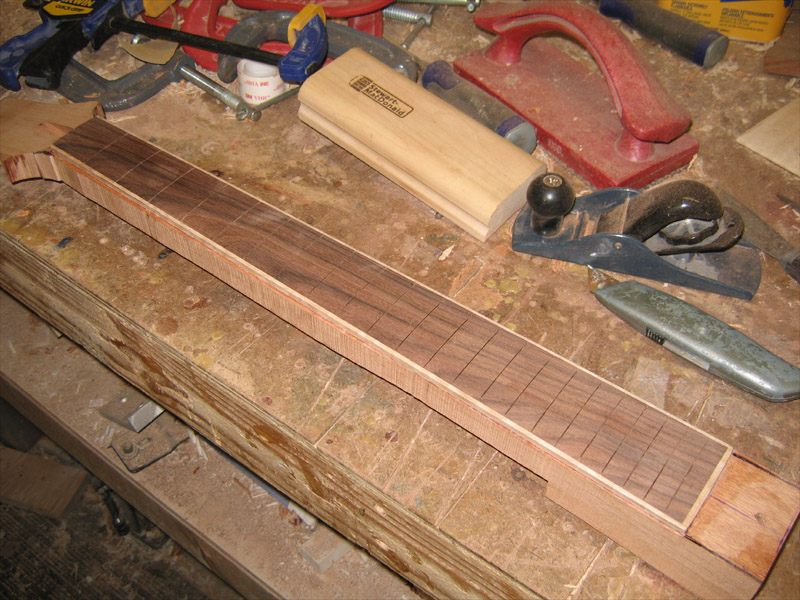
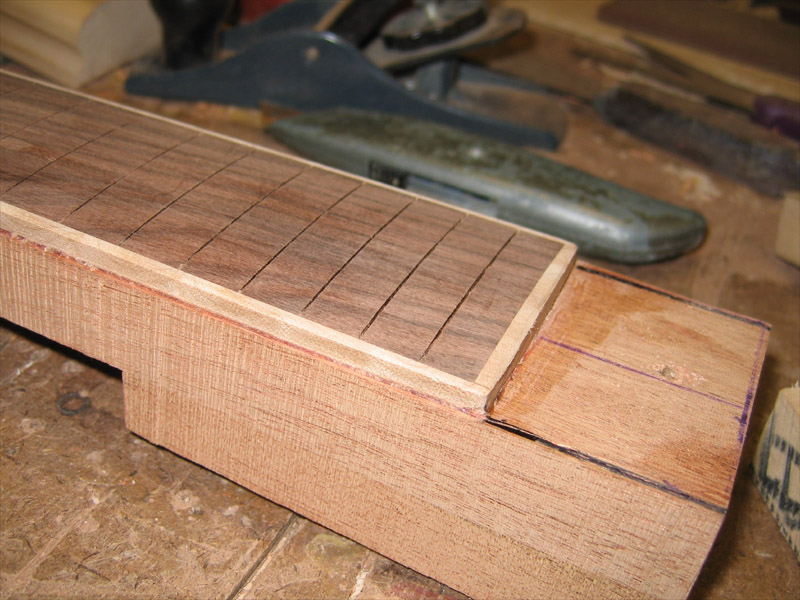
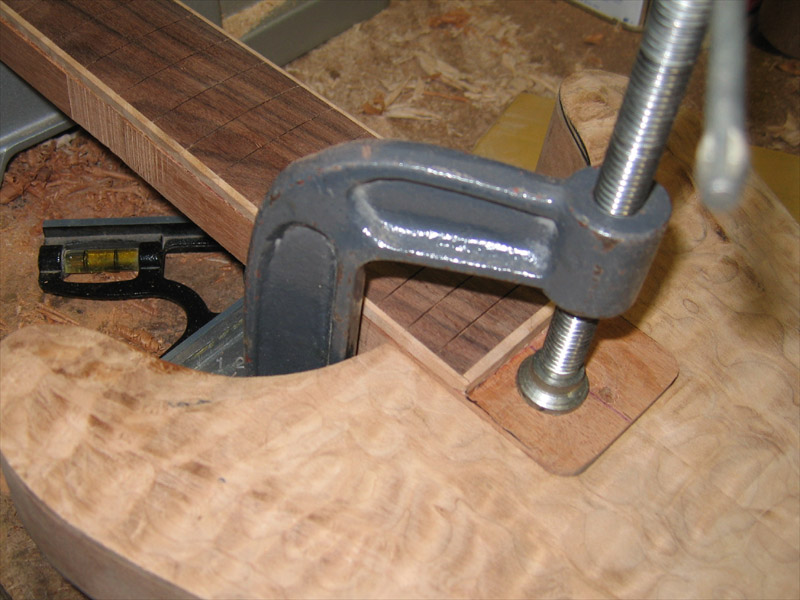
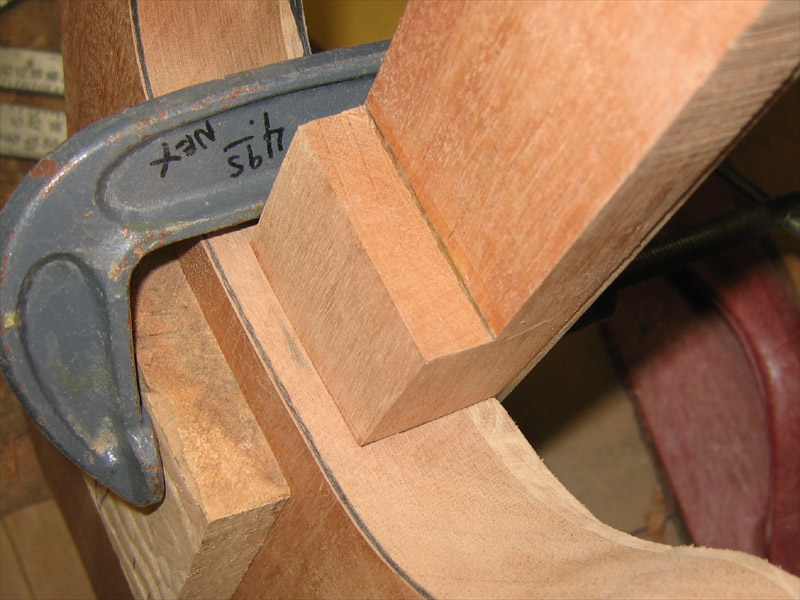
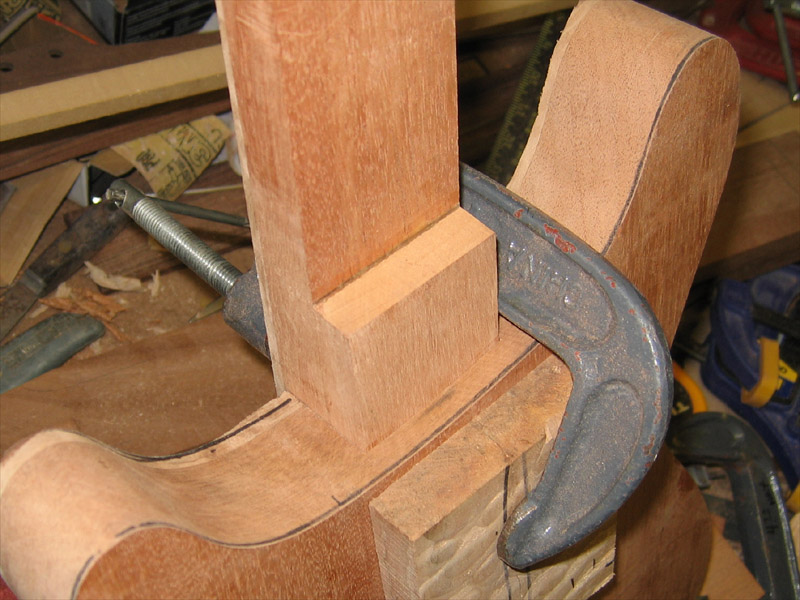
Hand planed the tenon and fit it to the neck pocket.
-
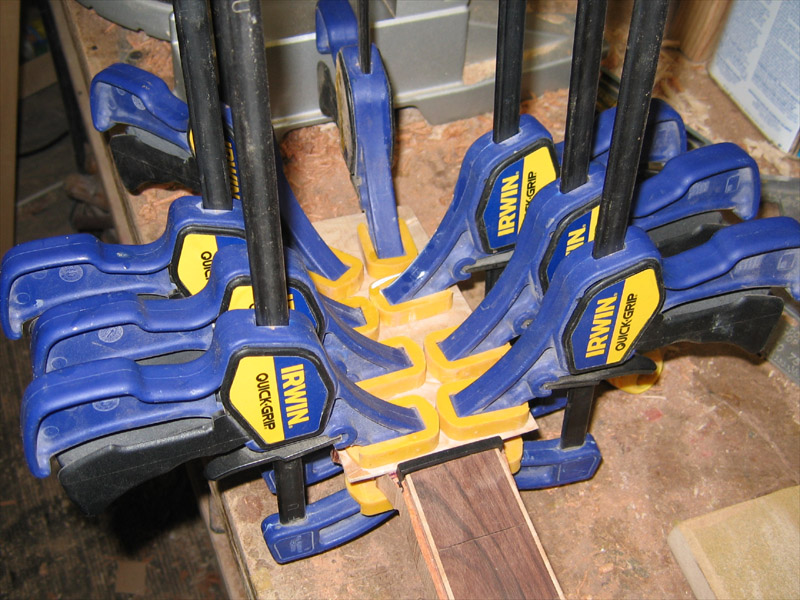
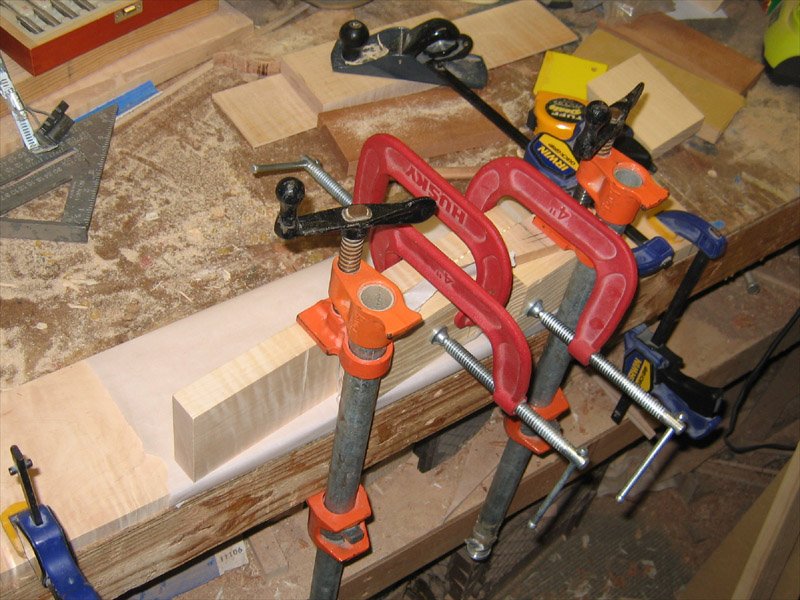
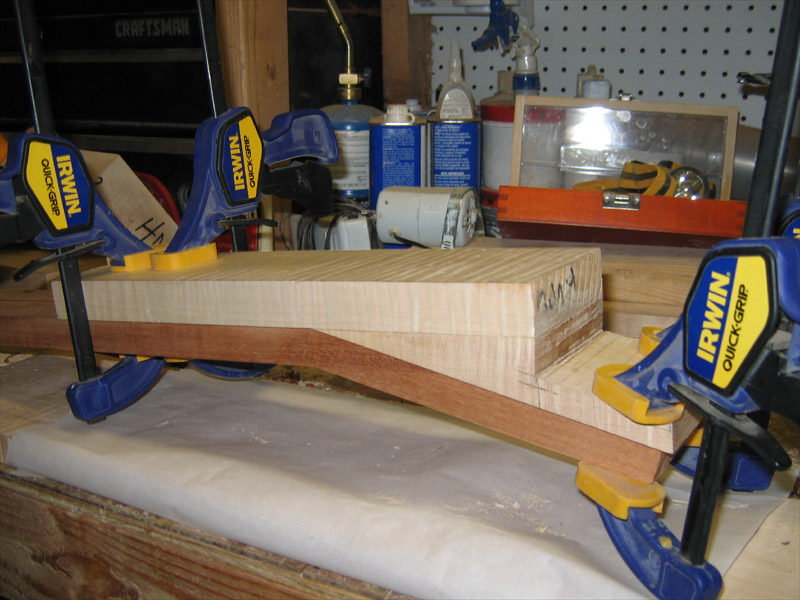
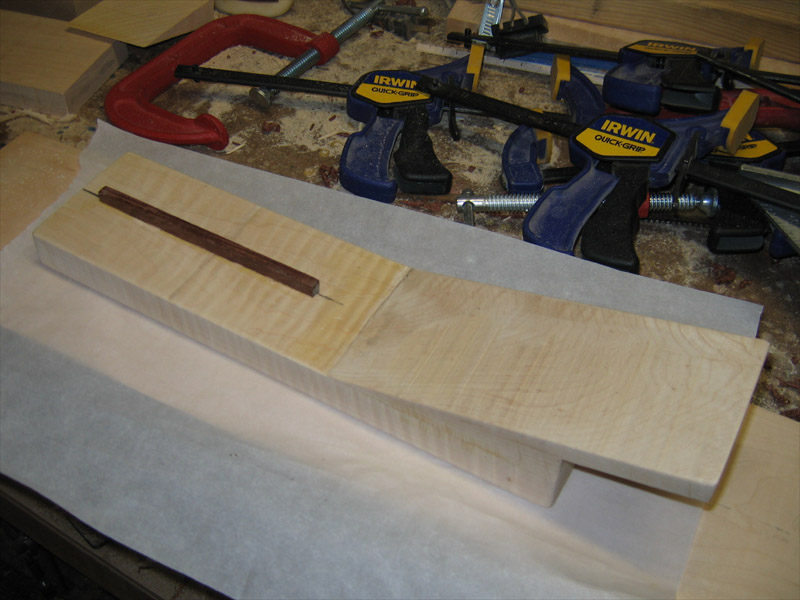
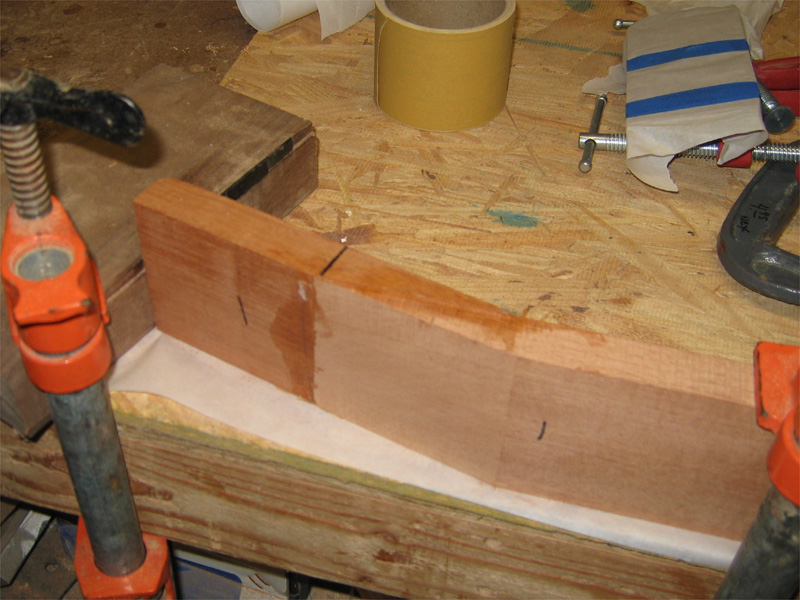
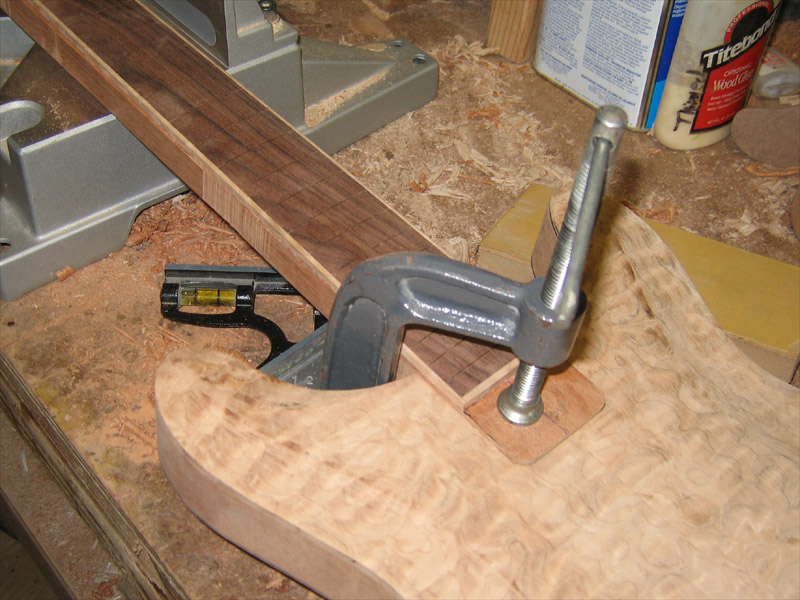
The plan seems to have worked out well. I started by sizing the 2 pieces and gluing them up. I left 8" forward of the line where the wedge meets the top piece. Here they are in the clamps. I used the pipes of the clamps to brace additional 14 degree wedges in place to use for gluing cauls.
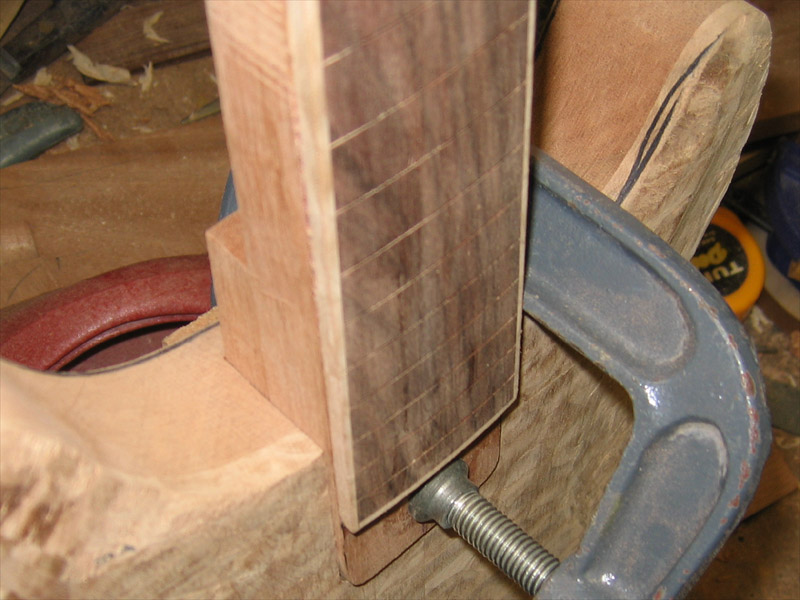
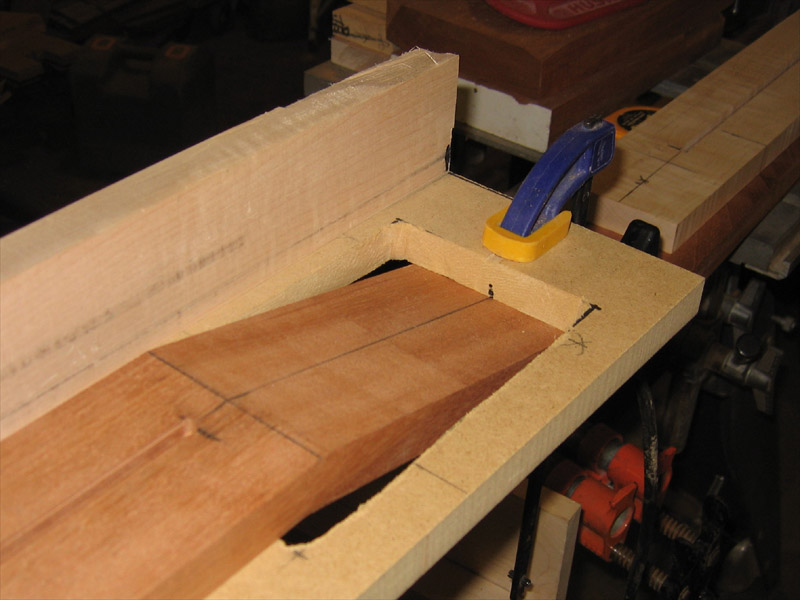
When they came out of the clamps, I attached a 6" rosewood spline on the centerline. I left enough space at the end of the spline so it didn't have to fit right up to the end of the TR channel. I just needed it to be inplace to center the jig.

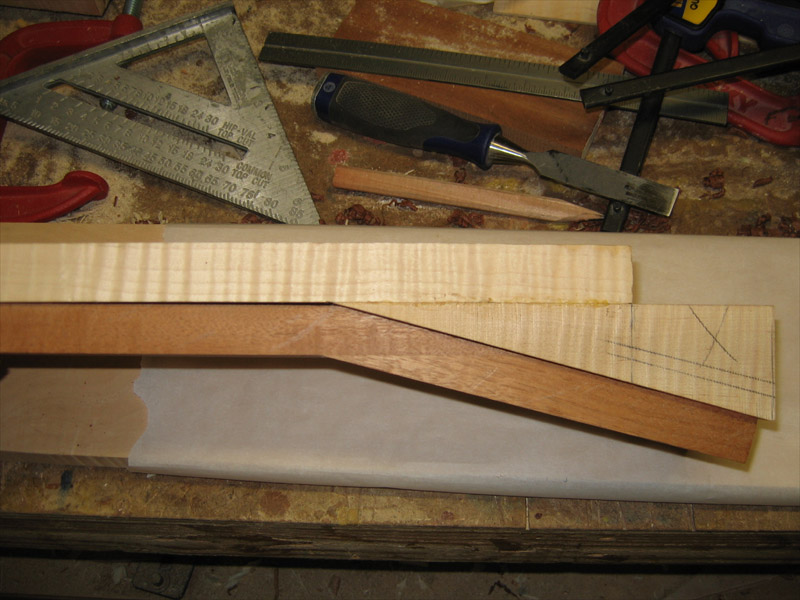
Here it is set into place...I still need to plane down the spline a bit to get the jig to sit flat on the neck.

After thinning out the spline...it didn't need much. You can see I altered the original design a bit by leaving a tongue on the back of the jig to give me another clamp point so the jig can't lift at the rear during boring.
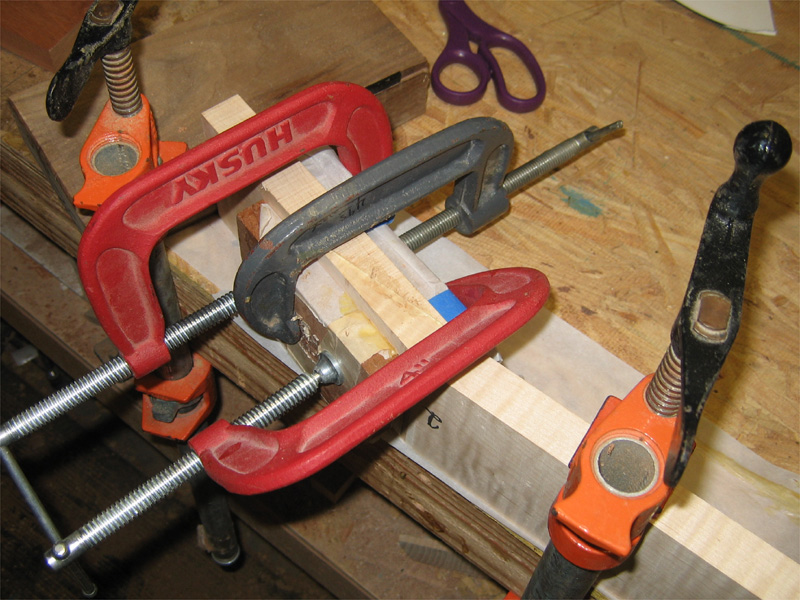
Here it is with the tongue trimmed out and clamped in place on a mahogany blank.
I eased the edges and cleaned it up a bit. I still need to do the bore...I'll save that for tomorrow.

Peace,
Mark
-
Moving on with the neck build I wanted to have a sure-fire way of cutting the access for TR adjustment. I've tried using a long bit on my ShopSmith in the horizontal boring position but it keeps flexing up away from the headstock. And Forstner bits are too short for the most part to get the throw I need.
I started thinking about pocket screw jigs and how they support the bit as it's guided in at an angle. I took a look at how Preeb and Scatter Lee did their jigs and sort of combined all of the above into something that would be one piece, attach easily, center itself and give consistant results.
I did a bit of pre-viz in 3D just to see what I needed to do to make it happen. Here's the basic design.
The top is a piece of 1" stock running end to end with a 14 degree wedge glued under it. There is a 1/4" spline attached to the underside that locks into the TR channel and centers the jig. A 5/8" bore is run straight thru at the proper height and a 1.25" hole is drilled on top as a window to monitor the depth of the drilling.


Peace,
Mark
-
This build is going to have a bound fretboard so I wanted to have a jig for tapering the fretboard blank. This allows me to size for the binding before attaching the fretboard to the blank. It eliminates the need for routing after the fretboard is attached.
Without building another jig all together, I was able to flip my truss rod jig and use the fence to ride along the side of the band saw table. It was 3/4" wider than I needed so this allowed me to make a pass with the saw running and trim it to a perfect width.
I installed T-nuts on the top side...countersunk so they don't interfer with travel...and when flipped over, I can clamp the fretboard blank into place with hold-downs. It's very similar to a taper jig for a table saw except it rides the edge instead of a miter slot. Even if the jig were to back away from the table during cutting, worst case, I make another pass...it can't get too close to the blade to gouge the fretbord or jig.
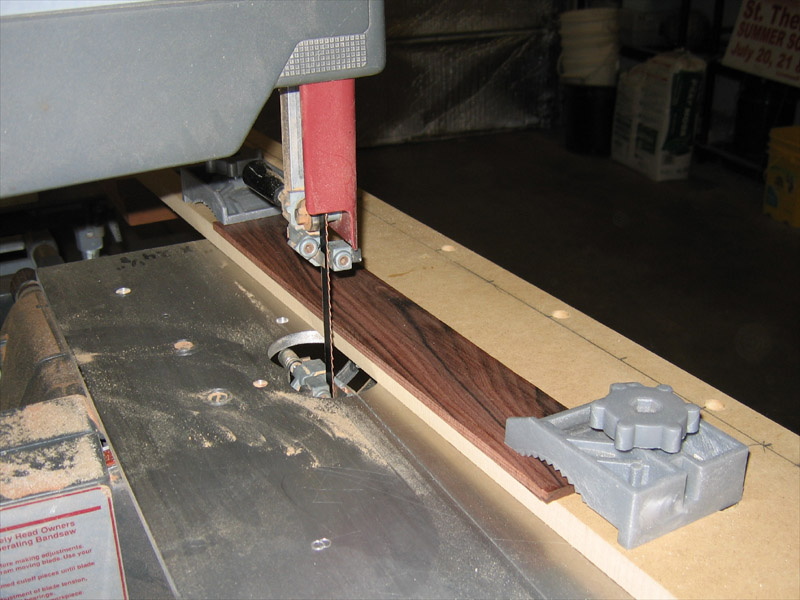
The marked tape lines are set to the edge of the jig and then it just takes a pass thru the saw and done. Turn the blank around and repeat.
Here's my test on a maple blank. I cut it just a touch wide to allow for shaping and final sanding.

More very soon.
Peace,
Mark
-
Well, after months of hot weather, crushing schedule at work and a general lack of ambition in the midst of it all, I'm finally getting back to this build. In the time away I've had lots of time to think about the next steps and a few jigs to help with future builds.
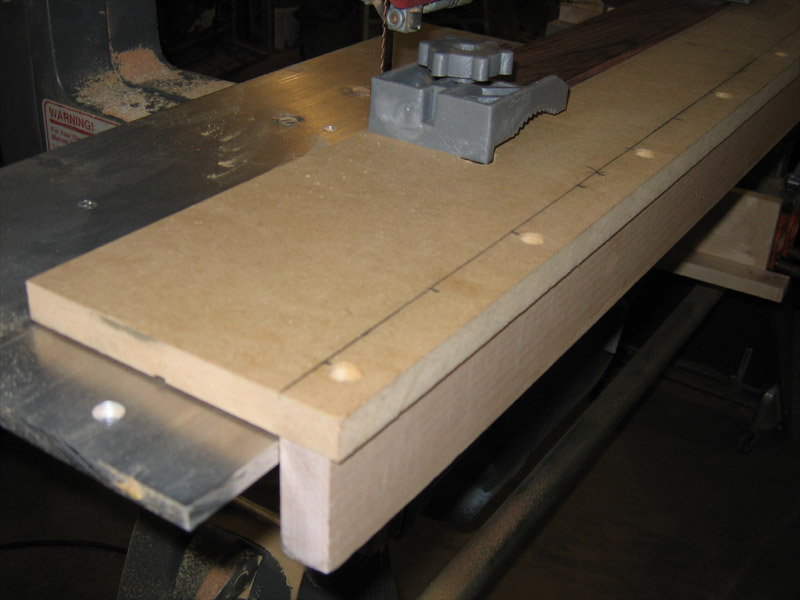
One of my setups that has long needed a revamp is how I cut my truss rod channels. I used to just clamp off a straight edge to the bench, measure out and screw the blank to to bench top and set stops at either end to control the router. It worked okay but I wanted a jig that would give me quick, repeatable results. What I came up with is not too far from where I started but it is much faster and more accurate. And it allows me to route a channel in a blank with an angled headstock while fully supporting the length of the blank to avoid flexing during routing. It can be setup on any surface as long as the end can hang out over the edge.

Back when I bought my chop saw, it came with a package of hold-downs for keeping stock in place on the saw. I never saw any need for them but I tossed them into a drawer for use at a future date. Today was that day.
After measuring everything out, I installed countersunk T-nuts on the underside in several positions. The hold-down threads thru the top and into the T-nut. The heel end of the blank is secured here. The headstock sticks thru an opening on the other end and is held in place with a clamp.
The blank is laid in on a centerline and the router runs along the fence. The router uses an aluminum plate that I made for it on my first build. I didn't incorporate any stops because the bit just doesn't go anywhere without firm pressure so the chances of going too far are minimal as long as stop and start points are clearly marked. I routed 6 channels in about 30 mins.


-
The unblemished front
The FUBAR'ed back
They're all on the back! Things are looking up already!

A little filler and you're good to go.
Peace,
Mark
-
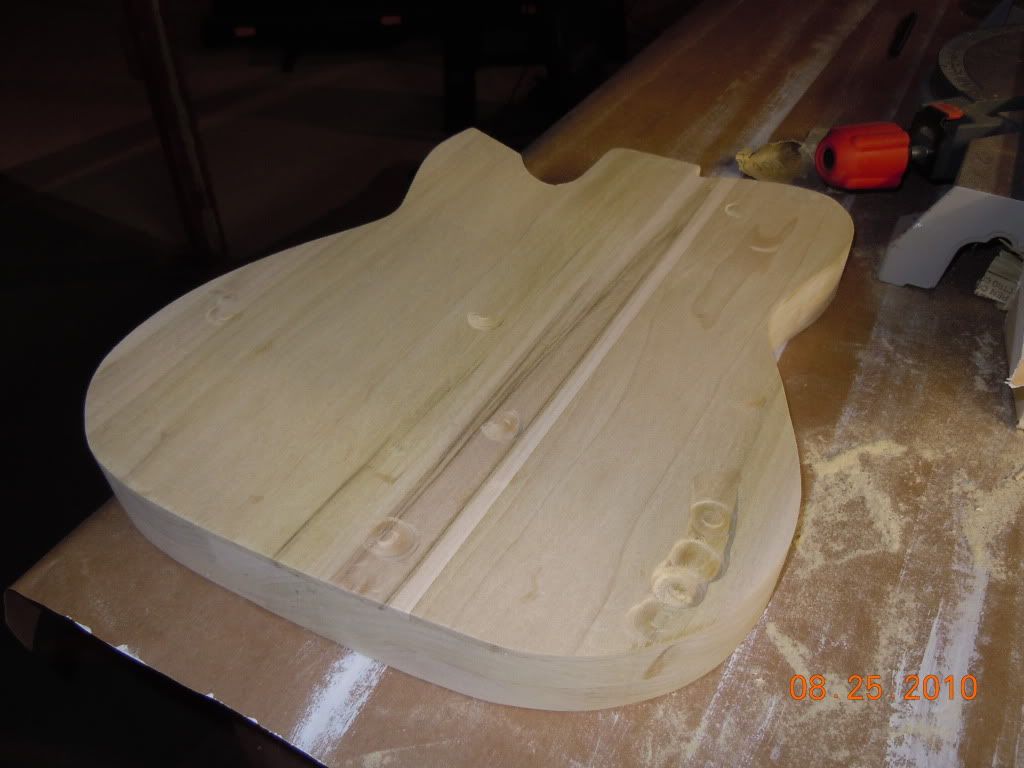
I recently started my first build. Its a basically a tele-custom body shape, im planning on putting a single humbucker, (lp jr style) with a volume control, to get my feet wet in wiring. Havent thought too much about the neck yet, but im thinking 25 1/2 scale length, 21 frets. My local lumber yard is a little dumb so I ended up getting two long poplar planks and cutting them into three pieces each which i stacked 3 high and 2 across. This led me to having an excessively thick body, as i was aiming for 1.75 in. I purchased a router and figured I'd use this to cut the body down to thickness. I had no prior experience with a router so after a few practice runs on scrap, I went to the real thing. Most of the process went pretty smoothly, until, ... oh god no... fuuuuuu... When I looked at the body I saw several "pot holes" where I accidentally, tilted I thnk is the right word, the router. Now I have no idea what to do, maybe fill them maybe sand it down, I just dont want to make it too thin. Ill post pics soon...
How are you planning to finish it? If it's going to be opaque, just finish up the routing, fill the dips, sand them flat and continue on. Once it's painted, you'll forget they were there.
Take it from a guy who learned the hard way. The biggest pressure you'll face during your first build, is the pressure you put on yourself to be perfect. Enjoy the journey of learning. You'll take that into your next build in the form of confidence.
Peace,
Mark
-
It also could be wired out of phase. I think DiMarzio has wiring diagrams at their site.
From the OP's description, he has it wired correctly and a single PU straight to output shouldn't be a phase issue...I wonder if it's a bad coil. I'd put a DVM across it and see if the DC resistance measures correctly...around 13.8K.
I'll explore it this evening ( reverse the poles etc...). It's as quiet as a mouse... No hum.Since you've had issues with more than one guitar, you may have to look outside the guitar itself for the answer. What are you playing thru? Do you have other guitars that sound good thru it? Do you have other signal cables you can try?
We'll get it sorted out. Hang in there.
Peace,
Mark
-
I know the guitar as a whole is more important than any one component, but my latest build (my second) sounds worse than my first. I used really clear basswood and topped it with 3/8" maple flame. Neck: bolt on birdseye maple and rosewood. Wilkinson tremolo. Dimarzio Evolution pickups with NO tone control. The guitar has mass. I intentionally made it almost 2" thick. The body is similar to an Ernie Ball axis.
Basically, it sounds super thin and lacks 'meat'... almost shrill. At the same time, I can barely get any false harmonics. The neck joint is tight - wood to wood. What else can lead to a crappy sounding guitar? Thanks, james
Well, it's not likey that it just sounds bad. May be a wiring issue. The formula that you put together should sound quite nice.
Double check all of the solder joints and make sure everything is grounded properly. Check the instrument cable that you're using...if 2 guitars have sounded less than desirable with it, it may be junk. Troubleshooting is a process of elimination. If you don't see anything obvious with the wiring, back up and connect each PU to output, bypassing the vol control...does it still sound bad? Add in the vol...still the same? And so on. At some point along the way, you're likely to find the issue. If you don't then maybe there is a structural problem but I just can't see that being the issue...I've heard guitars made of cinder blocks that rock!
Post pics of the wiring and a schematic that you followed.
Peace,
Mark
-
Which glue would you recommend (if either) for the glueing of a scarf joint in a guitar neck?

I'm not familiar with either but of the 2, I would be more inclined to use the EverBuild. The UniBond appears to be more of a filler than a glue.
From the EverBuild website about 502:
All Purpose Weatherproof Wood Adhesive is a high quality, resin based wood adhesive for all wood bonding. It can be used internally and externally and provides a high strength, impact resistant bond that is usually stronger than the wood itself. Ideal for all general woodworking and joinery uses, furniture assembly and household DIY use. Dries clear. Fast cure, initial set in just 10 minutes. Conforms to the international standard EN 204 (D3) and BS 4071 for creep resistance.
Peace,
Mark
-
Hi Rob. The guitar came out nice. Don't worry about the thickness of the body. It's not that much thicker than normal and it's thinner than a Les Paul so as long as you have the shoulders to support it, rock on!
If I had any nit with it, it would be the Tele lower horn with a Strat PG...especially since you contoured it on the back to make it more form fitting. But that's just a personal taste thing.
Nice job and good luck in school. You've got a good looking guitar to take with you. Keep your eye on it at the frat parties. I have an Epi Les Paul Plus Top that had it's neck broken at a party. The previous owner never found out who did it...it's lovingly restored now.
Peace,
Mark
-
Certainly food for thought!
Thing is I'm not so au fait with planing that I can say I can get the neck surface flat enough cock-up free, and as I (more by luck than judgement) bought a pre-planed neck blank, I'm VERY keen to leave the surface of the neck well alone! So what I'd like to do is leave that surface well alone if I can, and carve the neck from the back.
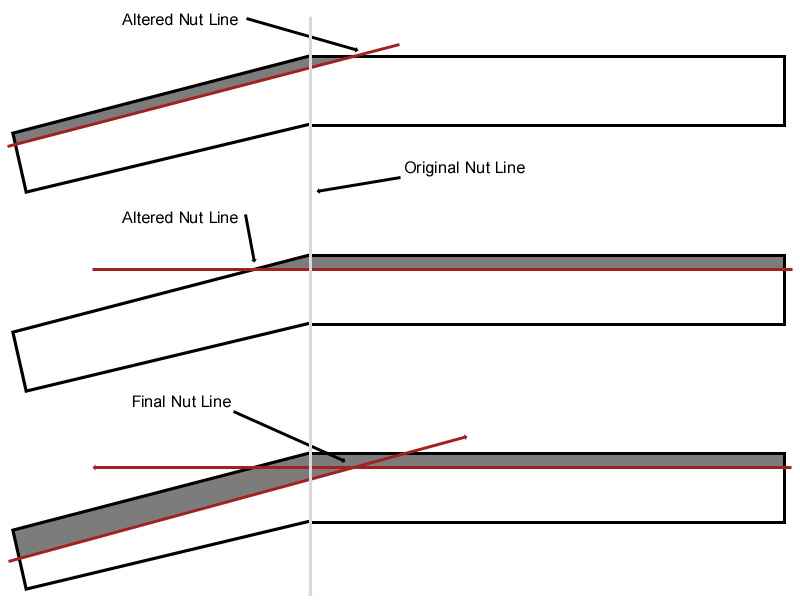
Doing it with hand tools is, I find, a very wasteful way of doing things. Had I a bandsaw I think I could have gotten the body and a top from the original slab of mahogany. As things stand now though I'm looking for a top - stylistically a good thing but not financially. But those are the breaks. I'm rather resigned to that fact though, so I've thought through a way of bringing the neck to thickness using a router and a jigsaw. I think the first drawing in the diagram - thinning the headstock - will be the biggest factor in the final positioning of the nut.
Got it. That sounds like a solid plan to leave the planed surface as is. You won't have to do any more to the face of the headstock than level out the scarf joint. You can then take off the balance of the headstock thickness from the back...leaving both the nut line and top surface of the neck in tact. You could even carve in a stylish volute back there.
Peace,
Mark
-
Looking good. Glad to see you're sticking with it. It can be a challenge to build even with ample tools but doing it with the bare basics is an exercise in patience for certain.
The neck blank looks good though it appears a bit thick. I would get it close to final thickness before dealing with the truss rod route. The reason being that every pass you make on the face of the headstock to thin it out, moves the nut line toward the body. Every pass you make on the face of the neck moves it toward the headstock. Everytime the nut line moves, the truss rod placement moves. This drawing isn't a realworld scenario but it illustrates the point.
Hang in there and best of luck on the build. I'm looking forward to seeing this one completed.
Peace,
Mark
-
I've had alot of response to the YouTube videos I did on my design process in Photoshop. Thanks to all who watched and commented. The question that's come up often is how I drew out my original line art for the body. I started with a pencil sketch and transfered that into Adobe After Effects where I used solids and masks, along with the Stroke effect to do the final tweaking and output. This allowed me to push and pull points and reshape the design in realtime.
Here's a quick look at how it works.
Peace,
Mark
-
Good work, but would not be plainer to skimp with a chisel then what to adjust the plastic surgery nicely with a plane?
Thanks Crow.
Maybe someday I'll learn to carve with chisels but I'm very comfortable with the plane for now.
Peace,
Mark
-
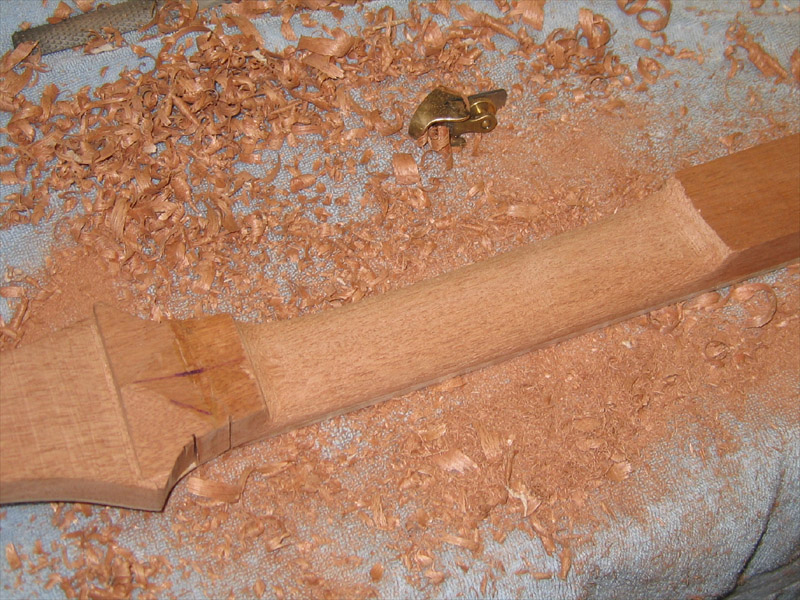
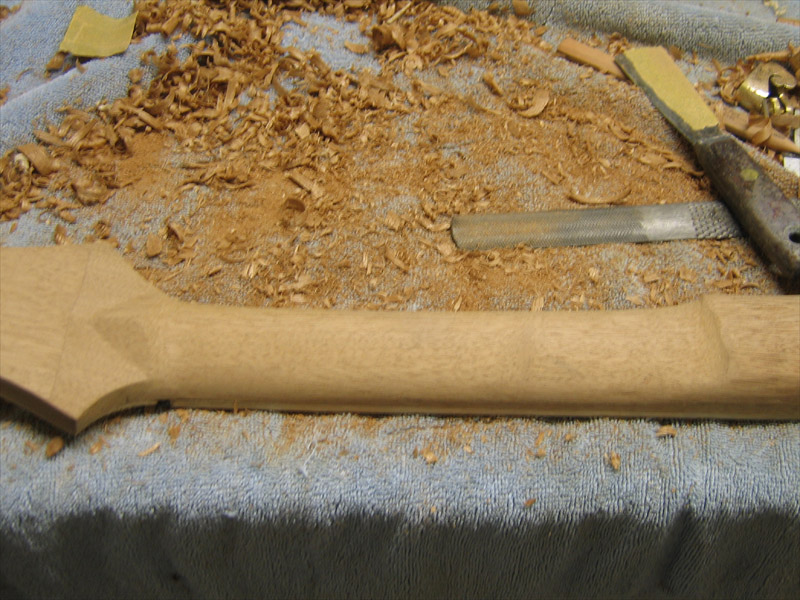
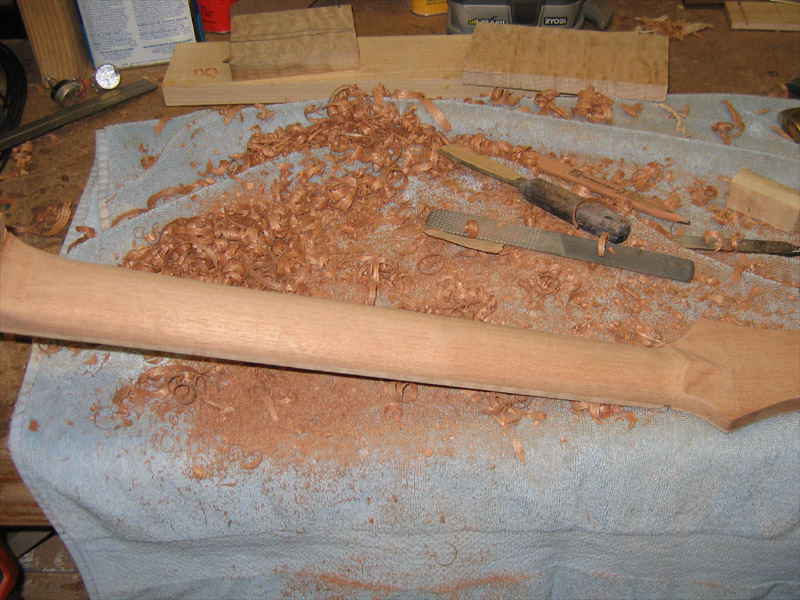
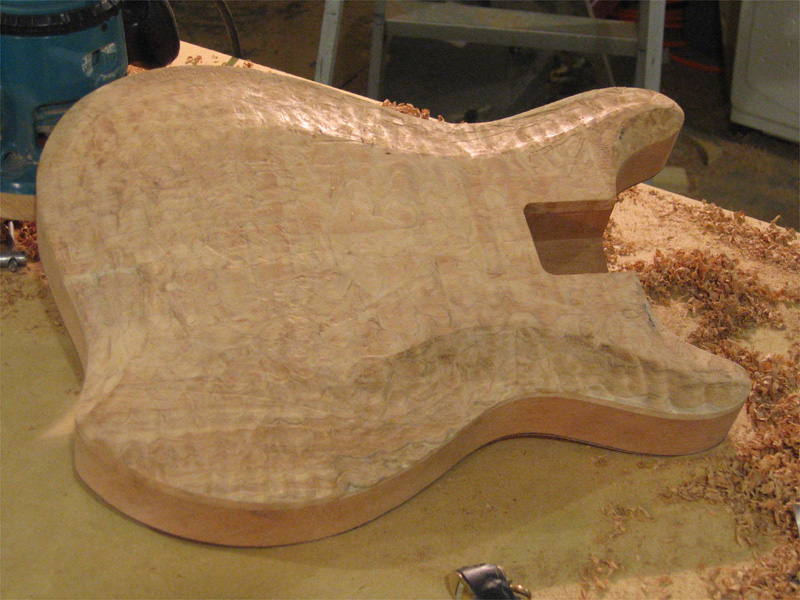
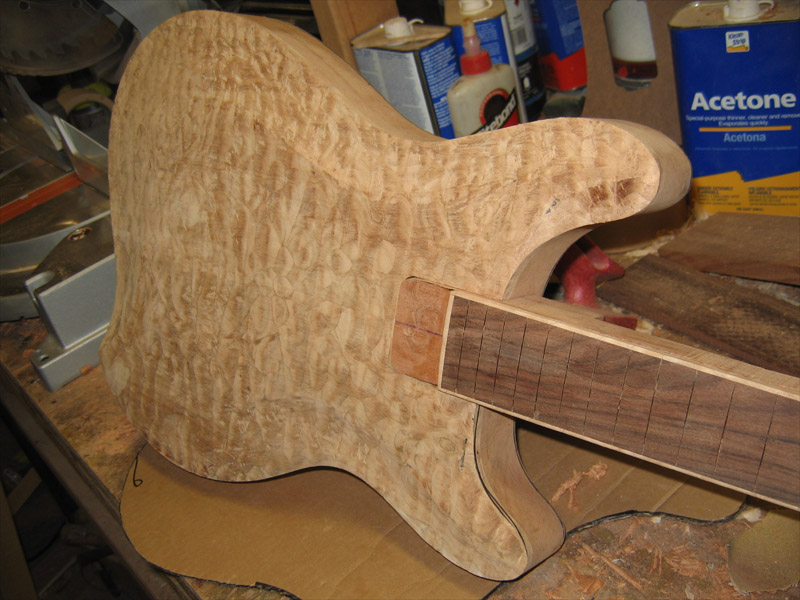
I really wanted to video tape the the remaining rough carve but the heat and humidity were fogging up the optics in the camera so I just pushed on without it.
Here's a shot of the rough carve so far...I still need to work on a few areas but it's close.
Peace,
Mark
-
For the carving I decided to do a video series. It's more demonstrational than informational but hopefully there's some usable info. About 35 mins between the 3 vids. Excuse all the sweating...it was HOT out there.
Part 1
Part 2http://www.youtube.com/watch?v=hYLIsC4R4ikhttp://www.youtube.com/watch?v=hYLIsC4R4ik
Part 3http://www.youtube.com/watch?v=qHopuF1iTekhttp://www.youtube.com/watch?v=qHopuF1iTek
Peace,
Mark
-
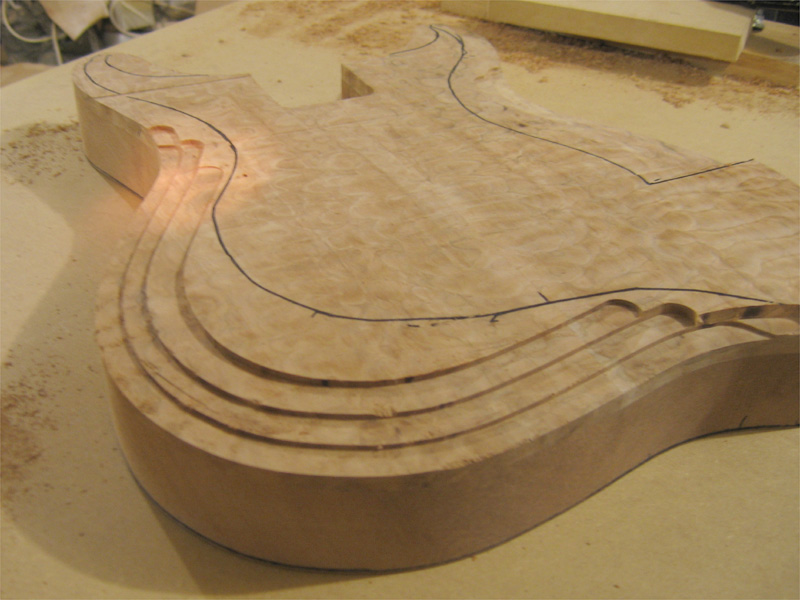
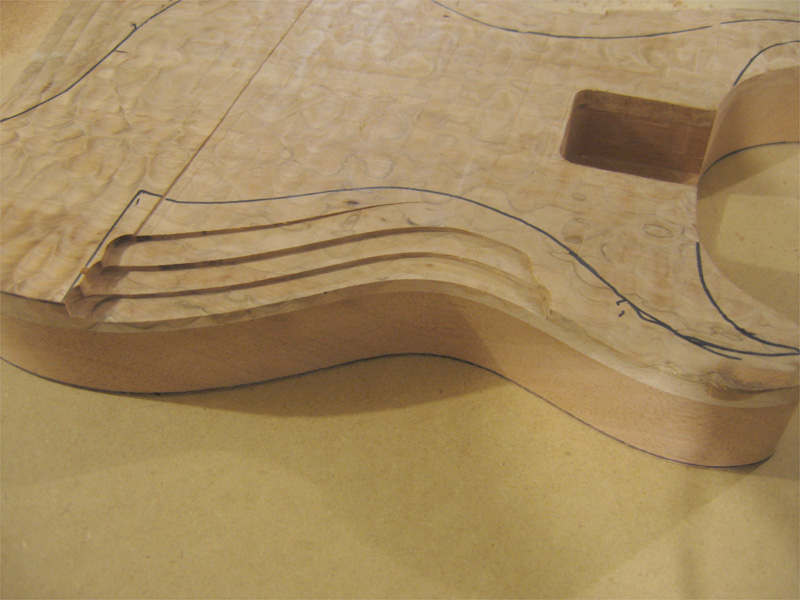
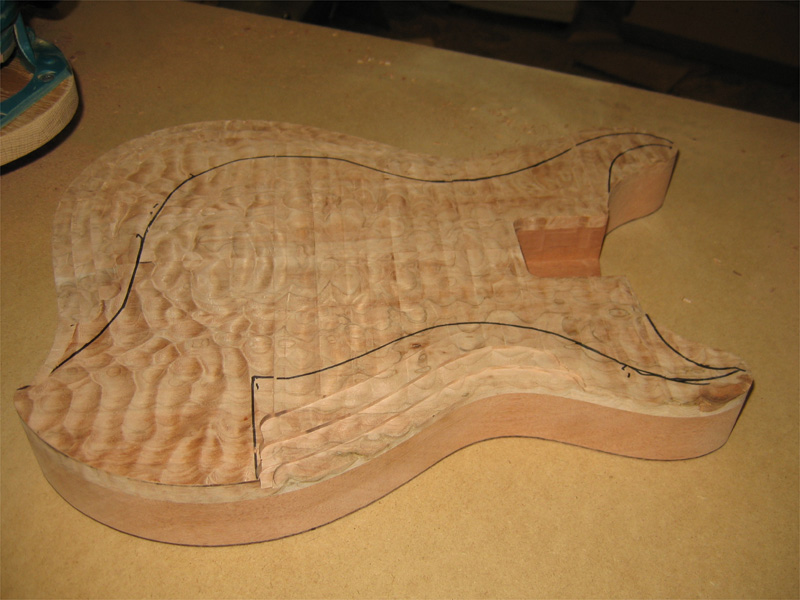
In between gluing up neck blanks, I worked on the body. First step was to do a pre carve. I used an overhead router setup to do this. I trimmed out the carve portion of my full sized printout and traced it onto the body.
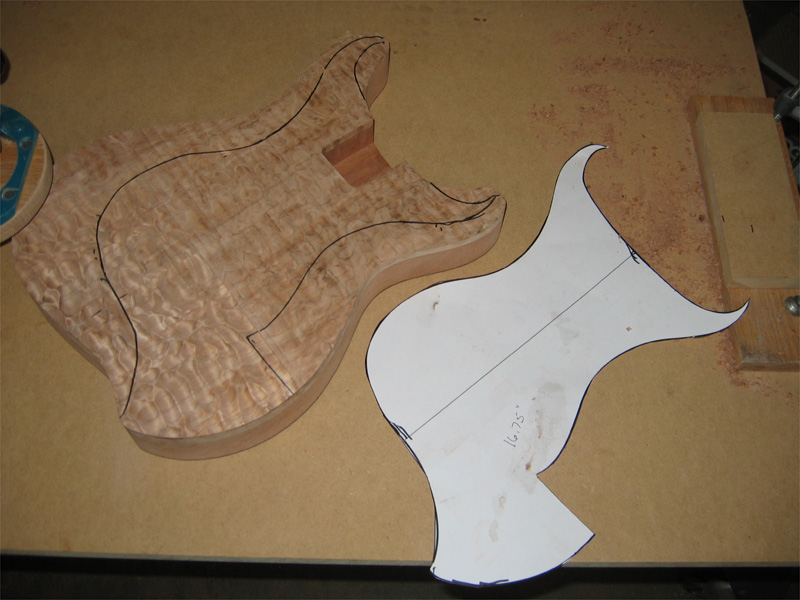
The router works by using a tongue that sets the width of the cut and the depth is set by the router.
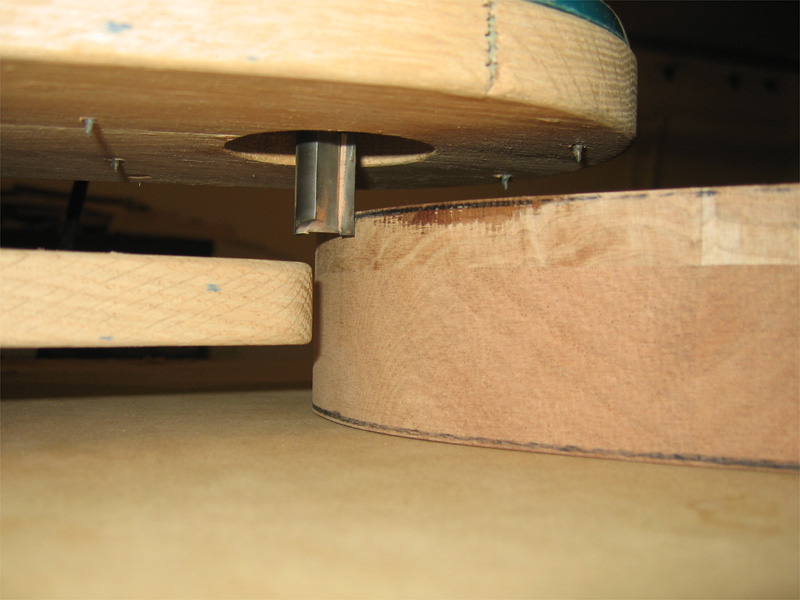
After the pre carving. Each step was made by advancing the bit and retracting the tongue..
-
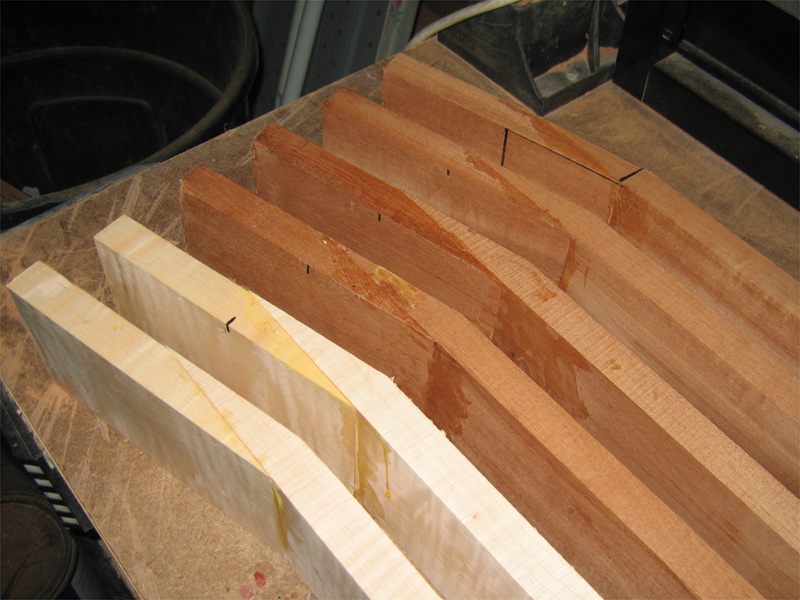
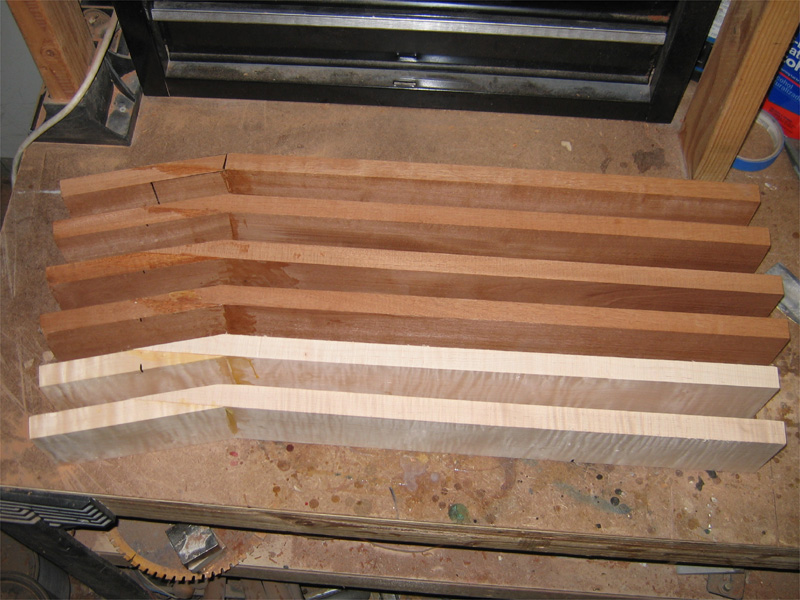
This process for the scarf joint worked very well and I went ahead and glued up 3 more mahogany blanks thoughout the day plau a couple of maple blanks for the ash top projects I have coming up.

Guitarnut - Double Cut Custom Carved Top
in In Progress and Finished Work
Posted
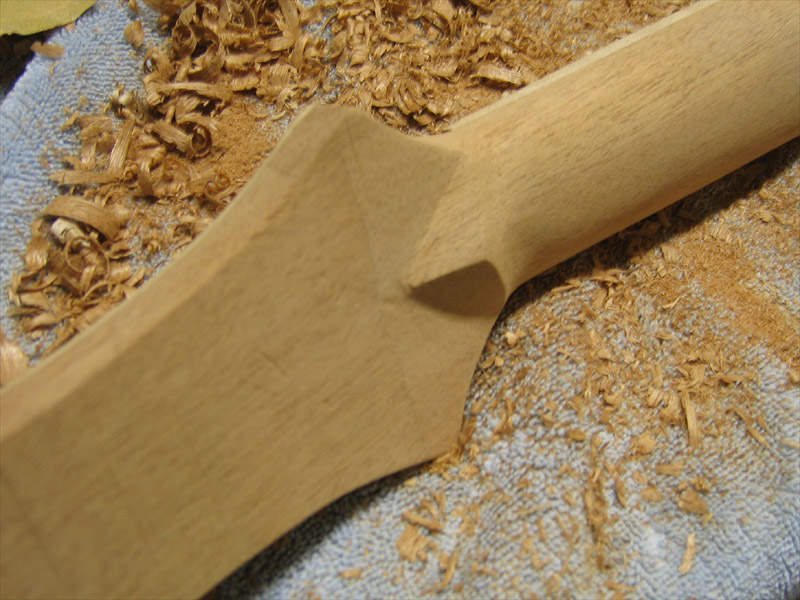
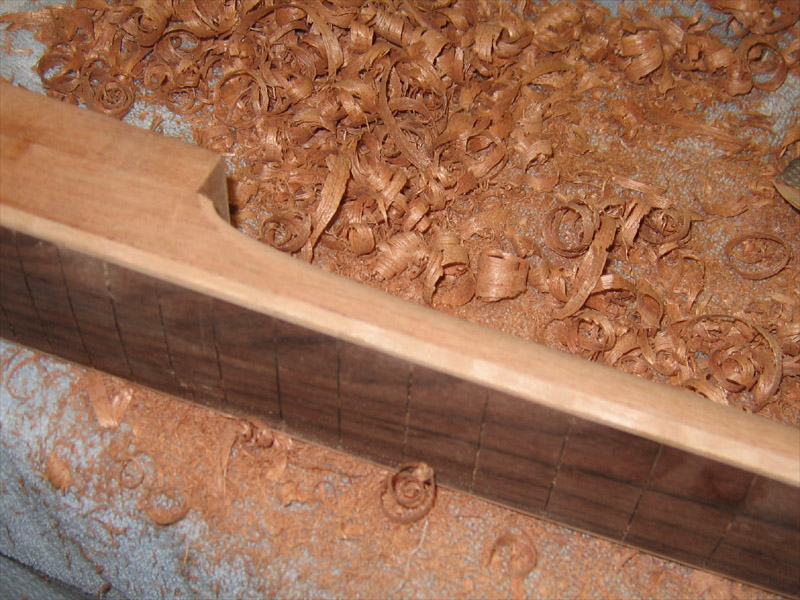
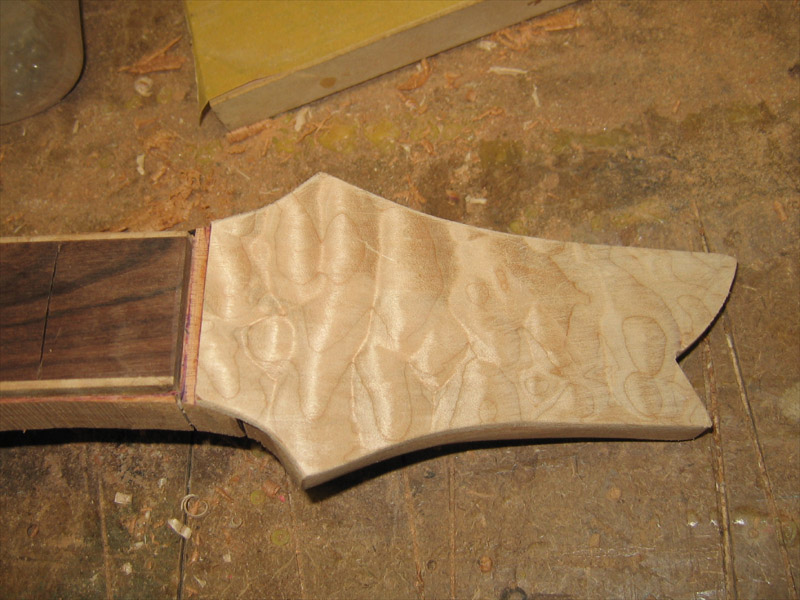
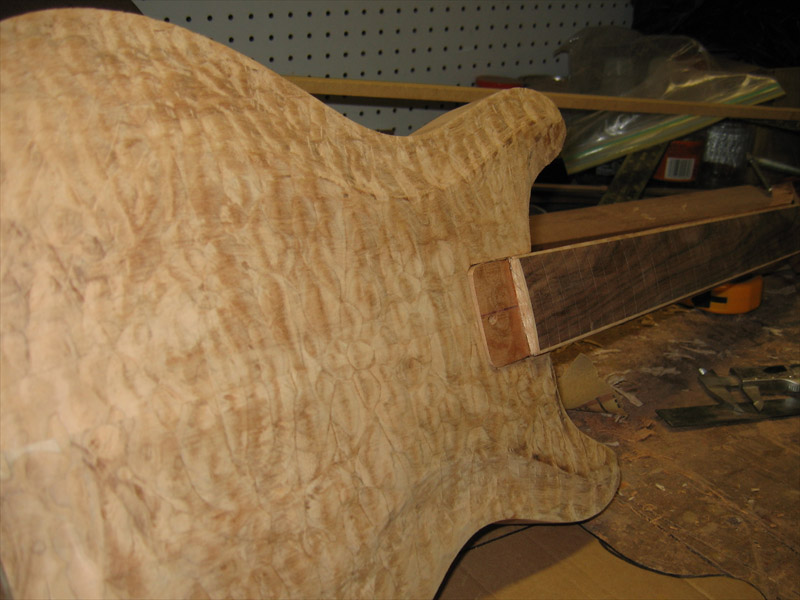
I made the volute more narrow and less obtrusive.
With a nut blank laid in place, the binding on the fretboard and the faux binding from the headstock veneer flow pretty nicely.
Also carved the heel...