


guitarnut
-
Posts
518 -
Joined
-
Last visited
-
Days Won
1
Content Type
Profiles
News and Information
Tutorials
Product Reviews
Supplier Listings
Articles
Guitar Of The Month
Links and Resources
Forums
Gallery
Downloads
Posts posted by guitarnut
-
-
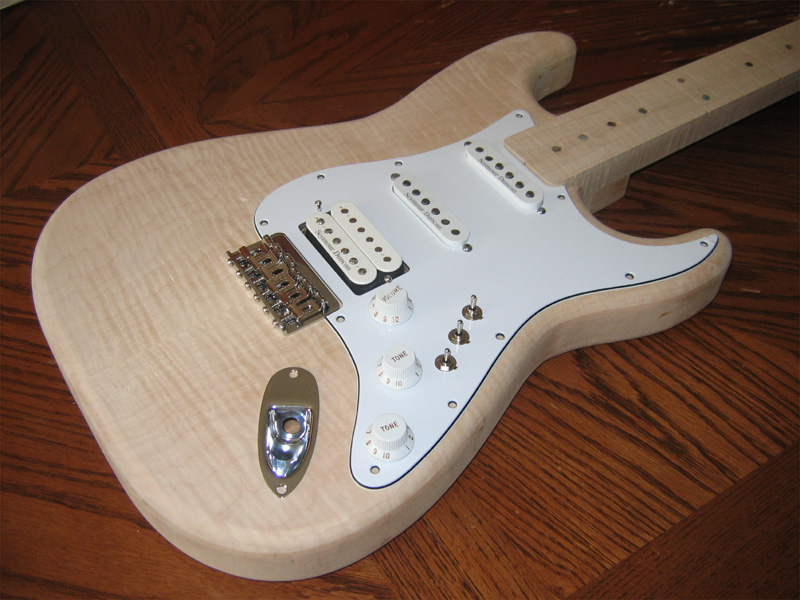
Hello all. I have a build going and I'm to the stage of planning out my controls. I'm going for something different here so I could use some input on my circuit. My concern is how the tone controls are being fed. I'm not sure they will react to the appropriate PU.
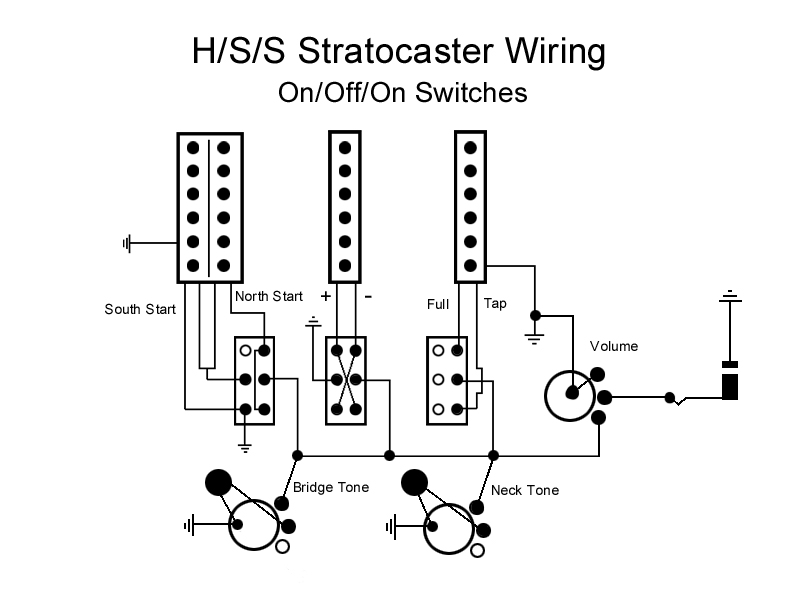
It's HSS, 1 vol, 2 tone (bridge and neck), 3 mini on/off/on switches.
Bridge: HB/Off/Coil Cut
Middle: Normal/Off/Phase Reverse
Neck: Full/Off/Tap
Comments and corrections much appreciated.
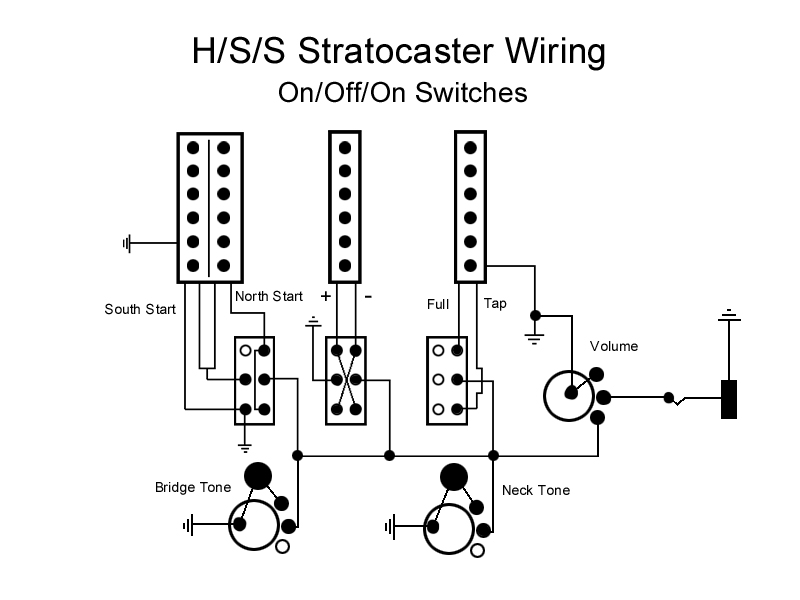
Alternate tone setup.
-
An alternate on the tone controls.
-
I've had the SD PUs sitting around for a year or so and didn't remember the specs on them so I put a meter on them and got the following DC readings.
Bridge:16.3K 8.8K
Middle: 6.6K
Neck: 12.8K, 6.8K
Now, I now DC resistance doesn't tell me what the PU will sound like but it's a good indicator of output. So, I'm rethinking the wiring yet again.
To get the most out of this set of PUs, I'm going to use this setup...at least if I have it diagrammed correctly, I will.
It should give me:
Bridge: HB, Off, Coil Cut
Middle: RWRP, Off, Phase Reverse
Neck: Full, Off, Tap
With volume, bridge tone and neck tone added. I'm not sure about how I'm feeding the tone controls. Any input or corrections welcome.
-
I have all the goodies in to start loading the PG. It just occurred to me that I didn't list the PUs in my first post with the rest of the specs. I was going to use an on/on/on bridge PU switch for series, coil cut, parallel but then I realized the bridge PU would always be on in some form. So, I need to look at doing a series, off, coil cut instead.
Bridge: Seymour Duncan SH-6B Dist
Middle: Seymour Duncan SSL-52 RWRP
Neck: Seymour Duncan SSL-5T Custom Tapped
This weekend I'll get the thru holes drilled, bridge mounted and the neck carved...maybe even start on the bleaching of the top. I'll do some tests on scrap first.
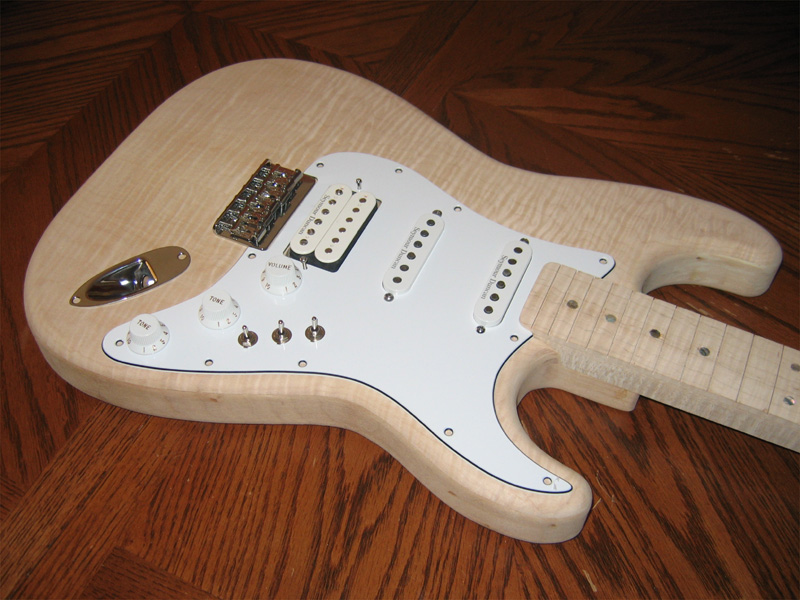
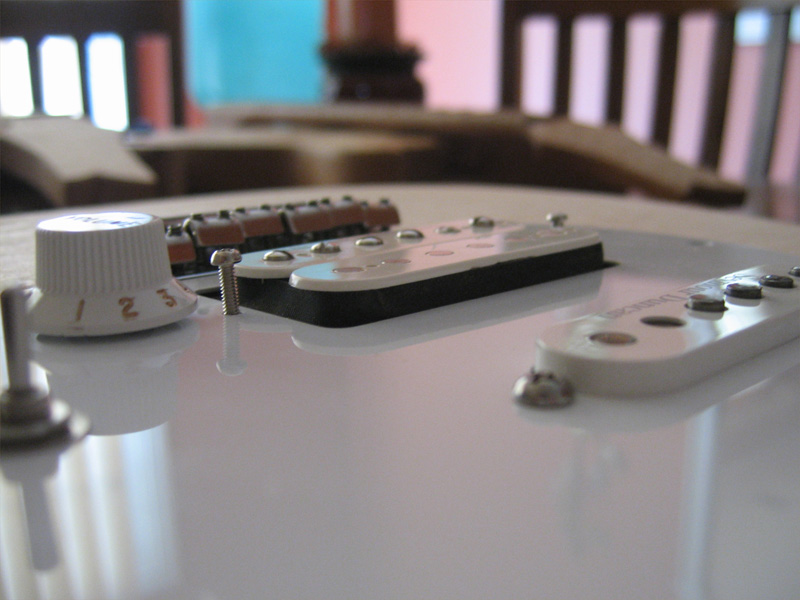
I need to shorten the HB screws a bit.
-
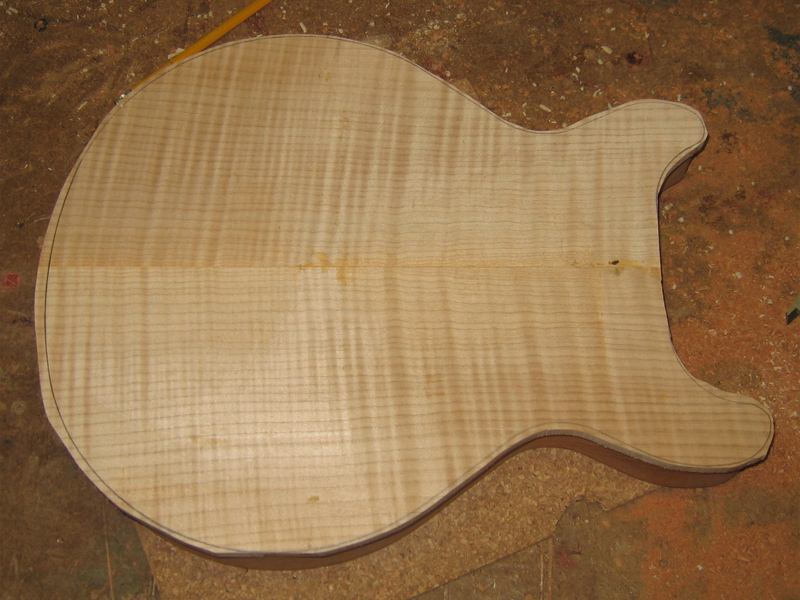
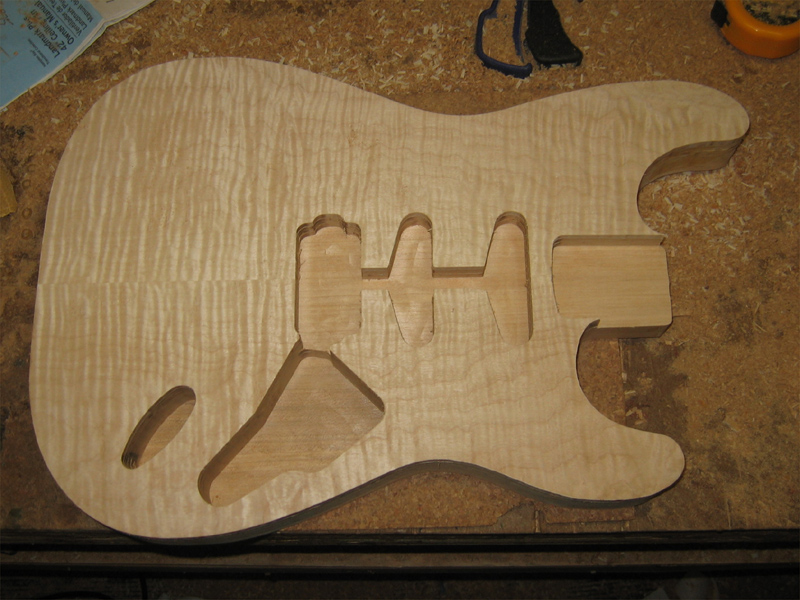
It's looking great. How do you plan to address the two tearout spots on that top? That top really is gorgeous, though.
Thanks.
The one on the upper horn is no problem. I'll fill it and the burst will cover it. The one above the PG is a bit tricky. I have plenty of scrap to patch it with. I need to do some testing with various adhesives. My hope is that it will be far less obvious after bleaching. I can drop fill any remaining spots with clear.
Mark
-
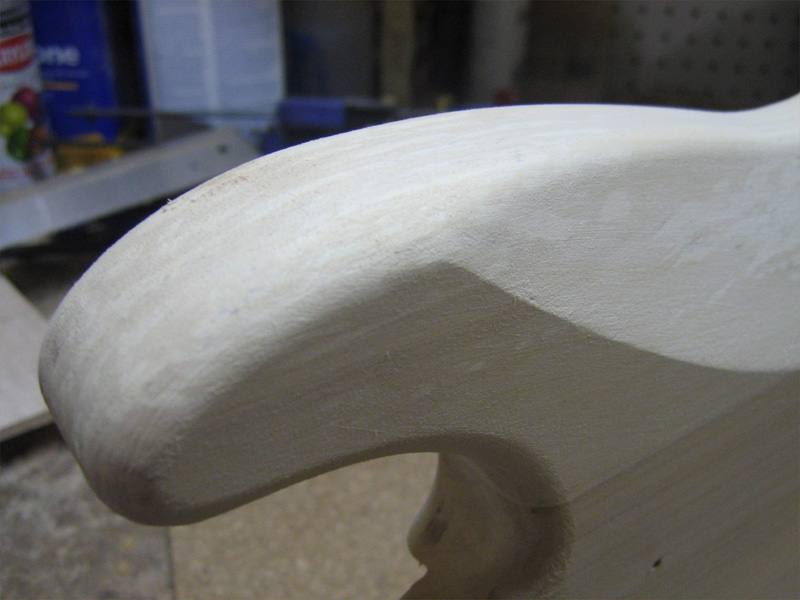
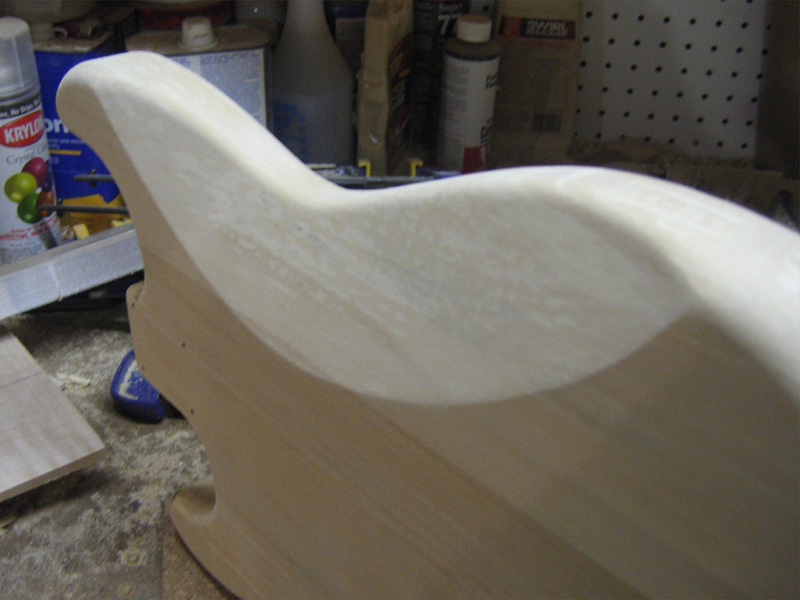
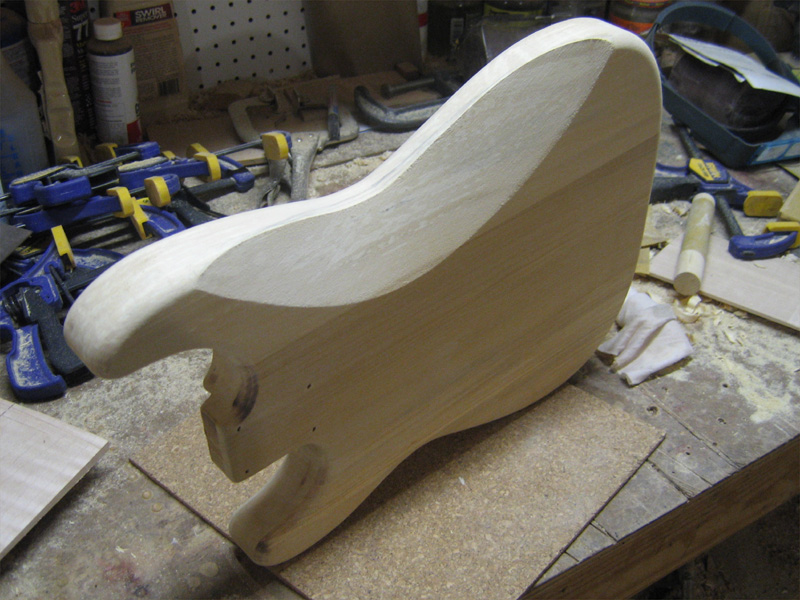
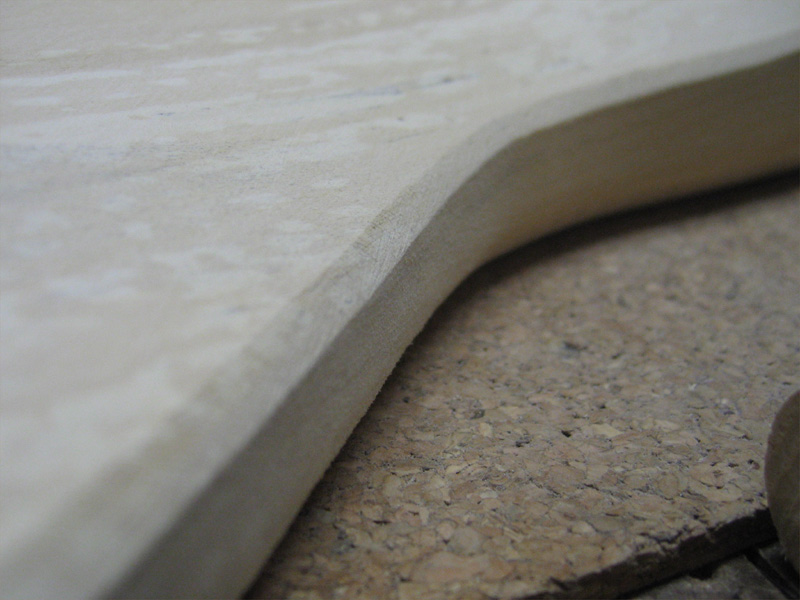
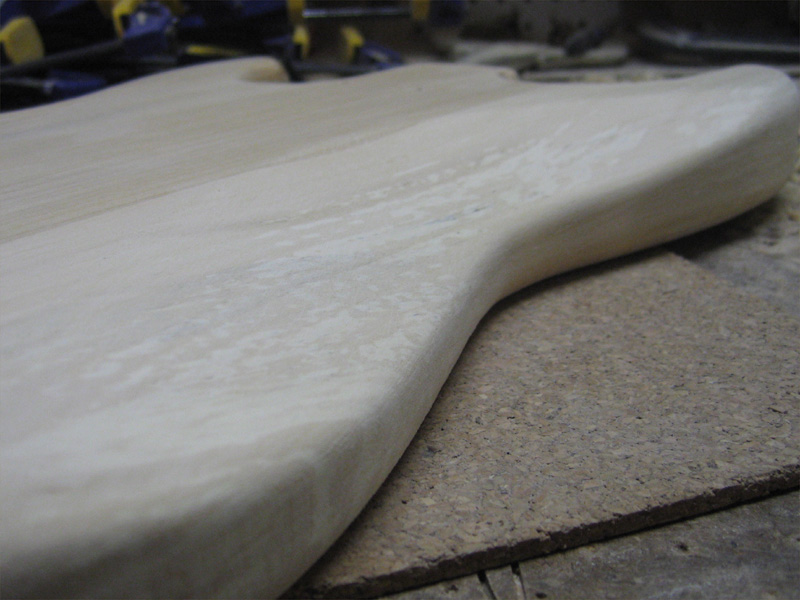
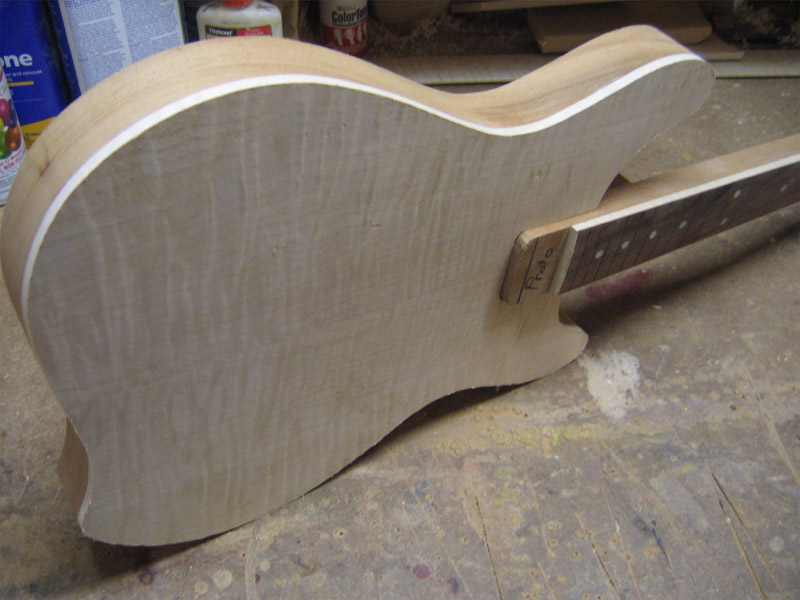
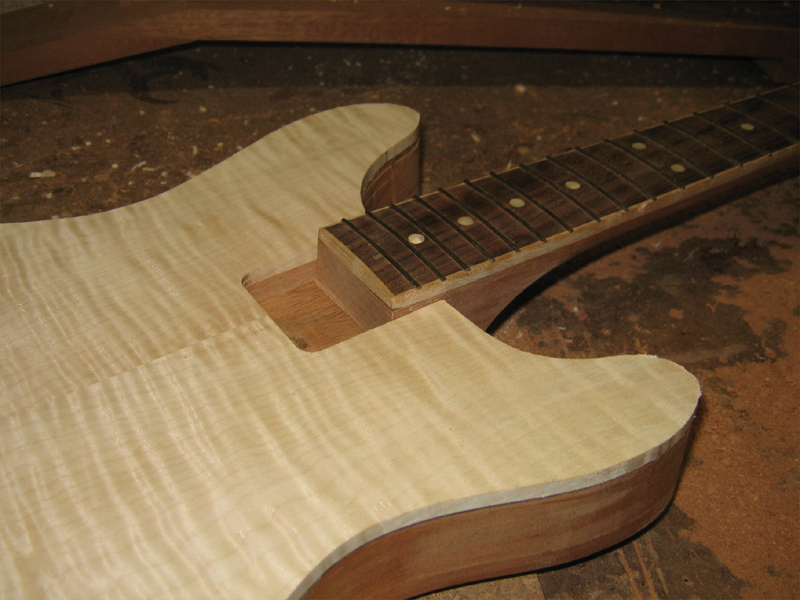
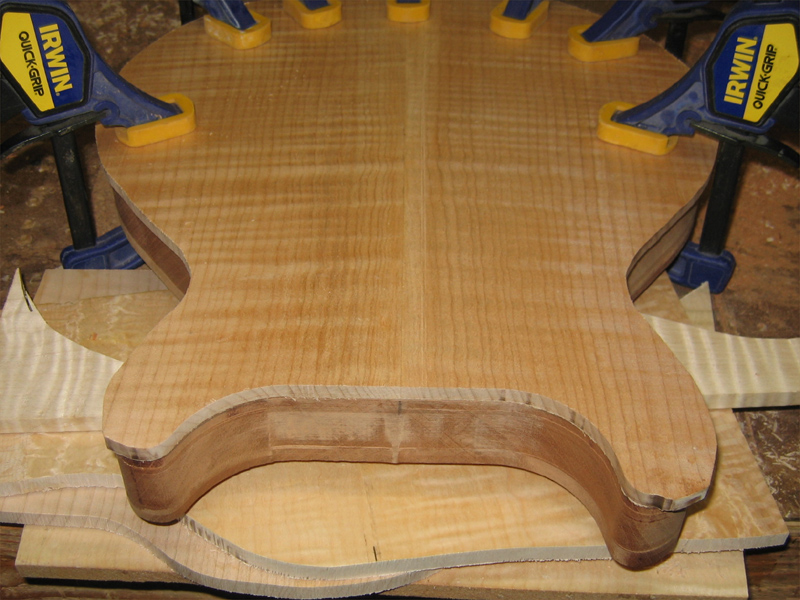
Here are some shots of the carve from various angles. I'm pretty happy with the way it came out. Not Fender issue, but neither is my tummy. :shock:

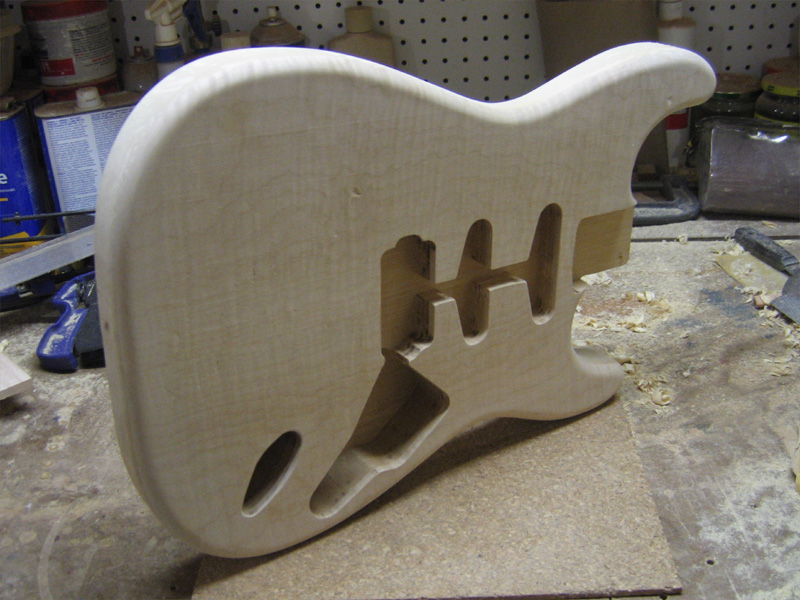
-
The tummy cut was next on the list for the body. I may have done it the hard way but even then, it only took an hour or so.
Not having a factory Strat to go by, I guestimated the start and stop points, then used a band saw blade to draw out the curve. I had to pull it into an oval a bit to get the curve I wanted.
You can see in the pic above that I started the process with a rasp but it seemed too slow so I went with an Ibex plane. I've used the plane enough for carving that it went really fast...carving basswood is a snap.

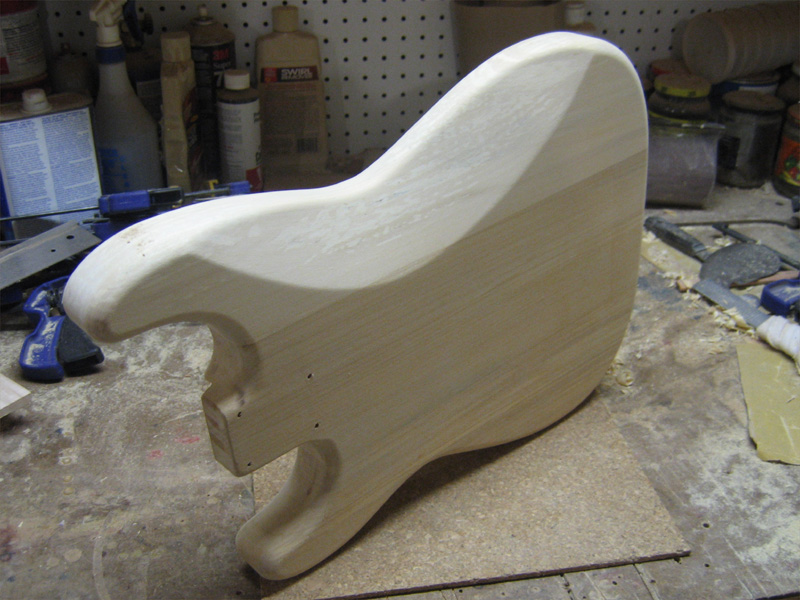
After hogging most of the wood out, I laid out the curve with tape so I could have a good visual reference while using the rasp to flatten out the carved area and true it up at the edges.
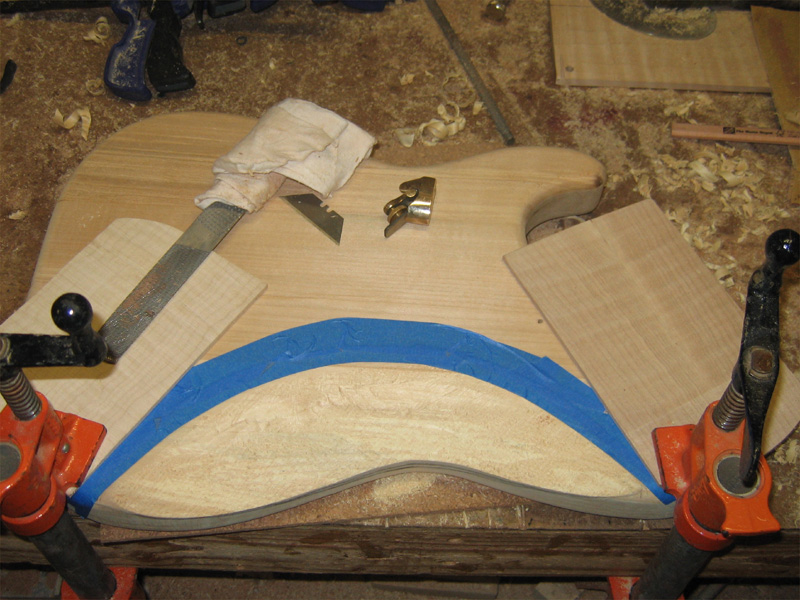
I finished the rough shaping with a 1" dowel and 80 grit.
I used the same dowel to cut a bevel along the top of the carve. This works for me because the corners catch light and guide me as to how much to take off and where.
Then it's just a matter of rounding out the corners left along the bevel...the dowel works great for this step too.
-
This build is coming along nicely. I've made good progress but don't have any pics since my camera is in for repair.
I've inlaid and radiused the fretboard and fit the neck to the pocket. This was bit of a challenge since the templates are inaccurate. The maker has long stood by his decision to undersize the pocket to allow for various vintage and current combinations but I just find it a pain in the a@@.
I used my Tele template, which is sized correctly, to open up the Strat template...I set it to the corners of the Strat template and widened the sides of the pocket without affecting the end. Worked great. I also had to slightly widen the top of the output jack bore so the plate would settle in.
More soon,
Mark
-
i like the mock-up as is (with pickguard) but i would love to see the color scheme expanded to the beautifully flamed neck and fingerboard. i haven't seen it done before and i think that it would really make the most of your concept. Also, i really like orgmorg's idea of the somewhat disguised 2-ply pickguard. it would be very pretty to imply the iconic shape of the strat PG with a pinstripe of black. Perhaps if you cut it with the grain going a different direction so it would be able to stand out as it's own design element, without distracting too much from the overall impression.
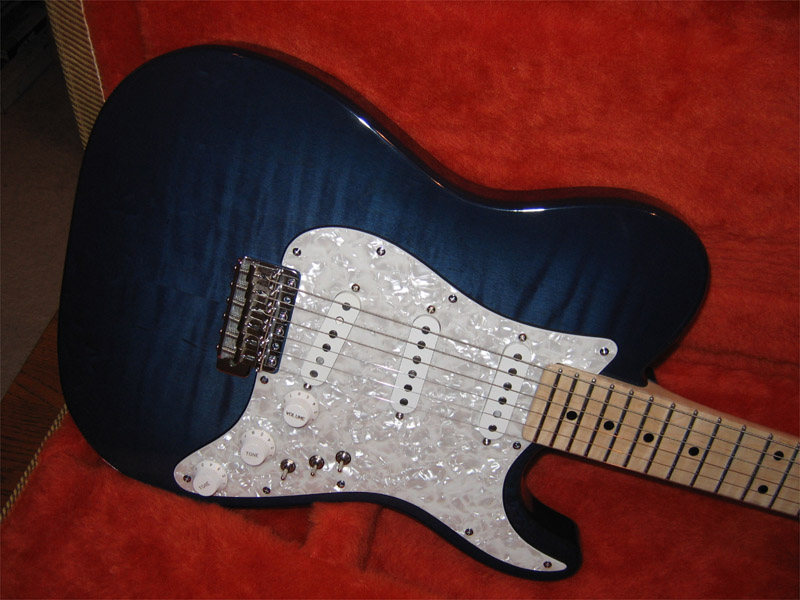
great job on your stratelecaster, btw. You see lots of people slap strat guards on tele bodies, but they always look shitty because of the the difference in lower bout shaping. It's nice to see someone else appreciates a perfect reveal. I've made a few custom bodies with tele upper/strat lower bouts and they've become my favorite shape due to the way the upper tele bout curves perfectly into the strat lower horn. i find the continuity of the lines more pleasing than in either of the original models.
keep it up!
Thanks! I don't think I'll be bleaching the neck, It might look cool but then, if it's a bust, I'll be dealing with correcting the neck too. At this point, I'm going with the white PG...though I have changed the switching to something similar to the Stratelecaster. I'll have 3 DPDT switches but instead of them all being on/off/phase, the HB switch will be series/coil cut/parallel with an on/on/on switch.
Peace,
Mark
-
Judging from the mockup it looks like a non tremolo bridge. Are you going with that or a tremolo bridge?
I think it looks great just hope it's getting a trem.
Thanks. You're right. The mock up and the guitar will have a string thru, hardtail bridge. I have 3 Strats with trems, I thought it would be nice to have one without.
Mark
-
A couple more pics...I remembered my video cam takes still as well.
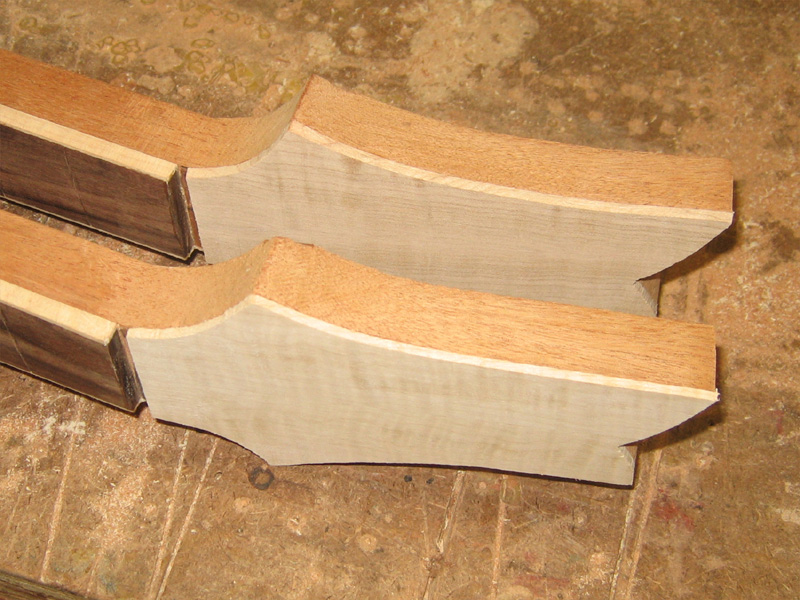
The bookmatch HS veneers are done. They're 2mm thick so I can get a faux binding on the edges. Since I plan to carve in a volute on the back of the necks, I'll take the extra thickness off the backside of the HS when I set up to mill the angle in the heel.
-
If you're following my LPJ build, this post is going to seem redundant but it applies here, too.
I have gotten some work done on the build but unfortunately my trusty Canon has bit the dust. It's suffering the widely reported CCD sensor problem that has been on gong since 2004. Canon will fix it but it's going to take some time. So, I only have a few shots for now.
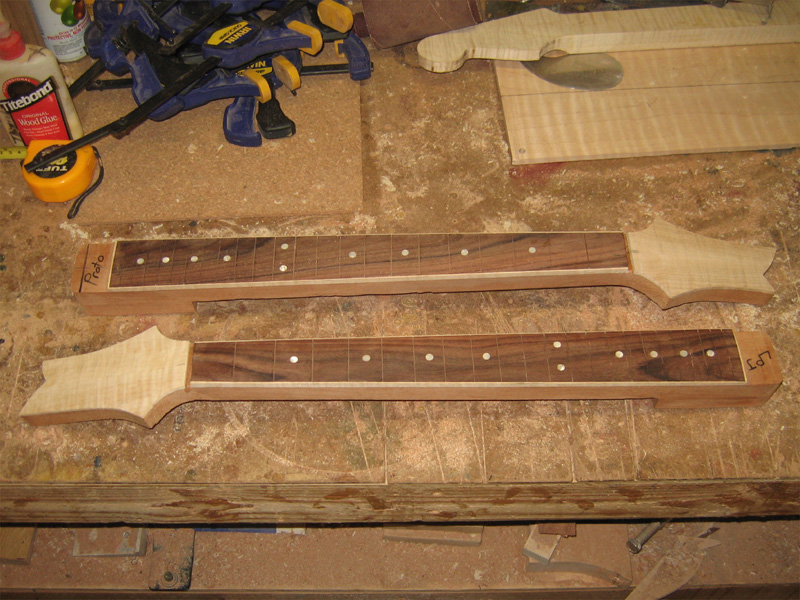
The fretboard has been glued up, inlaid and radiused. The neck has been profiled and fit to the pocket, binding is scraped, headstock shaped. I'm ready to cut the angle on the heel and glue the HS veneer. Then, carving and fretting.
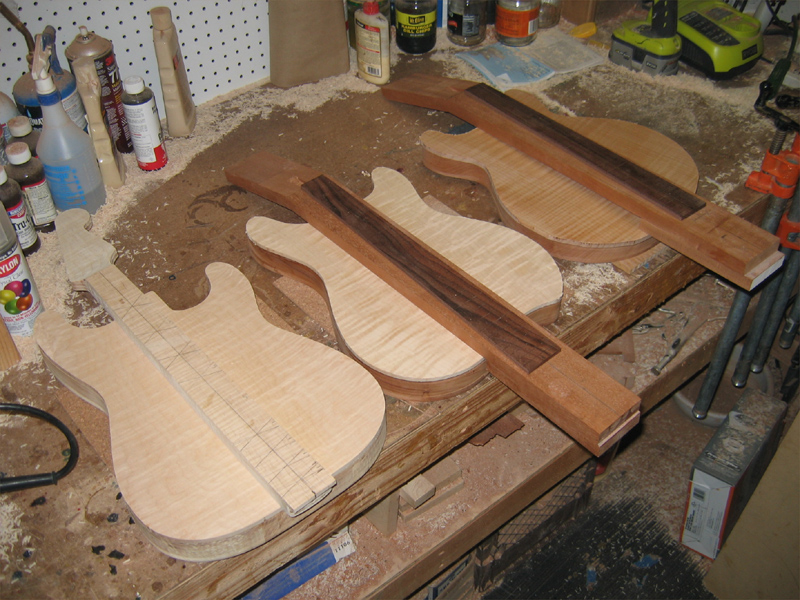
State of the 3 builds I have going.
More soon.
Peace,
Mark
-
've been thinking on this a bit. I'm leaning toward something with a vintage vibe.
I did these in PS with a pic of the actual top. Either of these get me excited. And they both make the faux binding pop and compliment a natural mahogany back. Plenty of time to decide but I'm 75% sure on the 3 tone burst.
A dark cherry burst.
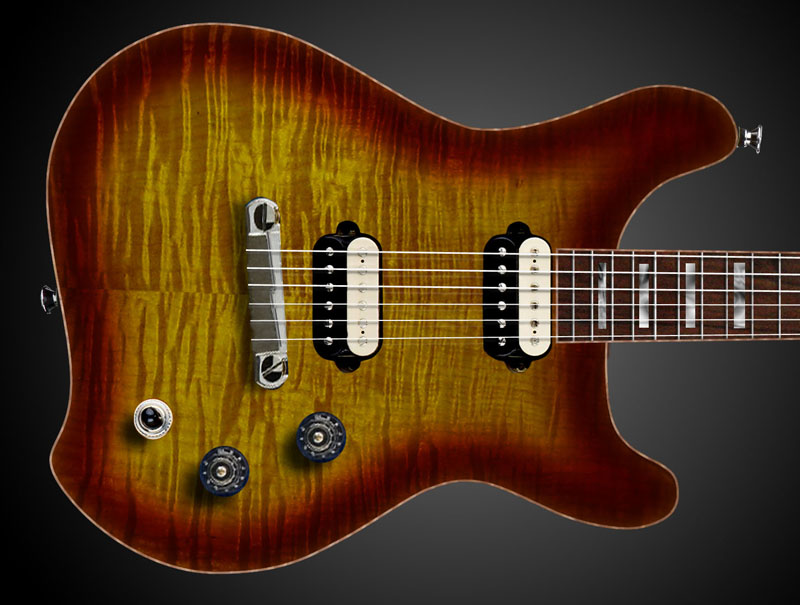
Or, a 3 tone burst.
-
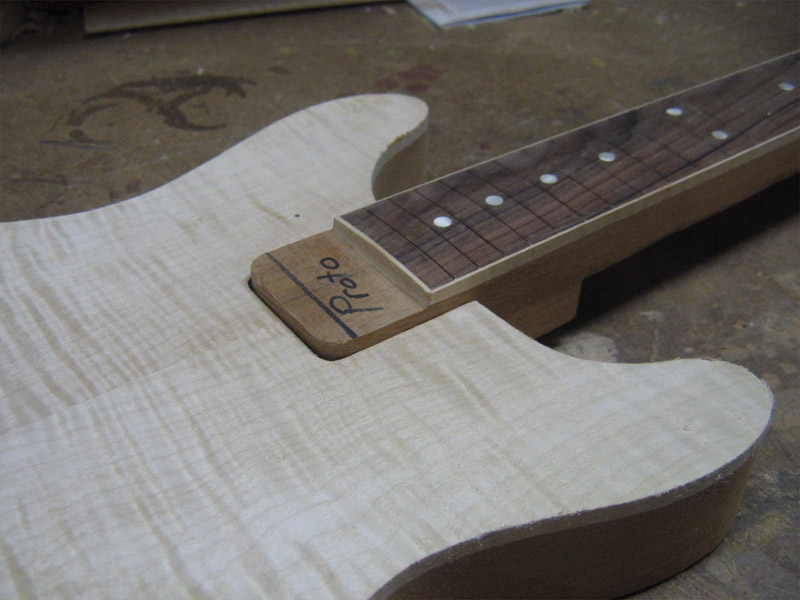
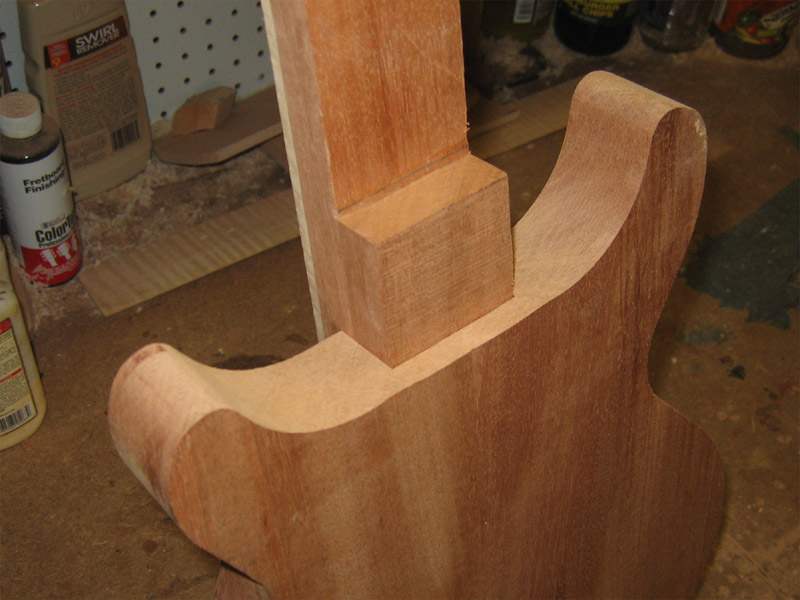
Time for the neck pocket. Since I took the time to make a template on the carved top version of the guitar, this went pretty quickly.
After a couple of shallow passes I removed the template.
A quick test fit with the neck from the carved top build. Snug!
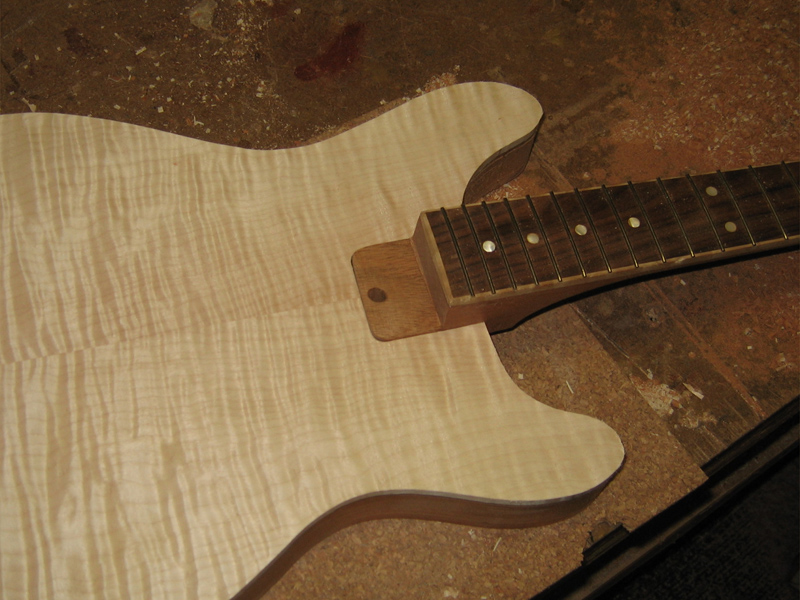
Then I took it to depth...not final until I check the actual neck that's going on this guitar. I want to make sure I allow for the difference between the two tops before committing.
What I'm seeing at this point is that the tenon needs to be a bit thinner or the pocket needs to be deeper.
-
A couple more pics...I remembered my video cam takes stills as well.
The bookmatch HS veneers are done. They're 1/8" thick so I can get a faux binding on the edges. Since I plan to carve in a volute on the back of the necks, I'll take the extra thickness off the backside of the HS when I set up to mill the angle in the heel.
-
Well, I have gotten some work done on the build but unfortunately my trusty Canon has bit the dust. It's suffering the widely reported CCD sensor problem that has been on gong since 2004. Canon will fix it but it's going to take some time. So, I only have a few shots for now.
The fretboard has been glued up, inlaid and radiused. The neck has been profiled and fit to the pocket, binding is scraped, headstock shaped. I'm ready to cut the angle on the heel and glue the HS veneer. Then, carving and fretting.
State of the 3 builds I have going.
More soon.
Peace,
Mark
-
Beautiful lumber there bro
 here in the UK we would get raped £££££ for timber like that, I guess you are in the US ? just curious what did the top cost ? that here in the UK we would be paying about £90 or $150 seriously! great build there and I gotta
 It was resawn from a larger billet. It's always cheaper to approach it this way vs buying a single top set. It probably cost $30 US when subtracted from the $200 I paid for the billet.
Peace,
Mark
-
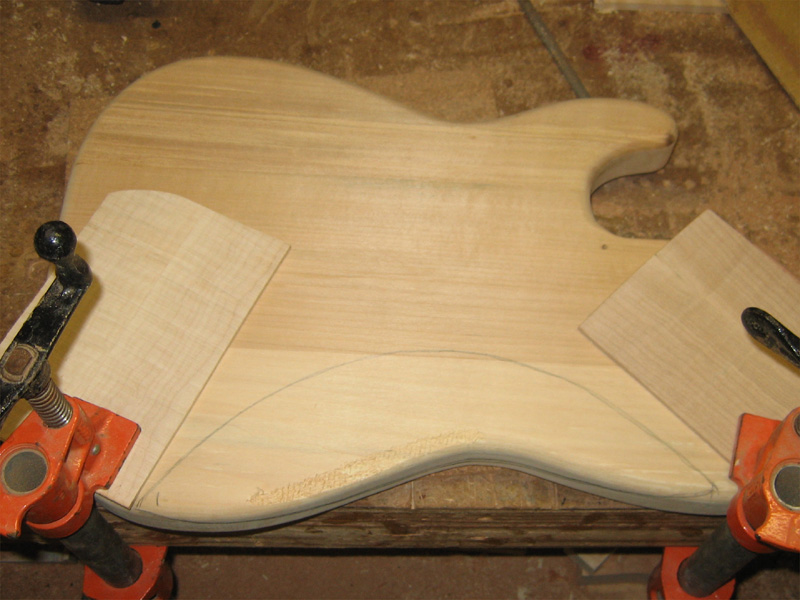
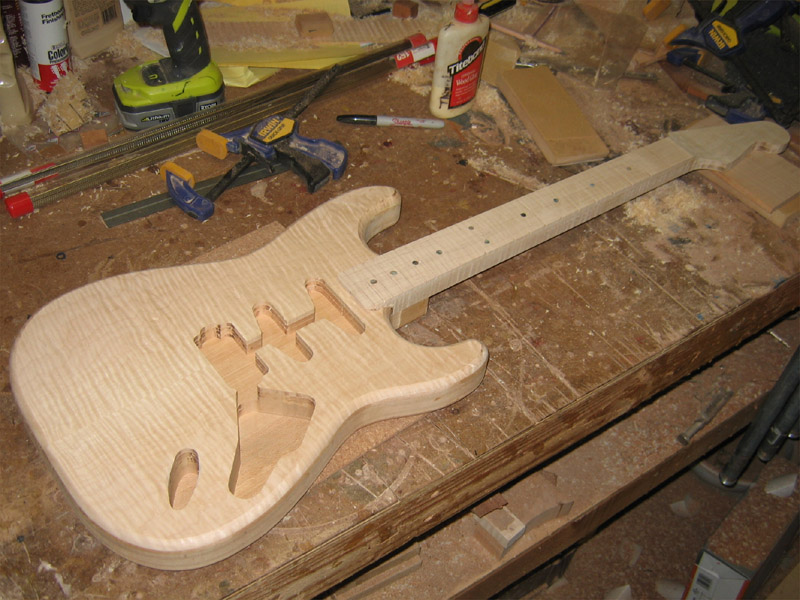
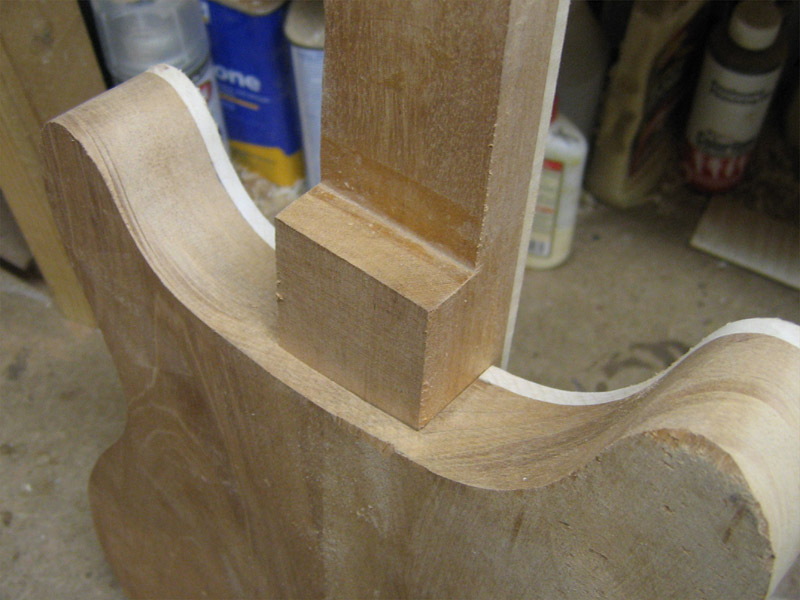
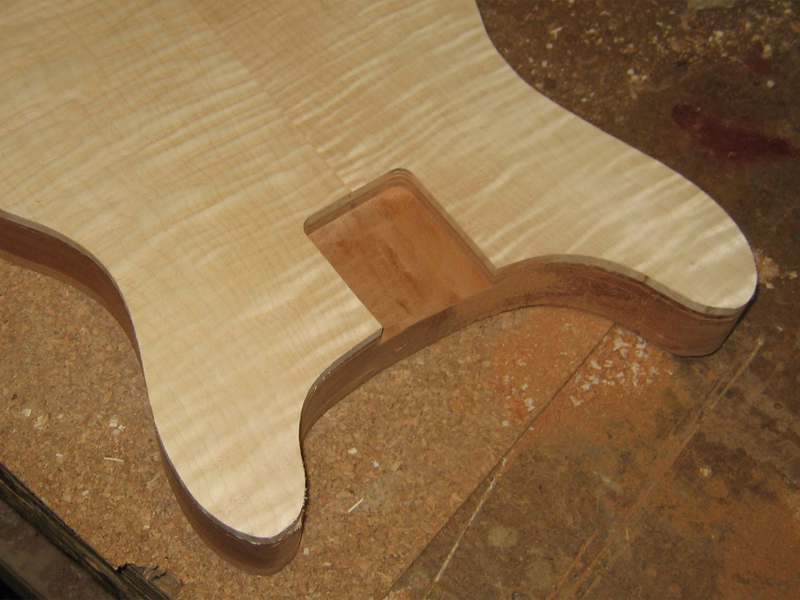
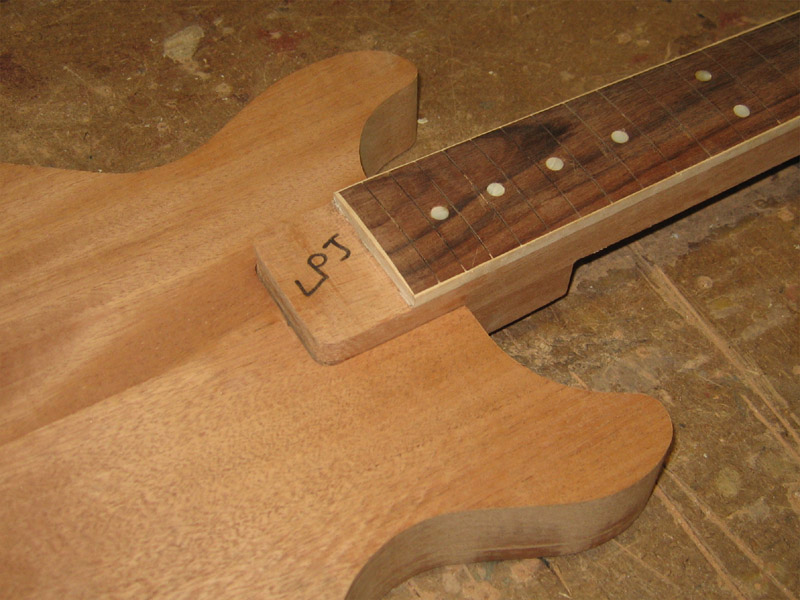
I'm having to take a litle different approach with this top. I want the top to cover the neck tenon so I have to route the pocket in several steps. The first is to route the full length of the tenon in the mahogany.
I lined up the top and clamped it in place. I made marks around the edges of the two so I can line them back up later. I could have screwed or pinned the top thru where the PU route will be, but since I'm altering the scale length, I don't know where that is at this point.
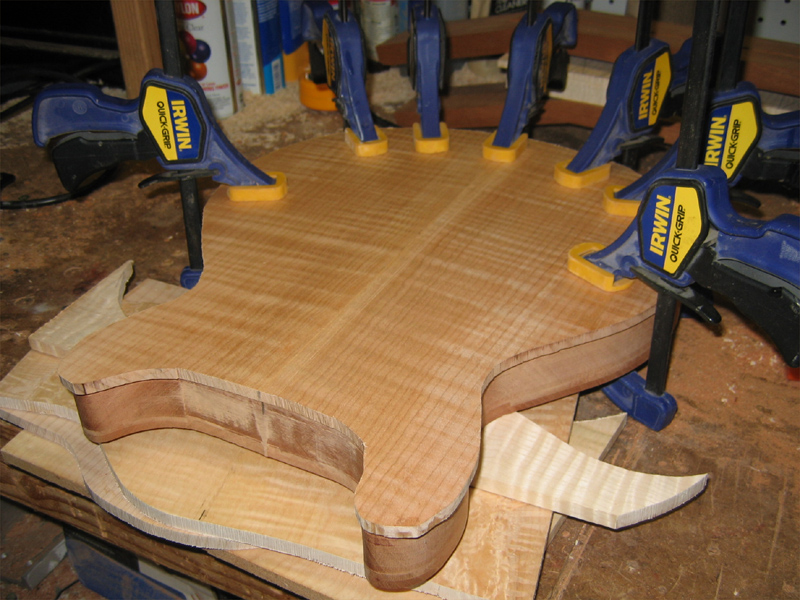
With the front braced up on scap to level it out with the clamps, I used a flush trim bit to dress out the area between the horns. I want this as close as possible so I have little clean up to do once the neck is glued in.
With the pocket template lined up and centered, I made a few shallow passes.
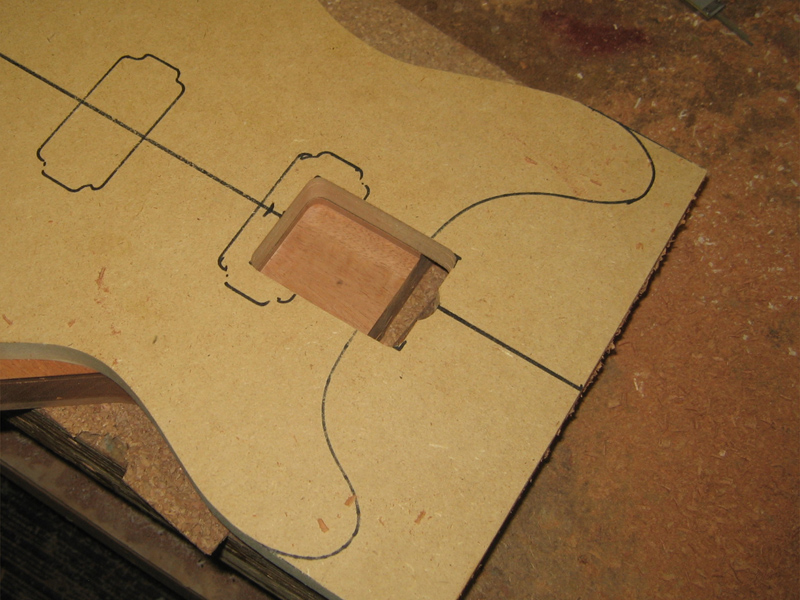
Then removed the template and took it to depth...remembering that part of pocket depth that will be made up with the maple cap. So, this route is the depth of the final pocket minus .25".
Looks pretyy good. I think I'm going to get the neck cut before I go any further on this one. A test fit is definitely in order.

-
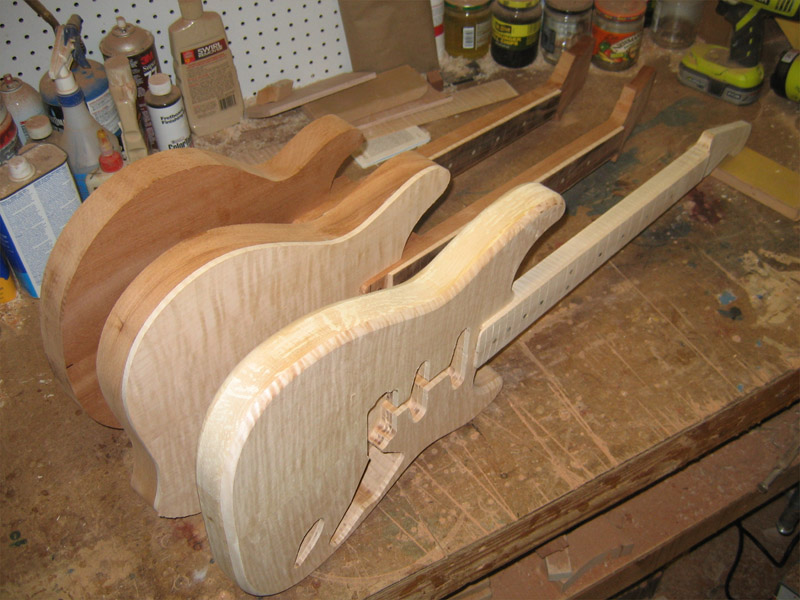
State of the builds as of Mon night.
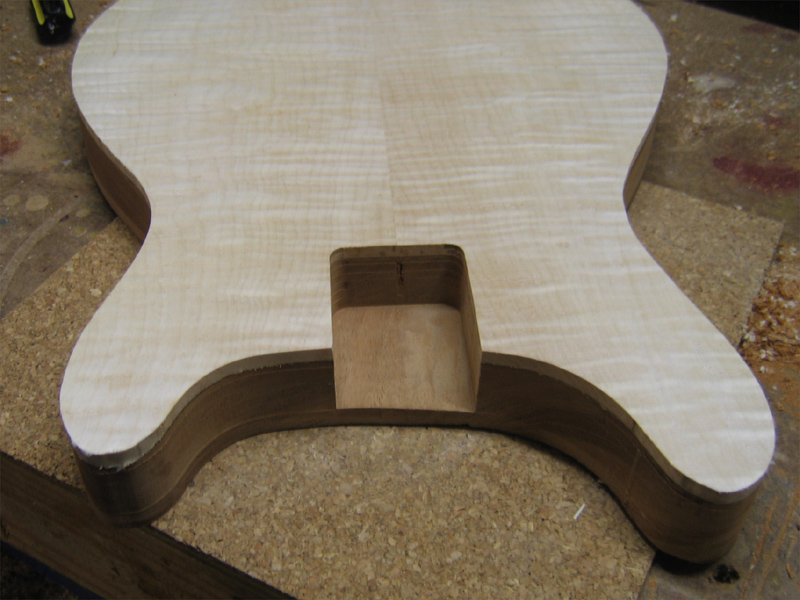
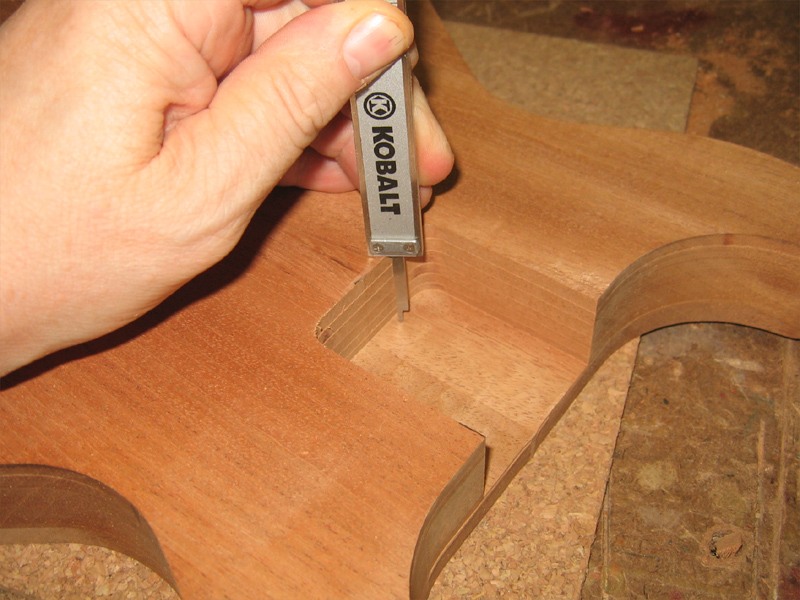
I had a few hours to work on guitars. I wanted to get the LPJ caught up to the others so I taped the cap down backwards onto the back of the guitar and ran it thru the planer to clean up the glue joint and do final thicknessing. It's still a hair thicker than 1/4"...it will come down when I clean up the other side.
After planing...it's ready to go. I'm going to have to really think thru the next steps on this one. To set the neck before the top goes on, I'll have to pretty much finish the edge of the cap in the neck area since I won't be able to get a router in there after it goes in. And, it needs to be notched for the portion of the neck that extends into the body.

-
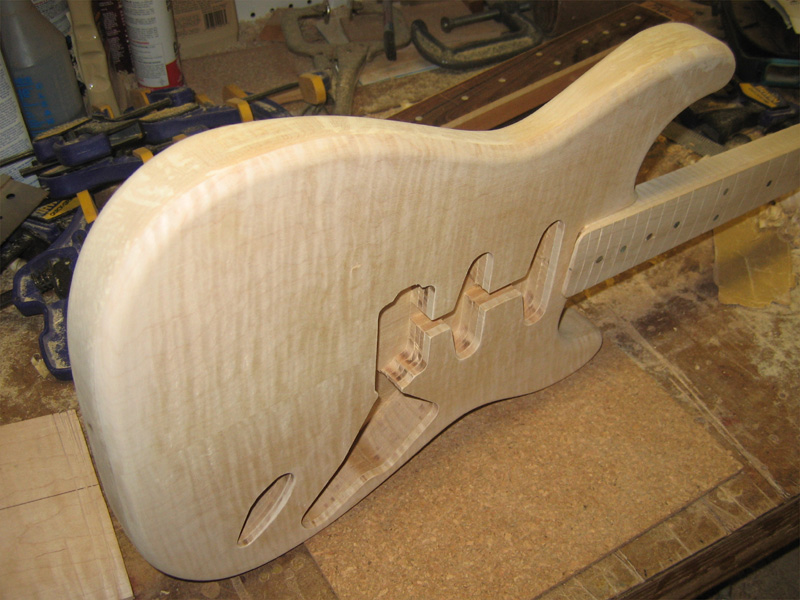
My goal last night was to get the front routed. I started off by making sure the neck fit the PG (this black one is a stand in). It only took a bit of sanding to pop it right in.
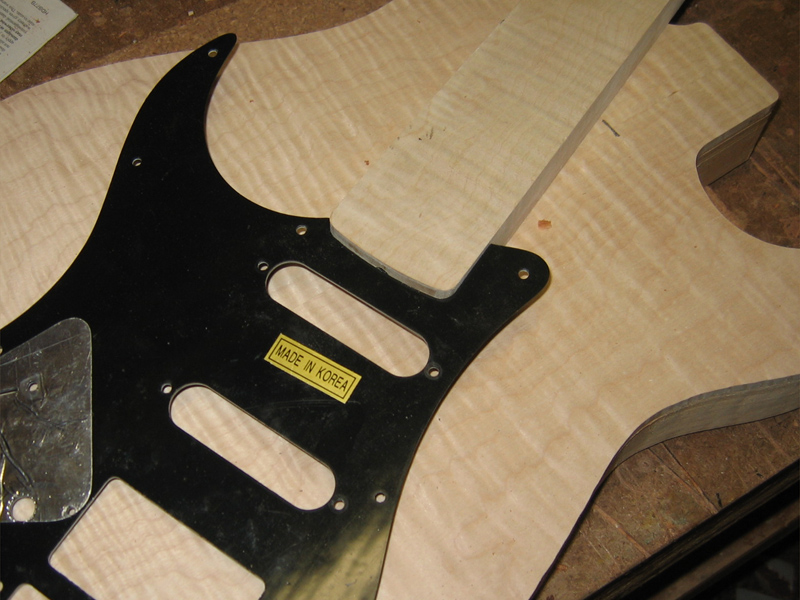
Then I marked the center of the PG. I used calipers and a straight line on another piece of wood to do this. I measure the width of the HB route, halve that and slide the PG side to side until I have equal spacing either side of the line, front to back of the route. It's a quick, accurate way to find the center of an oddly shaped object.
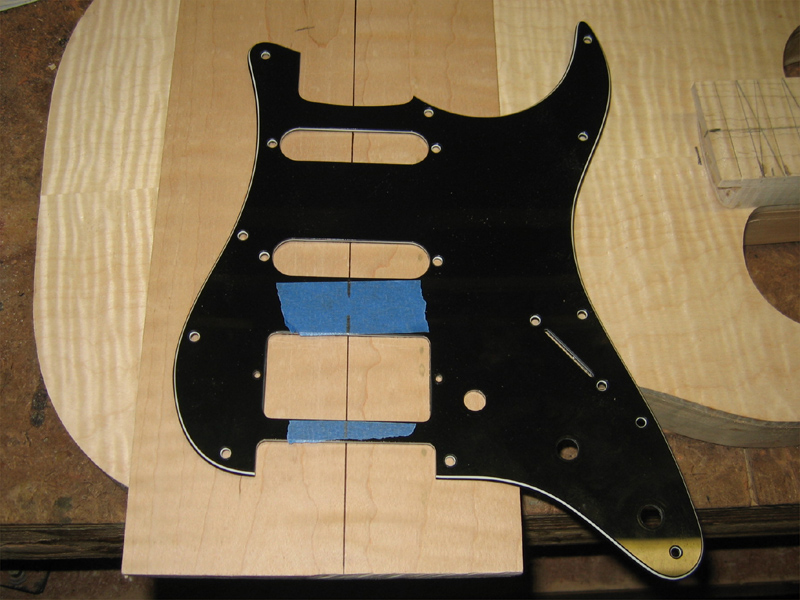
Then, with the back of the neck pocket marked at 3:, I set everything in place. The neck and PG had to be adjusted a bit after this pic but I got it dialed in. Then I traced the HB route onto the top.
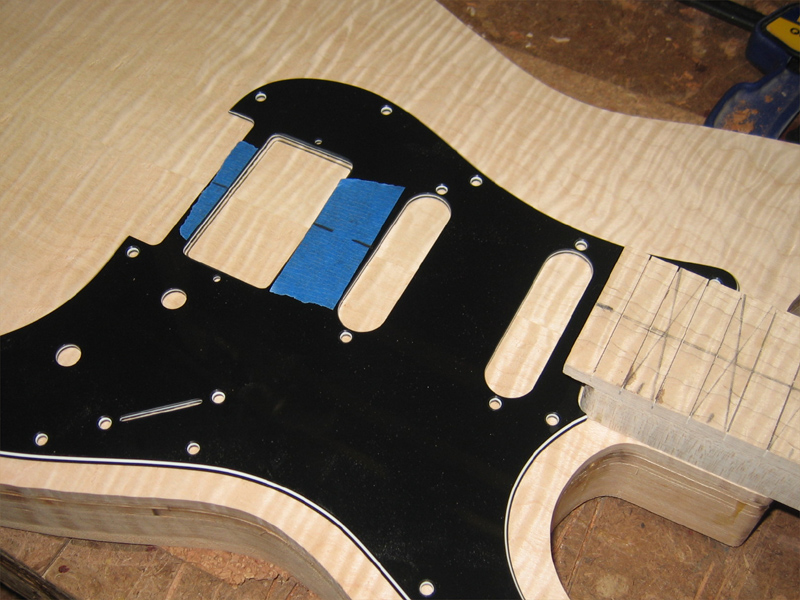
Using a HB route from another template I lined it up and centered it.

After the first pass with the router, I checked to make sure it all lined up. Good to go. Then, using the first few passes as my template, I took it to just over .75".

Then it was just a matter of using the regular Strat template to route everything else to depth.
-
I say go with a pickgaurd, but maybe just a single white ply?
Glad you are building again, I enjoy reading your threads!
Thanks. It's good to be back in it. The PG I have is w/b/w. We'll see how it looks. Single ply white might be the way to go though.
Definitely keep the scratch plate, that combination works.
Thanks.
Peace,
Mark
-
Go with a clear pickguard if you are going to put one on there, otherwise its a waste of a perfectly good flame top.
Hmm. I guess I would view a see thru pickguard like one of those body models or V8 engine things. It's designed only to show you stuff you wouldn't normally see. Not very attractive in my book. Just an opinion though.
Using a pickguard worked out fine on my Strat Tele hybrid I built last year.

-
Without a pickguard is interesting, but I think it loses too much of the Strat vibe...starts to look like a Kramer or Jackson of sorts. Not a bad thing, just not what I'm going for.
-
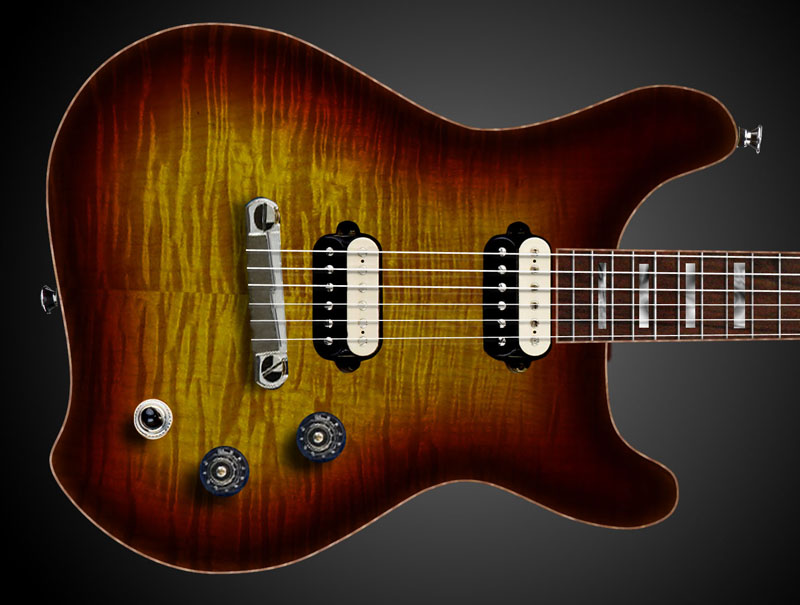
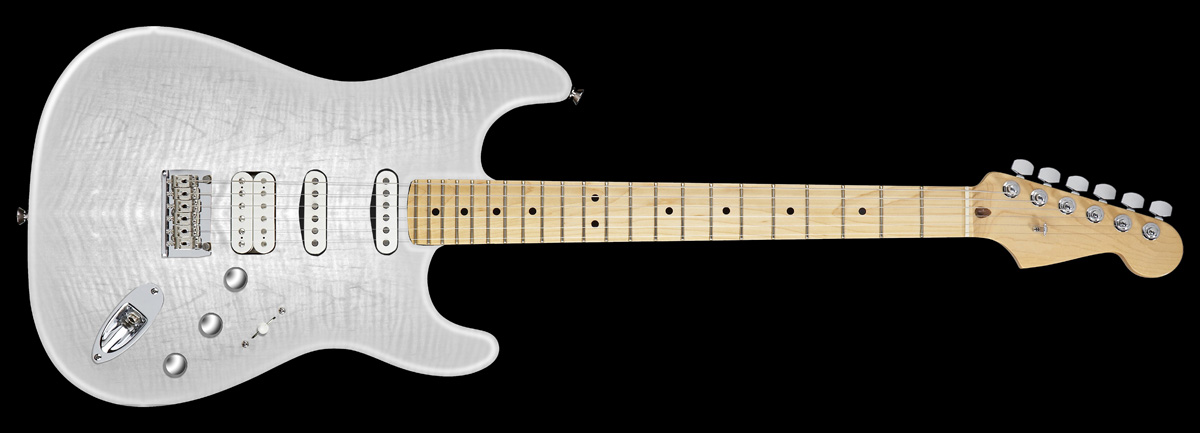
I like that finish. will it be a little bit darker than that in real life, or no? Also, you might wanna consider no p/g, and then use black hardware, dome knobs instead of bell knobs, and black pickup covers. I think that would look pretty sweet.
I don't know for certain but I plan to bleach the maple first. I've had good luck getting almost white in the past and that was with very amber/golden quilted maple. This is much closer to white to start. I may need to use a bit of dark dye and sand back to get the figure detail I want...I'll have to see what happens.
As for color scheme, I can see going that way, the contrast would be nice. But I'm thinking of a more ethereal look for this one. Sort of a white tiger or white velvet thing.
Peace,
Mark
 here in the UK we would get raped £££££ for timber like that, I guess you are in the US ? just curious what did the top cost ? that here in the UK we would be paying about £90 or $150 seriously! great build there and I gotta
Strat Hss Wiring Diagram - Please Review
in Electronics Chat
Posted
Thanks for the input Ripthorn. That's why I was doubting my setup. I couldn't see any isolation between the 2.
I went back and studied the 5-way setup that's standard on Strats. Looking at the switch as 2 separate banks with 3 inputs and 1 output each, I was able to see that the tone controls are fed from the input portion of the switch...not output as I was doing in my original layout.
So, I created a path for each tone control (green traces) from the input side of the respective PU. The north coil of the bridge PU is always in the mix when the PU is in use so I took signal from it before the mini switch. The second pole on the neck tap switch was unused so I jumped input from full and tapped states and then used the output of the switch to feed the neck tone. The middle PU is not connected to a tone control.
So, in either active state of both the bridge and neck PUs, their respective tone control should be active and isolated from the other filter. That's my theory anyway. Please advise if I'm off here.