


guitarnut
-
Posts
518 -
Joined
-
Last visited
-
Days Won
1
Content Type
Profiles
News and Information
Tutorials
Product Reviews
Supplier Listings
Articles
Guitar Of The Month
Links and Resources
Forums
Gallery
Downloads
Posts posted by guitarnut
-
-
Well, for my 3rd build started this past weekend, I decided to go with a LPJ. I've always wanted one and if all goes well, I will. :cool: Well, it won't be a traditional LPJ since it will have a single HB, flame maple cap and a different neck joint. More of a PRS style joint...the same as I'm using on my other builds.
The plan:
Peruvian mahogany body, flame maple cap, faux binding.
Peruvian mahogany set neck, rosewood fretboard with flame maple binding and HS veneer, pearl dots.
Singe HB with vol, tone, series/coil cut/parallel switching.
Not sure on the finish yet.
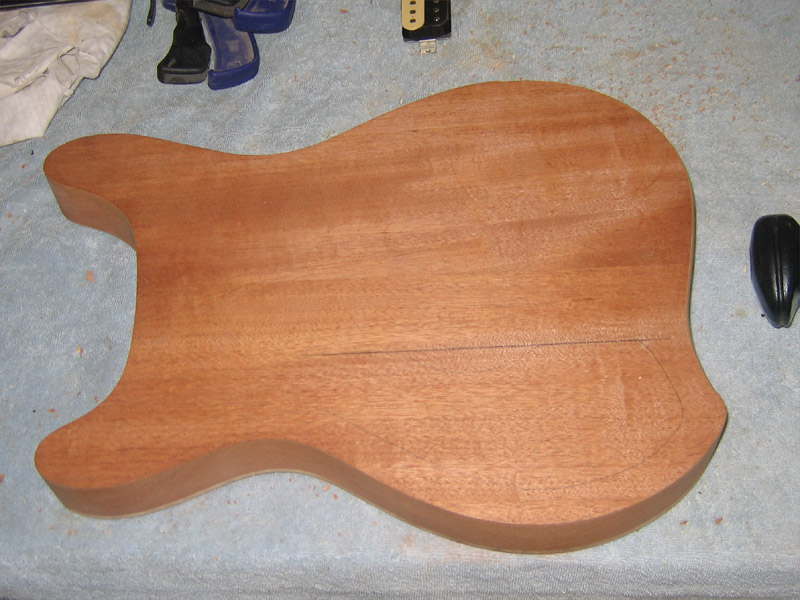
1.50" mahogany blank.
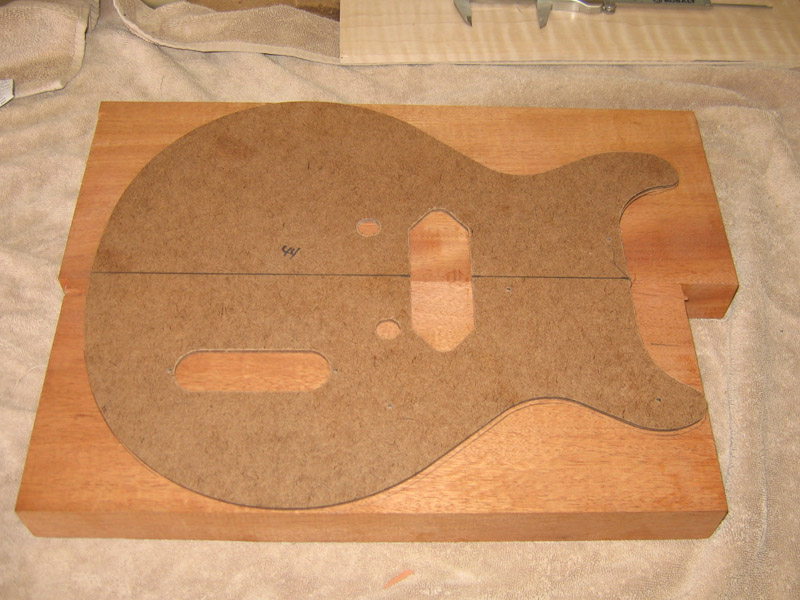
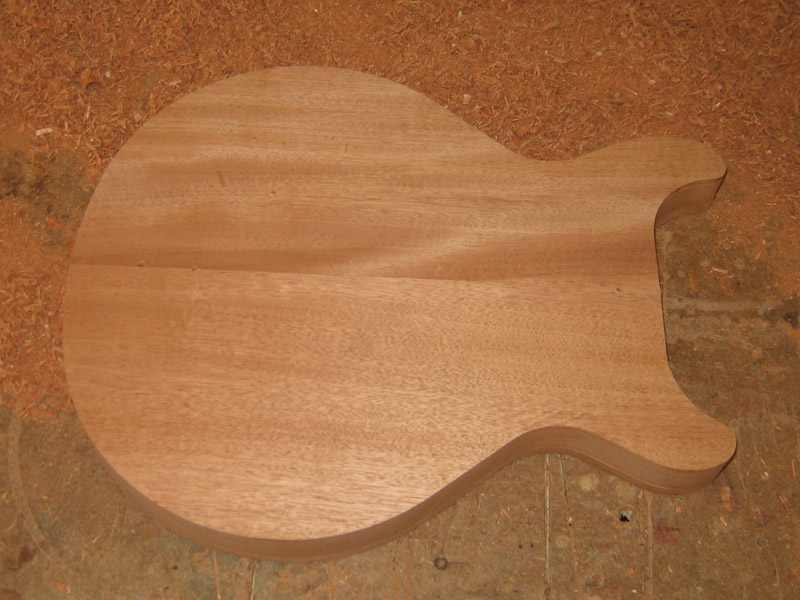
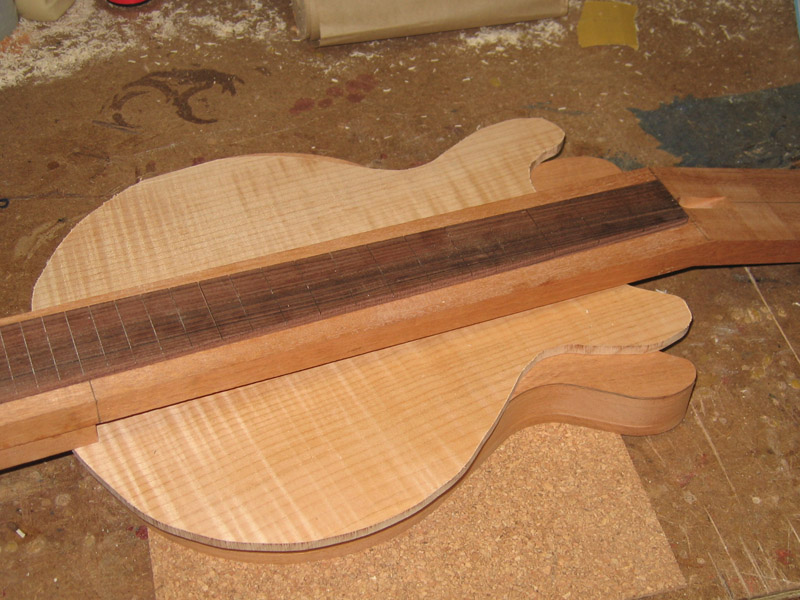
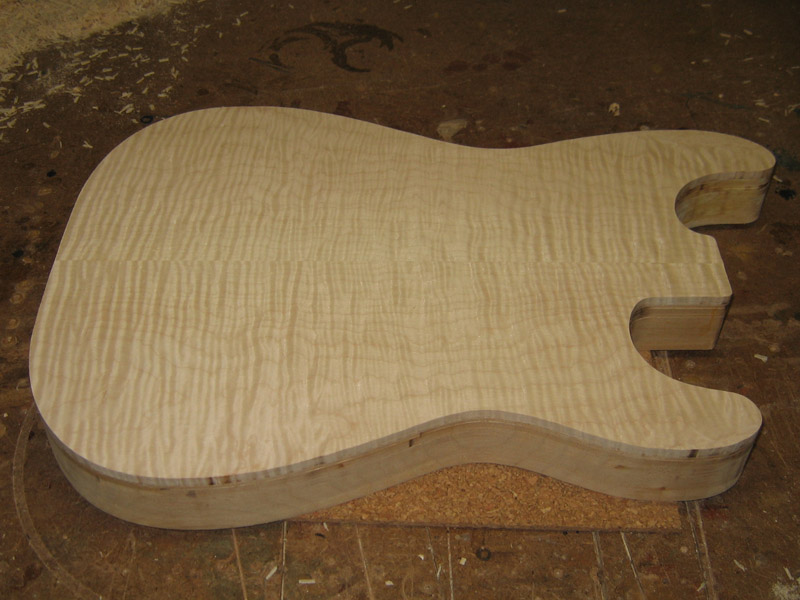
Profiled and ready for the neck pocket.
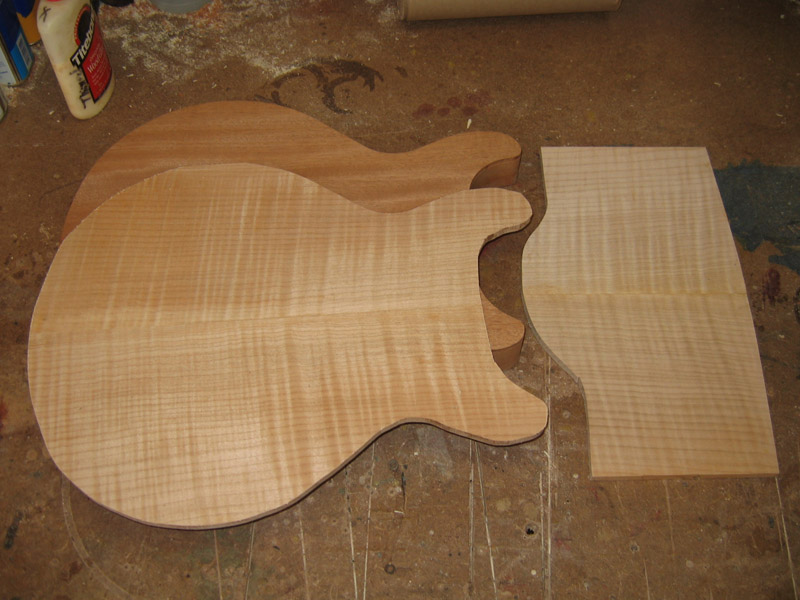
I haven't glued the top yet as I plan to set the neck first and then use the top to cover it. The cut off to the right will be used for HS veneer.
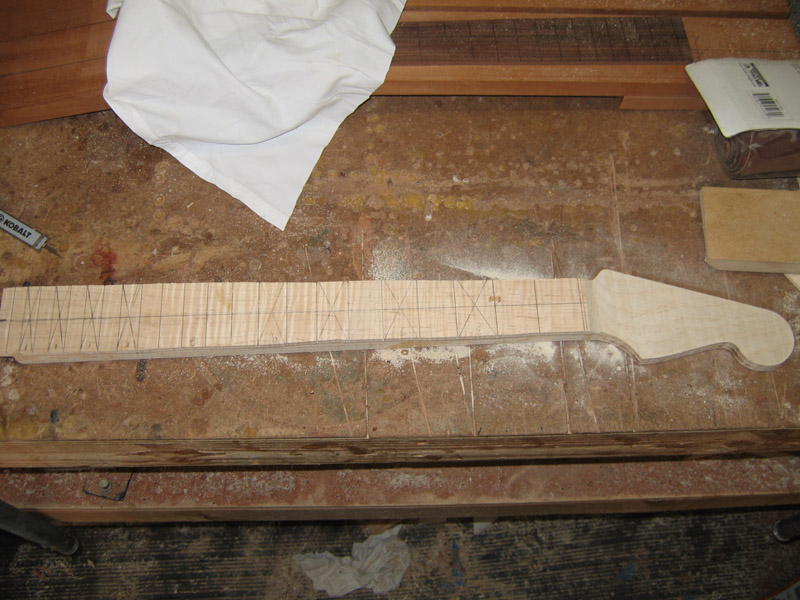
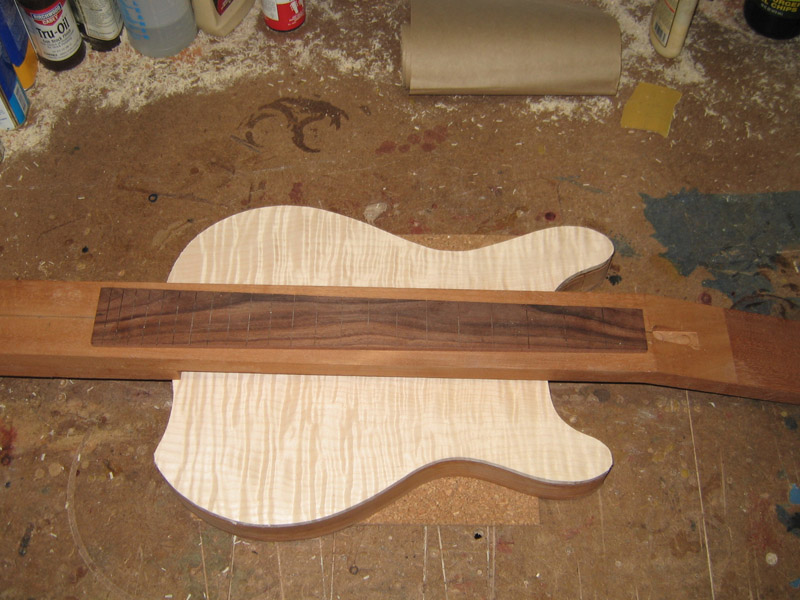
The fretboard is tapered, slotted and ready to go. I'll take my new approach on the radius and binding on this one also if it works on the other build.
Peace,
Mark
-
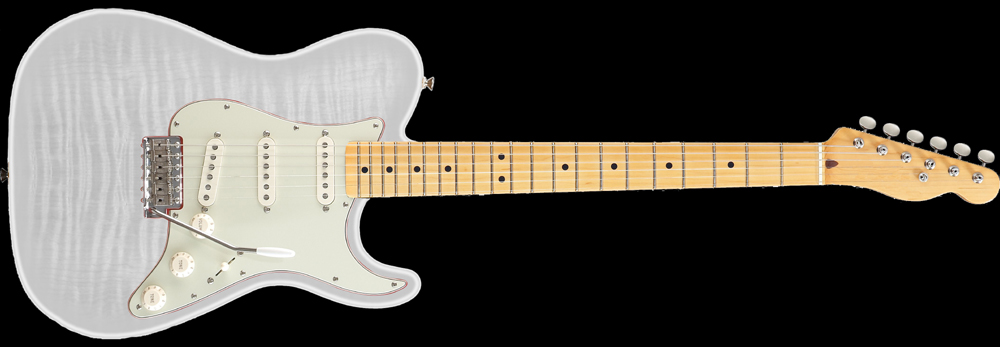
This is the finish I'm considering. I came up with this during my StraTelecaster build but didn't use it. This is the mockup from that build.
Peace,
Mark
-
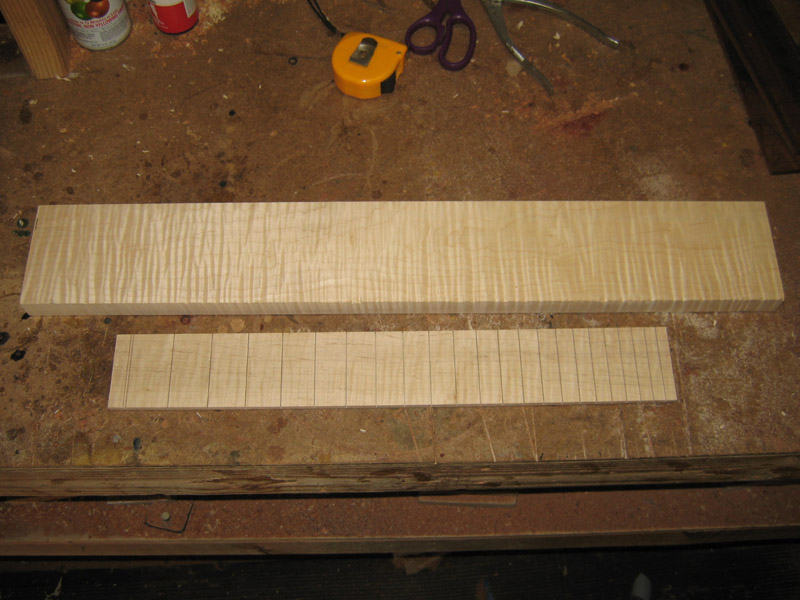
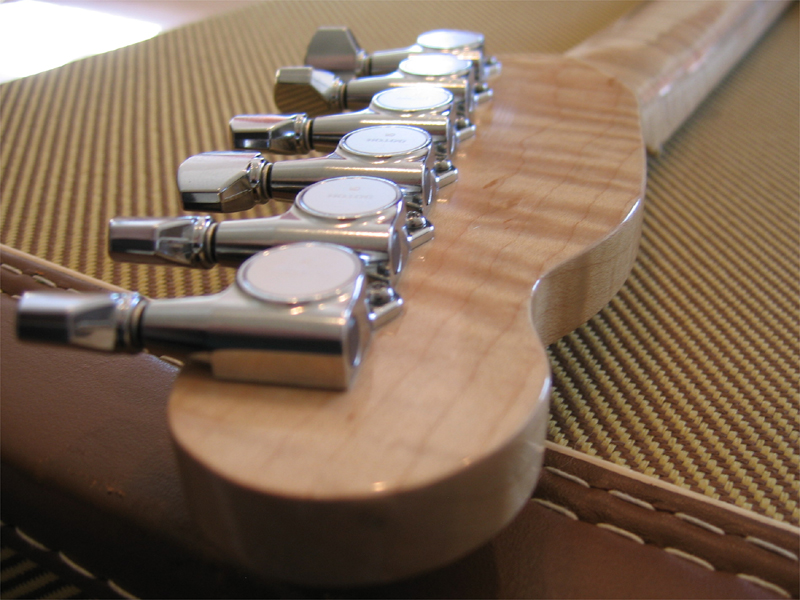
Some progress shots on the neck build. Mmmmm, flamey!
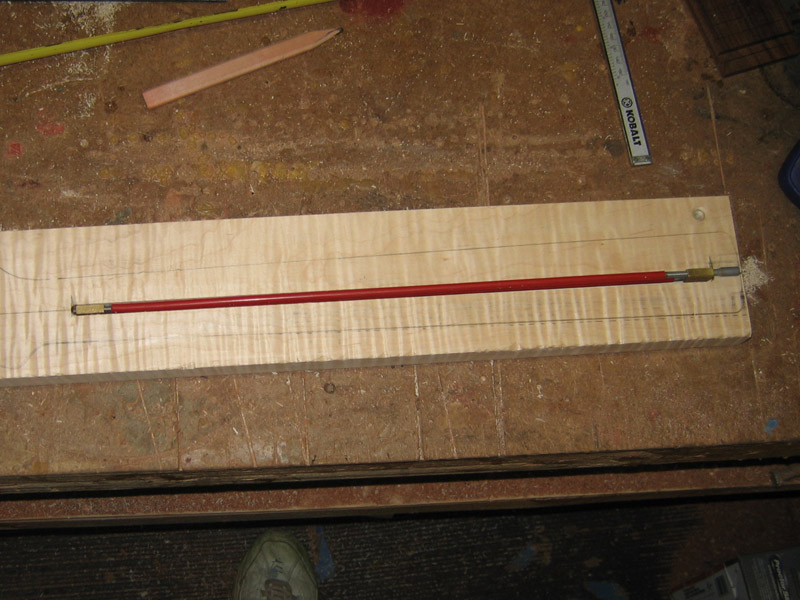
Check those truss rods!!!


-
Well, I went crazy this weekend. I've had the build bug for a long time but have been holding off until I finished current projects. I have them all done except for the prototype but it's getting closer all the time. So, while waiting on parts for it, I decided to dive in.
I haven't built a Strat since I started making my own necks. The 2 Strats I built 8 years back have StewMac necks on them. So, it's time.
The plan:
3-piece basswood body, flame maple cap.
Flame maple neck/fretboard, black dots, 2-way Hot Rod truss rod.
HSS, standard vol and tone, series/coil cut/parallel switching on the HB.
Bleached white frost burst.
I started with a 1.75" 3-piece basswood blank. I planed it down to 1.50", cleaning up the glue joints in the process.

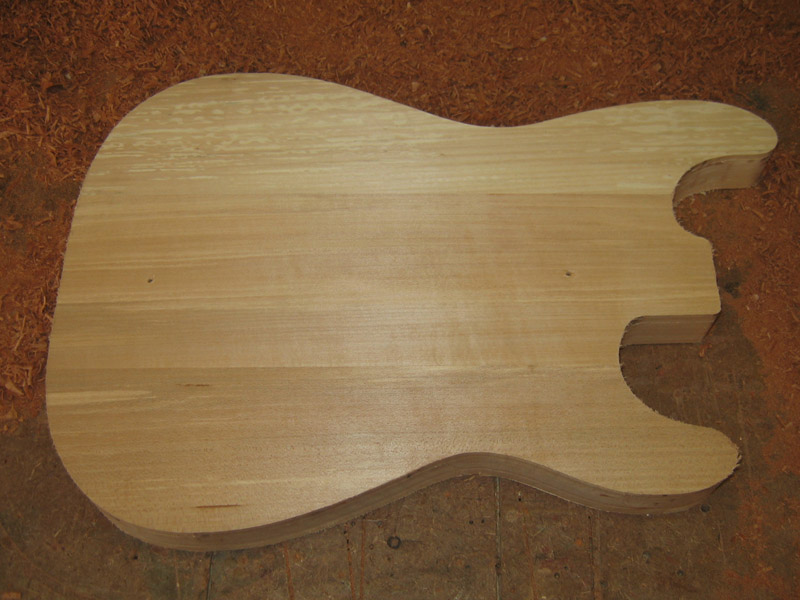
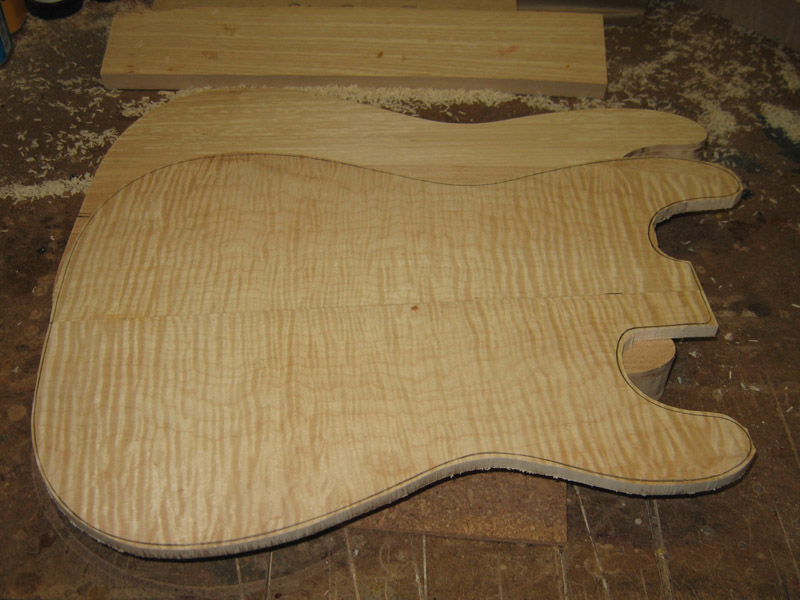
Here's the top glued up and rough trimmed. Ready for clean up in the planer. I used the same technique of taping it to the back of the body and planing the mating surface to not only clean up the glue joint, but also do final thicknessing.
Clampzilla!
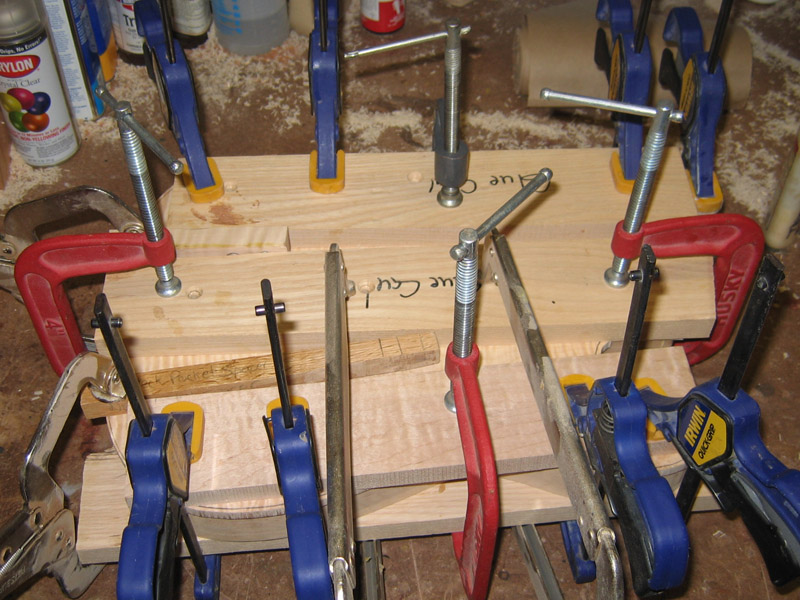
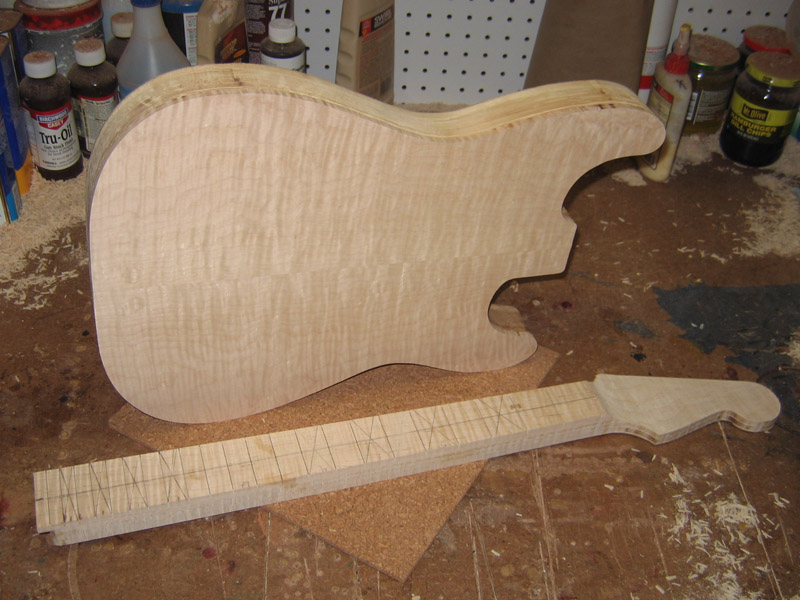
Trimmed up and ready for edge sanding and routing.
-
No pics of the process but I have the fretboard tapered and ready to glue up. I'm taking a different approach to the fretboard binding this time. I ran into issues with slot depth and sanding buildup in the slots on the last fretboard I bound...my 2011 Build Challenge.
I plan to glue the board to the neck blank, do dot inlays, do the radius, recut & radius the slots, then glue up the bindings. I can use a scraper to clean them up and avoid excess sanding at that point. We'll see how it works out.
Peace,
Mark
-
Some of you may be following the carved top prototype that I'm currently building. This is a flat top version of that design.
The plan:
Mahogany body with flame maple cap, faux binding.
Mahogany neck set at 3 degrees, Bolivian rosewood fretboard with flame maple binding, pearl dots.
2 HBs, Vol, Tone, 3-way switch.
Not sure on finish yet.
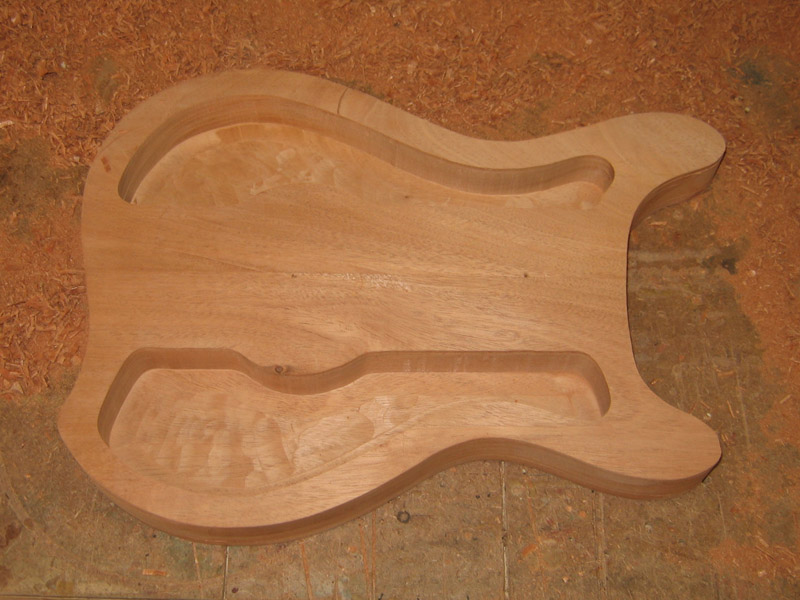
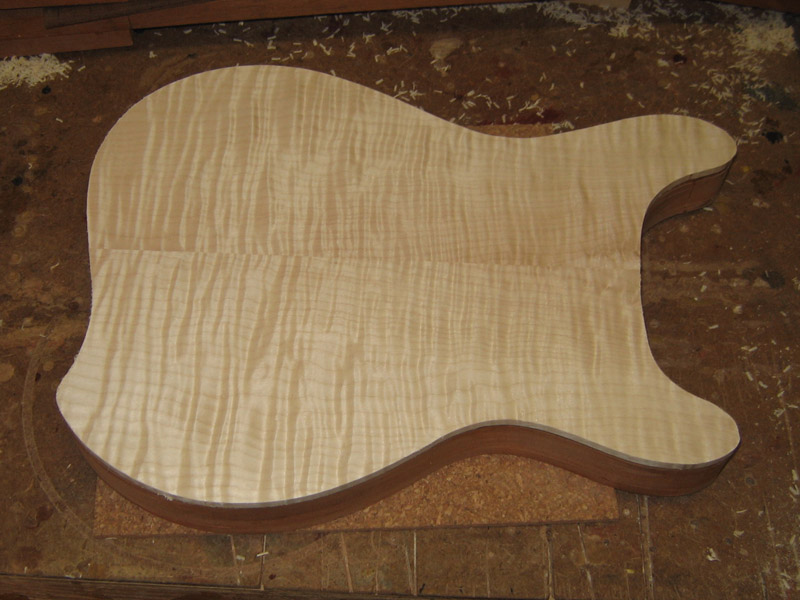
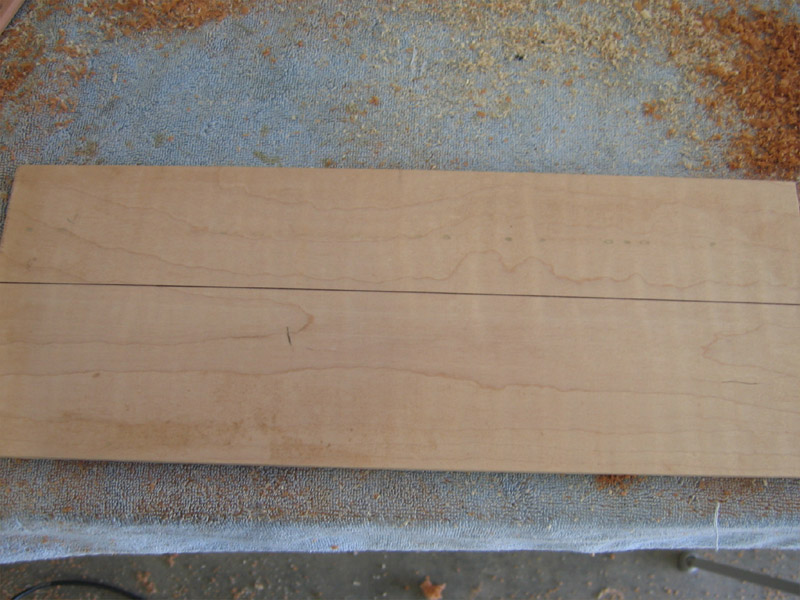
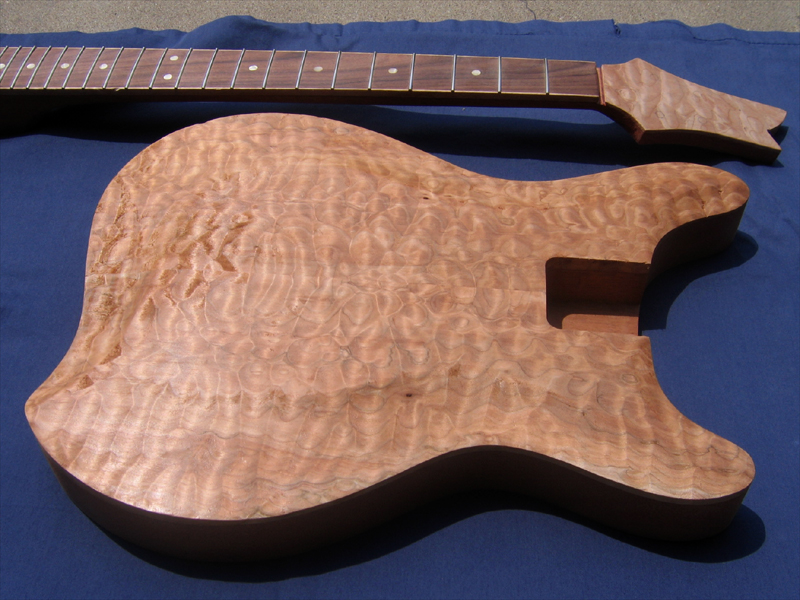
I started with a 1.500" thick Peruvian mahogany blank that I stored up last fall. This along with the extra necks I glued up during the first protoype build make this process so much faster.
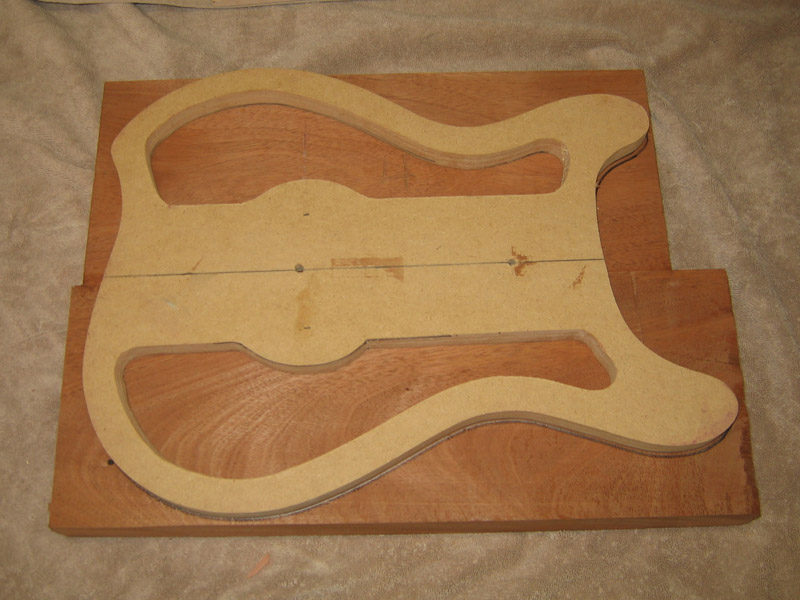
All chambered and ready for the top.
Here I have the top glued up, rough cut and ready for clean up. The cut off at the right will be thinned out and used for the headstock veneer. I'll probably bookmatch an outer edge where the figure is strongest.
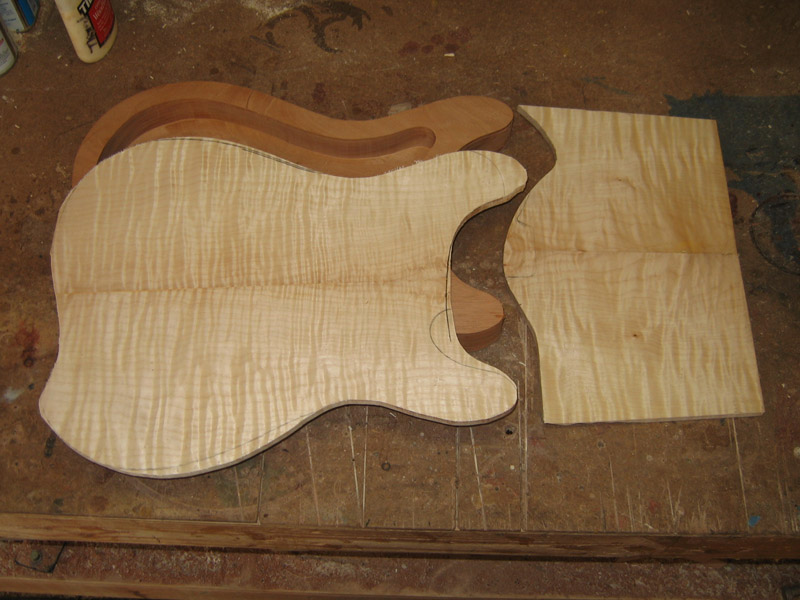
To clean up the glue joint on the mating surface, I tape the top on the back of the body and run it thru the planer. This gives me a nice, flat glue suface. I also do final thicknessing at this point so I only have to take a whisper off the bookmatch side...just enogh to clean up the glue joint.
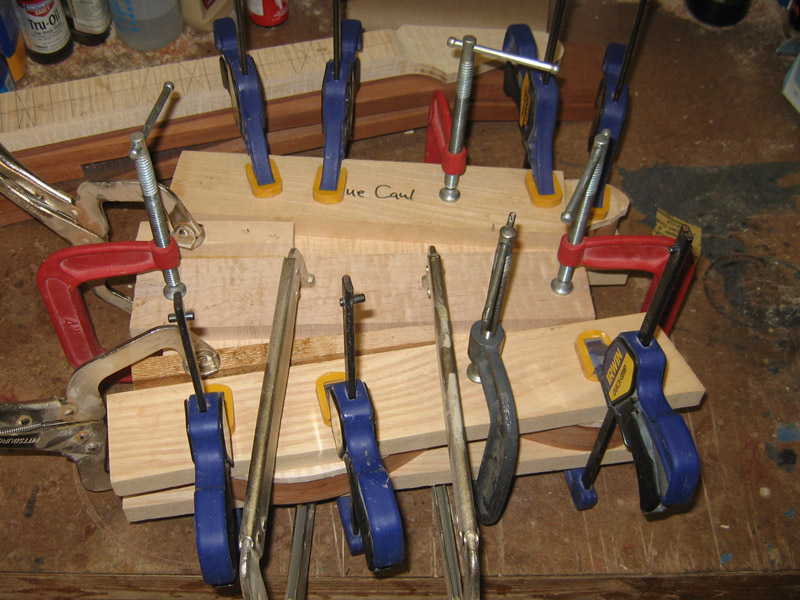
Clampzilla!
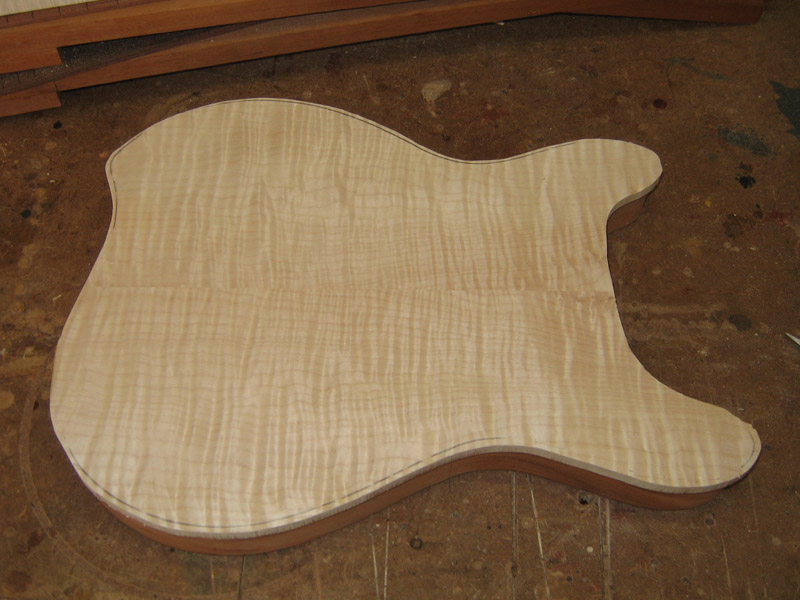
Glued up, trimmed and ready for edge sanding and routing.
-
Not much to report today. I drilled the paths for PU wires, and the bore for the output jack. I'm waiting on the bridge to arrive before I glue in the neck so I can check the angle while it can still be corrected. I hope to see it tomorrow or Wed.
Peace,
Mark
-
Thanks. I was wondering the same.

Peace,
Mark
-
Another wash coat on the top to seal it up.
More tomorrow.
-
Pickups are cut to depth.
I did a bit more blocking and planing on the carve, evened out some high spots...I hate to go back to the plane at this point, but sometimes you have to.
The headstock needed a bit of blocking too...it's ready to drill. I need to do that before gluing in the neck.

-
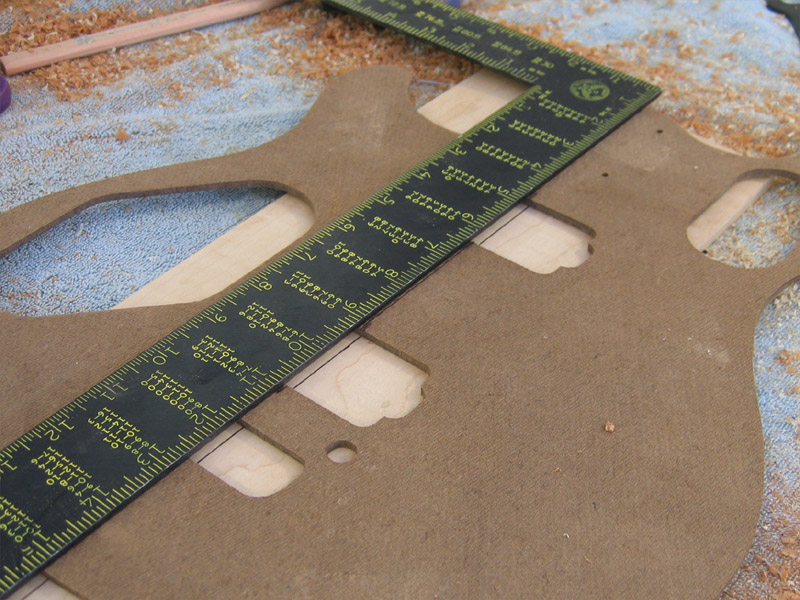
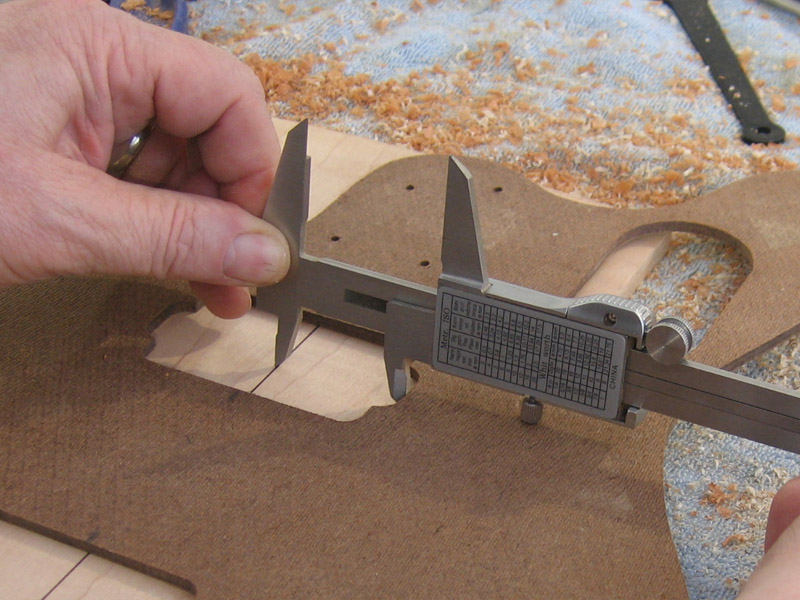
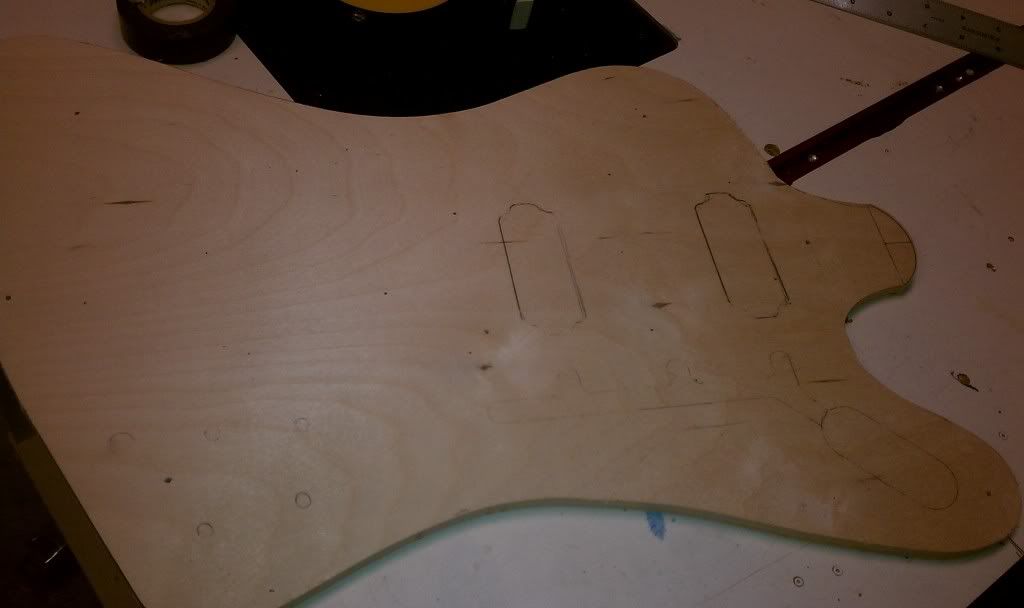
Then using a straight edge, I drew out the center line for the entire template.
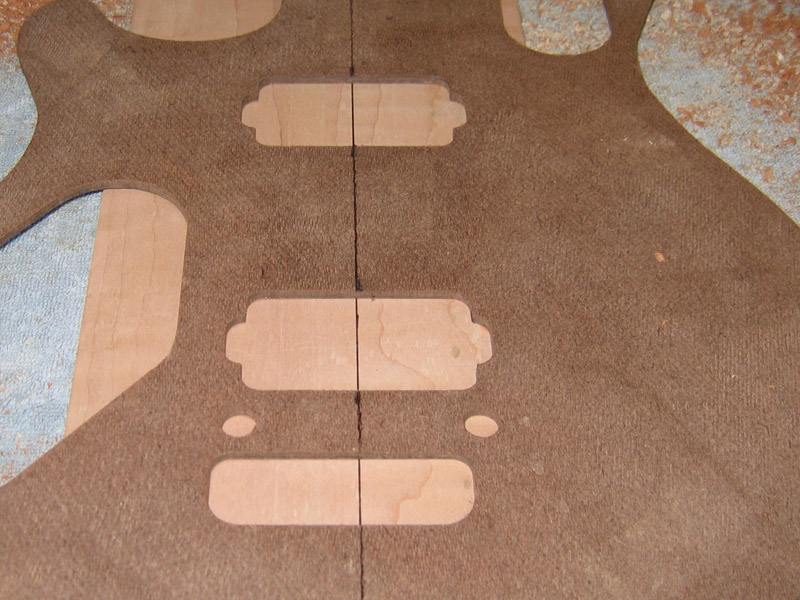
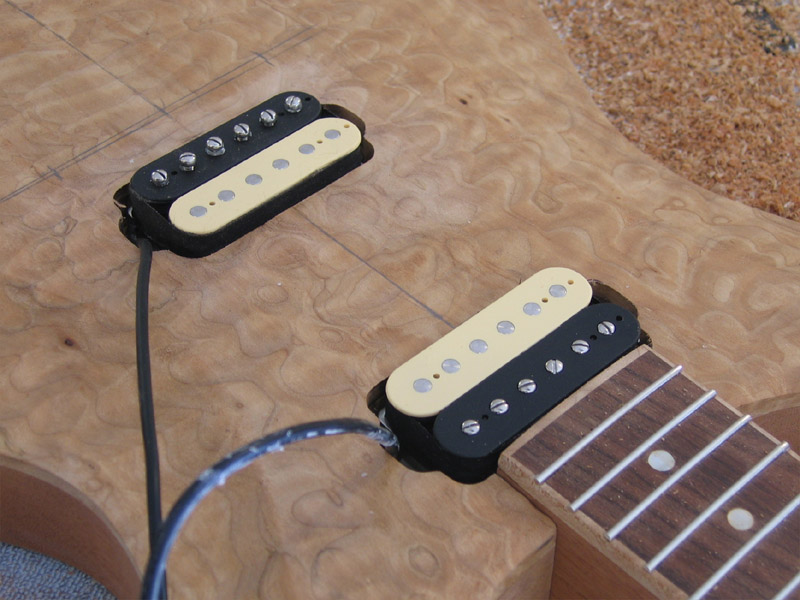
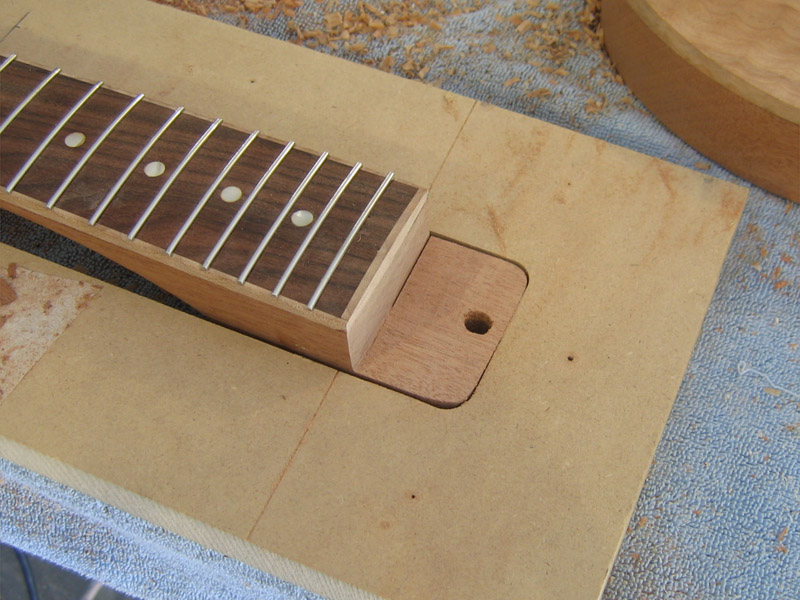
Before routing the PUs, I needed to trim down the neck tenon so I could make the proper depth checks with the PU.
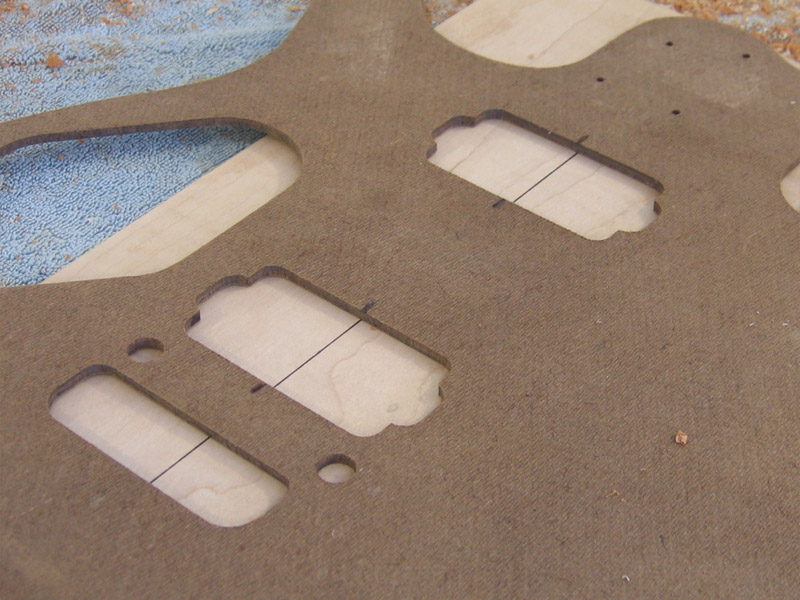
Because I wanted a different spacing between the PUs than the Wolfgang has, I had to stick the template down twice...once for each initial pass.
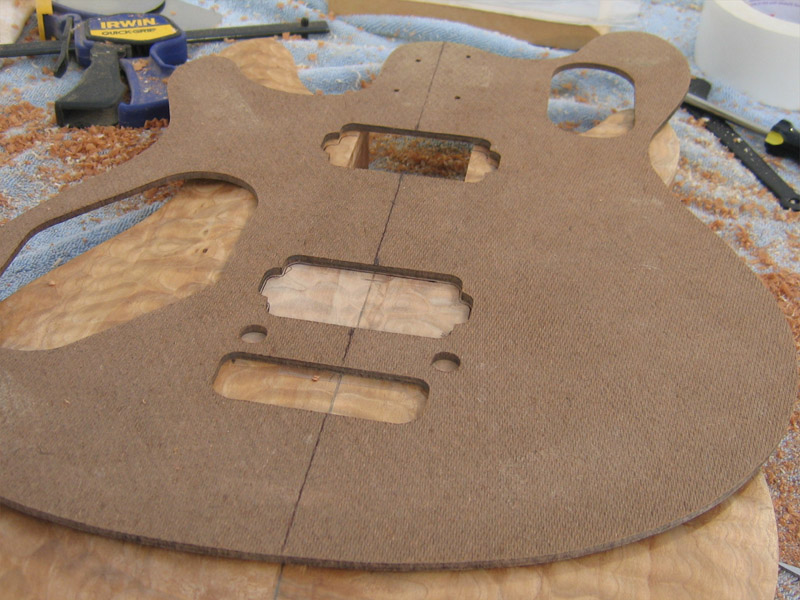
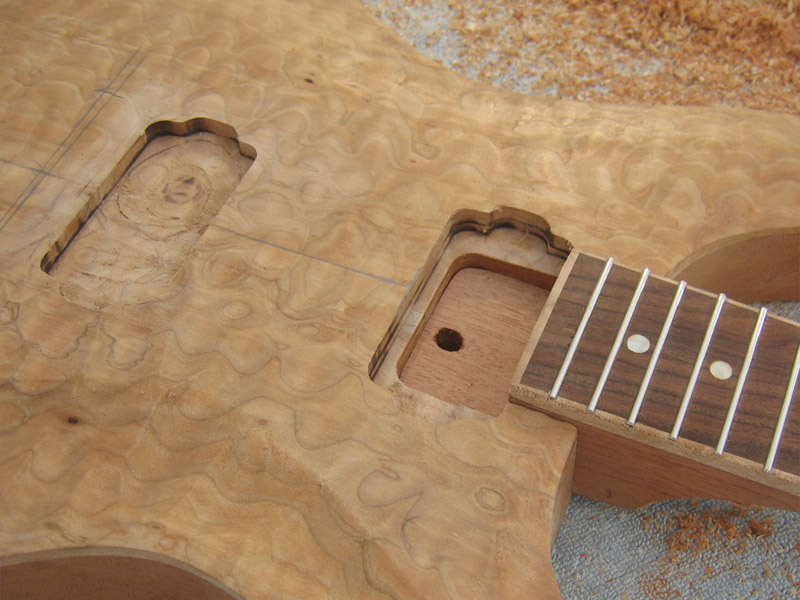
Here it is with the neck set in place, after the first two routing passes.
-
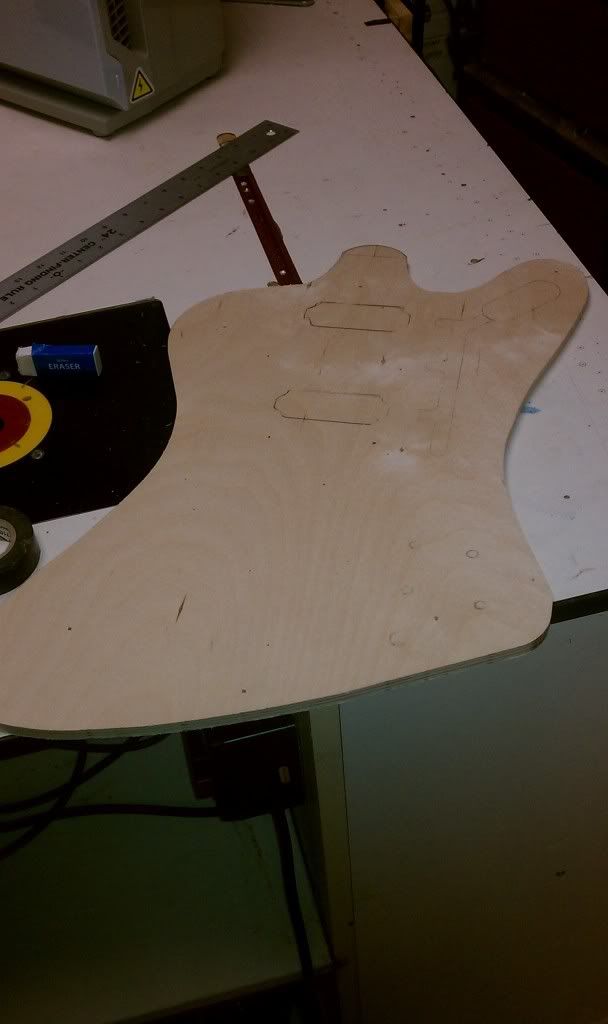
Next I wanted to get the PU routed. I'm using the HB routes from my Wolfgang template. It's an odd shaped body and finding the center line was a bit tricky. I came up with a way that can be used on pretty much any template...many ship without center lines marked. Still don't understand why.
I started by drawing a straight line down a piece of scrap maple. The line's relationship to the edges isn't important...it just needs to be straight.
Next, I used calipers to check the width of the HB routes. Then, set the caliper to half this amount. I laid the template in place and eyeballed the center of the routes. Then used the caliper to check the distance from each edge until they where centered.
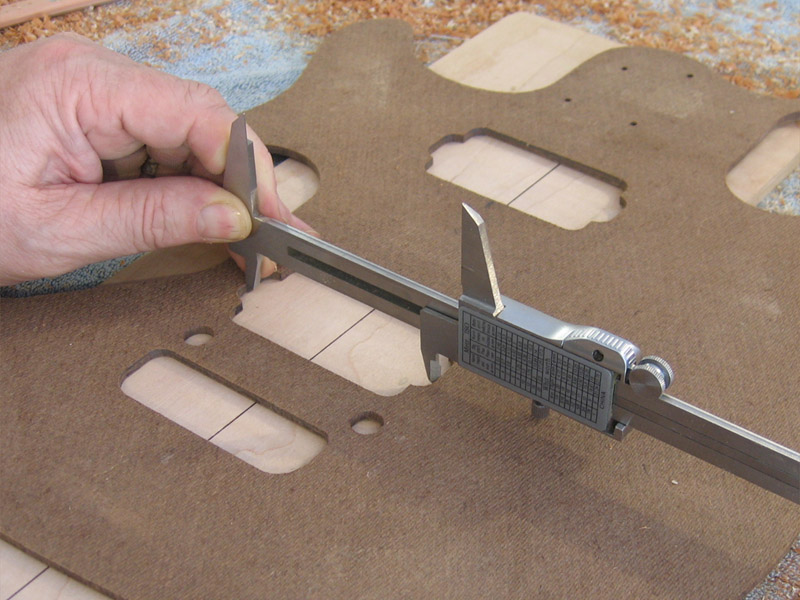
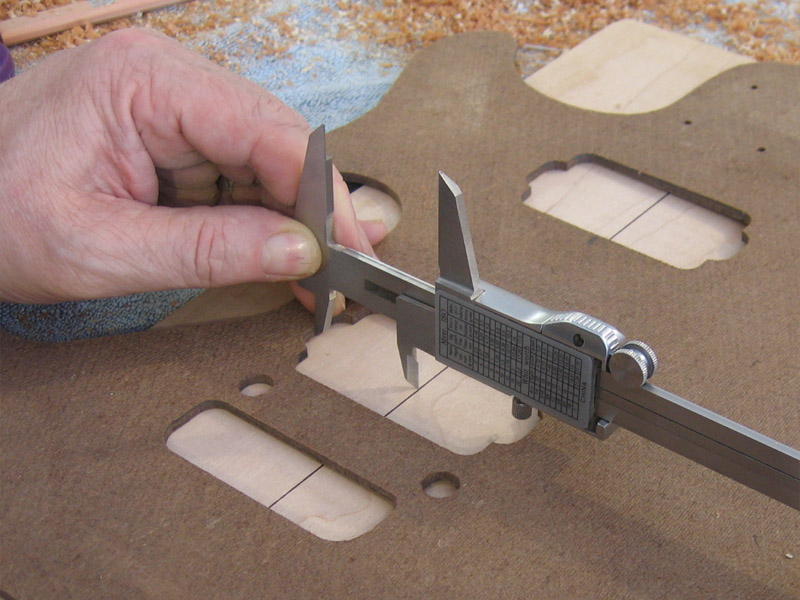
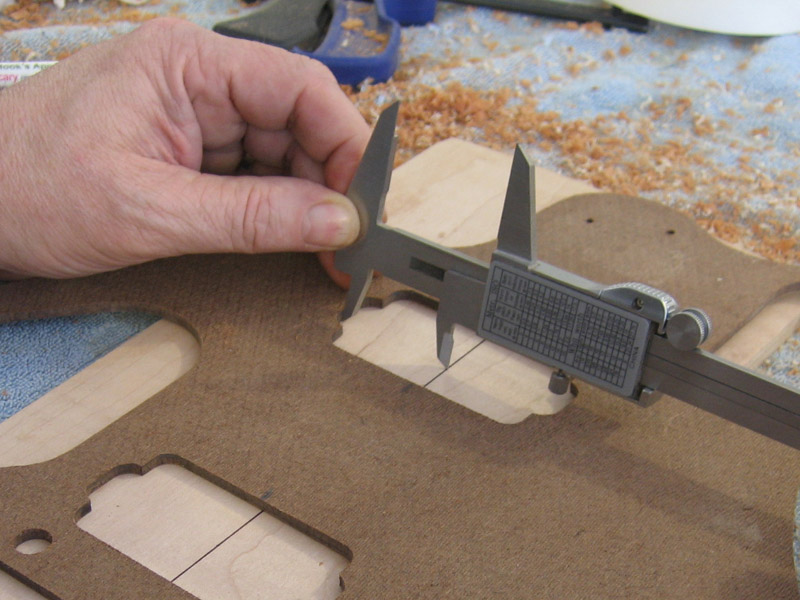
Then I transferred the marks to the edges of the template.

-
Well, I managed to get a few days vacation, coupled with a long weekend due to Memorial Day, I have 5 straight days off! So, the first day, yesterday, was a bust. No power since 8pm Wed night when severe storms blew thru. It came back on late in the day Thur, so I didn't get anything done. It was kinda nice just listening to the breeze and sipping a cold beer...no humming, buzzing, ringing, chiming going on. Just silence for the most part. Nice.
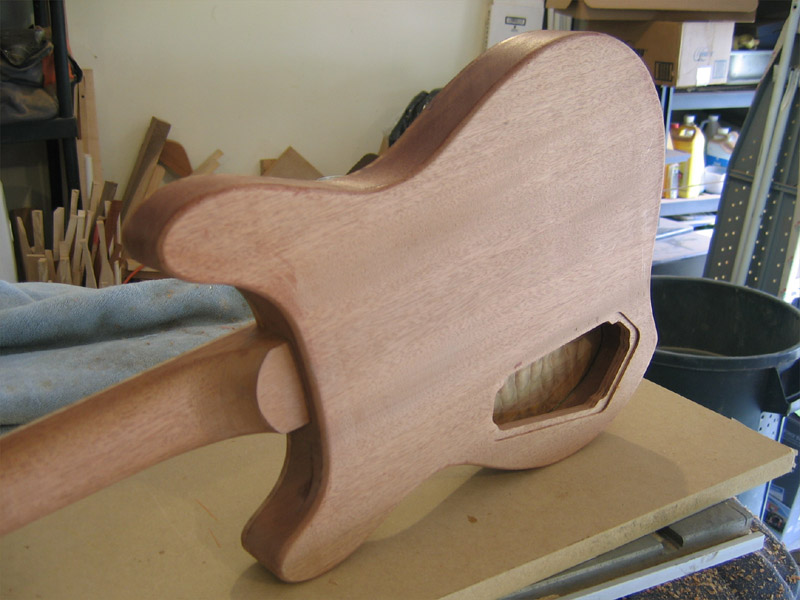
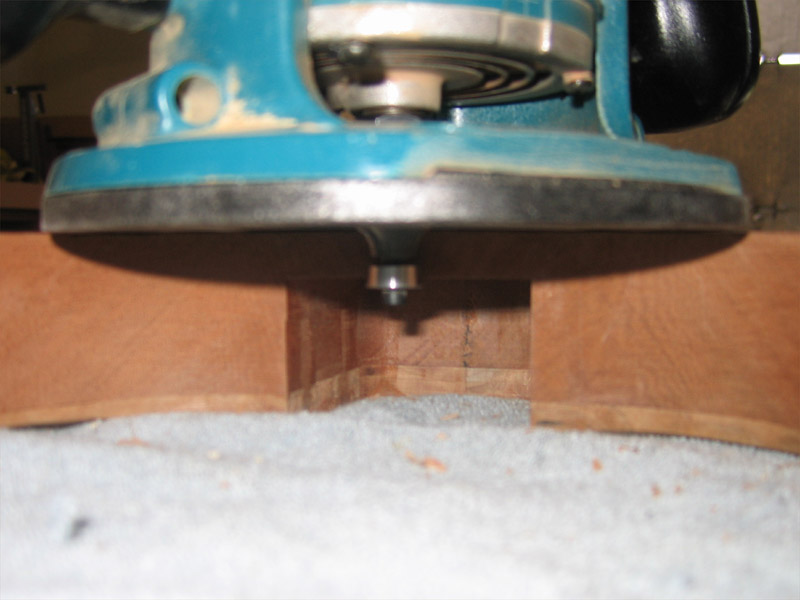
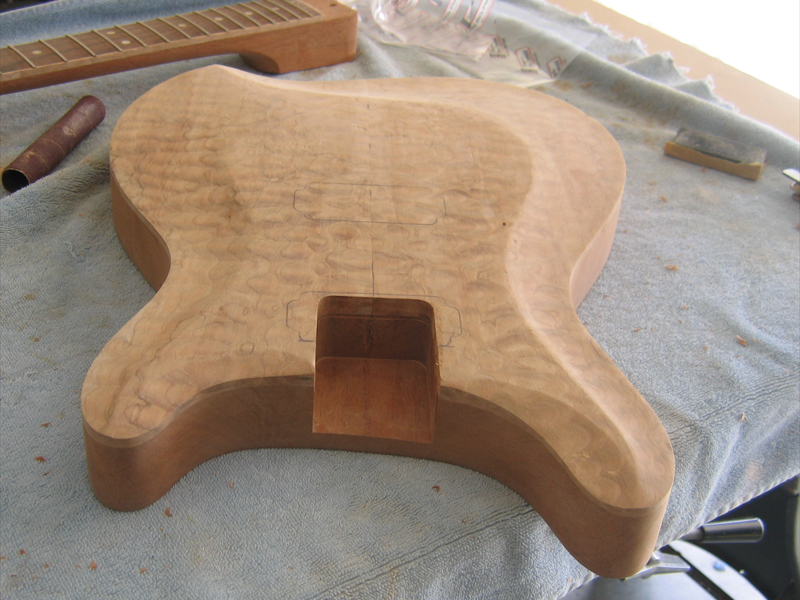
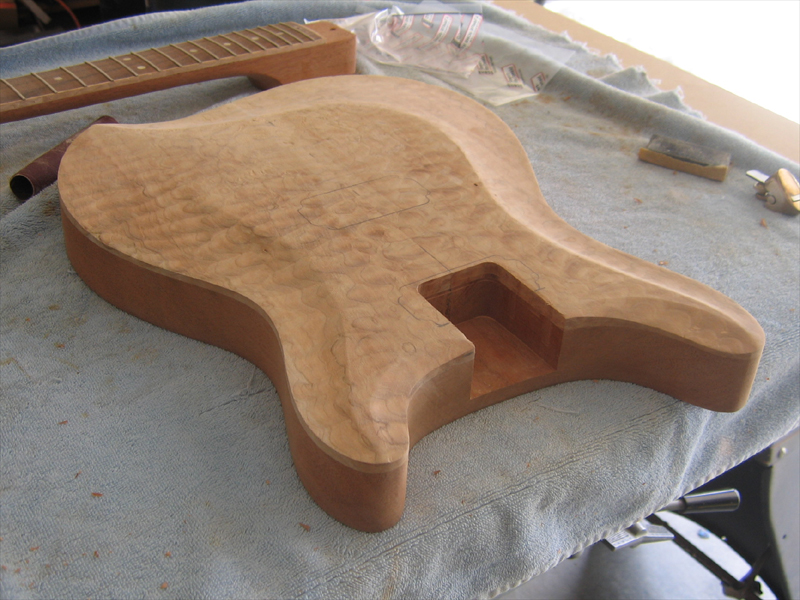
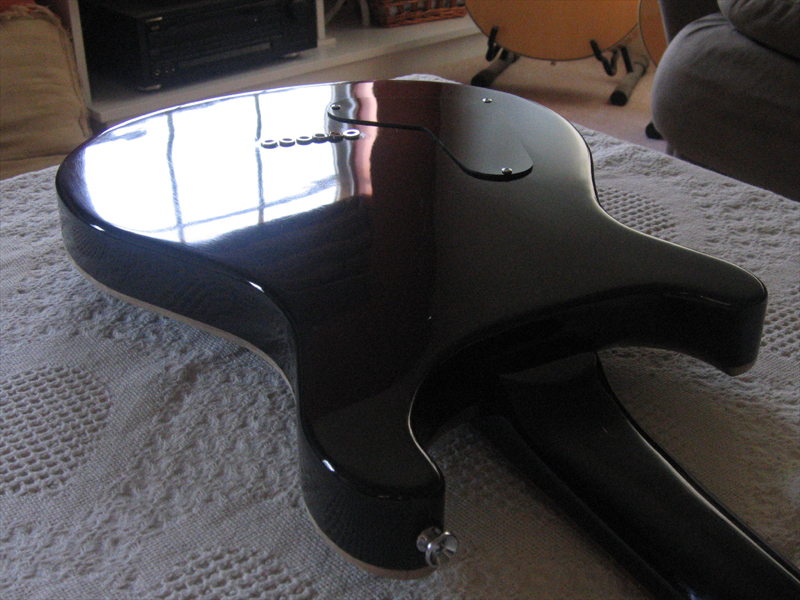
Power's back on today, so I got to work. I started by routing the round over on the back.
Made sure to check the bearing at the neck pocket...okay.
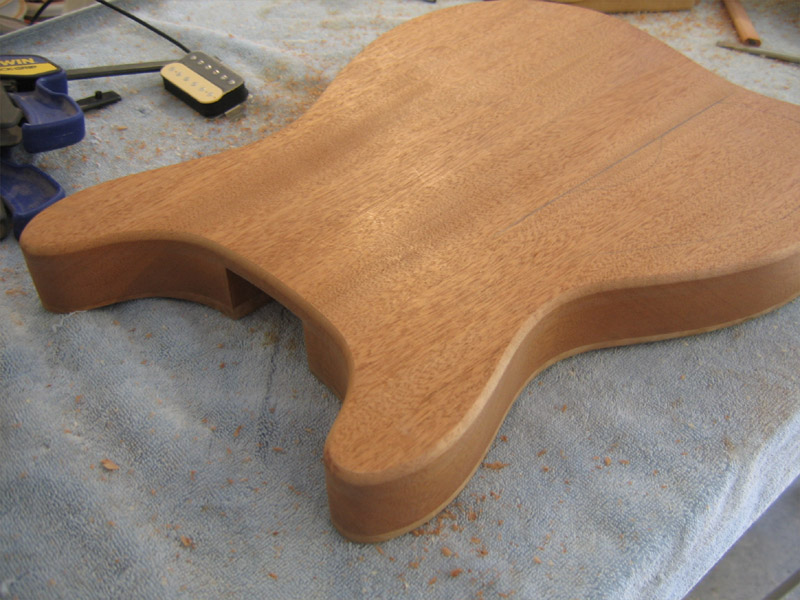
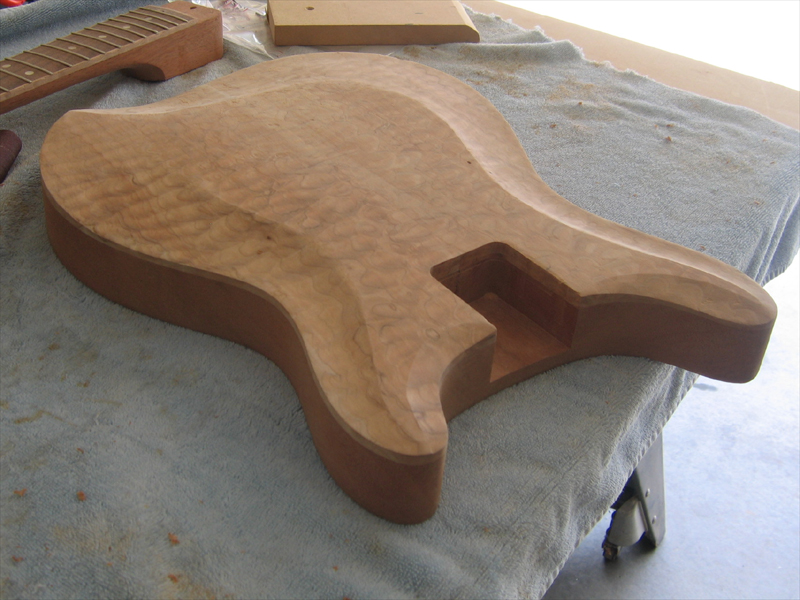
Next, it was the control cavity. I used a template set I already had. I turned the cover so I could get the control layout I wanted...sort of upside down from how the cover is normally used. I cut the main cavity...
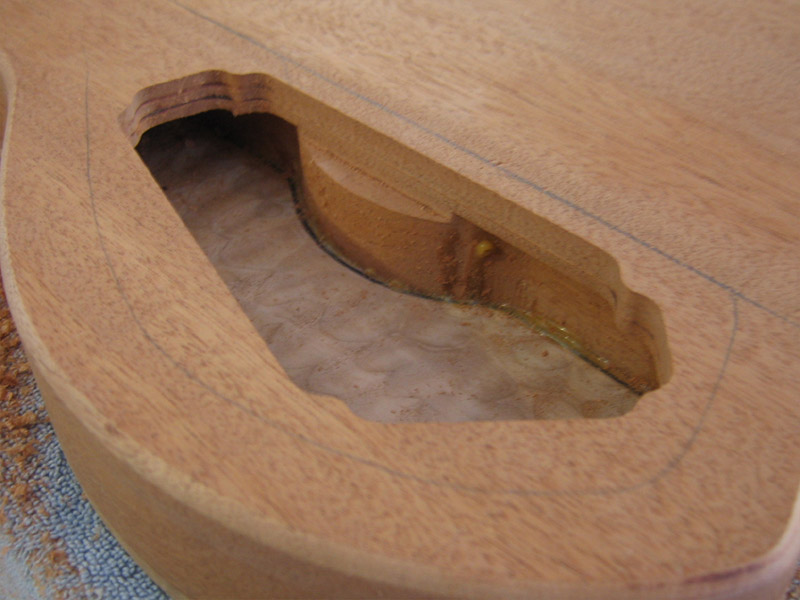
Then the lip for the cover. I went just a hair deeper than I needed knowing that finish buildup would bring it back flush.
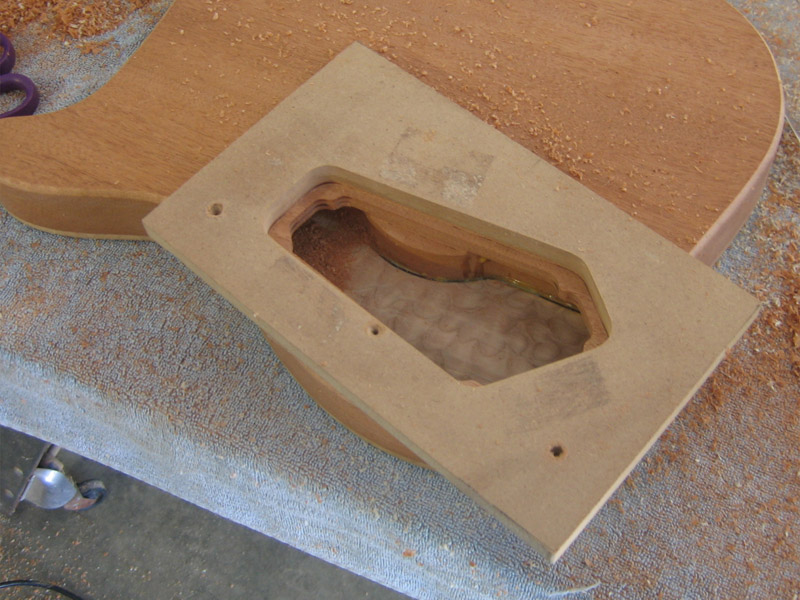
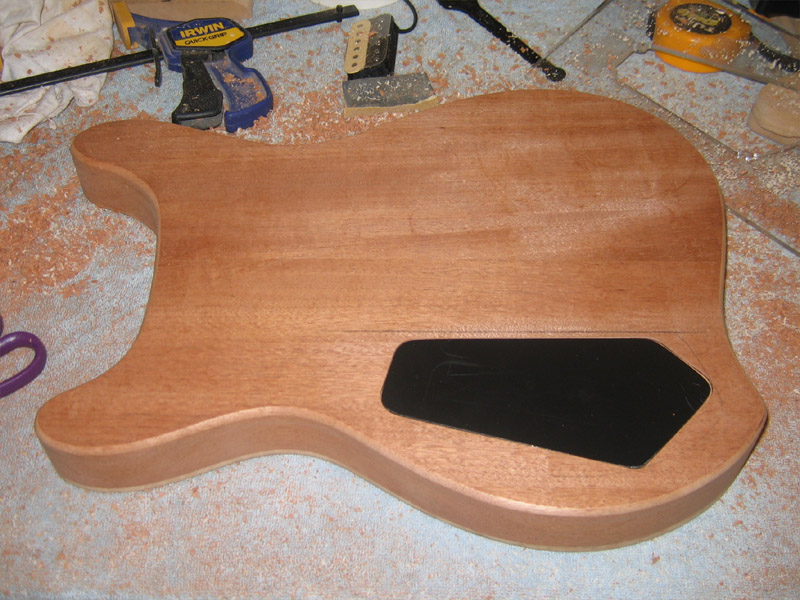
Done.
-
Post away...the more, the merrier.
-
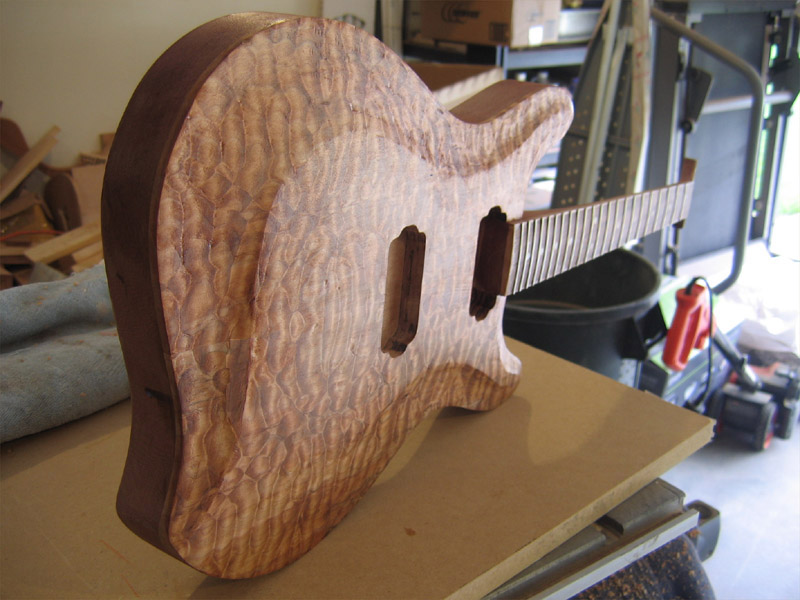
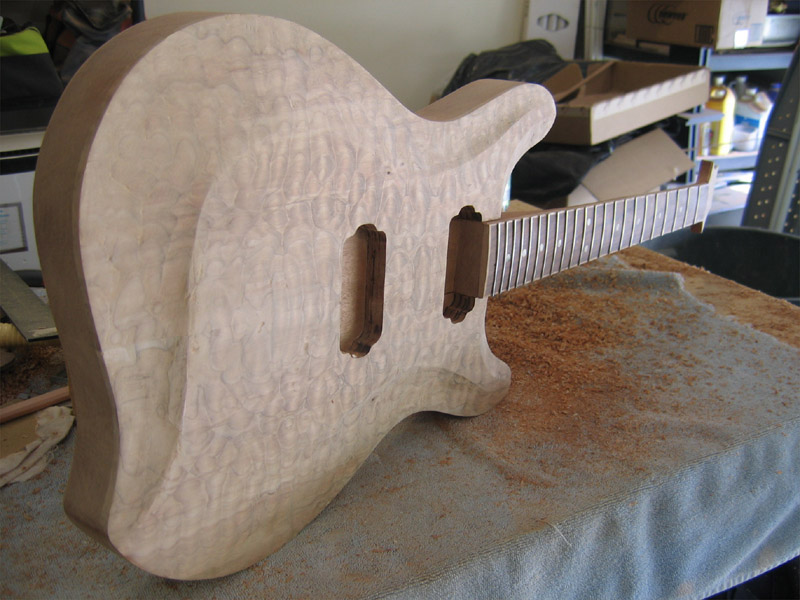
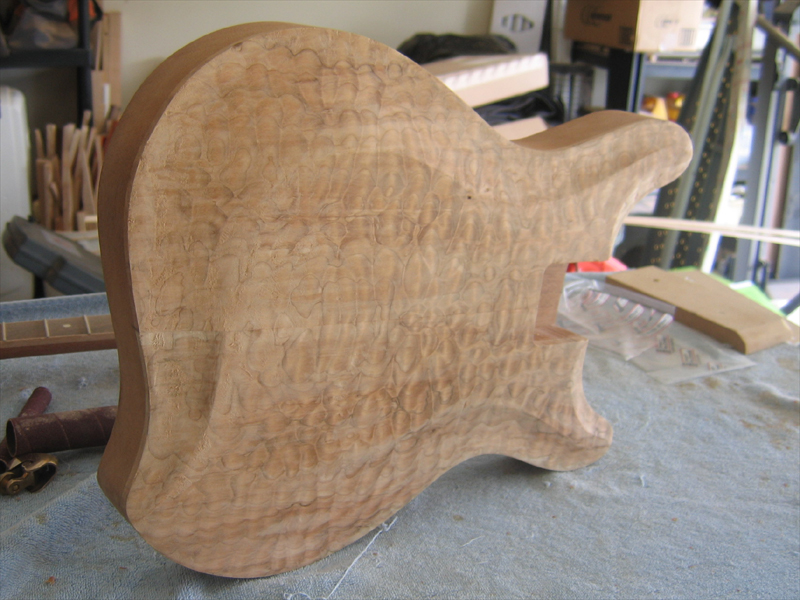
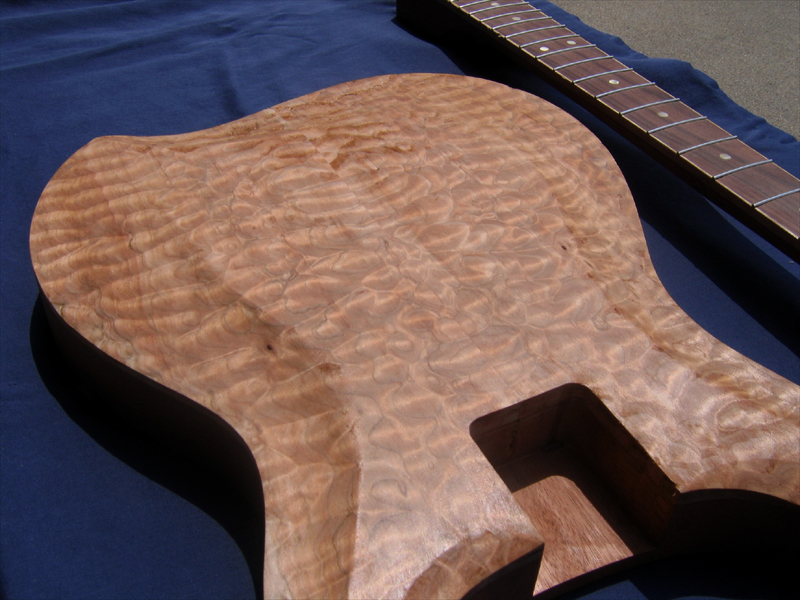
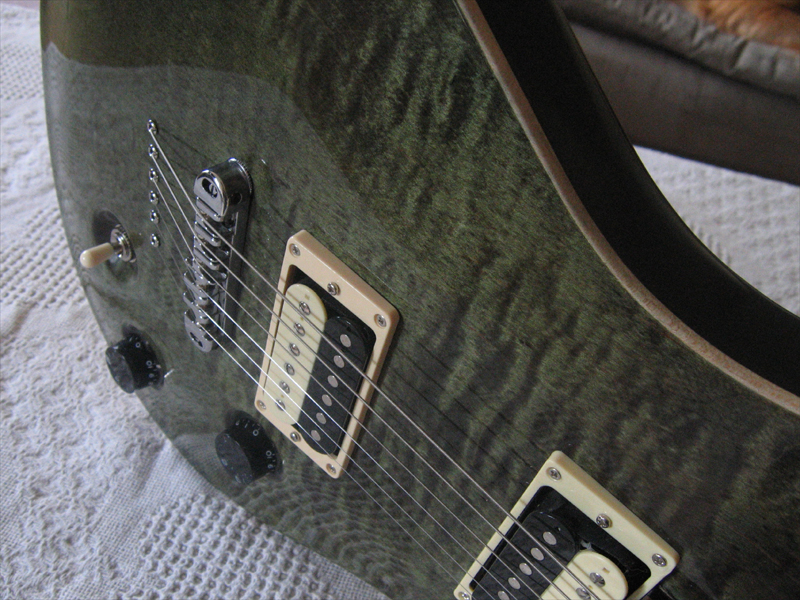
I shot this as the sun was starting to set. The figure is back with a vengeance.
-
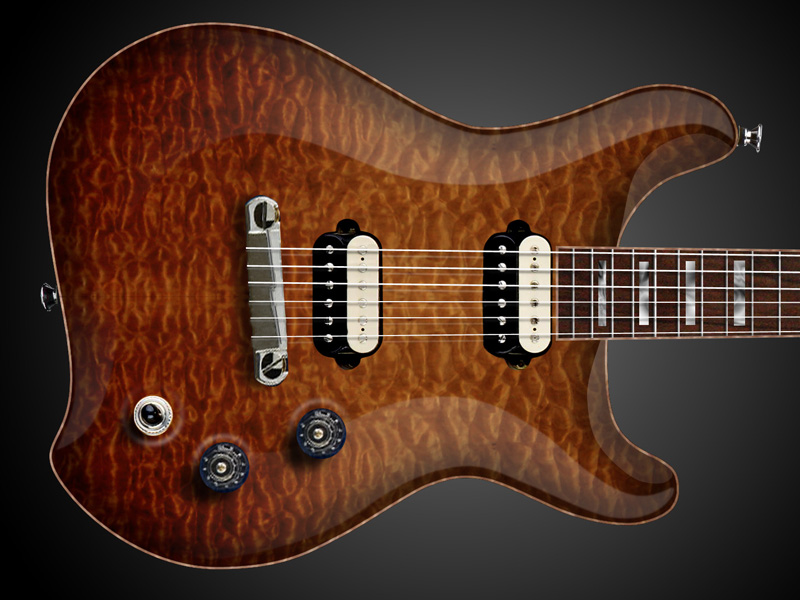
After seeing the natural beauty of the quilt again, I've decided to go with an amber color and a subtle burst to help the faux binding pop. This is a bit more orange than I want but it's close.
Peace,
Mark
-
This is the last of my unfinished builds. I wrapped up my 2011 Challenge build, the purple maple and alder Tele and my PRS Custom 22. Now it's time to focus on this one. I haven't posted on this one since Oct of last year.
There's a lot to be said for staying on task and getting things done in a timely manner, but there's also a great bit to be said for walking away, refreshing your perspective and showing a little patience. Coming back to this build after several months, I have a whole new outlook on it and a renewed excitement for the project
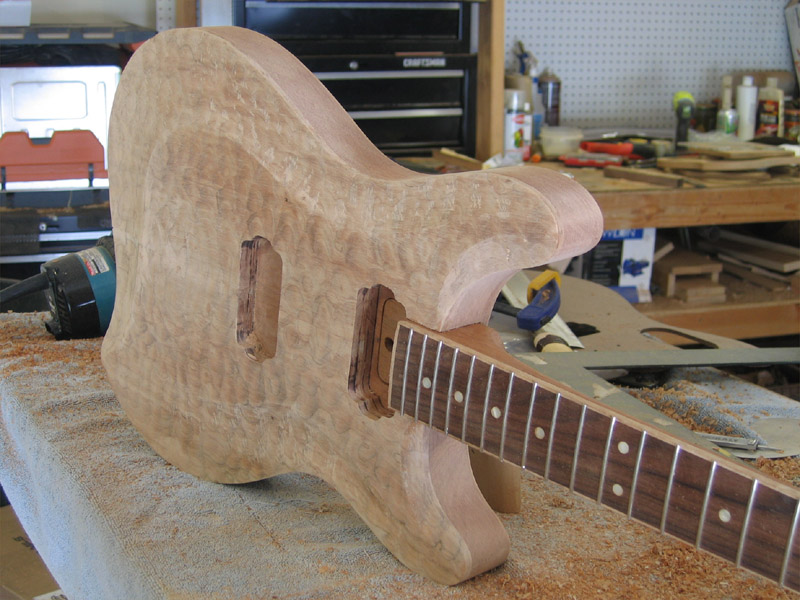
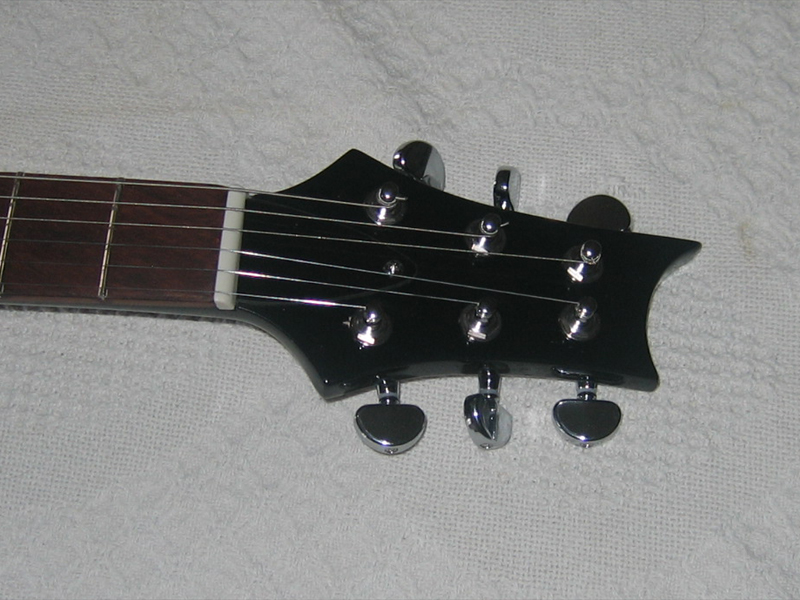
Since my last post, I have actually done a bit of work on the neck, It's fretted, leveled and dressed. I just need to drill it and open up the TR access. Here it is with the body pretty much as it was at my last post.
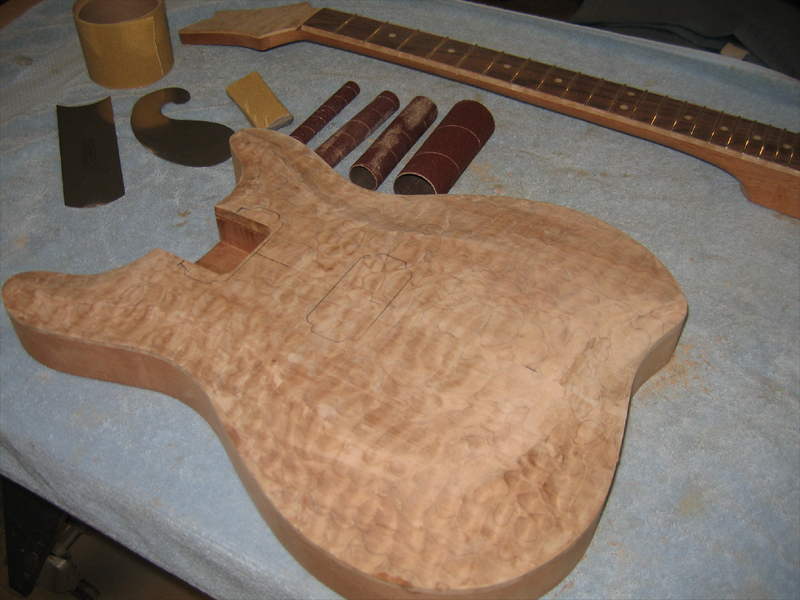
I started refining the carve with a collection of sanding tools, scrapers and my Ibex plane. I focused on the outer portions of the carve, making sure to remove all of the planing marks and deepen the areas that needed it.
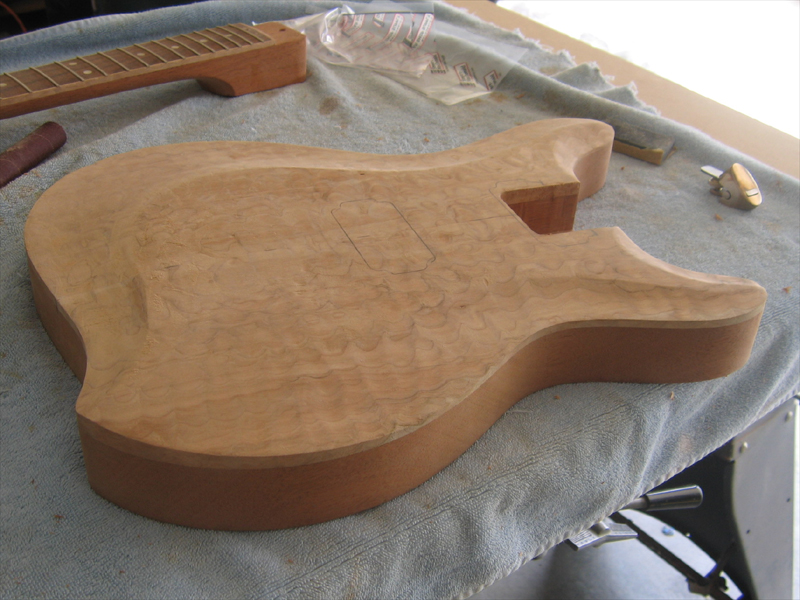
Then, I tool a piece of MDF with 80 grit and blocked the flat part of the top. This puts a crease detail back into the edges of the carve by flattening them. It also shows me where my shape may be off by the way the sawdust gathers in the recessed areas.
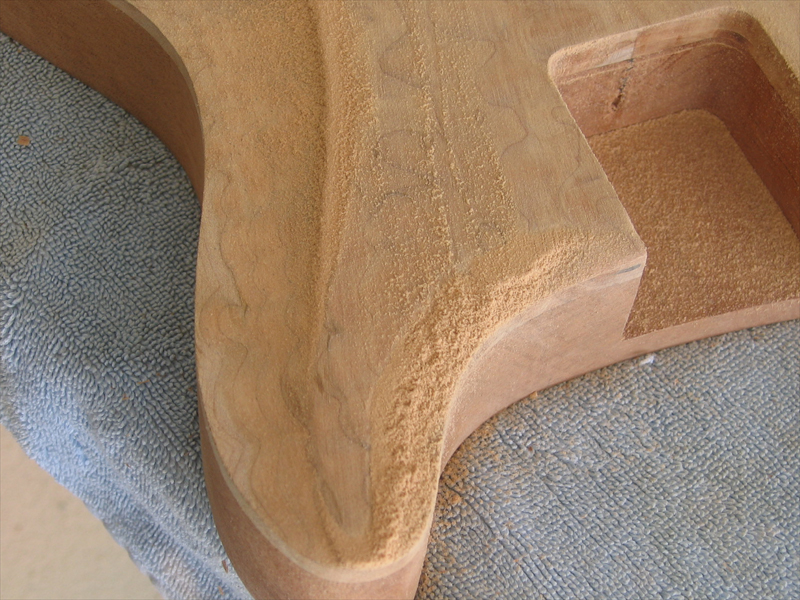
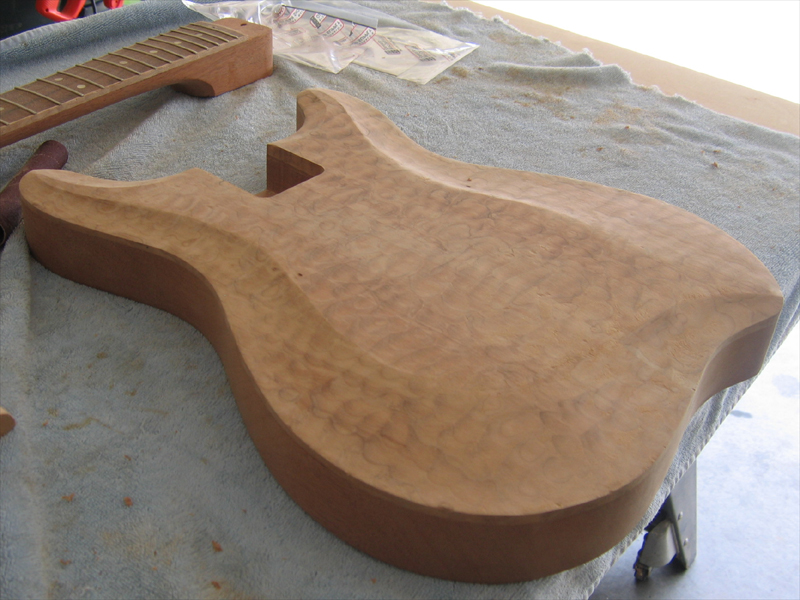
I then took a pass with scrapers to clear and open up the grain again...starting to look like the quilt I started with.
Here they are with a wash coat of EM6000 on them to seal everything up and serve as a guide coat for final sanding....it will all sand away but it seals things for now. The dark spots in the bridge area are still wet...they dried light like the rest of the top.
More soon.
Peace,
Mark
-
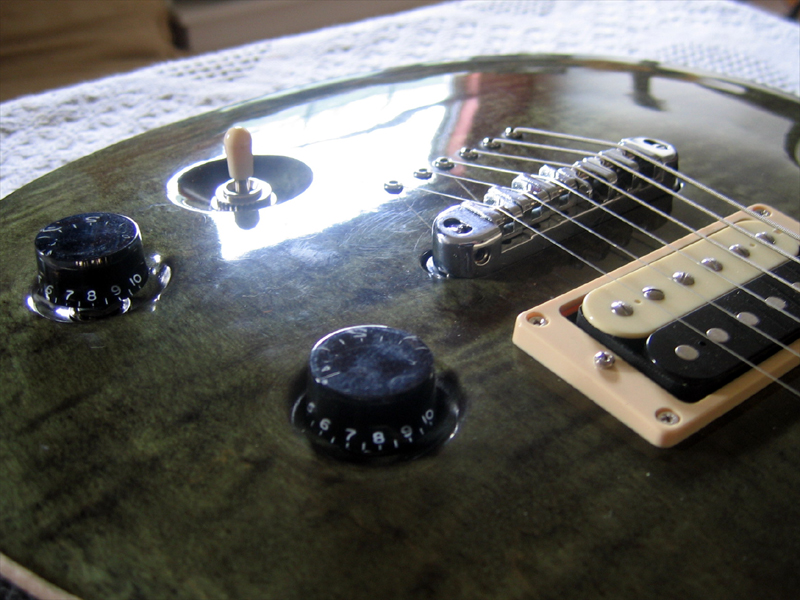
Following the adage that "if we can't hear it, it didn't happen", I put some sound samples together. I made clips of all PUs but put them on a web page instead of listing them all here.
I'm not sure what brand these PUs are. Two wire, no frills zebras. I bought them off eBay for $20. I'll be upgrading soon. Played thru a Fender Blues Deluxe Reissue clean channel with a little help from a Pod X3Live. SM57 tight to the grill, slightly off axis.
Peace,
Mark
-
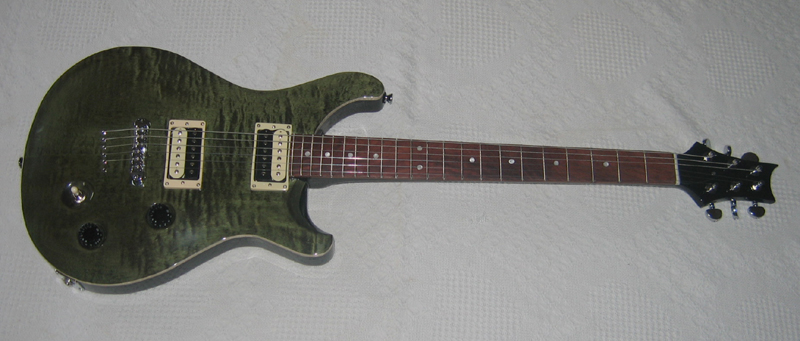
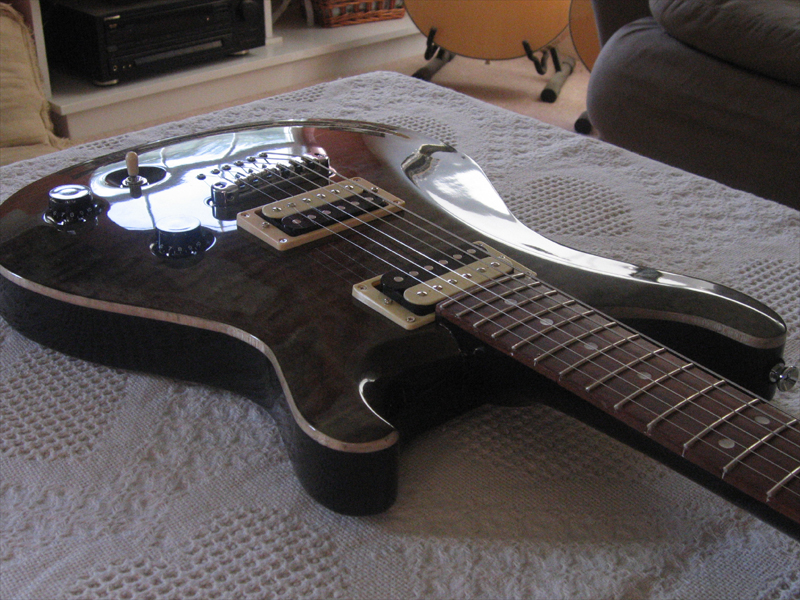
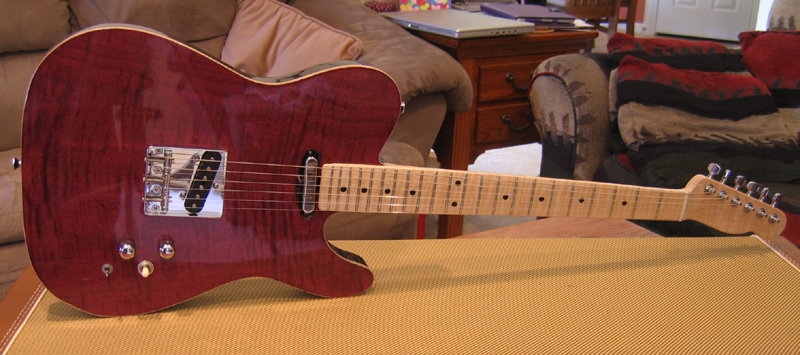
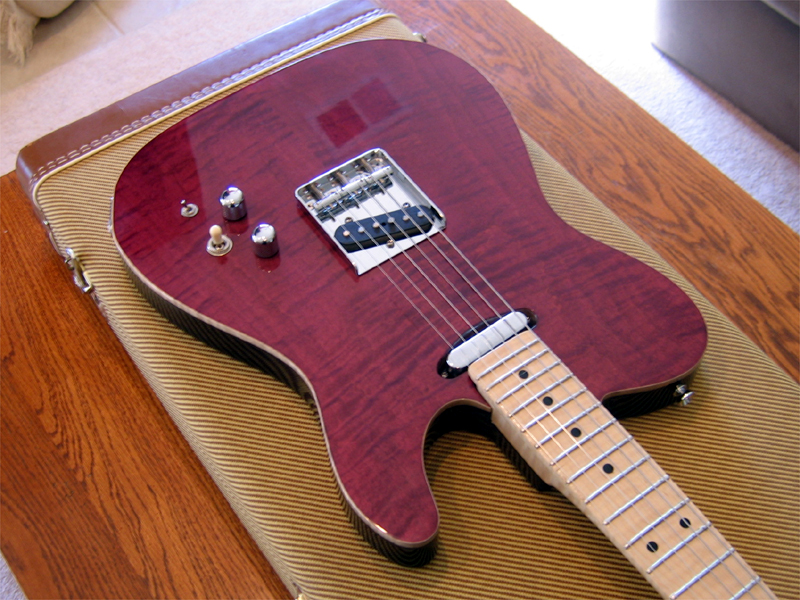
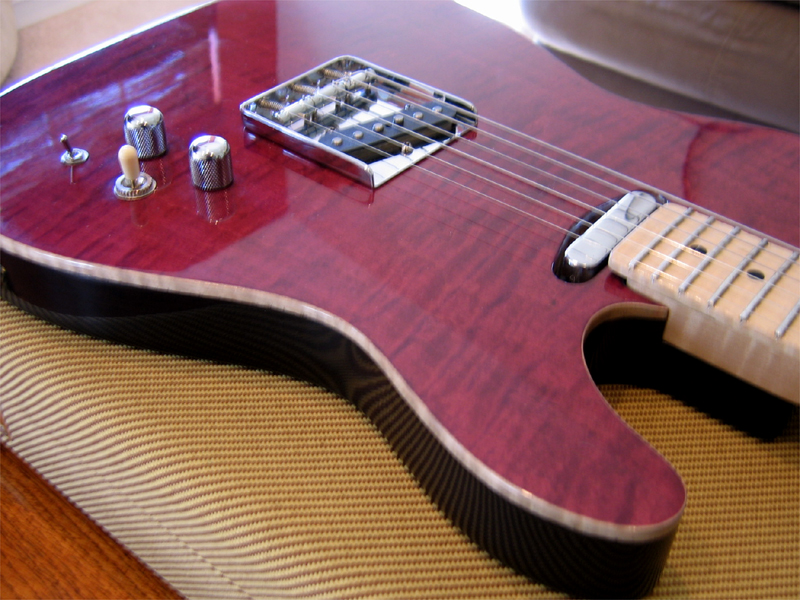
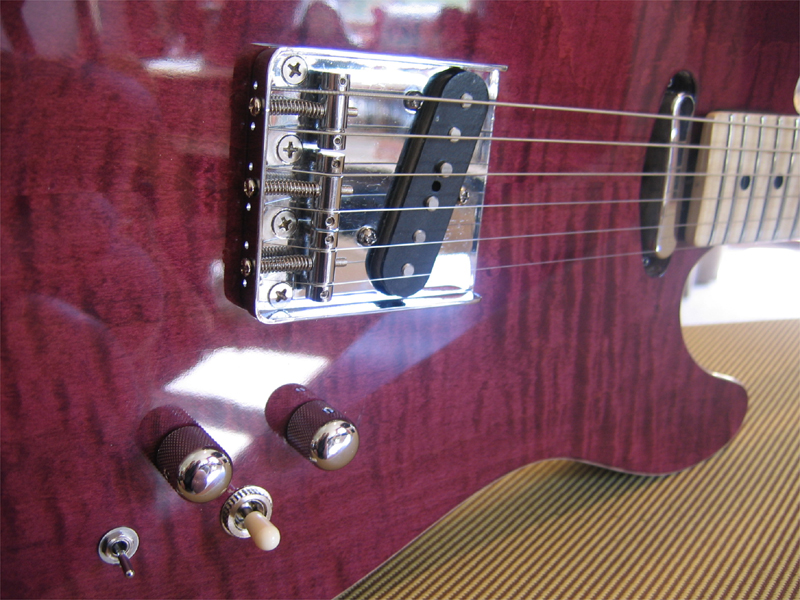
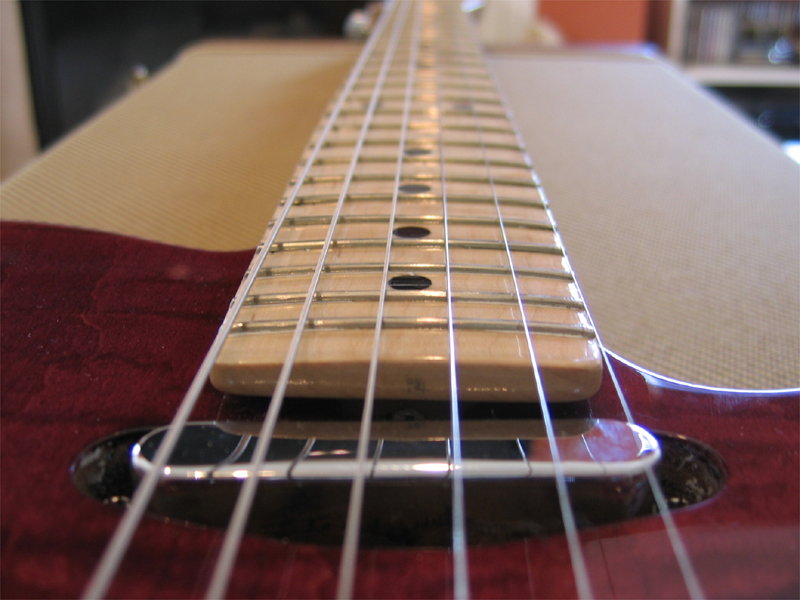
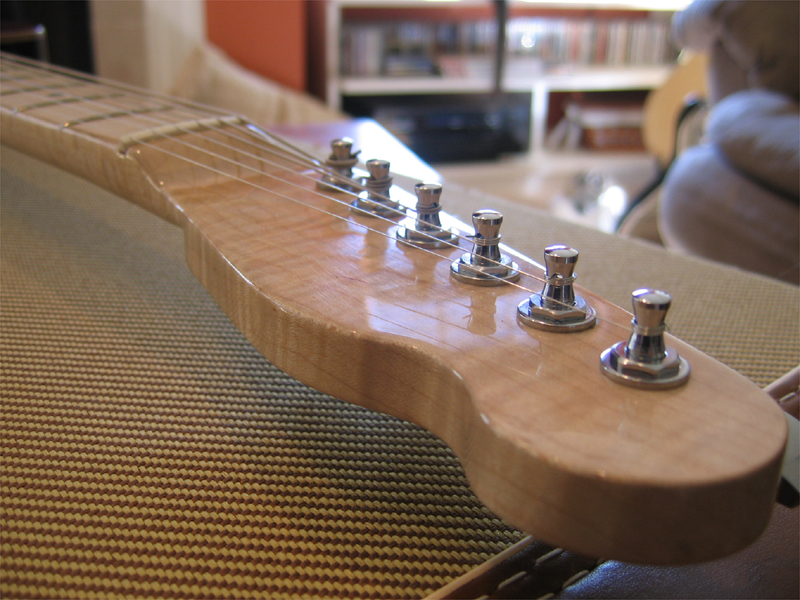
Some final shots of this one. I'm very pleased with the outcome. It plays like a dream and sounds pretty good...I need to upgrade the PUs at some point. Thanks to all who followed along.
Peace,
Mark
-
Awesome finishing, i really want to try em 6000 but its not available in the UK afaik.
Thanks!
Contact Jeff Weiss over at Target Coatings Forum and see what's available. He's a great guy and knows the products very well.
I saw your wood stash at TDPRI. I am incredibly jealous. I'm going to get myself some em6000 for my current builds. I hope it turns out as well as yours.
Thanks! EM6000 is a very good product, easy to use, easy cleanup. Well worth the learning curve...which isn't too bad.
Peace,
Mark
-
When you use the Insert Image dialog, make sure you overwrite the "http://" that's there by default. It's already highlighted...just paste in the full copied link from PB.
Body Template
-
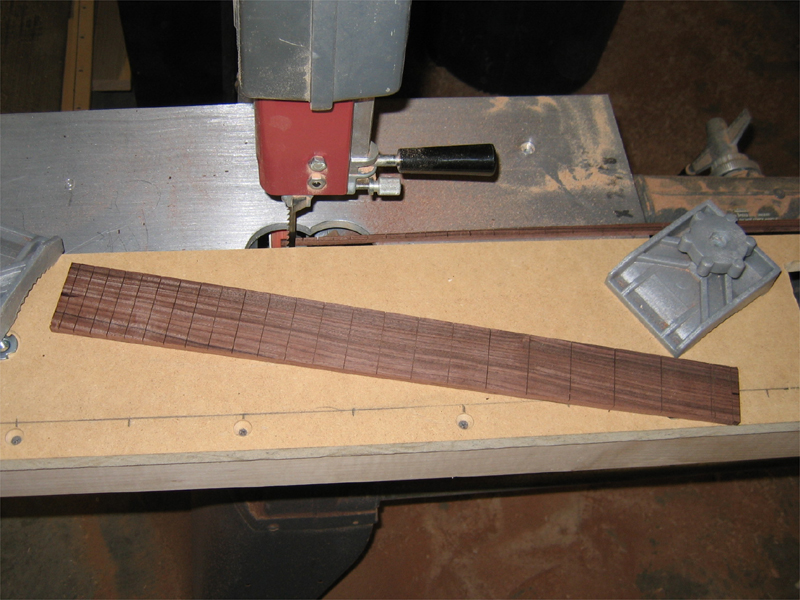
I use a tapering jig to trim the fretboard first to allow for the thickness of the binding. Then glue the fretboard in place, apply the binding, then profile and carve the neck. It's worked pretty well on the 2 I've done so far.
Peace,
Mark
Mark, Thanks!
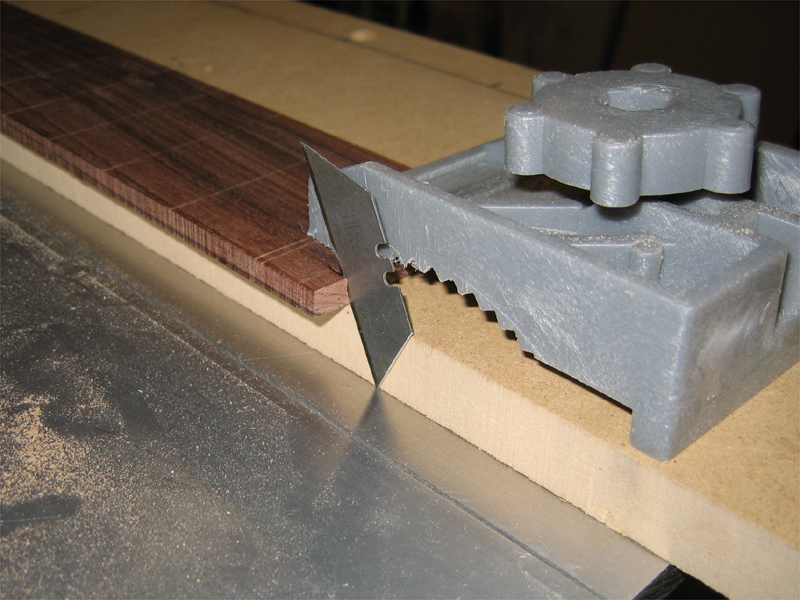
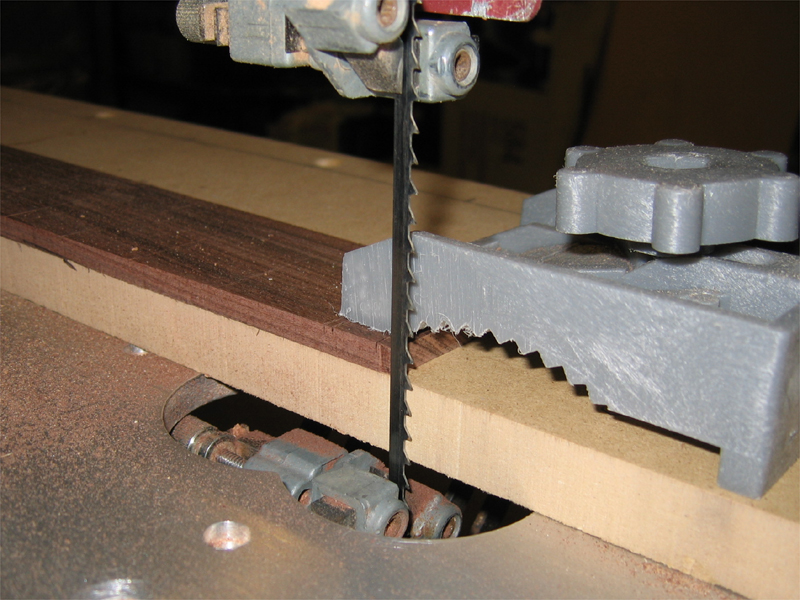
A tapering jig on your tablesaw? This fretboard is ebony, so I am afraid of chipping.
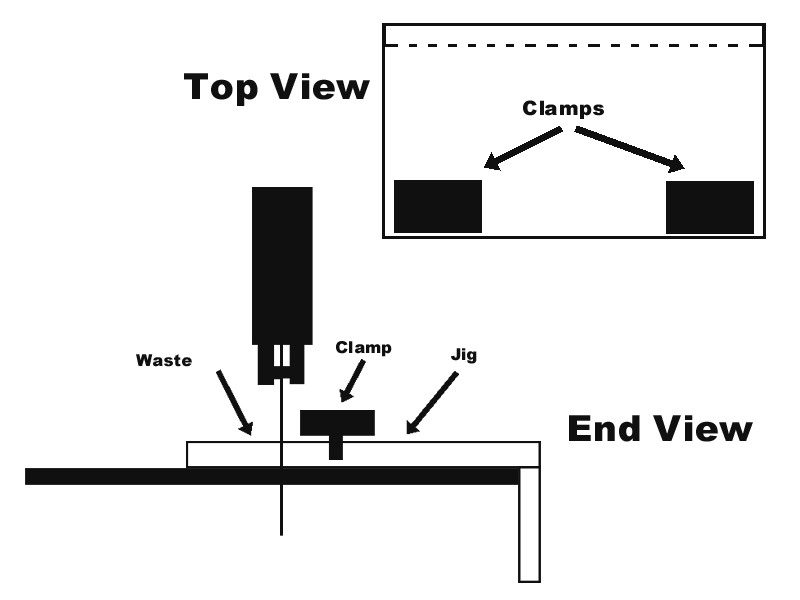
I made one for my band saw...it's a kinder, gentler cut at low rpm. It rides along the edge of the table. Just take a piece of MDF, add a doubler to the edge and don't worry about how wide the main part is, you can run it thru and make a perfect cut to the blade. The off cut is waste. I used a few clamps that came with a tool that I saved a few years back but they can be as simple as a drilled block of wood with bolts threaded into recessed T-nuts on bottom.
It doesn't use a T-slot but because it rides the edge of the table, it's impossible for it to over cut...if it were to back away from the blade, worst case you make another pass to trim it up.
-
I use a tapering jig to trim the fretboard first to allow for the thickness of the binding. Then glue the fretboard in place, apply the binding, then profile and carve the neck. It's worked pretty well on the 2 I've done so far.
Peace,
Mark
-

Guitarnut - Flame Top Stratocaster
in In Progress and Finished Work
Posted
Here's a more accurate Photoshop mockup.