


I Like Turtles
-
Posts
50 -
Joined
-
Last visited
Content Type
Profiles
News and Information
Tutorials
Product Reviews
Supplier Listings
Articles
Guitar Of The Month
Links and Resources
Forums
Gallery
Downloads
Posts posted by I Like Turtles
-
-
I curved those angles on the cavity that I drew, then routed it.
I ordered my stewmac stuff, so I should be able to pick this back up now once it arrives this week. Do you guys think I could rip my ebony fretboard with a tablesaw?
-
Alright, I'll route the cavity into the template.
I've got the book and I used it to get the measurements, but I'm pretty terrible at routing right now. Maybe I'll do it over.
Thanks man.
-
That gap closed up mostly. Good enough for me at least.
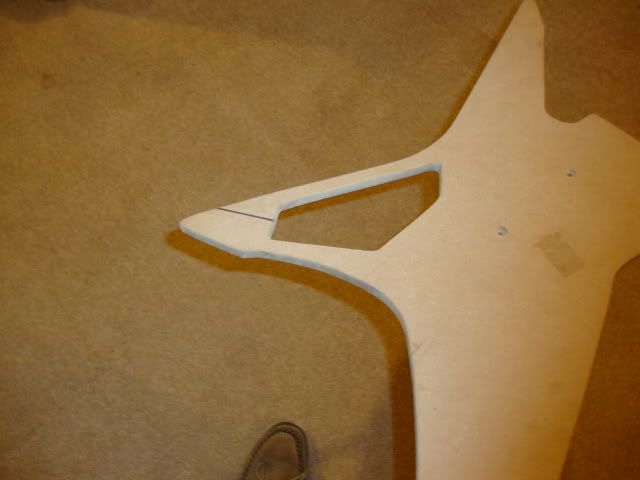
Alright so lately I've been a little frustrated/anxious about doing this. I don't have any of my stuff like my truss rod or my bridge so things are a little difficult. I also tend to overthink everything. I figured I'd better just do something, so I made my humbucker template and I drew on the control cavity.
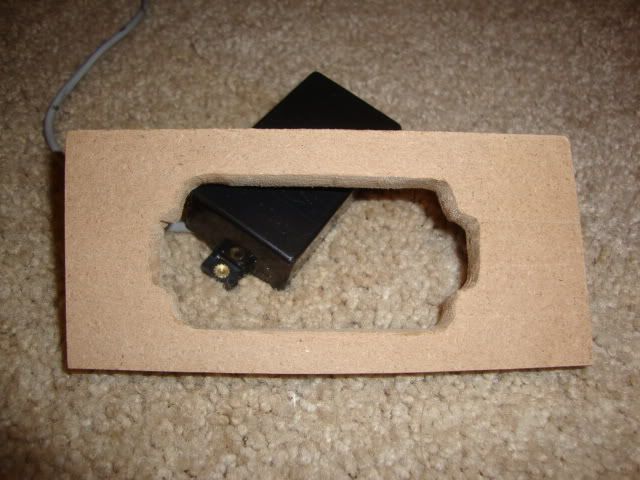
Definitely not perfect, but that's what mounting rings are for.
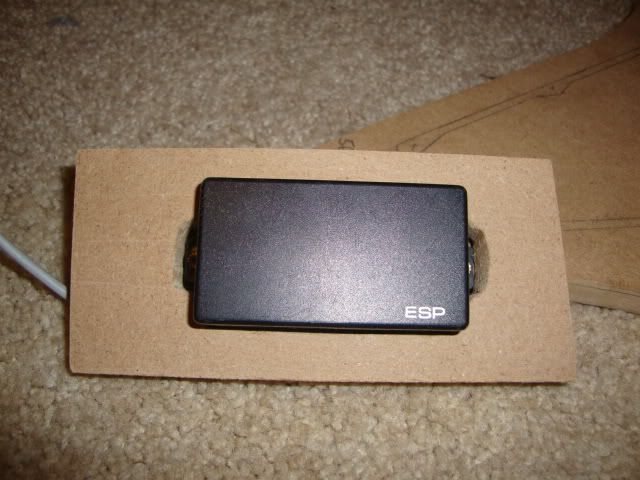
Success!
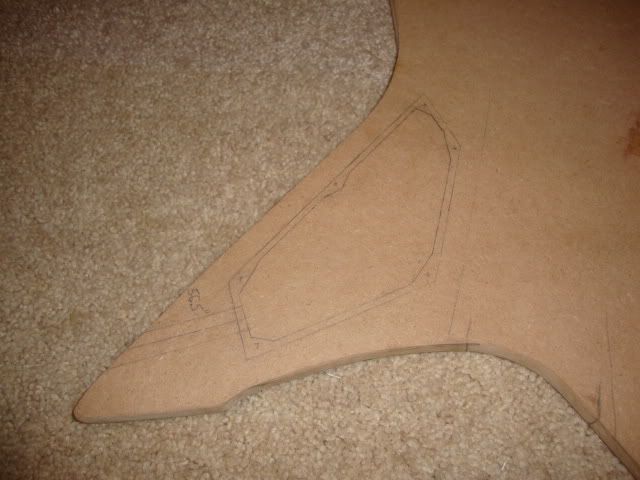
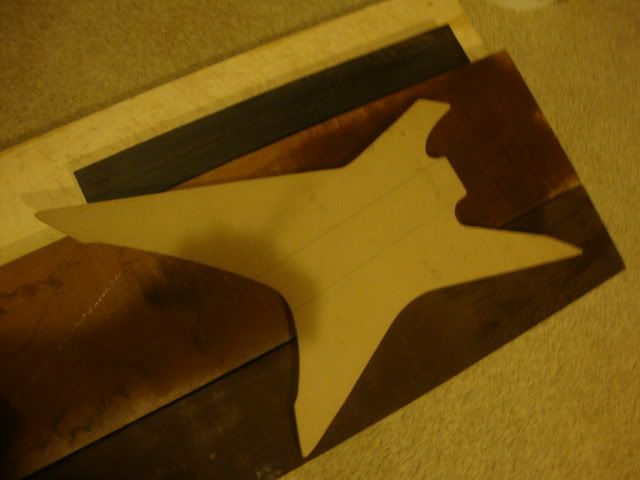
Here I mapped out the control cavity and the hole that I need to drill for the recessed jack cavity. At this point I'm not sure whether I should route the cavity into the template or trace it onto some paper, and make a separate template. Suggestions?
-
First off a correction: that gap did not extend 3/4" into the neck. It was maybe 1/8".
So I was planing my neck up, and things were looking pretty sexy...
The joint I fixed turned out perfect.
I got the accent piece flush.
And then, bad news bears again. Another gap, this time larger. It was hiding under glue so I didn't see it until after I planed the joint. Again, I fixed it.
Should be fine. It only went about 1/4" into the neck, so it would've been cut off anyways, but I'm a stickler and I want this thing to last a long long time, so craftsmanship is important.
I can only correct my mistakes and learn from them.
-
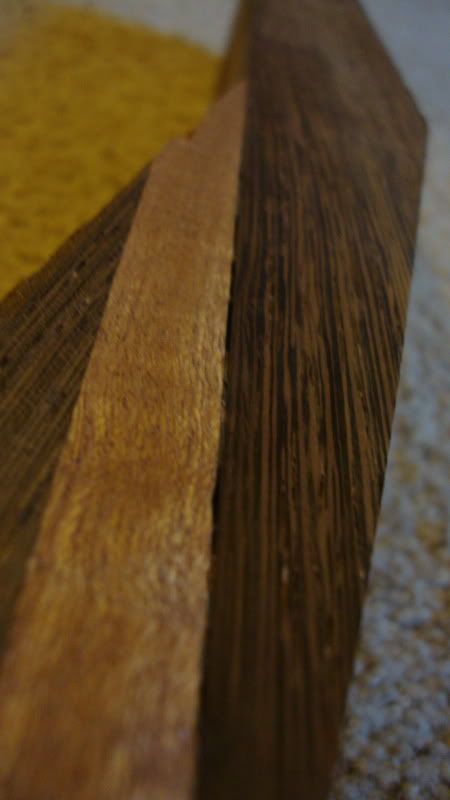
I agree except I think 3 is cherry and 8 is teak.
-

Each method has pros and cons. My way makes for easier glue up and no serious trimming after it's glued up. The problem is that the angles of the laminate and the neck need to be more or less exactly the same and glued up very carefully, but a normal scarf joint is like that too. You also have to figure out the right spot to cut the angle into the accent laminate.
The other way just gets rid of the somewhat frustrating angles and measurements.
I think with a consistent jig (I didn't have one) and premeditation (in working out the dimensions needed for the laminate), the angle way is better.
EDIT: 3 would probably work too if you've got extra material.
-
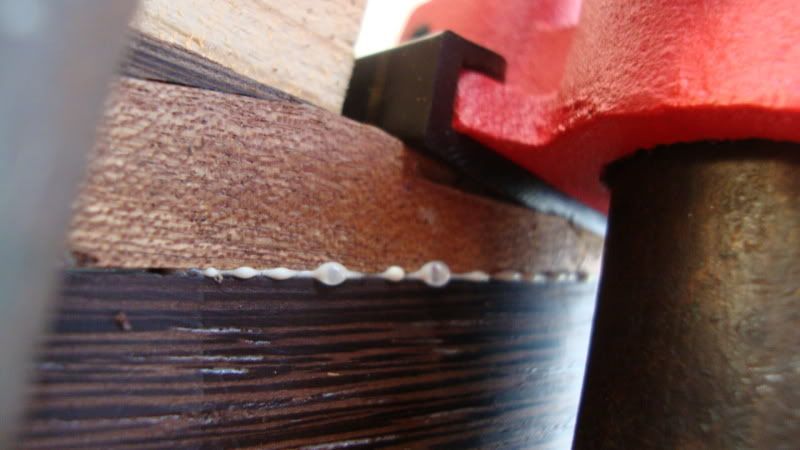
I finally got back to work today, and while I was planing the scarf joint up, I noticed a gap that I could fit my fingernail through. I knew there was a gap there, but I didn't think it was that bad, so I went ahead and used a razor blade to smear glue around inside the crack and clamped it up. My dad just got a sweet new bench grinder, too, so now the plane is super super sharp.
It was a pretty small gap that only extended about 3/4" into the neck, but better safe than sorry.

The joint in question. So once it dries up, I'll get back to work. The truss rod route is scaring me because I haven't ordered the truss rod yet.
-
Hahah. Those aren't my puppies. They are pretty sweet though.
I'm in Charles County in Southern Maryland. I'm only 17 though, so I probably won't go to that convention. Maybe one day, man.
I love xiphoses (xiphes? xiphi?) too Muffin. I also loved your tabar zin guitar. When is that getting started up again? It was one of the first builds I saw on this site.
-
Agreed, although a few puppies in a wagon can get pretty intense too.

By the way, your tutorials are very helpful.
-
Nice xiphos man! I only hope I don't screw mine up.
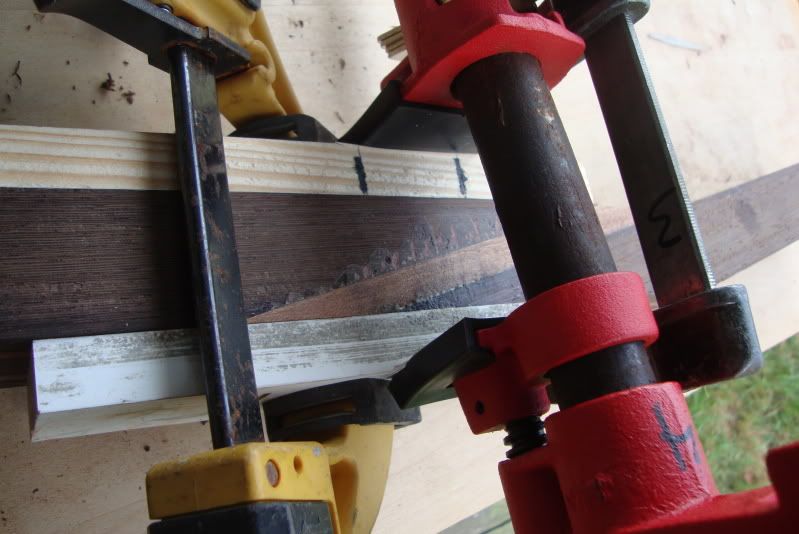
Clamps off.
The join is good. It's a little crooked (maybe by 1/32") but we were expecting it.
-
I love your builds man. This is probably my favorite one too. Sweet wood combos.
-
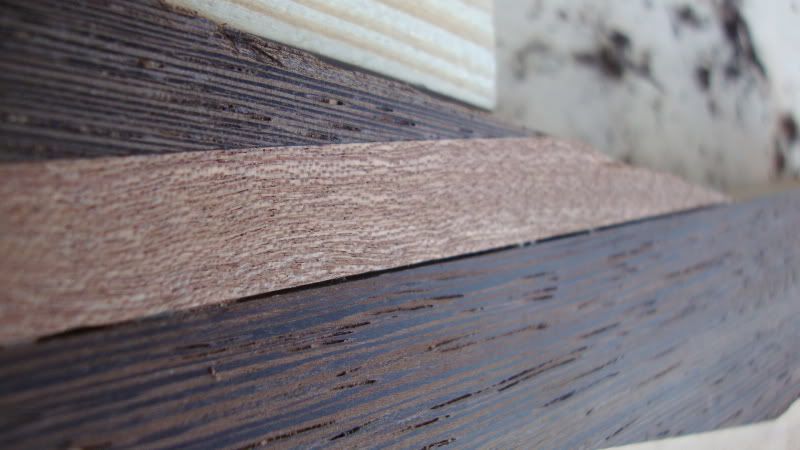
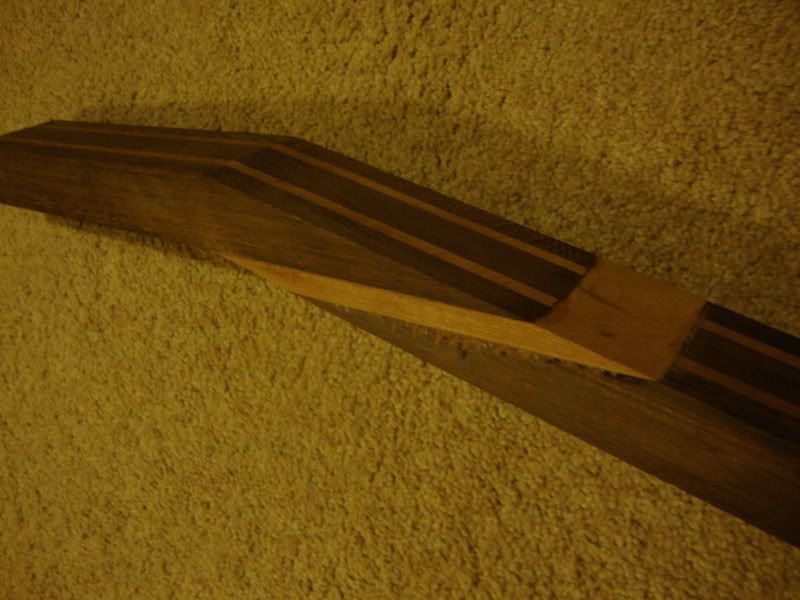
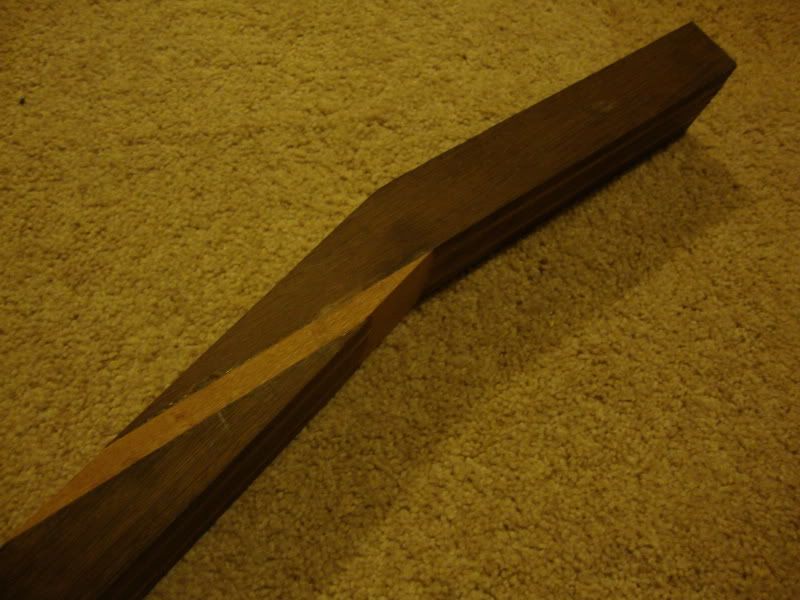
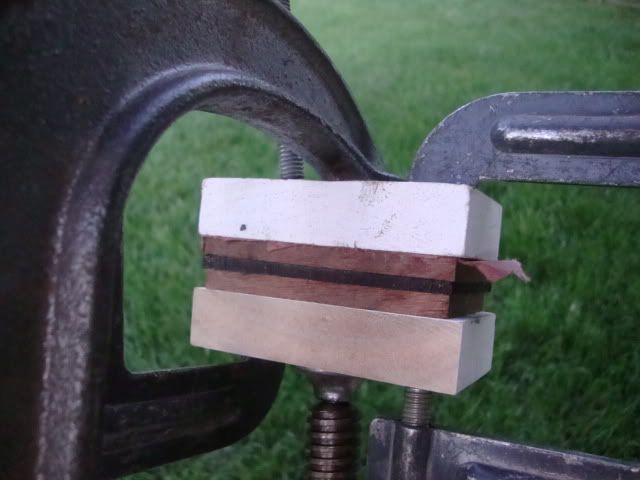
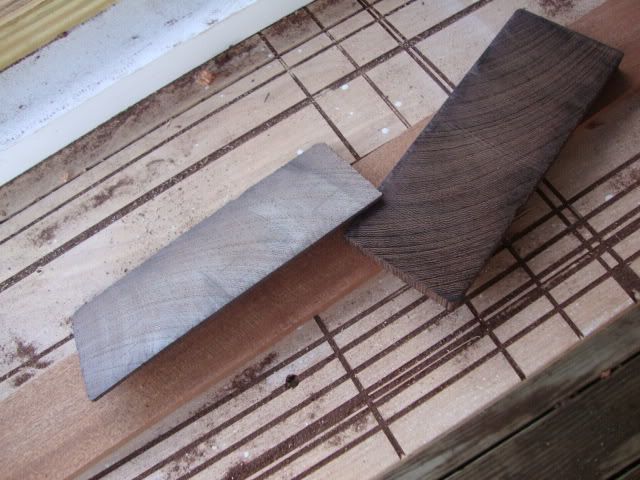
Let me start off by saying that gluing a scarf joint with an accent piece sucks. Super hard and it took about 5 hours to get it right. It's a 1/2" thick piece of sapelle that had the headstock angle cut into it. Seems simple but without many tools it's very difficult.
Here it is glued up.
Here you can see the accent piece better.
Also hand planed the ebony. I love the color. I'm definitely going to leave it in all its streaky glory.
Parts will cost me about $550 including reusable paint and tools.
I also pretty much got down exactly how I'm going to finish it. I'm using stewmac's colortone waterbased lacquer with a satin finish, and grainfiller everywhere except the neck. MMMMMMM.
Does anyone have any good tips for putting an accent piece into a scarf? This process had me so lost and frustrated.
-
Amazing. Did you have to taper the neck stripe before gluing the neck up? I'd love to see some close-ups of the scarf joint.
-
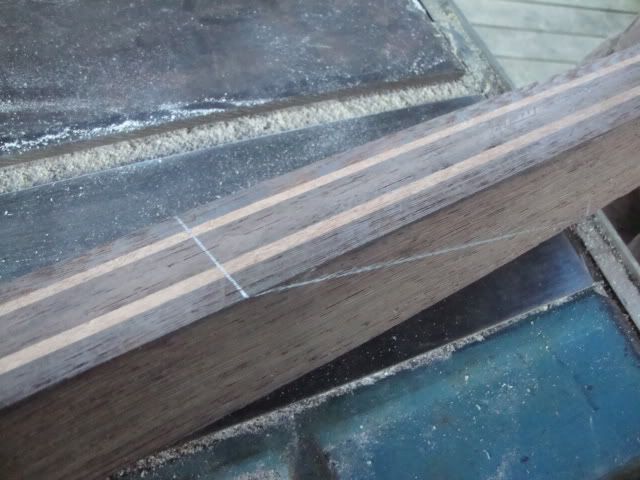
Thanks man! Yeah I just figured out that I cut those contrasting laminates wrong. I forgot to take into account that the scarf joint is angled.
I'll just make another set of them. -
Update!
Today I glued up the three pieces that are going into the scarf joint to simplify when I glue the actual scarf joint.
Me and my dad spent hours trying to figure out the best way to cut the scarf angle (14 degrees) with our limited tool supply. We ended up making a jig for the table saw out of this angle thing that came with that circular saw that's been so handy.
We made two practice scarfs, then we did the real one.
It turned out well. Tomorrow I'll see if I can get the faces jointed and then we'll get the scarf glued up. After the scarf is done, I have no idea what's next though. I guess installing the truss rod and gluing the wings on? I need to get my ebony ripped for the fretboard too.
-
Man those are the EXACT woods I wanted to use for my first build, but the stupid lumberyard was out of limba. Your lumber looks great by the way, and I love the body shape. Should be cool to watch.
-
Update!
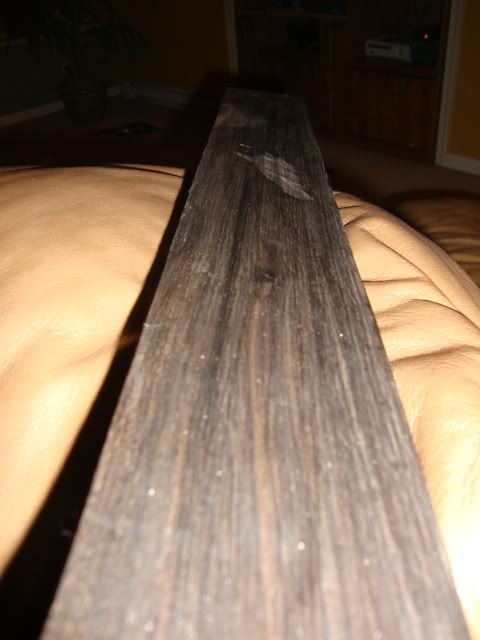
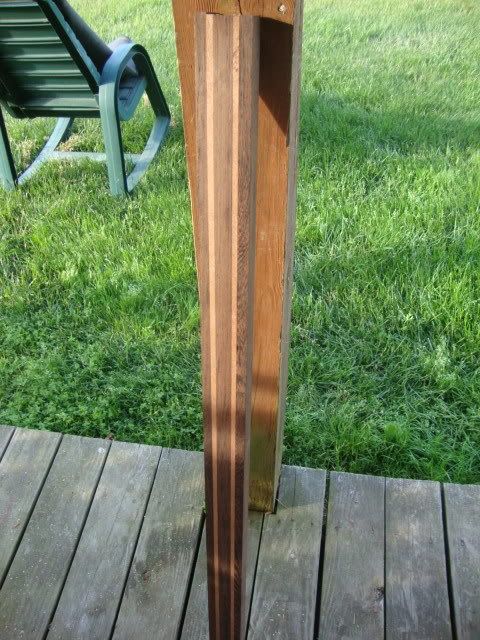
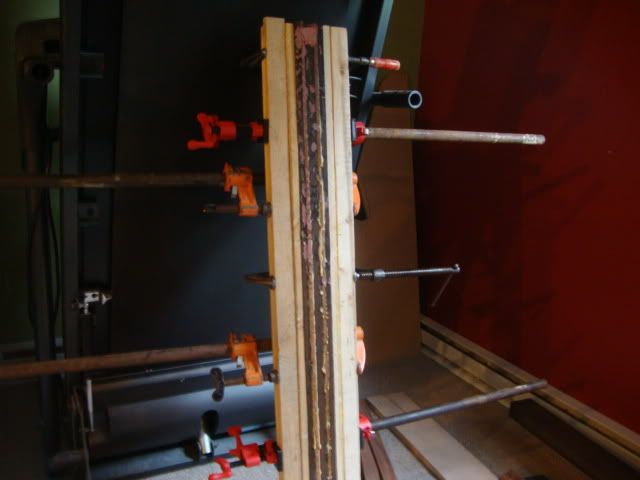
I took the neck out of the clamps. There was glue everywhere and the joints were uneven, so I wasn't sure how it would end up. I used the festool circular saw with the rail to cut things even (I want a planer so bad).
It took a few hours to get the sides even, but it is done.
No glue lines!
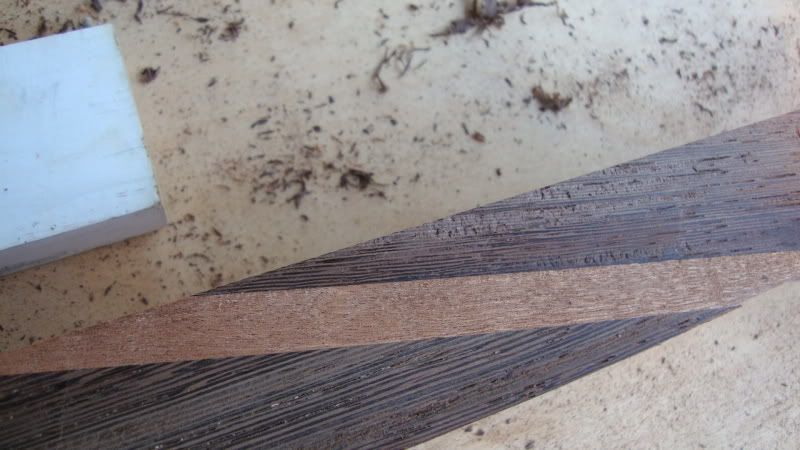
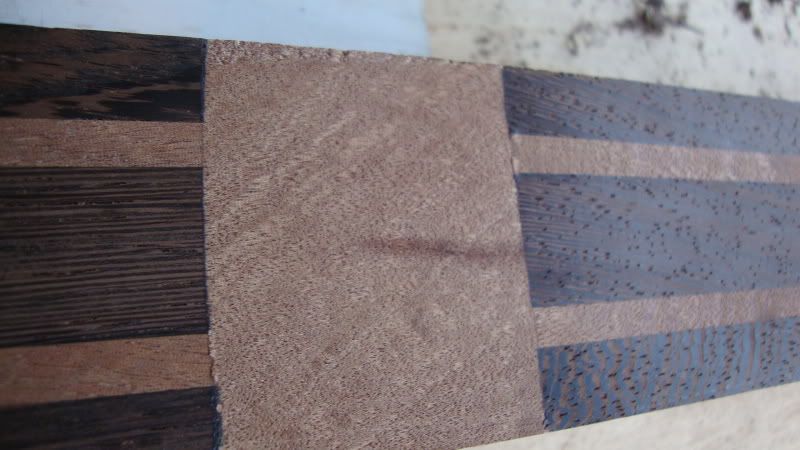
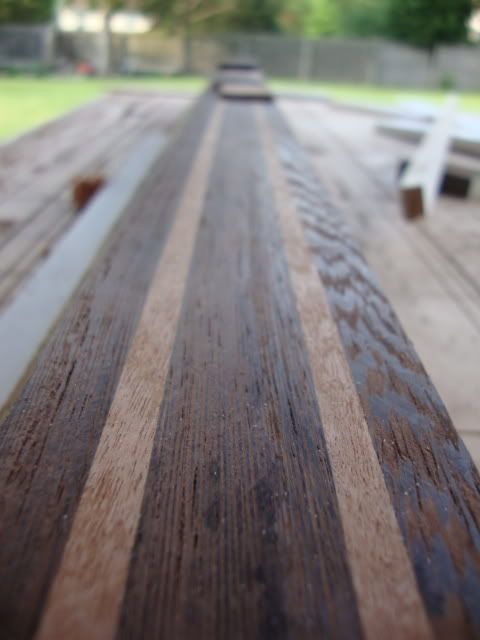
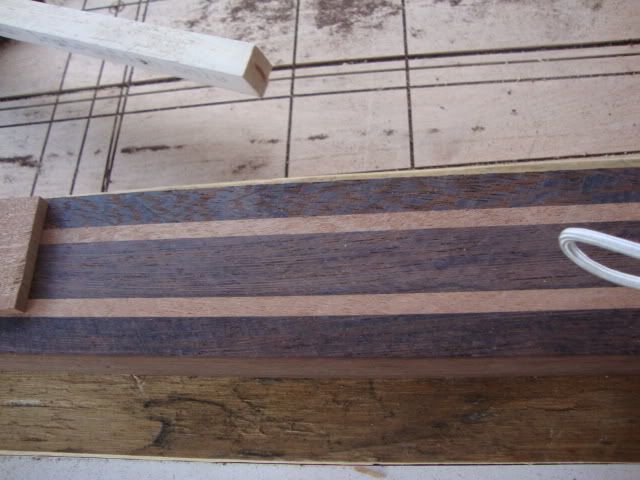
Started contemplating the scarf joint. I'm going to stick in three pieces: sapelle/wenge/sapelle, with the wenge being slightly thinner than the sapelle.
Moving along nicely.
I also decided on using a 27.5 scale length, because I've read a few threads lately and it changed my mind. The neck is now 1 1/2" thick, so that's what the body will have to be. Thinner than I had planned, but oh well.
-
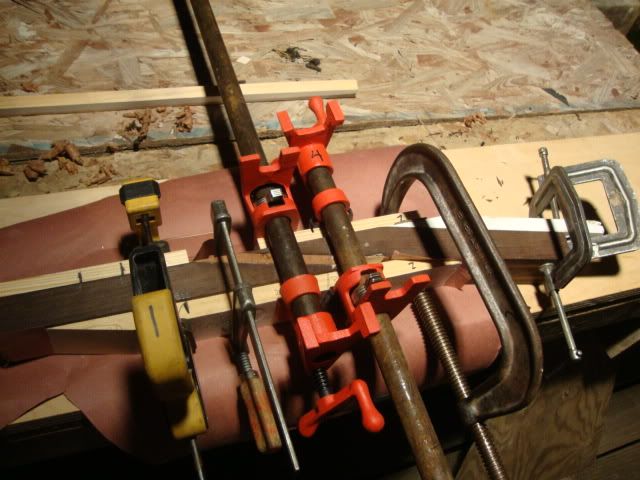
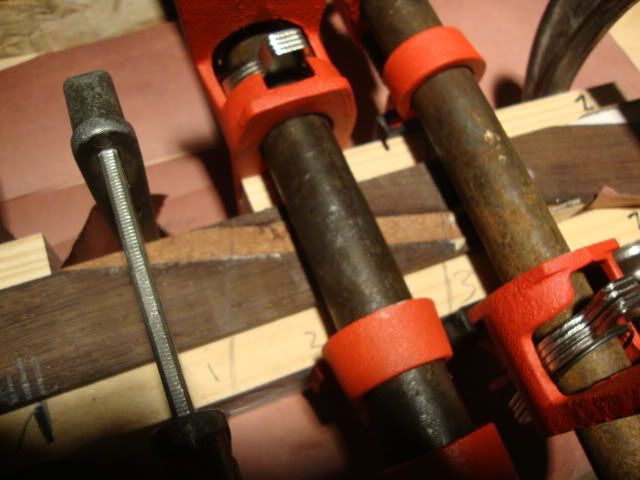
Update!
The neck is glued up. We used a fancy system of cauls just to distribute the pressure most evenly. Those big weird clamps are pipe clamps in case anyone wanted to know.
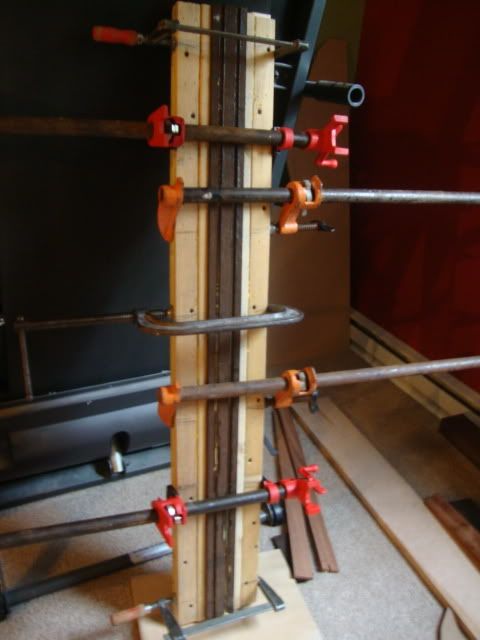
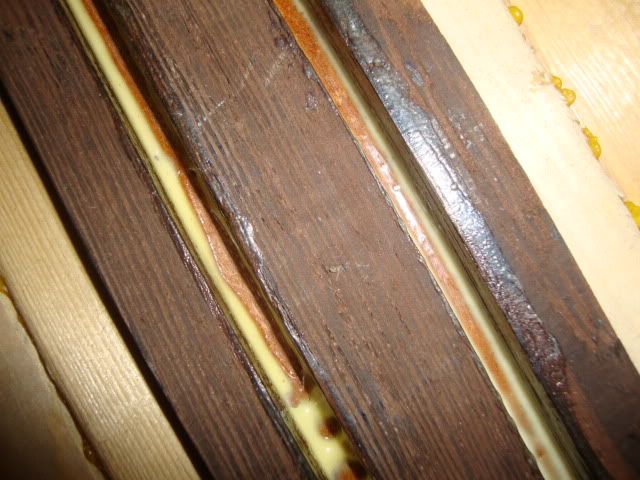
The wenge was already thicker than the sapelle, and some of the sapelle stuck out of one side of the neck, maybe 1/16" to 1/8". Again, the body will have to be made thinner now.
Overall though, things are looking good for my first build.
-
Did you get your name from that video of the kid saying "i like turtles" on the news?
I know off topic.
cool build btw.
Yeah haha. Did you know somebody made a mockumentary about the kid as an adult? It's so funny.
-
That thing looks great! I can't believe you got such a nice top out of two pieces that weren't even bookmatched.
Your builds are very insightful into the processes too. I appreciate it, man.
-
Update time!
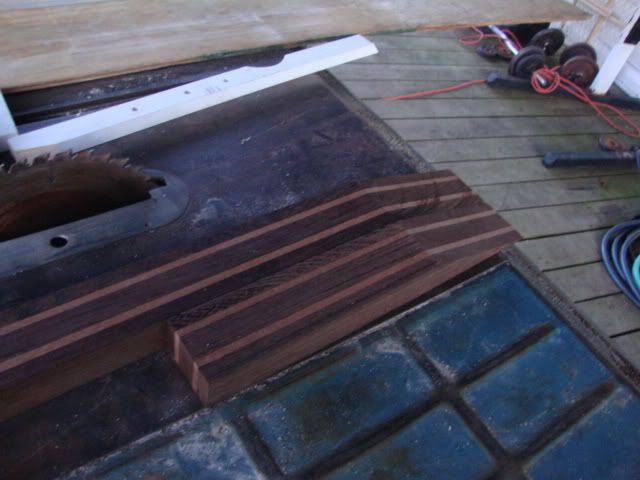
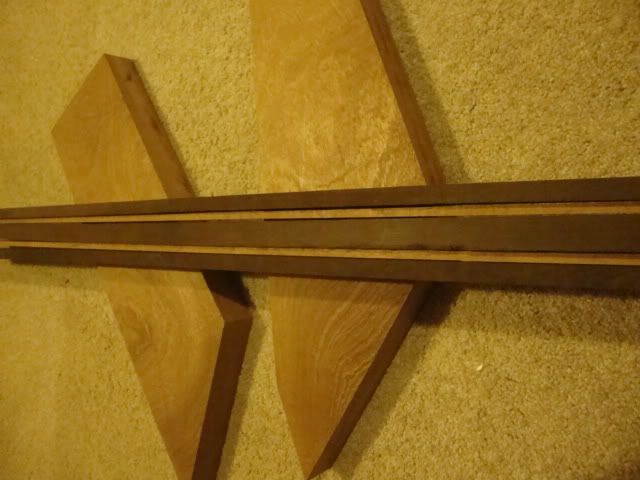
I got my wenge and sapelle neck laminates ripped. I also cut out the wing blocks.
I was planning on using ormsby's neck-thru neck angle method, but then I figured out I couldn't do that because of the somewhat large angle (almost 4 degrees) and the fact that my neck blank is only about 1 3/4" thick. I'll be recessing the TOM instead, which will be easier if anything.
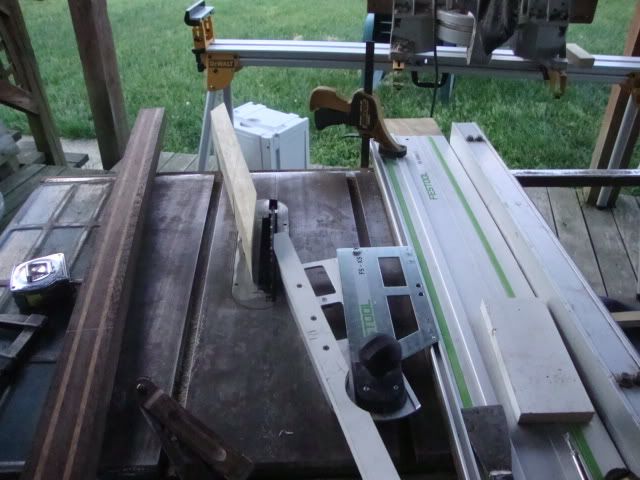
I used a festool circular saw with a rail-type jig that makes really clean cuts that can be glued without jointing. It's more accurate than my table saw would have been.
Those laminates look weird in the picture but they are even.
Damn wenge is hard to work with, and it's extremely brittle. Probably not the best choice for my first build. The sapelle was far easier to cut.
It's hard to see, but I traced the shape of the body wings onto the blocks.
The section I used had this really cool waterfall kind of grain, almost like bubinga. I'm actually starting to think that maybe it is bubinga and the lumberyard tricked me. Whatever
I should be gluing these up this week hopefully, then I'll plane it even.
-
Hey guys. This is my first post here, even though I've been a member for a while. I love this site and what you guys create, so I figured I'd contribute too. All suggestions and criticisms are welcome.
Specs:
xiphos body
28" baritone scale
24 frets plus a zero fret
five piece neck-thru (wenge/sapelle/wenge/sapelle/wenge)
sapelle mahogany body wings
ebony fretboard (I'm not dyeing it; I love streaky ebony.)
string-thru gotoh tune-o-matic bridge
locking GFS tuners
EMG 85/60 combo (I might get the 85x and 60x, not sure yet)
1 volume, 1 3-way switch
black hardware
anything else I forgot.
My wood:
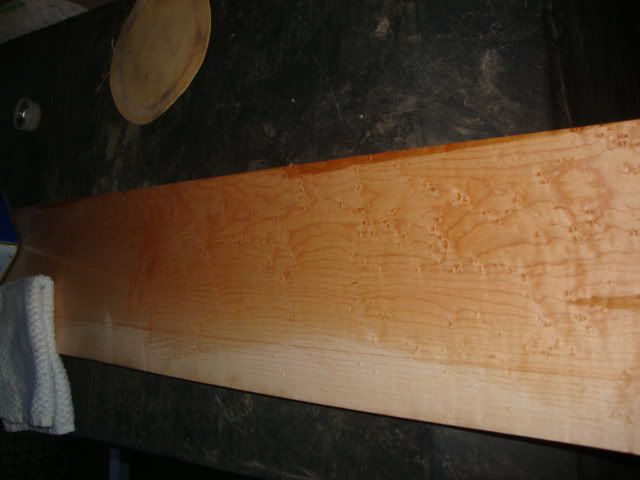
this is the birdseye maple that would have been in the neck-thru. more on the wood choices later.
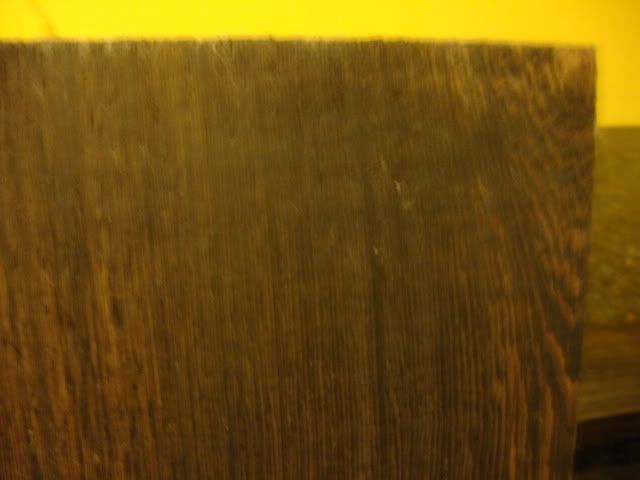
wenge
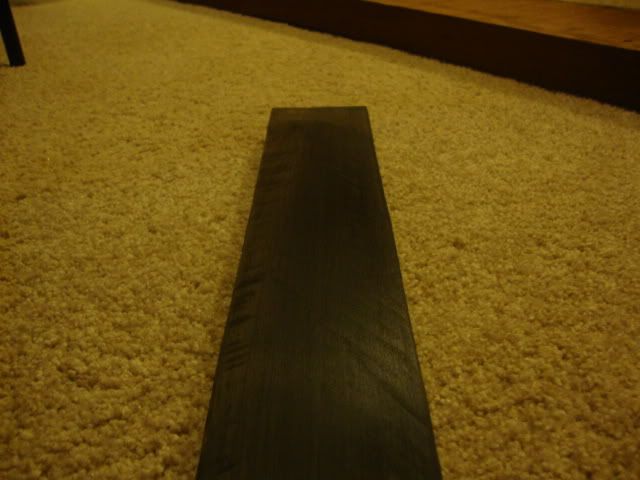
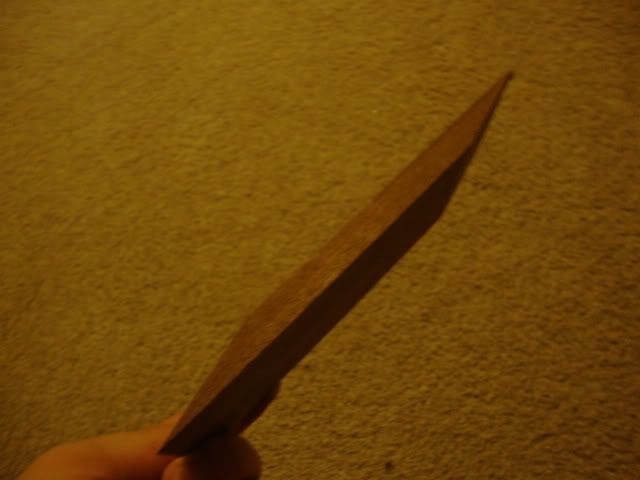
the ebony. I didn't realize at the lumberyard that it had a huge crack in it though.
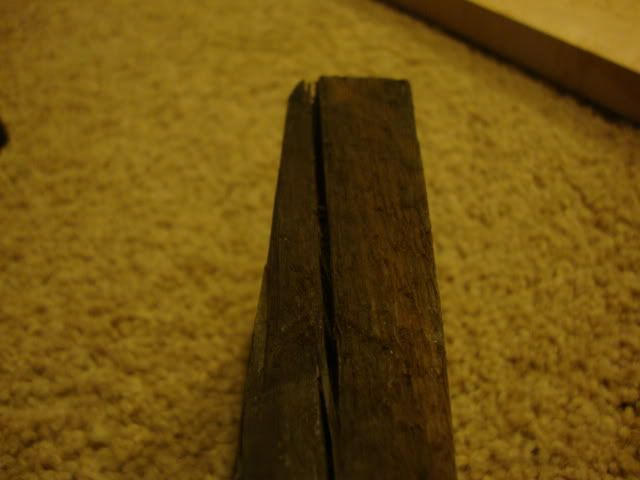
It's still usable for at least one fretboard, so I'm not going to cry or anything.
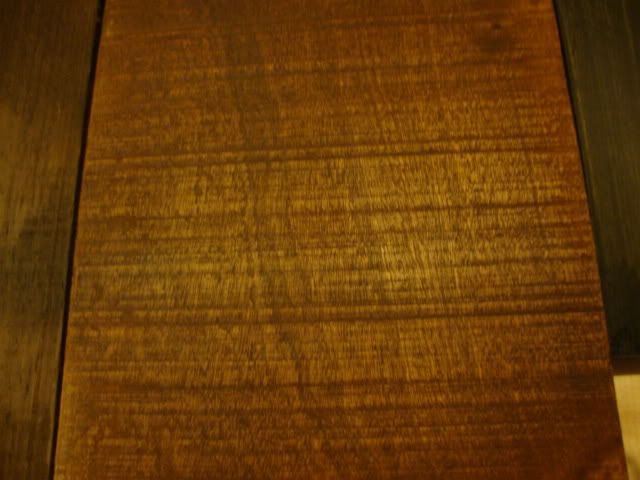
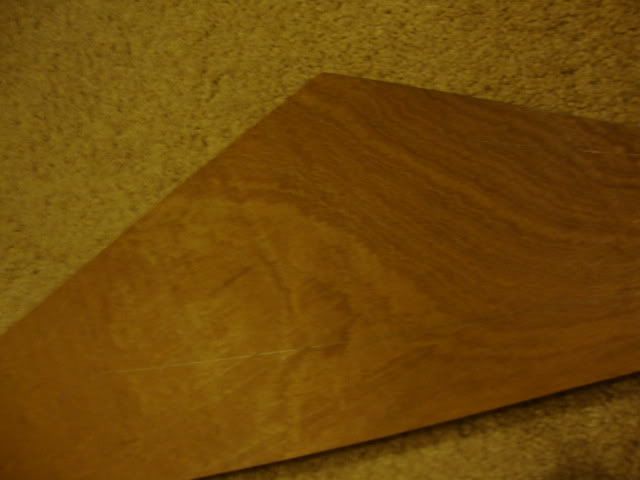
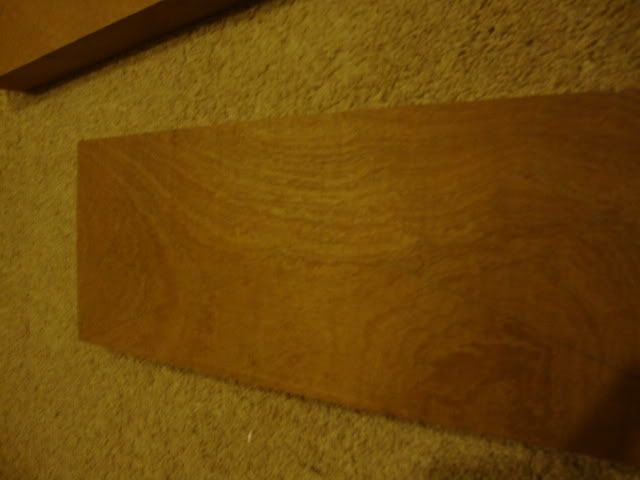
The sapelle had really deep sawmarks that I couldn't hand-sand out, but you can still see the nice color.
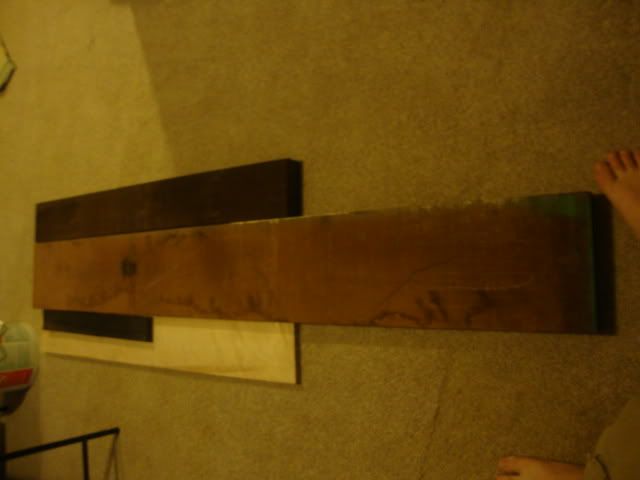
Group photo. Not too bad for $250 considering I'll have a lot left over.
The wood with my MDF template.
I originally wanted to use limba instead of sapelle for the neck laminates and body wings, but my lumberyard didn't have any, and turns out I can't find any good sources of it. I bought the birdseye because I was going to use it in the neck, but now I think sapelle would look better. I've got enough wenge for two necks, so maybe I'll use that combo for another build.
Wish me luck.

First Build!
in In Progress and Finished Work
Posted
HOLY ****! PROGRESS!
I've been working on some other stuff, plus I spent a week at the beach, so that's why I haven't been working much on this.
I've been completely modding a standard squier strat (my first guitar) into a shred machine. I've scalloped the frets, carved various crap, converted to a wraparound, redrilled the neck holes, and lots of other things. Right now It's getting refinished.
I'll post more pictures of it when it's done.
Does anybody know if it's a good idea to rip an ebony fretboard with a table saw? Or should I just get a bandsaw?