


sdshirtman
-
Posts
646 -
Joined
-
Last visited
-
Days Won
23
Content Type
Profiles
News and Information
Tutorials
Product Reviews
Supplier Listings
Articles
Guitar Of The Month
Links and Resources
Forums
Gallery
Downloads
Posts posted by sdshirtman
-
-
I just have to ask. Is your shop built over a filled in pool? It sure appears so.
-
I had the tape laying from a project I had in my shop a few years ago. Its made to bond metal to metal and it works incredible. It doesn't shift at all.
-
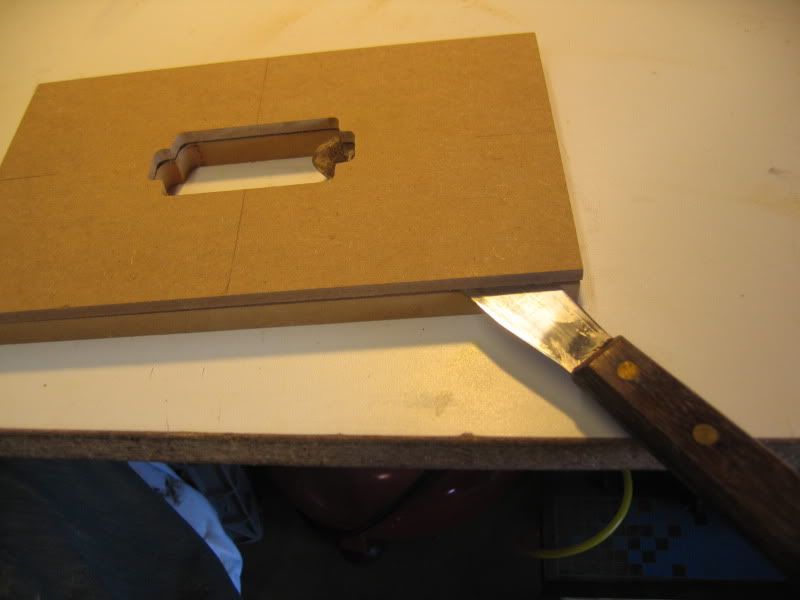
Your in luck and I do have a picture.
I put 3m double sided tape on the pivot point and also on both sides of the shim. Dont forget to account for the tape thickness.
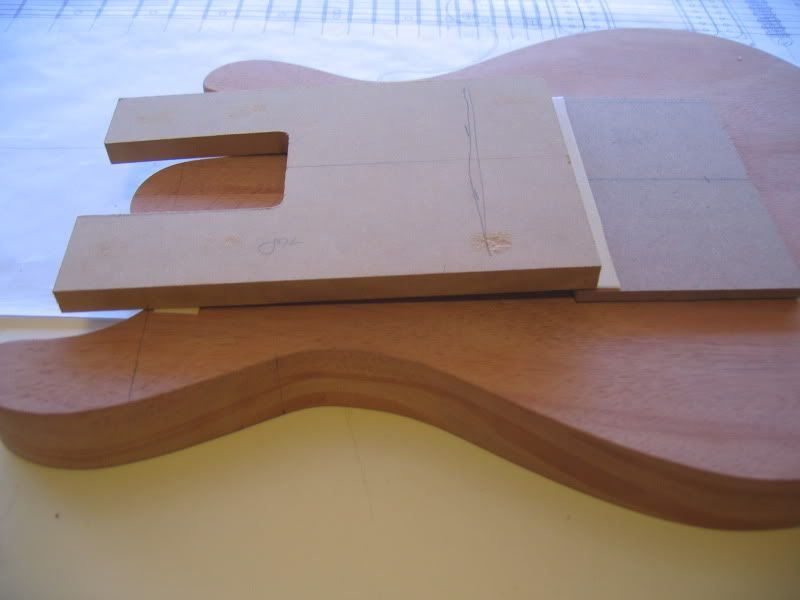
Any why we're discussing using double sided tame and templates. I use a cake knife to slowly and carefully separate the template from the wood. This helps prevent lifting a chunk of wood off your body quite a bit.
-
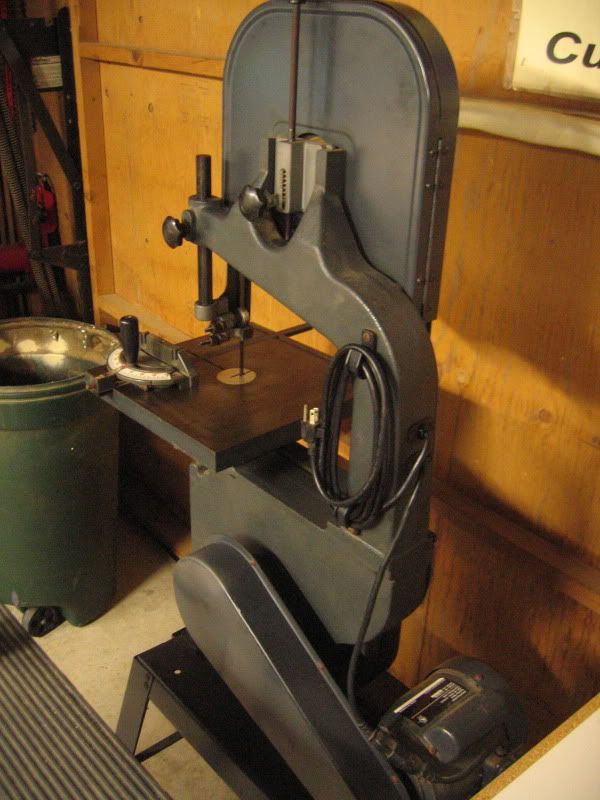
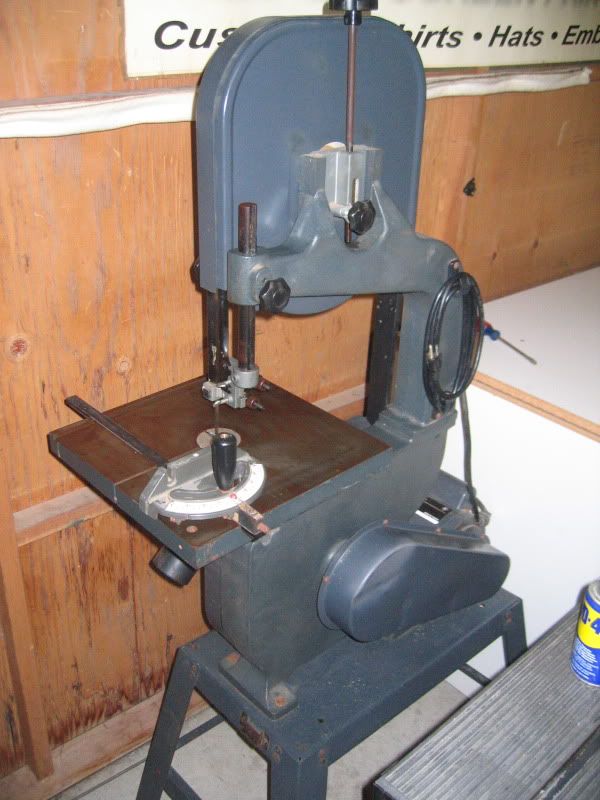
After 3 months of scouring craigslist 3 times a day for a great deal I finally scored a decent bandsaw on the cheap. Its a 14" craftsman that I'm pretty sure was made by delta. I picked it up for a franklin. I'm so stoked I had to share.
Things are crazy busy right now but I'm hoping to start my second build some time in early February. I haven't nailed down a definitive plan yet but it looks like I'm going to attempt doing two at the same time. One will be a figured top bolt on neck carve top and the other will be identical with a carbon fiber laminate carve top over maple/mahogany. Going to try some binding on my next build also.
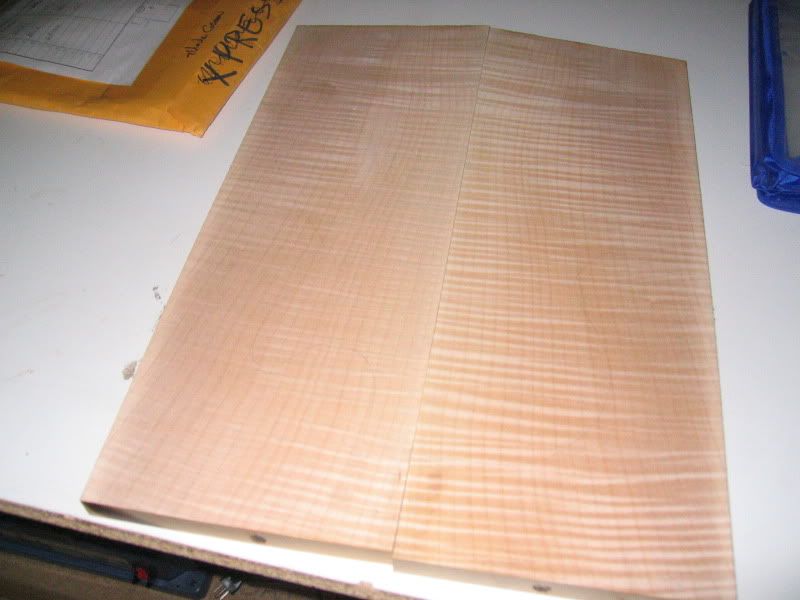
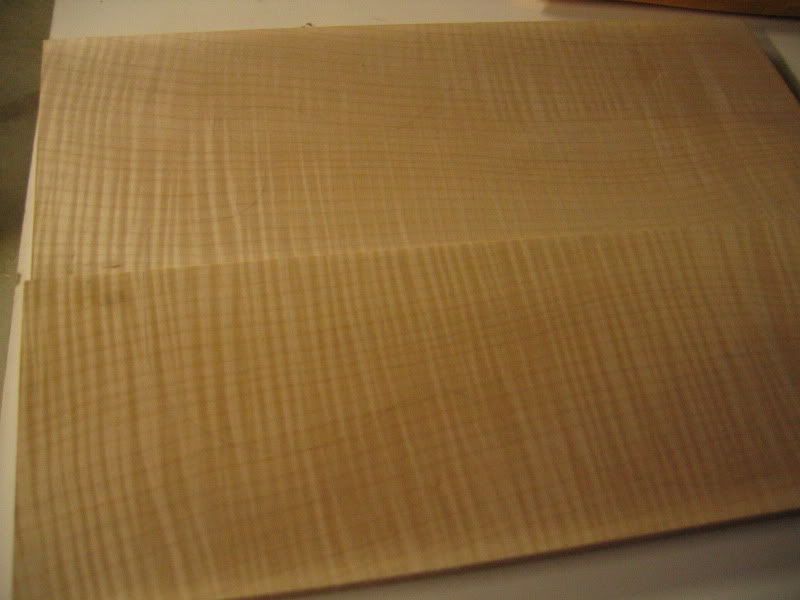
Oh and here is the top I got from north ridge hardwoods. I paid $75. Its a 3/4" AAA rated top that I bought it blind. I was very happy with what I received.
I cant wait to get started.
-
I used this method on my first build including utilizing double sided tape. It worked great.
-
I'll be checking to see how this ends. This build was very cool.
-
^^^^^
I agree. Take some extra time and make the finish match the quality of the build.
-
I use polyurathan moisture curing. I find its cheaper than Tightbond and it cures in 30mins so I done this body blank in two halfs in about one hour to first glue up to unclamping.
The wood will break before the glue gives in
ummm...maybe not. I am just saying.
Great link. Boy was I relieved after I went through this. I used Elmer's carpenters glue on my last build. Seems a close second to the titebond.
-
Nothing against Gwar. Just looks like something they could sport onstage.
-
They remind me of some wallhangings I saw at a small town craft fair in the midwest once with plants hanging from it.
They are just too brambly for my taste. The free handed router treatment looks substandard IMHO. The turtle looks like a carve top that was abandoned halfway through the build. I'm sure that there are people who would dig it (members of Gwar) but it just doesn't appeal to me.
How do they play?
-
Looks like you're off to a great start.
-
Have you seen this site?
-
I did my first burst using trans tint wood dye and water with great results. You can use alcohol also but your working time decreases. I pre-raised my grain 3 times before the application.
Using a rag and a spray bottle I applied it similar to working with watercolors starting with the amber color all over the body first. Next I used dark brown working from the outer edges of the body and spraying a light mist of water from the spray bottle before I started applying. If I got too much on the guitar I could use a dry rag and wipe off the excess dye and start over with another coat/application. The more you apply and the longer you let it soak in the stronger the colors get.
I finished up with black dye on the sides and outer edges using the same method. I did a mild burst but could have easily done one much darker and I tried it with a sample piece first.
Here is a link to the post.
My main source for helping me learn this method was this link.
I just substituted water for alcohol.
Maybe it might be worth trying this method on a few scraps then sanding it down and giving it another try.
Hope this helps.
-
I'm usually not into green guitars but that is just beautiful.
-
Its been a few months since I finished my first build and I'm really chomping at the bit to start another.
Currently my budget doesn't allow me to build a double cut mahogany w maple top so I've decided to do a modified telecaster with budget parts.
I'm in my planning stage and I've done a fair amount of searching but I cant seem to find a set of free tele plans. I know I can get a set for $15 bucks but I'm really trying save some cash on this next build and every penny counts.
Does anyone here have a set they would be willing to pass on to me?
Any help would be appreciated.
-
Thats a beautiful piece of wood there.
It looks like a mountain to me.
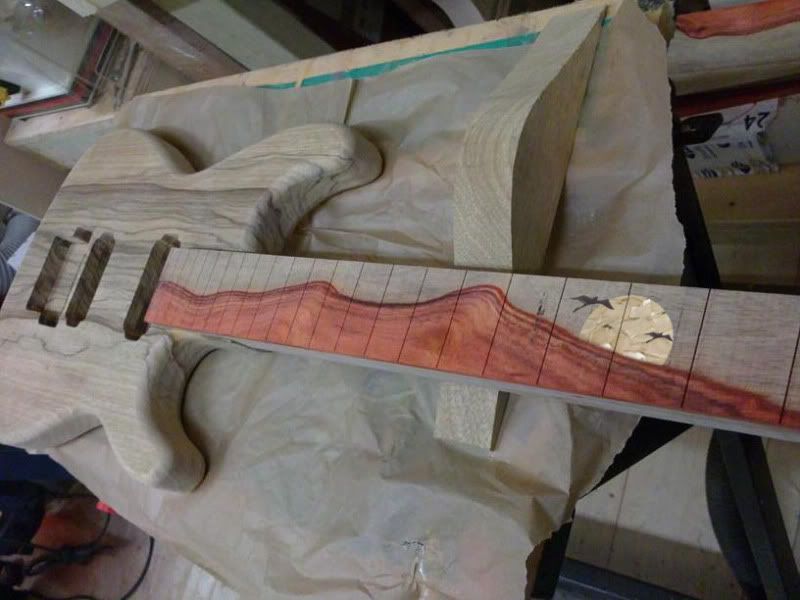
Not making suggestions, just killing a few min in photoshop when I saw it.
-
Great job. It looks awesome.
-
Thanks Drak and Dave.
Personally I think it would look cool on the right guitar with the right design. I just didnt know if it could be done.
Sounds like it cant.
Dave,
would a heat gun aid in something like this or is it just something that cant be done without miters?
-
I've done some searching but cant find the answer to this so here is a question for you experienced builders. On my next build I think I want to use binding on the body. Plastic or wood I haven't decided.
Most binding is bent/shaped to the guitar along the thin side of the binding along a linear plane around the edge of the body such as a les paul.
What I would like to do is run binding around the edge of a guitar body that incorporates an arm relief contour such as a strat does. I realize trying to have a router follow such a contour would be difficult so I'm thinking I'd have to cut the binding channel by hand around that section with the aid of a Purfling Cutter and a chisel.
The question is can binding be bent in the opposite direction like this? It seems like ABS plastic binding would lend itself to this better than wood binding but I'd really like to use wood. Would there be a certain species of wood that would lend itself to bending like this better than others?
I cant find any examples of this and I'm thinking the reason is its just too difficult or time consuming. (Or maybe just a really lame idea)
Here is a simple pic to help clarify what I'm talking about.
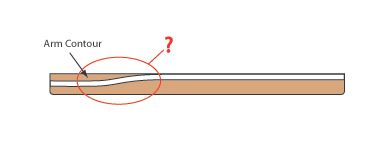
Can this be done without too much difficulty? Has anyone done it? Have any pics or a reference to a tutorial?
Thanks in advance.
-
I love that first one with the piano bridge.
very nice.
-
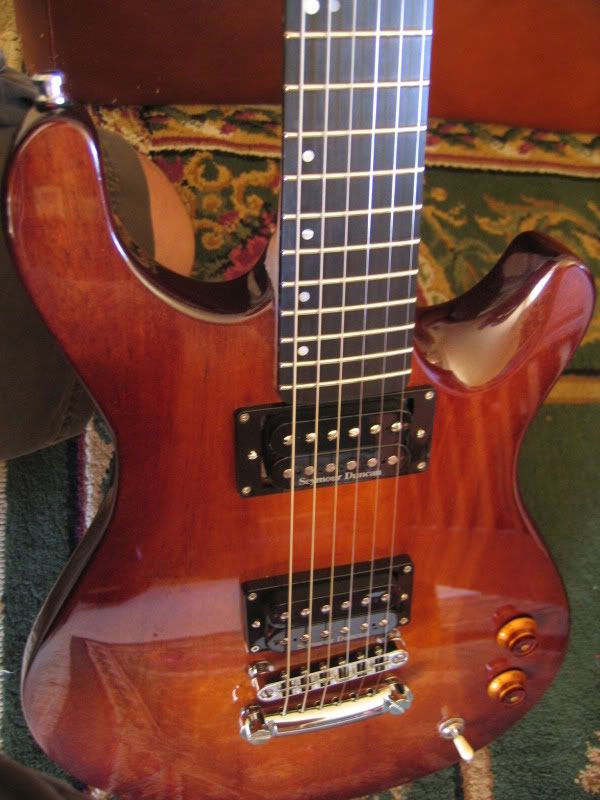
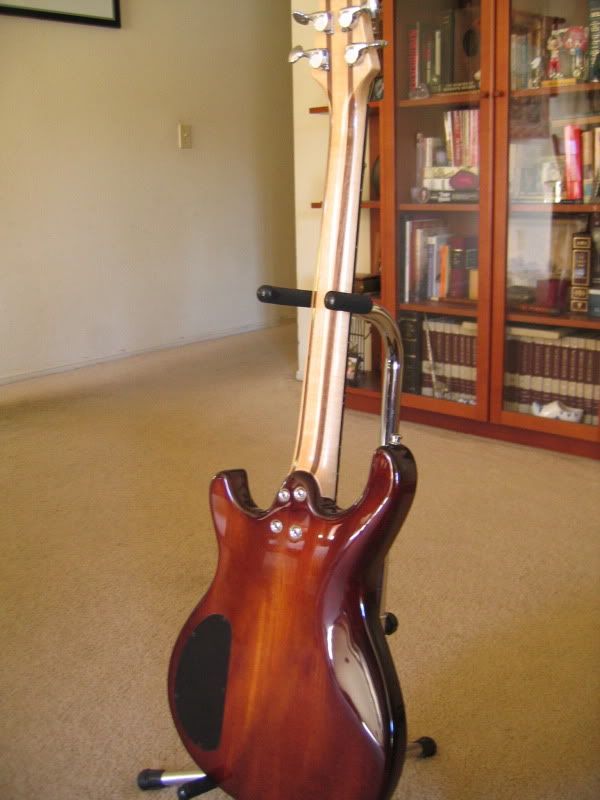
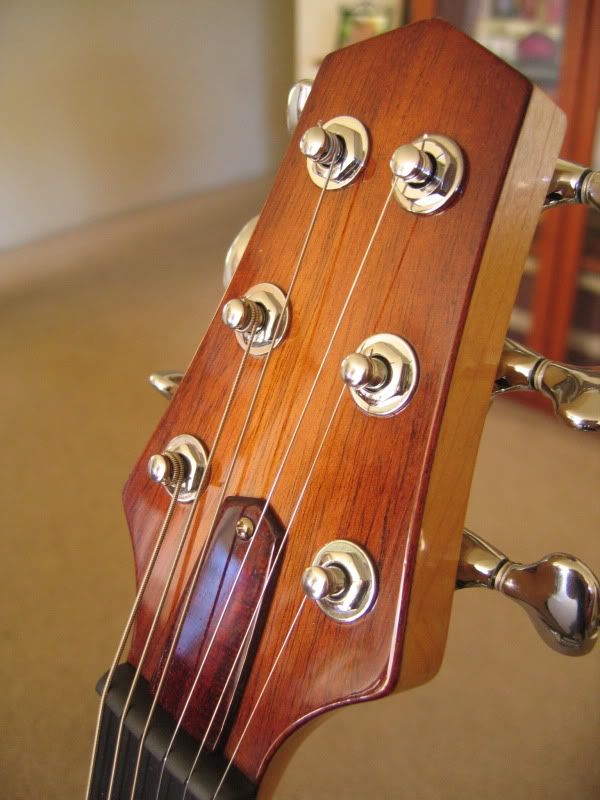
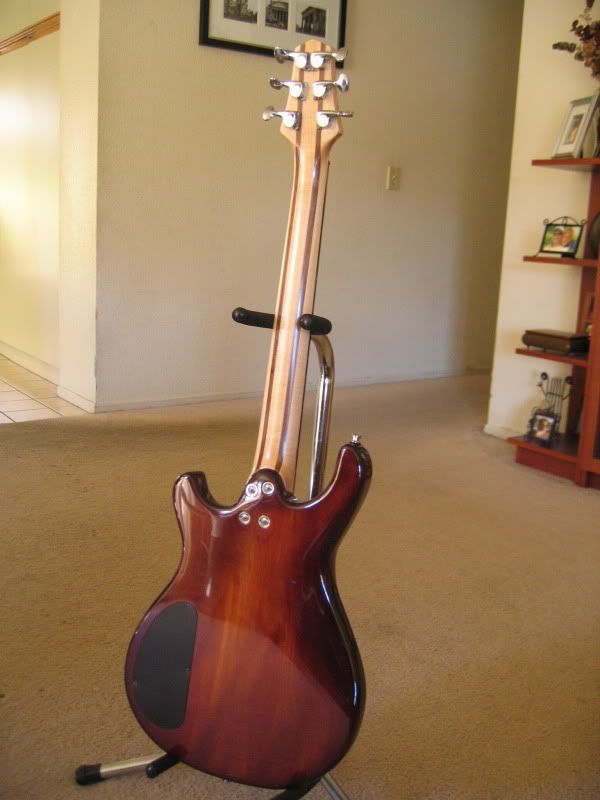
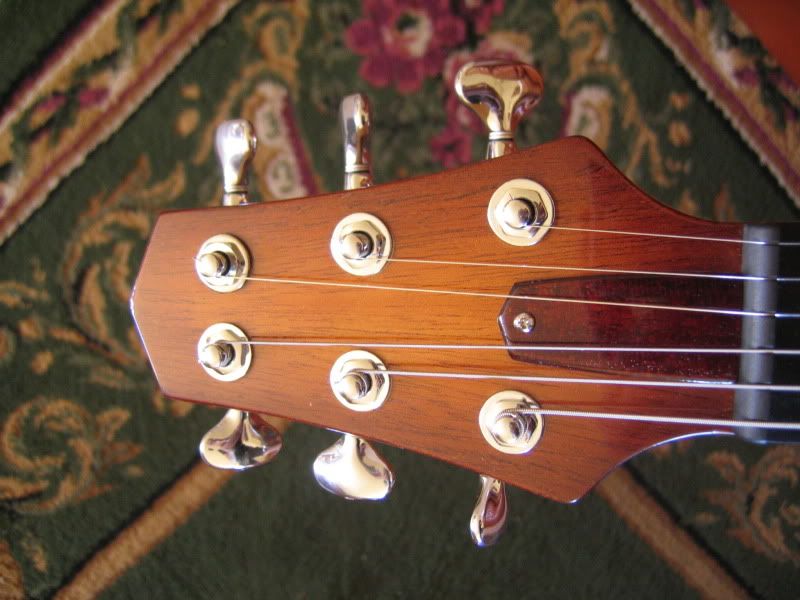
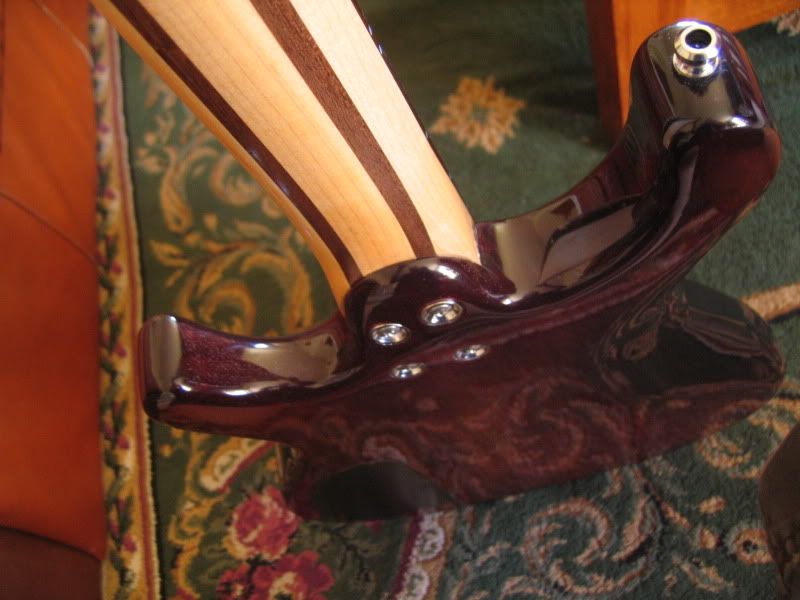
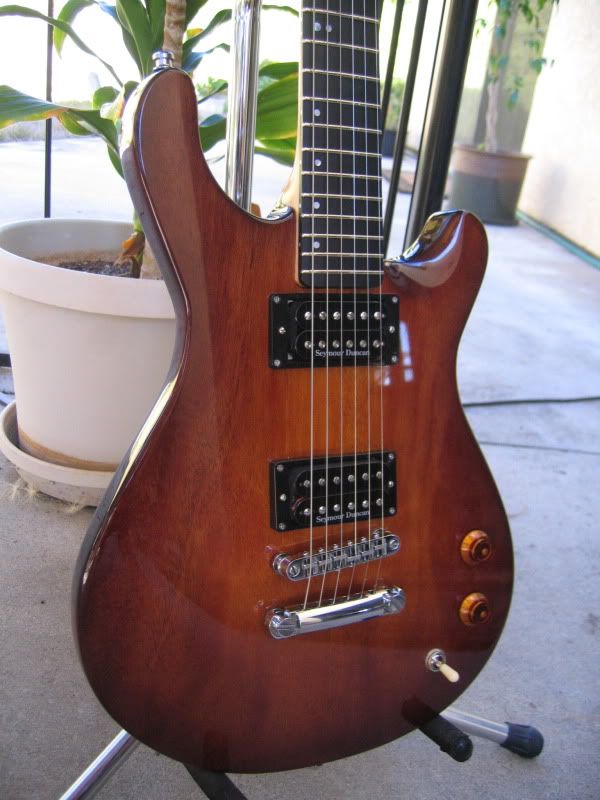
I humbly submit my first build.
The Dimple
Its named after a small flaw in the finish.
Build thread here
Body
2 piece mahogany.
1.5" thick. Mild burst done in water based hand rubbed dye.
Finished in clear nitrocellulose lacquer.
Brass inserts and machine screws in cavity cover.
Copper shielding.
Neck
5 piece laminate, maple/walnut.
Mahogany truss cover.
Graphite nut.
MOP markers
Ebony fingerboard.
2 way truss.
24.75 scale/22 frets
Hardware
Duncan TB-14 bridge/ SH-2 jazz neck
One tone, one volume, 500k pots .049 cap
3 way toggle switch
Gotoh Tune-O-matic bridge & tailpiece and 510 med 18/1 tuners.
Schaller straplocks.
The guitar weighs in at roughly 6.5 lbs.

-
Lol.
Pretentious or presumptuous was what I was thinking. I think I got side tracked and pushed the post button without completing my sentence. This is what happens when you're surfing guitar sites and trying to work at the same time.
-
I have a question. Do you think it would be to put this in the GOTM entries?
-
I did run into some problems with the JB pickup I bought for the bridge. bridge.
Because of the wider spacing on the TOMI had to go with a trembucker. Not string spacing is correctly over the pickup poles. Problem solved.
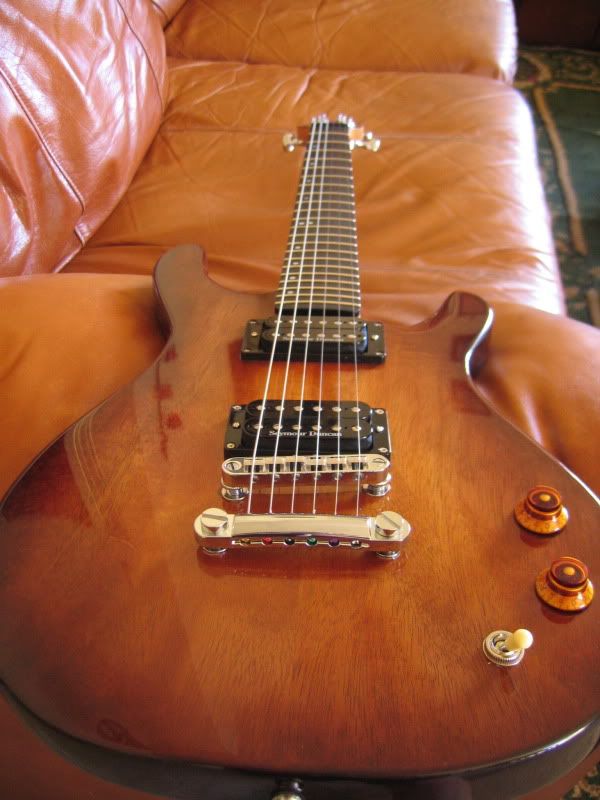
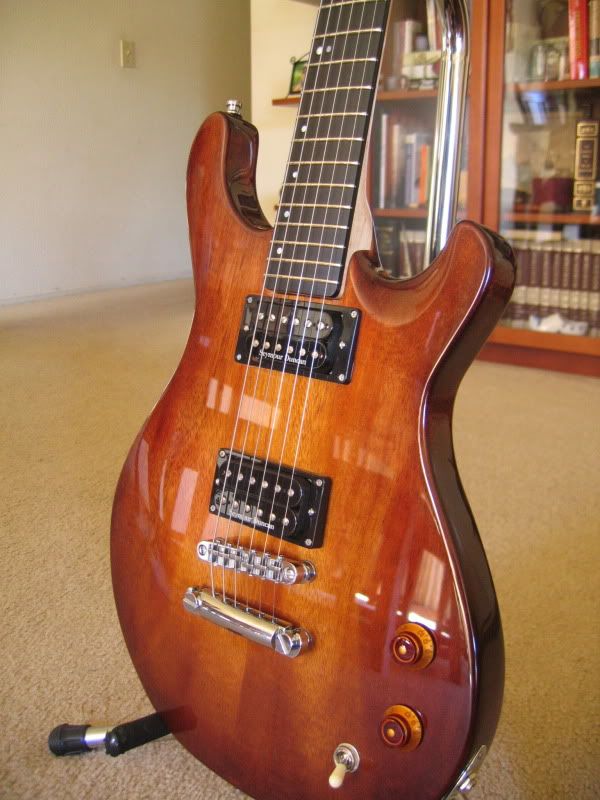
I just got done playing it for about 2 hours. Without going into too much detail it plays very good. Much better then any of the other guitars I own. No fret buzz. Holds tuning great. Action is nice and low but not too low. No dead frets.
Pickups sound great although the neck is a tad on the bright side. Because of the ebony FB Imaybe. Nothing that isnt fixed rolling off the tone a bit. The TB-14 sounds much better then I thought it would. Nice and punchy. The TB 14 measured out at 15.5k vs the JB measured out at 16.4k. I'll probably leave it in. The other thing that blew me away is how well the shielding eliminated any hum. Even with monster distortion, when your not playing its just super quiet. Even without muting the strings.
I cant even begin to express how stoked I am at how this turned out. The sense of accomplishment us unreal. I have to admit I spent some time drinking a beer and just staring at it for about 20 min and thinking of all the work that got put into it.
Although I dont really know anyone on these boards personally I'd like to thank anyone who's ever posted a tutorial or offered help here. I've learned so much from these threads.
I'm hooked. I have most of the tools I need now and I cant wait to do another.
Question On Selling Your Custom Guitars
in Solidbody Guitar and Bass Chat
Posted
Late last year I completed my first build and it came out better then I expected. It plays extremely well and I honestly surprised myself.
I cant wait to begin my next project but I have a major obstacle in my way in the form of cash. For my next project I want to build two builds simultaneously.
One of them will go to a friend and he is paying for his raw materials which will come out to around $800 by my estimates not including time. I dont plan on marking that one up and will be doing it just for the experience and to add a completed build under my belt.
The second one will be funded by me out of my savings with the intention of hopefully selling after it is completed. I like to make enough off the sale to make my money back and hopefully fund another future build.
So what I'd like is some suggestions on how I might I go about selling this? I had a thought to document these upcoming builds on Harmony Central and possibly generate some interest there but I think its against their TOS. I'd love to hear suggestions.
The second question is how much to you think I could expect to fetch for a quality custom guitar from a no name amateur? I have a figure in my head of between $1600 -$2k. It that unreasonable?
I plan on doing a mahogany body / maple top design with 2 HB's in it with a polished nitro burst finish. I'm not looking to start a full time business here. I just really enjoyed building the last one and want to progress my new hobby without my savings account taking too bad of a beating in the process. If I could make a little bit of money it would be a bonus but its not the objective.
I look forward to the responses and be gentile.