


sdshirtman
-
Posts
646 -
Joined
-
Last visited
-
Days Won
23
Content Type
Profiles
News and Information
Tutorials
Product Reviews
Supplier Listings
Articles
Guitar Of The Month
Links and Resources
Forums
Gallery
Downloads
Posts posted by sdshirtman
-
-
I never did find any suitable blank replacement saddles for the Gotoh TOM that I bought so I filed the notches off so I could widen the string spread a bit. It was tedious to say the least.

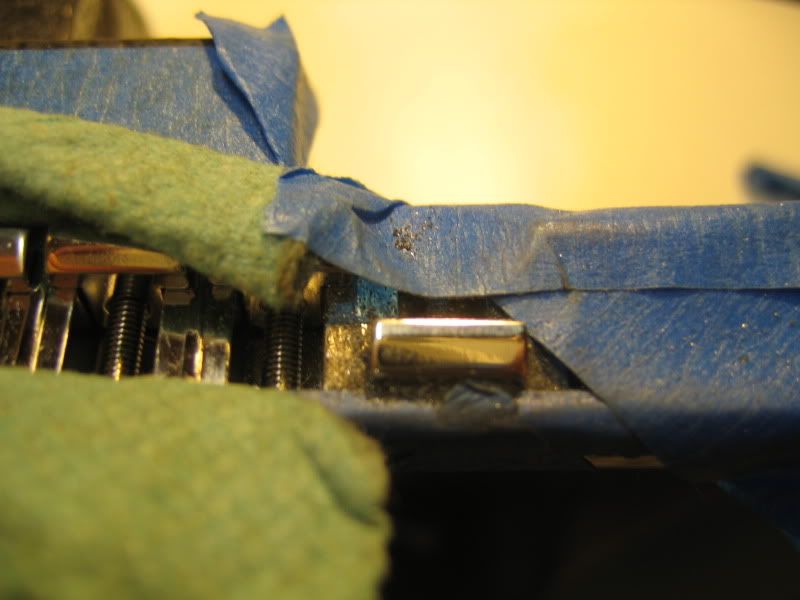
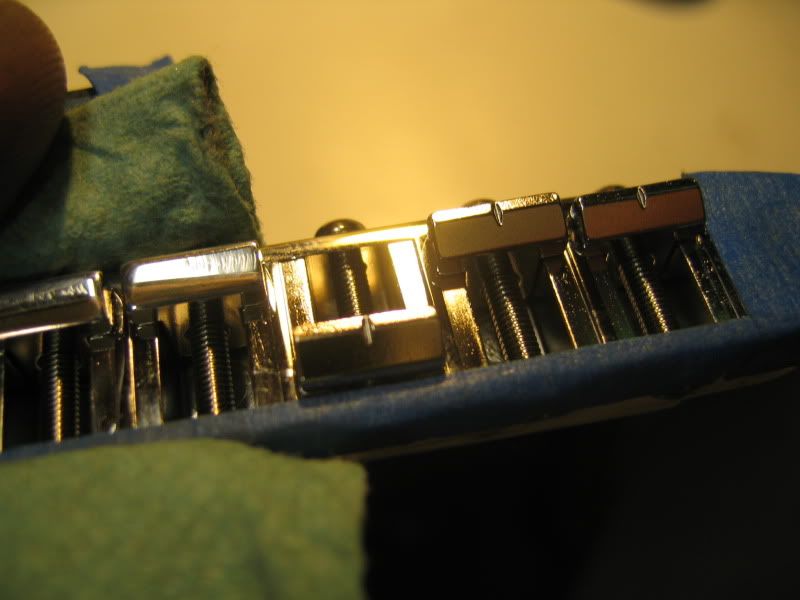
This will work.
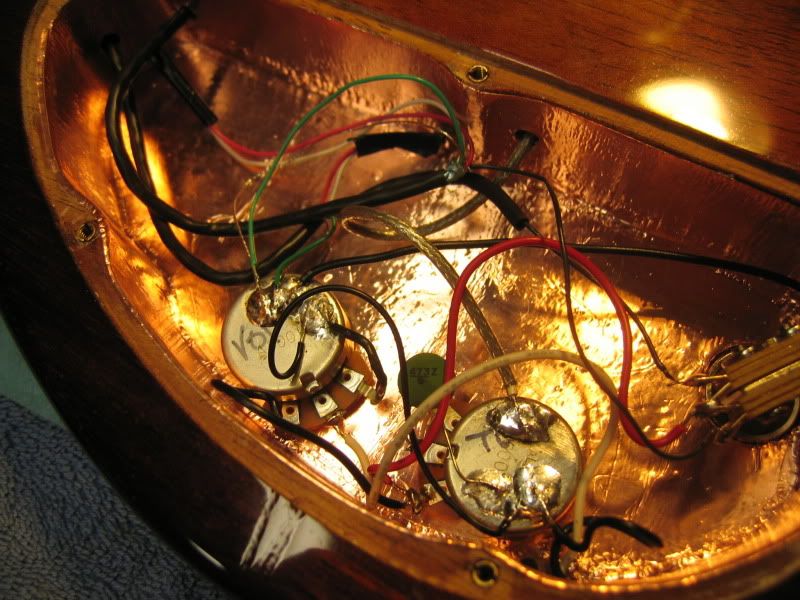
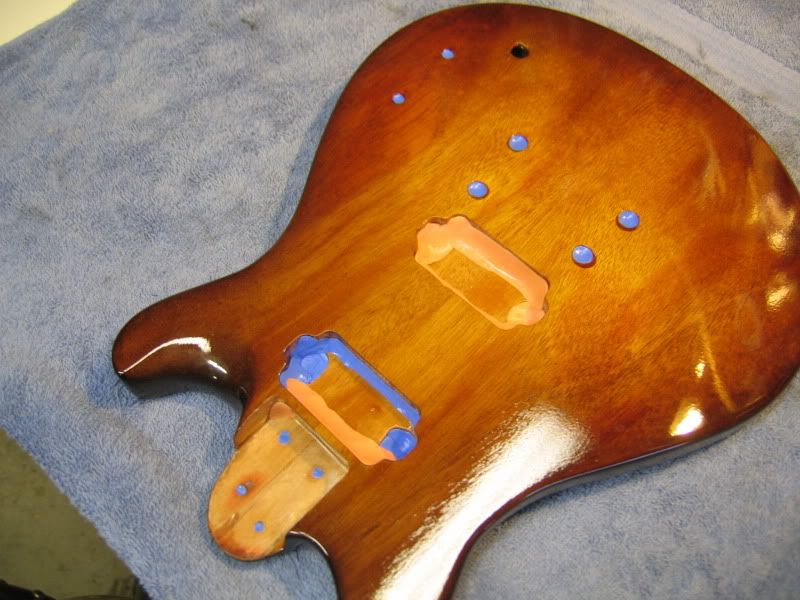
I shielded the electronics cavity and started my wiring. I used shielded wire for the stop tail stud ground. I'm going to attempt to make this guitar as quiet as possible.

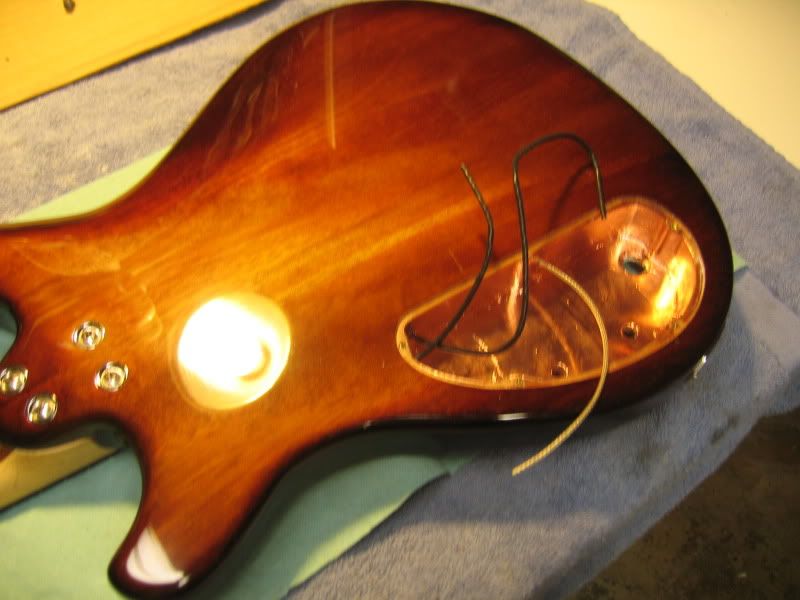
It aint the prettiest but the connections are solid.
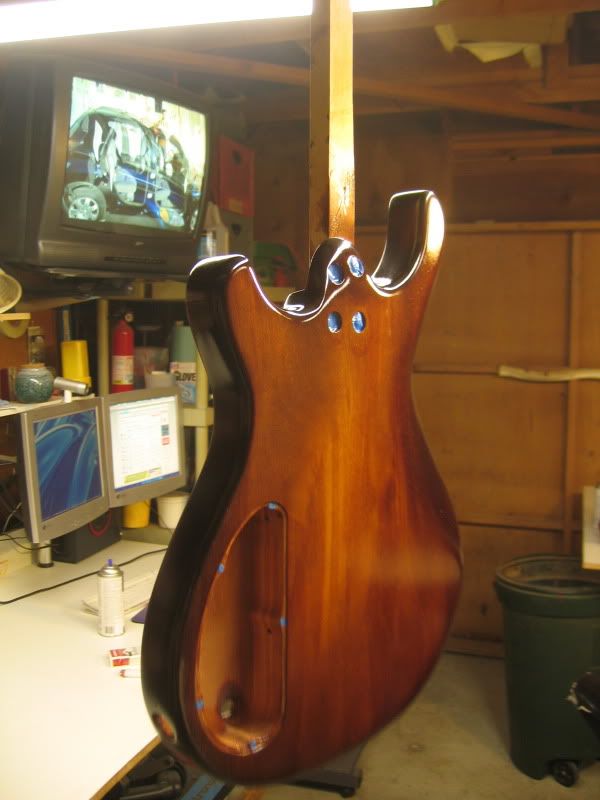
Not far to go now. I have to finish my truss cover which a should have done 2 weeks ago while I was waiting for paint to dry. Then slot my bridge saddles and do a set up and intonation.
-
IbanezDudeCK: The router works great. I like that it ramps up to speed instead of just cranking on. As far as the pictures. I learned half the build methods I'm using from forums like this one so I'm just trying to give a little back.
Narcissism: Thanks for the tip. I'll keep it in mind next time.
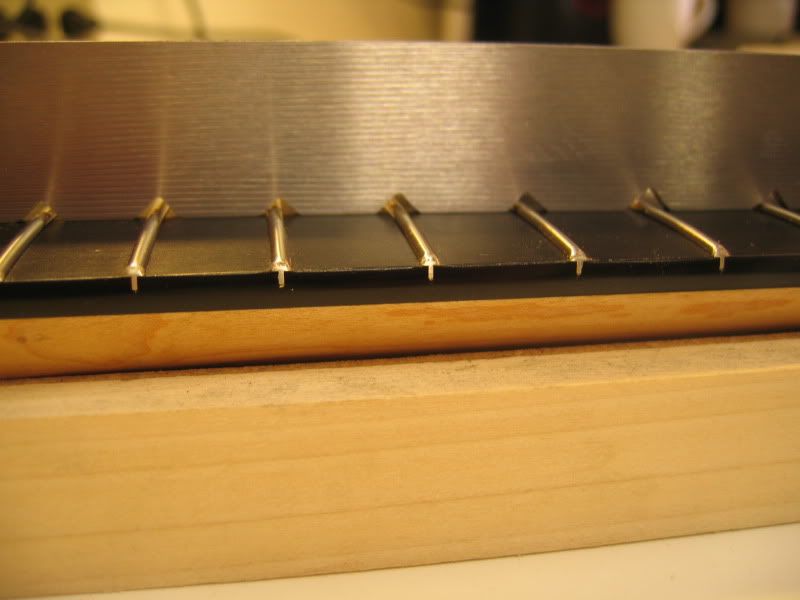
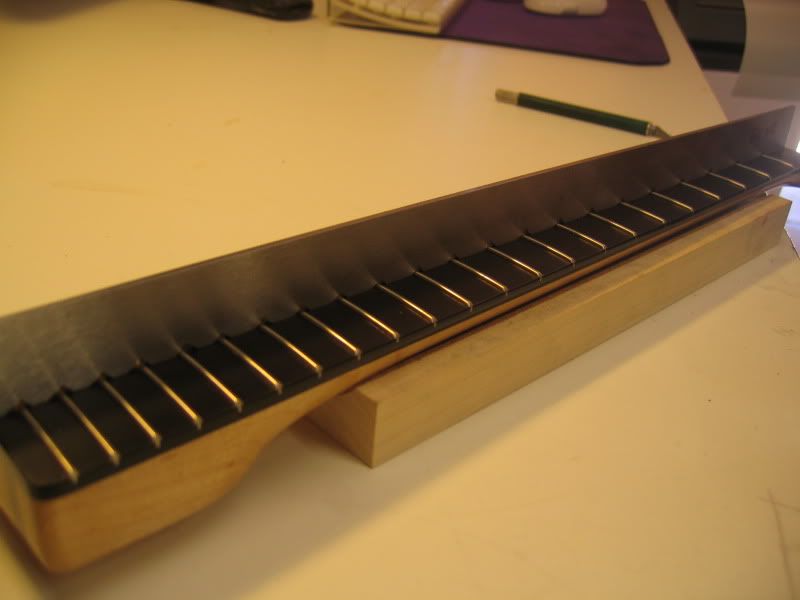
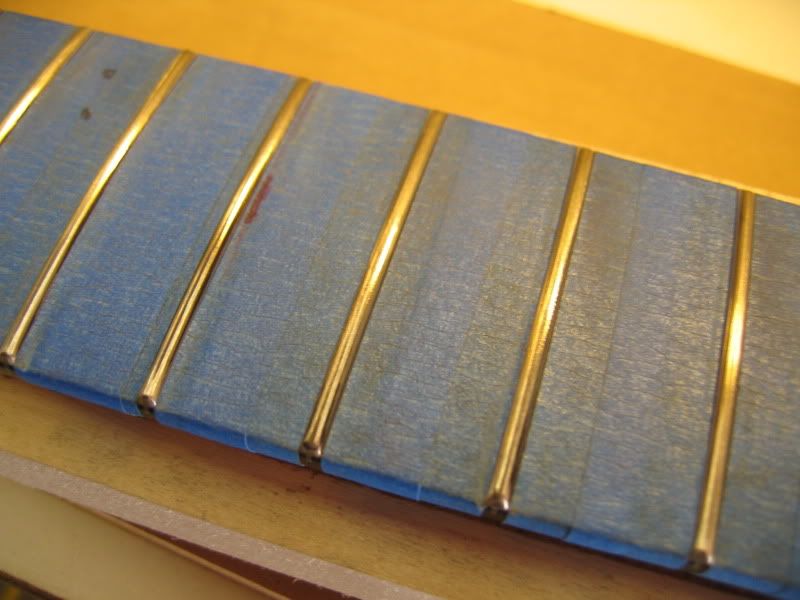
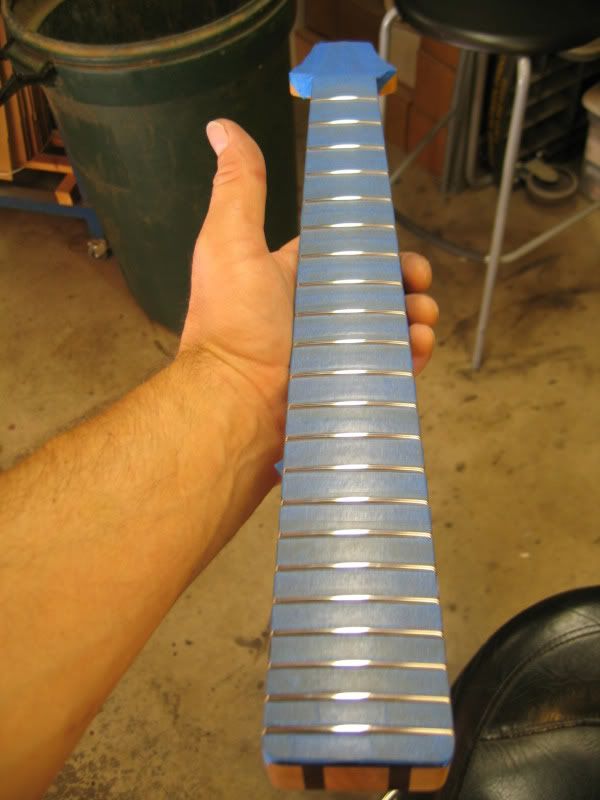
I finished my fret level. Its my second time. I bought an old junker Ibanez off craigslist for 30 bucks to practice on.
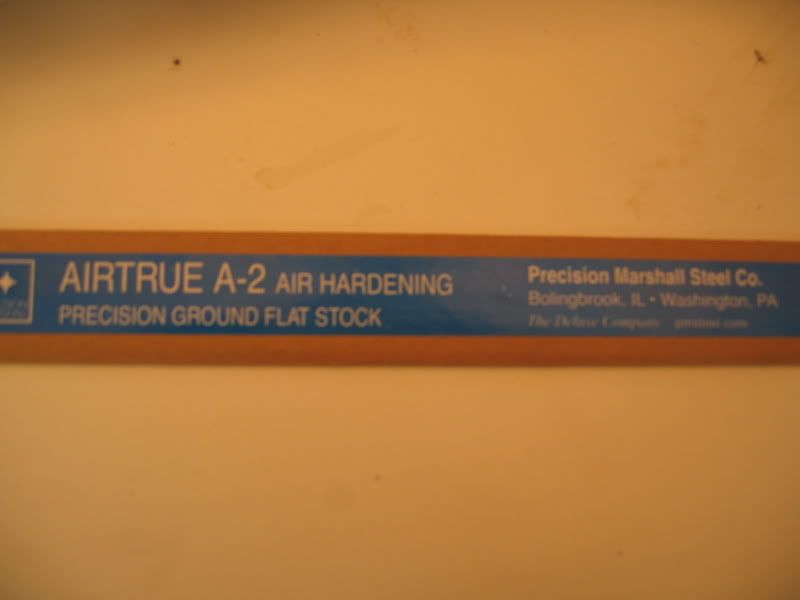
I made a notched straight edge from a piece of precision ground stainless steel I got from the local metal supply store for $4.00.
Saved myself $68 off the stew mac version and it worked great.
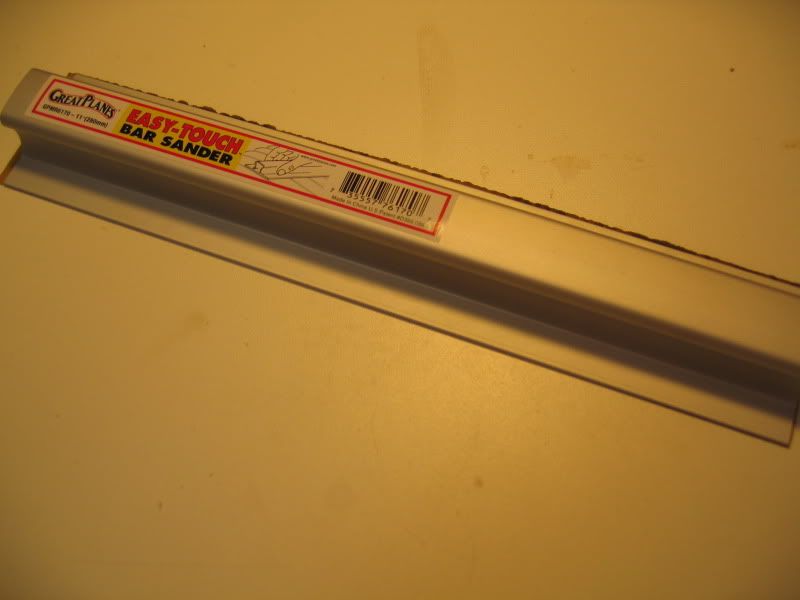
For the leveling I used this easy touch bar sander I bought from a hobby store for 6 bucks.
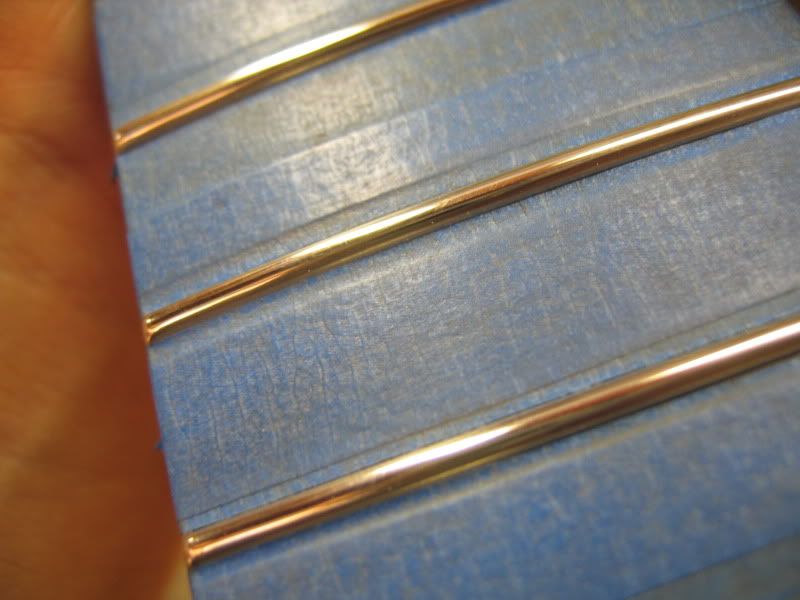
All polished up.
-
Great work SD! I can see this guitar is going to be absolutely gorgeous. I'm extremely new to working on guitars and have been trying to find the neck bolts with inserts for a project I'm working on and haven’t had any luck. If you could point me in the right direction I'd greatly appreciate it. Keep up the excellent updates and I'm really looking forward to reading about your progress. Thanks in advance and have a great Saturday!

Sorry I couldn't respond earlier. I've been away for a while. I got my hardware for the inserts from Lowes. I couldn't find them at Home depot.
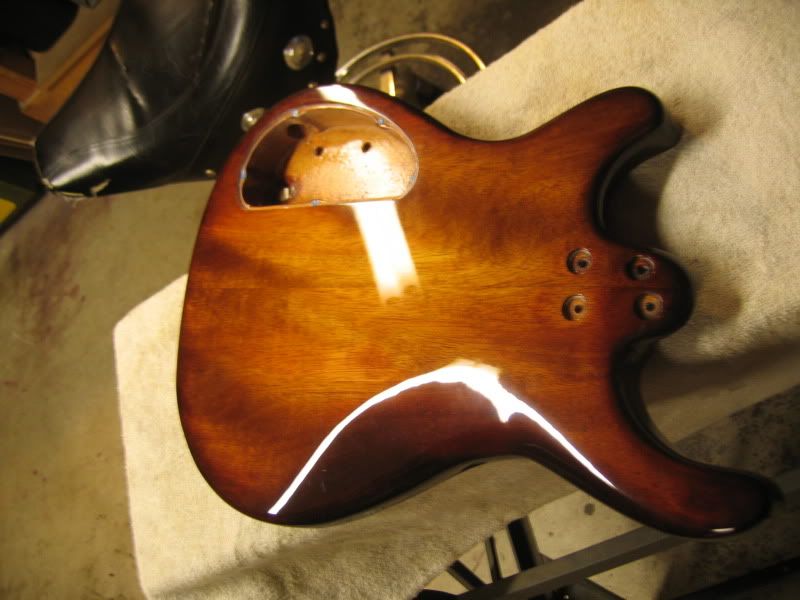
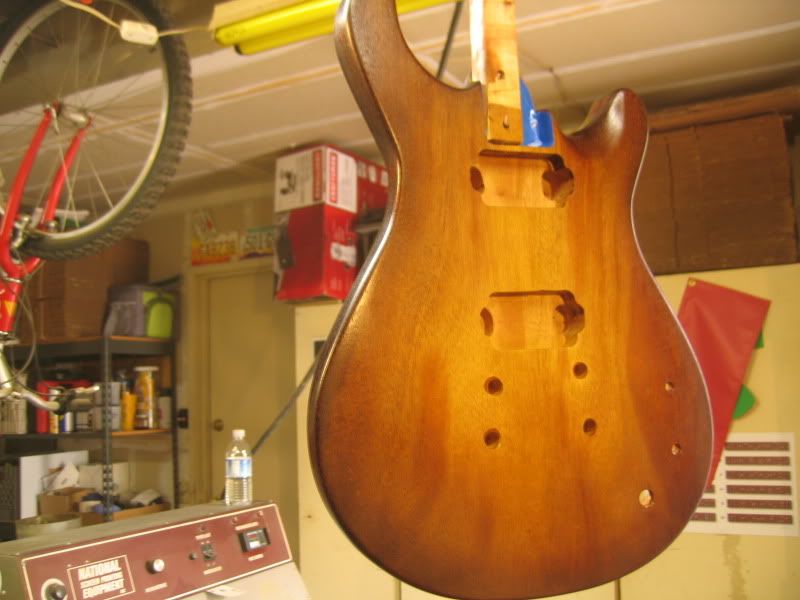
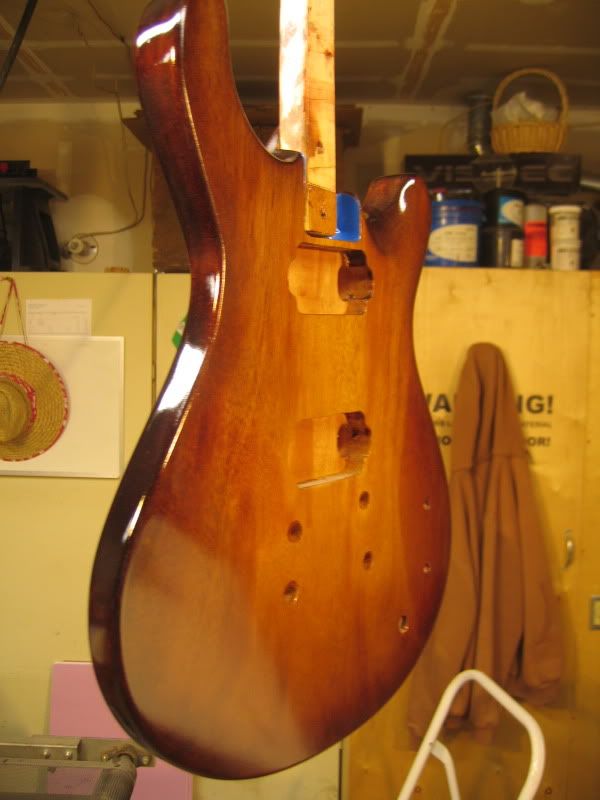
On another note my curing period is over for my lacquer finish. I waited 5 weeks I think. I wet sanded everything Sunday and buffed it out.
I only used 2000 grit. I tried it out on my test piece and it seemed to cut just fine so I figured it would save me time. That and it insures I dont have to remove any scratches from lower grits.
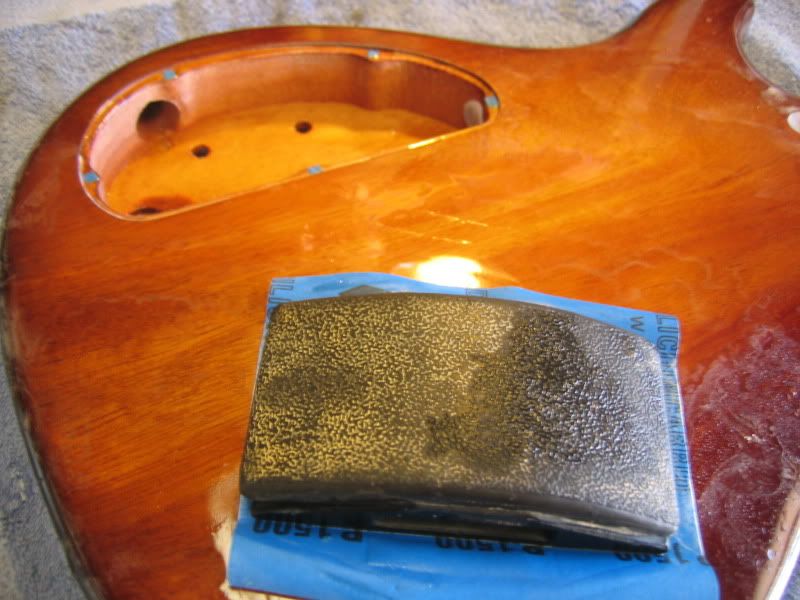
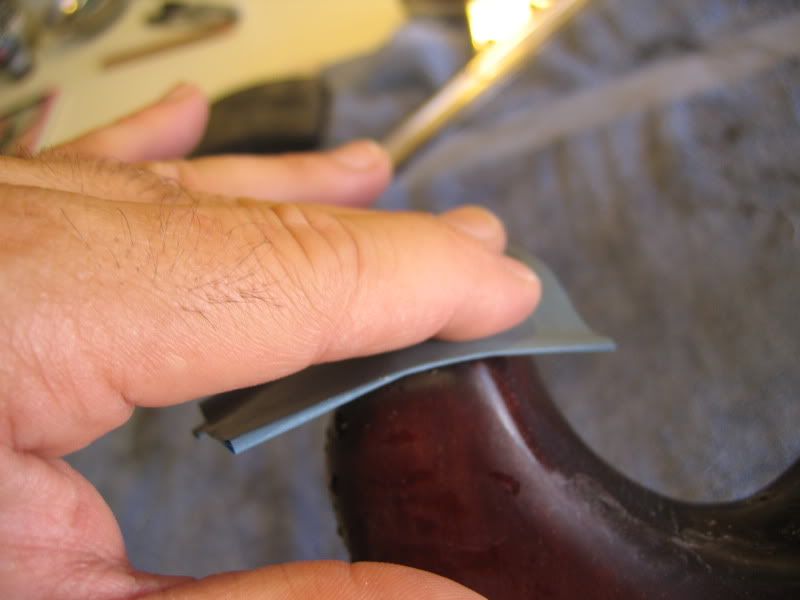
I initially tried clamping the body to the bench but was worried about leaving a mark on the finish so I had a friend hod the body while I buffed it.
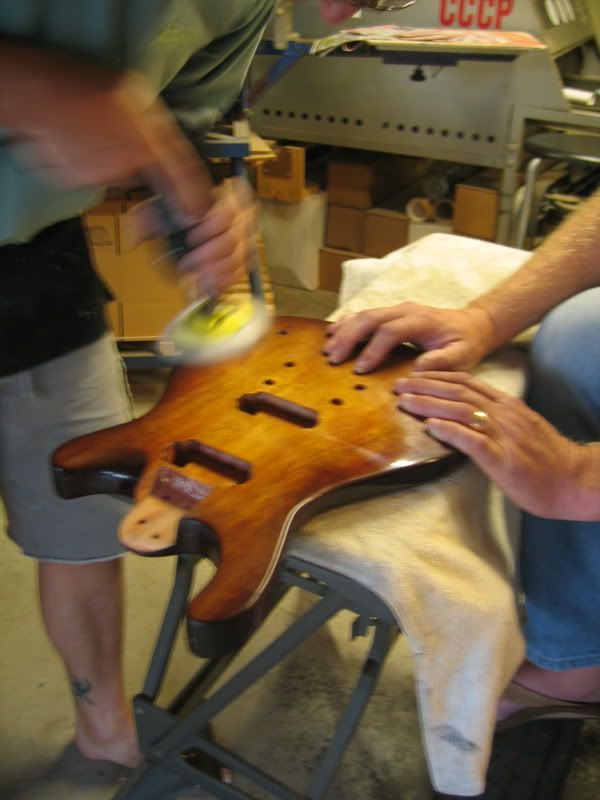
I'm pretty happy with the result. Its my first experience with nitro.
This is my test piece.
And the final finish.
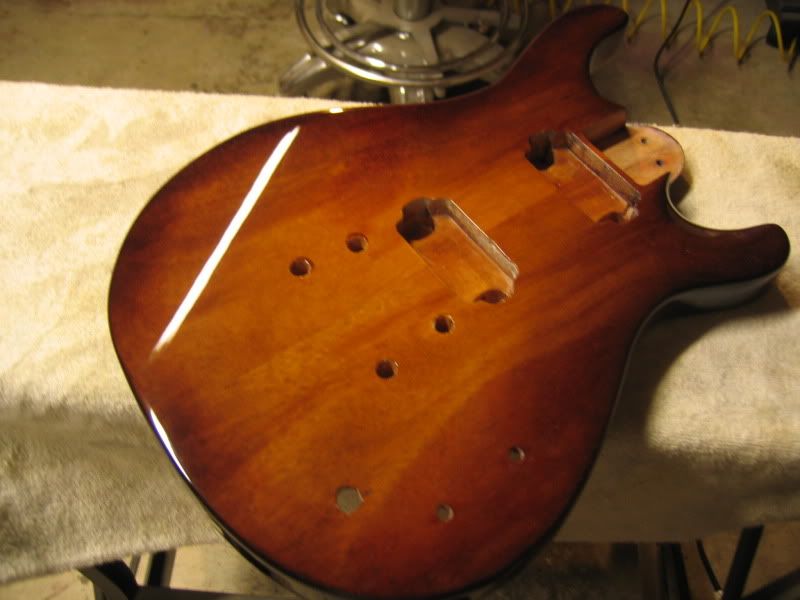

Almost there. I have some pickups in the mail. I still need to make a truss rod cover and level my frets.
-
I'm sure you already realize this but you have some serious sanding/planing to do to that scarf before you glue it up.
-
Just wanted to let you know the file arrived in good condition. Thank you. (Turn on your private messaging)
-
Before we finish this transaction I forgot to ask which size crowning file this is. I need a med.
-
jwallac3@san.rr.com
-
How about $30 for just the crowning file?
-
Nice progress on the guitar. I think the sunburst suits it very well.
The silly putty seems like an easy and convenient solution to the water problem during finishing. The only thing that worries me is that, according to Wikipedia, Silly Putty is "the Crayola owned trademark name for a class of silicone polymers". I know that silicone can interfere with finishes but I'm not sure if 'silicone polymers' has the same effect. Hope the guitar turns out OK!
Keep up the good work.
Thank you. That could be an issue. I wasnt aware of the contents. But I did clean and wipe the body down with naptha and a tack cloth before finishing.
-
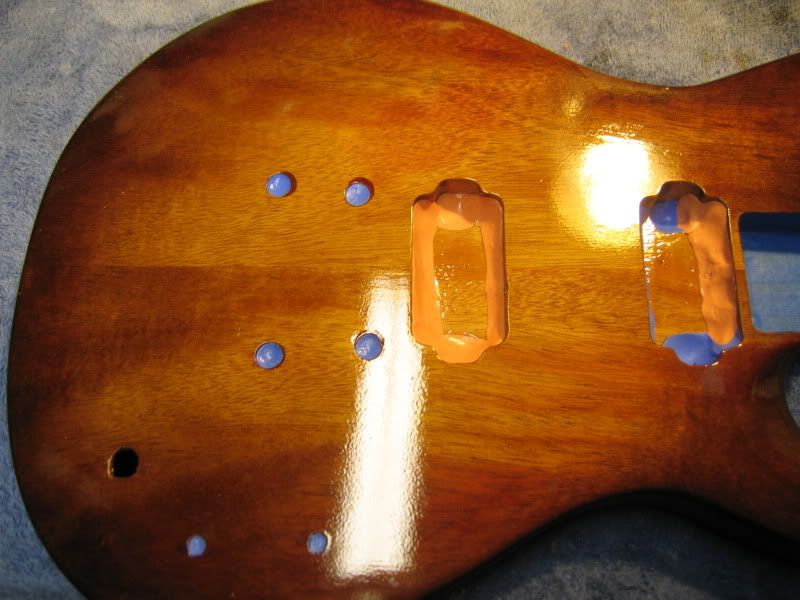
Small update. I've shot my sealer and sanded it down and started shooting my coats of clear lacquer.
Sealer
Lacquer
I shot roughly 12-15 thin coats of lacquer then wesanded.
I had some concerns about water penetrating the open parts of the guitar and swelling the wood. I thought of using blue tape protect it but its not water proof. My solution was silly putty stuffed into the open holes. It worked great.
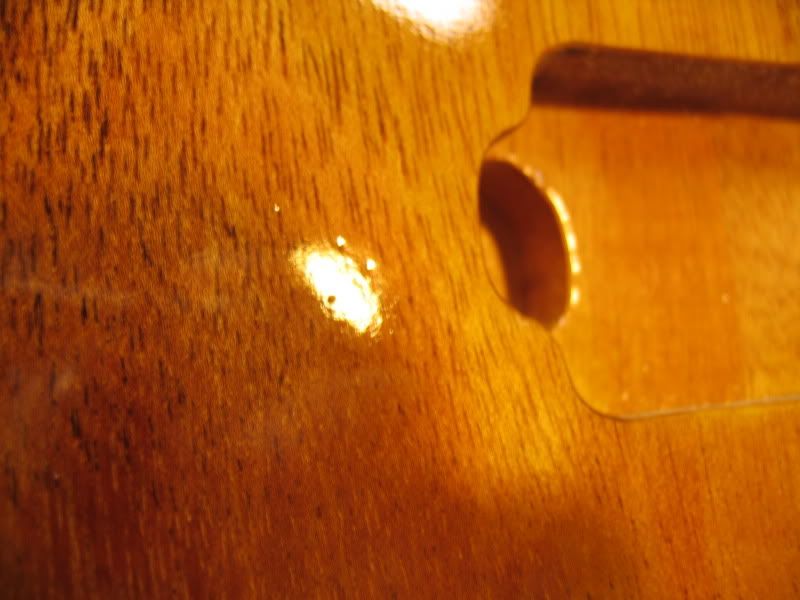
Knocking down my orange peel and almost ready for my final coats.
I started shooting my final coats. I did 5 and I think its ready to sit in the closet for a month.
Thats it for a while.
-
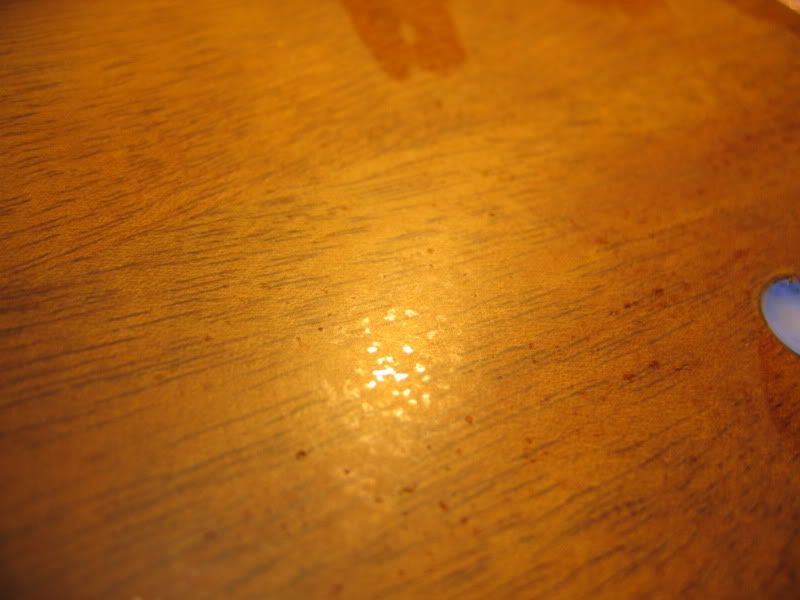
Here is the pic of the problem.
-
Thanks for the replies. I'm going to try and fill the spots with a small brush and sand off before buffing. That should work correct?
-
Ive got a small section on the face of my guitar that keeps developing 4 or 5 pinholes every time I spray a coat of clear lacquer. It was present when I was shooting sanding sealer also.
I filled the pinholes with an extra dab of sealer before I sanded flat and I thought they were gone. They showed up when I shot the next coat. I repeated the filling each time thinking that would take care of it.
Before each coat the section looked completely sealed and flat. I even inspected it with a magnifying glass. So when I got done wetsanding with 600 grit. Where the pinholes were I could see shiny depressions where the pinholes were showing that paint level was slightly shallower, so I filled with some lacquer with a brush. The next morning I sanded the fills down flat. Finally it looked like they were gone. You couldnt see where they were filled at all and they blended perfectly with the finish, albeit dull from wetsanding.
So now I just got done shooting the first of my final coats and the damn things are right back where they were all along. I have no idea why and how to correct this. Sanding down the entire finish and starting over just isnt an option at this point.
Any suggestions or insight to prevent this from happening ever again?
-
When I was younger and doing poly finishes we never started sanding the final coat with anything less then 1000 grit. And sometimes 1200.
-
You should be able to wetsand and spray right over it I would think.
-
This situation would kinda erk me also. I always smirk when I see someone posting a "guitar build" when they're really just assembling parts. They should call it a "guitar assembly" IMHO.
Anyways, if you call him on it there is the possibility he might not ever order from you again. Who is it really hurting? There a lot of people doing what you do out there. I think the bottom line is do you want to potentially sacrifice a customer for pride? Your making money doing what you like. I'd consider myself lucky.
Just my 2 cents.
it's not about pride. It's about right and wrong. It is wrong to claim someone elses work is yours. If I were a writer it would have been plagerism.
Yes, there are a lot of people who do what I do, and there is an entire world full of potential customers..............
Everyone has his own limits. if thats how you feel then I'd privately let him know how you feel and ask him to change his post and give you the credit you want.
-
This situation would kinda erk me also. I always smirk when I see someone posting a "guitar build" when they're really just assembling parts. They should call it a "guitar assembly" IMHO.
Anyways, if you call him on it there is the possibility he might not ever order from you again. Who is it really hurting? There a lot of people doing what you do out there. I think the bottom line is do you want to potentially sacrifice a customer for pride? Your making money doing what you like. I'd consider myself lucky.
Just my 2 cents.
-
Thanks. I just shot another coat. This time being careful to lay on a thinner coat. I'm shooting about 8" away until I barely have a wet look and I'm getting blush again. Its gassing off and disappearing after 15 min but still getting it either way. If I spray any lighter I cant get a wet coat.
Suggestions?
-
OK thanks. I guess I'm just rushing a bit. I'm familiar with 2 part poly finishes but have never dealt with lacquers.
So as far as multiple coats with the sanding sealer I'm cool with that? It is in fact just a high solids clear lacquer correct?
-
I ordered a crowning file from ebay last week and it was pure crap. I should have just ordered from Stewmac or LMI.
-
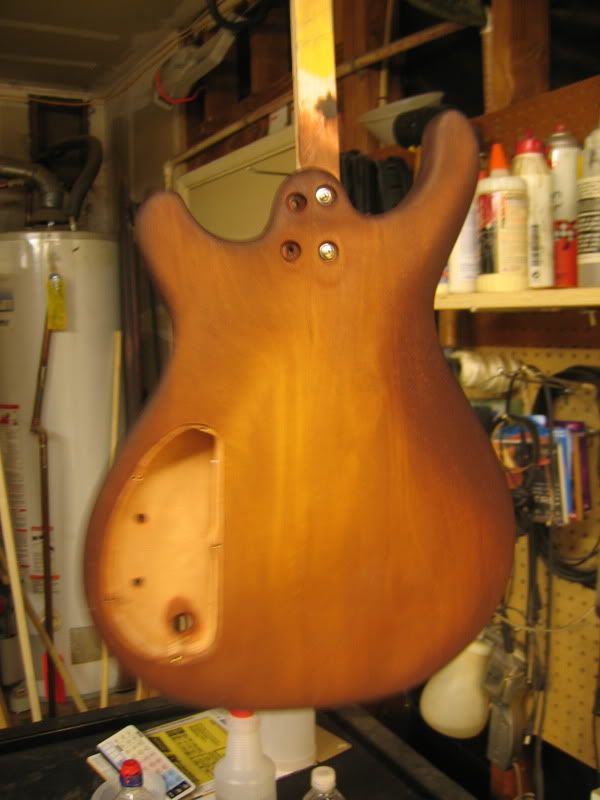
I'm at the stage of my build where I'm sealing over my dyed finish. I used 3 coats of cristalac clear grain filler sanding back to wood each time (Before dyeing)
I started shooting Deft laquer sanding sealer the other day and noticed my grain didnt fill nearly as well as I thought it did. I shot about 5 coats then let it sit for 24 hours then carefully sanded.
Sanding took out maybe 65% of the grain depressions and helped level the base. But there are still some grain valleys that aren't filling well. Or filling slowly anyways.
As I understand it the Deft Lacquer sanding sealer is just clear lacquer with more solids in it. Should I be worried about applying more coats to fill the grain? I thought I remembered reading somewhere that it was a bad idea. But if its the same as the lacquer clear why would that matter?
Also, I've noticed on several coats me developing some blushing (turning milky/smokey grey where thicker) where I was laying it on a little too thick. I thought I would have to go back and sand it off but 20 min later its gone each time. It appears its gassing off or something. Is this Its 75 degrees out and humidity is 32%.
How worried should I be about the blush?
How worried should I be about multiple coats of sanding sealer to fill the grain?
Thanks in advance.
-
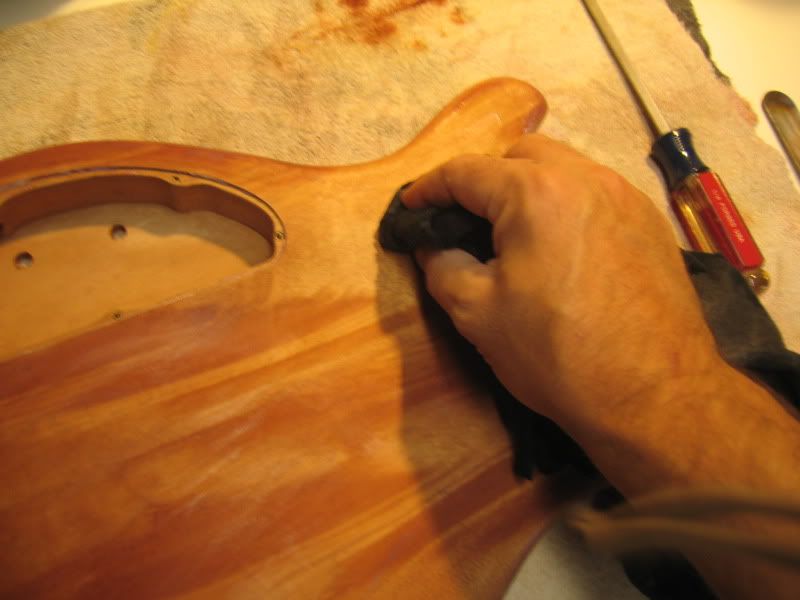
Did a little work this weekend. I sanded all the sealer off then did another cycle of grain filling.
For the final sanding I used 400.
After I sanded all the grain filler & scratches down I pre-raised the grain and sanded it back until smooth. I did this twice.
Then I cleaned it with some naptha.
Finished and ready for dying.
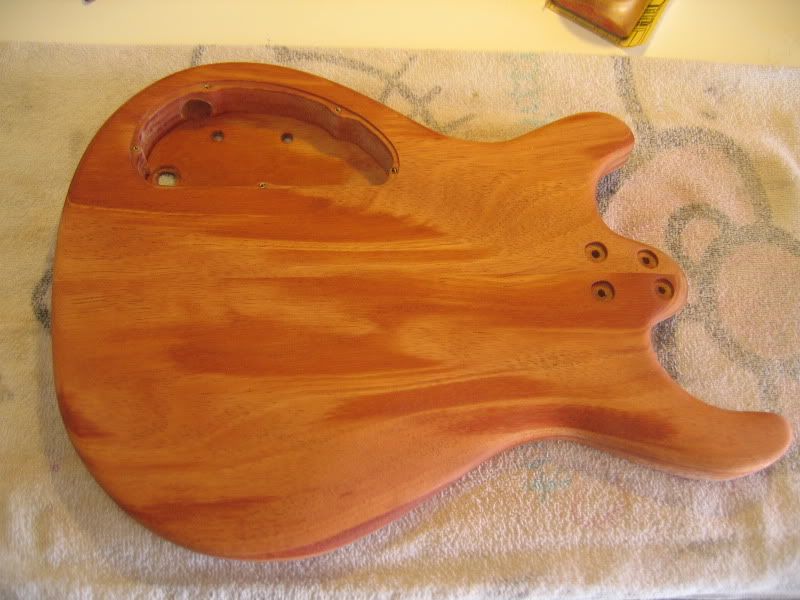
Then started staining using water dye working from amber to dark brown on the edges.
The most difficult part for me was holding on the guitar like a big Popsicle while I stained both sides simultaneously. It took me nearly 45 min to complete this. After a while it got a little heavy. I'm not sure what it takes other people but thats what it took me.
I'm pretty happy with the final color considering its just mahogany and this is my first time.

The sides came out nice and dark.
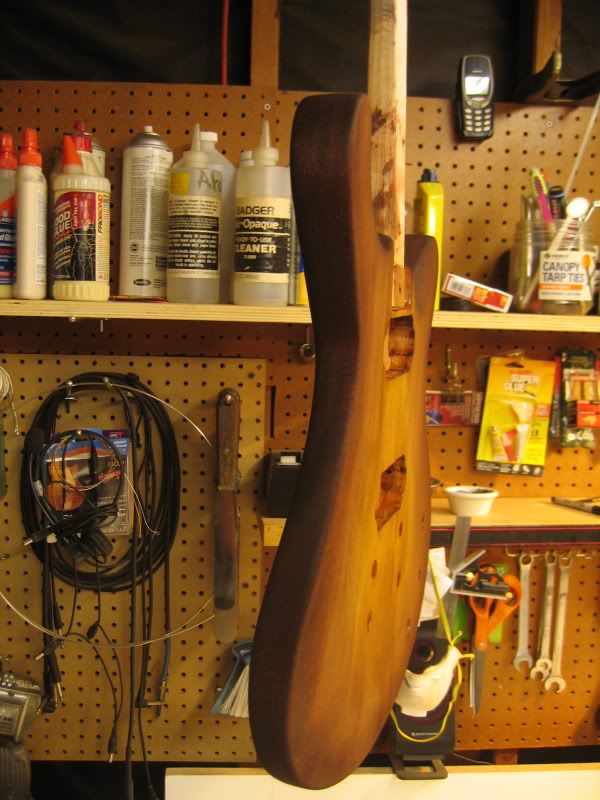
The broad swirls of grain kinda make this look a little off. It looks much better up close and in person.
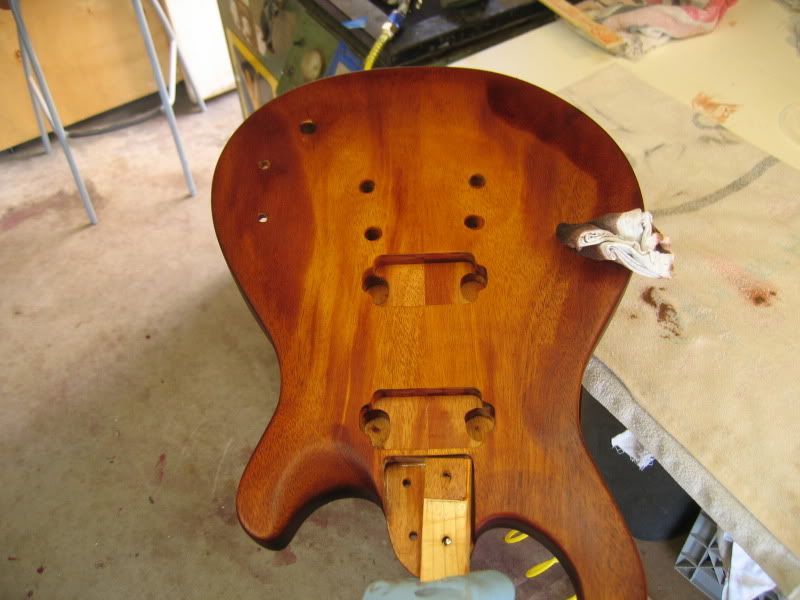
And last I dyed the headstock.
I'm going to let this dry for at least 24 hours then start shooting the sanding sealer.
-
Continued:
This stuff is kind of nasty. If I was thinking straighter I would have used rubber gloves.
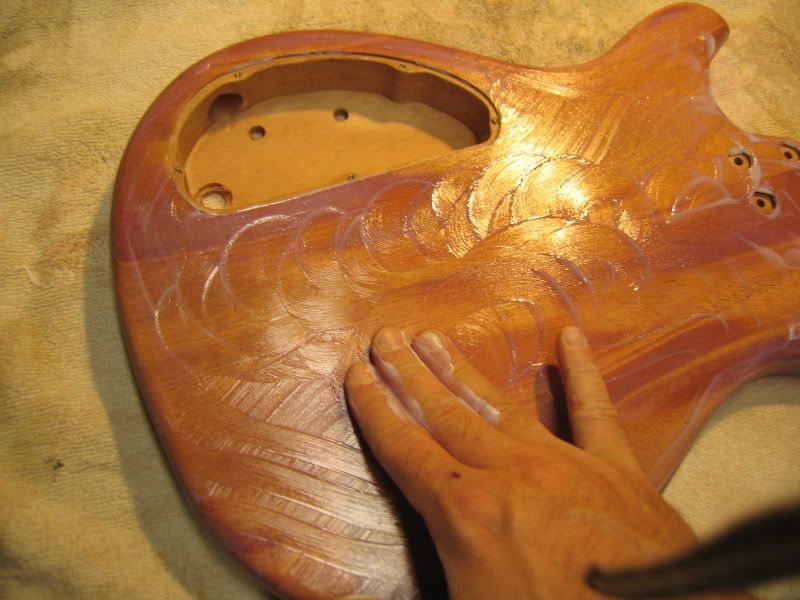
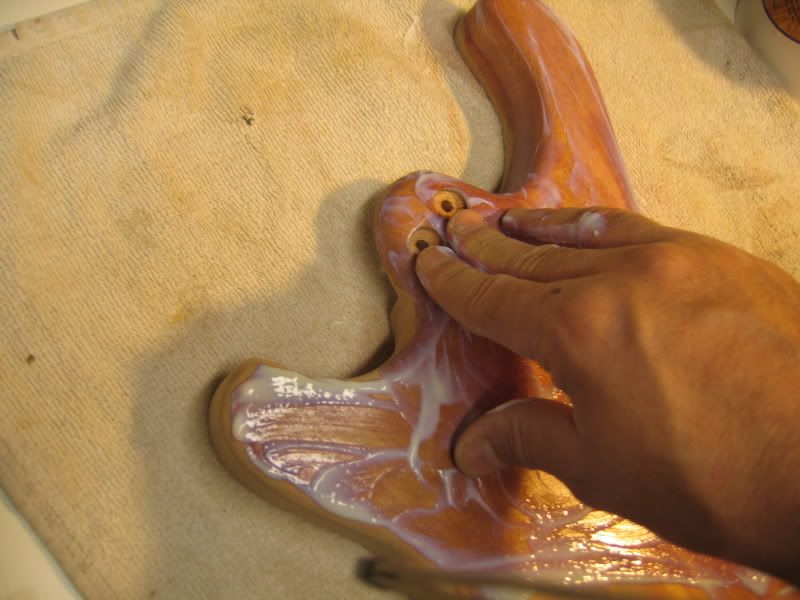
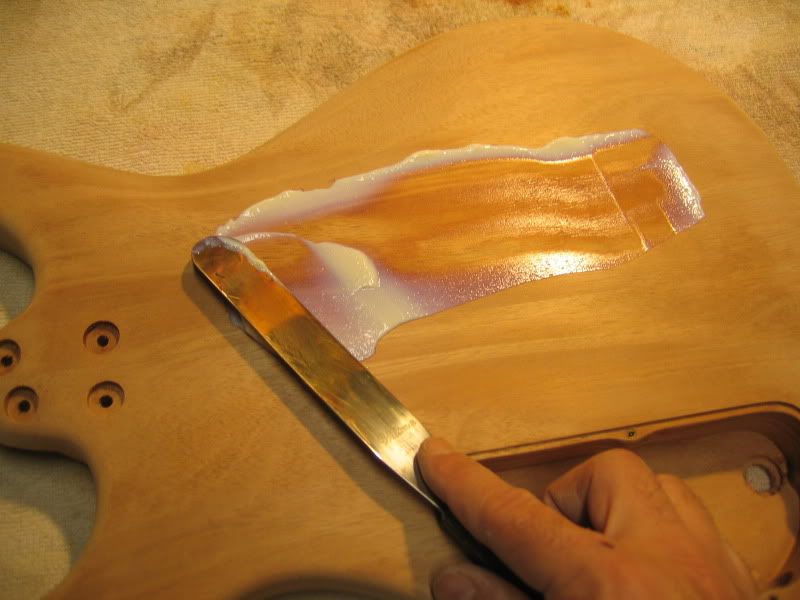
After I've covered one side and the edges I let it sit for about 2-3 min. Just enough to set into the grain. Then I scrape off the excess with a scraper. Or you could use a credit card. Use a diagonal motion.
Then I use an old rag to rub in the rest while also removing the excess.
This is what it looks like before rubbing.
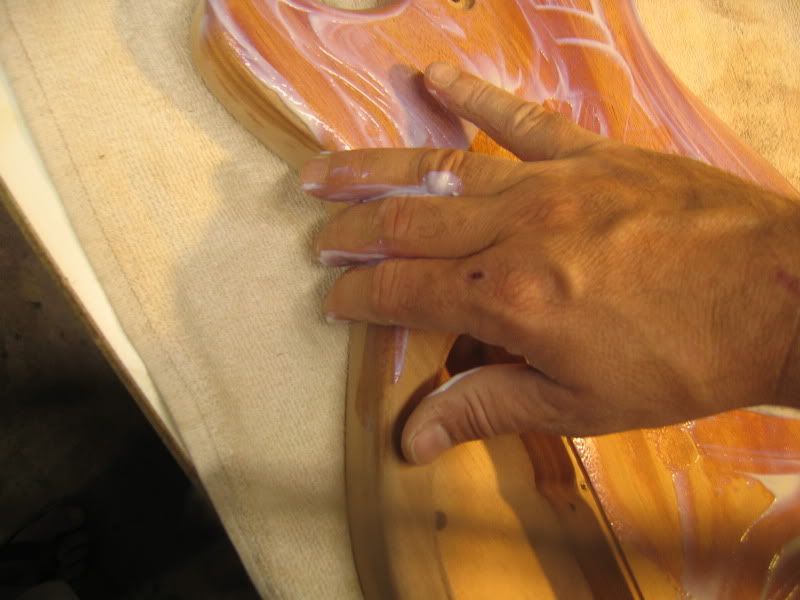
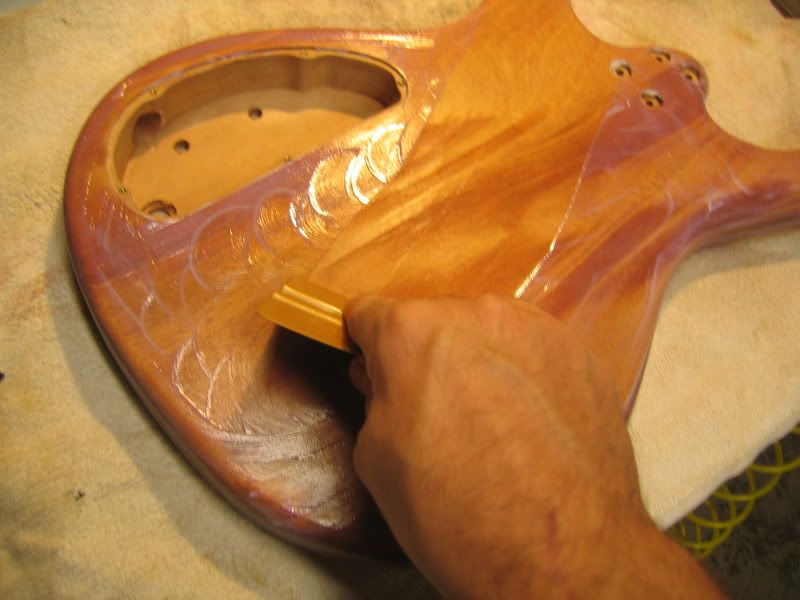
Make sure you get ALL the excess because this **** dries pretty hard and it doesn't like sandpaper.

This is what it looks like after wiping with an old shirt.

After its dry I'll sand it down to the wood with 120 grit. I dont want I want to sand past where I just filled. But I want to go deep enough to where the wood will accept wood dye. I did this process twice to my sample piece. I'm doing it twice to my guitar. Unless think I need a third. I have to keep in mind my sanding sealer will take care of any small things I missed.
After the second treatment is dry I'll sand it down with 220 instead of 120 like I used on the first treatment. Then I'll hit with 320 then 400 and I'll start doing the dye job.
That should be the next update.
-
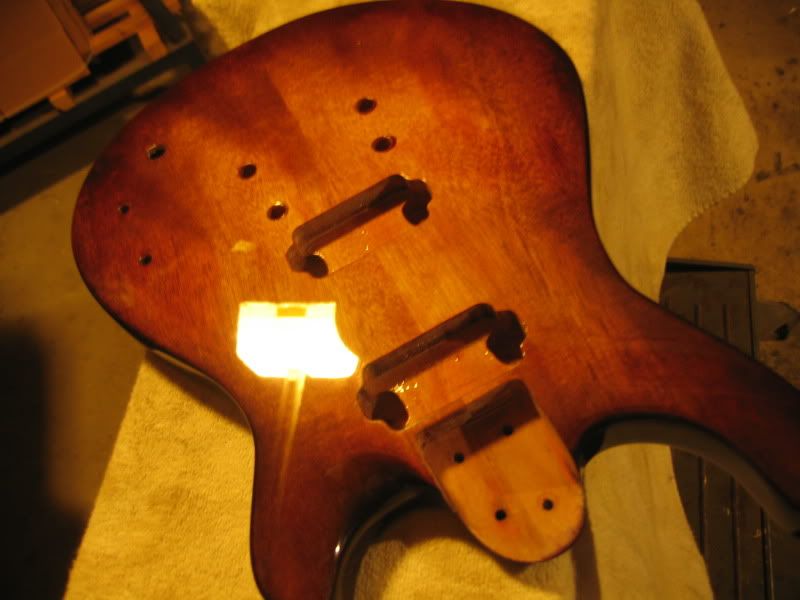
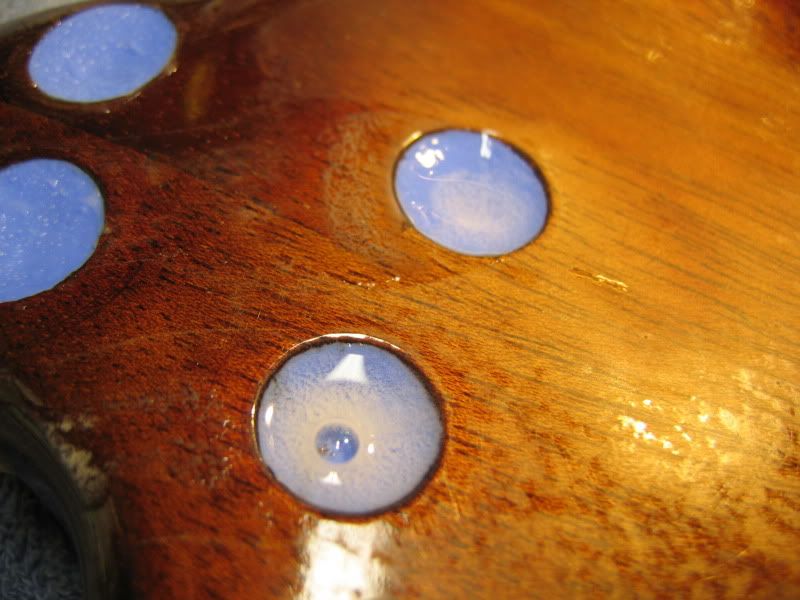
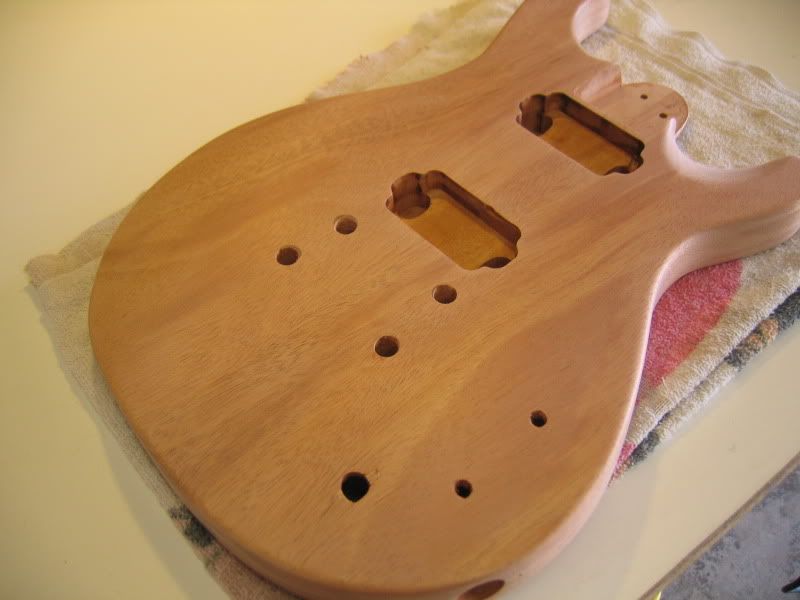
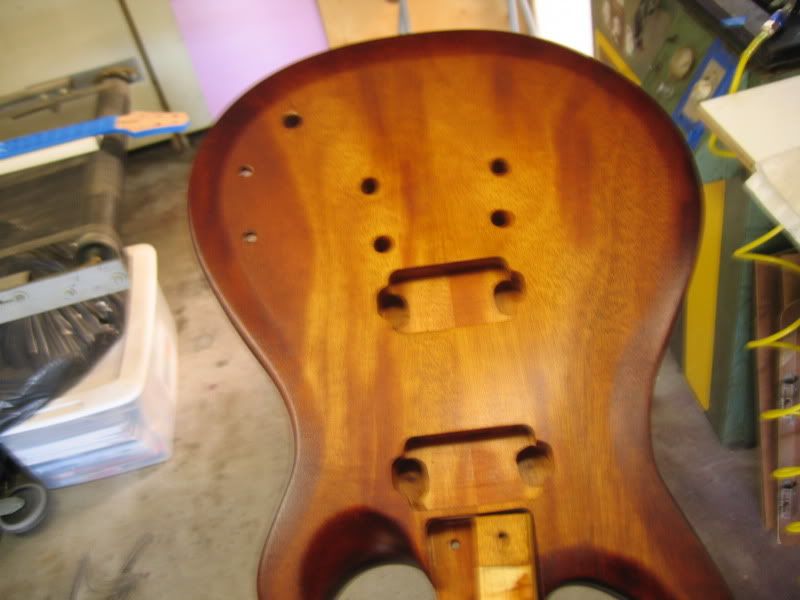
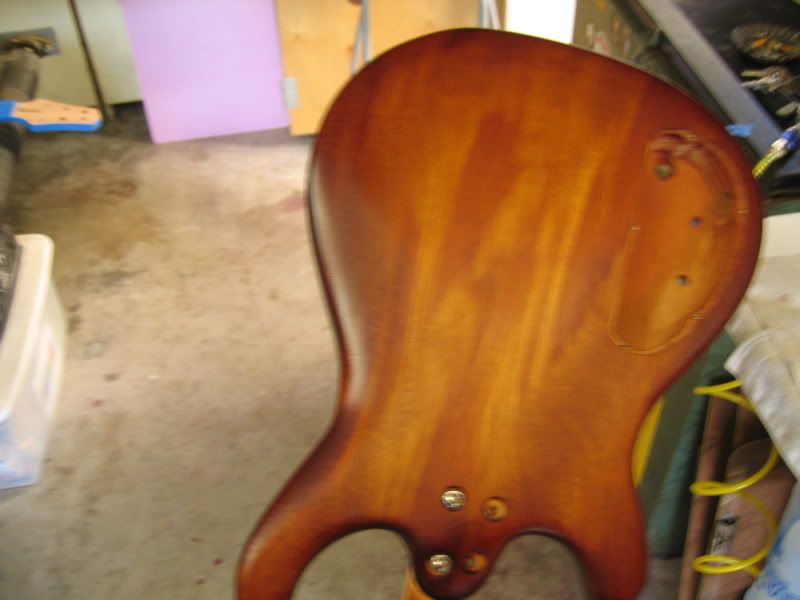
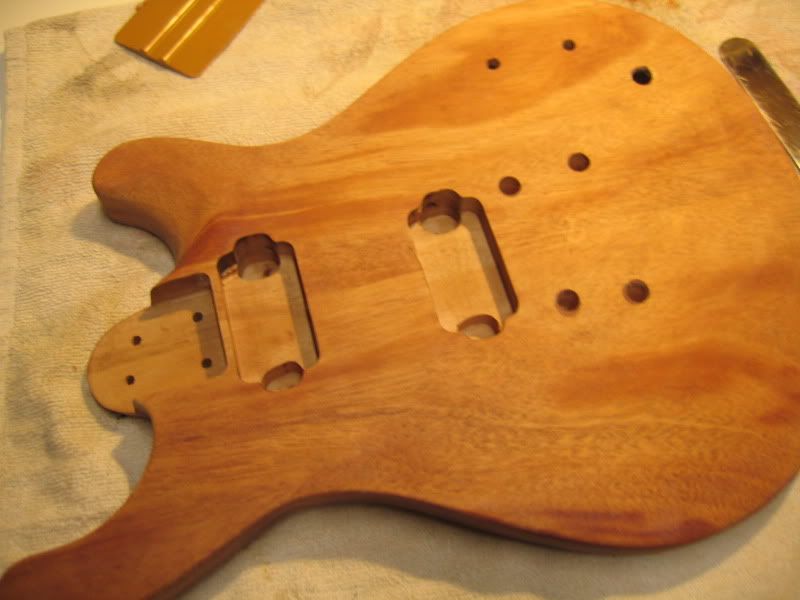
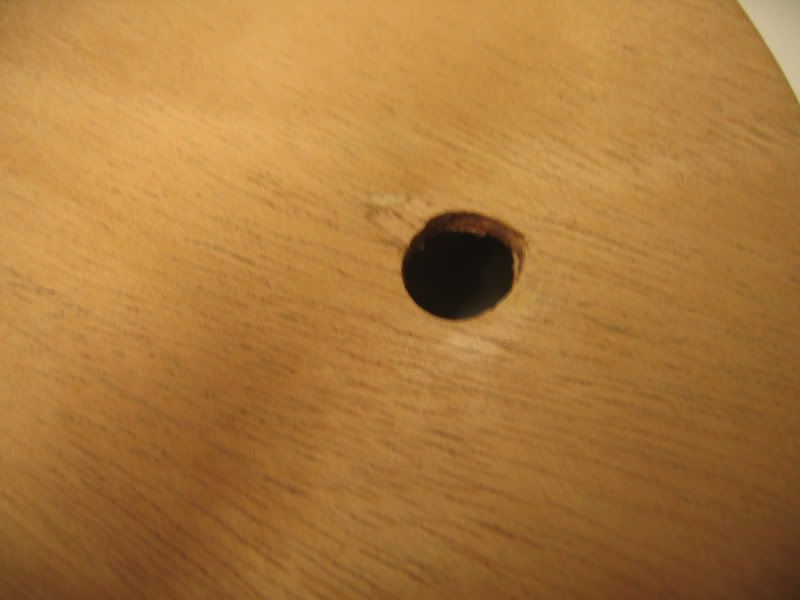
O so heres where I'm at. I drilled out the holes for my pots and pup switch and the drill decided to catch and tear out a nice chunk of wood. I used a hand drill and not the drill press. I dont know why but I did and I paid for it. I took some super glue and fastened back what I could. In the end I would up with some filler that will show slightly and a misshaped hole. Another lesson learned.
I also disassembled the guitar and went about reshaping the neck taking about 2 mm off the thickness and taking about 3 mm off the sides making it more of a c shape. Essentially chewing my cabbage twice. I dont have pics.
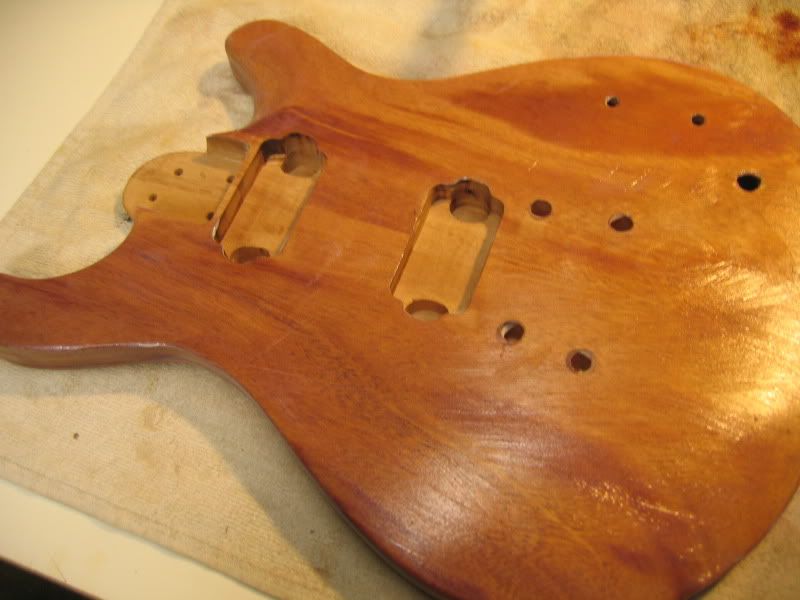
After this was done and my electronic holes butchered, er I mean drilled it was time to sand and fill the grain because its time to start finishing this.
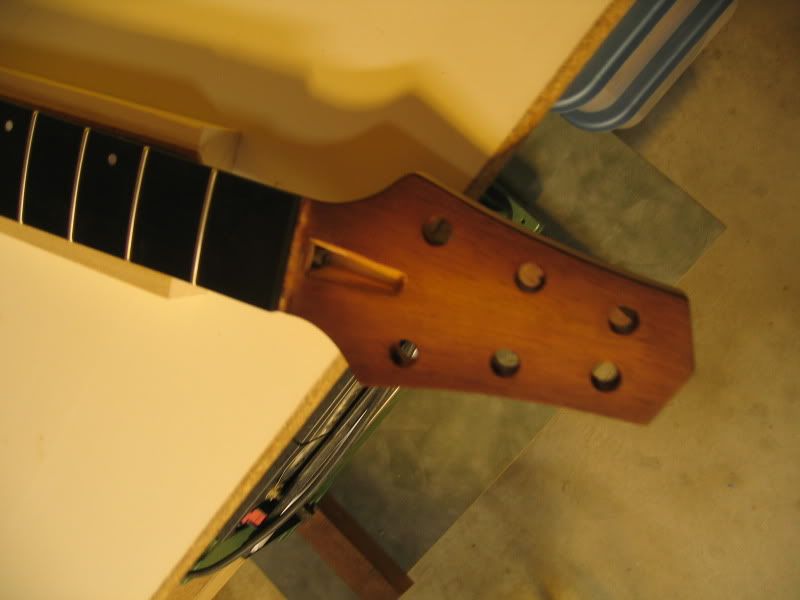
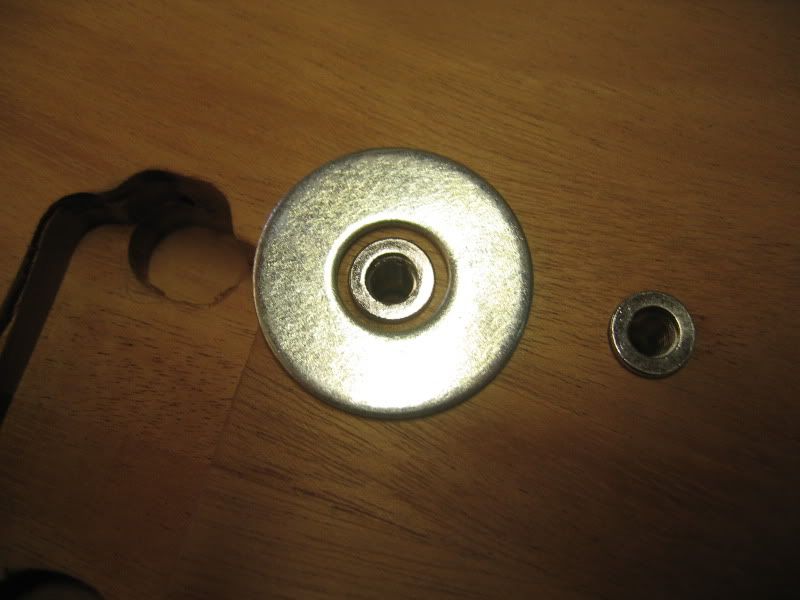
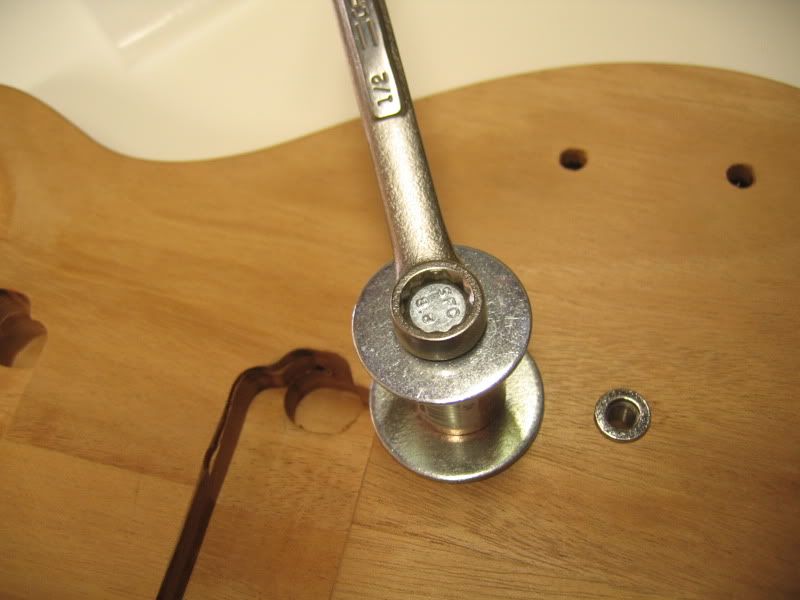
So my first task was to remove the bridge studs. This is common knowledge if you search the net but I'll show you anyways. Take a washer with a hole larger then your stud, and a washer that fits a 1.25" bolt that matches your stud threads (metric and available at home depot) . And sandwich it between a piece of pipe.

Thread your bold in and turn clockwise. Your stud comes out. Real simple. Stew mac sells one that does the same thing for 40 bucks or so. I spent 2 bucks.
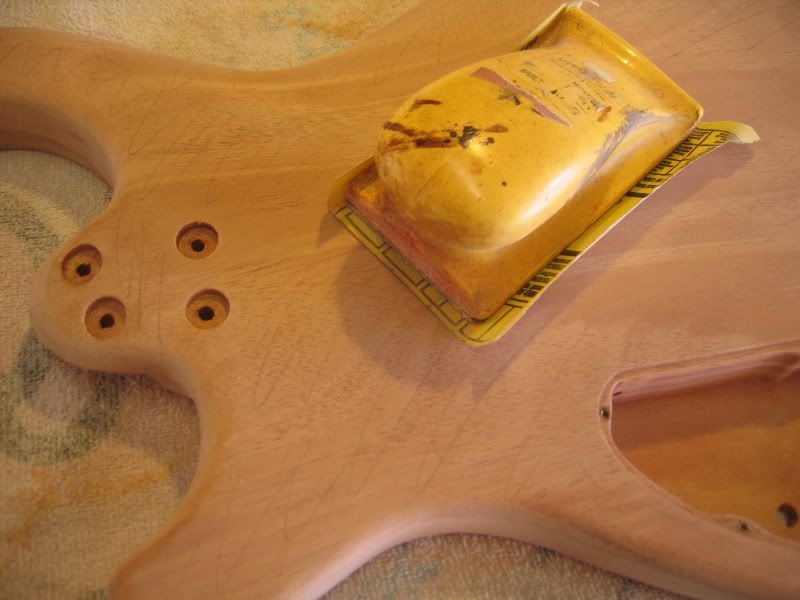
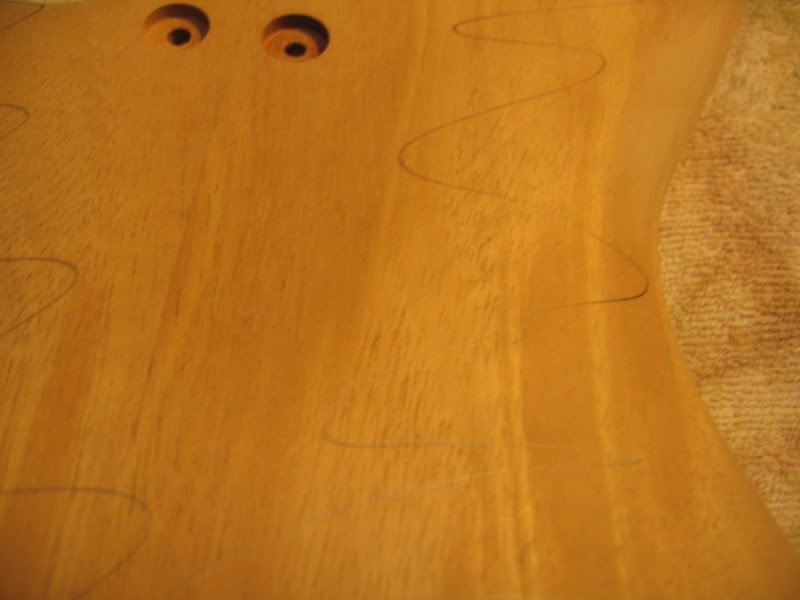
The next thing I did was sand everything flat using the block I described earlier. I put pencil lines on the body so I could see what I didn't sand yet.

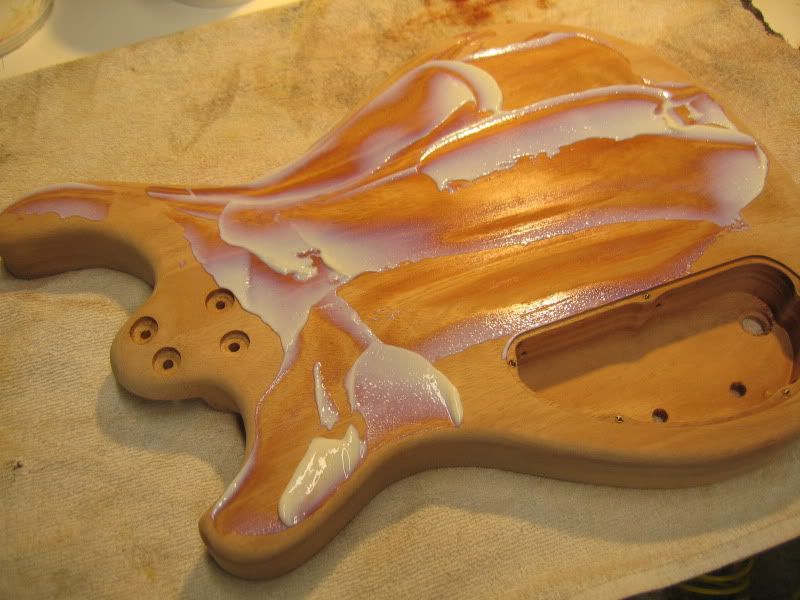
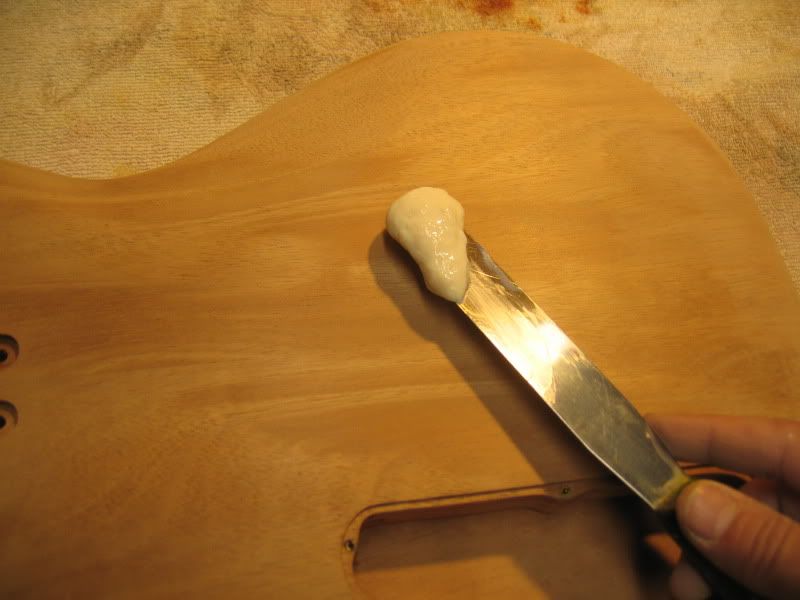
Next I started applying grain filler. The crystalac I'm using has the consistency of hand cleaner. From experimentation I've found it easier to apply it with a cake knife and then with my fingers, rubbing it into the wood in a circular motion.

My Inaugural Guitar Construction.
in In Progress and Finished Work
Posted
Finished the truss cover today. Cut em out from some left over mahogany and used double sided tape to mount them to a stick for finishing.
And with the truss cover I'm officially finished with my first build. Boy what a learning experience it's been.
Here are some final pics and some specs.
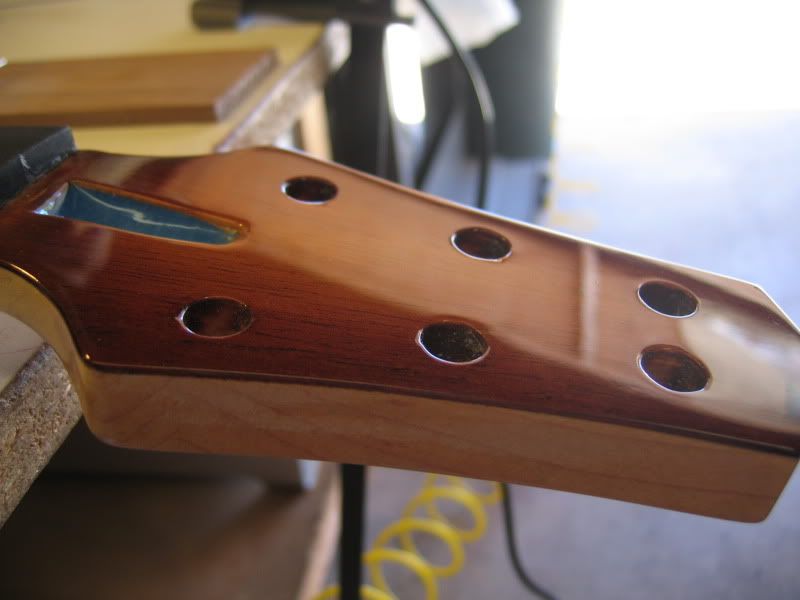
Quarter sawn rock maple neck with walnut strips finished in tru oil. 2 way truss. Graphite nut.
Ebony fretboard.
Body is 1.5" thick mahogany finished in nitrocellulose.
Duncan TB-14 neck/Jazz bridge
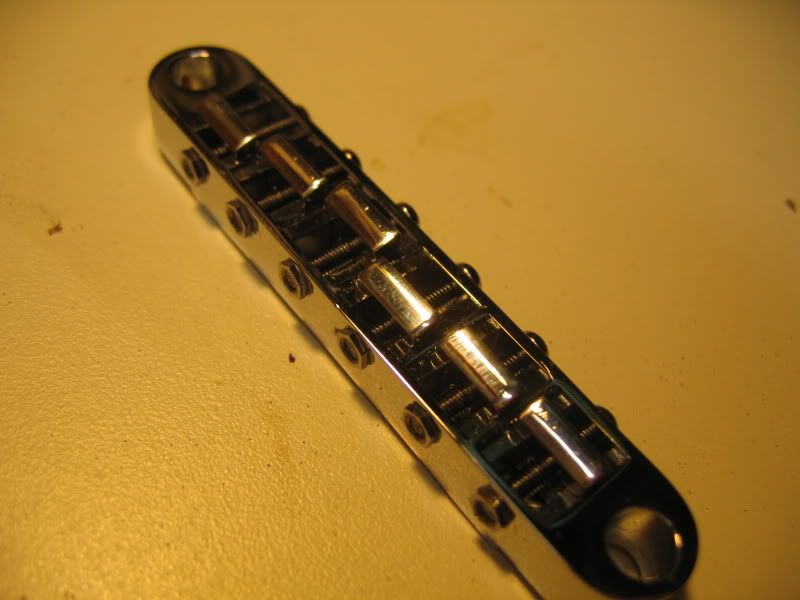
Gotoh TOM, stop tail and 510 tuners.
24.75" scale.
Start to finish it took a little over 2 months including curing time.
I didnt have to alter the spacing too badly on the bridge. Its a little strange looking but functional.