


sdshirtman
-
Posts
646 -
Joined
-
Last visited
-
Days Won
23
Content Type
Profiles
News and Information
Tutorials
Product Reviews
Supplier Listings
Articles
Guitar Of The Month
Links and Resources
Forums
Gallery
Downloads
Posts posted by sdshirtman
-
-
Pat yourself on the back because that came out great Scott. String that bad boy up and post a few more pics.
-
That's one hell of a cool way to sign a guitar Scott. How long did that take you to pull off?Justin mentioned a couple of times.......several times.......quite a few times that I need to sign this guitar.

So I signed it.
SR
-
And a few bonus neck carve pics that show the veneer I put on the back of the headstock for the one getting the cocobolo treatment.
Thanks for looking. Carry on....
-
 1
1
-
-
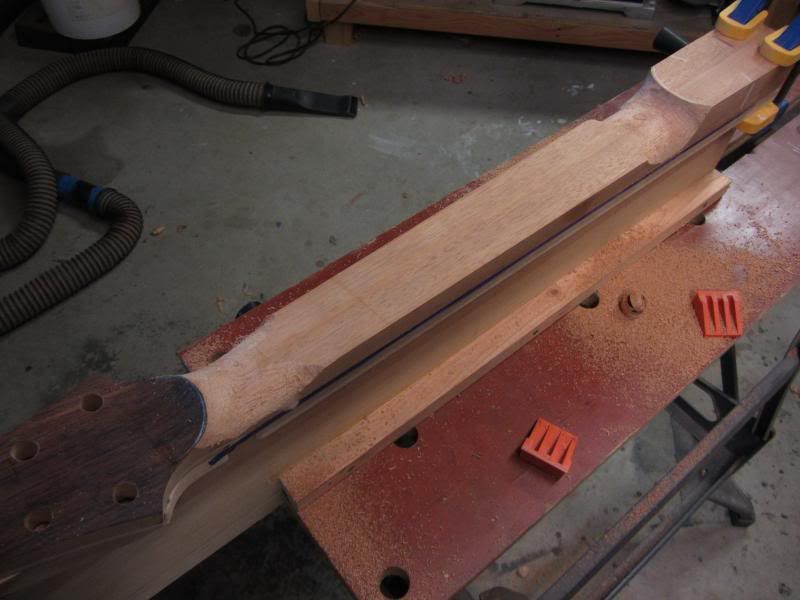
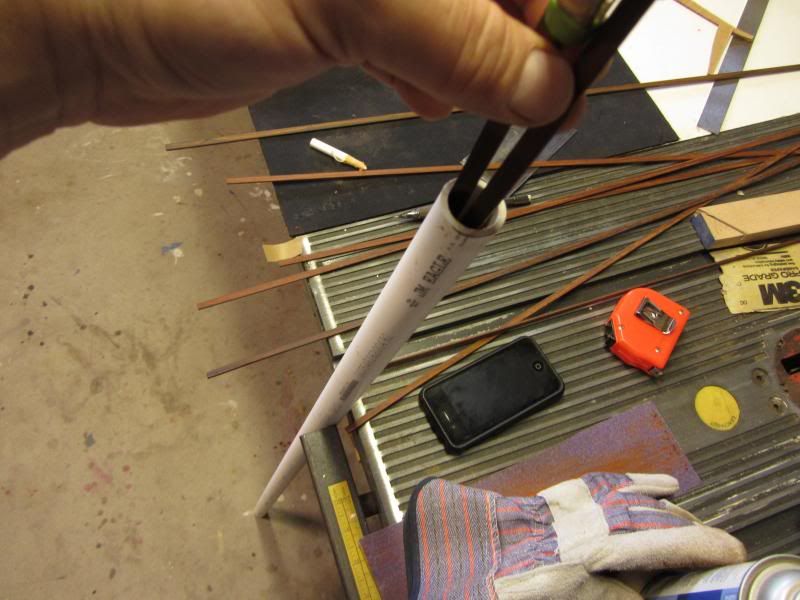
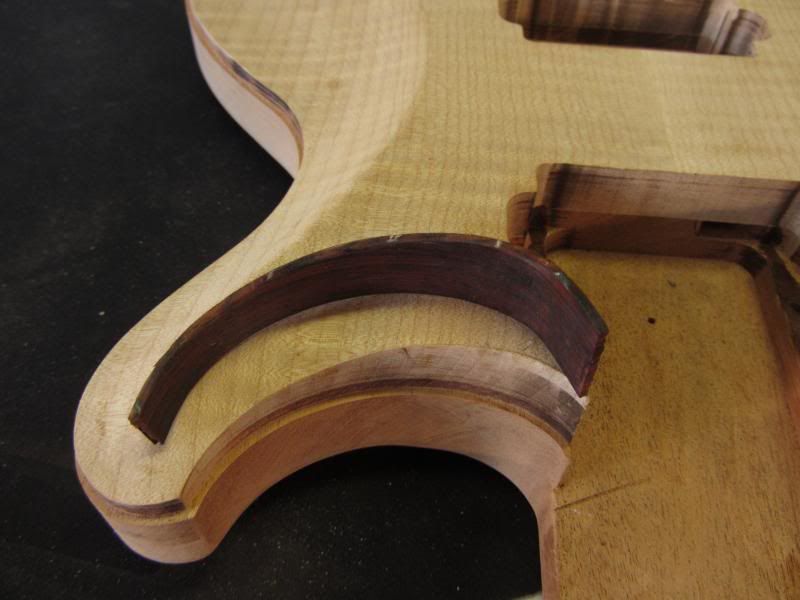
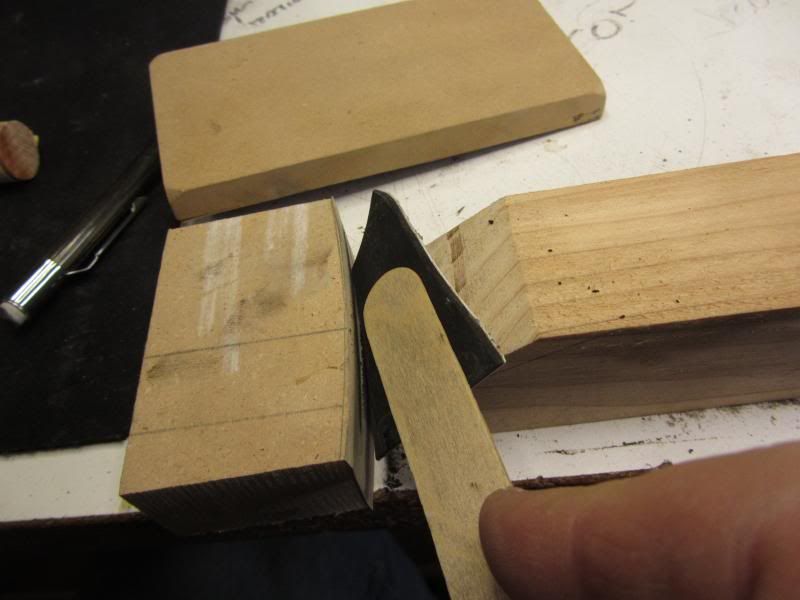
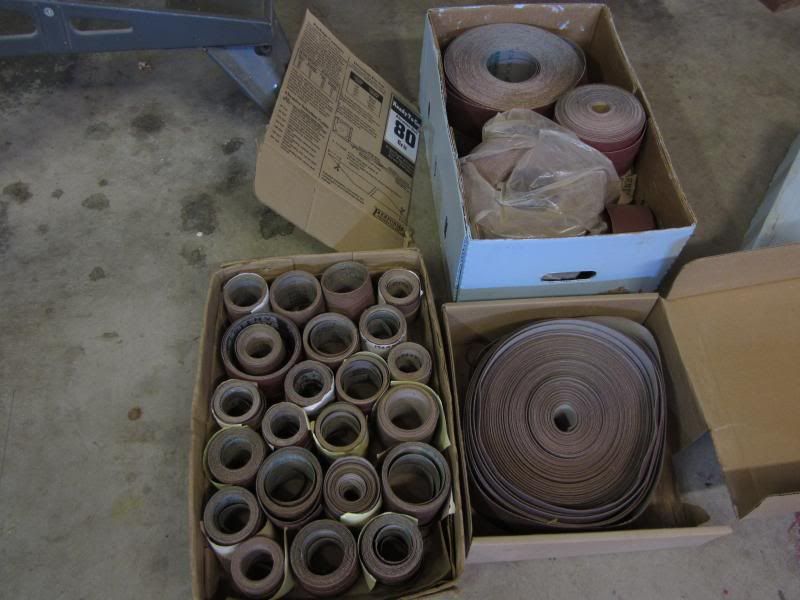
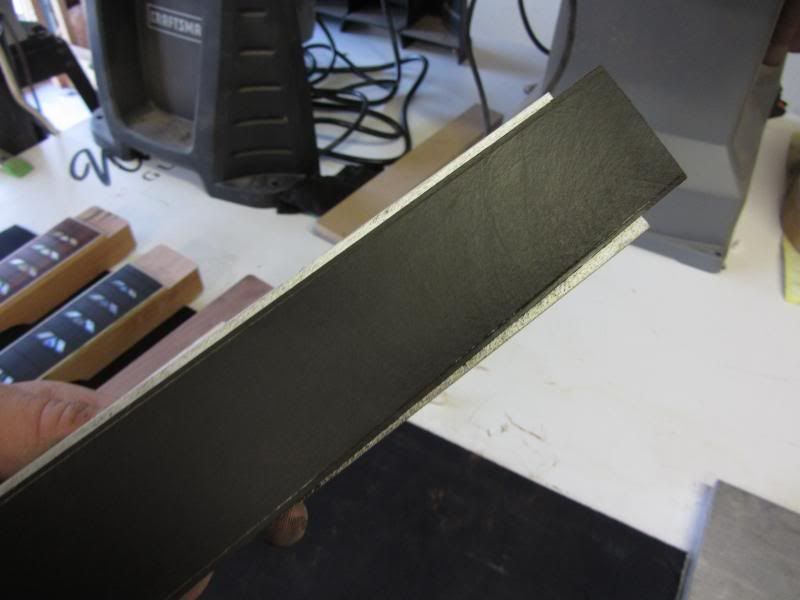
Its time to bind these and one of these is getting the cocobolo treatment. Cocobolo's kinda brittle and I knew this was going to be a pain but theres no turning back now. I made all this from a nice 36" chunk of cocobolo I have so I got to break out and play with my newly acquired drum sander. It took all of 15 min to make them. I dont know how I got along without a drum sander.
I cracked a lot of these pieces trying to get them to bend properly. This is two of a bunch I screwed up in the process.
One of the problems was how tall the two pieces for the inner horns were and the extreme curve I needed to put on it. Since cocobolo is so oily it doesn't accept water so I couldn't get the steam that helps it along. I even tried soaking this stuff over night to see of I could saturate it but no dice.
In this process of trying to saturate the binding strips I came up with a simple solution. Put a cork in one end of a piece of PVS pipe and fill with water. Use a small spring clamp to keep the pieces from falling in. Durp.
I finally got I piece I could use. The rest of the less tall stock bent much easier.
-
1
-
-
Nice vision with the one with the hole. Most people would have passed right by that piece. Not sure I would have went with the divots but it seems to work and never the less makes for a very cool end result. Thanks for posting. Enter in GOTM?
-
Nice dodge on the blush. This ones going to be a stunner.
-
<<-- jealous. That's a hell of a steal. Congrats. Care to elaborate how you got it?
-
I really like the clean lines and naked simplicity of your builds. This one is no different. Very nice.
-
Looking good. Solid choice on replacing the steak knife handle. Are you going to polish the brackets when finished?
-
I love the wooden covers and pickup rings. I'm attempting the same things nowadays, but my methods are much more crude.. this is very inspiring, thanks!
Care to share at least the outline of the process you use for the pickup rings?
My method is probably as crude as yours.
I'll have to add pickup ring tutorial to the never ending list of things I have to do but probably will never will. Lol?
But in a simple nut shell here it is verbally.
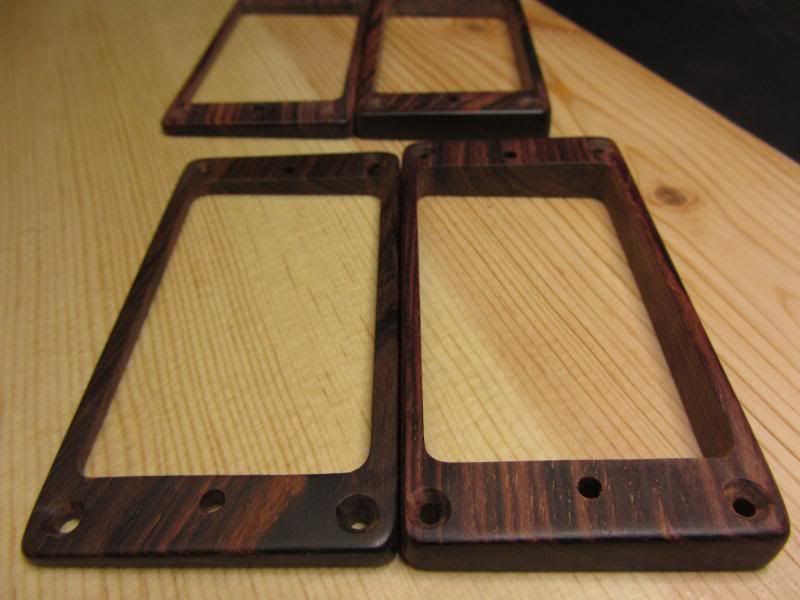
I split a 1" thick billet in half on the band saw. I then cut the pieces to size using a table saw sled with a vertical toggle clamp mounted on it to hold the pieces in place. After this part check the pieces to make sure they are perfectly square.
I then mounted the pieces onto my router sled bed using double sided tape to cut the angle into it. If memory serves I think it was around 3 degrees. Its what ever the stock Gibson rings are. I checked this with a digital angle cube. There are some pictures of this from my previous builds.
I then lay out where my holes are going to be drilled including the inside radius of the four corners of the inside using a square ruler. Once this is done I drill out all the holes.
From there I put it on a scroll saw and connect the 4 radius holes to cut out the center. Make sure to leave yourself some meat to sand the insides down to spec.
From there its just a matter of carefully sanding the insides flat and into spec. I made a set of three different sized sanding blocks with radiused edges matching the radius of the inside corners. The trick here is to cut your sand paper and attach it to the block just shy of the radius so you wont sand into it the radius.
I'll note that the counter sinks were done slowly by hand.
I sand all the edges and corners with 220 then move into higher grits and finish with steel wool.
Let me know if thats hard to follow.
Those one the most beatifull guitars i've ever seen.
Simply brilliant
Thank you very much

Looking great John. Nice little assembly line you've got going there. Is your wife calling herself a guitar widow yet?
The cocobolo rings are sweet. I seem to remember madhattr3 discovering that he couldn't get tru-oil to cure on cocobolo. It would probably be worth it to wipe some on some scrap just to see if it will cure.
SR
She doesnt call herself that yet. Between running a full time business and doing this in the evenings and every weekend I think I've worked every day for about 8 weeks straight. So wether she knows it or not she is one.

On the tru-oil and cocobolo. I did run into some funky curing problems. After 24 hrs they still weren't completely dry. I rubbed off what was left of the uncured oil with a rag and buffed it out. That left a nice shine on them. Always learning right?
Since I'm on here again today I'll add this from this weekend.
I found an incredible piece of spalted maple with some nice flame on it a few months back. Against warnings from a few others I decided to do a carve top with it. For for what it is this piece seemed stable enough to pull a carve top off. This piece actually had a decent tap tone in its raw form instead of the a dull thud like you'd guess a piece of spalt would have. If it didn't, I dont think I would have used it. Whats the point of building a dead sounding guitar right?
I started by soaking it with some wood hardener. It drank up a good 3/4 of a bottle before it was saturated.
From there I treated it like any other piece of maple until it came to carving it. I ran into trouble trying to use a DA on it. As you'd guess the softer parts would sand quicker than the harder parts leaving ripples.
I got around this by using a lot of custom made sanding blocks and methodically taking my time. This carve took me almost double what a normal piece would take.
After I got this down pretty close to its final form I sanded it down with 120 and gave it another good soaking of wood hardener. Thats where I am now - waiting a few days for it to cure nice and hard. Then I'll sand it down again and route the binding channel. I still haven't decided how to tackle gluing the binding on.
Here it is during shaping. You can see from the shaving that it wasnt too deteriorated.
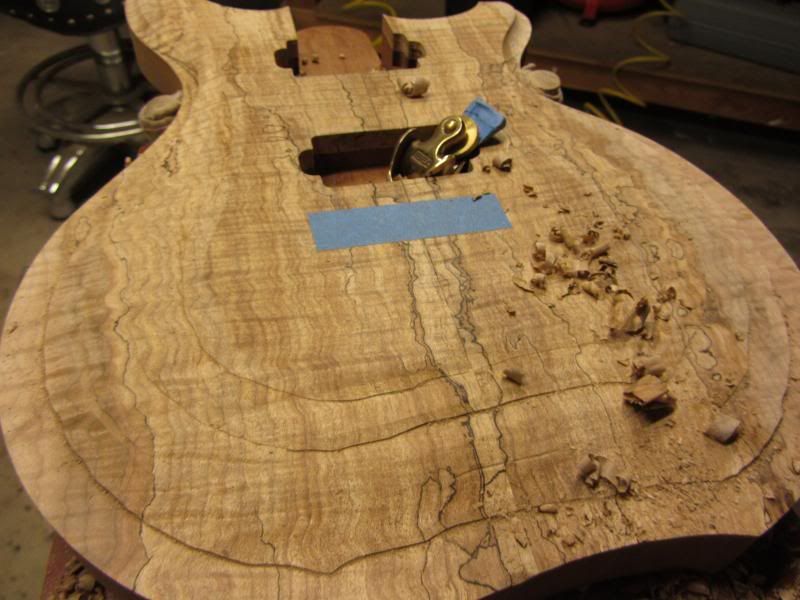

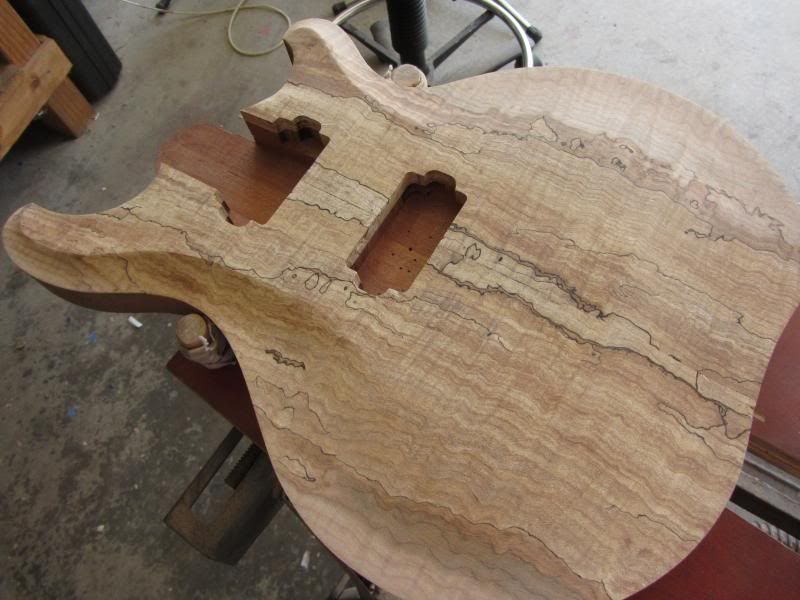
And then with a good soaking of hardener. Best of both worlds? (ignore the brush hairs. Those will sand out)
Part of me really wants to try and pop the flame out a bit more but given the piece I think thats going to be impossible.
-
2
-
-
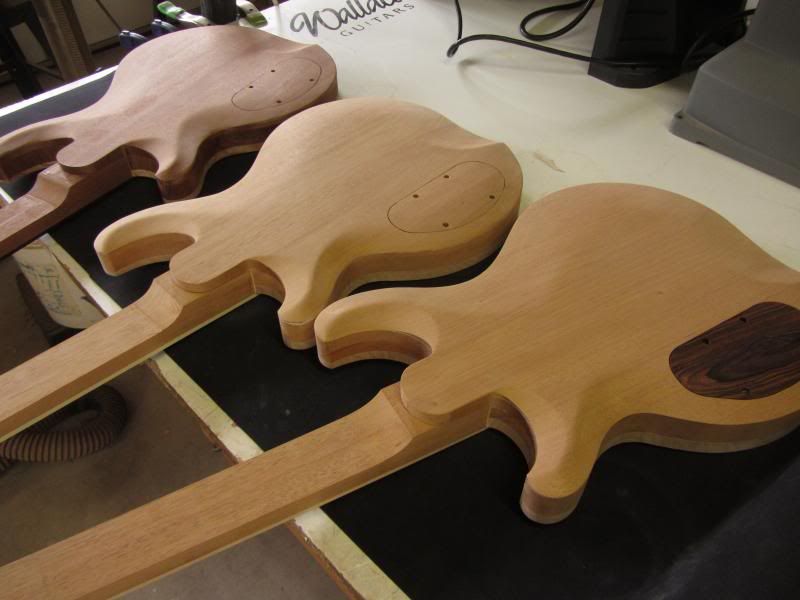
Fair enough Scott. I'm a lot further than than shown so I'll do truncated picture catch up.
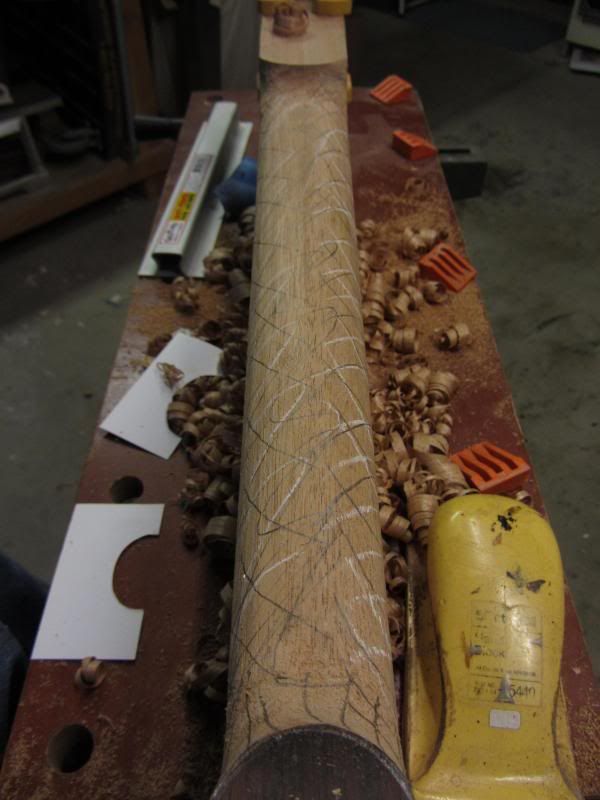
Backs getting carved. I'll dial this in all the way after my necks are glued in. My grinder and DA are becomings closer friend of mine.
I did find another use for the new smaller #7 gouge I just picked up. I dont like having to get out a smaller router bit just to do the corners of my pickup routes. The new gouge fits the bill perfectly. A good time saver for me.
Back carves mostly done. I'll finish up when I glue the necks.
I'll be doing a lot more of these magnetic truss covers moving forward so I made a simple template to help speed things up. Again these are time consuming and I can use any time saver I can utilize.
The first few of these I made were cut out on a scroll saw with a 45 degree angle. This time some of the laminates I did just tore apart using this method regardless of the speed and feed. I had to resort to a gentler method.
A block cut at a 45 degree angle, a popsicle stick with some double sided tape and a rounded block with sand paper does the trick quite readily without destroying the truss covers.
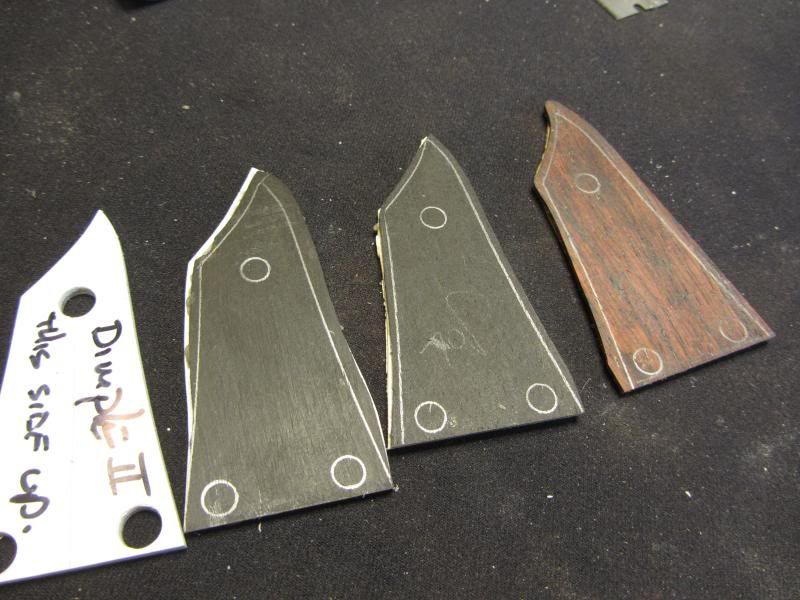
One in maple, one in cream abs and one with .030 white abs to match the board with block inlays.
The new template worked very well. They snapped right into the intended position although there were a few tricks I used to insure that that I'm not divulging.
On the board with maple binding. These look cool new but I've seen that they have a tendency to soak up nastiness from your fingers over time and discolor. To thwart this I taped off the maple binding and gave them a few coats of tru-oil to seal them up on top before I installed frets. Once dry a few strokes with some steel wool took down the gloss. The sides will get lacquer. This should seal them up keep from griming up for a while.
And last for today. (my computer has 7% left)
I told myself I wasnt going to ever make another set of wood pickup rings again but one of these builds is screaming for a set. I was just going to buy some pre made ones but everything I found out there were either flat or the color was off and very pricey. So I said screw it and ended up just biting the bullet and making another set. Two actually. I'll save the other set for a future build or sell em on ebay.
These were pretty time consuming to do by hand. I'd say a good 5+ hrs from start to finish from a nice billet of cocobolo.
The entire time I was working on them all that I was thinking about was how these could be done soo much faster with a CNC machine. Someday right?
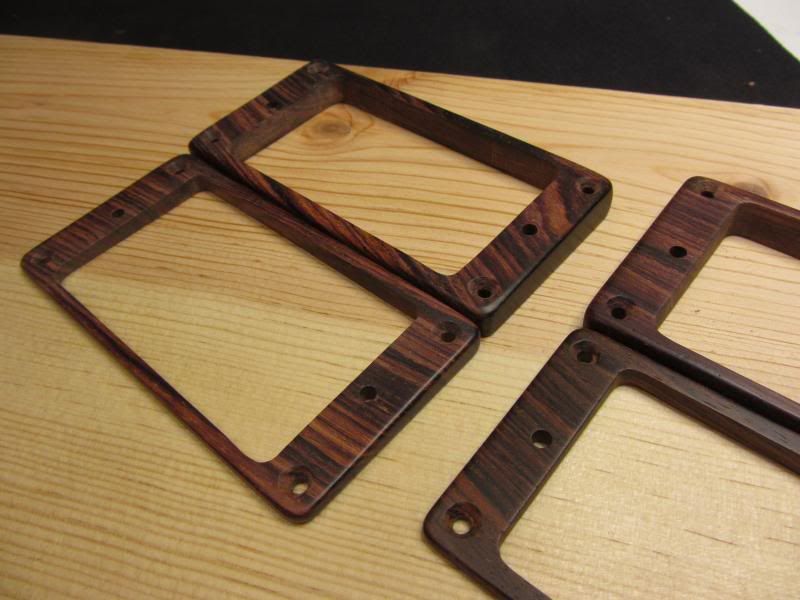
I'm very happy with the final result though. Once in context on the build it will be time well spent. My last two sets I finished in lacquer. These are just getting a light coat of tru-oil. I think they will wear much better that way plus I dont think the cocobolo really needs it.
This installment still doesn't bring these builds up to their current state. I'll bring this thread up to speed soon enough. Today I finished up the front carves and will be binding them asap. I'll post more pics soon.
Till then . . .
-
2
-
-
Some of the pics pop out a bit more than the last you posted. Is it me or is it just the camera?

Either way it looks great. Look like a pretty productive weekend Scott. Thats looking pretty damn cool. Cant wait to see the final color.
-
OK play time in Florida is over. I want some progress pics!
-
Green with Book Press Envy!!!
Says the man with the CNC!
A few more progress pics for you guys.
I'm shooting fora little better consistency on my carves for this model so I made me some carve templates.
Here they are finished. Now I have to get some bigger template bits for this.

Honestly I'm wondering if it will save me any time at all. My freehanded method seems quicker and is reasonable accurate.
We'll see as I'm going to put these to use this weekend.
-
Will do. All I've done so far are some tests when I was buying but those were promising. I'll put it through some paces this weekend and report bak.
-
Ironic that after the last post I scored this.
I've been looking for one of these at a decent price for months. I finally found one this weekend. Apparently the previous owner just passed away and it was being liquidated by his son in law.
I came with the optional in/out feed tables too.
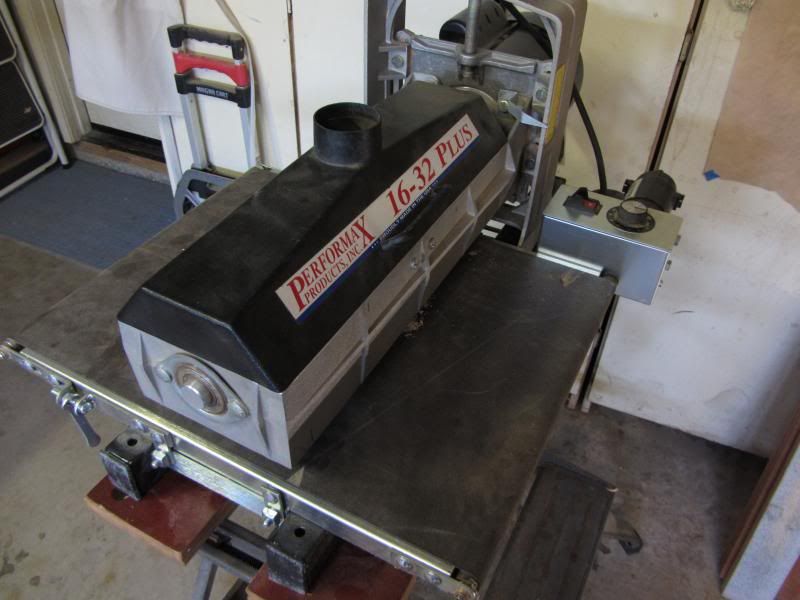
And he threw in 3 stocked boxes of paper for it.
No flattening on that slab of aluminum!
-


It's like magic.
SR
I love that stage. Looking good.
-
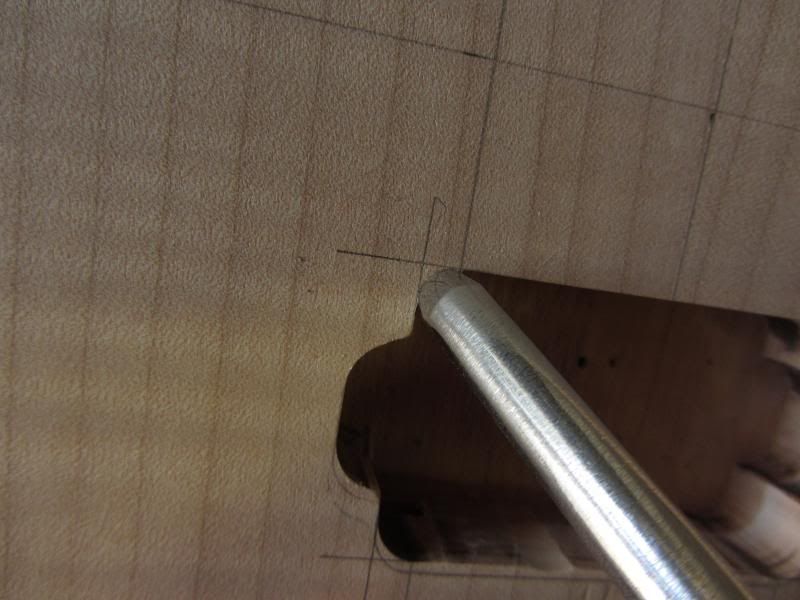
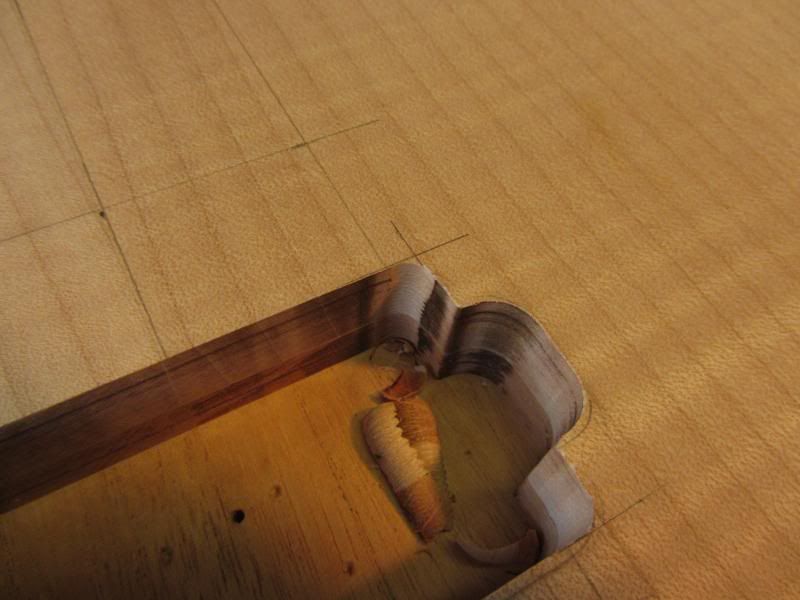
OK next installment.
I want the bottom on my fretboards as flat as possible to insure a good mating surface and to make sure there are no gaps between the binding and the neck. Pictures are kinda self explanatory. Double sided tape for the board and a piece of 120 grit paper stuck to a flat surface should do it.
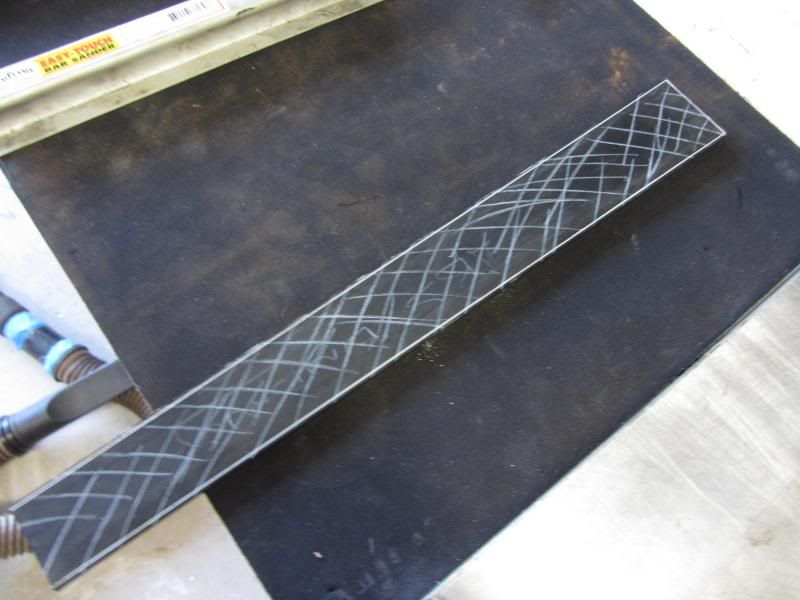
These boards looked nice and flat when I started. Looks can be deceiving.
Almost there. This edge would have left an unsightly gap when glued up.

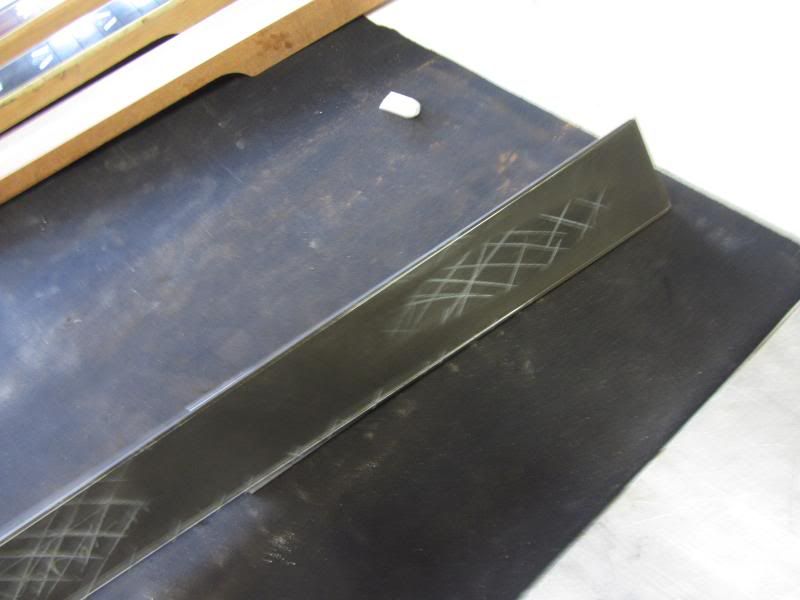
Finished and ready to glue up.
Das it for today.
-
I'd send it back and order the blade from stew mac. It doesn't need the stiffeners.
-
Looking good!
Thank you thank you.
Dr. John Walker.....what a skilled physician. He can heal you when you're seeing red, he can cure you when your mood is black, and mellow you out when you're feeling blue.
Methinks that cocobolo build is going to be something special. Are you going to make the rings out of cocobolo and bind them the same as the fretboard and headstock?
SR
Dr. Walker is my general physician that I see for minor aches and pains. When I really want to get to the bottom of what ails me I go see my specialist - Dr. Laphroaig. But he's a specialist and thus, kind of pricey.
I have high hopes for the cocobolo too Scott. Binding the pickup rings in maple is a pretty novel idea. I hadn't thought of that. Just goes to show you how we all see differently from our minds eye. On this one I think I'm leaving the body natural and am going to make the rings from cocobolo. The body is going to get cocobolo binding. I'm thinking this will offset the fretboard and tie it all in. Its going to be interesting though. I've done some bending tests and cocobolo is a bitch to shape. One of the problems is that its pretty impervious to water and steam which is a key part of the bending process.
Came away from my last consultation with Dr Walker unimpressed. Decided to go to the source and consult Dr Talisker and Dr Caol Ila instead. I sensed their teachings in Dr Walker, but the student really doesn't compare to the masters.
I've consulted with Dr. Talisker before . He's a pretty good doctor.
Really love the inlay work. Despite you feeling that it is gappy, it is not. You're too damn critical of your own work! It's fine to "hold yourself to higher standards than your last job" however this should always be tempered with an understanding of how your work stands to third party scrutiny....lest you give yourself a complex of some sort! What you perceive as a minor flaw might well be perfection to others, and they're pretty damn close to it from what I can see. Have you had a chat with Doug about inlay work costing? Whilst your results are fine work, if you want to offload a bit of the stress from the process you have that option.
You say you have difficulties lining them up....how are you marking? I very much recommend using either a carbide scribing pen or a marking knife over a pencil any day. Took most of the worry about fine drill locating, and for only a few Euros.
I get the critical thing a lot. I think being ultra critical of your own work pushes you a bit further than you thought you could achieve. In a million years I'll never achieve perfection, but I aim for it even though I know I wont hit it. It could be considered a character flaw by some.
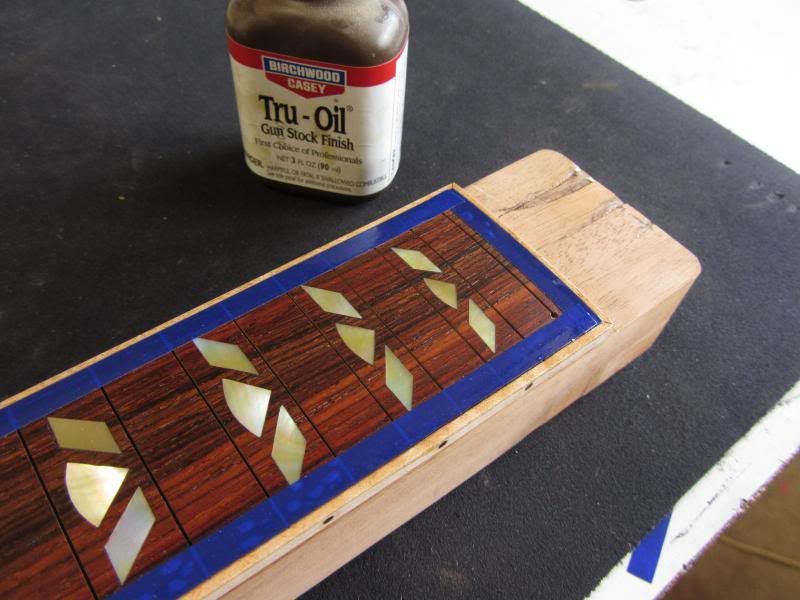
I think I have emailed Doug before. I have to follow up again. I've actually emailed several people on several different forums about doing CNC inlay. Its the way to go I think. I like doing it, but its so damn time consuming. These boards took me around 35 hrs for all three which is far too long.
I sharpen mine with slipstones and 3 grades of fine diamond pads (sticks, plates, whatever you call them) and then polish the edges with what is essentially a power strop. That's a wheel of pressed paper--mdf would probably work nicely as does leather-- that is loaded with white jewelers rouge, mounted on a bench grinder. It's a set up I got at Woodcraft some 8 or 10 years ago.
What are you using John?
SR
I use a combination of the scary sharp method to start with which is less than ideal on gouges, but its what I can afford. I mark the edge with a sharpie so I know I'm getting the correct angle. I use a slip stone at the end just to remove the burr on the concave side then I hand strop with leather and compound.
Pretty much all my gouges are from pfeil. The steel they use is pretty decent and I can go a really long time without having to re-hone. I just strop it a few strokes on the leather before I start and get to it.
What I'd really like is a nice used tormek. But wouldnt we all?
_________________
So check this out.
I'm browsing craigslist Tuesday night and I find this huge antique book press for sale. I spoke to this nice lady selling it the next day and she said it had been sitting out side for years and was pretty rusty. I asked her if it still worked and she said she couldn't budge the wheel and was frozen. Bummer.
It was also in Newport beach which is about 120 miles from me.
But as luck would have it my best friend was going up to newport yesterday for a meeting at the Newport yacht club and said he'd go check it out and pick it up for me if he thought it could be salvaged.
He ended up picking it up because he managed to get the wheel to move about a half of an inch with a hammer. But it was still pretty frozen.
So I gave the threads a nice soaking in PB penetrating oil and let it sit over night.
This morning I gave it some more TLC and broke the screw loose. It needs a little bit of cleaning up but It now works as it has for the last 100 years or so.
So new tool day! I think this will be perfect for clamping tops during glue up.

-
With all the natural woof finishes around here its nice to see something like this. Nice job.
-
Those are three really nice boards.
 Very classy-classic looking. I'd have a twich after doing that much inlay work.
SR
Thx Scott. I twitched a lot afterwards. Had to see Dr. John Walker afterwards.
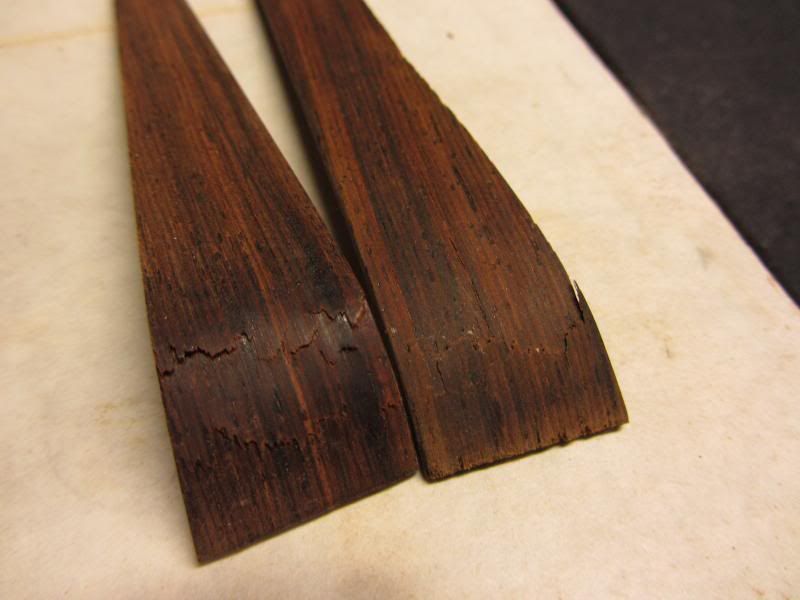
I've been saving the cocobolo board for something special. That ones getting matching rings and binding.
Last build I routed my truss rod recess and didnt like the result as much as when I hand carved it. So I went out and bought a smaller gouge and I'm back to doing it by hand. Better result and lots quicker and more enjoyable.
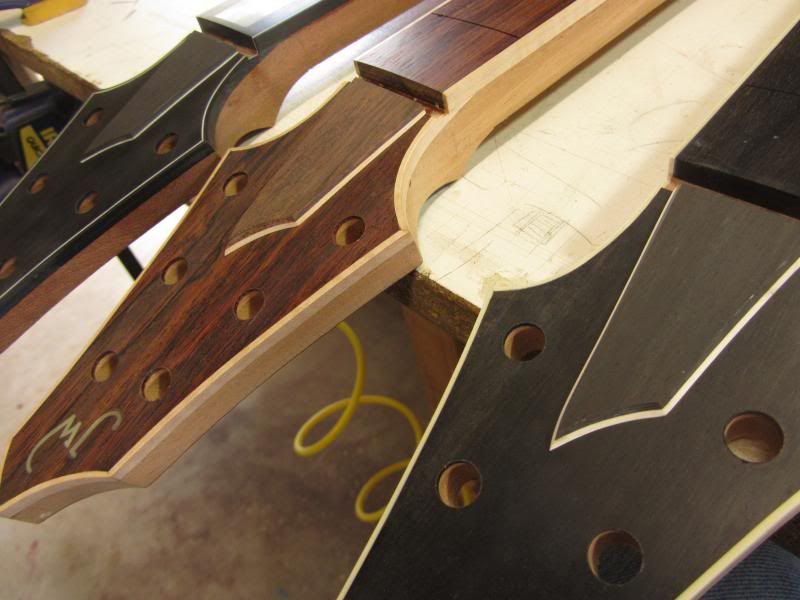
You've seen pics like this in my previous builds but here are a few shots of the headstock binding being installed.
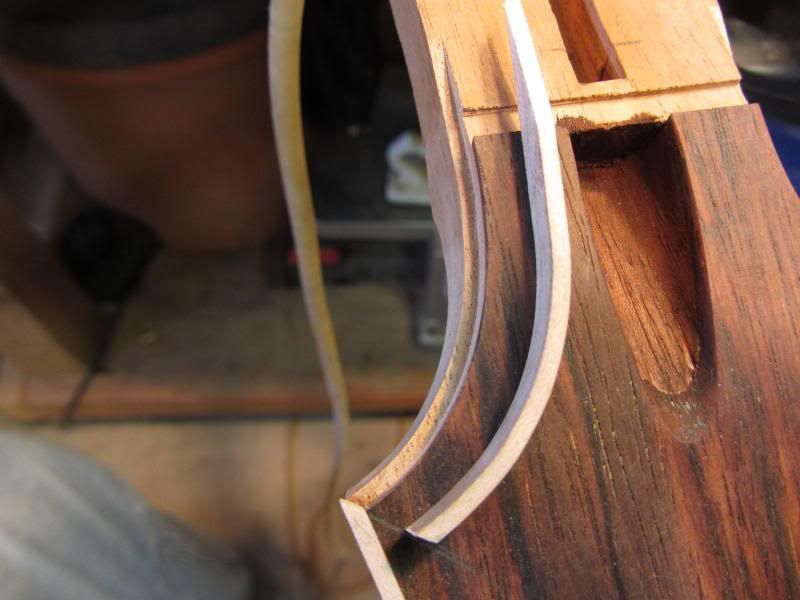
This headstock goes with the cocobolo board. (Obviously)

-
2
-
-
Loving the Dayne SS6. Pure sex
-
Love the beaver reference. Very fitting. That top is defiantly a stunner. Have you decided on a finish color?


 Very classy-classic looking. I'd have a twich after doing that much inlay work.
Shirtman's 2014 Builds
in In Progress and Finished Work
Posted
I cant believe its been a month since My last post. Life has had me on the run the last month.
I had my daughter graduate HS and we had a tons of friends and family out for the occasion. Her 18th birthday a week after that. She got a car that took me a week of searching to find. Scratch another weekend. Spend the next weekend with a friend who is moving away. That ate a lot of weekend build time.
I have free weekends in front of me so maybe I can get these done soon.
Thanks for the previous comments. I did do some experimenting with the boiling water trick. Great tip. Appreciated and thank you.
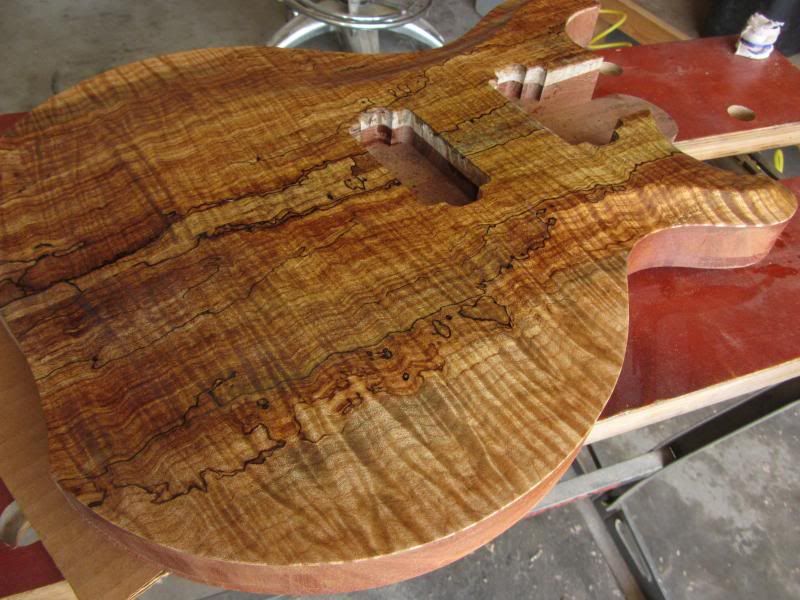
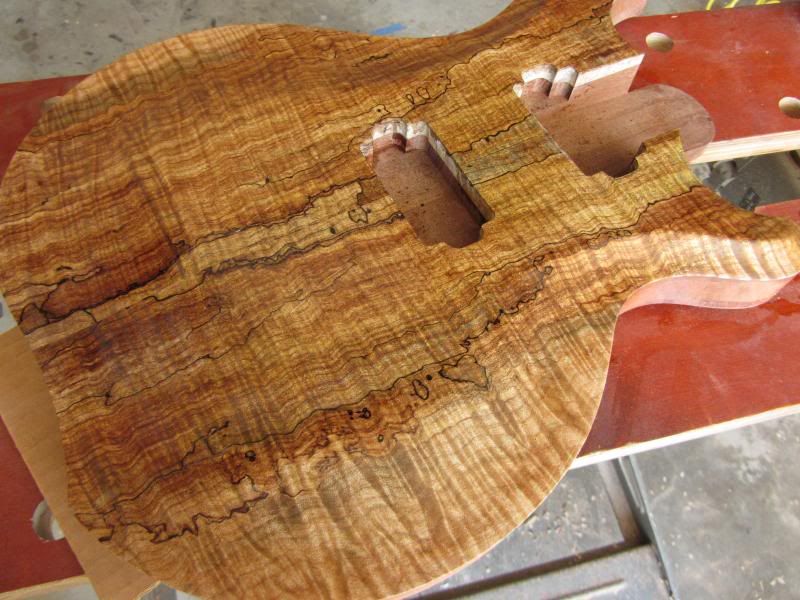
Bringing these up to date.
The spalted one has been bound with two ply to mirror the neck binding.
Neck on the spalt is glued up and blended in. Still needs the bridge installed and a nut cut and grain fill, but then its ready for clear coat.
I had originally planned for a chrome bridge and tuners for this one.
But after some contemplation and a lot of badgering from a friend of mine and my wife I've decided to go all black on this one. Kind of cliche but I think it works better which is why everyone else prolly does it.
Opinions?
That meant ordering new hardware. The Pigtail bridge I had planned on using doesn't come in black but the Tone Pros wrap around version does! It was actually a little cheaper and came with locking studs.
I think the Pigtail came first but it makes makes you wonder if there was ever a lawsuit between these two. They are almost identical. I like the saddles on the Tone pros a little better. I tried to get this customized by having nickel/chrome saddles on it but no dice. And unfortunately the saddles only come pre notched. If anyone knows of any saddles that will drop into these let me know.
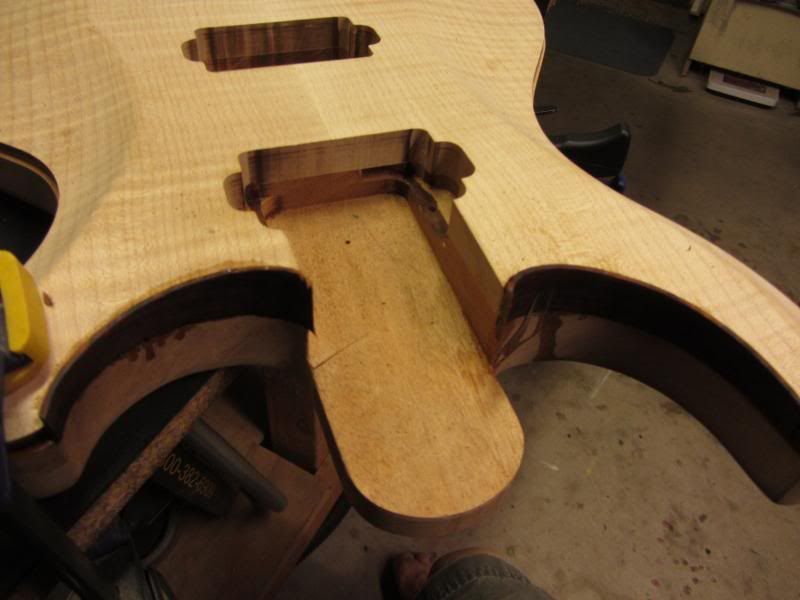
The one with the cocobolo binding has a pretty thick top and thus a thick carve on it. When I did the recesses they came out little deeper than I thought they would be. I ended up re-contouring this one a bit to try and make these appear a little shallower. Worked out better in the end.
Colors.
I want to leave a natural top on this one. I'm thinking it needs just a small amount of pop so I did some tests with a weak mixture of med brown applied to a pre-wet surface.
This looks close but its still just a little dark to me. I just want to slightly enhance the figure. .
The spalt is getting clear coated which leaves the one bound in cream in question. I was thinking red but It clashes with the blue green inlays.
In an effort to mimic the inlay I did some experimenting with direct dyed dark blue with a sand back then shot with tinted green lacquer over it. I thought that might preserve the blue a bit. In the end it didnt look the way I wanted. I'm also not a huge fan of green guitars anyways and I dont think many others are either. I've decided I'm going to do a blue burst on this one. Simple and classic.