


Johny
-
Posts
26 -
Joined
-
Last visited
Content Type
Profiles
News and Information
Tutorials
Product Reviews
Supplier Listings
Articles
Guitar Of The Month
Links and Resources
Forums
Gallery
Downloads
Posts posted by Johny
-
-

That's just beautiful!
-
Do you have sound clips for this guitar?
Now I do! I finally recorded a short video of the thing.
Sorry for the bad quality, could not plug it into an amp to record, it would have pissed off the neighbors...
So it's all via my Vox Tonelab SE, then directly on the soundcard of my laptop.
Hope you guys enjoy.
-
Wow!
Great job!
-
Cool shape, in a funky Salvador Dali kind of way.
Besides, is it just me or

=

?
-
!
That's a good looking guitar!
I really like the headstock and inlay work.
Great job and great thread.
-
Great job, that distressed finish looks really cool.
-
Talk about knocking one out of the park...Congrats on the GOTM.
Well I'm really surprised and honored, really, seeing the quality and the beauty of the other guys' guitars, especially chops1983's !
Thanks!
-
Amazing work! Really clean design.
I'd buy one!
-
This is an awesome guitar. I have been wanting to do a nylon string guitar for a while, but was not able to get past the startup cost of doing an acoustic classical. This project has added one more build onto my list. My wife will be cursing your name in no time.
Tell her I didn't mean it.
Seriously, be sure to post progress pics here!
And thanks everyone for the kind words, it's appreciated, coming from you guys.
-
The headstock is beautiful but you need a logo for it !
Didn't think about that... Not a bad idea...
-
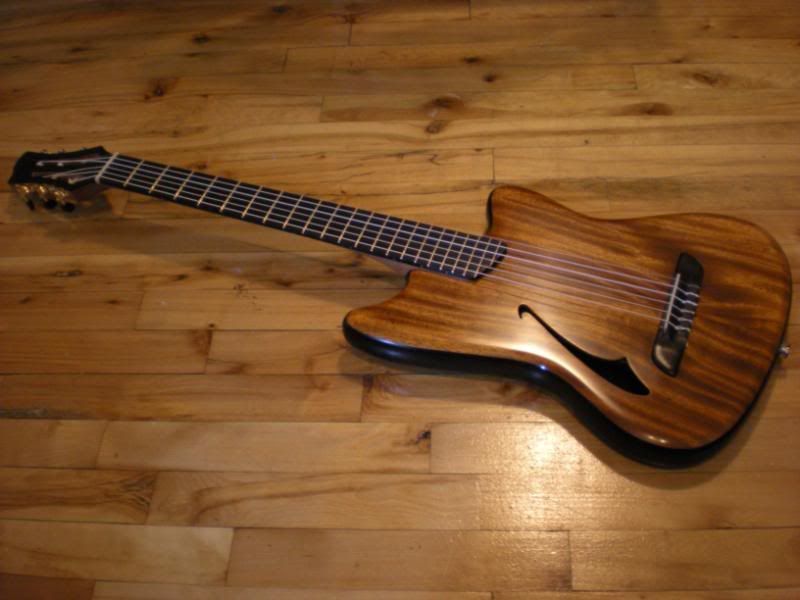
Hello!
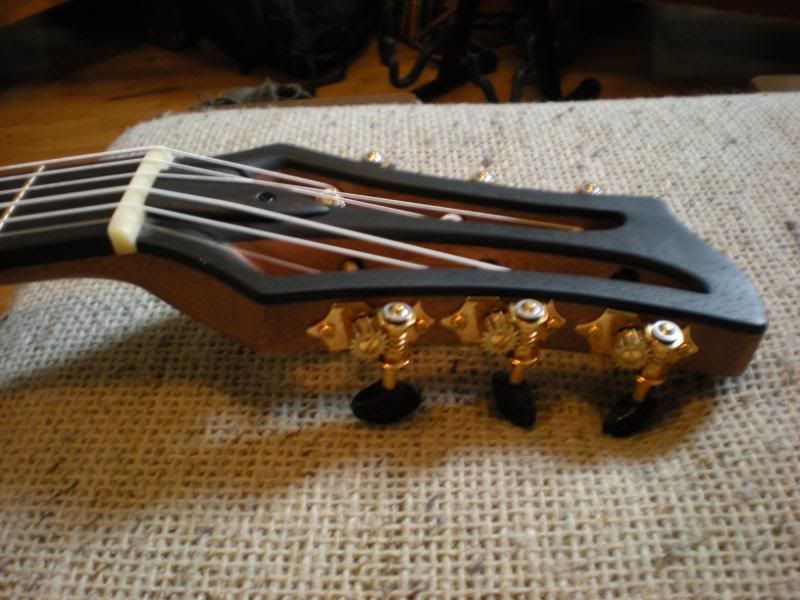
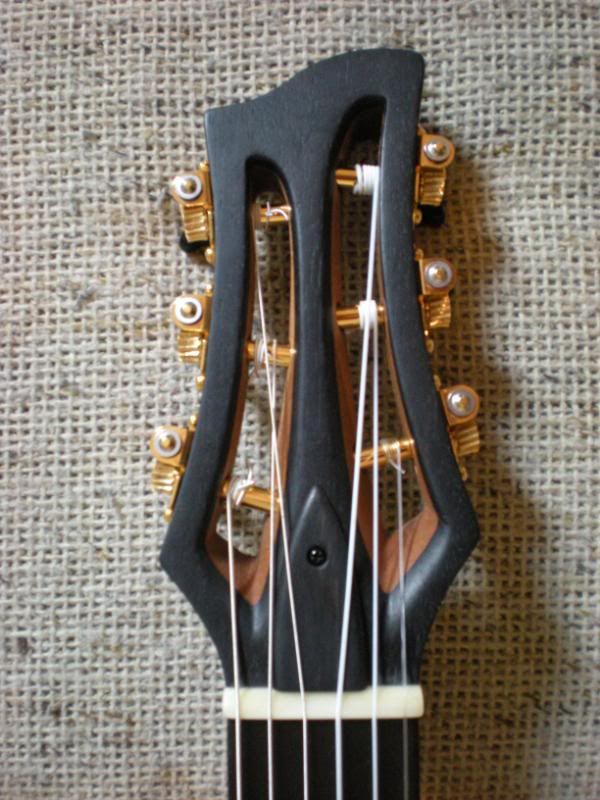
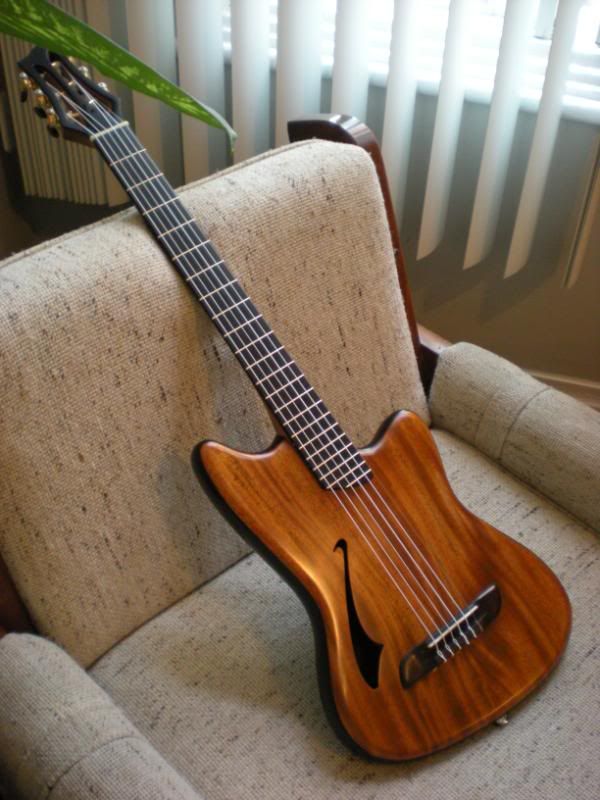
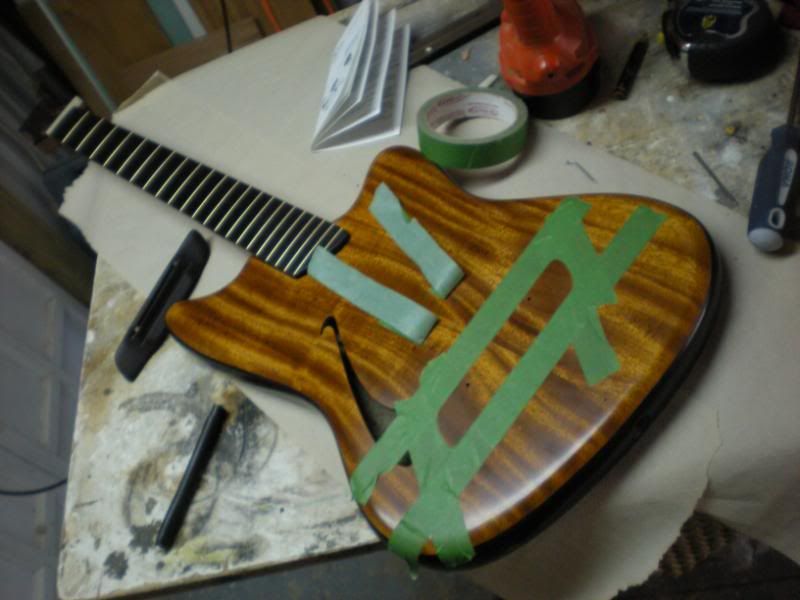
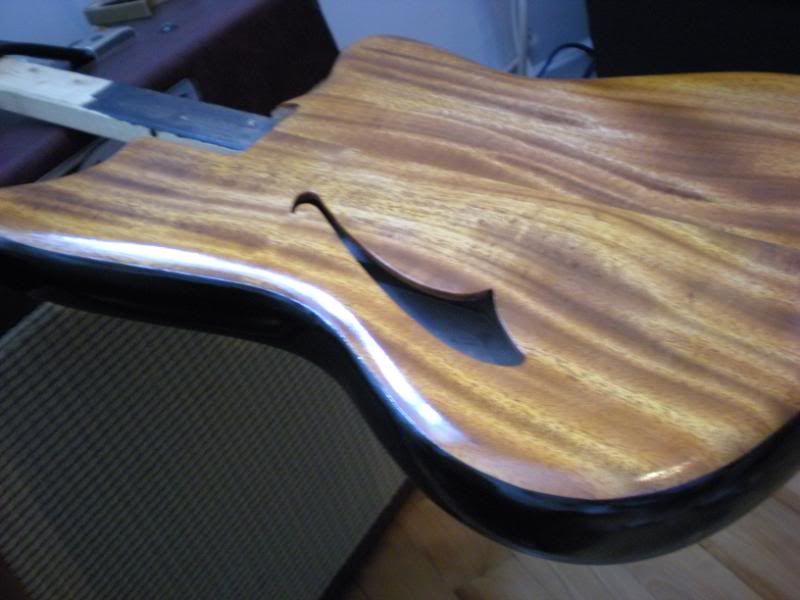
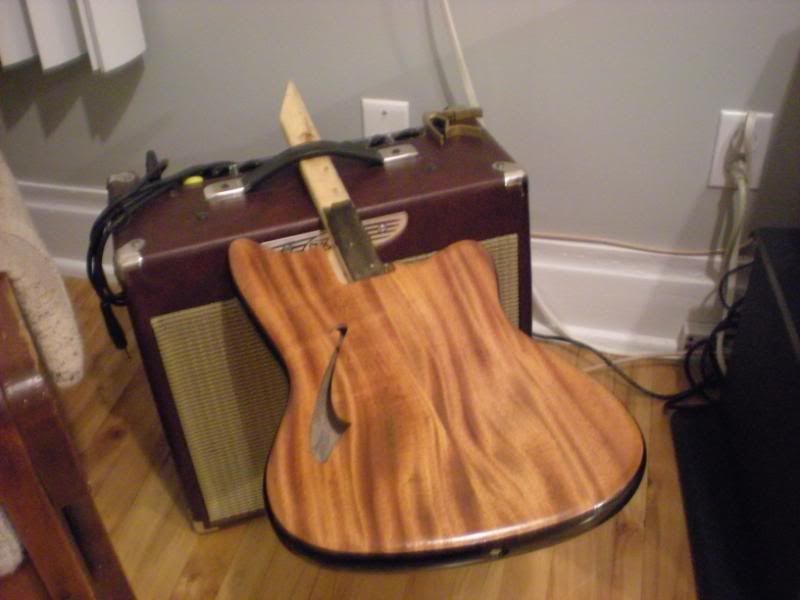
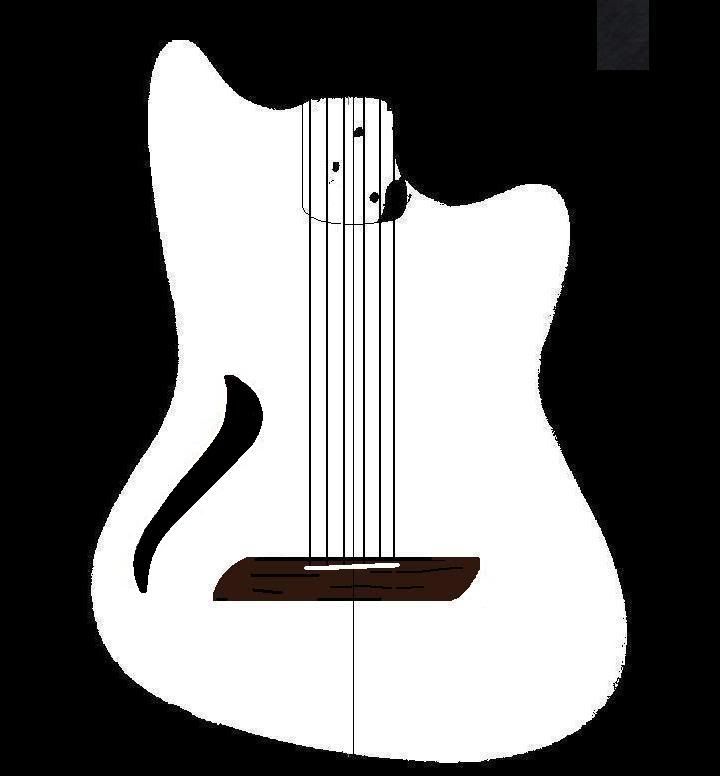
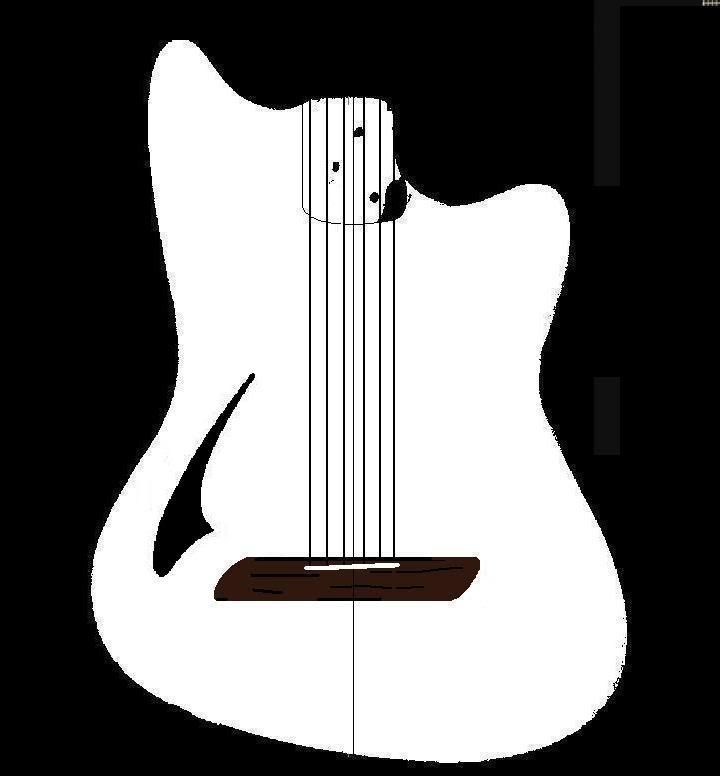
This is a chambered body nylon string guitar. The body is from an old harmony bobcat from 1964.
Build Thread: http://projectguitar.ibforums.com/index.php?showtopic=43783
Specs:
650mm scale lenght
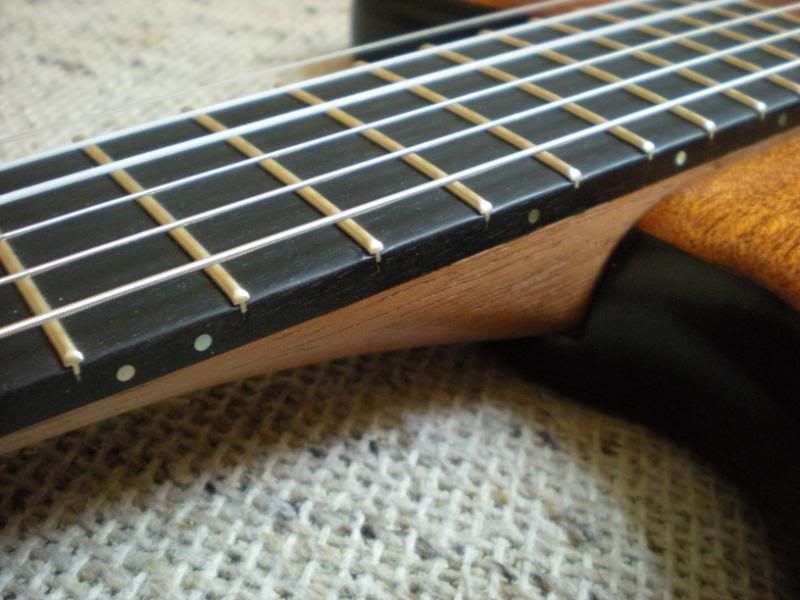
22 frets
Gold Evo fretwire
20 inch radius
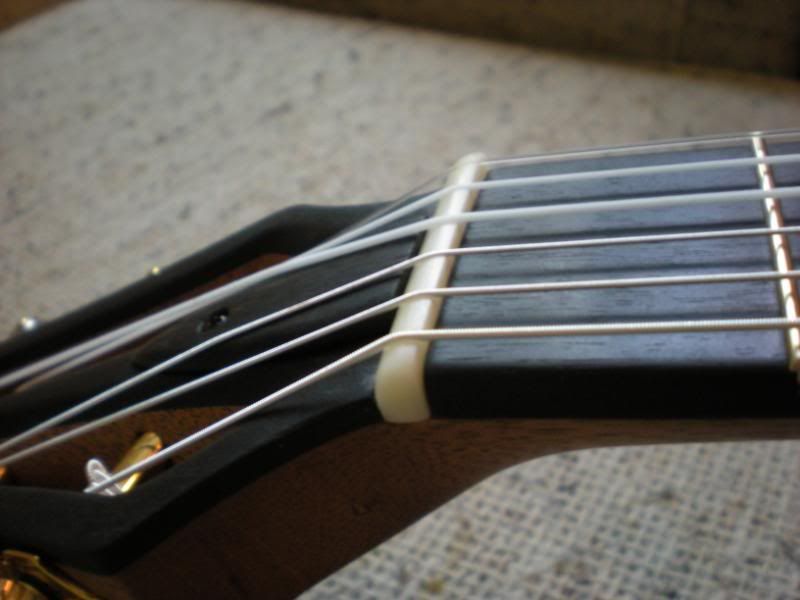
Ebony fretboard
Gotoh gold and black tuners
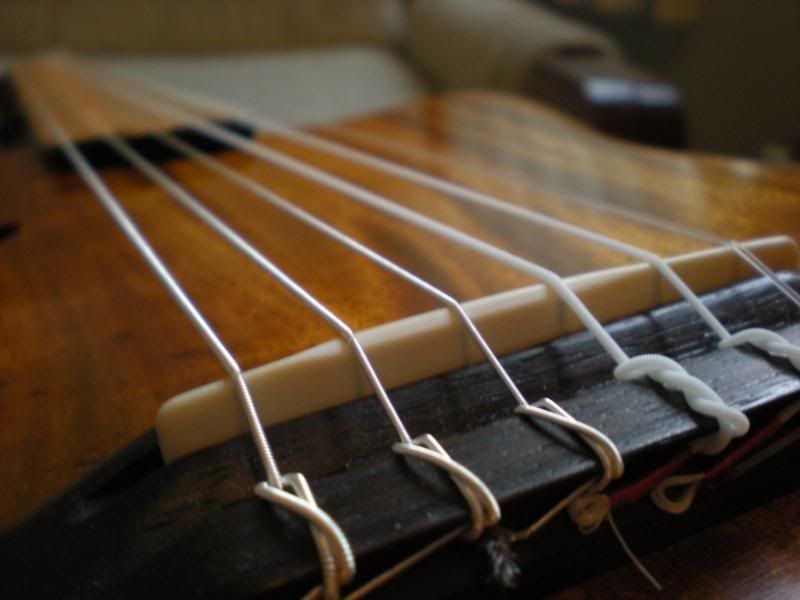
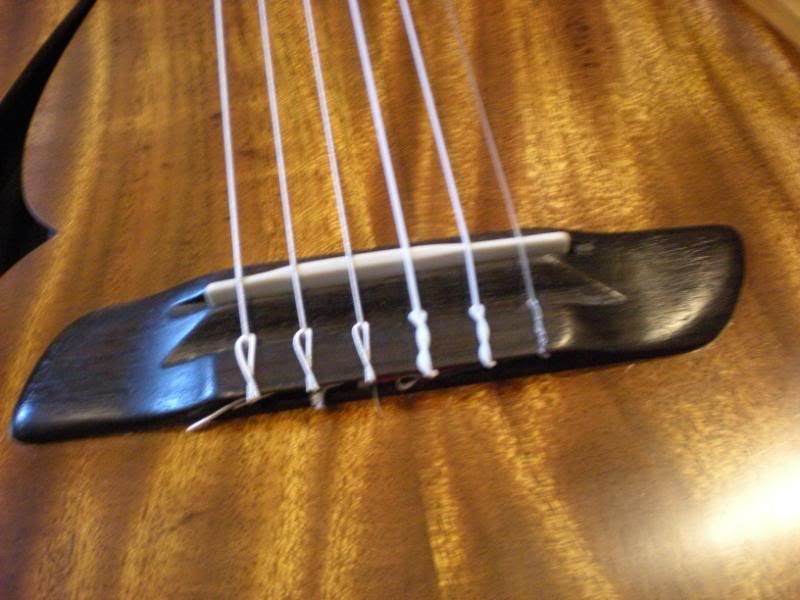
Rosewood bridge
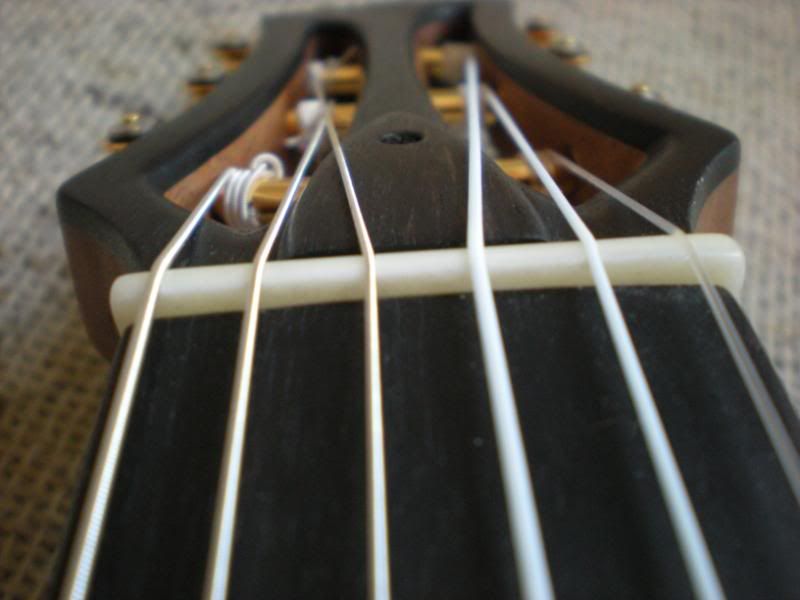
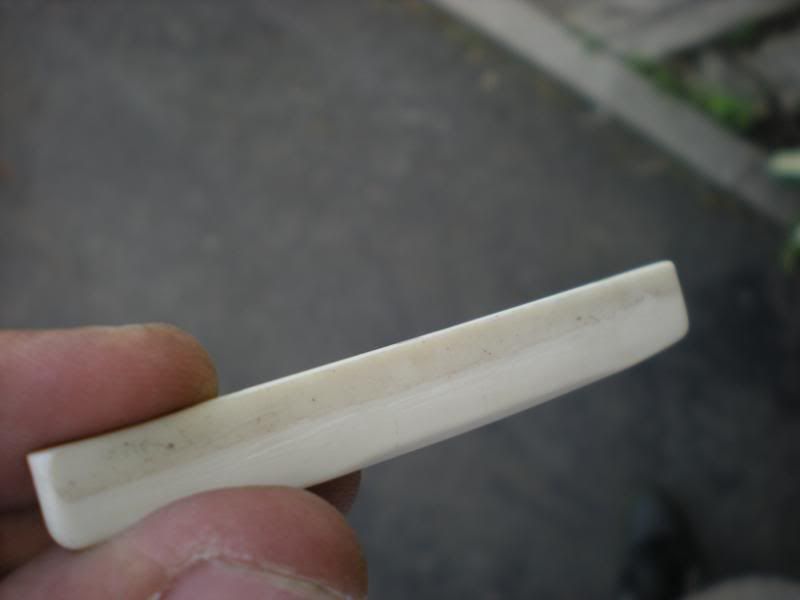
Bone nut and Tusq Saddle
D-TAR Multi-source system (wavelength UST + condenser mic + 18v preamp)
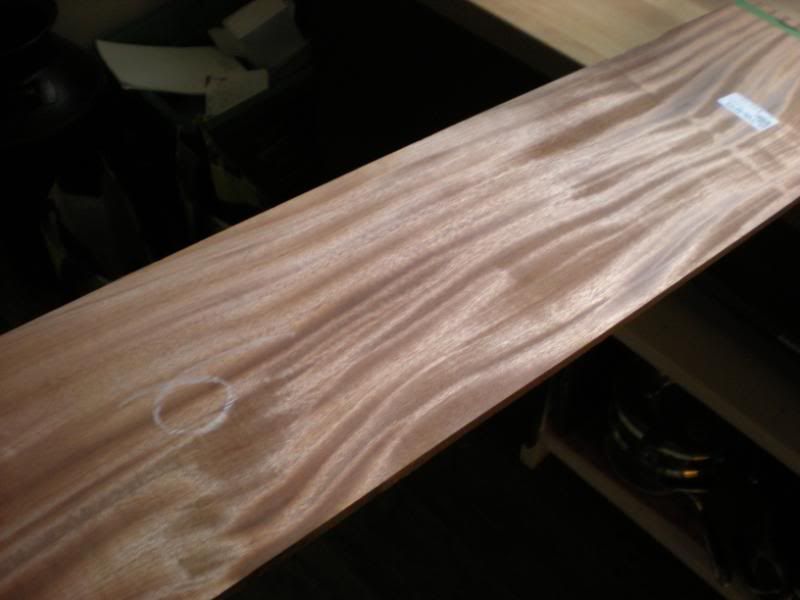
The top and neck are african mahogany from the local lumberyard.
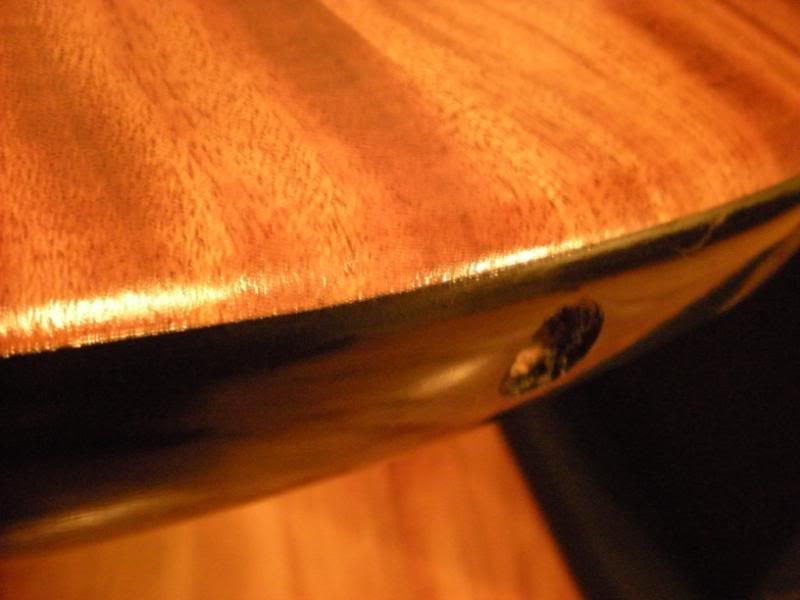
Finish is brushed on golden shellac for the top, and brushed on shellac with black pigments for the back and sides.
Neck is finished with Danish oil
-
my question is how do you fine tune the chambers..............
I just removed some more material around the bridge area and deepened the cavities a bit more.
I wanted the "top" to "vibrate" and move some air as much as it could.
Hey and thanks for the comments everyone. I might just try GOTM...
-
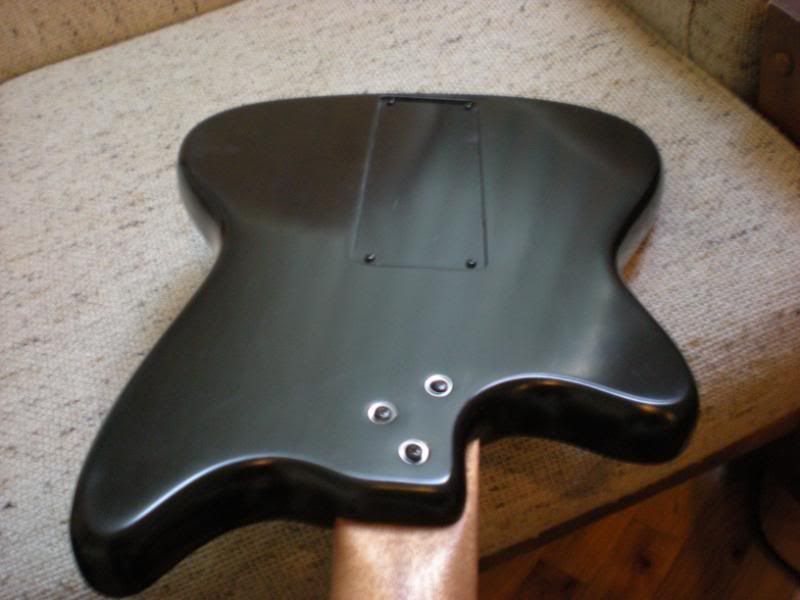 (Yeah, I'll put on some new screws with real bushings in the near future)
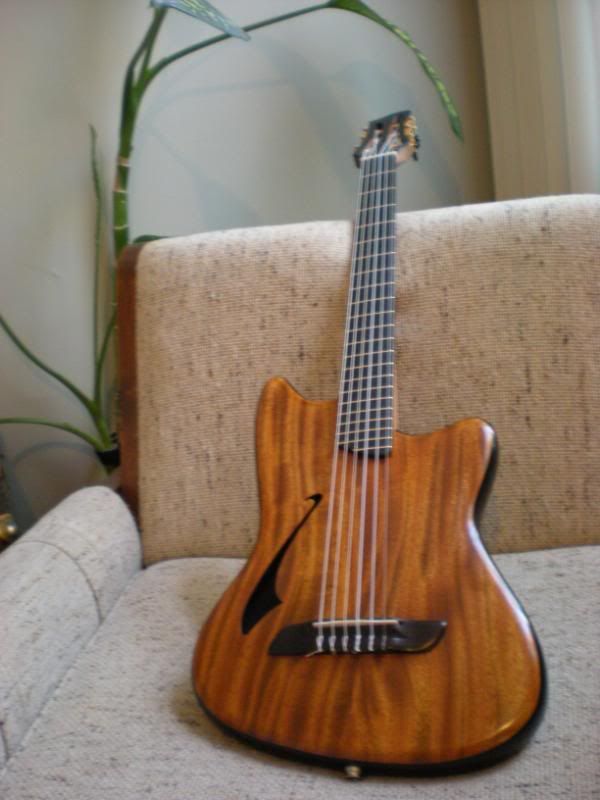
I love it! Plays really good and sounds impressive. Needs a little bit of tweaking still to get a really even response from all the strings on the piezo.
If you have any questions, please go ahead!
-
One of the many guitars I want to build one day, is a chambered or solid nylon string, because I used to play classical guitar back in college. I hope one day I get the chance to. Your headstock design is absolutely perfect and fitting. I will have no compulsion in using it and giving you credit for it.
The rest of the guitar looks fantastic as well.
Hey! Thanks, and feel free to use my design! It'd be an honor to inspire others, having myself been inspired so much around here.
-
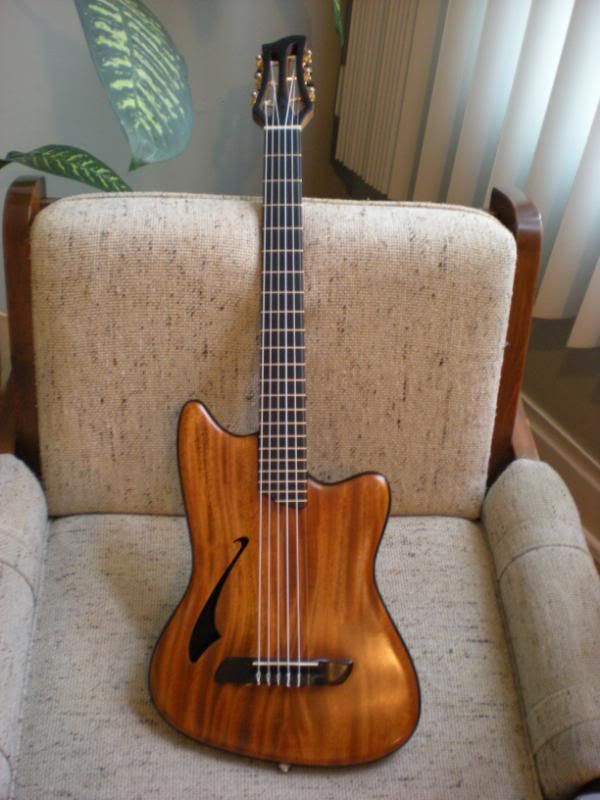
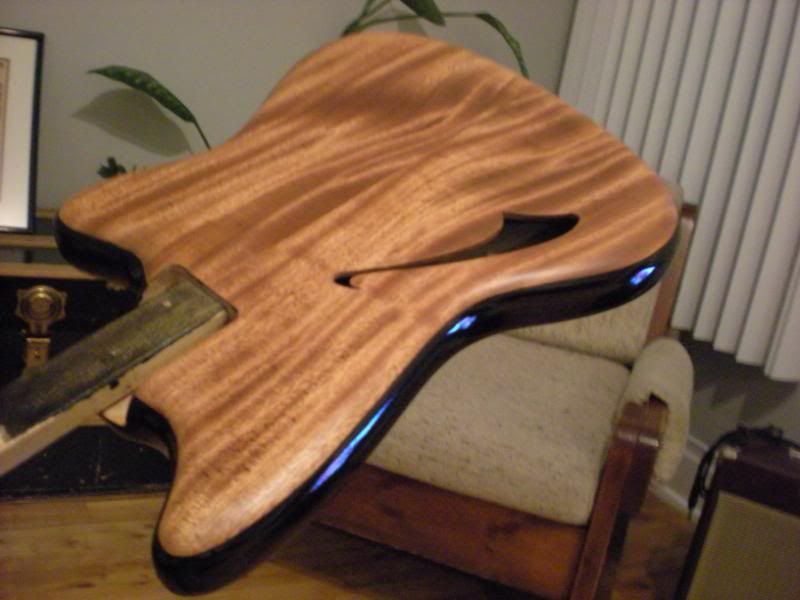
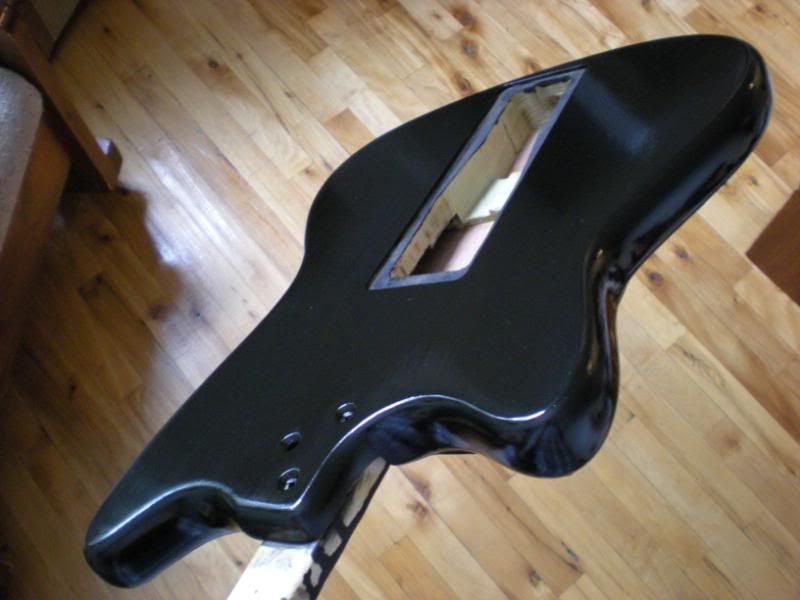
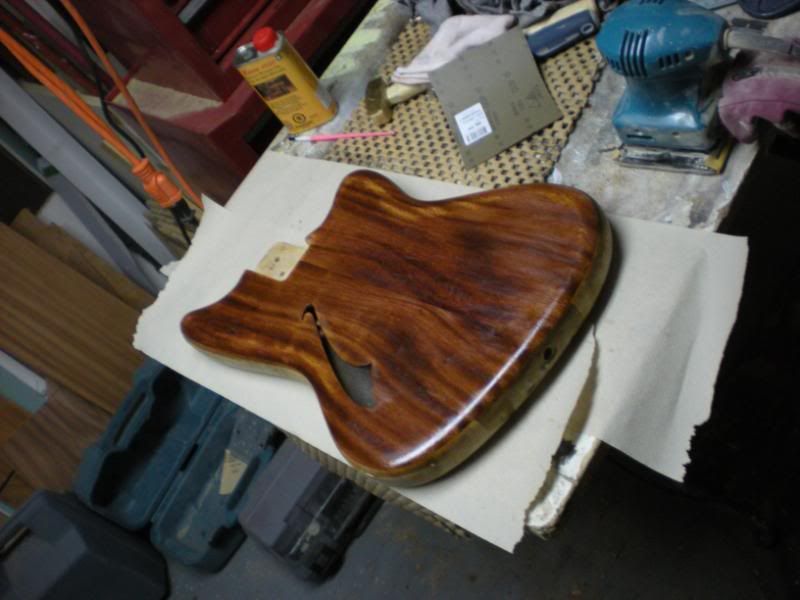
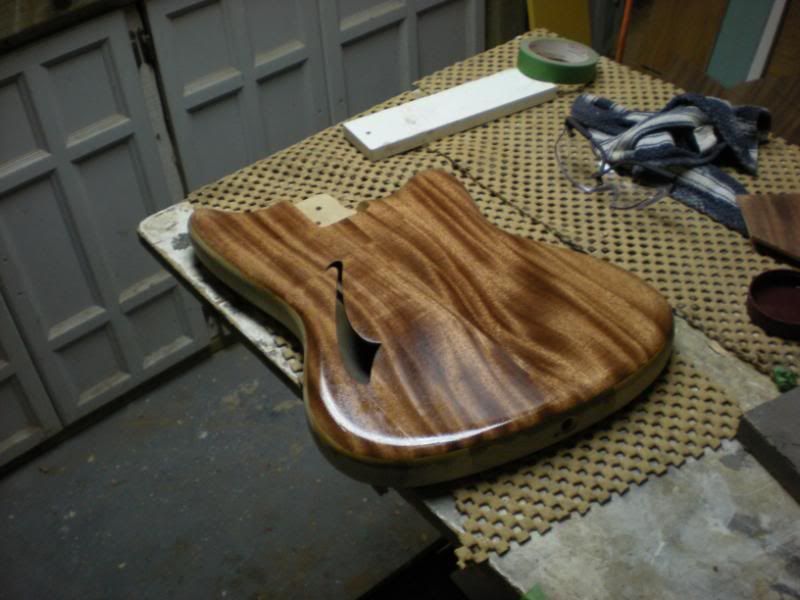
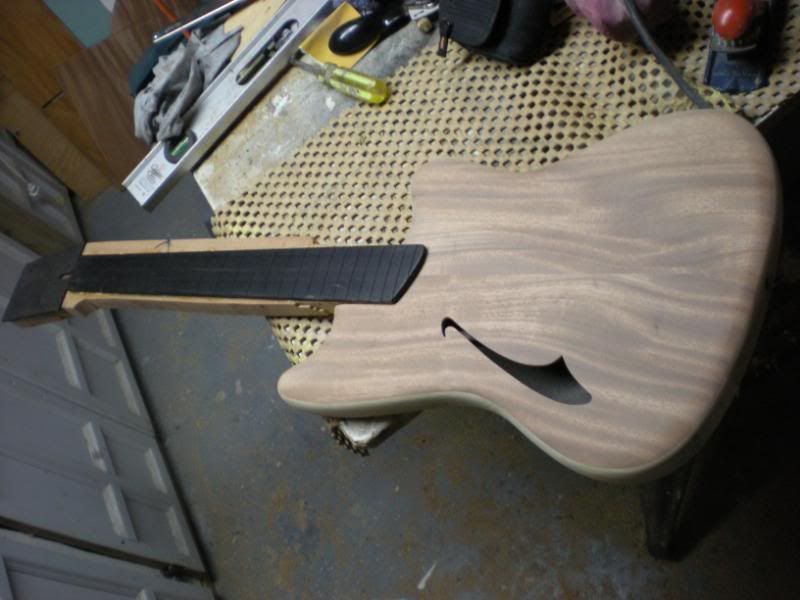
Finished everything with a good wax and a hand buff.
And there you have it:
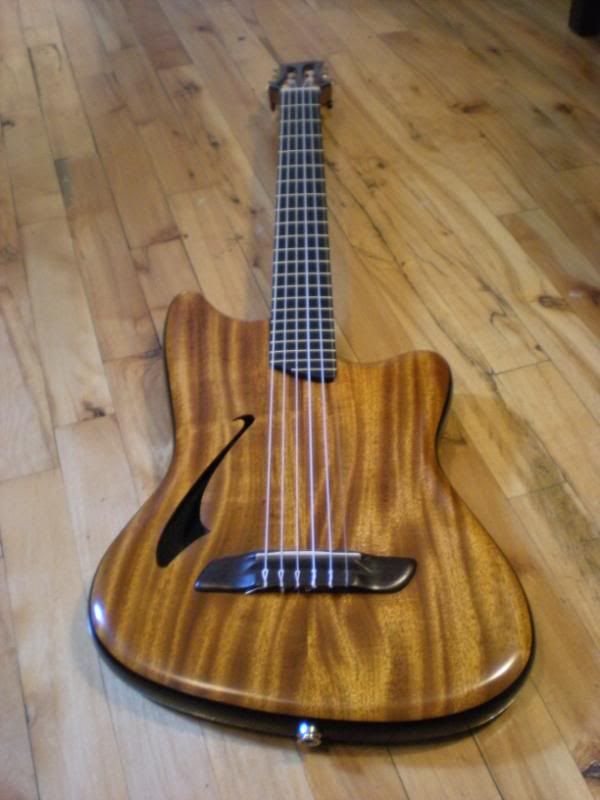
You can kinda see the two small thumbweels which control the mic volume and master volume of the system.
-
Finishing is done, you'll see better pics at the end.
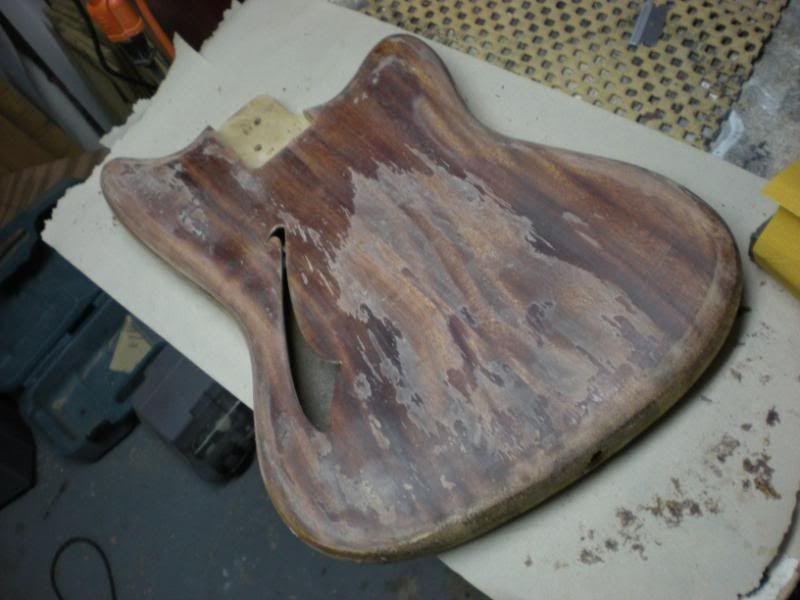
Masking around where the bridge will be:
Then scraped the finish down to bare wood:
And glued on the bridge (which I reshaped a bit and stained black to make it look like ebony)
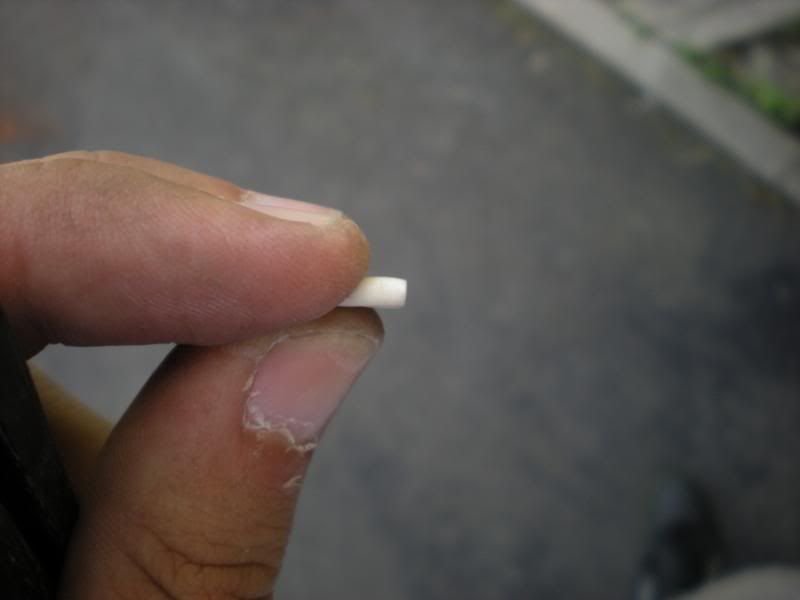
Shaped the nut:
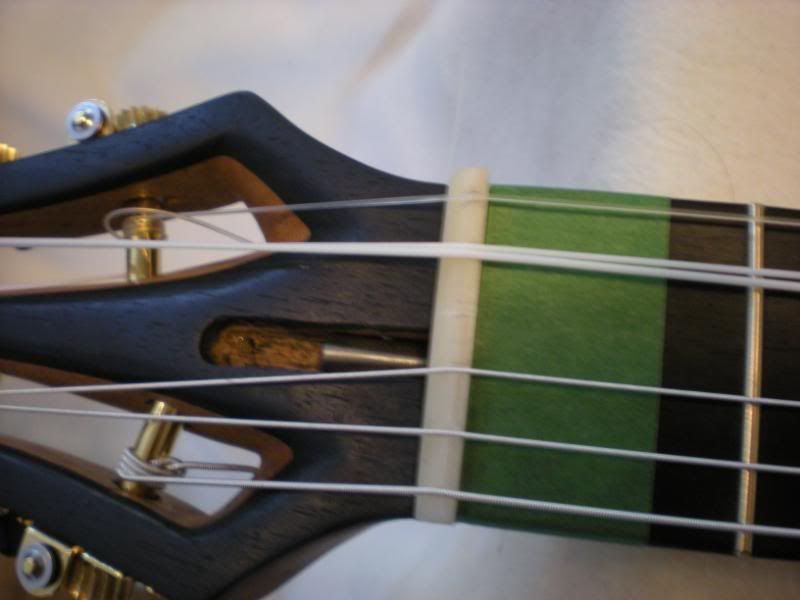
Some of you might really not like what you're about to see, but it worked out pretty well for me on my last projects.
The nut slotting monster:
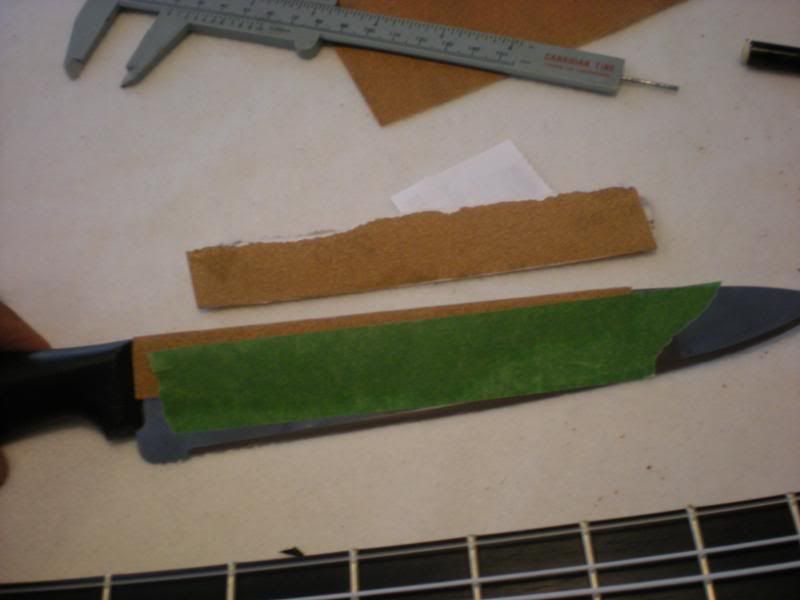
Which is a big ass knife with 220 sandpaper on the back of the blade
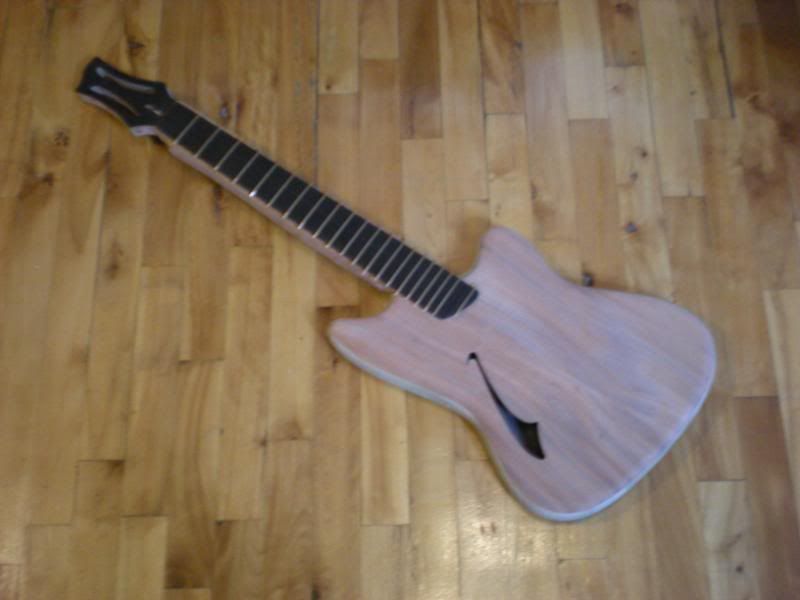
And at this point I stringed the thing up, did the setup, had to put a shim in the neck pocket, removed a bit of saddle material, adjusted the intonation just a hair.
-
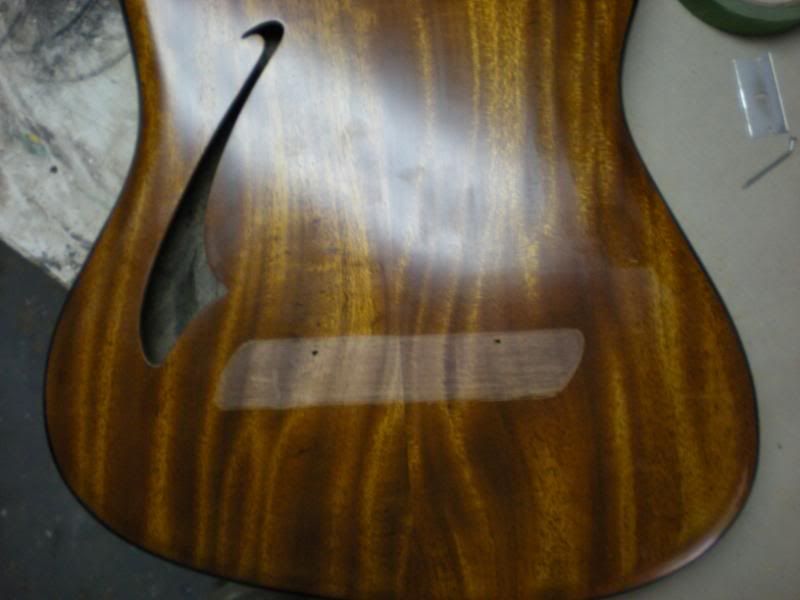
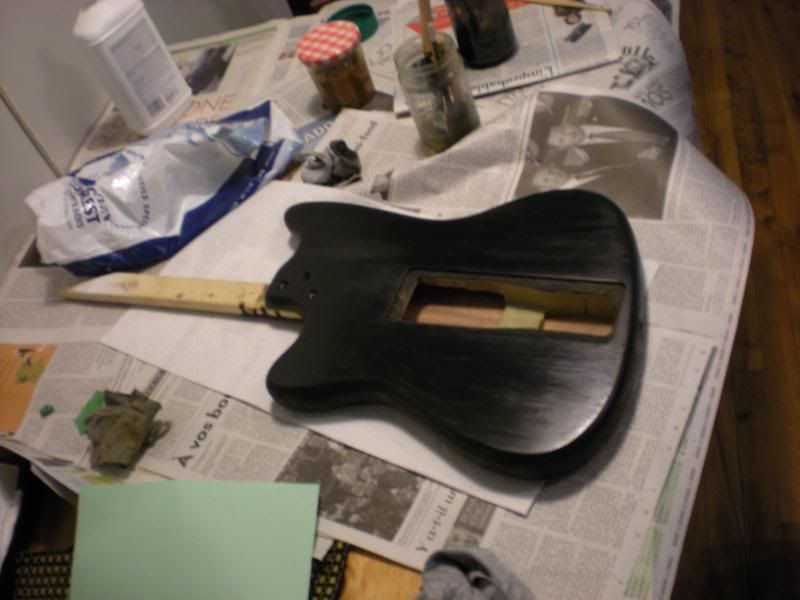
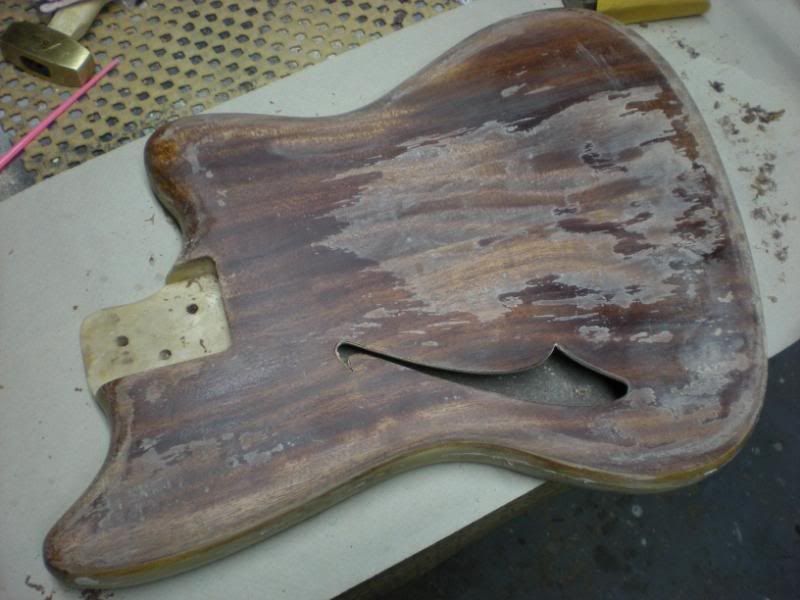
Unmasked the top
Then the job of applying finish continues, as I need to get rid of the ridge the black has made around the tape.
Basically: apply shellac with a brush, the next day sand everything with 400grit and olive oil, then 000 steel wool, clean everything, apply some more, etc.
You also see in these pics the Traynor all tube guitar holder I have.
We're getting there
-
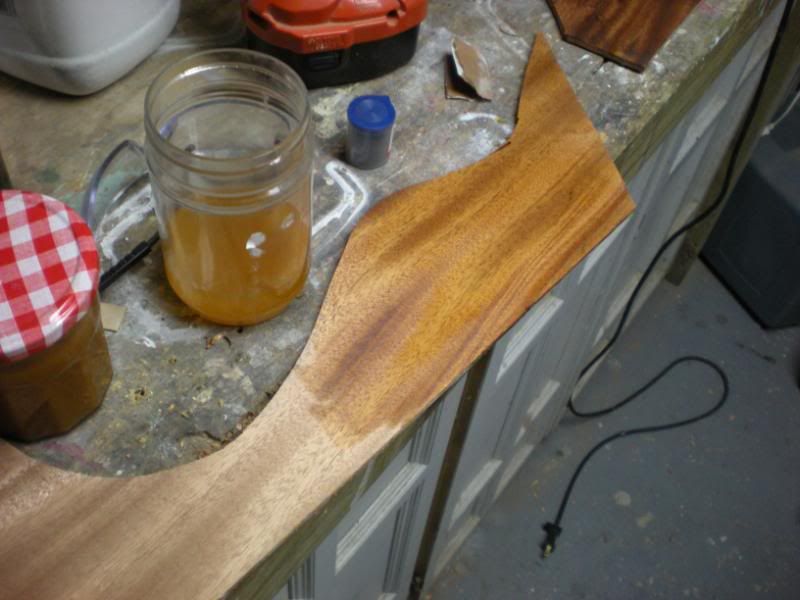
Masked the top and began working on the back and sides.
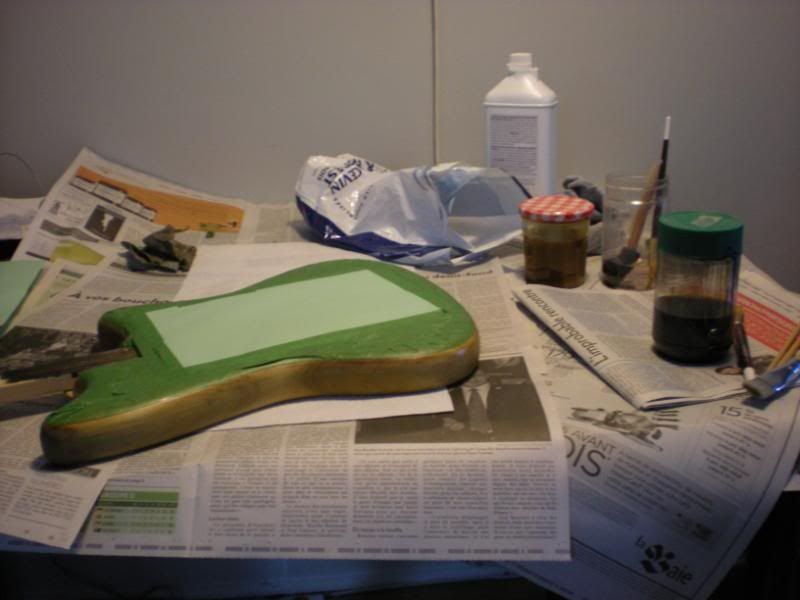
I Wanted to have a black semi-satin finish on the back and sides, so I mixed some black pigment (actually ashes from vine tree) with the shellac mix and then went at it.
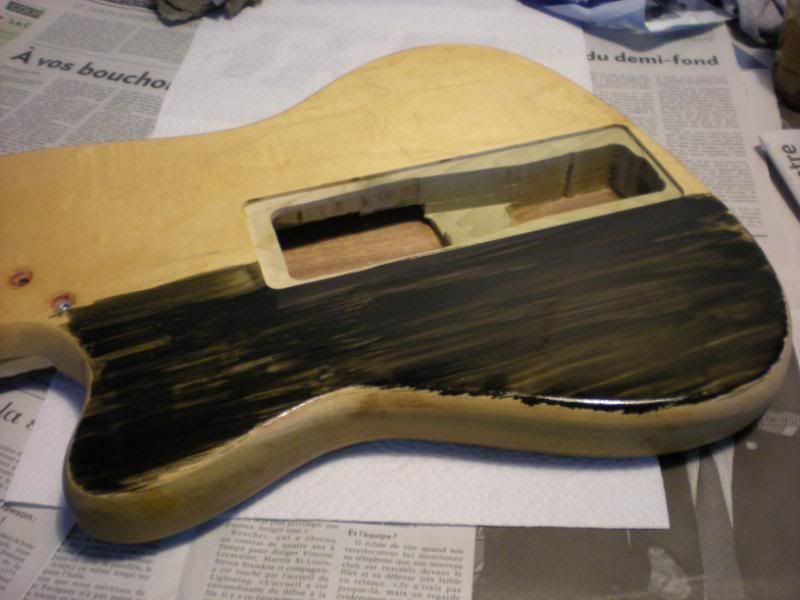
You see the coats are not opaque by themselves, but the accumulation of them gives off a nice and warm black finish.
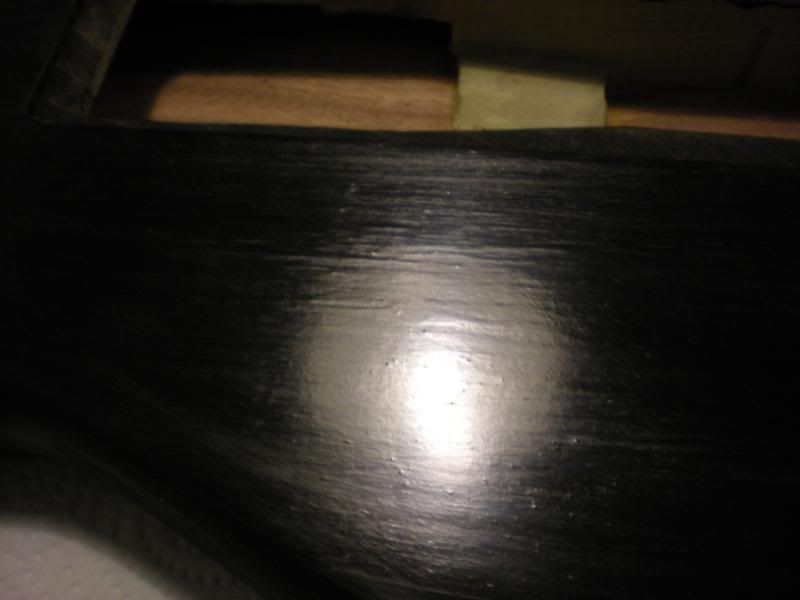
After a few coats, I wet sand the thing with olive oil as a lubricant to bring back a flat surface, then clean everything and put on some more coats
3 coats of oil on the neck, in the meantime:
-
While the epoxy is curing, I decided to work a little bit on the tusq saddle I had.
Wanted it to have a slight backward angle in the slot, I 've read that it would help to even out the response from the piezo. So played around with CA glue and files and sandpaper, until I was happy:

Back to the neck: started oiling it (danish oil) and made sure the tuners were aligned:
Here is the only major "!"?$*!&$" moment:
I was beginning the application of the golden shellac on the body, which had had 3 coats of epoxy pore filling so far. Well I sanded back to wood in some places, the shellac penetrated the wood there and made it contrast. :eek:
Taking a deep breath, I decided to sand everything back so that the epoxy would be "just" in the pores of the wood.
Sanded it all off, then tested on some scraps with just the golden shellac on.
Victory!
So I began the application of shellac (mixed with denatured alcohol and applied with a brush) on the top.
-
Then the sanding process began.
Gold MOP markers:
Less rough neck:
Filled the pores of the top with epoxy:
Sqee-gee and a plastic card to spread it around
Your eyes should be misty from the emotion at this point. Mine were. :love:
-
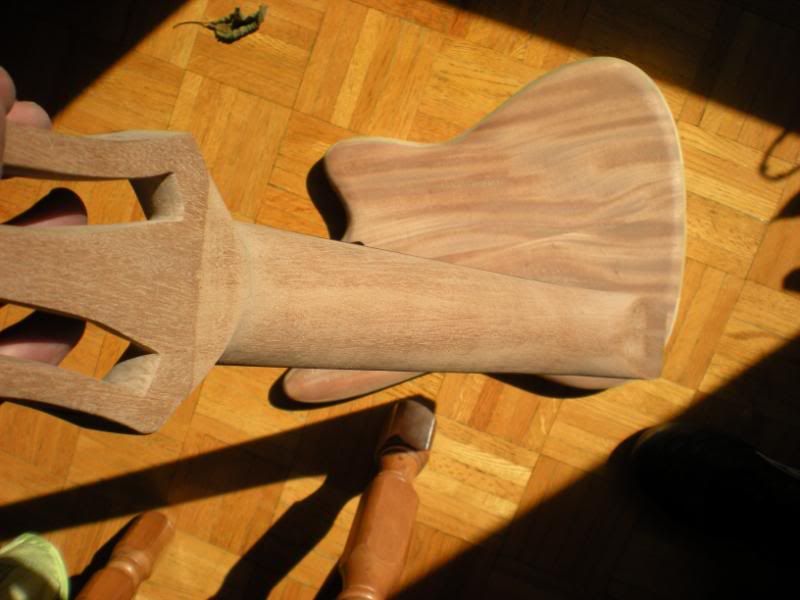
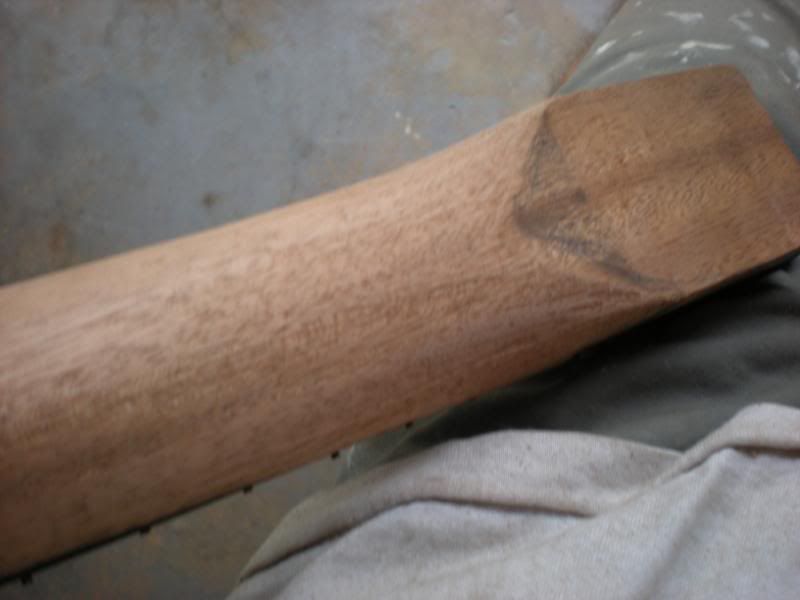
Forgot to tell about the headstock shaping thing, I'll post better picture later on, it was still rough at this point.
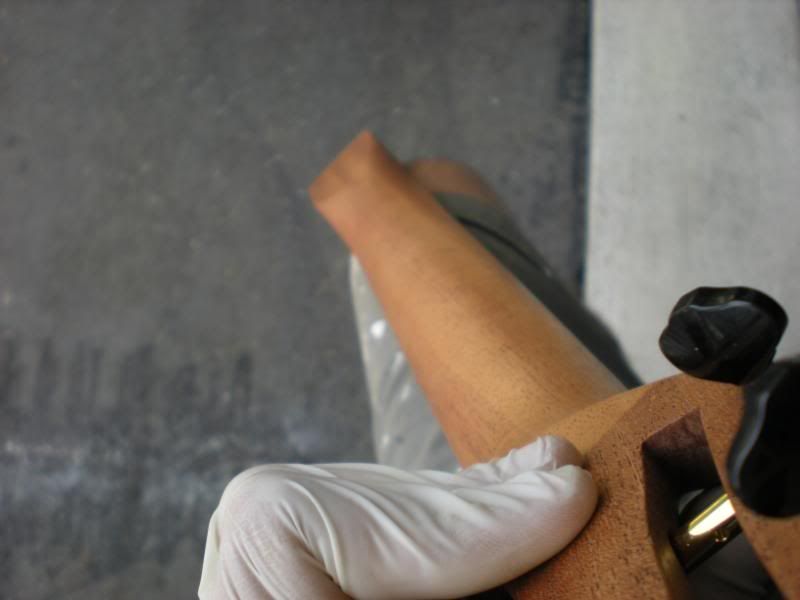
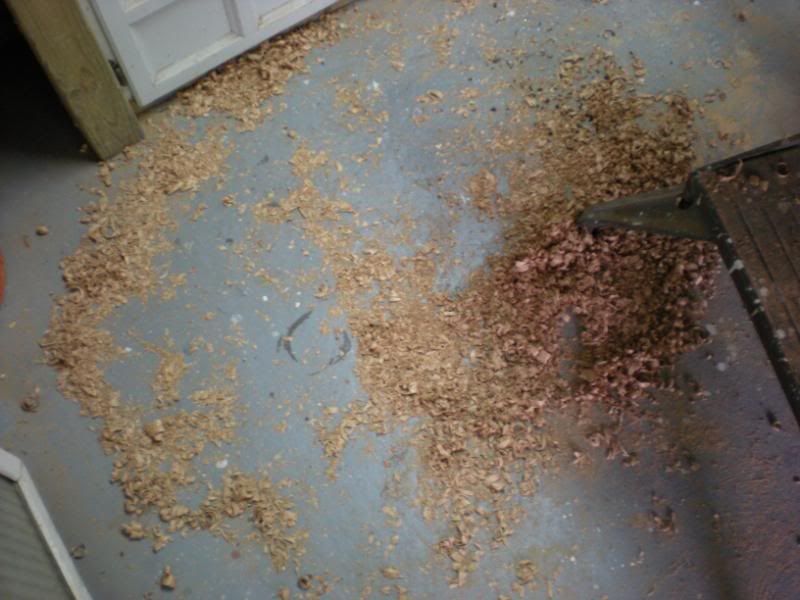
Bought a spokeshave, tuned it and sharpened the blade, then began carving the neck (a lot of fun, to say the least)
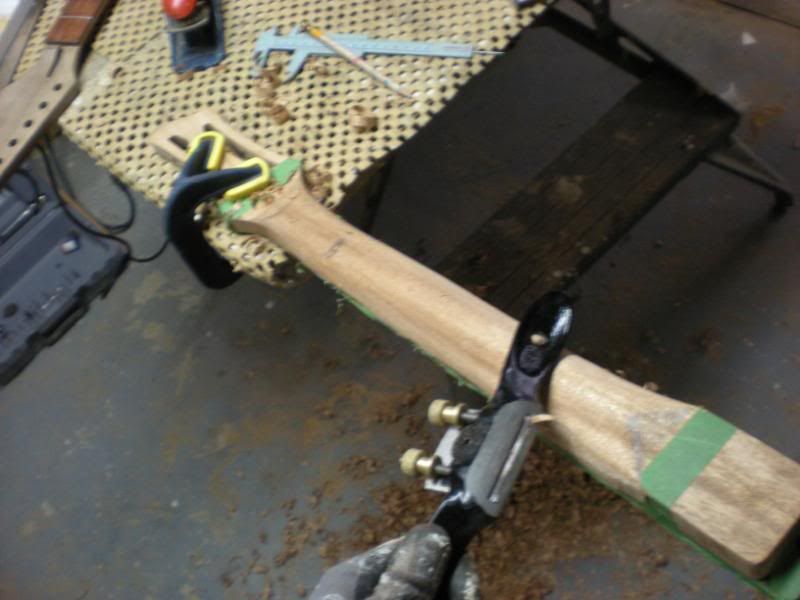
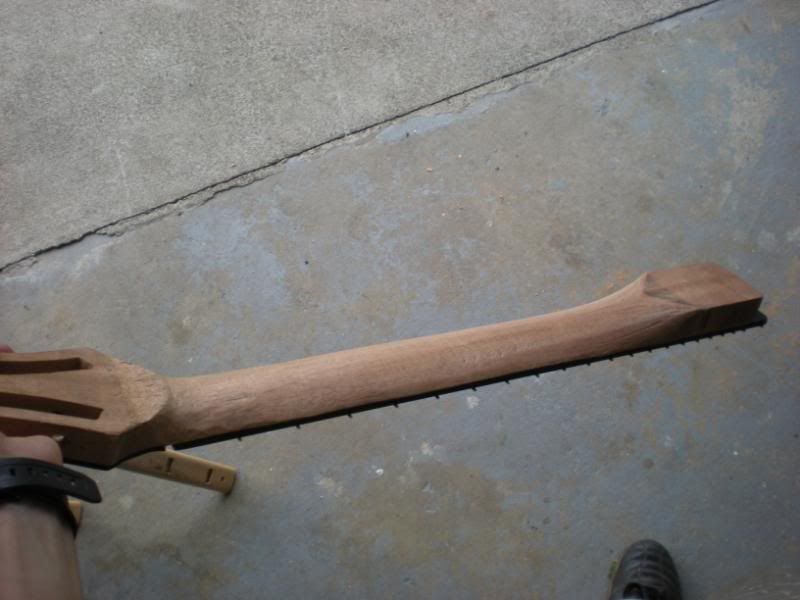
The neck:
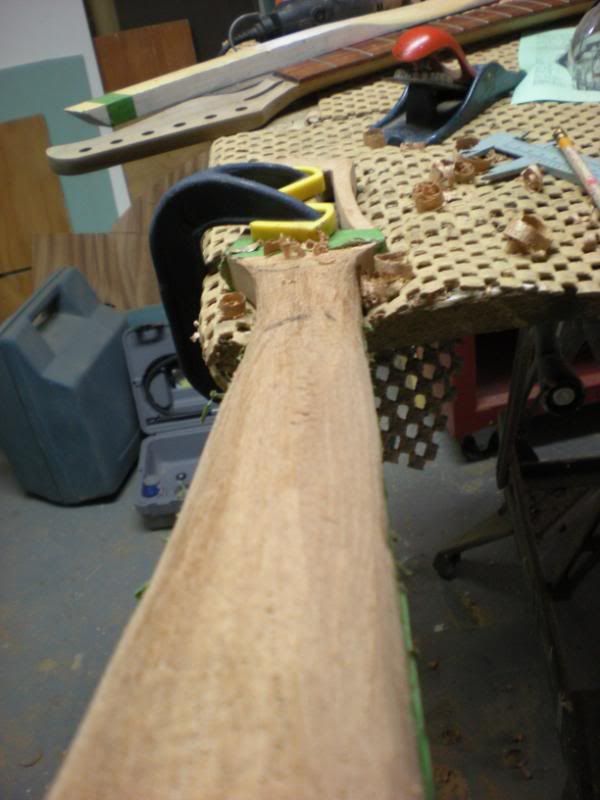
What didn't make it as a neck:
Shaped the volute and heel with a chisel:
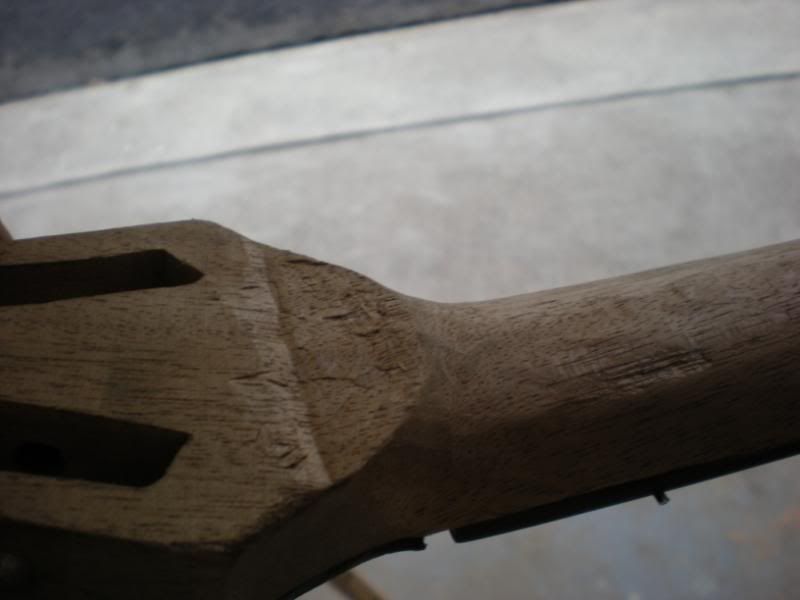
And you see it in proportion with the body.
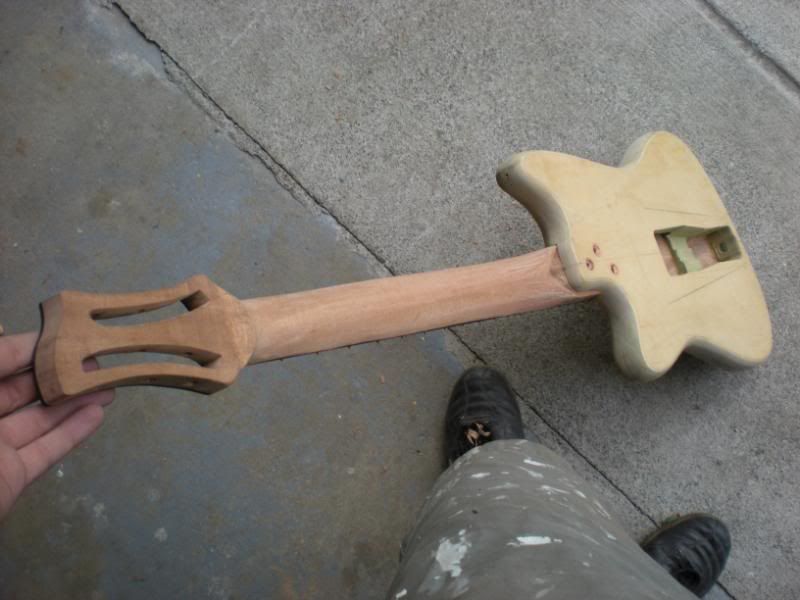
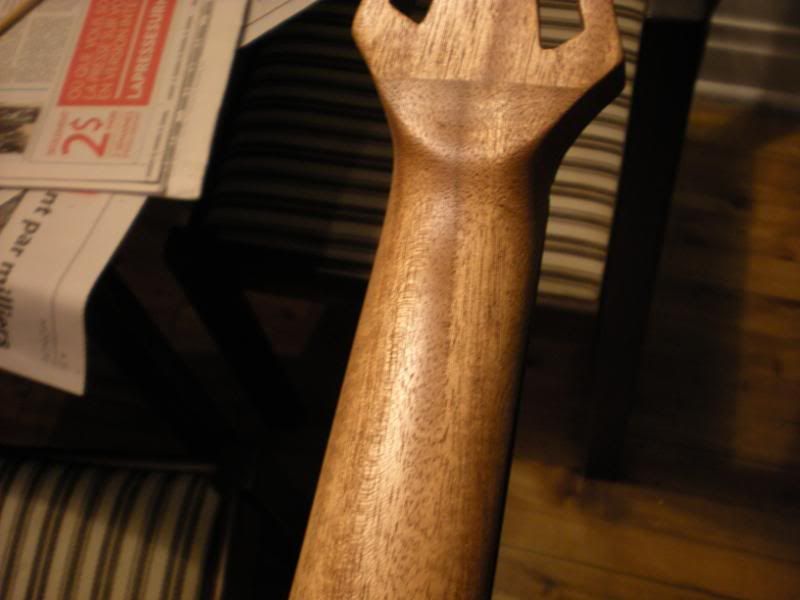
Fine tuned the headstock with small files and sandpaper:
With the world cup to keep me entertained (with those obnoxious vuvuzelas)
-
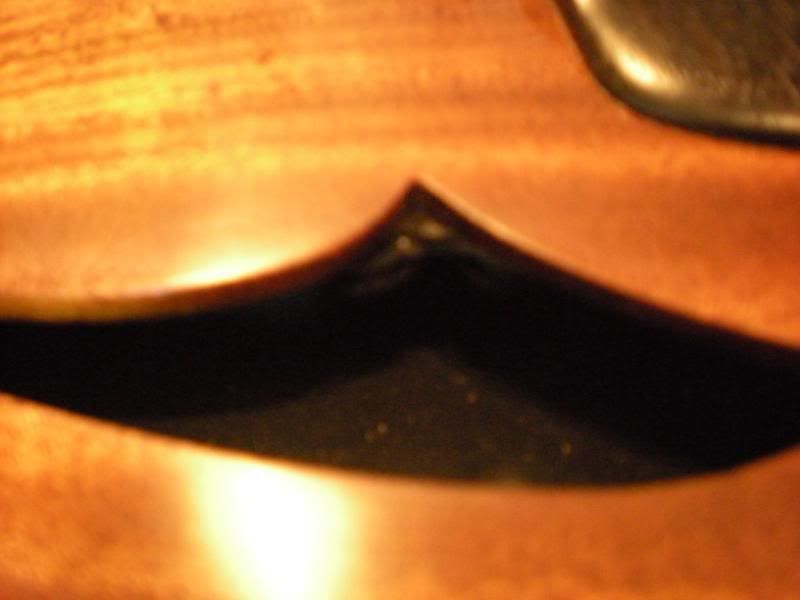
Back to the top and soundhole thing:
No pictures of this, but I jointed the two halves, then glued them together, then cut the outline with a bandsaw at my uncle's shop.
Back to my dad's garage:
Traced the outline of the hole, I cut it with a coping saw:
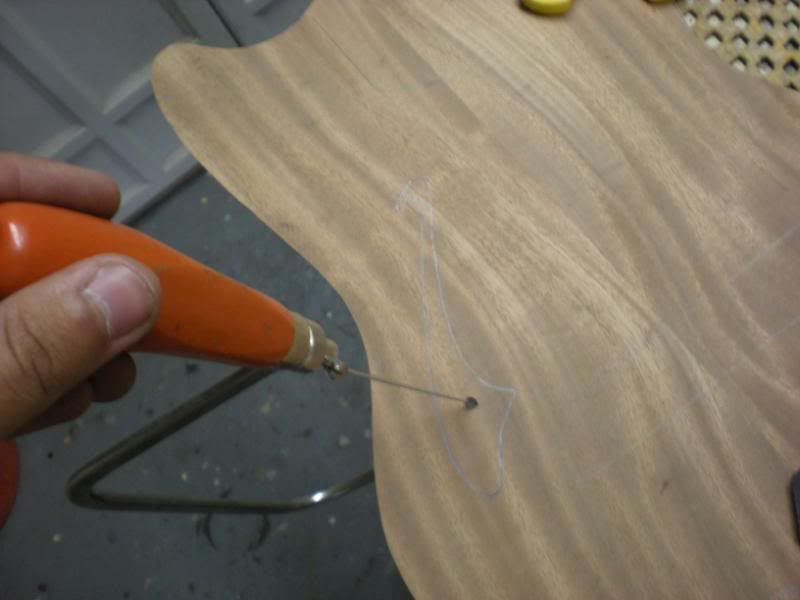
Still rough
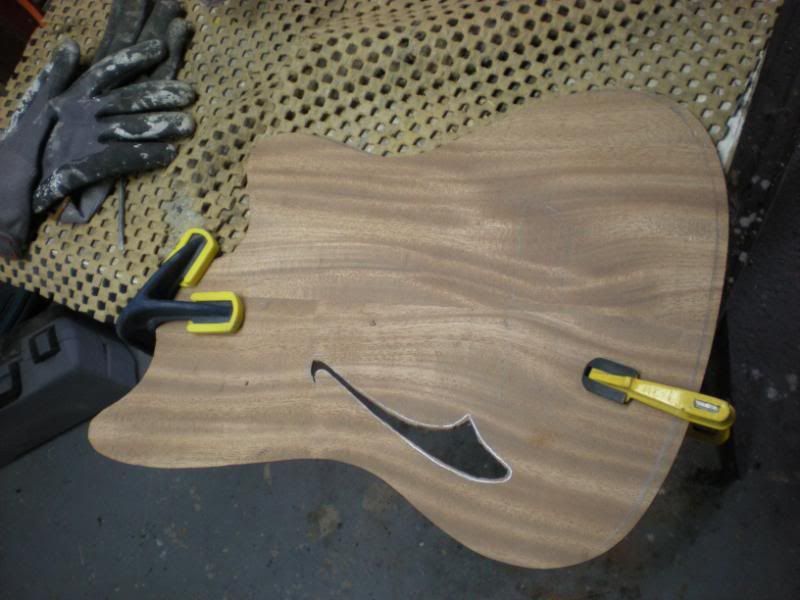
A plastic card behind sandpaper gives me some resilience to shape the curves, along with some files and razor blades.
Done:
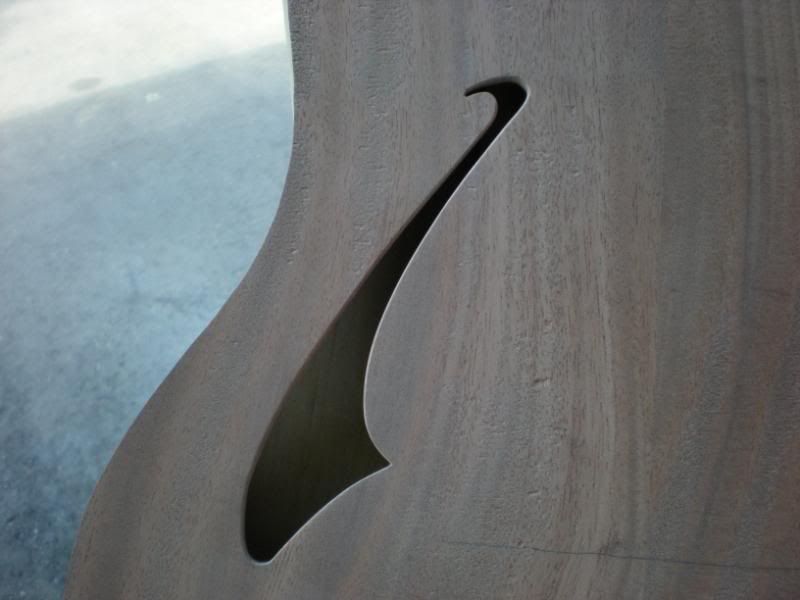
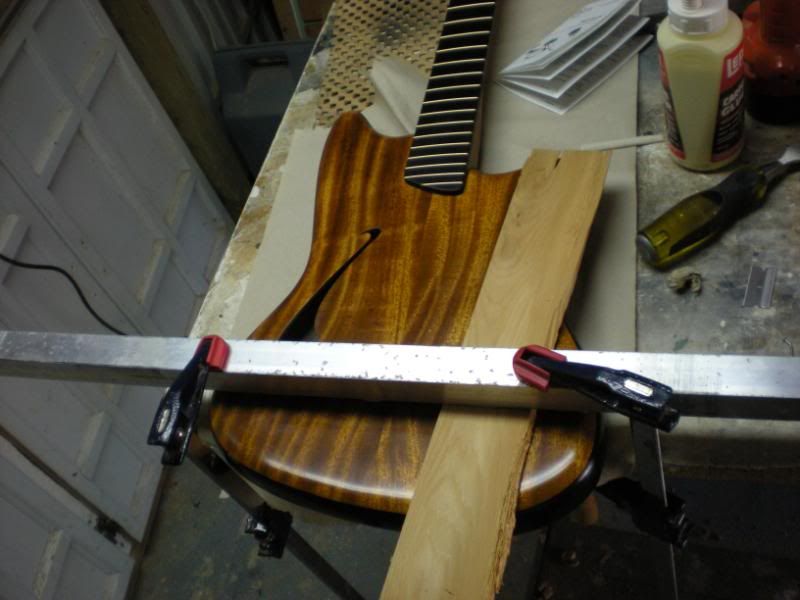
Glued on the top:
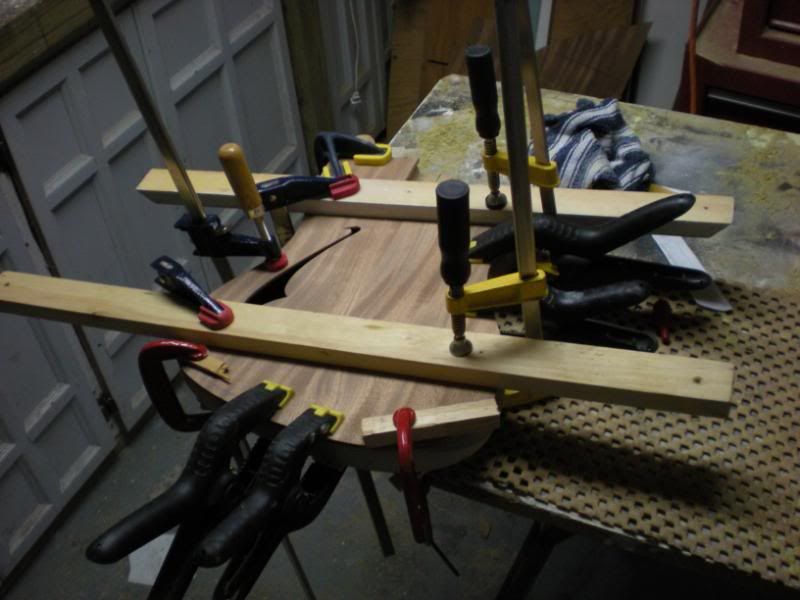
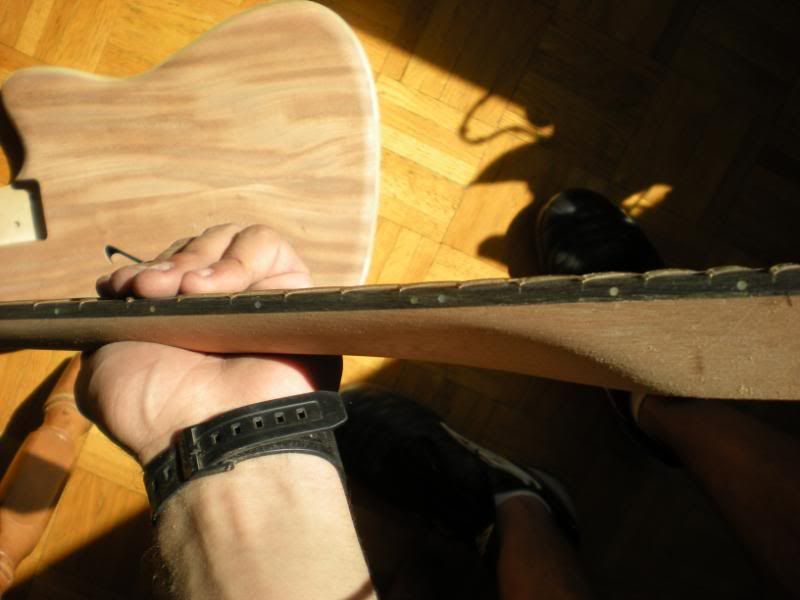
Than shaped the neck pocket and neck heel:

The obligatory "hold the guitar by the neck to show tight fit" picture:
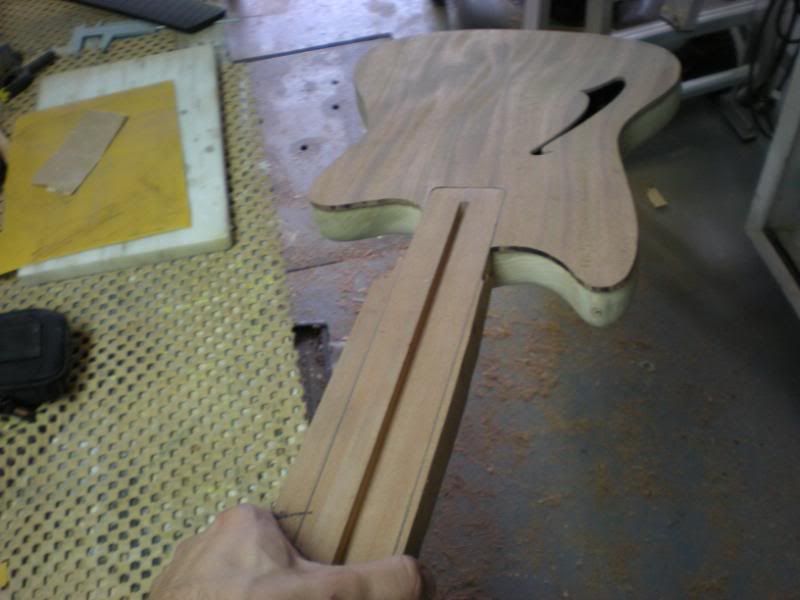
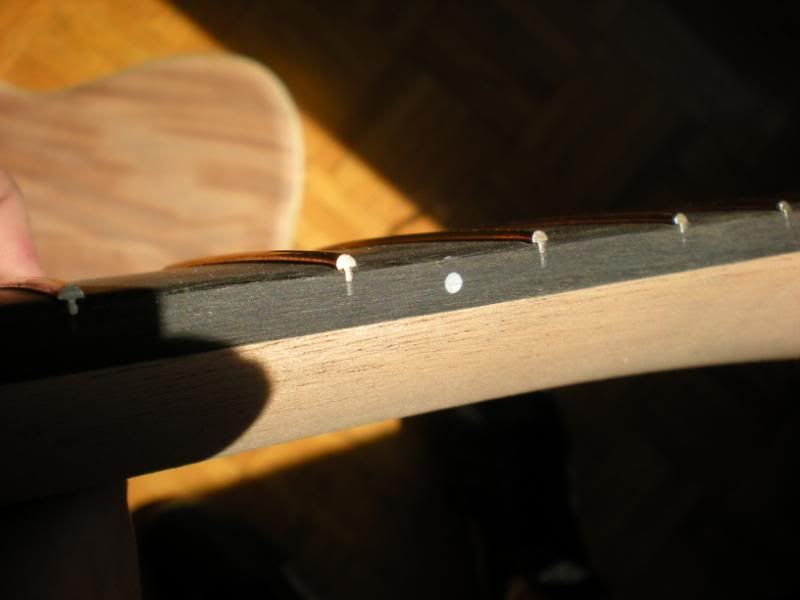
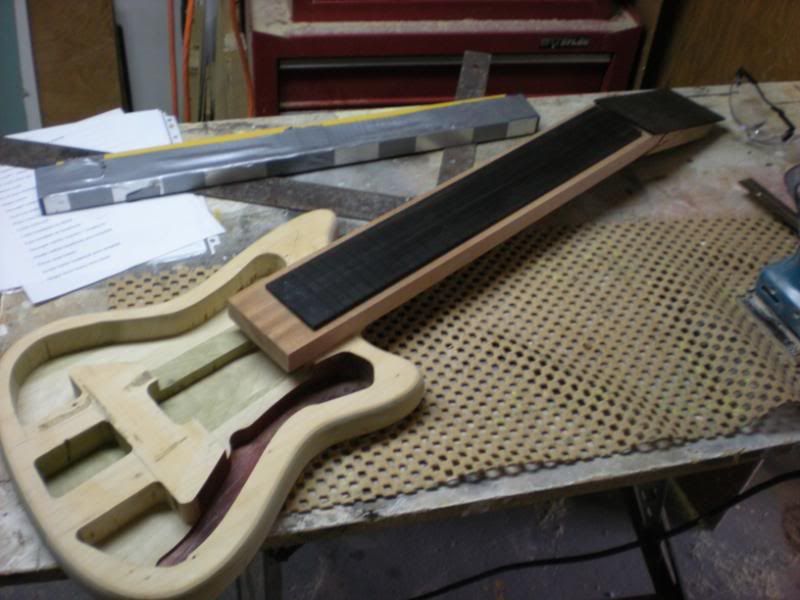
Here I glued on the ebony fretboard on the very rough mahogany neck, and I also rounded over the edges of the top with the router and some sanding afterwards:
And with some frets on:
Specs so far: 650mm scale length (standard for classical), 22 frets, 20 inch radius and gold fretwire from LMI. (I really love these guys, they are aweseome people to do business with)
-
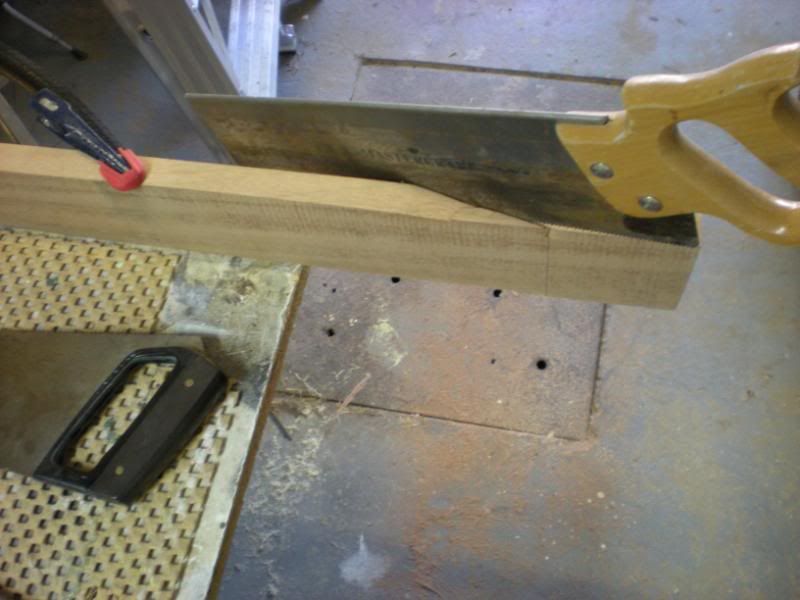
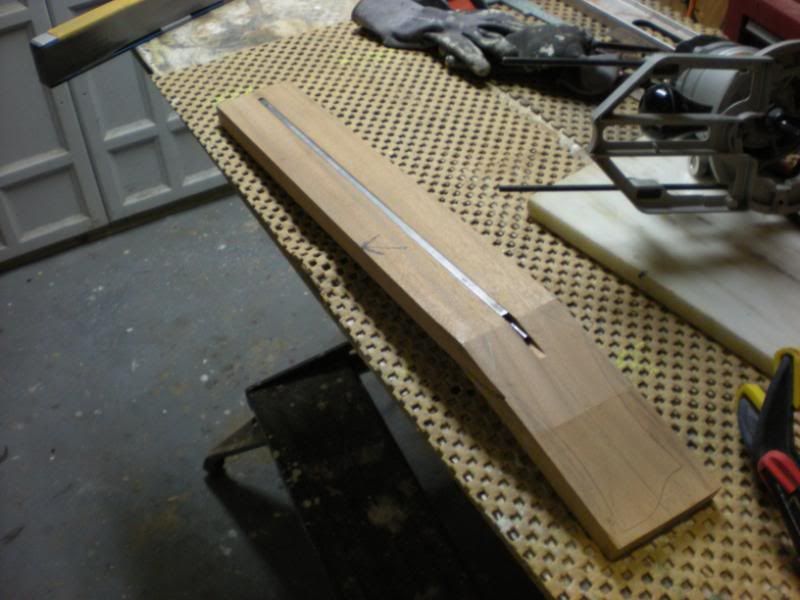
Ok, neck construction post.
It was my first neck, and I enjoyed the whole process.
Cutting the scarf:
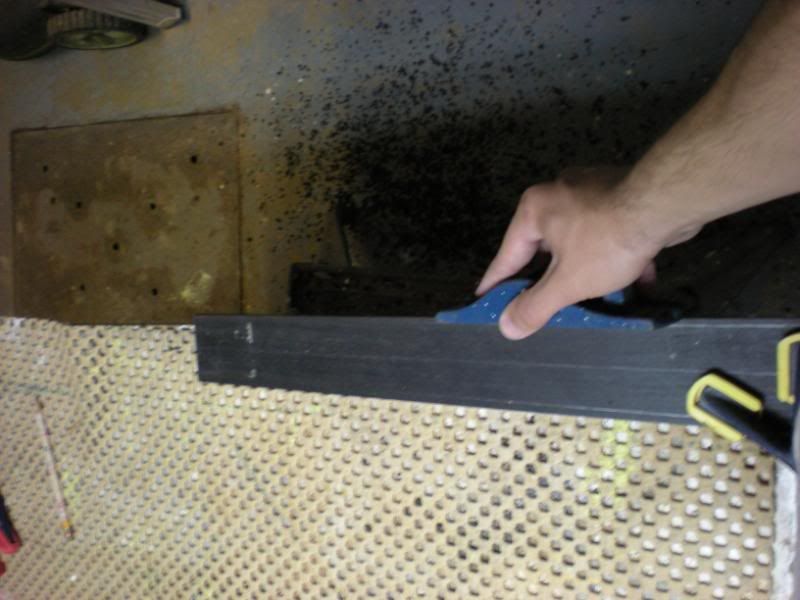
Cleaning up the scarf joint (handplane, sanding blocks):
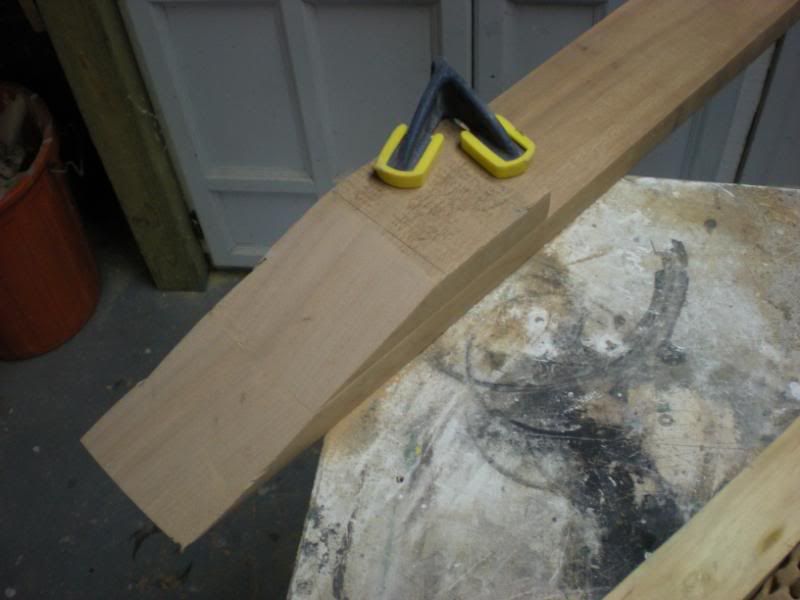
You see that I'm off my line right now, worked it a little bit more and then clamped it:

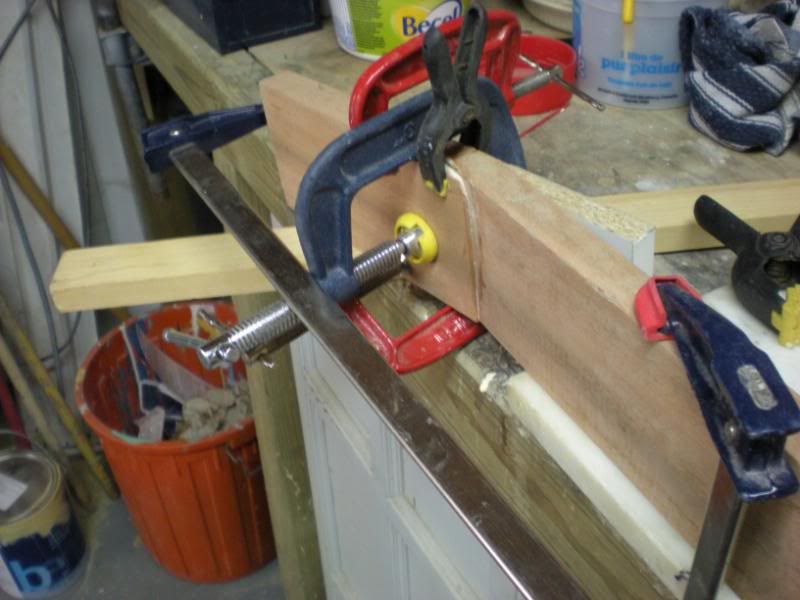
First mock-up:
Routing out the truss rod slot (double action from LMI):
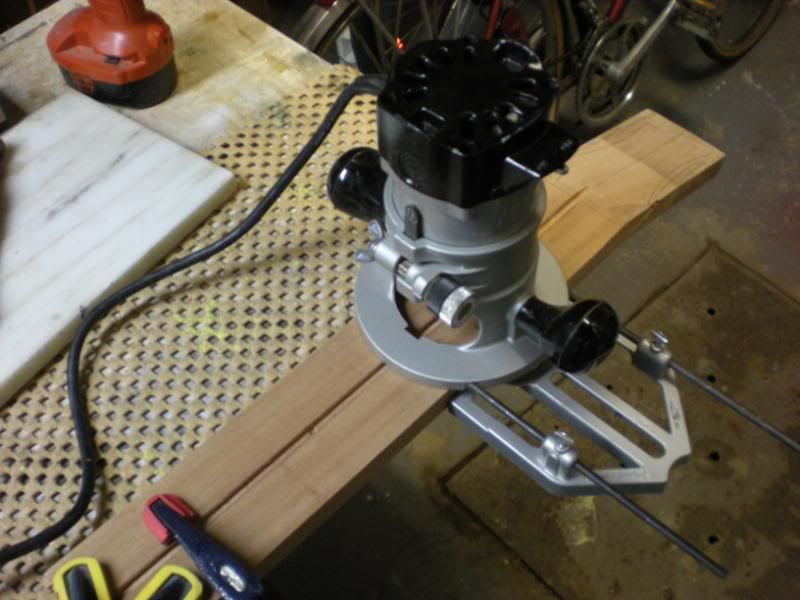
There ya go:
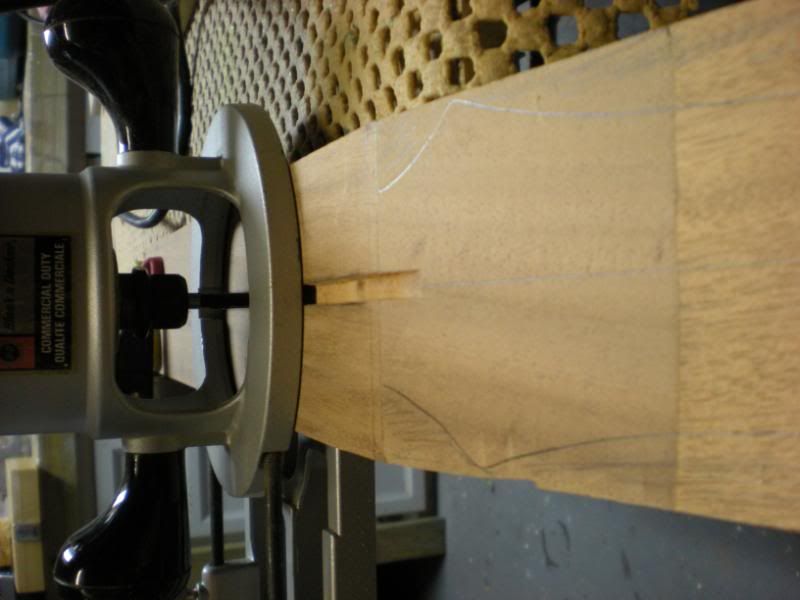
Planing out the fretboard taper:
-
Then I started to think more clearly about the soundhole design I wanted.
Here are the options that made it to the final selection:

And here is a plank of african mahogany that will be made into a top
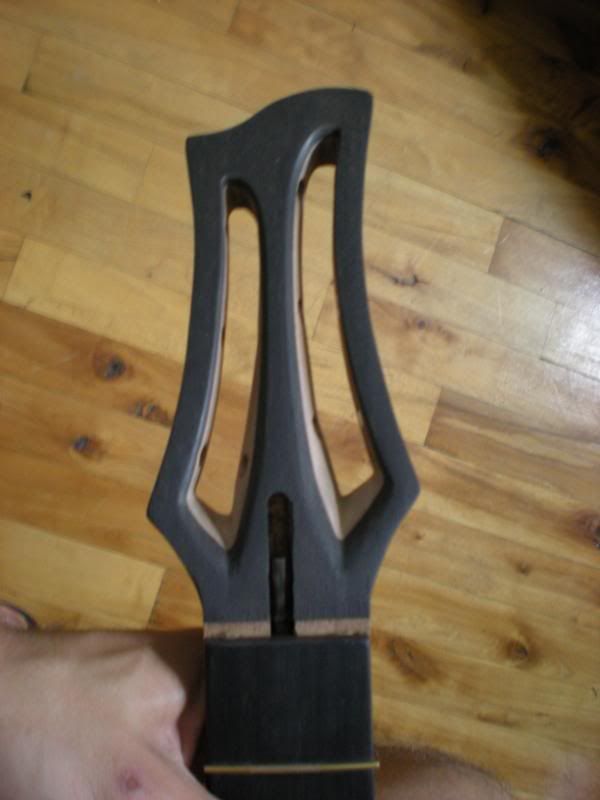
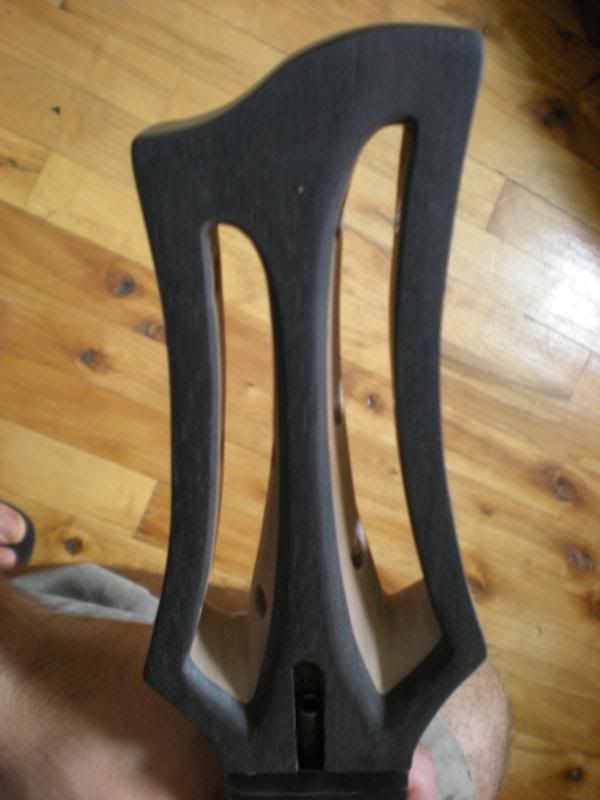
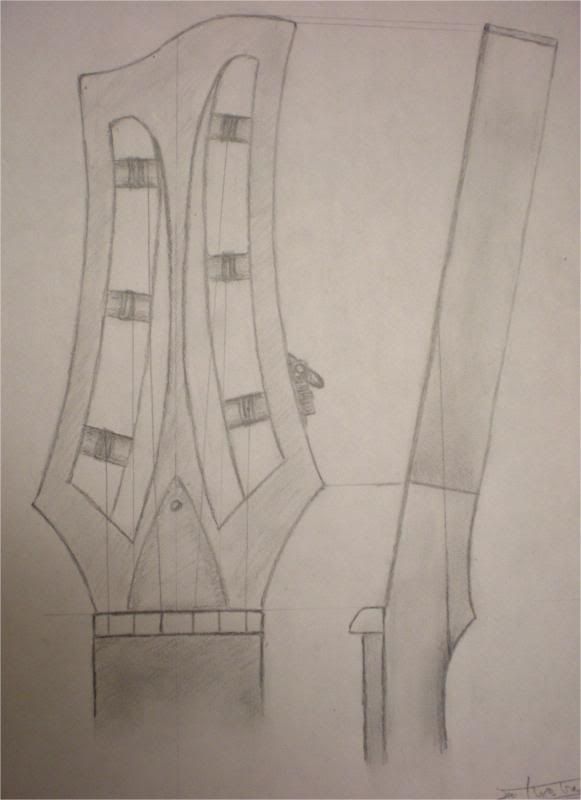
This is my first headstock design, based on Artinger's
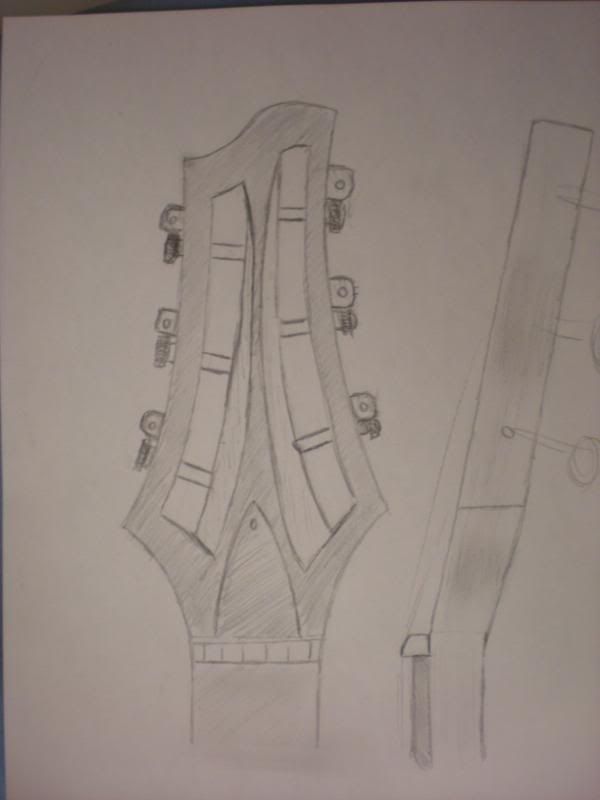
I decided to tune the shape a little bit to make it more subtle and neat.

The Scattervarius Ii
in In Progress and Finished Work
Posted
This build makes me smile.