


M_A_T_T
-
Posts
484 -
Joined
-
Last visited
Content Type
Profiles
News and Information
Tutorials
Product Reviews
Supplier Listings
Articles
Guitar Of The Month
Links and Resources
Forums
Gallery
Downloads
Posts posted by M_A_T_T
-
-
Since we're talking about fretting tools, I just got this hammer on ebay.
That looks similar to a Cluthe that a pro guitar builder friend swears by for fretting, though he's only ever seen the two he owns. I got one at the flea market for $2 and made him jealous.
 I'm putting an order together right now, here's what I've got so far....
- 5432 Radius Gauges - Original (smooth), set of 2
- 5212 Luthier's Digital Caliper
- 4479 Neck Support Caul
- 4895 Fretting Hammer - Hammer with plastic and brass faces
Regarding the digital caliper, I got the same one at a tool store for about $25
on sale. Maybe look around a little.EDIT: I didn't see the notch on the bottom, nevermind.
-
Clamp it togather and use a screw size drill in a hand drill to spot the holes. If you use a hand drill to drill the holes to depth, be shure to wrap tape arround the bit to act as a depth gage. Most drill presses have a stop you can set to controll the depth. Even with a drill press you could screw up.( I guess I'm picturing a strat type neck thats allready radiused). I would clamp it up and drill through the body with a hand drill if it was me. Happy drilling.
Even with a drillpress at my disposal this is how I always attatched my bolt-on necks.
-
The smaller gauged ones file narrower-than-the-listed-gauge square bottomed holes.
-
They do sell a nut kit too. Comes with that neat little vise, right ? I almost included that vise in my order the other day, but then a light-bulb went off and I have an idea for an alternative that cost $4.00 (when it's on sale)
You're right:
http://www.stewmac.com/shop/Nuts,_saddles/...g_Tool_Kit.html
-
For fretting what about this kit:
http://www.stewmac.com/shop/Fretting_suppl...g_Tool_Kit.html
I though there was a kit for nut making too, I guess not. I myself REALLY like THESE for slotting nuts and just pluncked down the $$$ for the entire set (minus the three I already have) yesterday after selling my double-sided Stewmac brand files to a member of this forum.
As for the more expensive tools, it's been said here before if you can't justify the cost of a certain tool you are probably not ready for it, though some of the tools you can make/modify by yourself.
-
You used the wrong Photobucket code. You can't use HTML in most forums, I believe. You can just use the 'tree' icon in the menu just above where you write in a post.
Images tags for this forum look like this
the image address goes in the middle between the ][
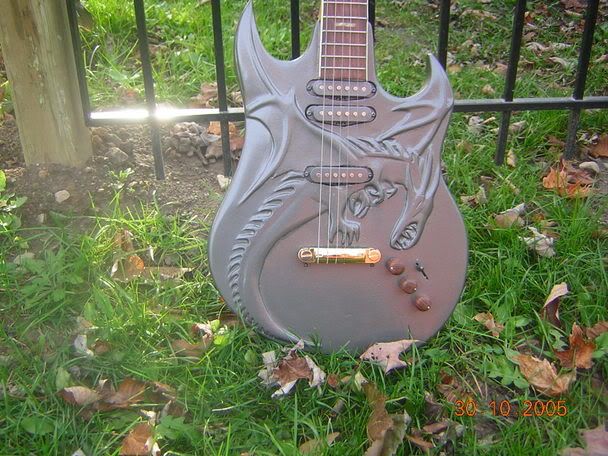
Neat carving, BTW.
-
Try this:
http://www.talkbass.com/forum/showthread.p...highlight=knobs
You have to scroll down a ways to find the actual topic.
EDIT: And this:
-
I just want people to be like "o0o0o0o0 gibson explorer".
But in my head I'll be sad its not
You'd also be lying right to their face when they ask what kind of guitar it is.
Also, is there not a slight difference in the headstock design? I know there is with the Epi Les Pauls.
-
I think I got them at Sears....
-
I used to have an 8" bench-top bandsaw. It actually worked quite well with GOOD blades. I was able to resaw 4" thick Ebony.....
-
In cello building I've heard of Poplar being used in place of maple.
-
I think there has been a study done, but I'm not sure. There are slight variations of the traditional X brace system in use, one is the Larrivee symetrical bracing pattern, with variations of that in use also.
-
is it just me, or does that look like a botched refinish?
Reminds me of the 1960's Fender 'bulls-eye' sunburst.
-
Thanks.
It seems he really wants to start a business doing this, my first answer would be to check out any local professional luthier's and see if they offer any apprenticeships. If they don't see if they'd be willing to higher an assistant from one of the better known schools and take one of their courses as well as a business course because you'll need to know how to run a business as well.
Getting a job a some factory is a lousy answer, and my opinion is the original poster has no idea what he's talking about.
-
i think the "no wood" contest would yield the best results.
I agree. It would show the most creativity.
On the other hand, we had a 2x4 project in highschool and I made an awesome stool by turing the legs & seat on the lathe. You wouldn't have thought it was made from a single 2x4.
Keep in mind with the 2x4 project you're not just throwing strings on a 2x4, you'd be able to join numerous pieces to make a guitar body & neck. I just had a though that maybe while I wait for my wood for violin #2, I could quickly throw together a 2x4 violin???
-
What exactly was the question? I don't really like the answer he posted, seems like he thinks he knows what he's talking about.
-
I've seen a couple all-koa guitars (larrivee comes to mind) but they were meant as 'show guitars'.
-
Use a high quality Brad-Point drill bit. They have flutes along the outer edge that score the drilling area first, as well as a central pin point for accuracy. They are actually specifically designed for wood.
-
-
Seems like almost half the people originally signed up have dropped out. Maybe the next should have more build time?
-
Quit messing around and start that next violin!!!
Got an email that my wood has been shipped today, should get it next week, a week or two after climatizing to my shop I will begin (early Feb?).
-
Thankyou! I got some neat gifts already. My dad got my a neon light guitar/clock....and I had PIZZA!
-
This place sells acoustic guitar backs by themselves as low as 58 bucks. They will be thin like you want:
-
if we lifted the "fretted" rule, that'd take out the hardest part for me
That's why I won't be participating. I don't have the materials/tools.

My Violin Kit!
in In Progress and Finished Work
Posted
A warm room definately helps. I carefully use a heat gun on it's low setting to warm up larger surfaces, I didn't find a hair dryer to be fast enough. What you will first want to do is size the surfaces on the ribs, particularly the blocks because the end grain soaks up alot of the water in the glue. If you've already tried a few times to glue the top on I guess you have inadvertantly done this, which is fine.
There are other methods than the 'all at once' one, which is the only way I seem to like doing it. One way is to simply clamp the top on then remove a few clamps at a time and use a thin spatula or palette knife to insert glue into the joint, another is to apply glue to the areas and let it set, clamp the top lightly then go around with heat/steam re-activating the glue and tightening the clamps correspondingly.
When I do the 'all at once' method I use more glue to re-activate any areas that set to quick, by brushing it into the joint. I tried hot water but that just diluted the glue and washed it away. Clean up excess glue with warm water. I used a 1:1.75 or 1:2 glue to water mix for gluing on the top, which is supposed to be easy to remove for future repairs. I also planned out the application of the glue to correspond with the important areas of the joint: Lining surfaces of the upper & lower bouts got glue first, then the c-bouts, then the corner blocks, then the neck block and finally the tailblock. My reasoning in doing this is to have the freshest glue on the important parts so they glue up fine with the initial clamping, and it's just the lining areas that may need extra attention. I shouldn't have to tell you to have all your clamps laid out a ready to go while you are doing this...mine are actually numbered for a particular order.