


Geoff St. Germaine
-
Posts
184 -
Joined
-
Last visited
-
Days Won
17
Content Type
Profiles
News and Information
Tutorials
Product Reviews
Supplier Listings
Articles
Guitar Of The Month
Links and Resources
Forums
Gallery
Downloads
Posts posted by Geoff St. Germaine
-
-
Looks great. What's the tuning going to be?
-
When I was gigging I played Dingwall basses exclusively (had a prima artist 6, prima 5 and a Z2 5), so I was going to run the scale the same as the Dingwalls, so 37" to 33.25".
Looking great so far... and what a shop!!!
-
Looks great! I really like your inlay design.
-
I can't wait to see this one go. I have a design I've drawn up for a 6 string multi scale Thompson type scroll bass. Don't know if I'll ever build it, so I may have to live vicariously through your build.
-
Beautiful work, Brian!
-
Thanks Levi!
A guy who has checked this guitar in progress is now asking me to do a full acoustic archtop guitar. It looks like I'm going to have projects to keep me busy for quite a while... and some learning to do.
-
 2
2
-
-
Here's where it's at now.
Did some more carving around the waist and upper horns as I wasn't happy with the match to the lower part of the body. I got more of a 3D effect with the carving now, so I'm quite happy with it.
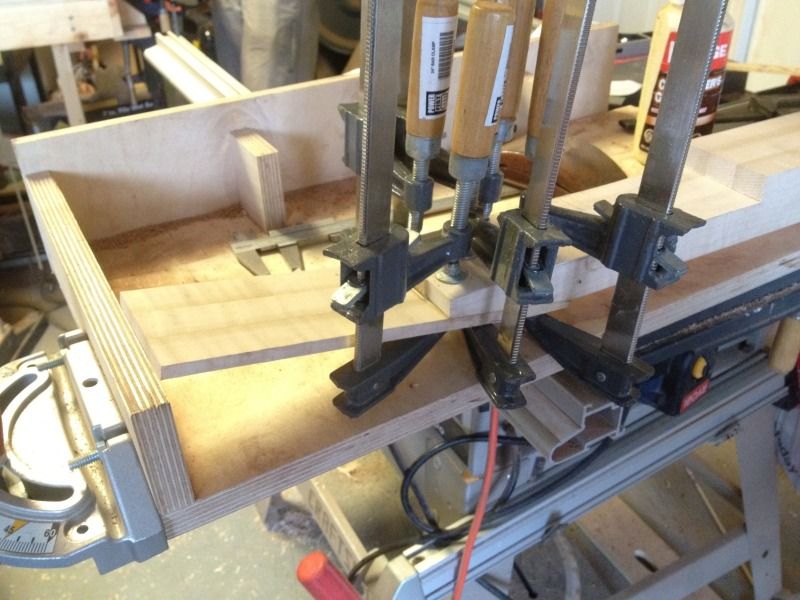
Made the parallel braces and glued them in. They're quite a pain in the butt. I used a technique with a pencil and a washer to transfer the arch of the top to the brace stock, but it still wound up being a lot of fussing with getting the curve exactly right. One one of them I took a bit too much off, so I used some veneer to build the small area back up and reshape it. In the end I wound up with a night fit that required very little clamping pressure to get a nice squeeze out of glue.
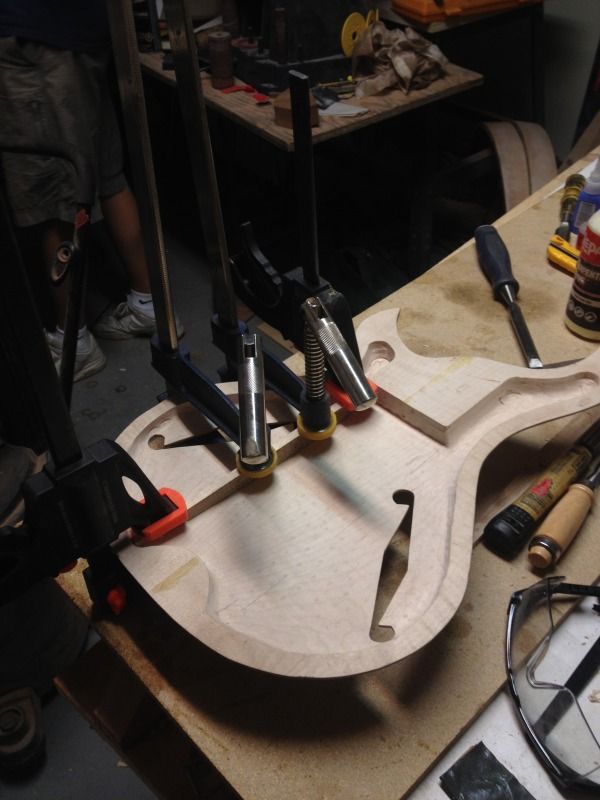
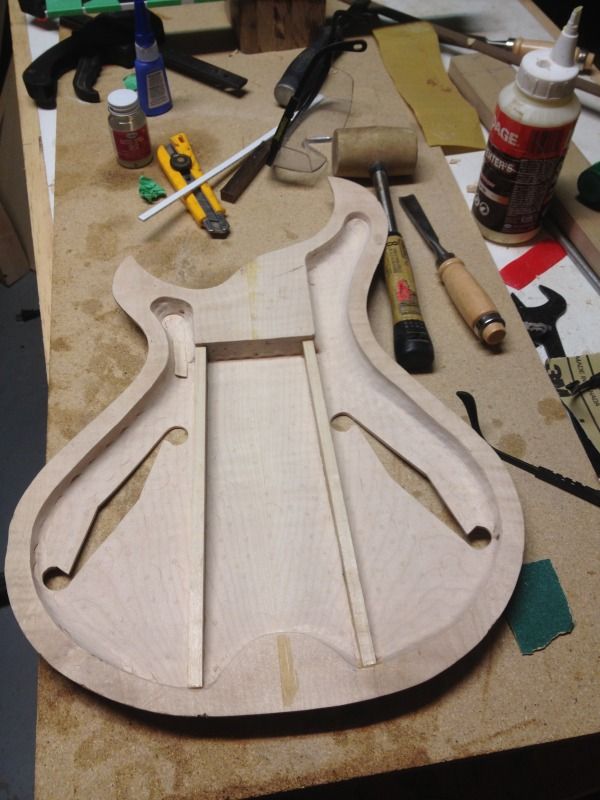
After seeing the inside of a few archtops that were finished to near perfection, such as Ken Parker's work, we decided to have the inside look good in case someone decided to look in through the f holes. Probably a waste of time, but we weren't happy to close it up looking slopping and not finish sanded. Some danish oil was applied.
After the bracing dried, the pot and switch holes were drilled and the top was ready for gluing. Fortunately the maple stayed extremely true and very minimal clamping was required compared to what I had envisioned and what I had ready to go. I guess because the edges of the inside aren't shaped exactly like an acoustic archtop's would be and the fact that the sides are quite a bit stiffer the requirement for a violin type clamp every few inches wasn't there. Anyway, the result was an invisible seem.
Some more work on the neck was accomplished. The fretboard is bound and ready for the neck. The peghead has the veneers laminated on the back and the volute is rough carved as well.
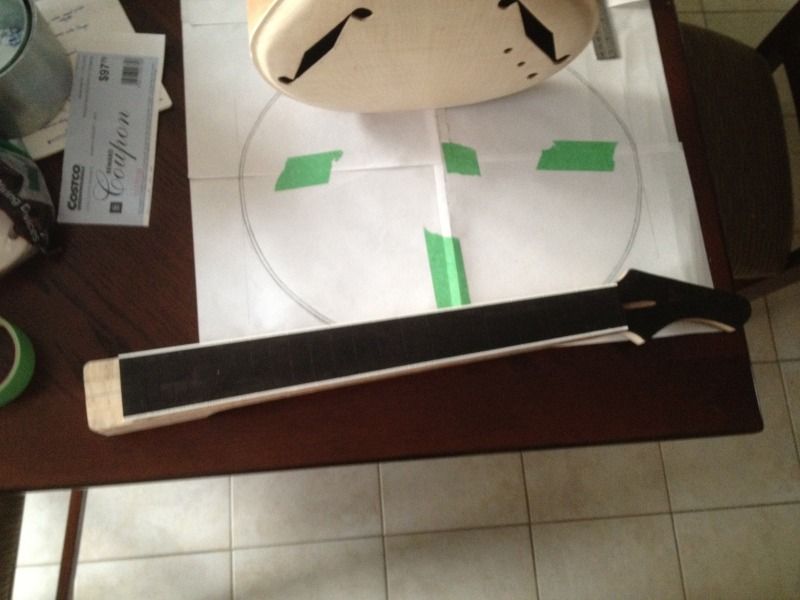
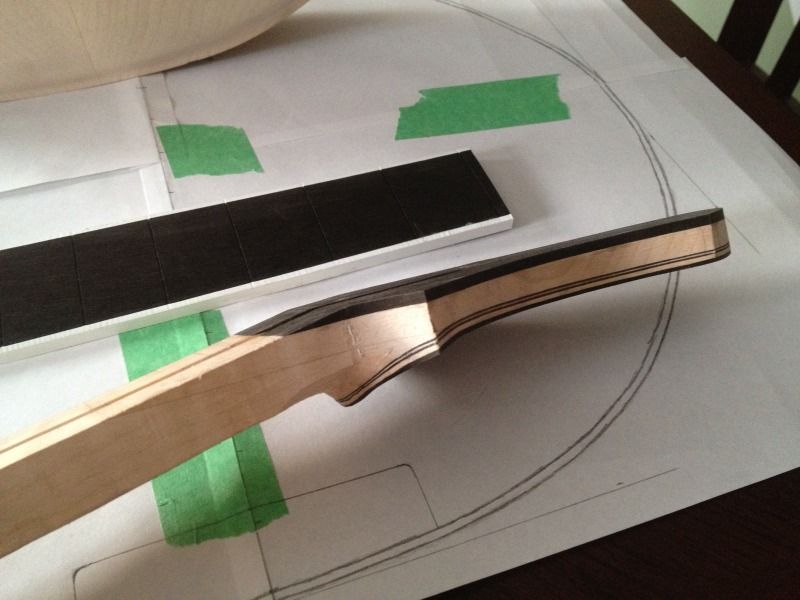
So next up it's getting the fretboard glued on, the binding channels and neck pocket routed in the body and preparing the frets (which I am pretty much dreading).
-
1
-
-
Looks great! Clean work all around.
-
As of now the intent is to not run a string ground. I have been able to do this in a couple of instruments by having a very well shielded cavity and pickup covers. The concern with this instrument is that the hollow body doesn't really lend itself to a shielded cavity, so I'll be building a box for the two pots and switch to mount into and push through the surface. If this is insufficient to get quiet operation, the fall back will be based around inlaying a brass strip into the tailpiece where the strings anchor.
-
Thanks Anthony! Yeah, the Pederson DC, PRS McCarty and some of David Myka's work are what my friend liked and what the design came from.
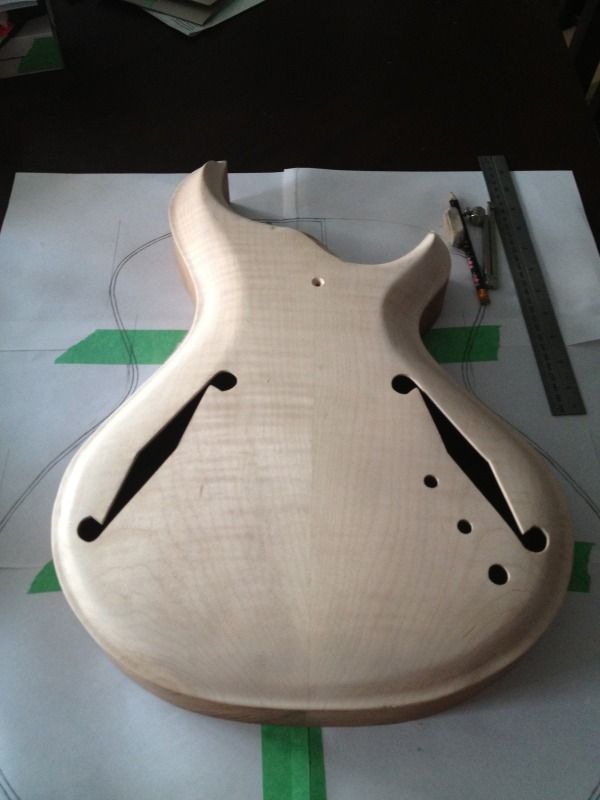
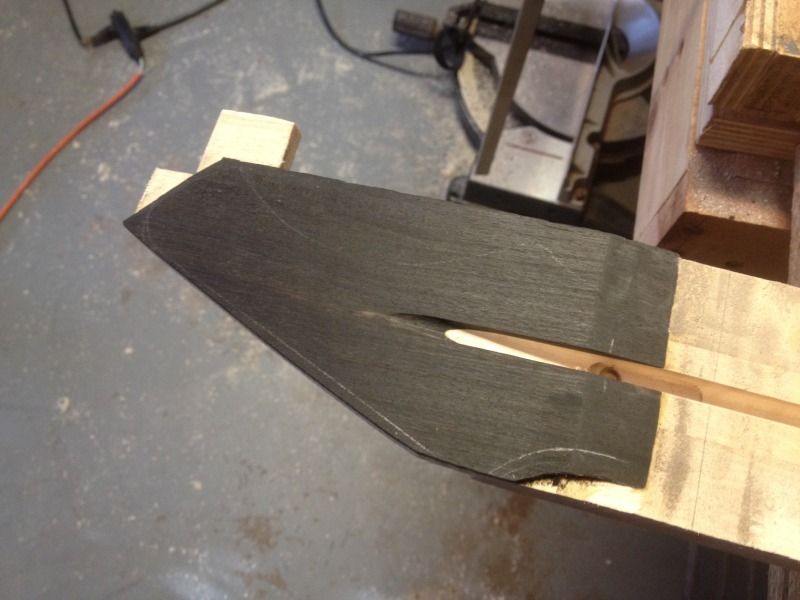
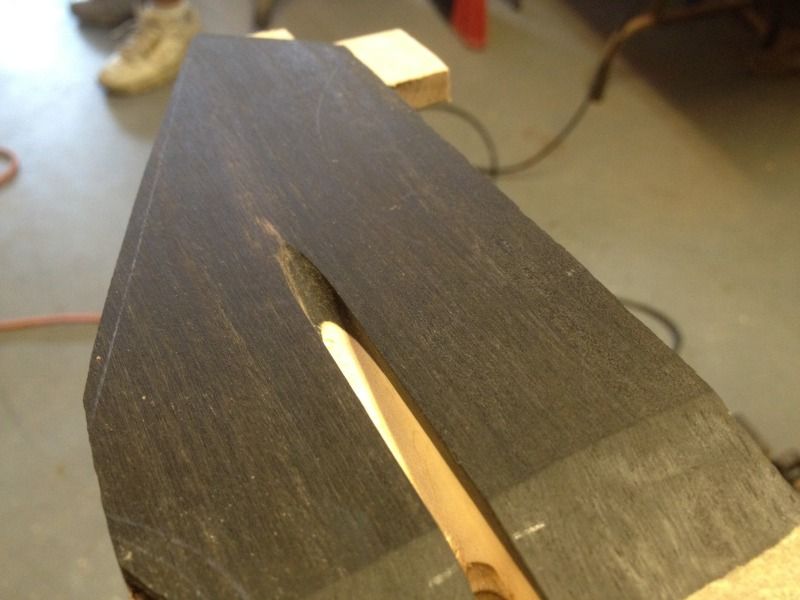
Here's some more work on the guitar. The truss rod channel is done.
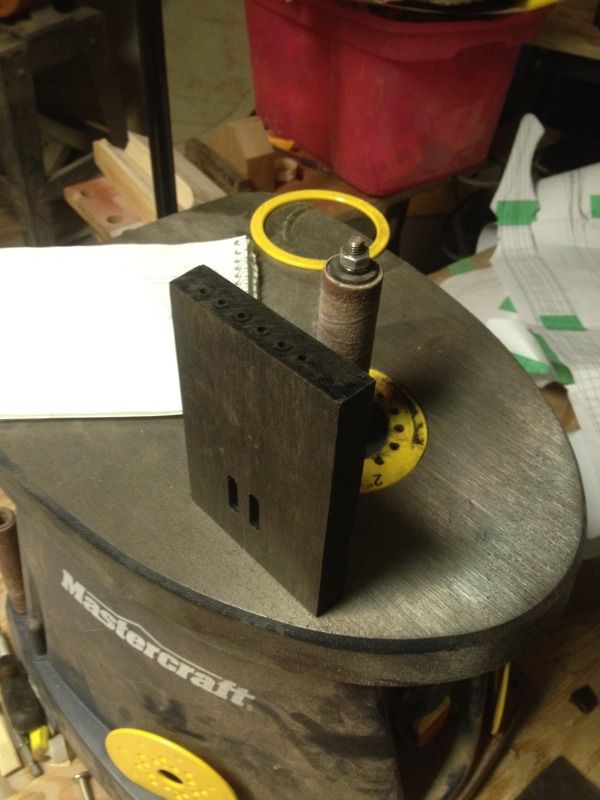
The tailpiece is mostly finished as well. Here's a shot of all of the string holes and end strap bits cut and drilled into the blank.
Here's where it sits now:
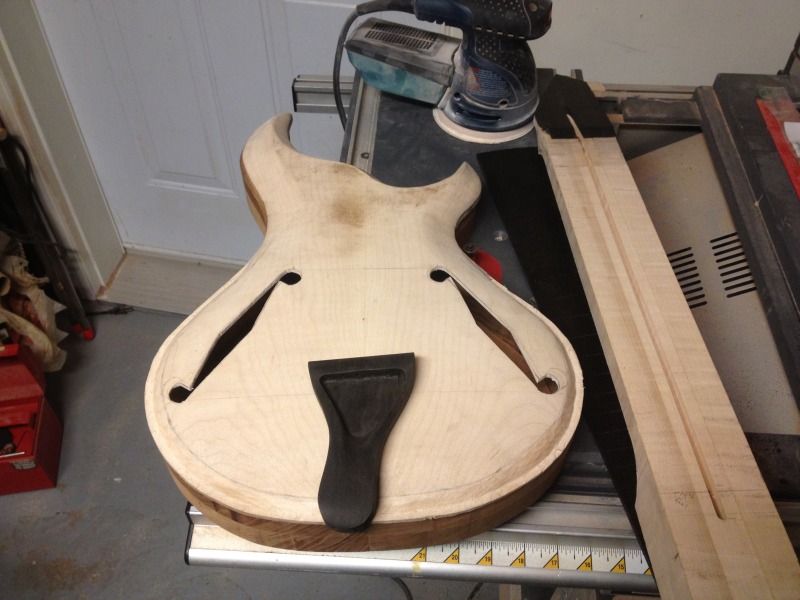
The top still needs some more clean up, then it will be bracing and lining the f holes, drilling the holes for the pots and switch and then the top will be glued on. The neck top profile and fretboard profile templates are next to be made for the neck, then once those are done the neck will be brought to final rough shape. Then the fretboard will be brought to shape and bound prior to gluing to the neck. One experiment coming up is trying to bend some ebony to laminate to the back of the peghead. It should prove interesting.
-
1
-
-
Here's my scarf cutting jig and the neck blank with the scarf cut.
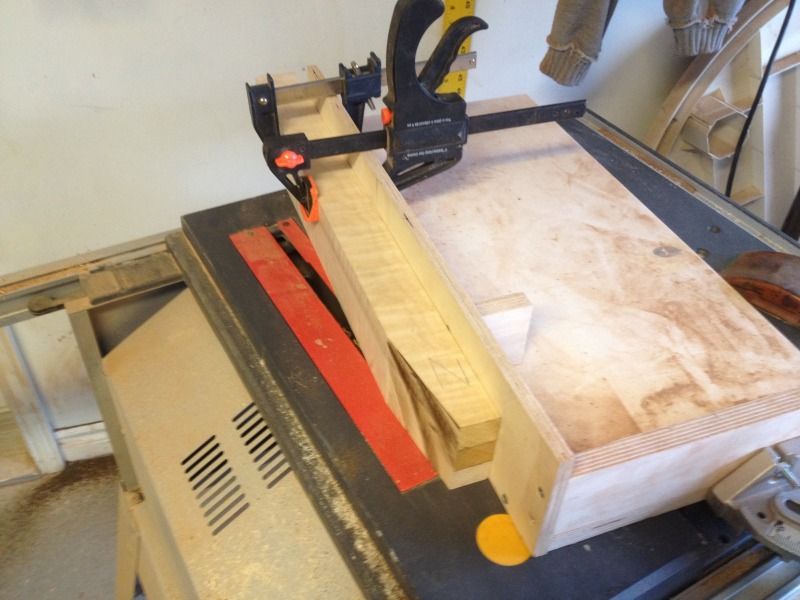
I use the jig to prevent the headstock piece from sliding off the neck due to the non-parallel clamping surfaces.
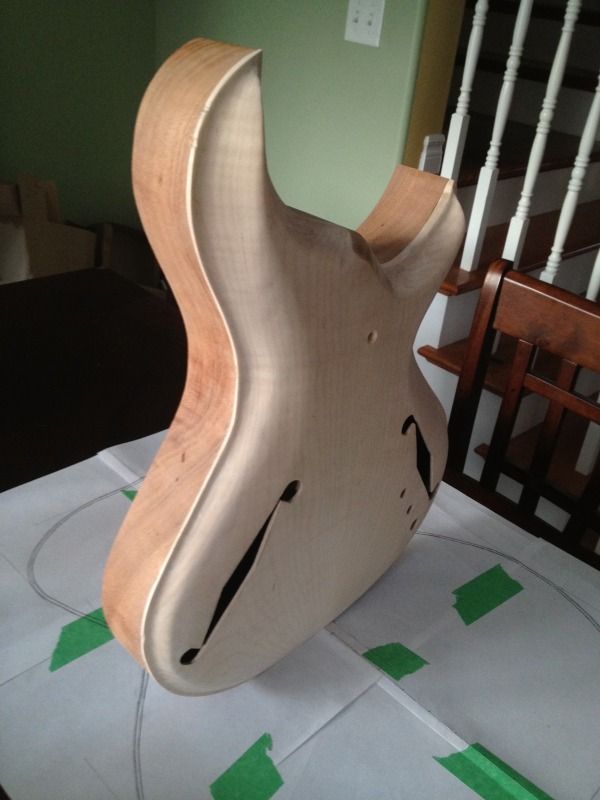
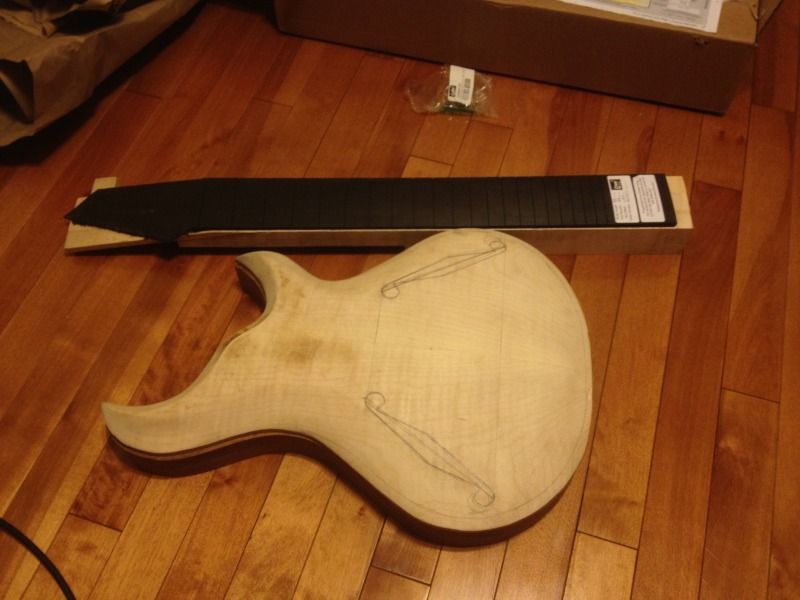
Here's where it's at now. The back of the arch is almost done... there's some tweaking to the front and back of it that we're going to do. The neck has the ebony headstock overlay glued on. The next steps are finishing the top, cutting the f holes and installing the top braces. The neck will have the truss rod channel routed next before the side profile is cut.

-
Your gloss finish turned out amazing! Beautiful guitar!
-
1
-
-
Beautiful!
-
Thanks guys! The tricky part for me on this one is going to be the binding. I've never done it before, so I'm entirely sure what to expect. That's why there's scrap wood, I guess.
-
That's original looking. The lower bout looks like it will make it pretty comfortable to play seated. Was that the goal? How much are you hollowing it out?
-
Here's where we ended yesterday:
Hopefully we'll get some more progress soon. We're both busy flying this week, so we'll see how it works out.
-
2
-
-
Since I've finished one of my 6 string basses, it's time to add a new project.
A friend of mine, who's quite the violin/fiddle player was over a few weeks ago and has been considering starting to play guitar for a while. When he saw the instruments I have in progress and completed he became immediately interested in having me build one (the price being the cost of materials probably contributed as well). After some discussions and looking at a bunch of guitars, he decided on a sort of hybrid hollowbody/electric with an arched top on it. Like my friend and the Jazzmaster, he'd like to be involved in the building. The specs we settled one are:
25" scale, 22 frets
Hollow sapele body with carved curly maple top
Curly maple neck with ebony fretboard
Ebony bridge and tailpiece
Ebony/maple/dyed maple veneers on both sides of the headstock
Golden Age PAF pickups with nickel covers
Amber burst finish top and neck, blackburst on the sapele back
White binding on neck, headstock and body
So far we've been working for 3 days and here's what we've done:
Bought some maple and sapele:

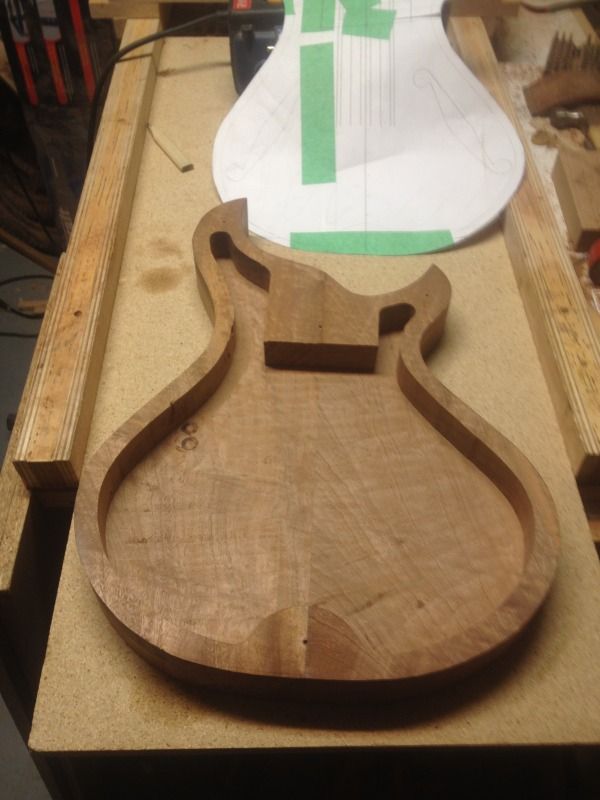
Cut out the body halves on the bandsaw and glued them up:
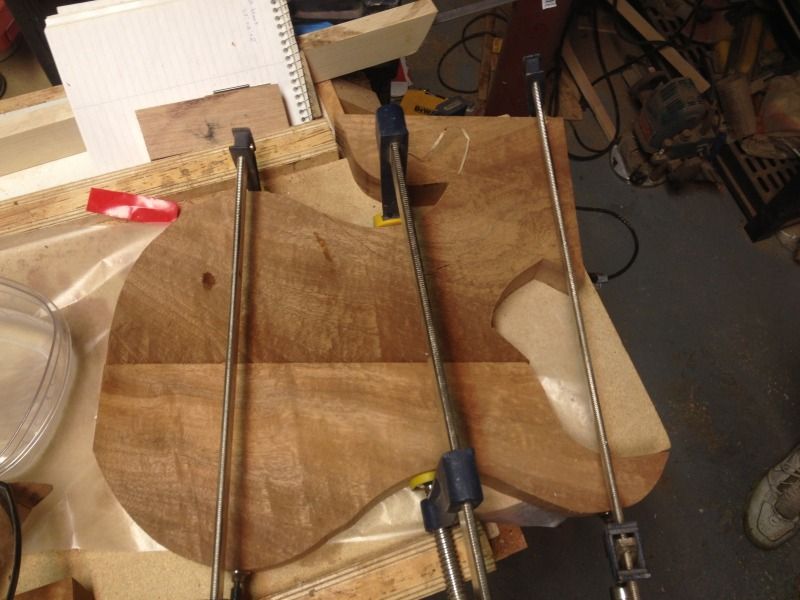
Routed the body to the template:
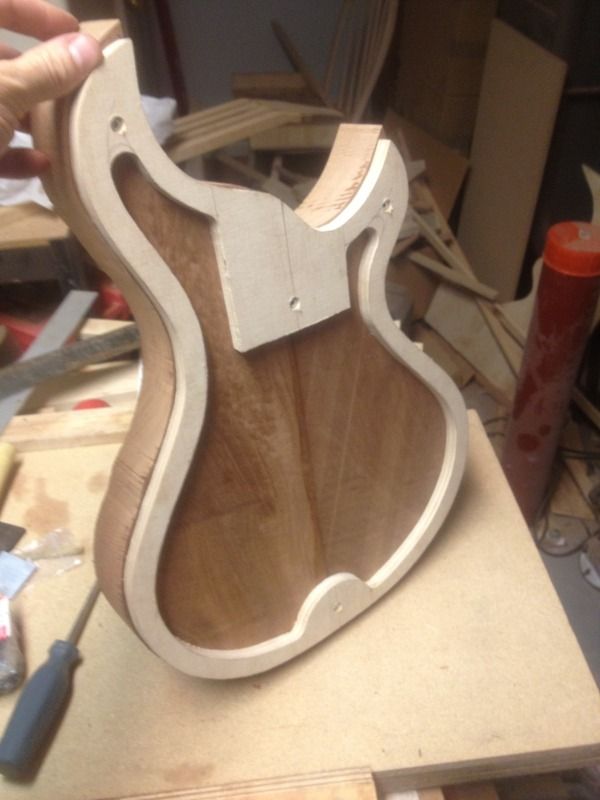
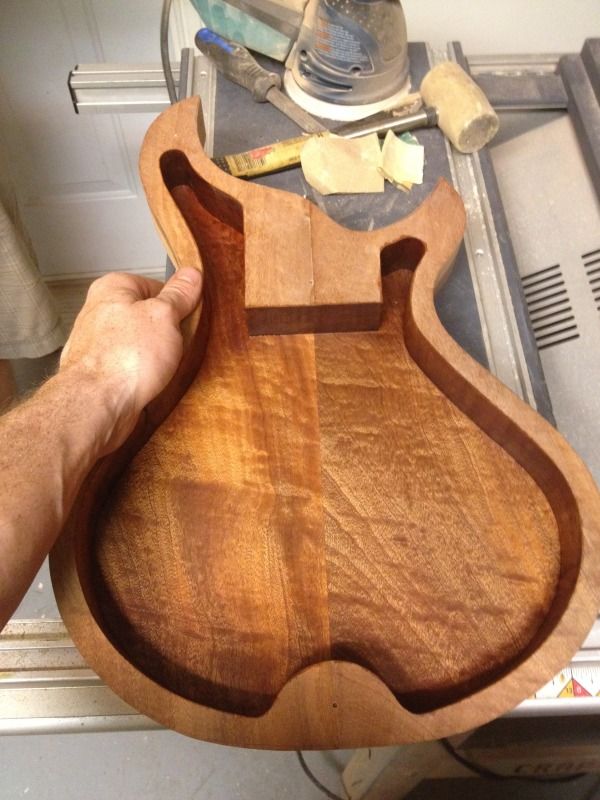
Hollowed out the body first using Forstner bits, my buddy was assigned the task of drill press operator:

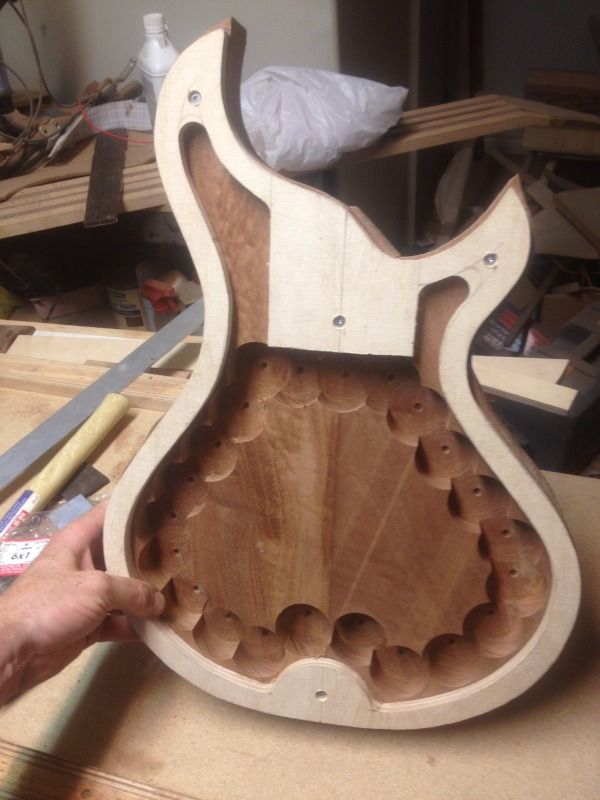
Cleaned it up with the router:
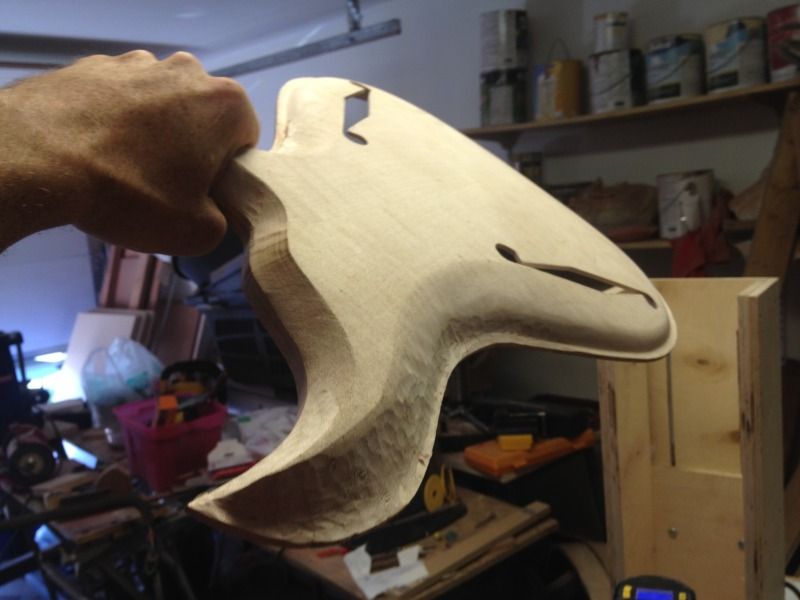
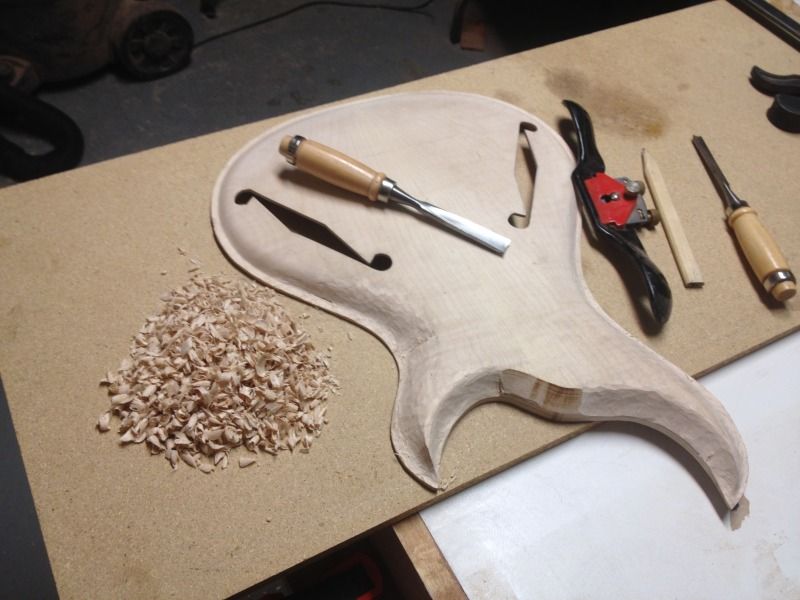
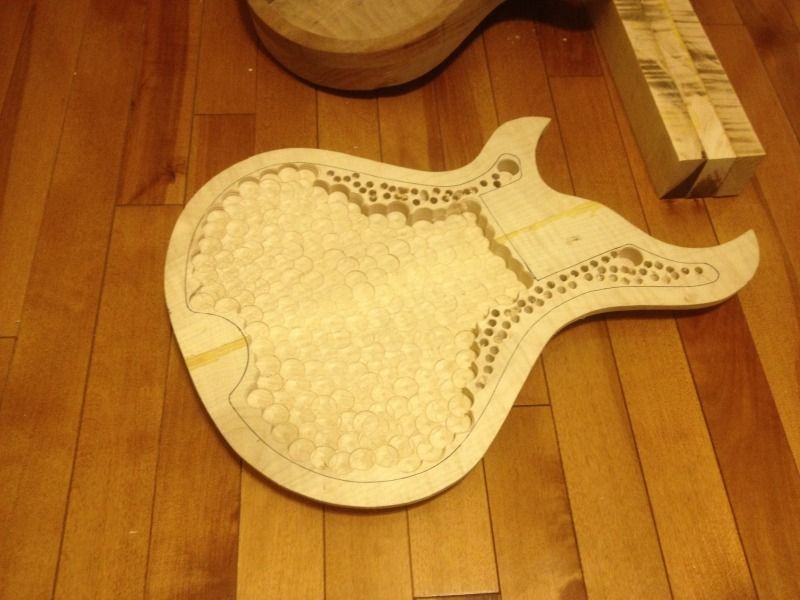
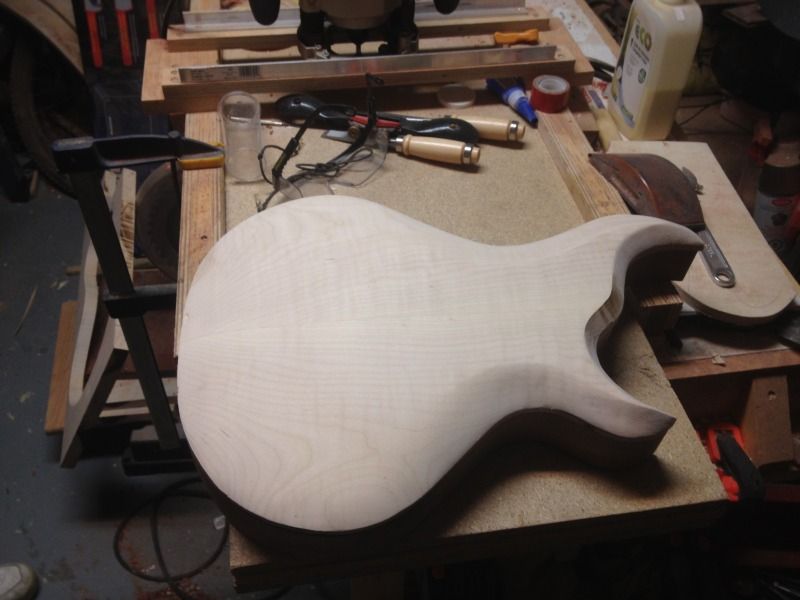
Carved the top. I didn't get any shots of the router work, but we cut a series of ledges matching the desired contouring before moving on to gouges, rasps and a spokeshave:
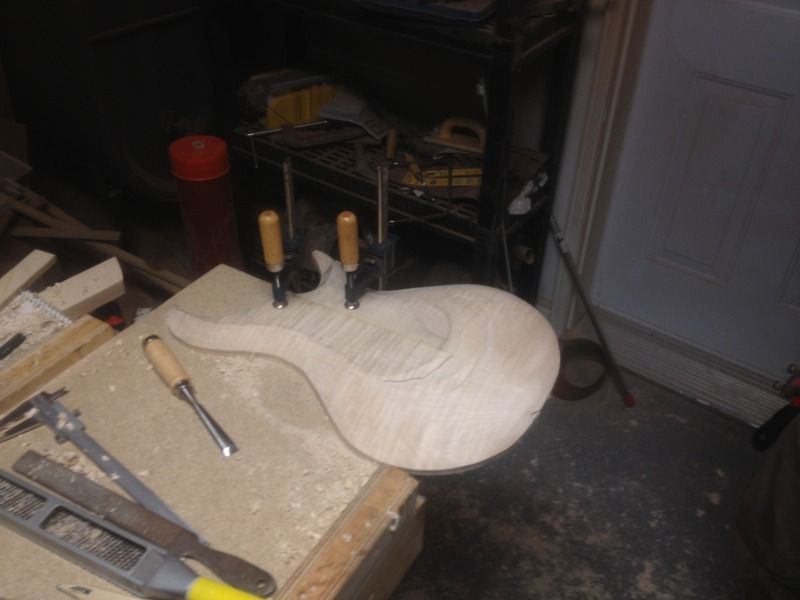
The top is rough carved enough to start the inside of the carve:
The inside carving is being sped up quickly using a jig I built for the drill press. Unfortunately I didn't get a picture of it, but I can get one and throw it up if anyone's interested. It's just a 1" x 1" pillar about 6" long with a felt pad mounted to the top. This is mounted to the drill press and the depth stop was set to get a 1/4" thick top, which should be plenty to make it easy enough to get to the final depth of about 3/16". Here's a progress shot of the top:
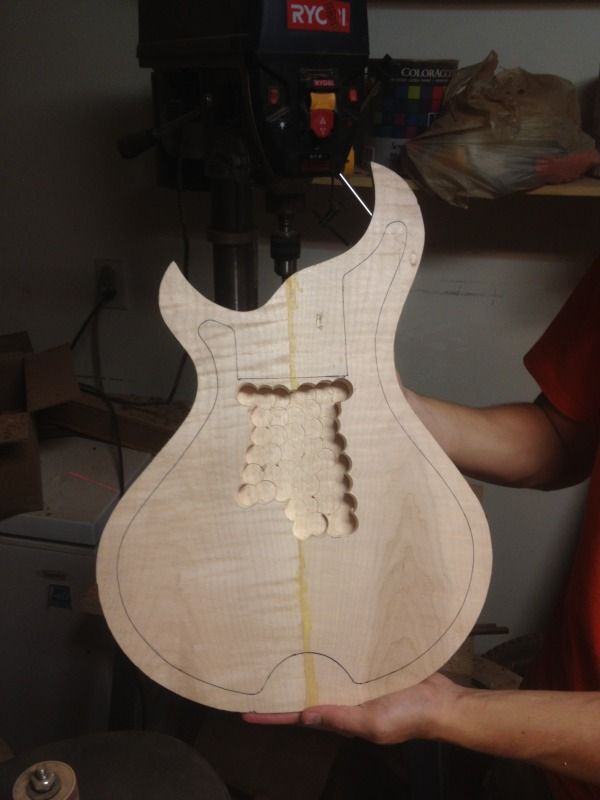
At first I was a little hesitant of getting too close to the edges where there was more curvature. I wasn't sure how well the jig would pull the body so that the outer surface would sit tangential to the felt pad. It turns out it worked very well and we were able to get most of the top drilled out with a 3/4" Forstner bit.
-
Thanks Levi. I really like how it's turning out.
-
I'm really not sure what the pickups sound like. I'm primarily a bass player and have neither played nor knowingly heard a Jazzmaster. It'll be a new one for me.
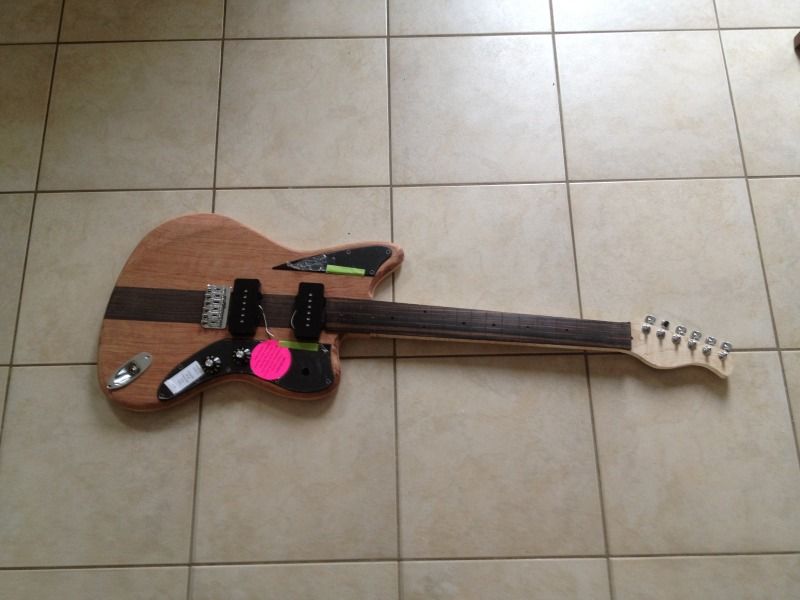
The pickup cavities are routed now.
-
Looks really good. I like the offset dots!
-
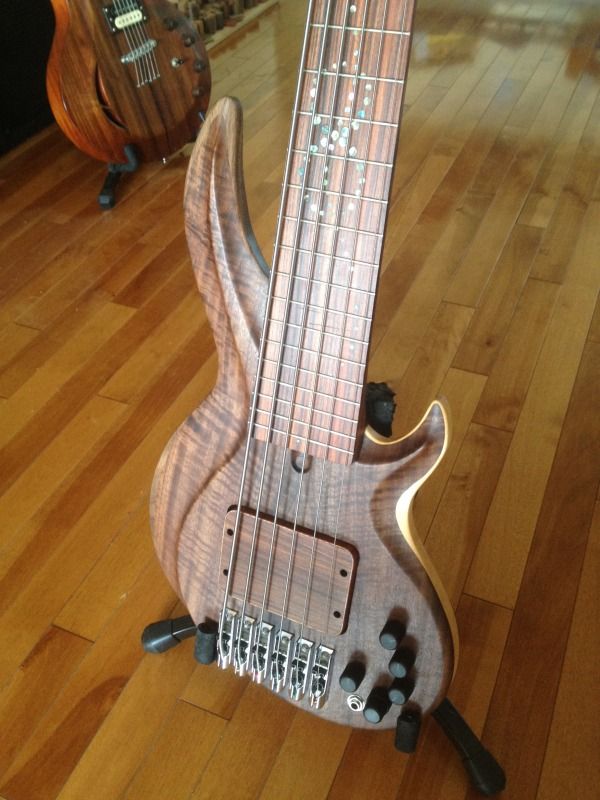
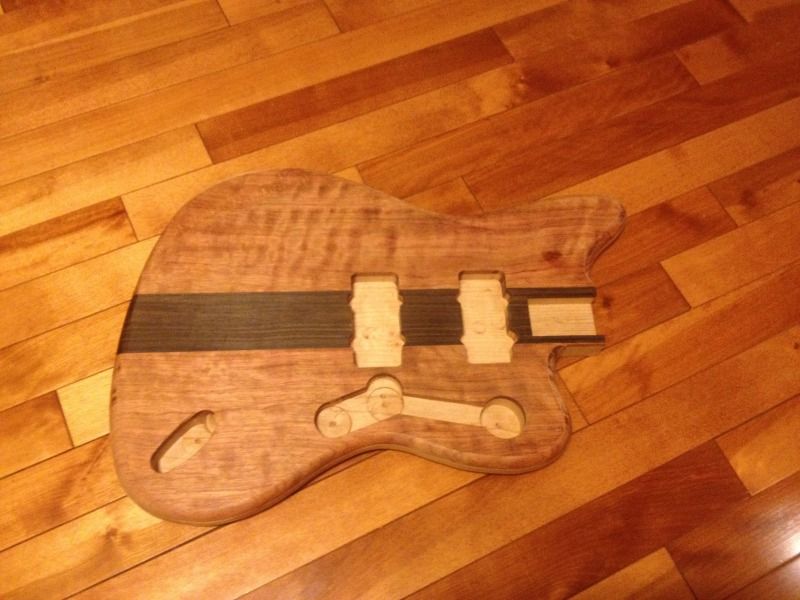
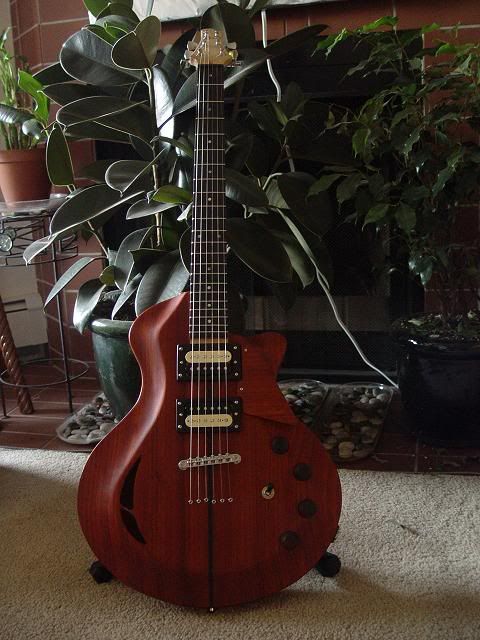
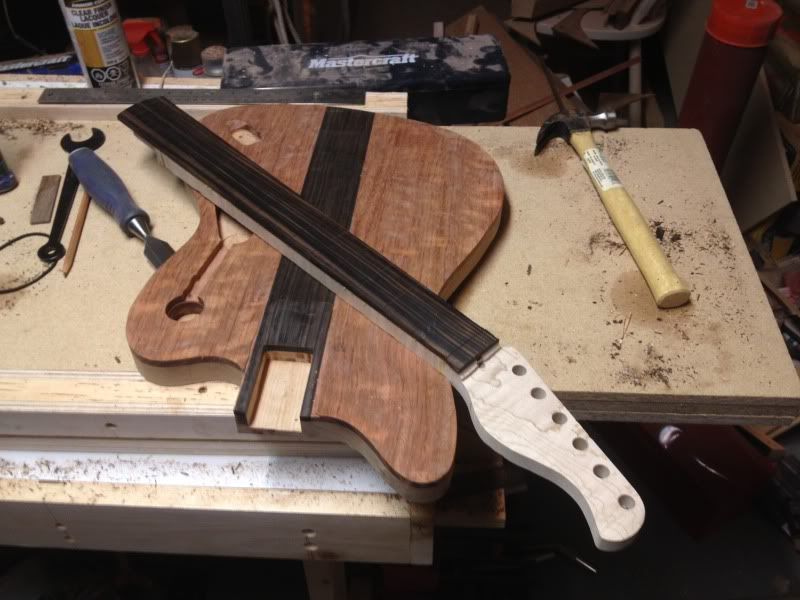
Here's a guitar I'm working on with a friend. He's on a course from me and across the country from home for 6 months. He'd mentioned he was looking at getting a new electric guitar and was over and had a look at a guitar I'd built previously. "You build guitars?" and "That looks awesome" turned into a new project. I'm trying to get him to do most of the work with my supervision. He has very limited woodworking experience, so sometimes I take over for the critical parts. Anyway, here's the guitar he looked at:
And here's what we're working on:
Set neck Jazzmaster
Flamed maple neck with macassar ebony fretboard, 22 frets
Cherry body with bubinga top and ebony centre strip
Seymour Duncan Quarter Pounder Jazzmaster pickups
Vol/Tone controls with 3 position switch (neck/both/bridge)
Gotoh tuners
LMII hardtail bridge
Here are some progress pictures:
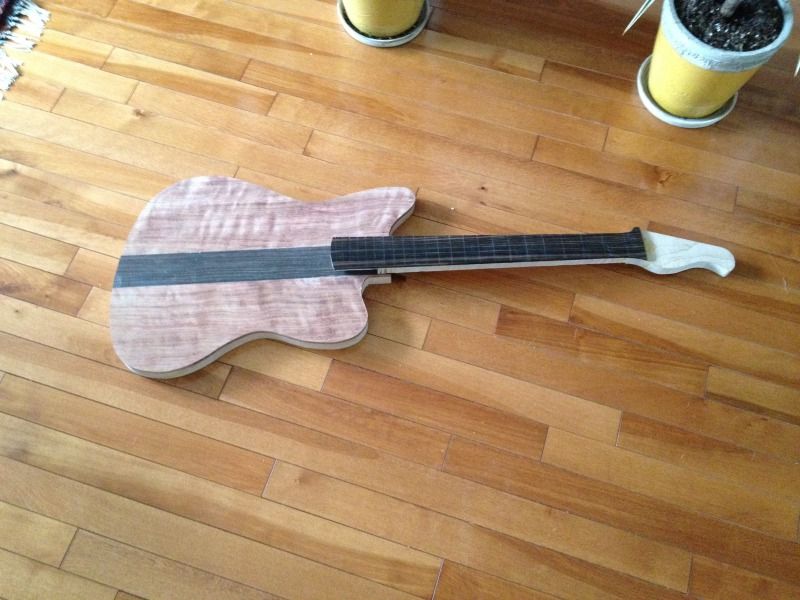
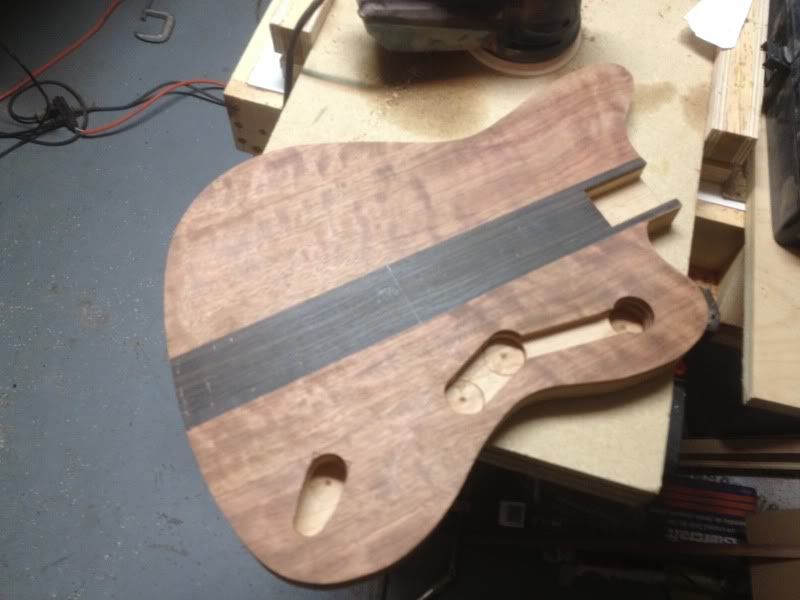
And this is where it sits now:
Next up is fretting the neck and routing the pickup cavities before the neck is glued into the body.
I have two 6 string basses and a headless guitar on the go right now as well. I'll try to get something up on those.
-
ETS makes great stuff. I've used a few of their bass bridges and they are top notch and the pricing is great.
-
www.galleryhardwoods.com is where I get all of my woods. Larry is a great guy to deal with.
-
looks like a carl thompson!!
it's roughly based (bassed) on a couple of Ritter models and the BC Rich Wave
I was going to say that it looked like a Ritter. Looks great.

Guitar #3 - Electric Hollowbody With An Arched Top
in In Progress and Finished Work
Posted
I got the back binding channel routed. I was building a jig to route the top binding and figured the bottom part of it could be mounted to the router table rather than ordering a bit with a bearing that was 0.090" smaller. It worked quite well, though I may still order the as it would probably speed things up as it wouldn't require the testing that this method required (testing to set both height, and depth of cut) and it would be easier to route into tight curves.
The setup:
The result: