


gilsolomon
-
Posts
60 -
Joined
-
Last visited
-
Days Won
1
Content Type
Profiles
News and Information
Tutorials
Product Reviews
Supplier Listings
Articles
Guitar Of The Month
Links and Resources
Forums
Gallery
Downloads
Posts posted by gilsolomon
-
-
Hey all,
After a long long time of not building or even touching guitars (7 years) I'm back to building.
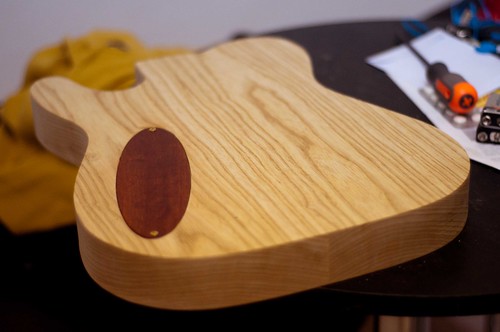
I have a guitar that had a tru oil finish (temporary for keeping the wood in a workable condition as I live in a very humid place), now that I am back, I sanded it to the bare wood again and in doing so I accidently sanded the neck pocket too much in a way that it is now 1mm shy of the neck itself and would look very bad as is once I bold a neck there...

To "save" this body and avoid throwing it away (I'm a perfectionist) I thought of rounding the neck pocket until its somthing like the Ibanez AANJ style joint (see pencil marking below). I'd hate throwing it away as I really love the Imbuia top I sourced for it. Will it affect the tone much? How stable would the neck be?


-
That is correct. My aim is basically cosmetic in doing that.
I really like the accent laminate thing (now I know the term so thanks for that as well.).
-
Hi everyone,
I have a question. I am starting a new project involving a fender style neck (straight headstock and not angled).
I'd like to add these decorations usually added on scarf joints.
Has anyone tried these on a straight neck? How will it fare in terms of strength?
Thanks
-
39 minutes ago, aperez said:
Hi
Have look a look at this guys
https://guitarsandwoods.com/tools/templates/fv58-acrylic-templates.html
Cheers
Thanks Aperez.
Have you had a chance to try them?
Are they a match of the original?
-
Thanks,
I'm looking for a Gibson flying V guitar templates.
-
Hi,
I am searching for an accurate guitar template provider.
I've tried Ronnie from guitarbuildingtemplates.com and I wasn't really happy with what I bought (it's not 100% accurate - as was stated in the terms of service - nit's not something he hides and i wasn't smart enough to go over them in the first place) the neck pocket and the neck did not match (apparently on purpose).
So, I am looking for a provider of foolproof templates (the kind that I can just cut with and not make any adjustments)
I would appreciate if anyone can direct me to one.
Thanks !

-
-
Thanks!
How is it texture-wise? how does it feel while you play ?
How durable is it?
-
Hi guys,
Does anyone know how Mayones did this finish ?

-
I used a bloodwood fretboard on my last guitar, has a nice feel and its something different so using it here again.
I am not big on inlay, usually go for more over the top wood but as this is more of a tribute guitar versus my usual one offs, I thought I'd throw something small in.
Arch Enemy logo
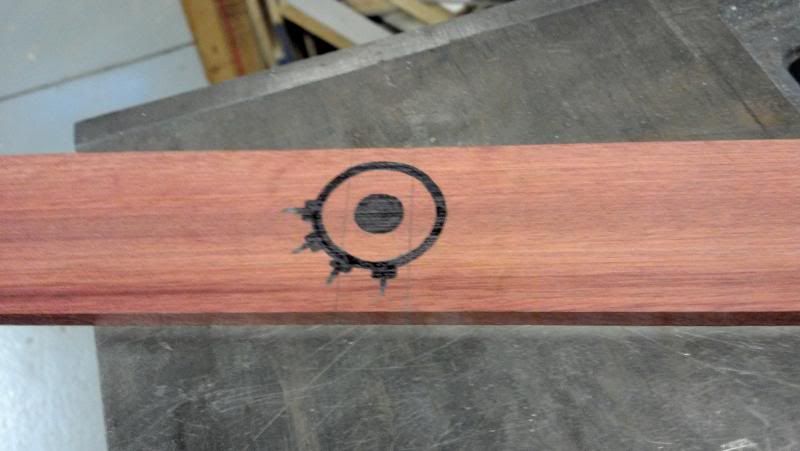
All routed

Hi,
What did you use for a filler within the inlayed cavity?
-
Thanks all ! you made this an easy choice
-
Thanks guys
I'm from Israel which means that Grizzly are costly as muc as Makita (due to the shipping costs VAT and customs fees).
My Options are DeWalt which is 2 times more expnsive, Makita and Bosch...
I'd always prefer to avoid German products (Historical reasons mostly)... So it leaves me with Makita
-
Hi all,
I am an amateur builder. As such I mainly work at home and don't have much space. So until now I avoided buying a big saw and went to a woodworker when I needed sawing or plaining services. But now I want to buy a saw. which Brings me to my question:
I am having trouble to decide between buying a bandsaw - probably this one:
http://www.amital-ltd.co.il/ProductsImages/W128655.jpg
or buying a table saw - probably this one:
http://img.zap.co.il/pics/4/8/9/3/34983984c.gif
What I need from the saw is straight and accurate cuts for laminating necks and bodies (also the bandsaw is adding the flexability of the option cut shapes using it).
What would you advise?
-
wow, nice! I'd probably round off the edges a bit, but otherwise they look great!
As soon as I finally manage to successfully make a wooden pickup ring I gotta try this..
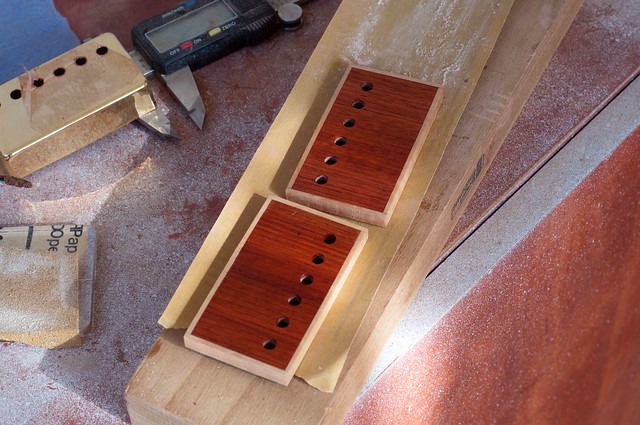
Thanks It's really easy to make... I used a miterbox and a fretting saw to cut the pieces so it's dead accurate and used a metal cover to drill the holes is 5 times easier than making the rings and much more fun since you could play with the combinations...
-
I decided to make wood pickup covers ... I got the inspiration from Pukko's amazing guitar.
So I took a plate of bloodwood and cut two pieces from it:
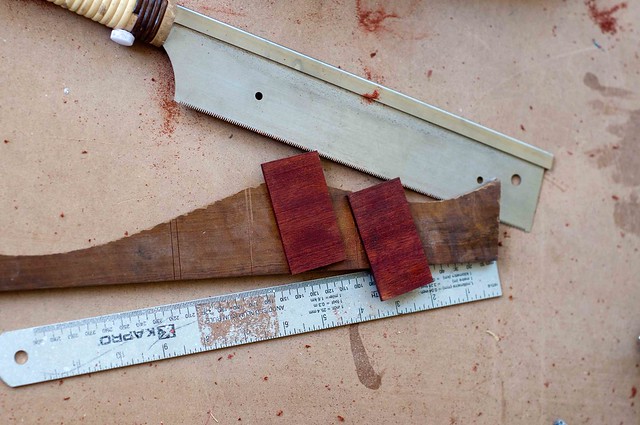
Then I used a metal pickup cover to position the holes and drill them:

The I binded the plates with flame maple bindings
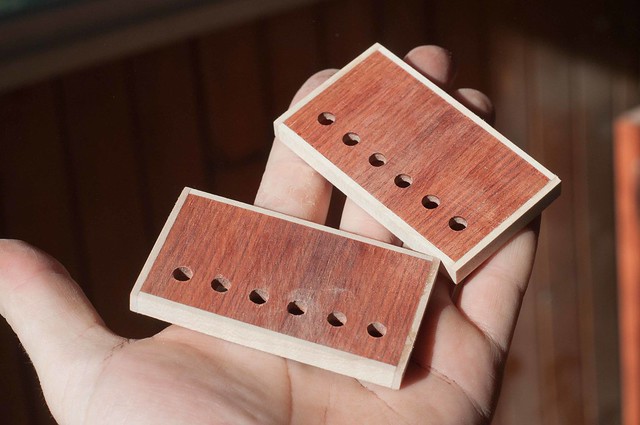
and applied a coat of tru oil:
-
I'm delaying the soundhole routing... I'm still unsure about the shape... I tought about routing two f-holes but then I thought that this is too common and I want to be a bit more outstanding...
I'm in search of ideas... something similar to the Butteflies guitar that Tim Robbins did...
But I want another theme...
I tought about something like this but I'm not sure about it:

Any suggestions?
-
I continued today and routed the neck pocket:
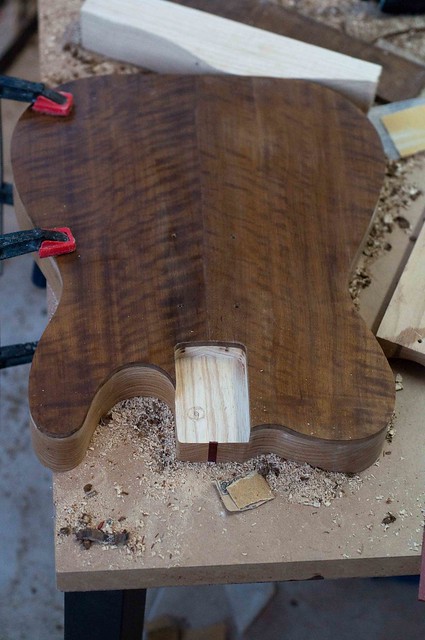
I was not happy with the one stripe decration... So I made a new three stripe decoration and routed for it:
The result after gluing:
Playing with the hardware a bit:
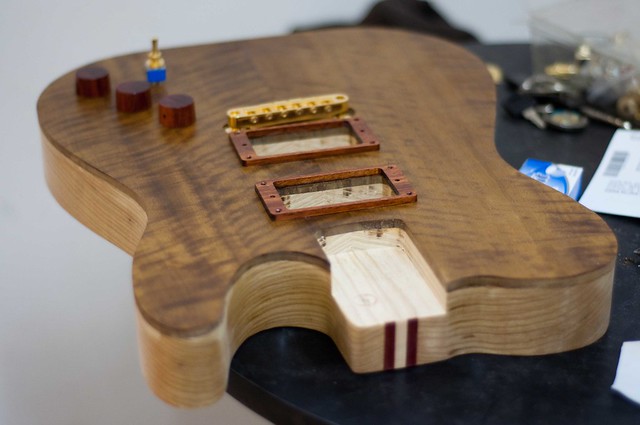
I'm eager to see how this babe turns out.
-
that piece of imbuia looks familiar.. I got a very similar one a few months ago
mine is currently waiting for a project .. It'll be nice to see how your's turns out - looking good so far! Nice idea with the back strip. I had a similar thing on a guitar recently and didn't bother to cover it up, but I probably would if I had thought of this.
Thanks,
I like this wood very much, smells nice while working on it
To say the truth I didn't came by this idea all by myself... I took Robert O'brien's Acoustic Guitar Building online course. He did something similiar on an acoustic...
-
This should be sweet, how thick is that top?
Are you going to be using some version of a TOM bridge?
SR
Thanks!
I got it 8mm but I went to a shop and got it planed down to 6.5 mm to fit the binding.
Yup,
I have a gold Gotoh TOM just waiting ...
-
Sooooo I've been sick this week and was foced o stay in house... this made me start the new guitar I've been thinking of...
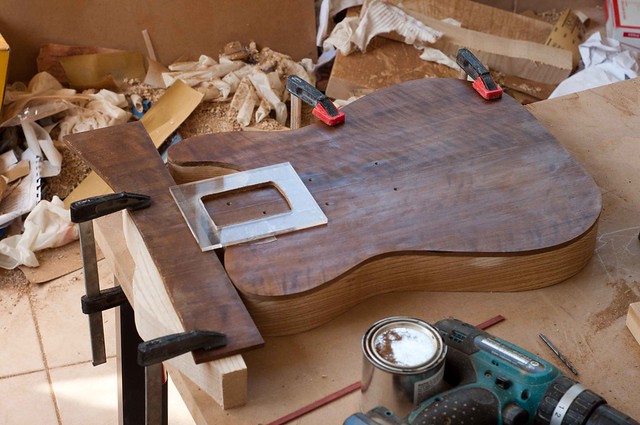
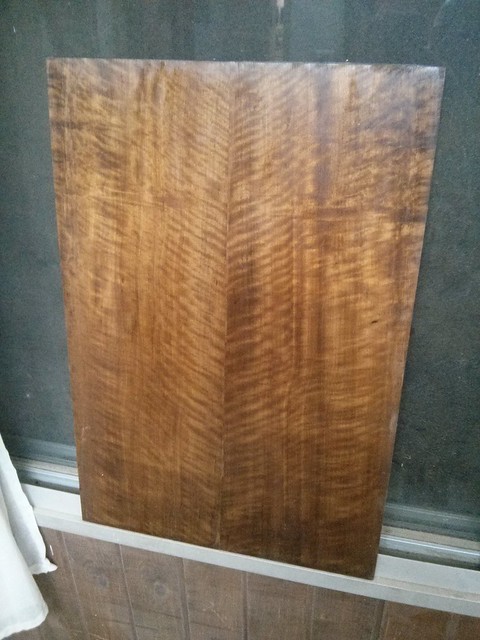
This is going to be a hollowbody guitar made of worldwide woods. The body’s core is made from American Swamp Ash, the body’s top will be made from Brazilian flamed Imbuia, the neck will be made from African Mahogany (with a lamination of bloodwood-maple bloodwood in the middle) and the fingerboard and bindings will be made from Bloodwood.
This was the beginning:
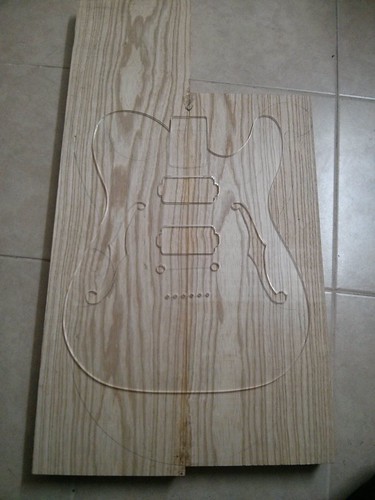
I then cut the rough shape:
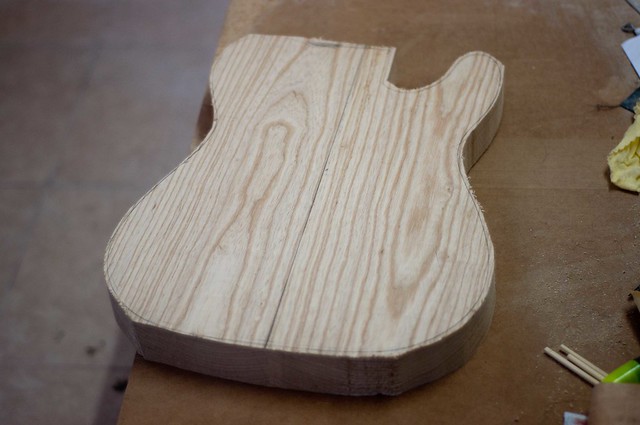
And sanded it to exaxct shape using a robo sander:
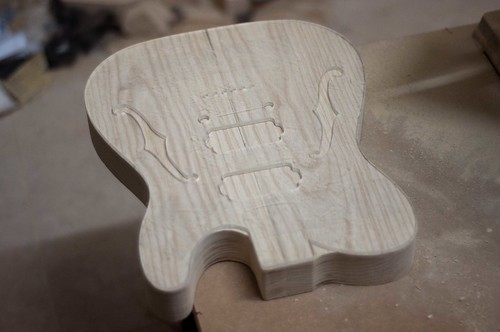
Afterwards, I started to chaber the body core:
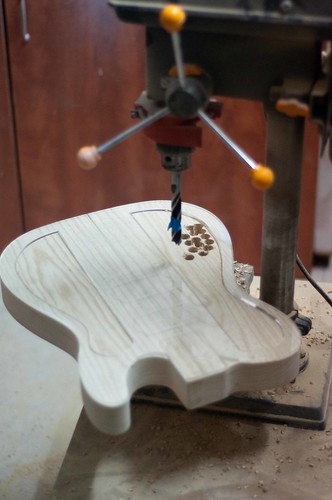
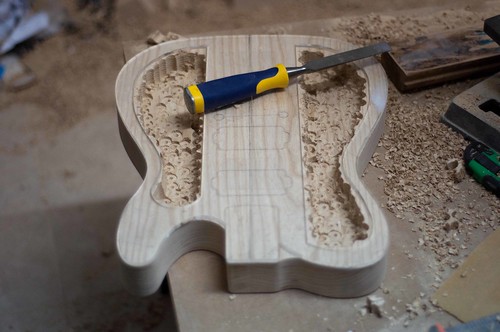
And finally, I cleaned the cavities up with the Router:
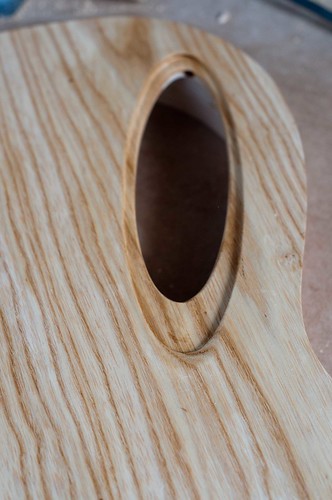
I routed of the electronics and made a cover out of bloodwood:
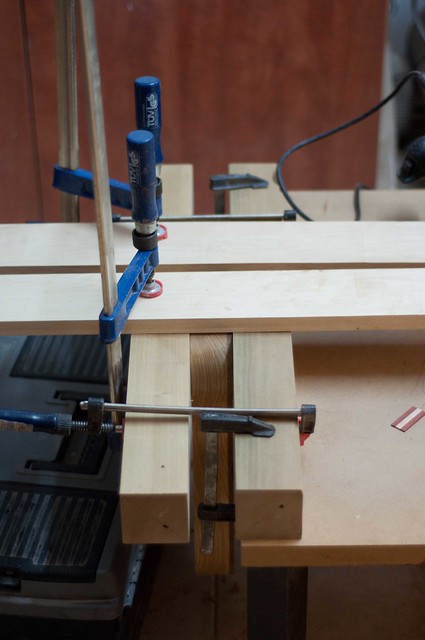
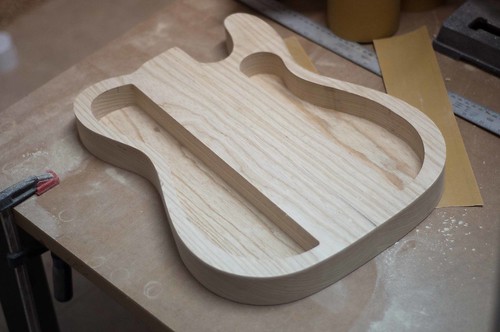
 While cutting the body’s core I have had to divert from the swamp ash block’s middle line by 2 mm (due to a nasty hole I wanted to avoid). This was not an issue since I was exactly parallel to it. There was one problem since my top is a joint top the middle line of it would be clear and the deviation would have been clear to see on the side of the body.So, I decided to “mask” the side’s line of gluing with a decoration (three pieces of binding: Bloodwood-maple-Bloodwood glue to each other) making sure that in will be perpendicular to the body …For that, I made a jig with a few pieces of wood and routed the small cavity:
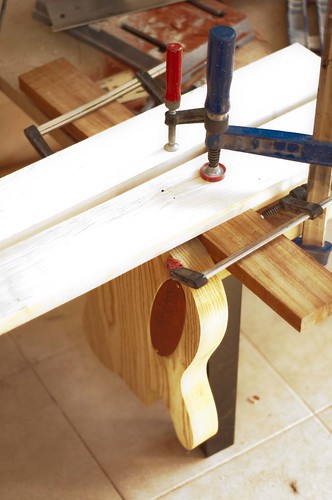 I then placed the new decoration and glued it:
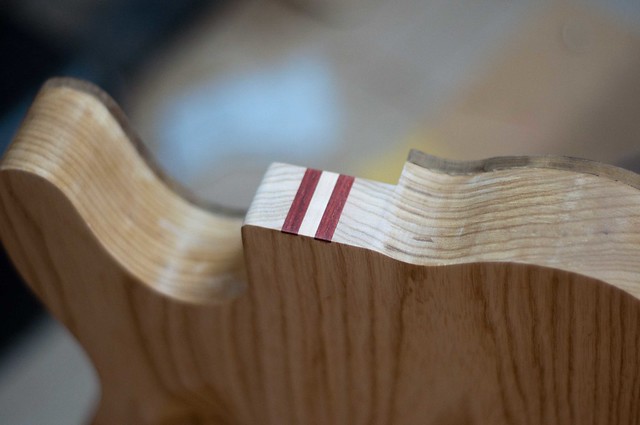
After two hours of drying time, I sanded the piece flush with the body, and cut the excess. There was an incident while cutting the excess of the new decoration the wood chipped out … Luckily, this is an area that with be routed out anyway (this is where the binding channel goes). I had filled it with wood dust and Loctite glue to create a smooth surface.
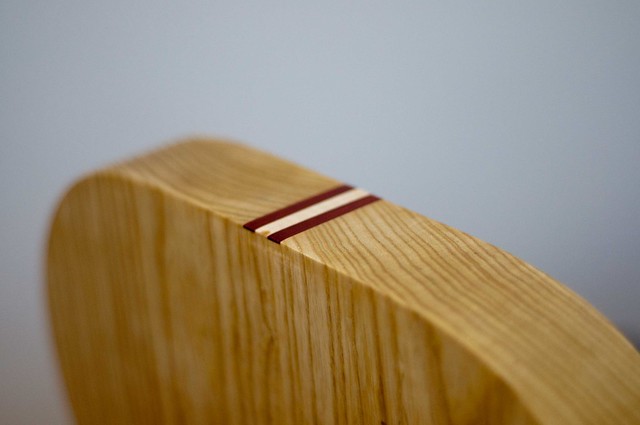
Today I've joined the top:

It now looks like this:
-
Paint the sides black (from binding down) with a burst on the back
Thanks, But the guitar is to be oil finished and paint is out of the question since there are top and back bindings and I want the wood to be visible...
-
Hi,
I've recently installed Dimarzio Air Norton on my newest built electric.
Best bridge pickup I've had.
Set it up with some coil-splitting and you got yourself a great-sounding instrument.
Highly recommended.
I've also installed Dimarzio Transition on the neck but I'm not sure if I like it or not...
-
If you want to use the center line, thats fine. But, you need to stay on the center line. Make your measurement from the leading edge of the nut, to the center of the bridge. Place your bridge vector perpendicular to the center line. Using the center point of the high E stud as a fulcrum point. Rotate the the low E bridge stud counter clockwise until you add .125" to the length on the low E side...
Although, It looks like the bridge vector is already adjusted in the pic. If that is the case, you can use a centerline that is your scale length + half of the offset:
25.5" + (.125/2) = 25.5625
Thanks a lot for the elaborate explanation ! I finally understood it !
-
Commonly, The measurement is from the leading edge of the nut, to the center of the "throw" on the high E saddle. Most TOM bridges have the studs centered in the bridge, so you can use that as well. Keep in mind, many guitar manufacturers add 1/8" to the scale length on the low E side. This makes the bridge look crooked. It is done this way for intonation purposes so there is sufficient throw:

CAD it out so the bridge is parallel with the leading edge of the nut, and then offset the low E side by adding .125" to the scale length measurement.
Thanks !
And where do I start to measure on the nut-fretboard meeting point? the center line fo the neck or one of the fretboard edges?
My current mesurement is from the treble side post to the meeting point of the nut and fretboard on the center line (The green line in the image below). Is that the correct way to measure?


Smaller than usual Neck pocket - tone effect?
in Solidbody Guitar and Bass Chat
Posted
Thank you !!!!
Thank you for the explanation and the suggestion which I would exercise")