


Bionic Machinist
-
Posts
32 -
Joined
-
Last visited
Content Type
Profiles
News and Information
Tutorials
Product Reviews
Supplier Listings
Articles
Guitar Of The Month
Links and Resources
Forums
Gallery
Downloads
Posts posted by Bionic Machinist
-
-
Thanks guys
So I got the truss rod slot routed out today.
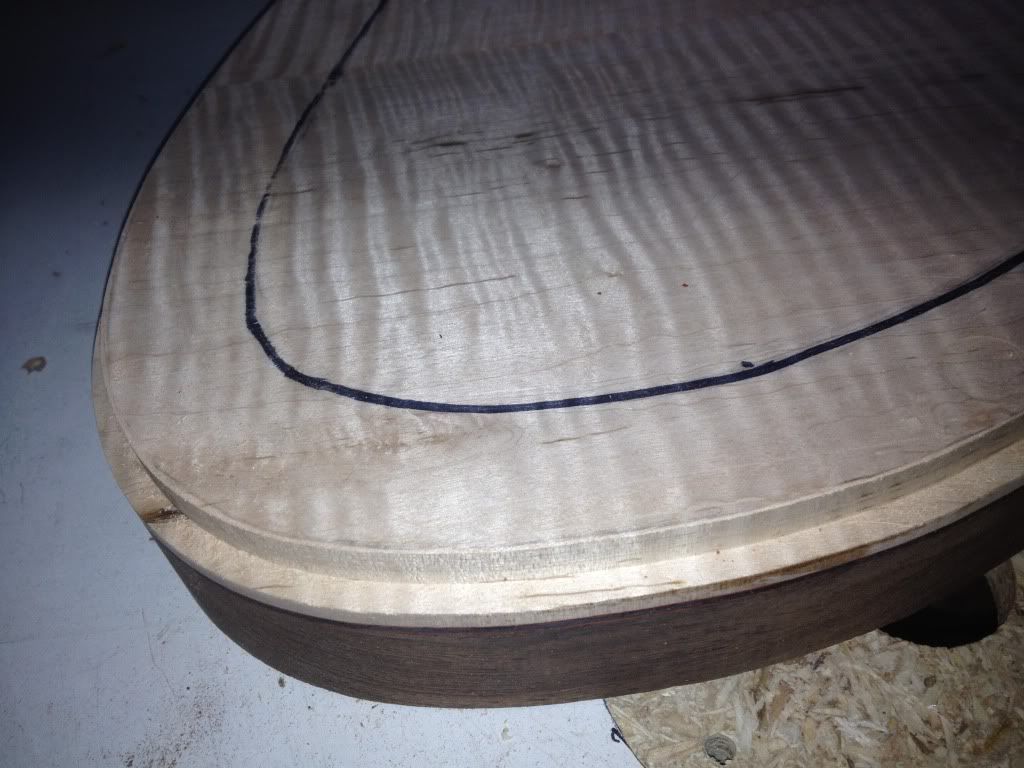
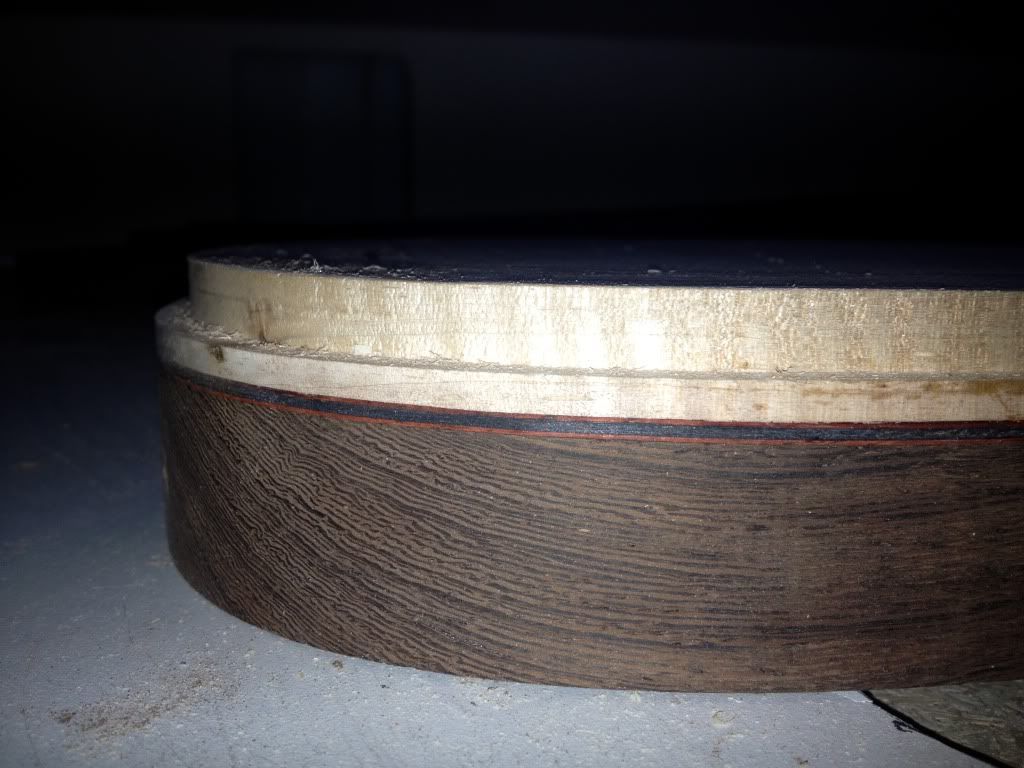
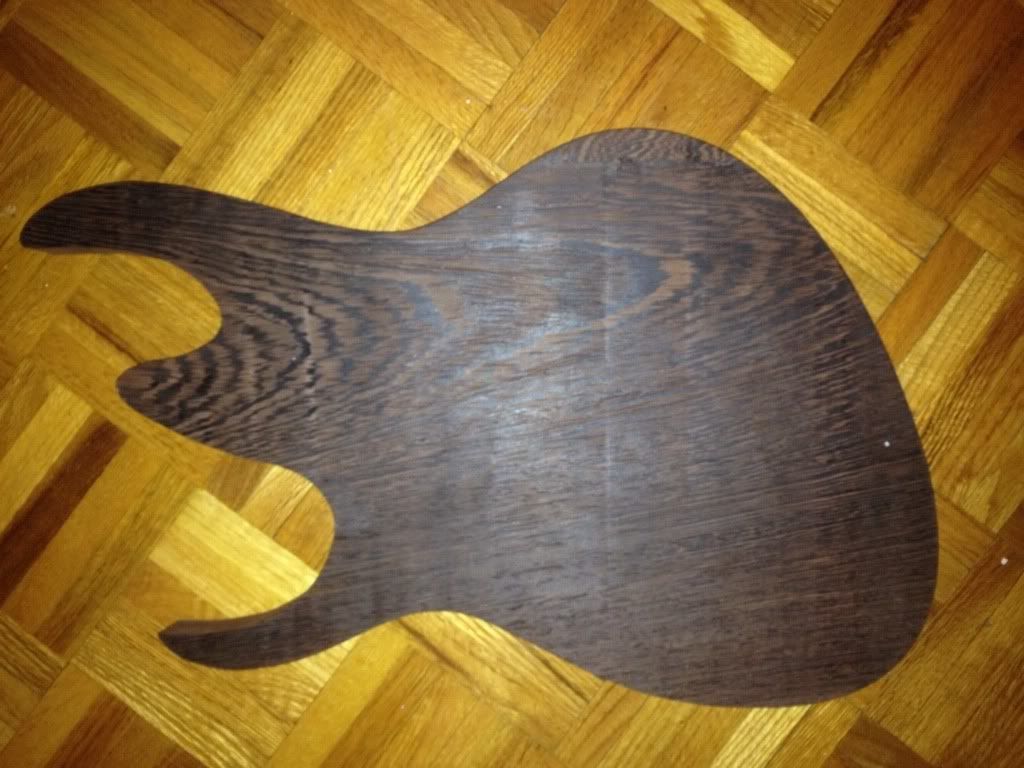
Also got the re-carve routed on the body. The top is only .500" thick.
-
I might just hit you up for some parts. Ill email you a list.
-
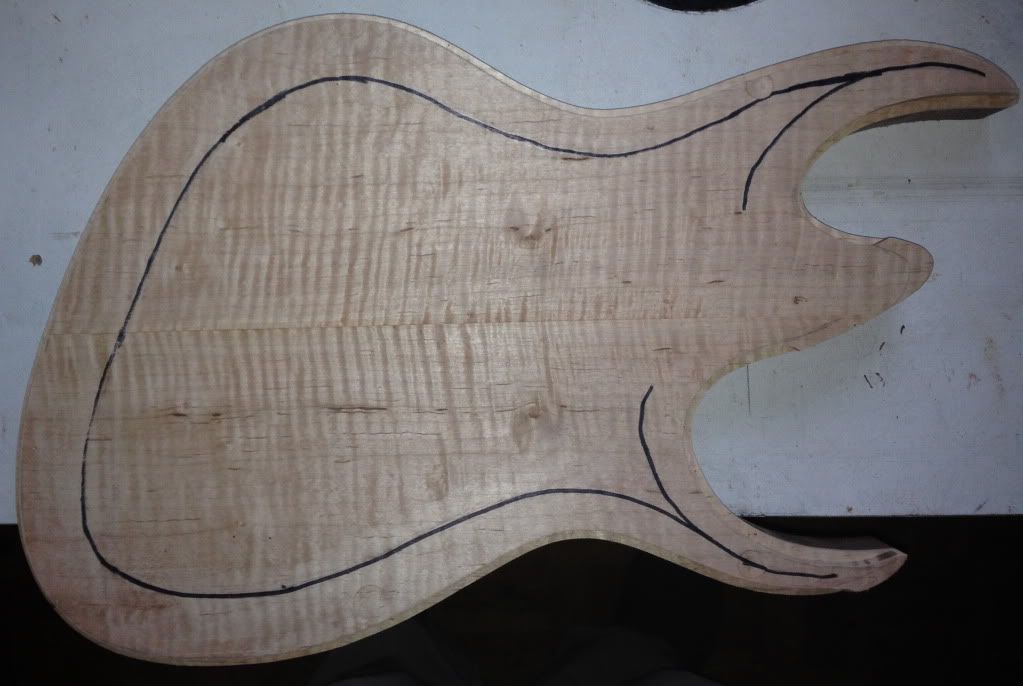
Got an update for you all.
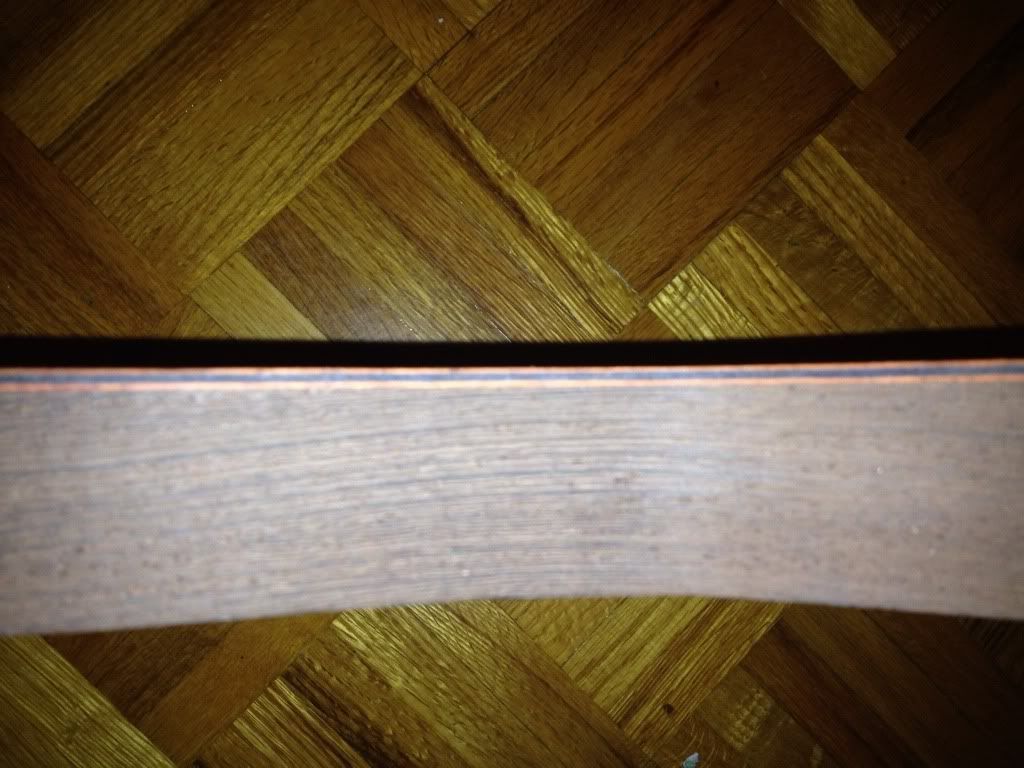
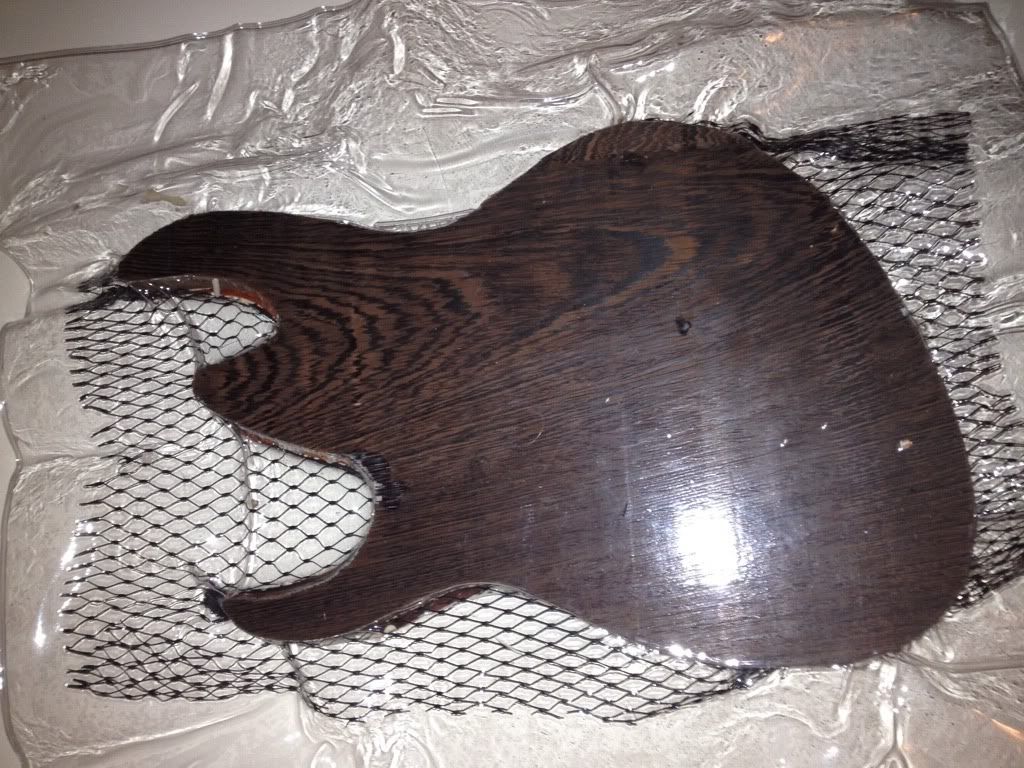
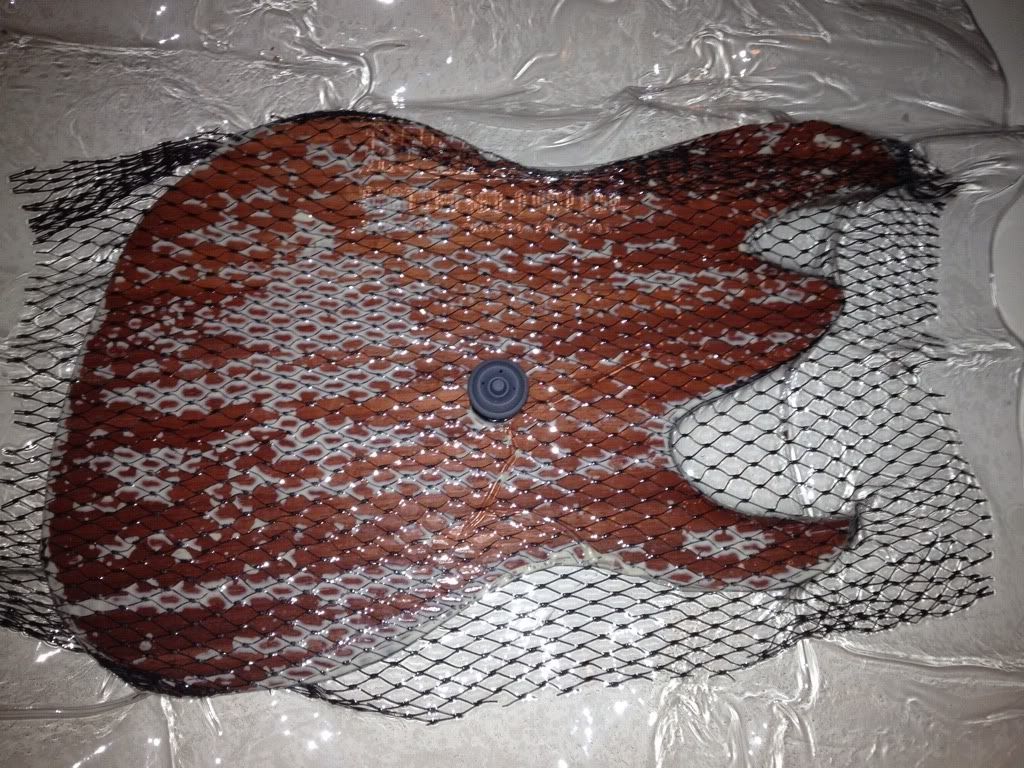
Got the top bookmatched, cut, glued, and trimmed up.

Here's how the veneering looks now with the top glued down. I like it a lot.
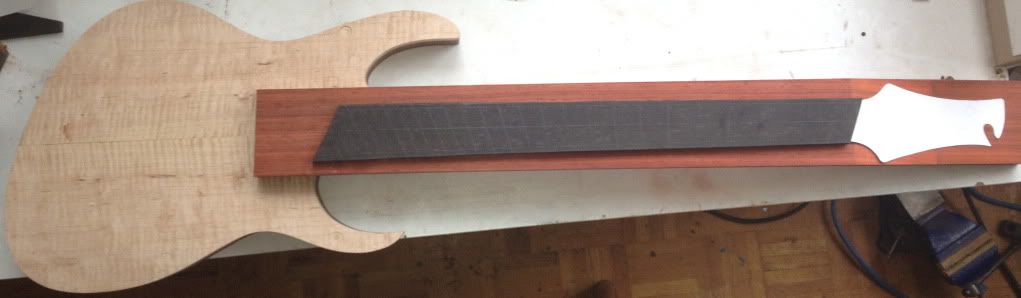
Got the Fret board all laid out and ready for slotting. Also got the neck Scarfed and glued.

And together now for a look ahead.
BM
-
 1
1
-
-
I love the bridge,but it gives me an idea for an easier solution to the same issue.
you could remove the saddles altogether from the Kahler,set the Kahler 1" back from the scale length(28" from the nut on a 27" low E scale),and make a separate saddle assembly to attach to the guitar body...individual saddles so you could set them for any scale
Yep I was originally going to use the single bridges your using with the Kahler cam behind it. like you just said. we talked about it in the bridge build post as well. It will make it universal.
BM
-
It will all make sense when you see it together. At least I hope it does. :croudwaits
-
Trimmed up and rough sanded to shape. Ready for top.
mock up
-
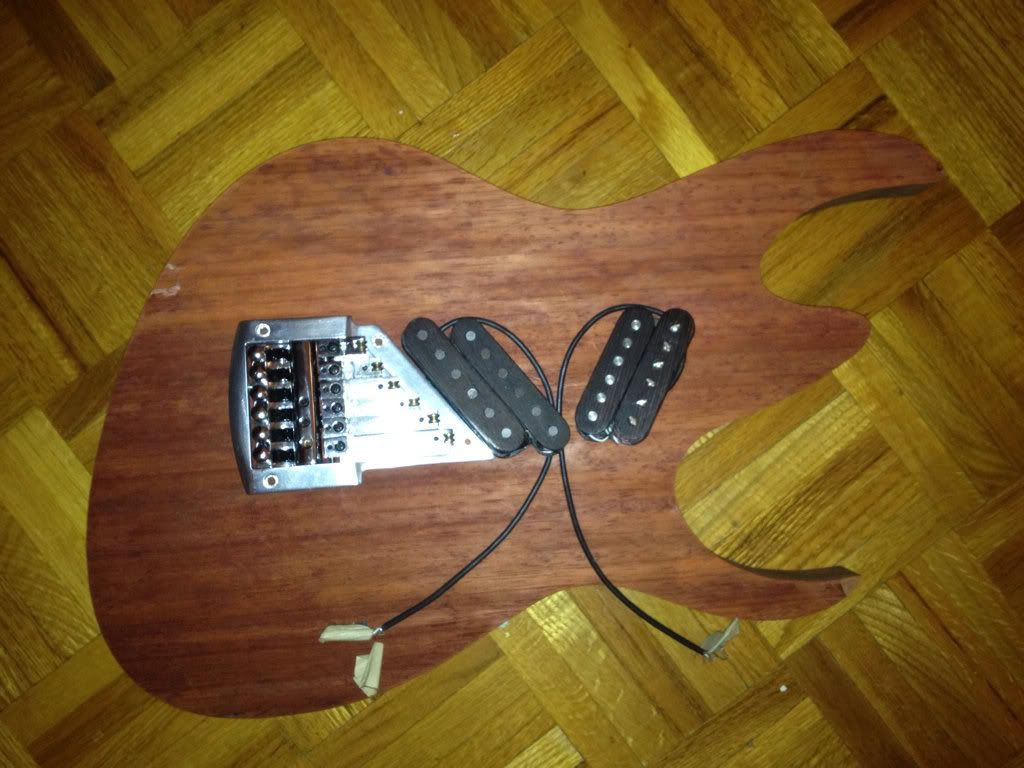
Heres what i have so far. Rough cut body blank, and glued veneers
-
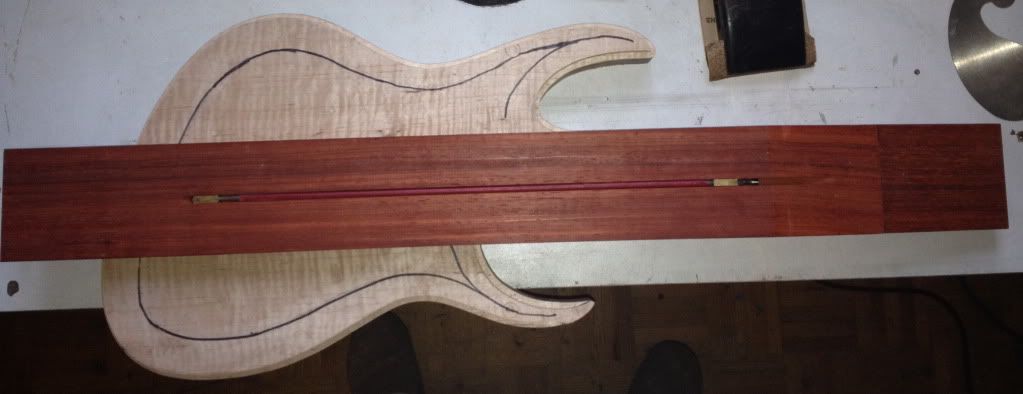
Started my multi scale build.
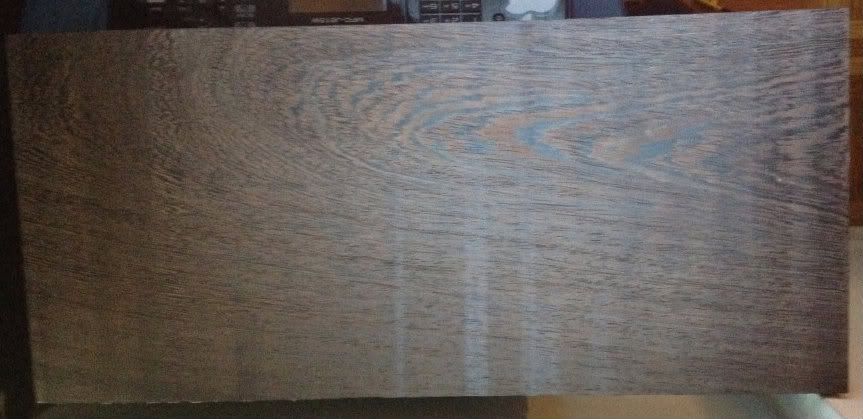
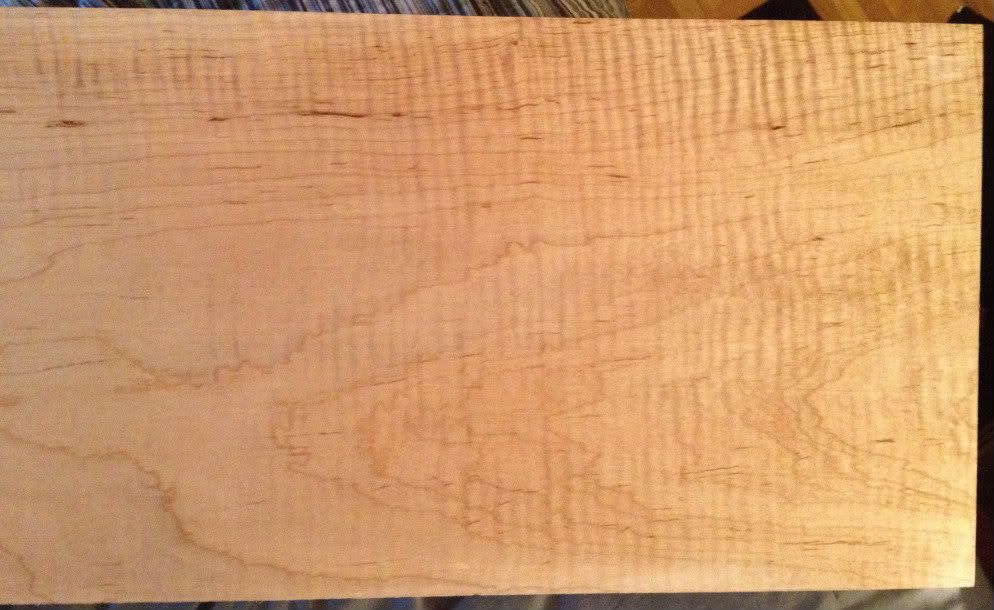
Wood selection
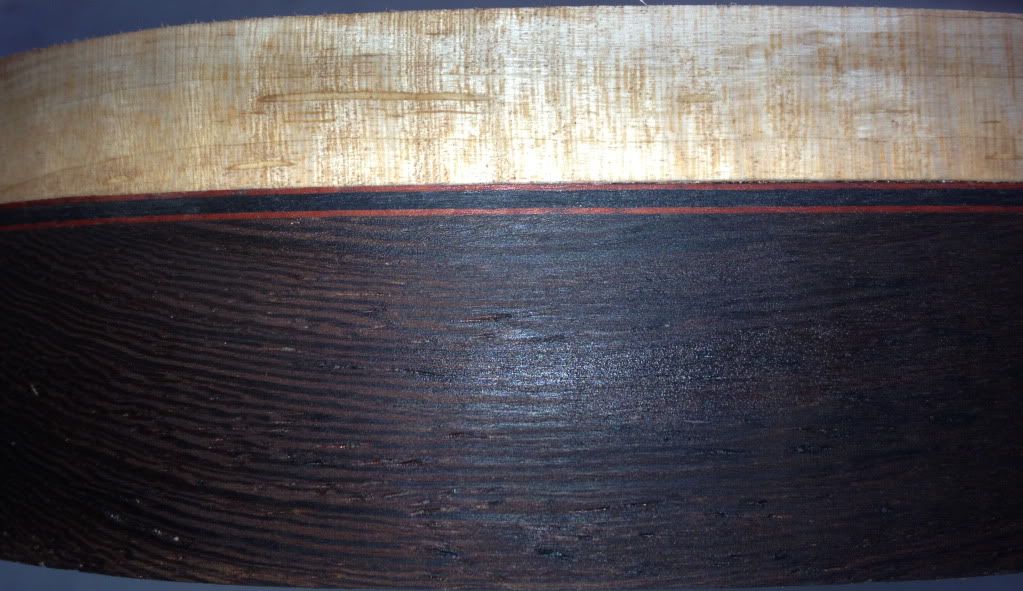
Wenge body - padauk and stained black maple veneers
Top curly maple
Padauk Neck
Gaboon Ebony Fingerboard


-
I don't know if you've played a multi scale before but, I think your going to find it rely weird to play with the perp at the 16th fret. For the best ergonomics the perp fret should be closer to the nut. Usually around the 3rd - 7th fret.
BM
-
is it worth having a channel under each height adjustment set screw - might help to keep them all parallel
also worth remembering that the saddles need to be set quite high on a kahler style trem to give enough string pressure on them - they look a little low at the moment. definitely worth considering trying it on an actual guitar to get all those aspects correct before going much further
hmm. i think i would also thin down the long saddle sections from just behind the grub screw so that they all looked like the low e saddle
The channel under the saddles for the grub screws is a good idea. never used a kahler before so I wasn't sure if the saddles would move around when playing. the channels would prevent that.
I'm not going to thin down the saddles behind the grub screws though. The reason for that is the length of the saddles and thinning them down would make them to weak in my opinion.
BM
-
BTW used some junk I had and some 20 mins to make this, still have to test it...

By gpguitars at 2012-06-29
What might that be? Looks like a fancy Bong to me.
-
Using 27" - 25" scale then ghats with the 5th fret as the perp.
-
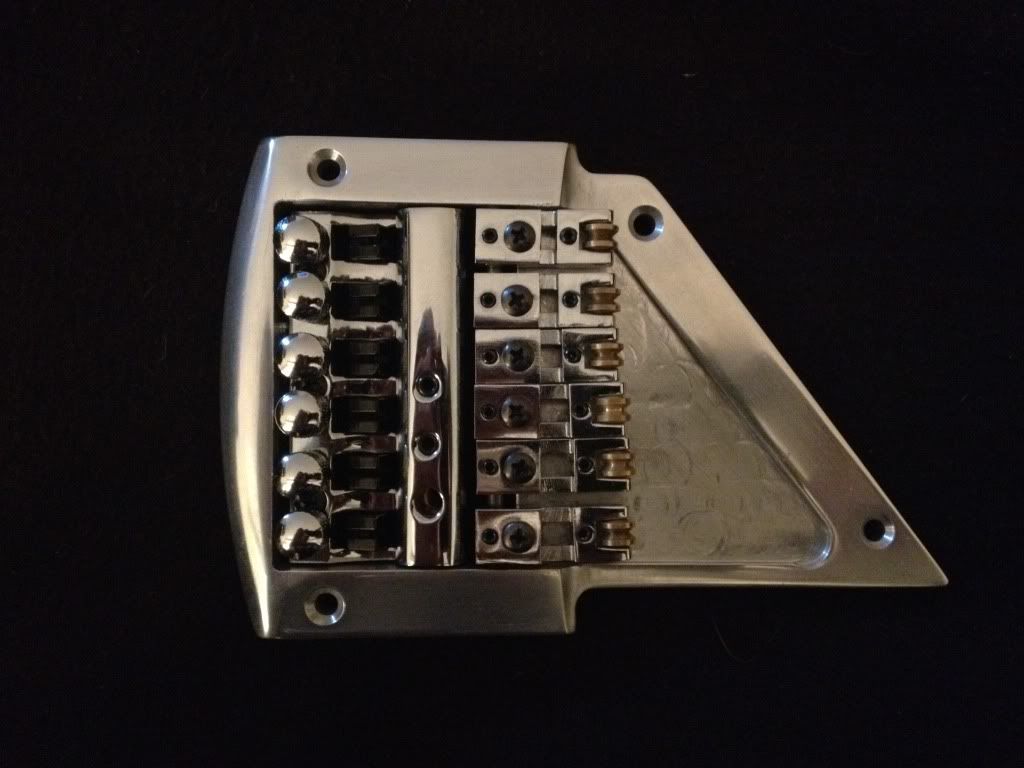
K I got all the machining finished up for now and just got some polishing left to do. Then I have to harden it and send it out for chrome or anodizing. If I anodize it I'm not sure what color to do it.
Here's how it looks.
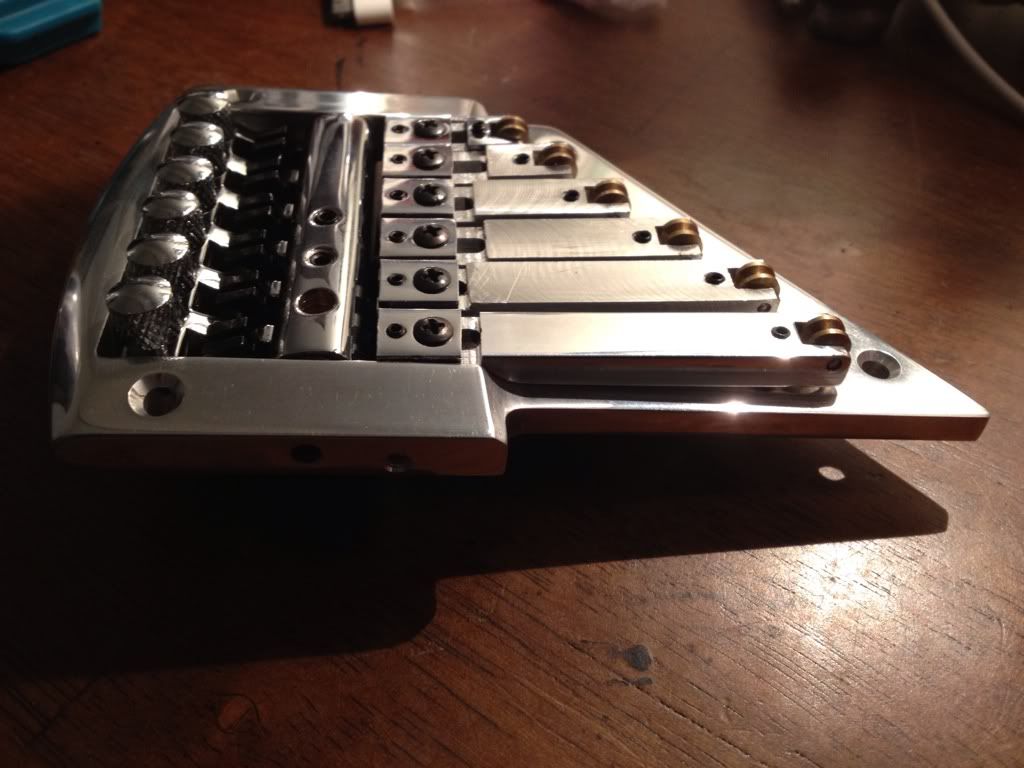
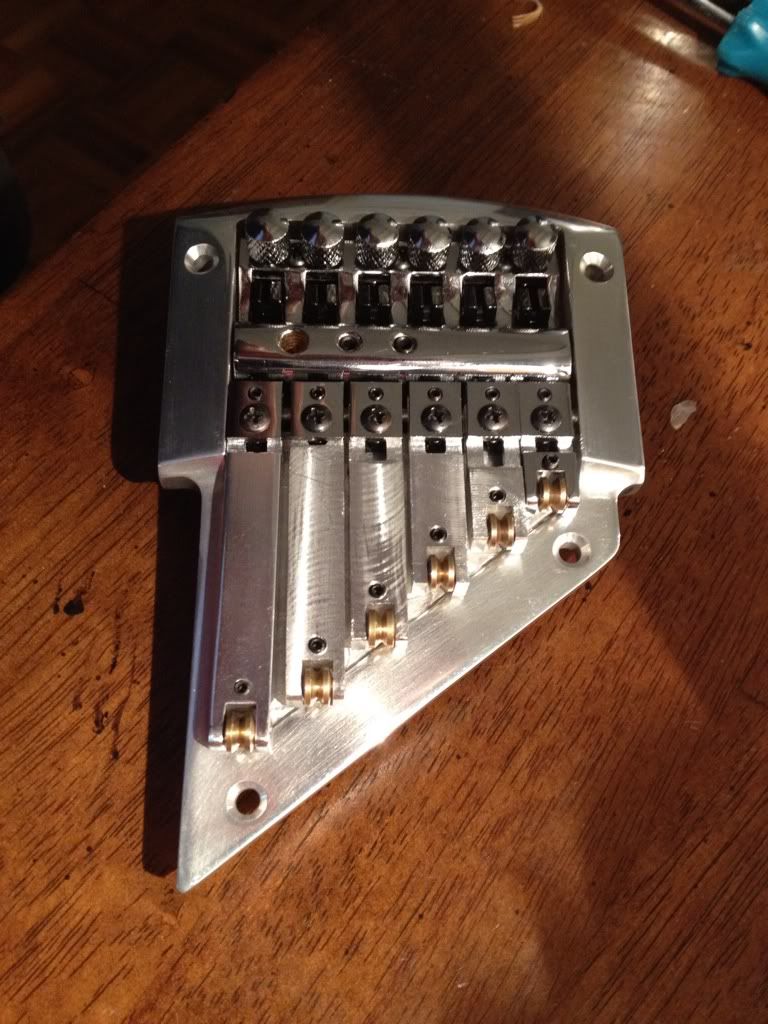
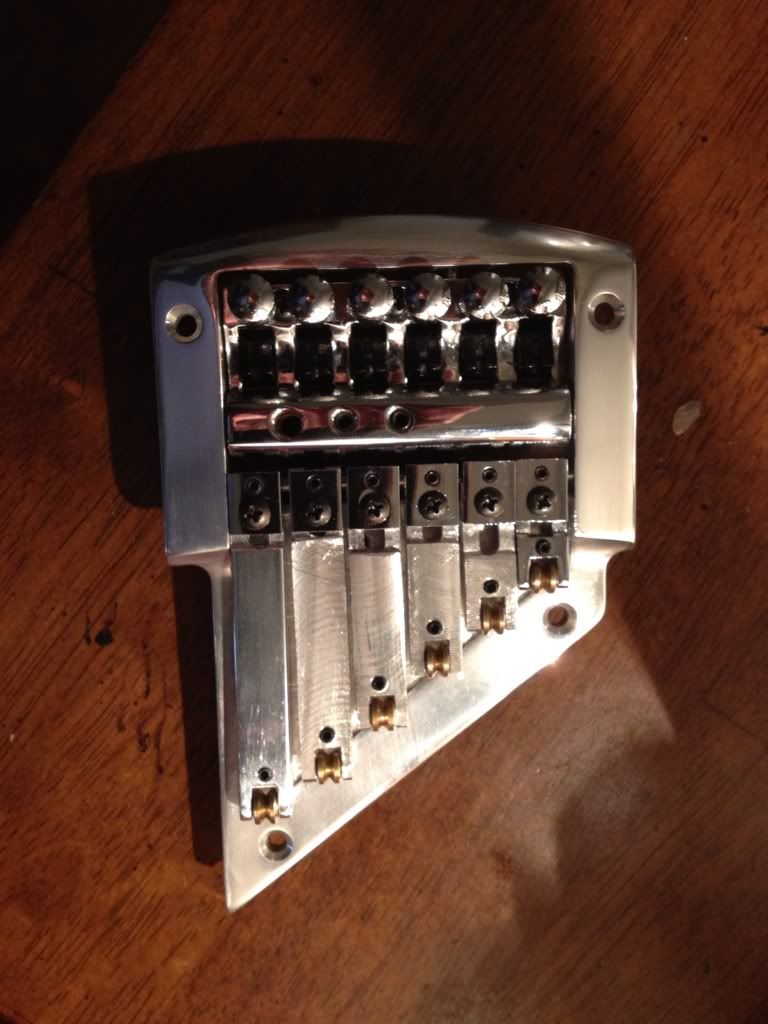
BM
-
I'm just thinking you should have made 2 or 3 while you had your setups lol...
I was concerned about the unpolished surface in the flat but i see where its going now...
Looks great!
Thanks piercefield I was just doing this as a test to see if I could machine all the parts manually. Wasn't thinking of the future at all. I will be changing the design for the future to make it a 2 piece bridge so it can be used on any Multi scale length and perp fret desired.
damn that looks nice
Thanks been a lot of mind numbing hours with calculators and edge finders on the mill to insure it's perfect.
Now I want to make it out of Brass.
-
1
-
-
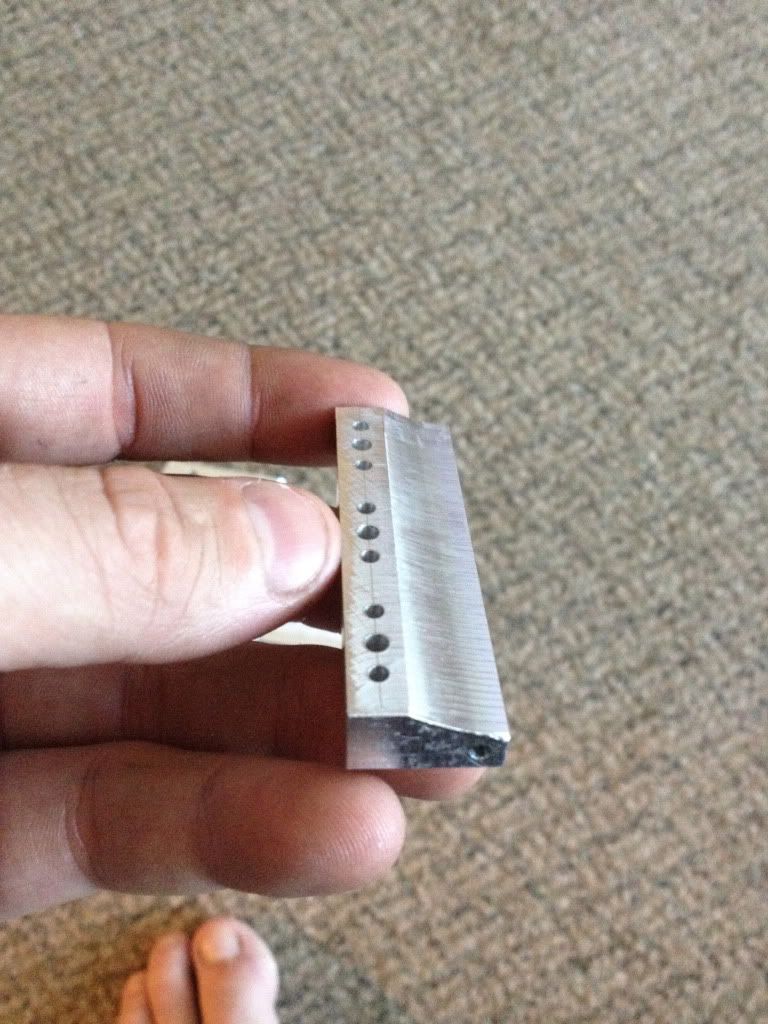
Got the 1 saddle extension made and polished up this morning. I installed it to see how it looks.
What do you all think.
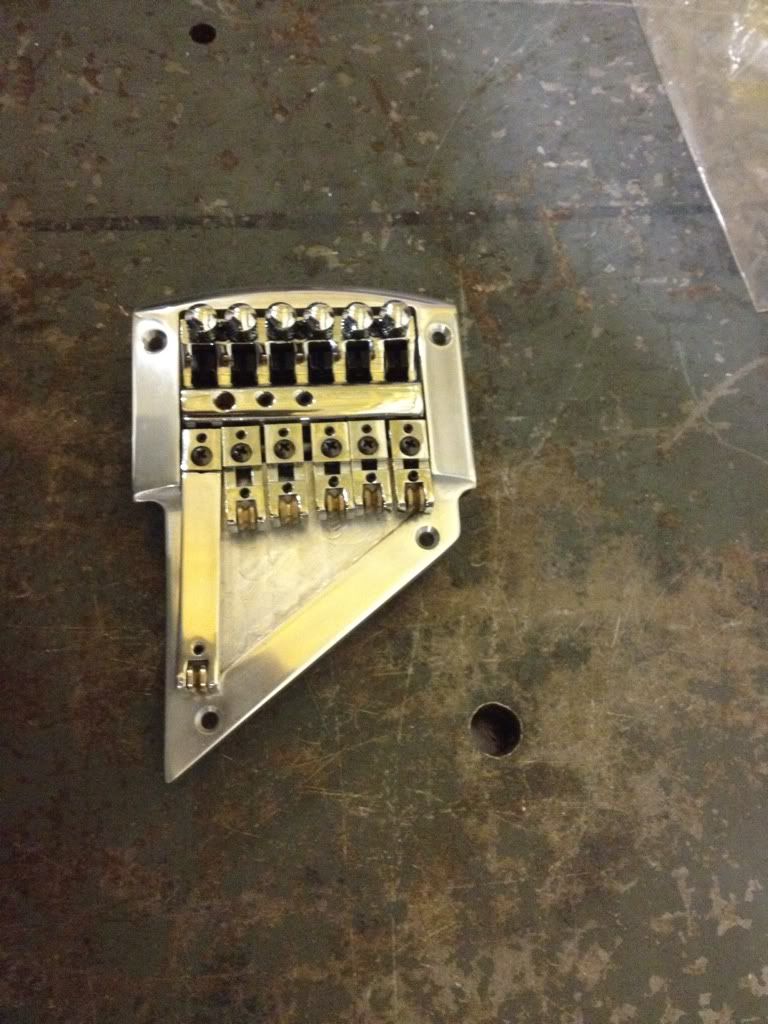
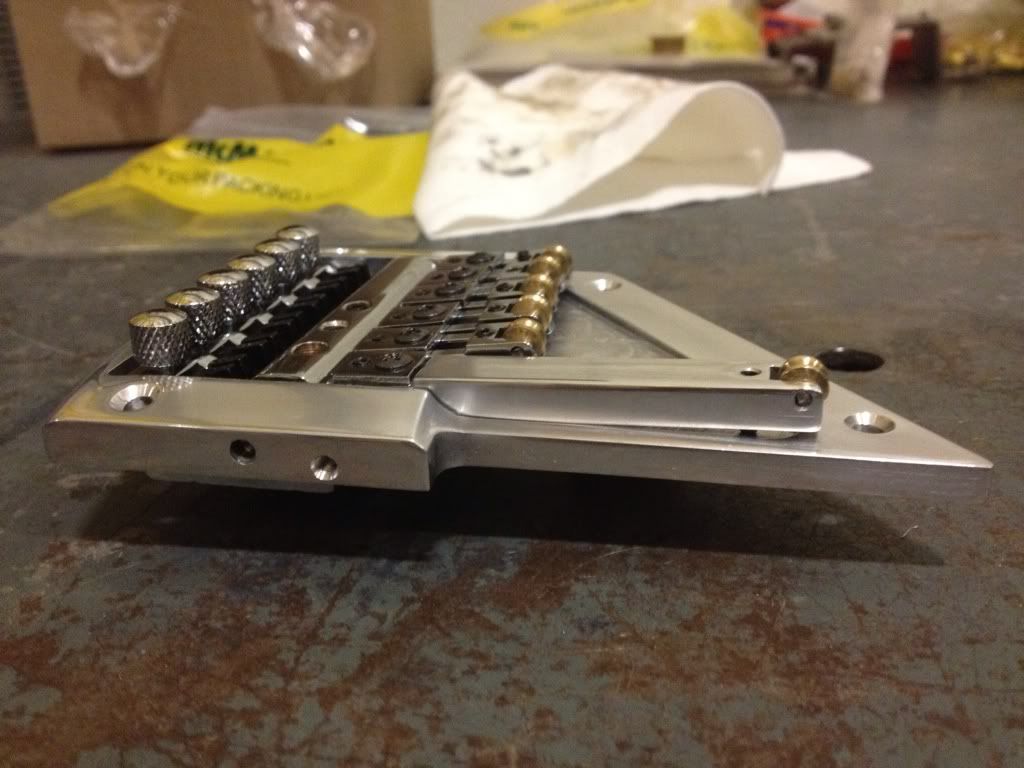
BM
-
Pretty cool. I wish I had the tools and skills to mill like that.
Thank you.
-
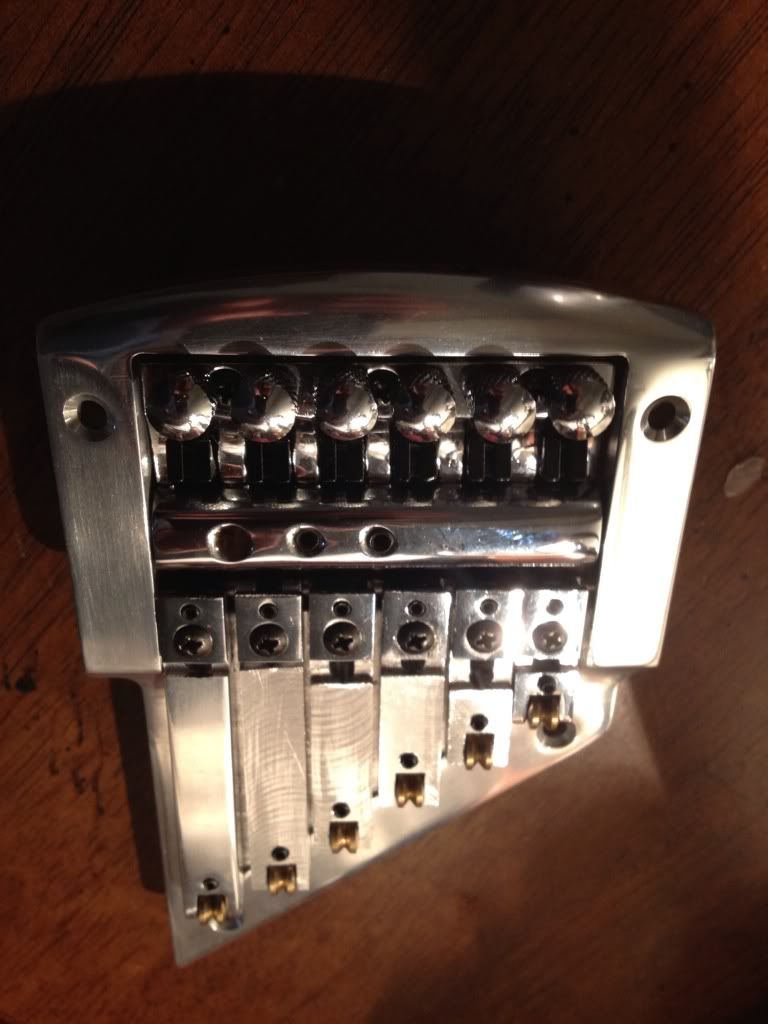
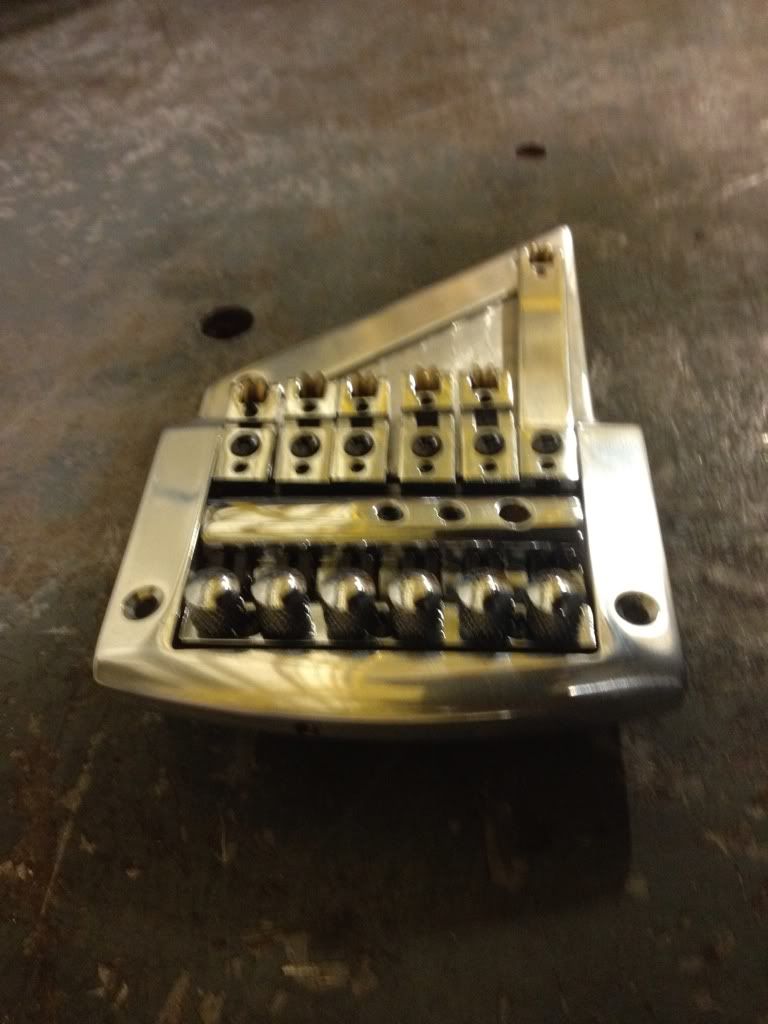
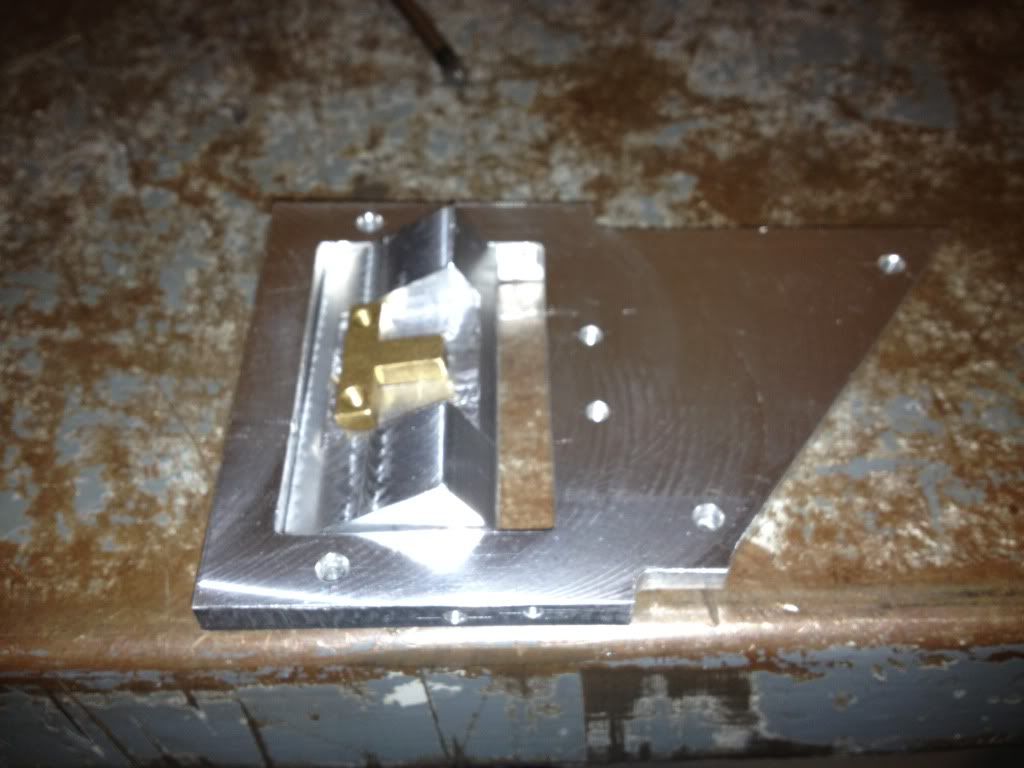
Very busy at work these days but still moving along with the bridge.
I've finished the Bridge base and started polishing it.

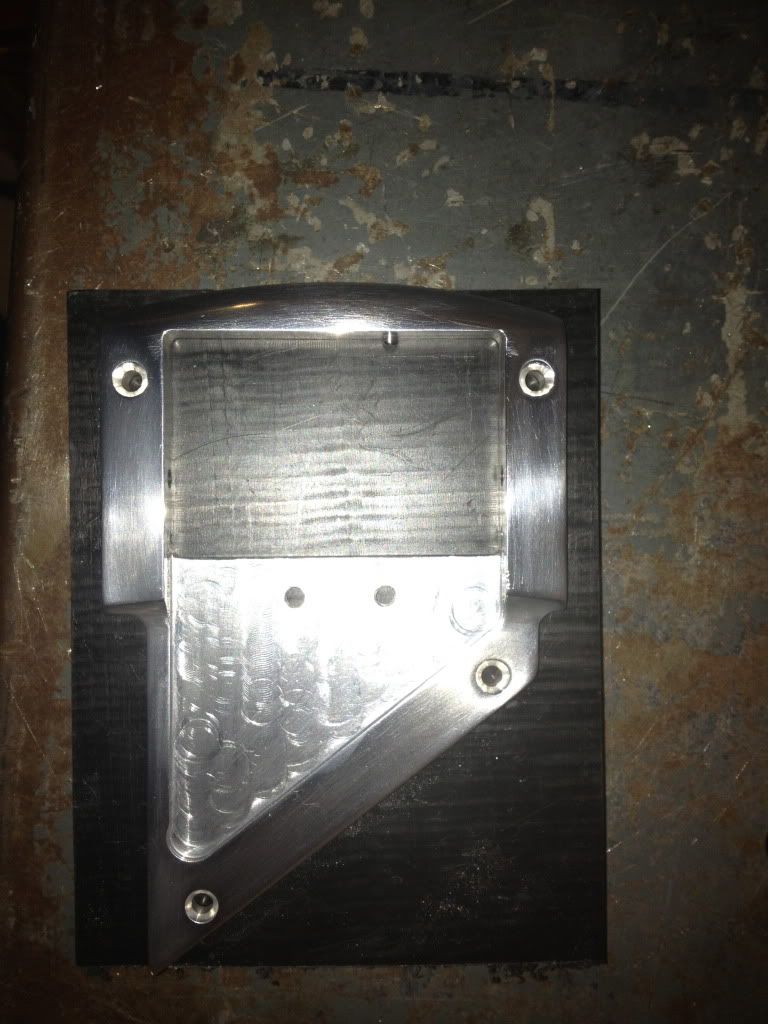
So seeing I am waiting on parts for the bridge to show up still I mocked it up with the cam from the Kahler and the saddles too.
I just have to start and finish the saddle extensions but this pick gives you the idea of how it's going to look.
BM
-
Are you taking measurements from the donor piece as you work, or are you working from a drawn plan? Sorry, if you posted this answer already it escapes me....very tired....
I'm using the Kahler for measurements, but I'm not styling it the same.
Got some good news at work today. they are giving Me and the other Machinist $25,000 for a new mill and surface grinder. happy days are coming.
We're looking at a Mill power, for CNC work. Sweet.
-
CNC Fixed. I installed new motor last night... I need to get some Buna N Type couplers though or this is going to happen again.
You can get those at Mcmaster carr as well.
-
Started the top section of the cam today. I got a lot done on it too, doesn't look like it but Machining is all about setup. It takes up so much time the cutting is fast.
-
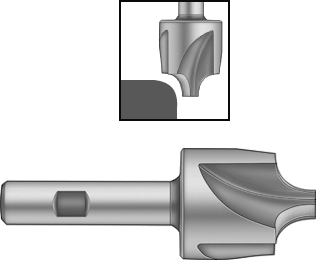
The best way to add a Radius to any material. is with a corner round bit / or as I call it a radius bit. looks like this.
Your bridge looks nice.
-
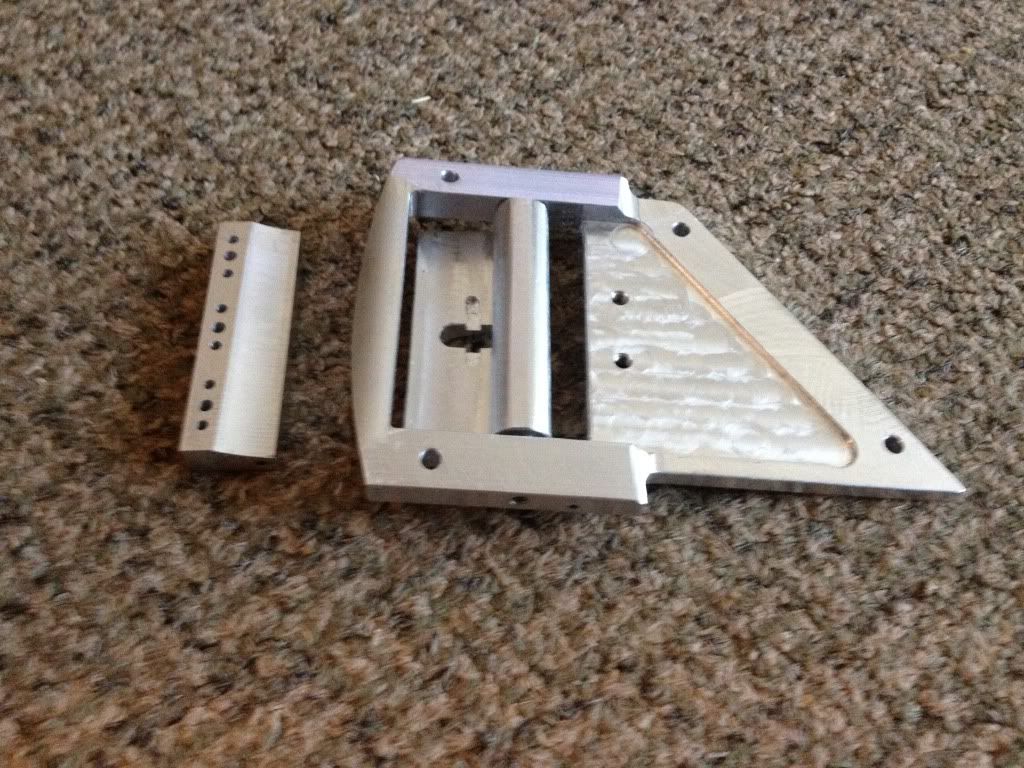
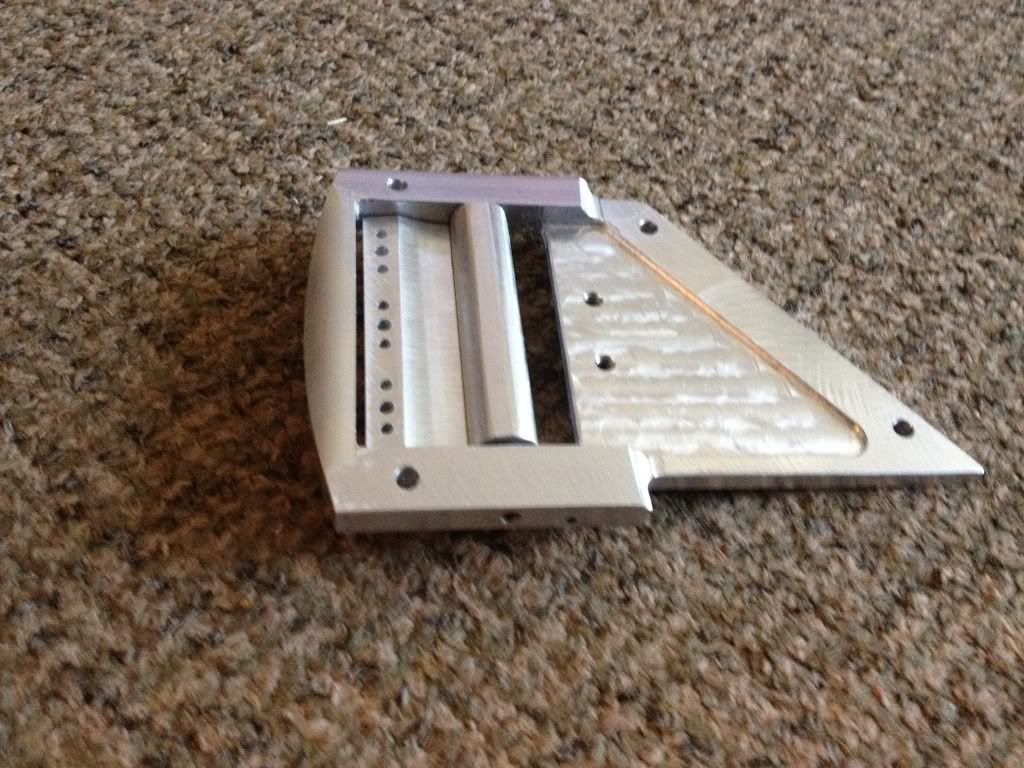
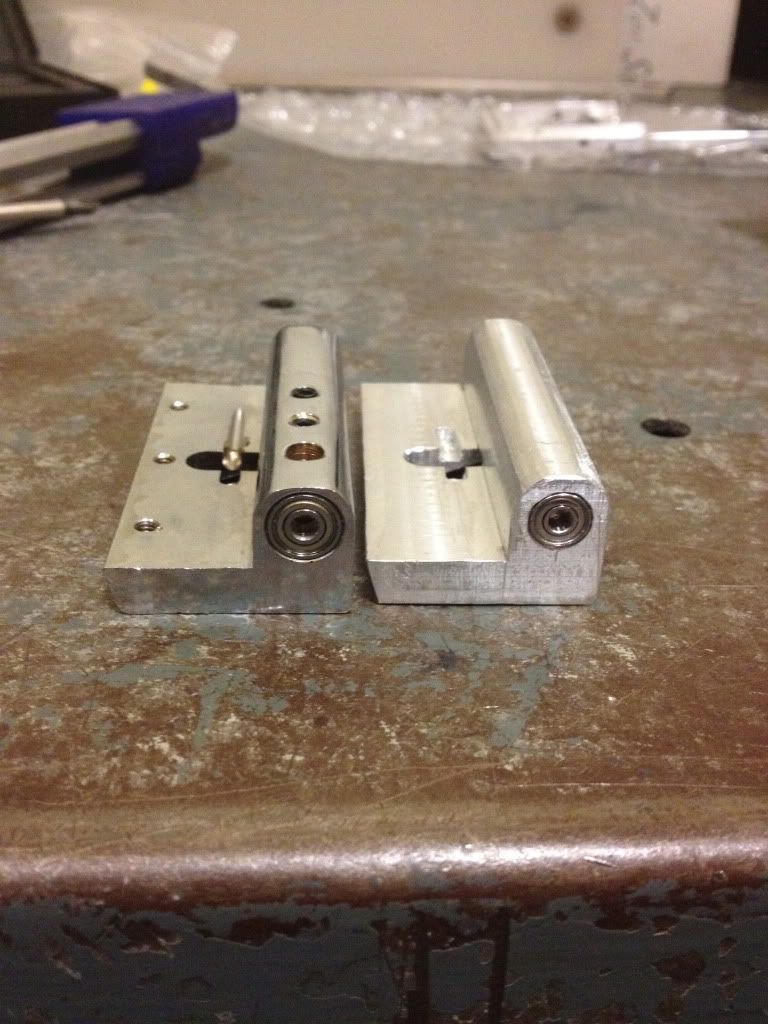
K didn't get a lot done, but I finished the bridge base and the contouring as well. Turned the set screws for the the cams bearing pivot point to size.
Tomorrow I'm starting the top section of the cam.
Anyhow here's what I got for pics.
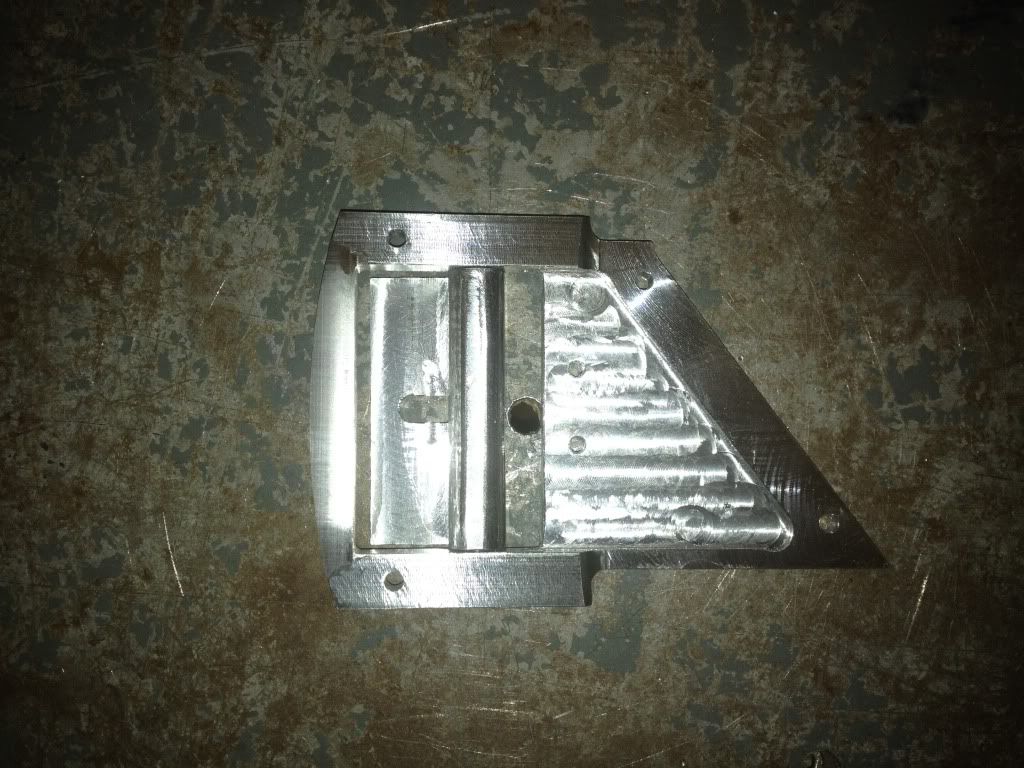
More tomorrow.
BM
-
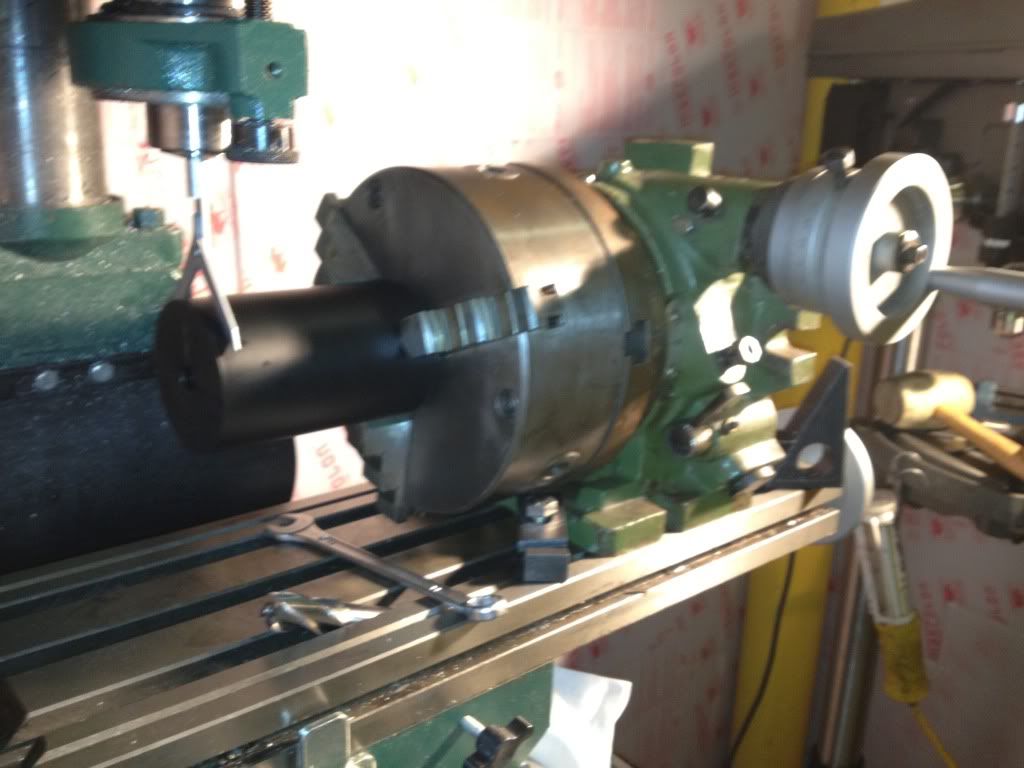
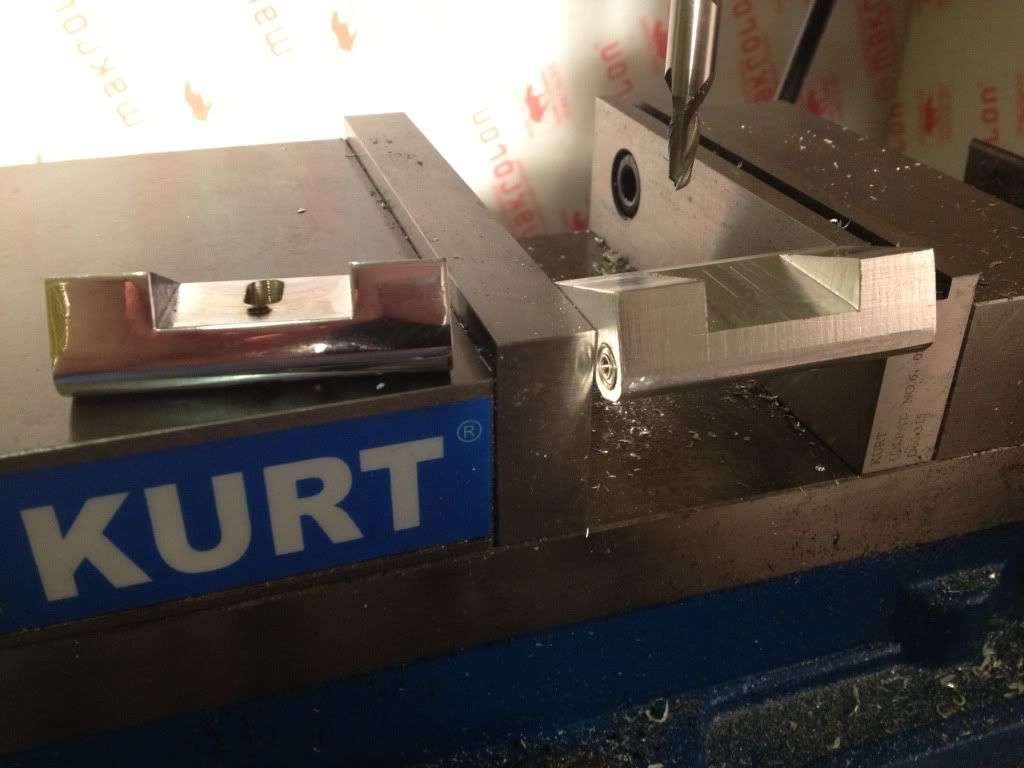
So like I mentioned in my earlier post there was a rush job that came up today. So I lost the use of myMill and Lathe to another Machinist who need it for that job.
So I was using the Knee Mill in our other shop. Anyways the job I was working on took me 8 hours just to get it setup to start. hers some pics of it.
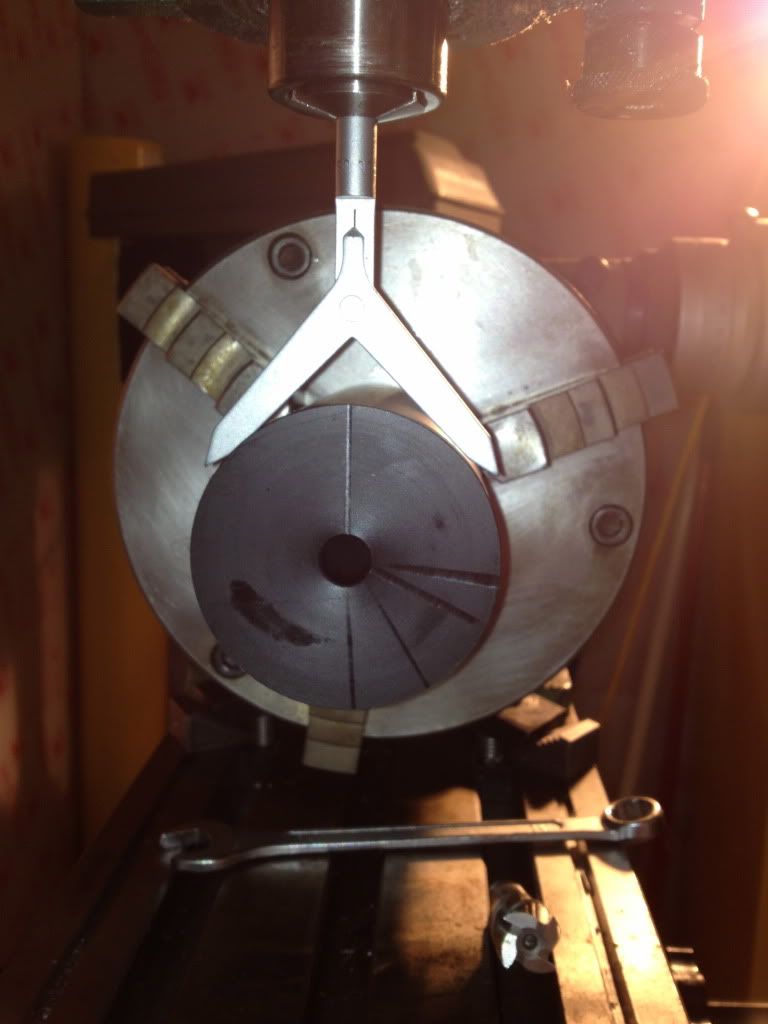
This is what I keep tapped up on the Cabinet for the mill and Lathe.
Till tomorrow then.
BM
-
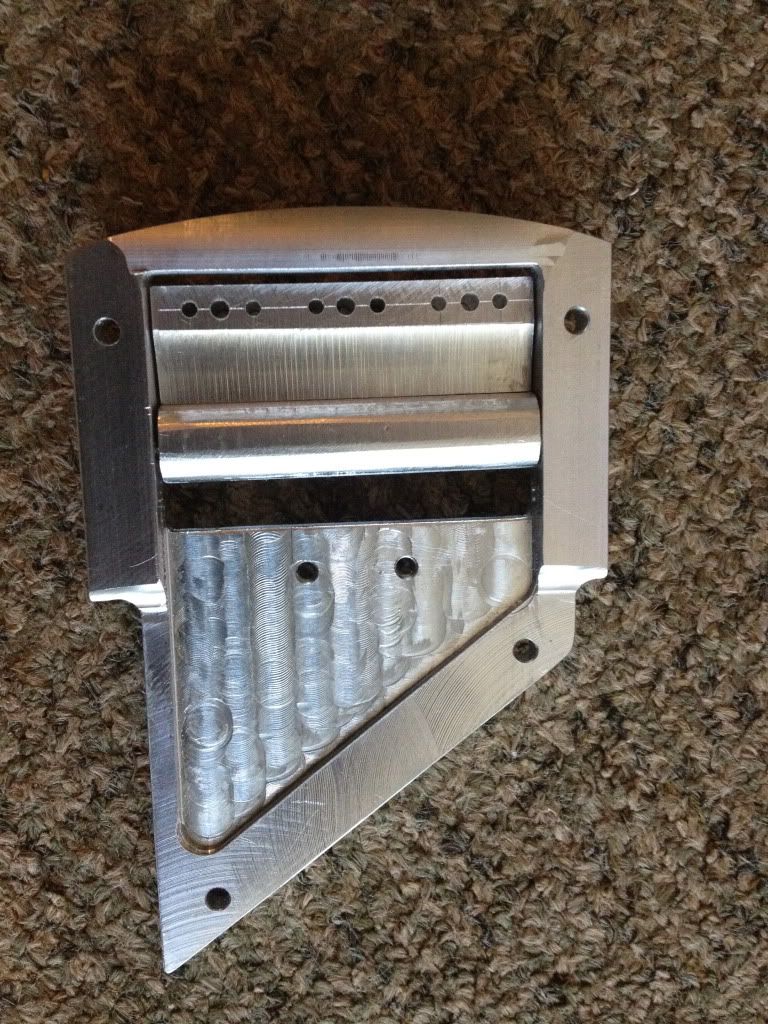
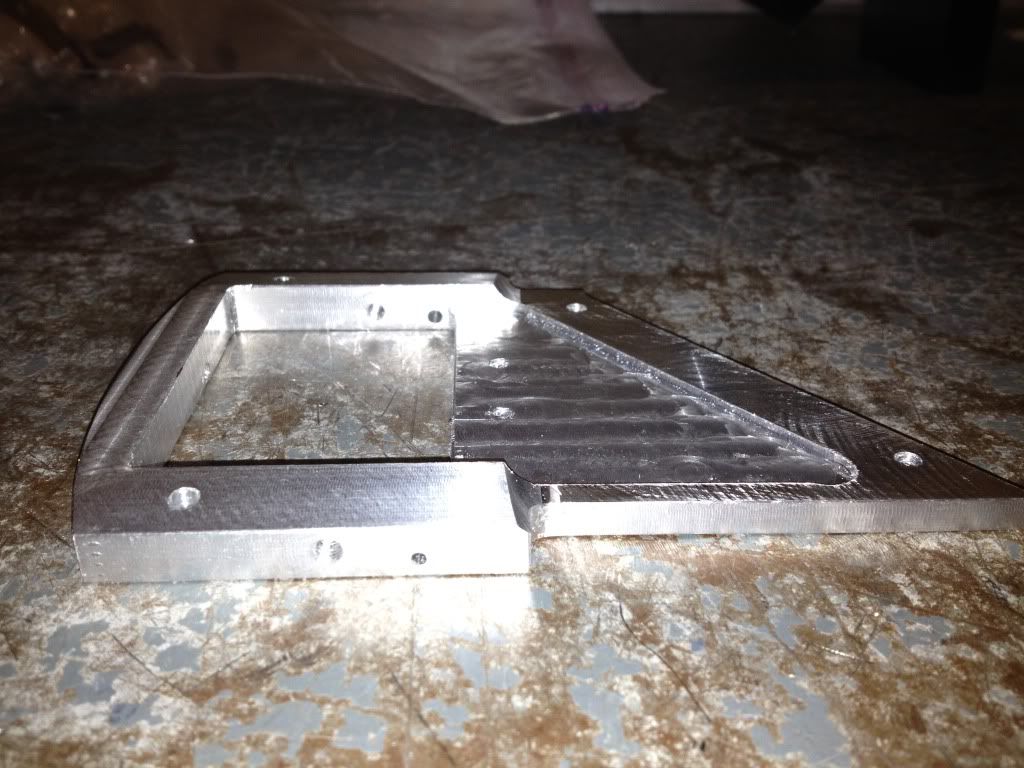
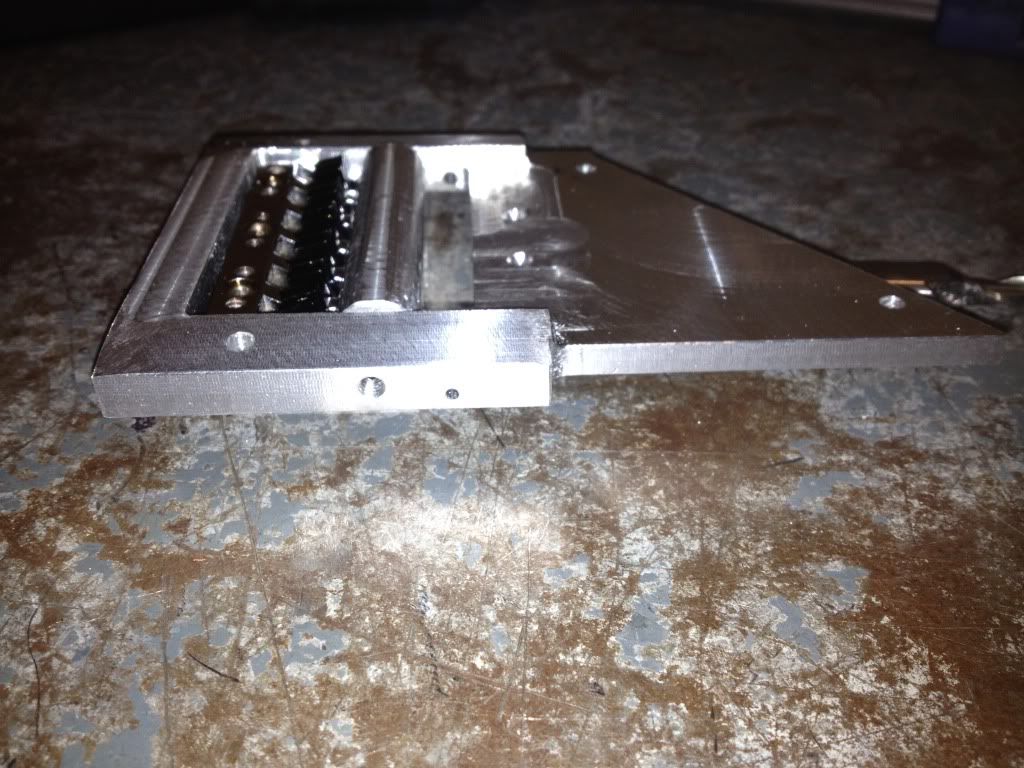
Ok here's where i got to today. I didn't get a lot done, do to a rush job that came in.
Here you can see the KAHLER cam sitting on the clamp and mine in the clamp I finished milling the spring return cavity, and setting up for the slot.
Here it is finished and you can see the radius I added to the cam section earlier.
Bottom shot.
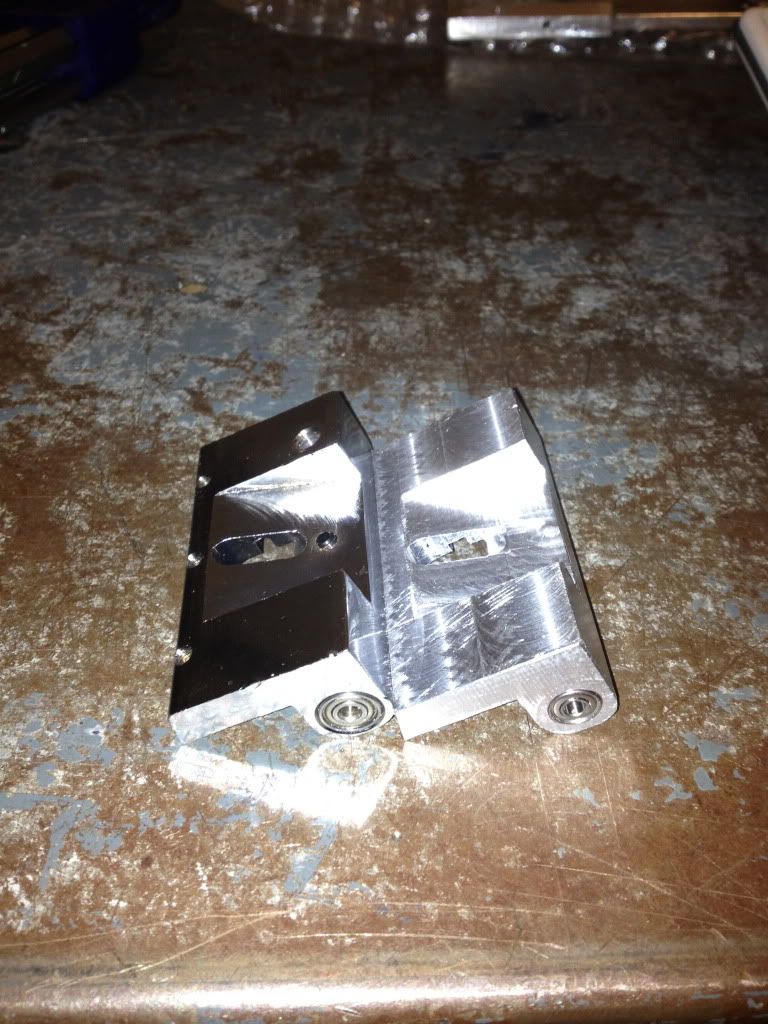
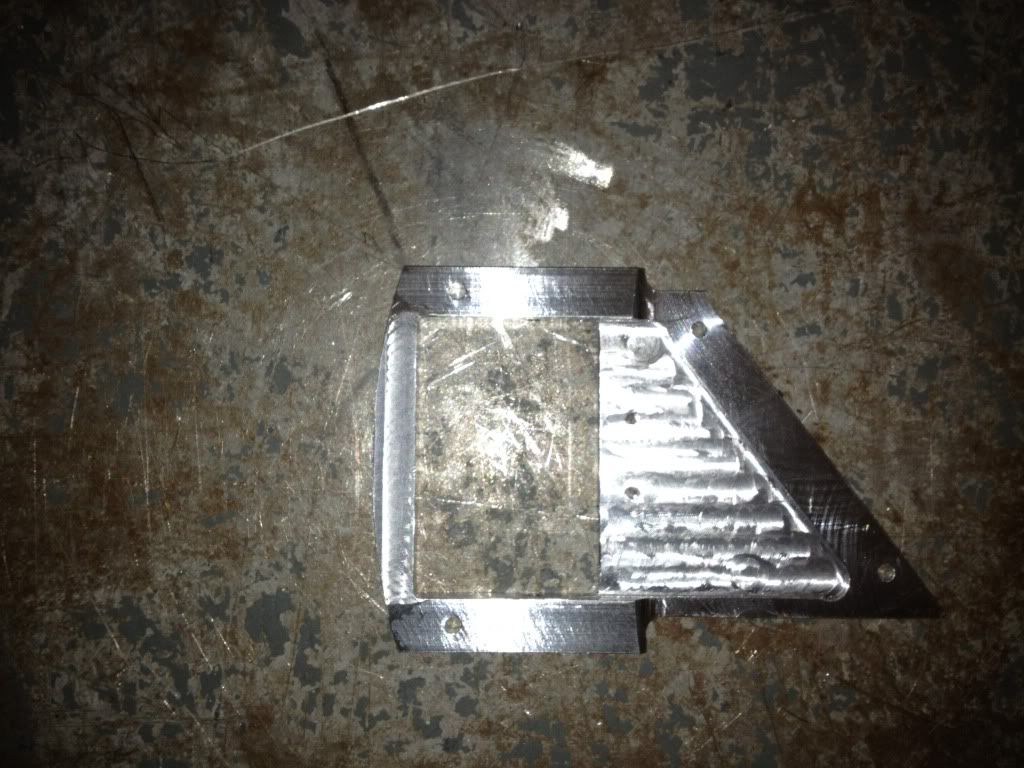
This is with it mounted to the bridge upside down.
And finally with the top section of the KAHLER cam sitting on top of my bottom section.

Wenge/padauk Multi Scale
in In Progress and Finished Work
Posted
Planed the neck angle yesterday, and got some of the top carved today.
BM