hittitewarrior
-
Posts
118 -
Joined
-
Last visited
Content Type
Profiles
News and Information
Tutorials
Product Reviews
Supplier Listings
Articles
Guitar Of The Month
Links and Resources
Forums
Gallery
Downloads
Everything posted by hittitewarrior
-
I really like that top! Will you be putting a finish on it of some sort or leaving it raw? I just bought a piece of cracked rosewood to try something different as a top. I like the idea of taking a piece of wood you wouldn't typically find in this sort of thing, and figuring it out anyway. Fun stuff!
-

SHB-2 - Tele build
hittitewarrior replied to hittitewarrior's topic in In Progress and Finished Work
Here is an example... and last pic is the fret press insert I made. Same price as one from the stores, but enough brass left over to make more - win


-
SHB-2 - Tele build
hittitewarrior replied to hittitewarrior's topic in In Progress and Finished Work
I gave the item away, but plan on doing something similar soon, so I'll take pics of that when I do it (sometime in the next couple days I think). I was planning on doing one of the aluminum 25.5" scale with the 1/16" notches on one side (let's you use a 1/16" pin in a mitre sled to use the table saw fretting blade). They are about $40 which isn't awful, but I was hoping to dodge that expense... lol I do have access to a CO2 laser cutter, so your comment does make me wonder if I could use a thick plastic/plexi, etch it using the laser cutter for precision marks, and then put the 1/16" notches in using a dremel bit.... I'll have to give that some thought. -
SHB-2 - Tele build
hittitewarrior replied to hittitewarrior's topic in In Progress and Finished Work
Thanks! I used tin snips to do a rough cut, a Dremel with bit 9902 (tungsten carbide cutter), and then went back and cleaned up with some files. I didn't realize how much copper dust it would make so after a little I started doing it over a piece of paper and collecting the copper. I did a CA + copper dust inlay on a separate piece of woodworking and it looked pretty cool. Above pic is before the file work which I got around to late last night. I thought one of the machinist's at work was going to do a little side job and trade a fretting template for a six pack, but he hasn't gotten around to it yet... might be ordering from the red shop lol... -
SHB-2 - Tele build
hittitewarrior replied to hittitewarrior's topic in In Progress and Finished Work
Had a problem with the glue up, and ended up with some gaps... I thought I'd used enough clamps and got good squeeze out all around, but there's two spots that look like they have a 1/8" gap... Been trying to decide what to do about them. Still not sure. In the meantime while I cool my temper down and figure out the next move, I've been working on the pickguard. I'm pretty sure I will patina it. Ammonia or Vinegar... one gives you a blue patina and one a green. Plan is to do a couple small scrap pieces and then figure it out from there.
-
SHB-2 - Tele build
hittitewarrior replied to hittitewarrior's topic in In Progress and Finished Work
Scroll saw to cut out the shape on the koa top. Clamped it up. Need to get a laminate trim bit for my router to clean it up.. I realized after I did this, that I kind've screwed up when it comes to order of operation if I wanted to stain the back prior to gluing... oh well. I'm curious if taping is enough. If not, I'll just do the natural look.
-
SHB-2 - Tele build
hittitewarrior replied to hittitewarrior's topic in In Progress and Finished Work
One other thought and question I've been having. The main body is poplar, which can have a kind've greenish tint to it, and isn't all that attractive... I don't hate it by any stretch, but am toying with the idea of staining.. How do I go about staining the back without having it bleed into the edges of koa top? I wouldn't think careful taping would be sufficient, but perhaps I'm wrong. Any suggestions on color that would go well with the koa top? I'm thinking a sanded back black at the moment, but am open to suggestions. The neck is maple. -
SHB-2 - Tele build
hittitewarrior replied to hittitewarrior's topic in In Progress and Finished Work
@Mr Natural No, I'm not sure what the moisture content is, but I'm pretty sure it should be ok. The koa is from the luthier's section of the local hardwood supplier, and I've only used Mineral Spirits to wet it (my understanding is that this flashes off fast enough to be safe and not detrimentally effect the moisture content over the course of a couple days)... Am I wrong in that? I had an old door sitting in the garage, so i mounted some sandpaper to it, worked on the book match just like @curtisa mentioned. Seemed to make a nice match. Gluing up now. I had one really good scare while clamping it together. The boards are thin enough that I needed to use blocks to squeeze it together uniformly, Well thinness coupled with the cupping, and at one point when squeezing them together the boards bent up so severely at the joint I was quite afraid they were going to crack. Thankfully they didn't. I backed the pressure off a bit, and put some dumbbells on the top to prevent it from doing that while the glue is drying. The furring strips across the top are lightly clamped to the table just outside the image... I needed them to hold the aluminum down. I think one of the machinists at work is going to make me up a fretting template to go with my fretting table saw blade I just acquired, so I'm hoping to get my hands on it on Monday. We'll see!
-
Swel Guitar #2 Limba & Maple
hittitewarrior replied to 10pizza's topic in In Progress and Finished Work
Congratulations! -
SHB-2 - Tele build
hittitewarrior replied to hittitewarrior's topic in In Progress and Finished Work
Thanks for the advice and thoughts on the top... have another question. no pictures this time, unfortunately. I've been working on the top over the last week, cause I ran into a couple problems. I looked a little more closely to make sure the two sides were about the same thickness and that the book match would look nice (minimal seam). Unfortunately the tops were not uniformly thick and the variance was so much I had to go to town using a block plane... now the two boards are level enough to work with once glued to the body.... Unfortunately, the two pieces, although mostly straight on the edges where I want to glue them, are not flush/straight enough. I tried using the block plane, but it was thin enough that I couldn't keep it perfectly perpendicular to the edge. I had the (I thought) bright idea of putting the two halves side by side (edges parallel), and sandwiched between two longer boards. I then ran a electric planer down the edge, which SHOULD have given them matching profiles, parallel and flat, which when laid flat, given me a nice bookmatch. Not so, something happened in the process and it still has variation such that I can't get a "seamless" joint when clamped up. Sooooooo... how do you joint it without using a jointer? I thought about gluing some sandpaper down to glass and then just holding it vertical and sanding the edge. -
SHB-2 - Tele build
hittitewarrior replied to hittitewarrior's topic in In Progress and Finished Work
@10pizza It will have a pickguard and the modern tele bridge, but I think you're right, most of the light spot will be under that stuff. I'll have to lay it all out once I get the top cut and glued. On that note... do you all tend to glue the book match first, and then the drop top to the body, or glue the bookmatch and glue to body all at the same time?? I did make some progress this weekend. The piece of poplar I had for the majority of the body was 2" thick.... Had to take it down to 1.3-1.5" so that I could add the ~.25" top. Ended up routing a landing , and then using a piece of .5" mdf to get a relatively constant platform for the router as I worked my way down the body. Took about .25-.375" using a chisel, and then cleaned up with router. Worked pretty well for most of it, but it definitely seemed to be drifting in depth towards the end. Definitely had some clean up to do with a plane and scraper... I'm still not convinced I'm happy with it, but the pictures show how far I got with it. The dents in the foreground are from the chisel, and not the sharp end.... where it transitions to the handle... i didn't even realize how shallow i was holding it, and the handle took a couple big dents before I realized it. Came out in shaping though. A lot of wood and dust tonight... really need some sort of dust collection system. and for the belly... Waiting for my fretting blade for the tablesaw to come. Should I shape the neck prior to putting the fretboard on? I'd think it would be easier to clamp with it still flat, but I think I've seen a lot of people put it on afterwards. Opinions?


-
SHB-2 - Tele build
hittitewarrior replied to hittitewarrior's topic in In Progress and Finished Work
I did get some progress this weekend, albeit minimal. Got the poplar body (outline) mostly routed. It is too thick though. It is sitting at 2" and I want to put a drop top on it. I think I might be able to take it down to 1.5" going slow with the router.... Perhaps my buddy's planer, although it's caused some snipe the last couple times we've used it. Also, my workbench got way out of control... tools and sawdust everywhere, so I spent a good bit of time cleaning. I need to rig up the shop vac for dust collection too... Kids helped me with the paperwork below so I could select where the drop top would come from. I'm not a huge fan of the big piece of light wood in the middle. I was thinking of cutting the middle 2" out (1" on either side of the centerline, and putting a piece of cocobolo in the center. Anyone have an opinion? crappy cut and paste job... Lastly, the gutamelan rosewood I picked up the other weekend. table saw fretting blade is on its way... template to be ordered soon.


-
fingerboard radius vs nut radius
hittitewarrior replied to hittitewarrior's topic in Solidbody Guitar and Bass Chat
Ok thanks, good to know. I was trying to avoid buying all the nut files/saw/etc. at this time, but maybe thats the better option. How about a zero fret? If I understand correctly, the only thing the nut is htere for on those is to keep the strings in place, not as a contact point. Perhaps the "cheaper" solution... how do they sound? -
Can I use a 7.25 radius nut with a 12" radius fretboard? What is the impact in playability... Middle strings will be higher off the fretboard... Noticeable enough not to recommend? Any guidelines as far as how far away from matching they can be? Thanks!
-
SHB-2 - Tele build
hittitewarrior replied to hittitewarrior's topic in In Progress and Finished Work
Pictures never quite do it justice. When wiped down with mineral spirits, I can't bring myself to not try to make it work. We'll see... it's slow going for sure. I've got it down to between .18" and .2"... I need to run a thicker/stable fingerboard blank down the table saw to make a base to mount to the bottom of this for stability.. I think I'm going to shoot for .15" on the support one. What thicknesses do you use for your fingerboard blanks prior to radiusing? Stopped by the local hardware store today on a whim and got a couple "nice" Guatemalan Rosewood and Cocobolo drop tops from the luthier scrap bin. $24... Takes some digging, but every now and then they throw something away that meets my budget AND qualifies as a prettier than average. I should have snapped pictures when I had it out, but didn't get to it. I'll post em soon. Template is waiting on the body to clean up the edges (roughly shaped on bandsaw). I forgot the bit I have doesn't fit the trim router... and I haven't gotten around to pulling the larger router off the tablesaw base... The weekend is coming........
-
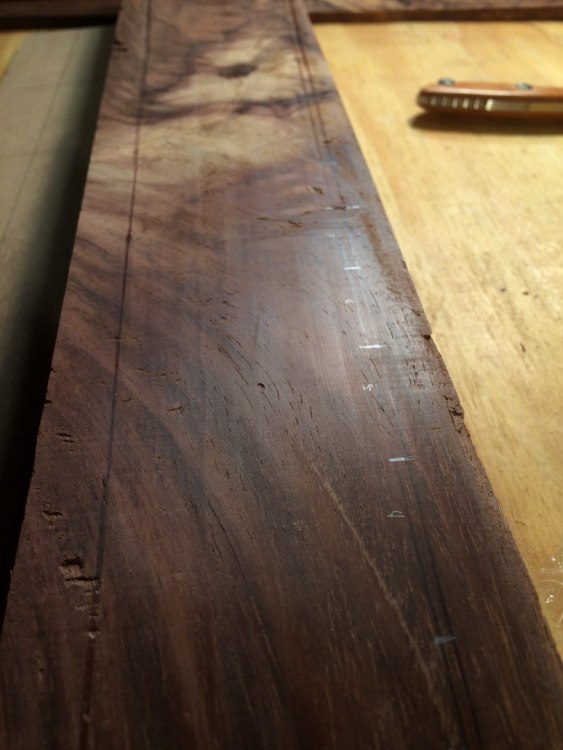
Gorgeous fretboard material - bad tearout
hittitewarrior replied to hittitewarrior's topic in Solidbody Guitar and Bass Chat
I got most of the tear out taken care of. There's two holes in the two (the one above, and then one just out of the screenshot). I'm not sure if I'll be able to get them out. I took a good .05" off it. I'd like to get it down to .15" and flat if possible and take ScottR suggestion and glue it to another baseplate. The baseplate would probably show though once radiused.... I'm not sure what to do at this point.

-
Figured I'd try a build thread for my second guitar. I am currently in the process of building the neck. Maple with cocobolo fretboard. Tele will have a Poplar body with Koa top, black hardware, and a Copper pickguard. Haven't decided if I will patina the copper yet or not. The koa was in the scrap bin at the local hardwood store a few months ago. $1 a pound I think... It's got some defects, and not bookmatched, but I'm pretty sure I can get a pretty decent looking top out of it. I'm debating which fretboard I want to use. The one on the left is the one I posted about elsewhere. I sanded MOST of the defects out of it, but there are a couple right in the middle of the knots that I'm not sure if I'll be able to get out. If I use that one, I'll end up getting it pretty thin and gluing it to the top of another... Just not sure if I'll get there. We'll see. The ones with the eye are pretty cool as well, and ripe for some sort of inlay right in the middle. I'm not sure.... opinions?? I goofed up already on the neck and got overzealous and cut the shape out a buddy's workshop before cutting the truss rod slot... stupid. Spent most of the evening rigging up a way to route a straight line, but it ended up turning out alright I think. Out of curiosity. Do you guys secure the truss rod? epoxy or CA on an end or anything like that, or since its snug and under the fretboard, it can just free float? One of the pieces of koa I have for the top has a nice warp in it... more like a bubble. One specific area abt 3-5" diameter in the middle/edge of the board bulges up. I think it will glue down flat, but I imagine lots of even pressure in that area just to be sure. Anyone run into that before? You can kind've see the area I'm talking about below Anyway, more to come. I need to order a fretting saw for next bit on the neck. Might do some work on the body this weekend if time allows.


-
I have a friend with a nicely outfitted woodworking shop, which is what has allowed me to start into this hobby. I purchased a table saw last year and it had a router accompany it, and am considering purchasing the rest (below) as funds allow... hopefully allowing me to progress with builds at my pace, and not feel like I have to burden him. They are in order of priority (which I'd love people's feedback on). 1) Bandsaw: I am curious if 14" is large enough in most people's minds.... I think it is reasonable, but I could see some scenarios where larger would be beneficial... they go up pretty drastically in cost, so I'm particularly interested if people with a 14" really wish they had the 16-17" models for more than a passing second 2) Drill Press 3) Planer 4) Jointer Thoughts?
-
Almost neighbors! - Oxford
-
I tried to make a miter box and use a hand saw, but I wasn't comfortable with the accuracy of my measurements (I might have been being overly picky, but at the rate I get to work on this hobby... I didn't want to get it wrong and find out much later).... so between buying the stew mac miter box and 25.5" template, or the fretting saw blade and template.... I'm thinking the 5 minutes per fret board thing might be realllly nice, let alone cheaper than the miter box. Is anyone using a router approach to fret slots, or does most everyone else use a manual fret saw? @Skyjerk I see you are a fellow Chester County Pennsylvanian!
-
Has anybody used the Stew Mac fretting saw blade for the table saw? It gets mostly good reviews on the website but there are some saying the tolerance on the saw is not so great?? Thoughts?
-
This is the result of my first build. I spent years (probably close to 15 years) wanting to build a guitar and would occasionally ask for various components. Finally, a buddy's woodworking shop allowed me the use of some power tools (bandsaw, planer, etc), that I otherwise would not have had access too. Originally was going to be all poplar that I would paint, but he had a scrap piece of walnut with some figuring in it he gave me. This was the end result. Design was inspired by a Hembry bass I saw searching Iceman images on Google. Top countours were hand carved using an Ibex finger plane. Also decided to give Inlay a try. I figured if I were to ever have a custom guitar side business, I'd call it Stone Heart Beating custom guitars... Hence the inlay, and the name: SHB-1 Name: SHB-1 Neck: Carvin BN-1, Truss Rod Cover: Walnut with Custom Inlay using Cherry and synthetic stone Body: Poplar back with Walnut cap Finish: Minwax Poly Wipe On Pickups: Dimarzio Liquifire and Dimarzio CrunchLab; 3 way toggle with coil tap It is a pretty heavy guitar, but ended up perfectly balanced when on a strap (doesn't nose dive or pull the neck up). Sounds fantastic, plays fantastic... extremely happy with the results of my first build, and on my way for #2. Thank you to many of you who provided information (whether you knew it or not) that helped me actually accomplish a 15 yr. dream.


-
Gorgeous fretboard material - bad tearout
hittitewarrior replied to hittitewarrior's topic in Solidbody Guitar and Bass Chat
I never would have thought of the structural component, and the forces it would take from the truss rod. Thank you all for the comments to that effect. I'll try laminating it (I have a bunch of less interesting, but straight grained, cocobolo) and see if the defects come out when I sand this piece down. Really helpful! Thanks! -
Gorgeous fretboard material - bad tearout
hittitewarrior replied to hittitewarrior's topic in Solidbody Guitar and Bass Chat
Thanks for the thoughts. ScottR, it is right around .26" thick. If using a sanding block to fix it, I'm assuming I should just cut the fret slots into it first, and then radius it (hopefully removing the defects during radiusing)? I'd be afraid of mounting it to the neck only to have it unable to be fixed. -
I haven't posted in awhile, been through a move, kids started school... life. But - am in the process of building guitar #2. First guitar, I bought a Carvin neck pre-made... for the second one, I'm going to give a shot at making it. I found some very pretty Cocobolo in the "scrap" bin at the local hardwood place which they gave to me for a song, and when I cut it up into fretboard width material, I found the piece in the pictures. I'd really like to use this for the tele I'm building, but I think the tearout may be too deep to come out in sanding (while keeping the board thick enough). I'm curious what you all have done in the past, should something like this happen? I'm thinking my options are: 1) Try planing/sanidng it down to get the tearout out. Planer would risk more tearout, but sanding/scraping could get there with a lot of work. I'd have to double check thickness afterwards and see what I get. Risk is it isn't quite thick enough... 2) Get creative with inlay and try to put something where the larger aggressors are. 3) Fill with cocobolo dust + glue? Epoxy? etc.? Thoughts?