


Guitaraxz
-
Posts
117 -
Joined
-
Last visited
-
Days Won
4
Content Type
Profiles
News and Information
Tutorials
Product Reviews
Supplier Listings
Articles
Guitar Of The Month
Links and Resources
Forums
Gallery
Downloads
Posts posted by Guitaraxz
-
-
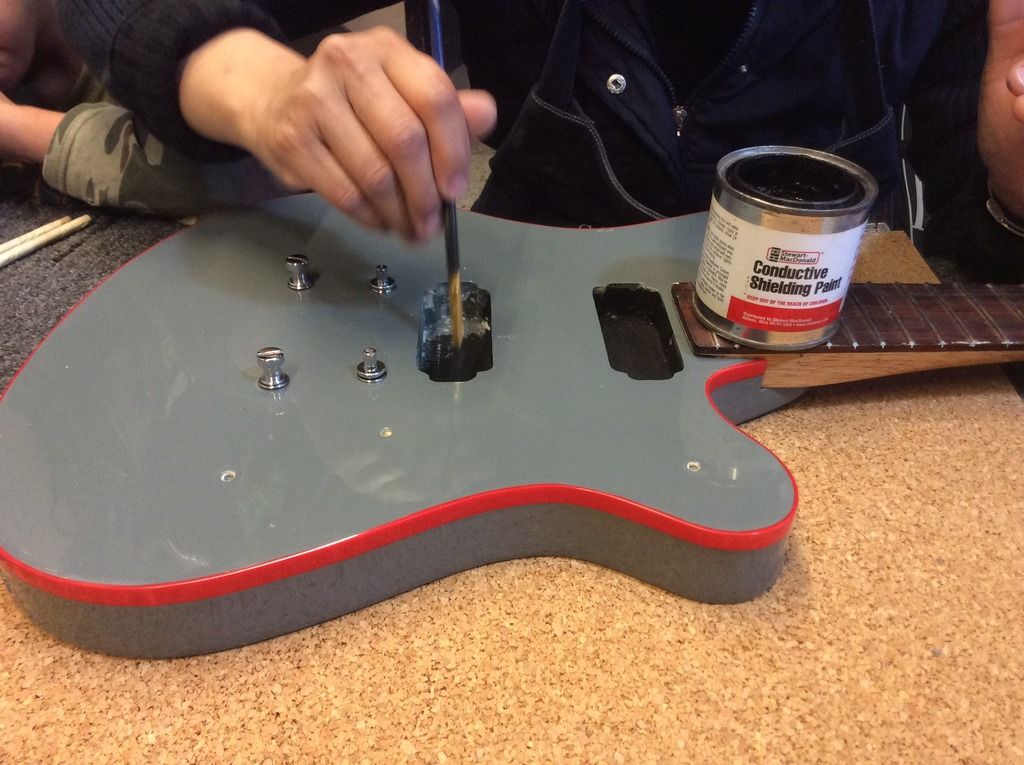
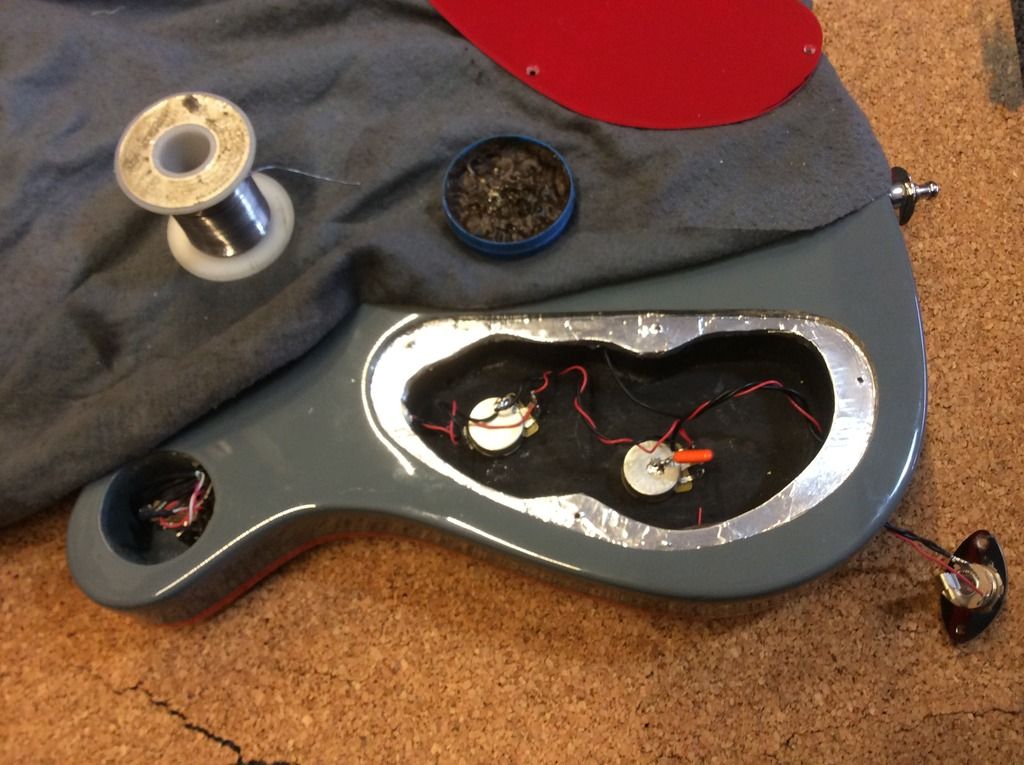
Did some shielding
-
On 26 de febrero de 2016 at 9:07 PM, demonx said:
It's part of this facility:

That is one incredible set-up!
-
On 26 de febrero de 2016 at 11:13 AM, killemall8 said:
Ive found its a lot easier to cut the headstock shape and neck taper before you glue the fretboard on. Then glue it on full sized and trim it to the neck taper. That way the fretboard isnt in the way when you try to rout the headstock to shape.
Thankyou Killenall8! I'll try that on the next guitar.
-
Day's 5 & 6
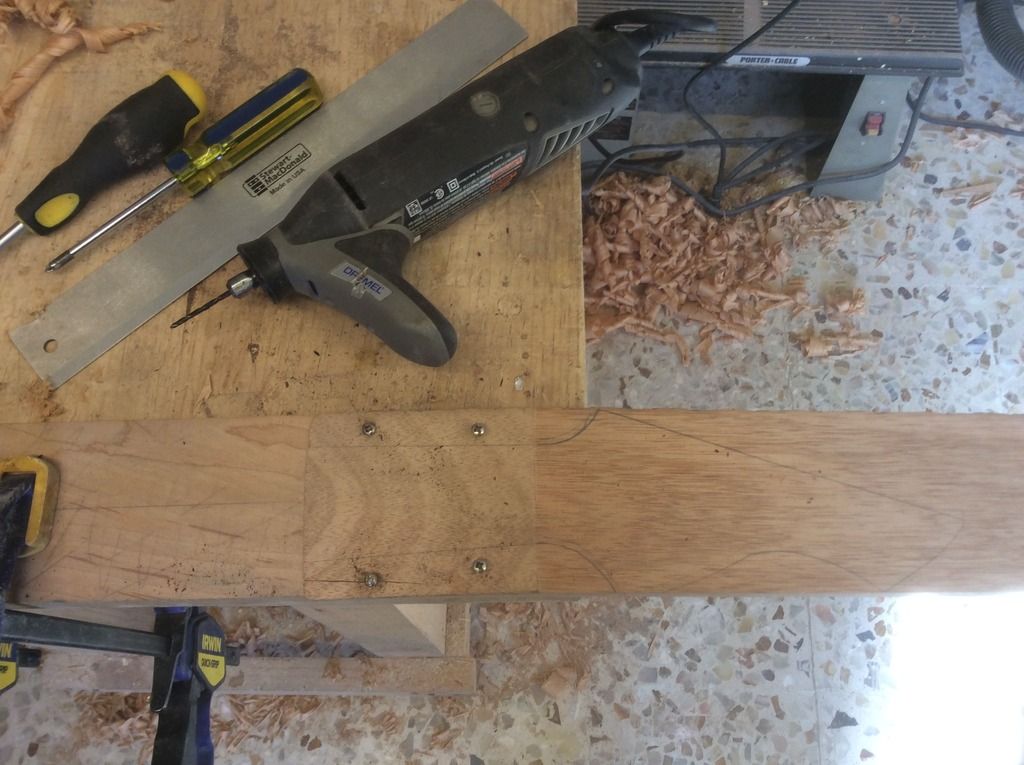
Started with the headstock, first I put on the rollernut to measue where the strings will go, and drilled the tuner holes.

Drew up the headstock and started rough cutting


Put on a Fender neck template & went on with the router


I went too fast since I wish to finish it by the 12th of March (I don't think this will happen) and got a nasty tearout

So I lost time and had to cut it out with a Dremel

Glued on a peice of wood

And cut it in to shape

A whole day lost because I rushed! dumb dumb dumb.......
-Raxz
-
I would sugest to sand down the finish, let the blue in the grain, and refiinish it with a lighter blue. That would make the flame stand out. Then redo the bevel, this would make the blue/white/mahogany stand out too.
-R
-
Sheesh, where I live we can't find mahogny & maple that nice. There are 2 Home Depot's in this city and all they have is Pine. You can get nice wood in Home Depot over there? You are blessed!
Your build is looking damn good, and I find your bridge very interesting.
-
They sell it right here in Puebla Mexico, I hope to have the right translation into English, it's called "Caoba Blanca" scientifically Swietenia Macrophylla. The so called "Honduras Mahogany" grows all of central america including the lower states of Mexico. At least that's what the wood shop tells me, haha!
I didn't get to see the real tree, just the wood cuts, but I can describe it. Soft, much lighter than dark Mahogany, smelly when you sand it. A kind of stable smell but sweet, I like it but my wife hates it, it is said to be used for some perfumes in Peru. The light shines diferently on it when you turn it, I mean that as you chenge the angle certain shimers of light apear and disapear.
-Raxz
-
Please let us know how that bridge turns out!
You mentioned Custom Humbuckers, who made them?
-
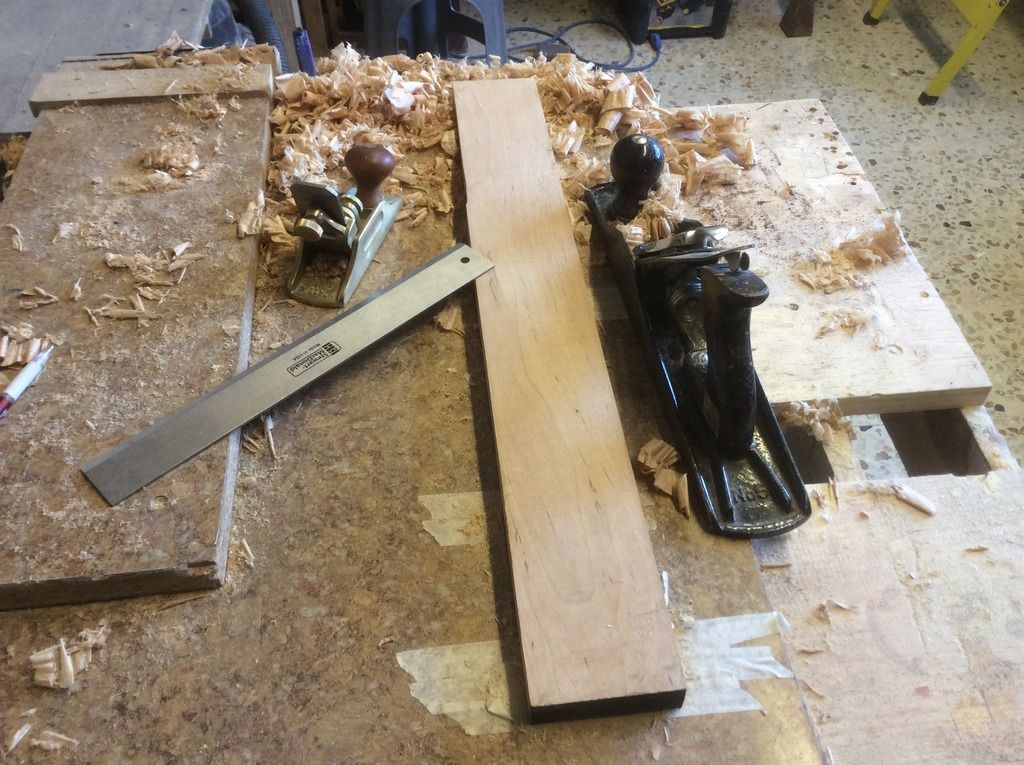
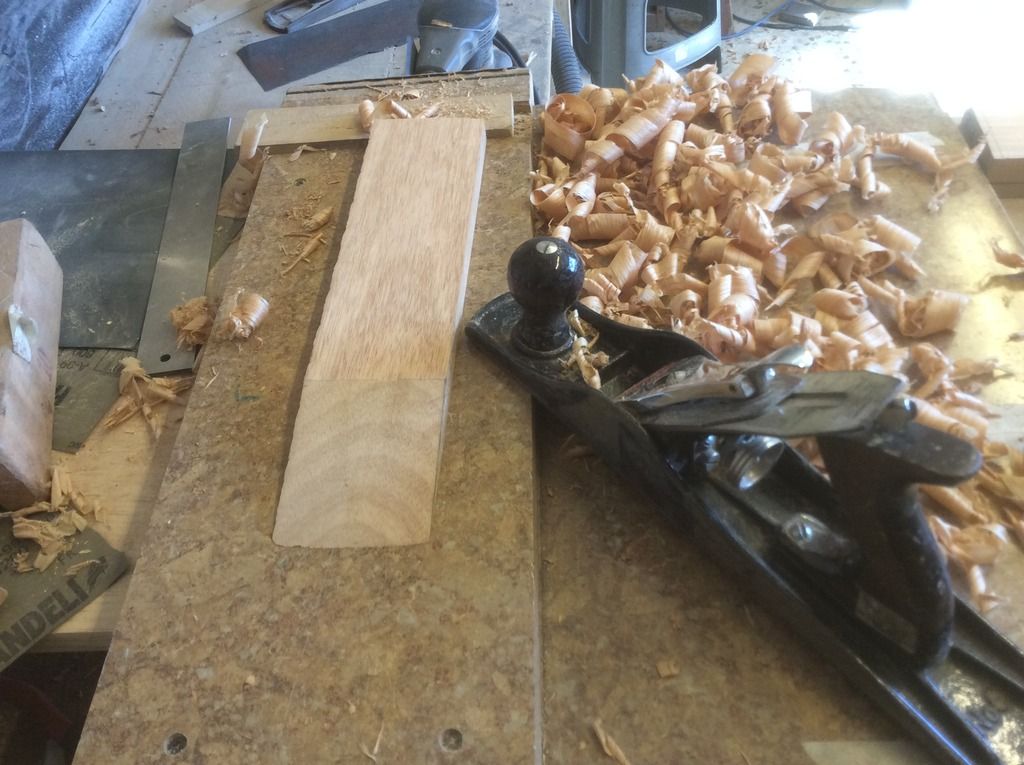
Day 4
Today I worked a bit on the body.
First I thinned it out a bit with the router

Then I used the good ol hand plane to clean out any bit marks

Used a round over bit

A small hand plane and Dragon File to do the arm rest

For the belly cut I used a chisel, file and sanding paper


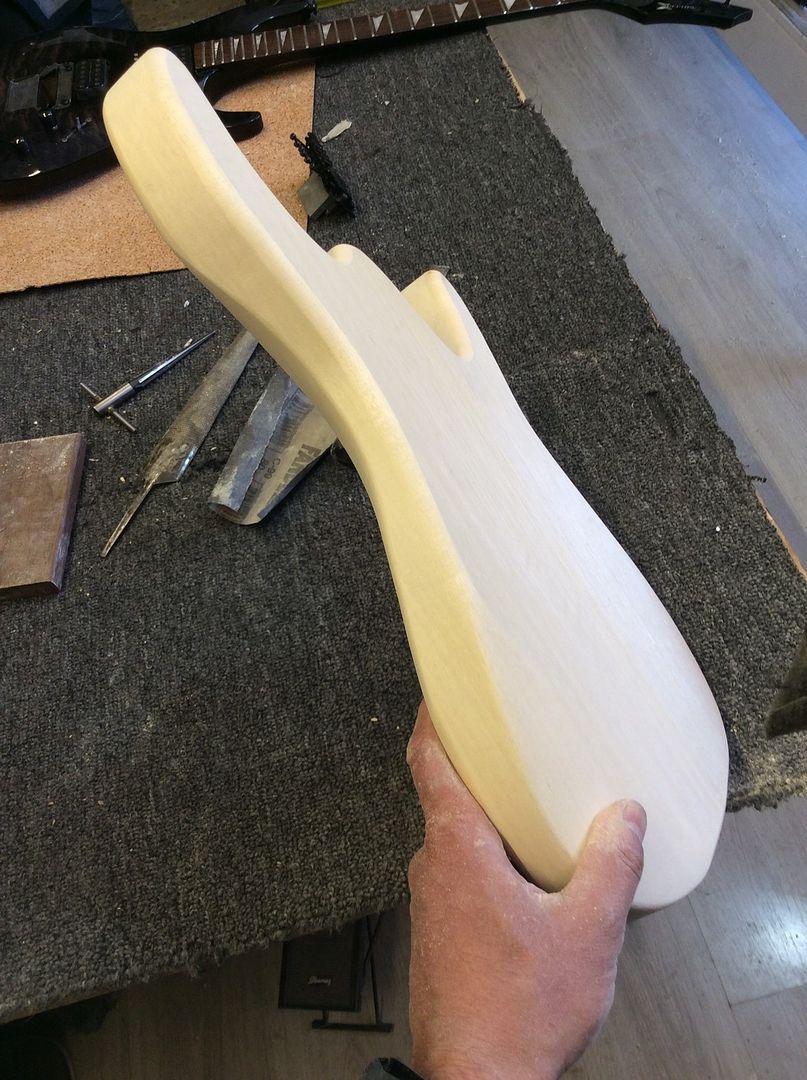
Thanks for looking,
-Raxz
-
 1
1
-
-
On 15/2/2016 at 10:10 AM, ScottR said:
Thanx ScottOooh you've got one of the miter setups with the roller bearings! Nice.
SR
Thanx Scott, but damn I wish i had one of them nice tables where you just slide the fretboard in and finish in 5 min.!
-
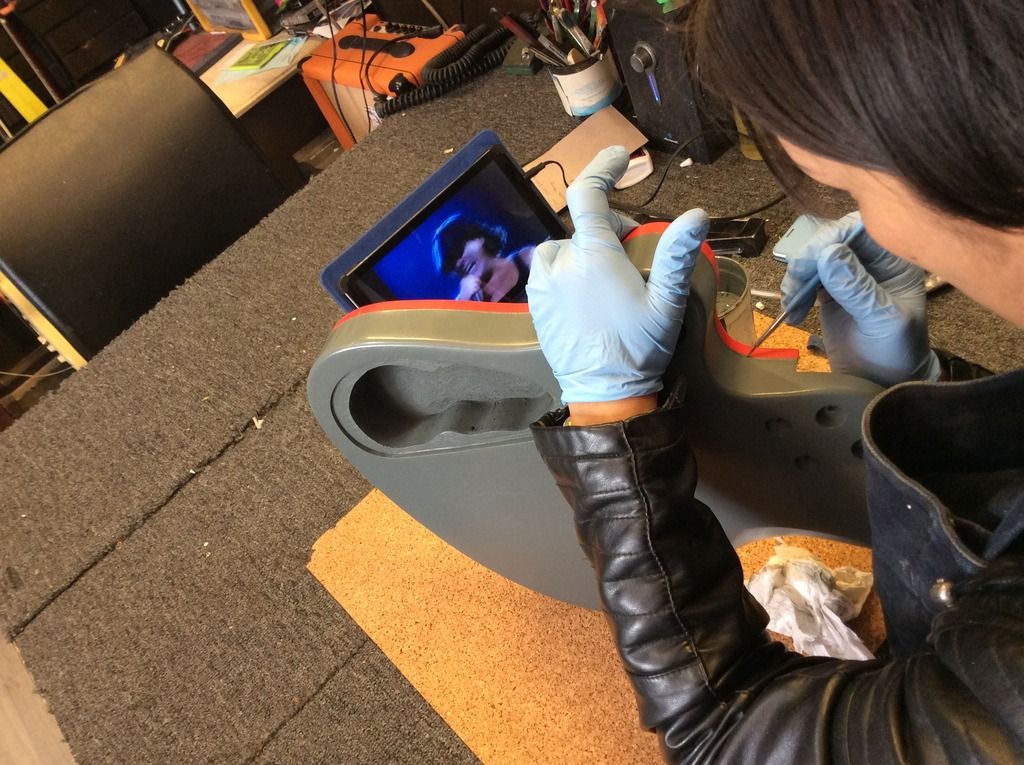
7 String (The 8 string is temporarily on hold, the client sked me to make it a 7 string!)
Peeling of a bit of masking tape

Nancy touches up before sending the ax for some transparent finish
-
Those are some boxes the humbuckers came in! They look superb. What are they, hand made, custom?
Personally I have a collection of pickups, just like some people like guitars some people like pickups. Let us know, let us know!
-
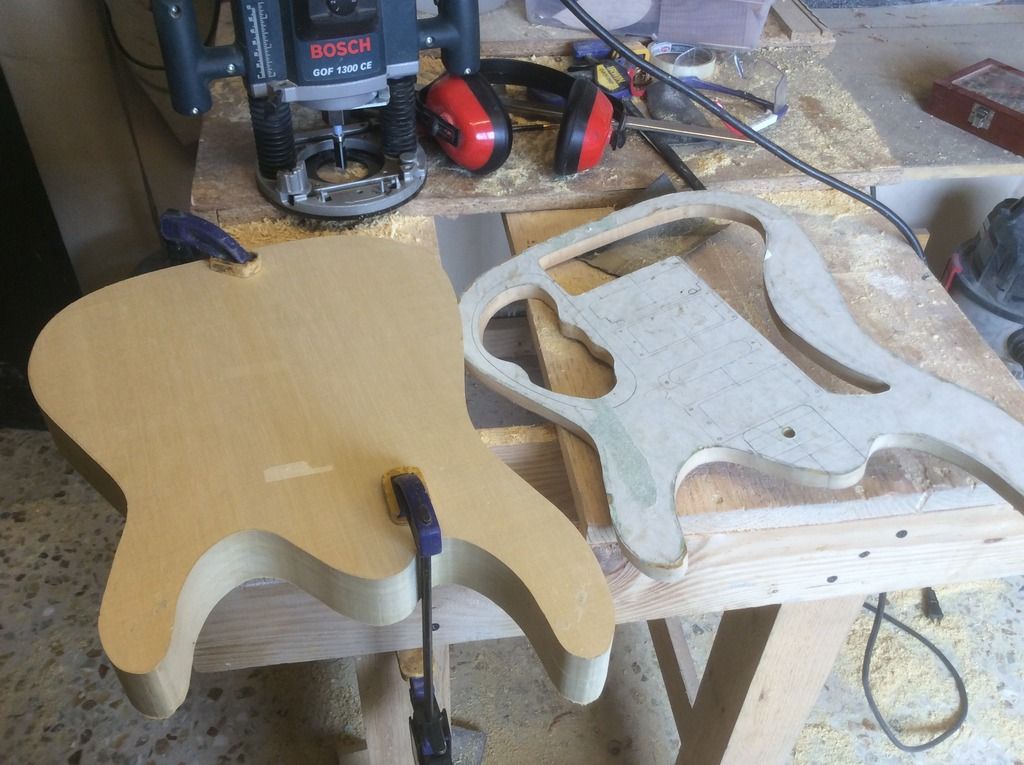
5 hours ago, verhoevenc said:
You have access to a laser cutter!? Screw messing with the neck, re-cut the template with a wider pocket and re-route it. If you have access to that level of accuracy why not take advantage of it. Everything SHOULD line up perfectly again with lasered stuff.
Chris
Yes. I once ran into a similar problem and did exactly that. First I put the neck in, as far as it would go, then stuck on the new template.......That assured me that it was in the right spot. It worked.
-
1
-
-
On 7/2/2016 at 10:01 AM, ScottR said:
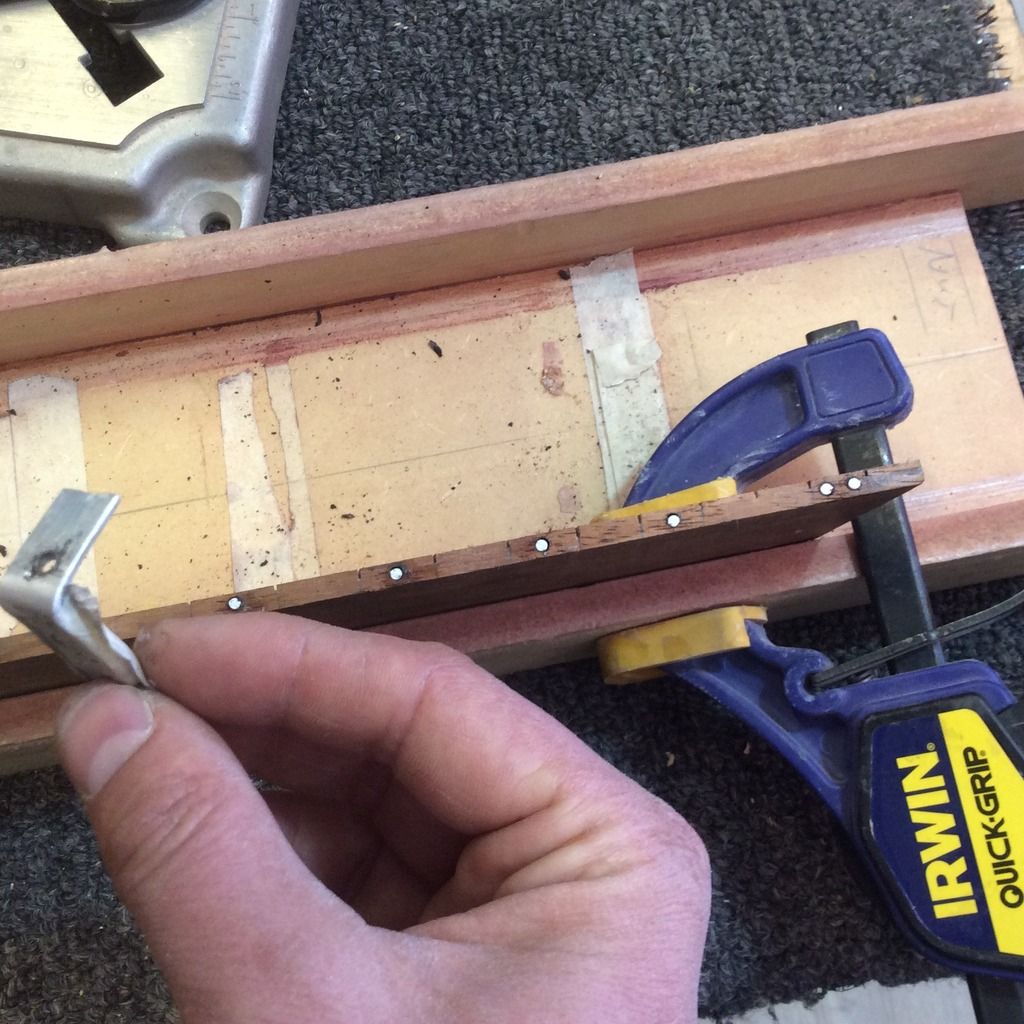
I drilled pilot holes for screws, then glued up, then used the screws to add clamping pressure. I've done the nail thing too.....not sure that it's not better.
SR
I preffered the nails because I put them first to prevent the wood from slipping. I saw that a screw will prevent the clamp from adding pressure while the nail will let the clamp do its work.
However adding the screws after the clamps, as you mentioned, seems like a great idea.
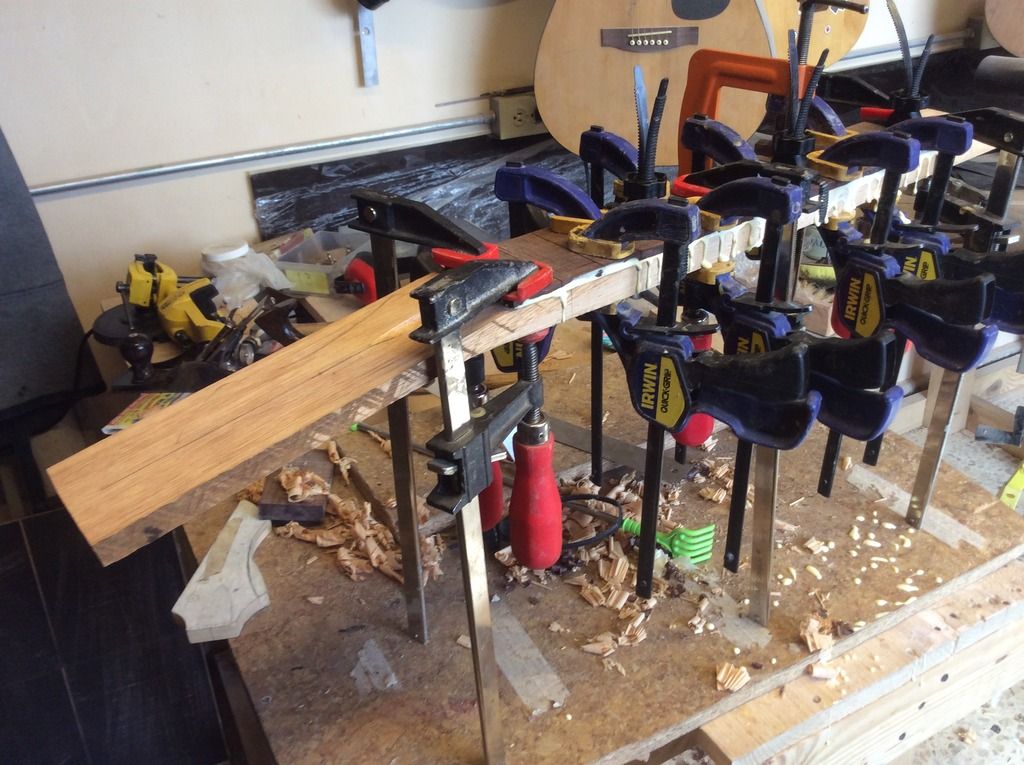
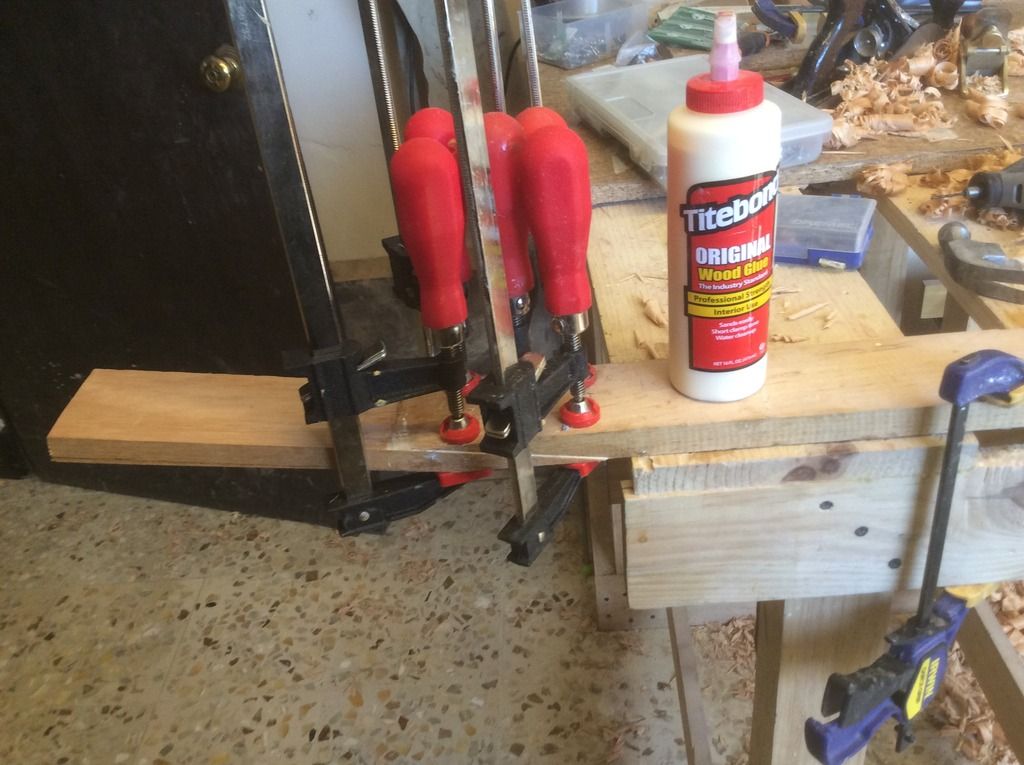
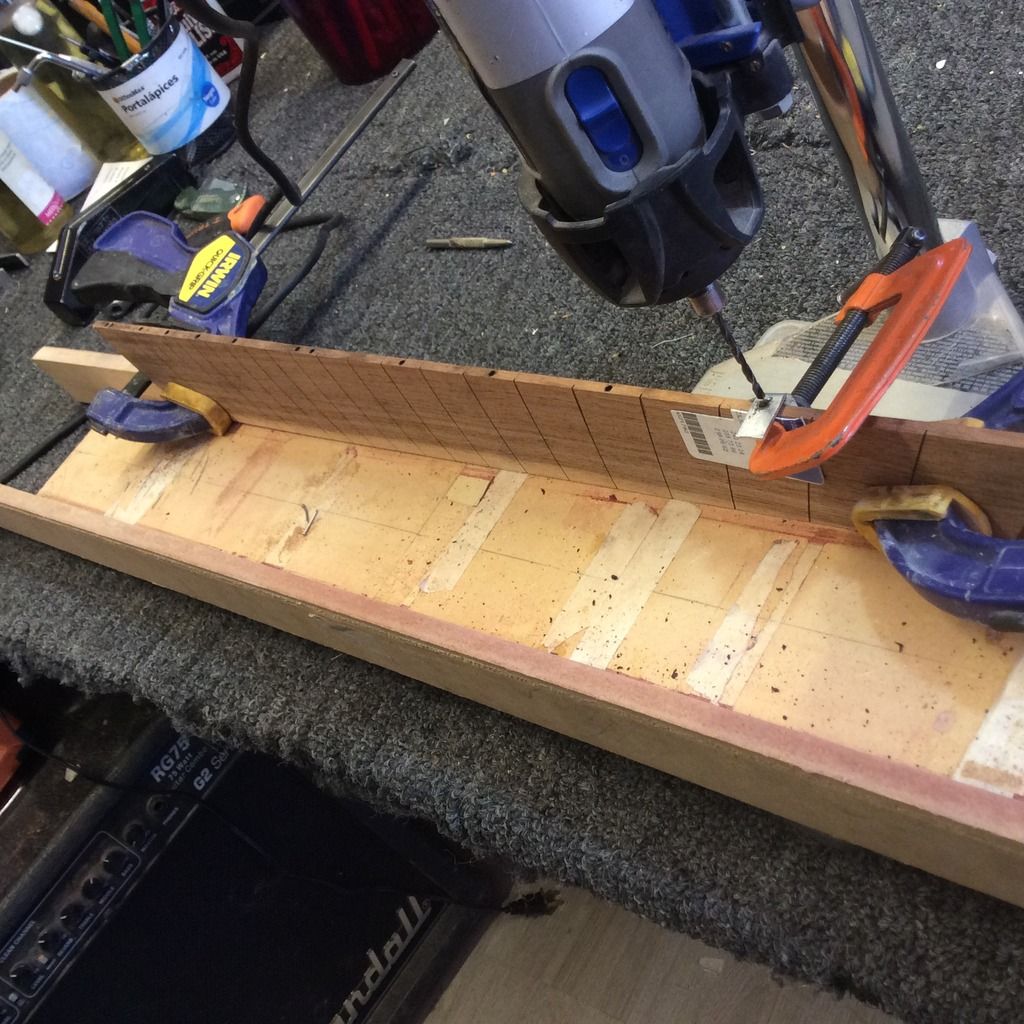
Today, day 3 of the build (alas, they were not consecutive) I cut out the fret slots and glued the fretboard and neck together. Once again nails inside the first and last frets to prevent any slipping.
Pic of using a mitter & japanese saw
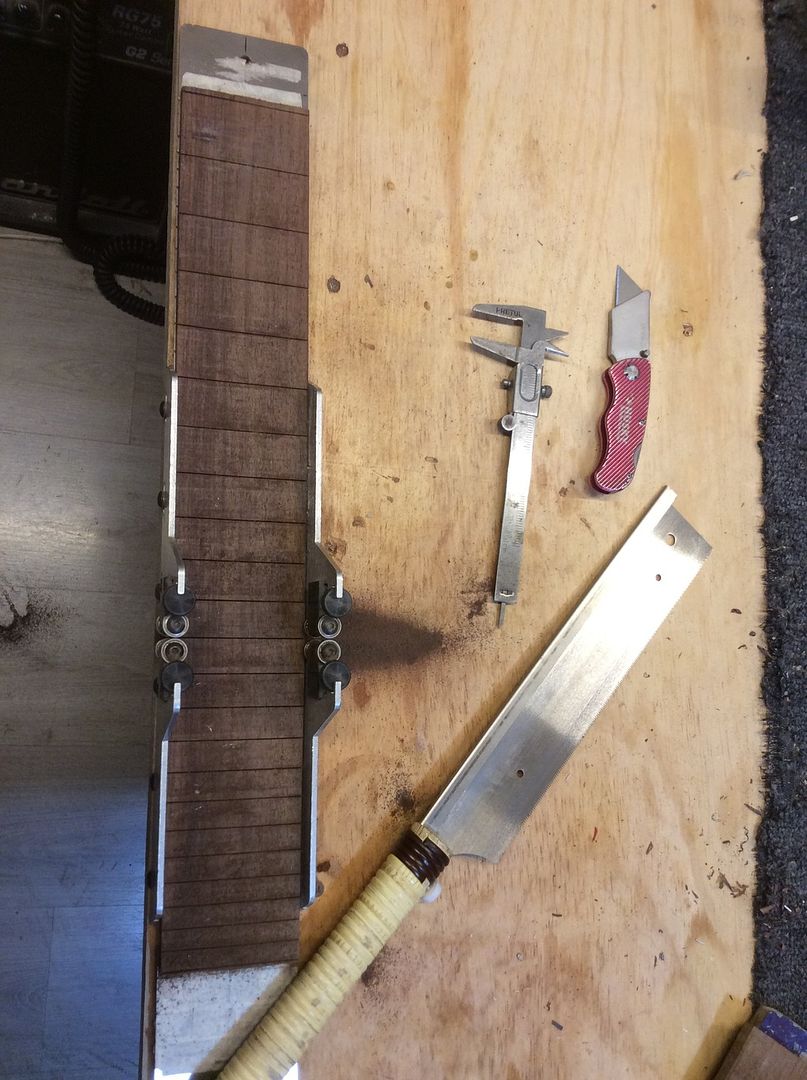
cutting out the trussrod slot with a desk router
I spread silicon on the trussrod (not on the neck, I tried that once, because then the rod wouldn,t fit), and hammered it in. nice and tight.
Clamped the fretboard on, with Titebond, ofcourse.
Thanks for watching!
-
Yeah, I remember seeing your Tomato in the GOTM, yours and Scots' were absolutelly awsome.
I relly like the miminalism yet carefull detail on the multiscale, going from a normal length to a smaller one seems like the right direction in standard tuning. To me atleast.
-
IMO, two humbuckers, zebra, and no pickguard (or maybe a transparent, ala Gretch, one) is the coolest look for that guitar.
-
I like that jig idea!
-
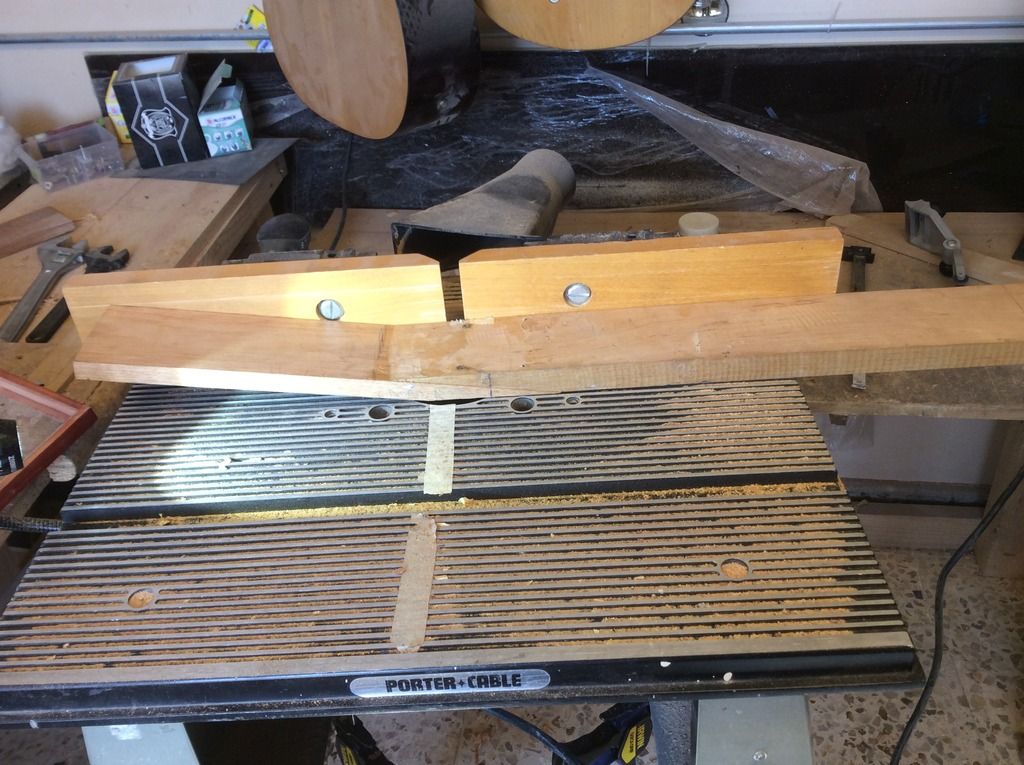
Day 2,
Preparing the neck, took 1 peice of maple, one peice of Caobilla.
First step was planing out the faces, just took photos of one blank (same process for both). To hold it down I used masking tape, on both table and blank, and placed crazy glue inbetween.

Then used a Stanley Wood Plane #5
An MDF jig is used to plan out the angle for the scarf joint..
First Wood Plane then sand paper.
Once the Neck is done I thined out the Head Stock to 1.5 mm, I'd rather do this now than after glueing.
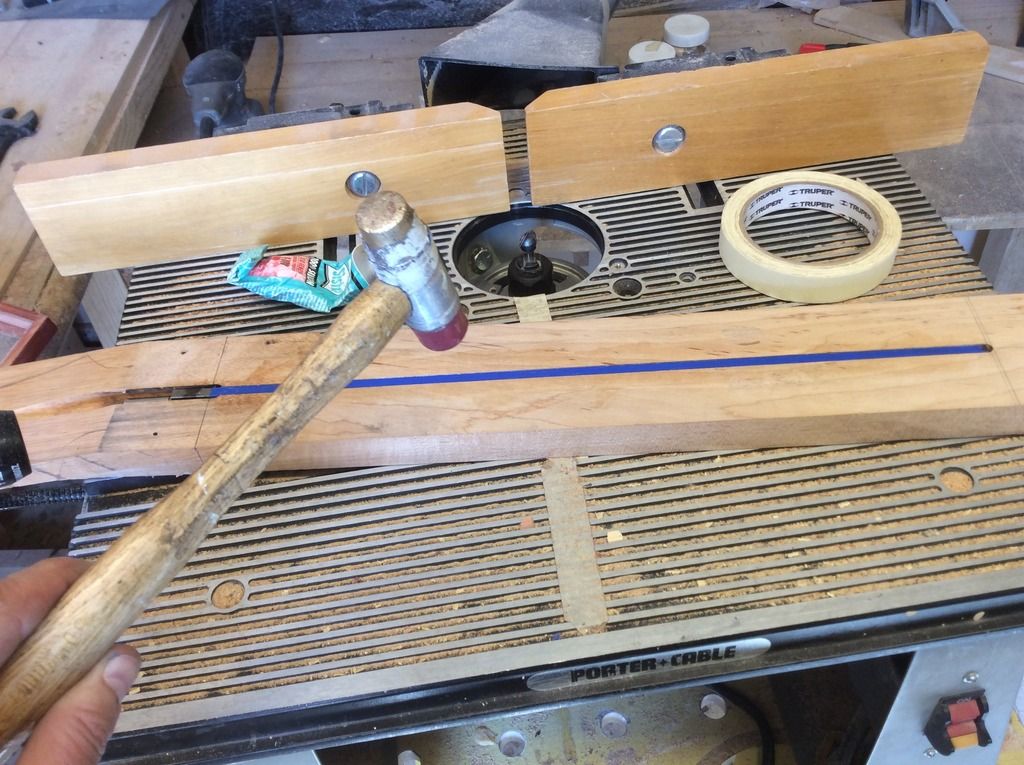
Today I tried a new method to keep the scarf joint from slipping when glueing. I drew out the neck & head stock and outside of the line and placed some screws, since this area will be cut away.
Using screws was wrong! Luckilly I realised it before glueing; use NAILS not screws, this will work better with the clamps. No pic, but that's what I did..
-
1
-
-
Nice guitar, very clean wiring, and I really like the elegant dots on the fretboard.
-
1
-
-
There are no diagrams to follow exept the images in my mind, so I'll just post the process and write down the materials used as we move along....
First a nice big peice of Korina, no need to joint it, just draw the Strat shape untop
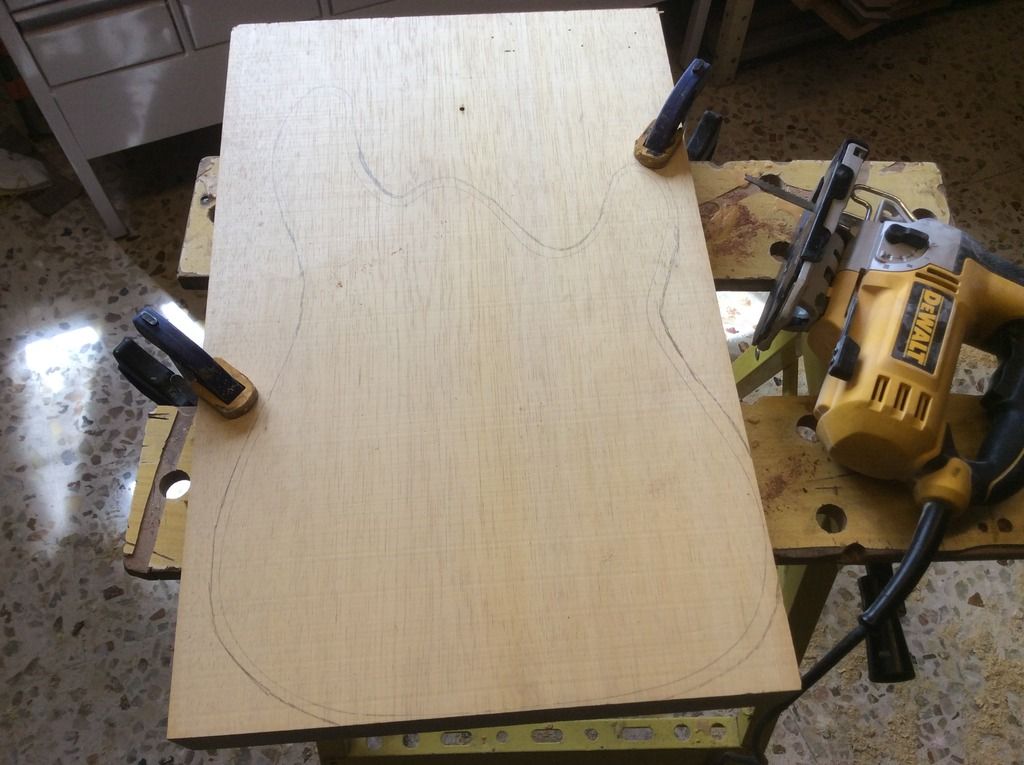
Rough cut with a Jigsaw

Used a template to rout out the basic shape
Thanks for watching,
-Raxz
-
7 hours ago, Norris said:
That's a neat little jig. I like that idea
It needs to be perfected, the base was too small so the jig had a tendency to shift, next time I'll make it with a wider base. With base I mean the flat part which laches on to the back of the fretboard, it needs to be wider with 2 bolts to latch ln correctly.
-
Yeah, carving is the best part! The problem is that when you're finished its's time to sand and sand and sand .........hehe.
-
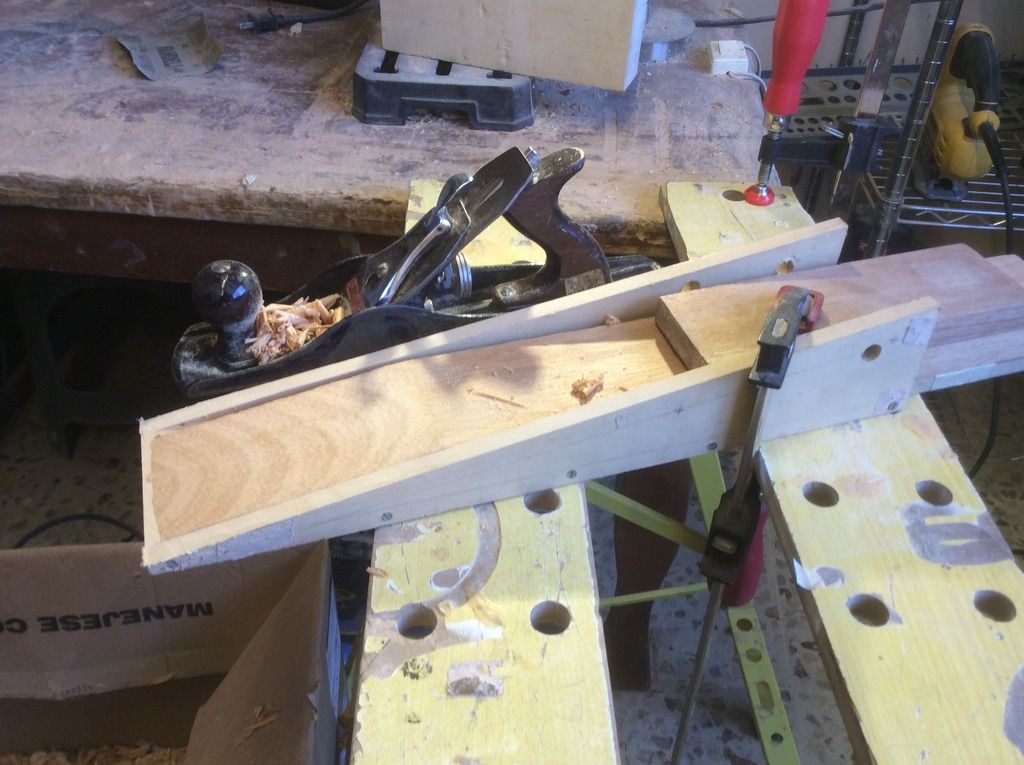
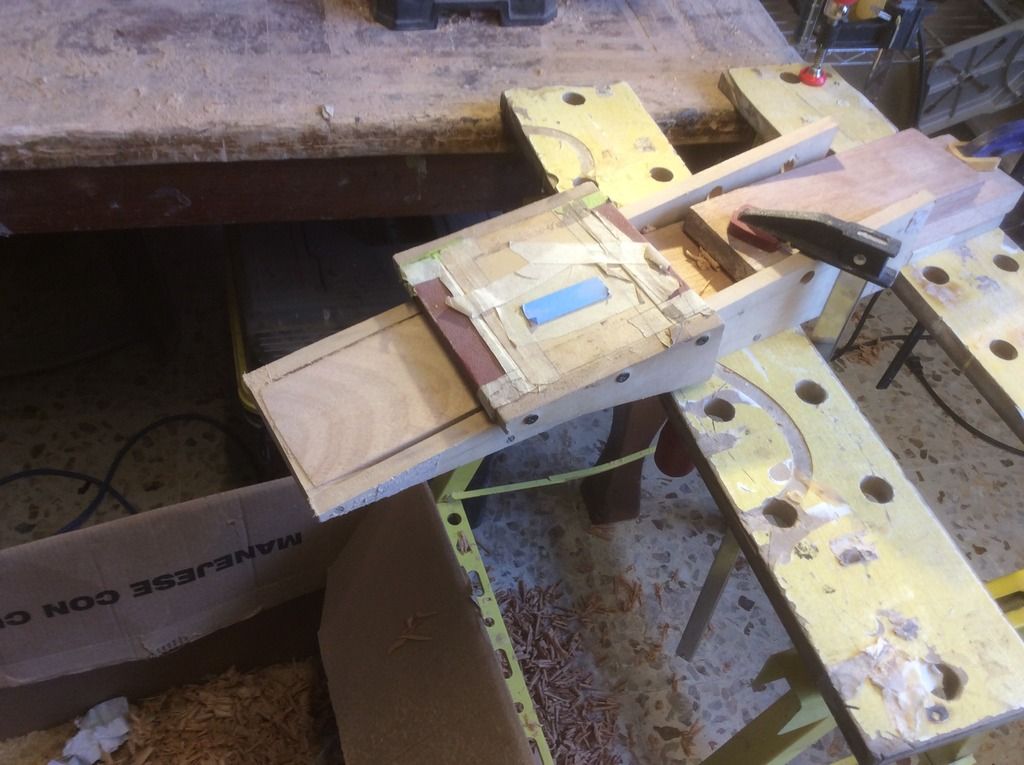
Today I put in the side dots on the fretboard. I came up with a little "jig" to keep the dots in line, it worked pretty well yet any pics of your system are welcome.
Here is a side view of how I hold the tiny "jig" (if we can call it that)
A close up to the "jig", it's just a small pecie of aluminium with a hole (same bit used for side dots). I clamp it to the fretboard which will keep the bit from wandering.
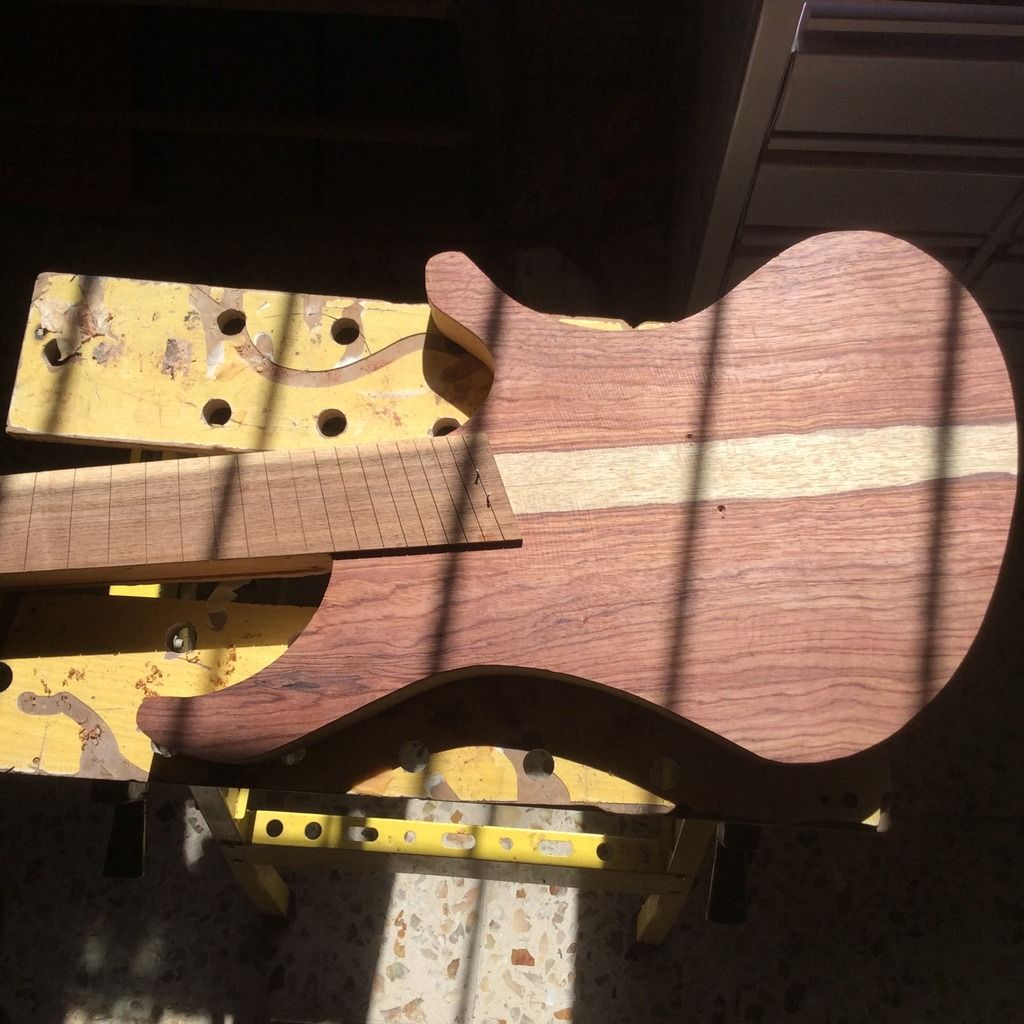
And a dry fit to the body to check it's the right size.
-
On 1/2/2016 at 2:18 PM, Prostheta said:
Sweet. I didn't realise it was an INCRA product! Their gear absolutely rocks. I just wish I could afford more of it.

Yeah, they have great stuff. This lamp aint expensive, just 28 bucks, it's battery powered and holds on with a magnet. All I did is screw on a peice of metal on the template, I then atach the lamp when needed.


7 & 8 string axe's
in In Progress and Finished Work
Posted
The 7 string all done