


Sancho Marino
-
Posts
202 -
Joined
-
Last visited
-
Days Won
7
Content Type
Profiles
News and Information
Tutorials
Product Reviews
Supplier Listings
Articles
Guitar Of The Month
Links and Resources
Forums
Gallery
Downloads
Posts posted by Sancho Marino
-
-
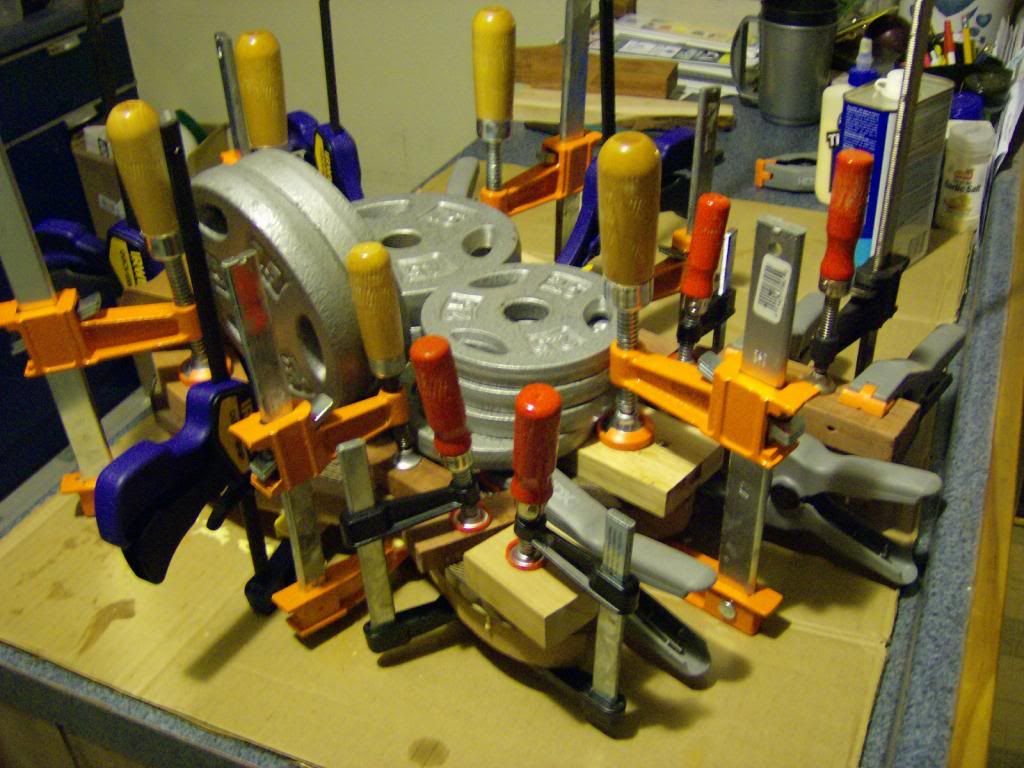
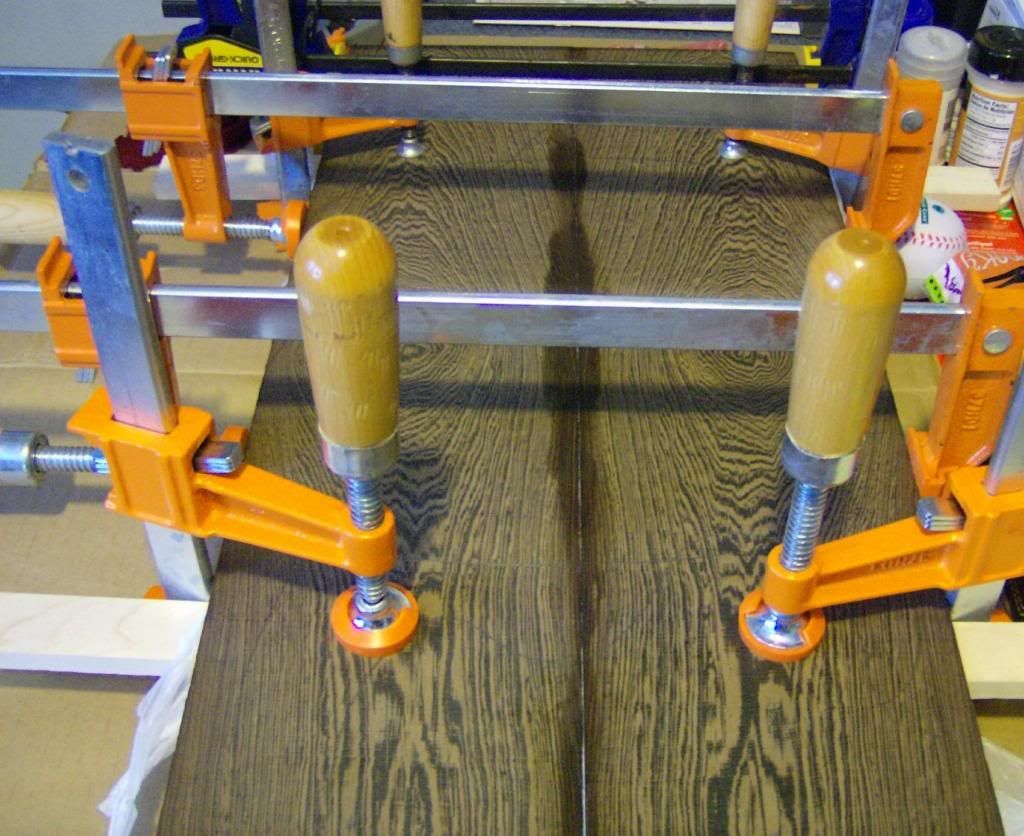
Out of the clamps this morning and sanded to rough shape... Going to flatten the top next.
I love a good glue join

-
Should look pretty damn cool after the touchups man, nice work so far!
-
That's a slick looking axe man... Love this thread too tons of great info, thanks!
-
Oh wow luckily no septic wounds yet

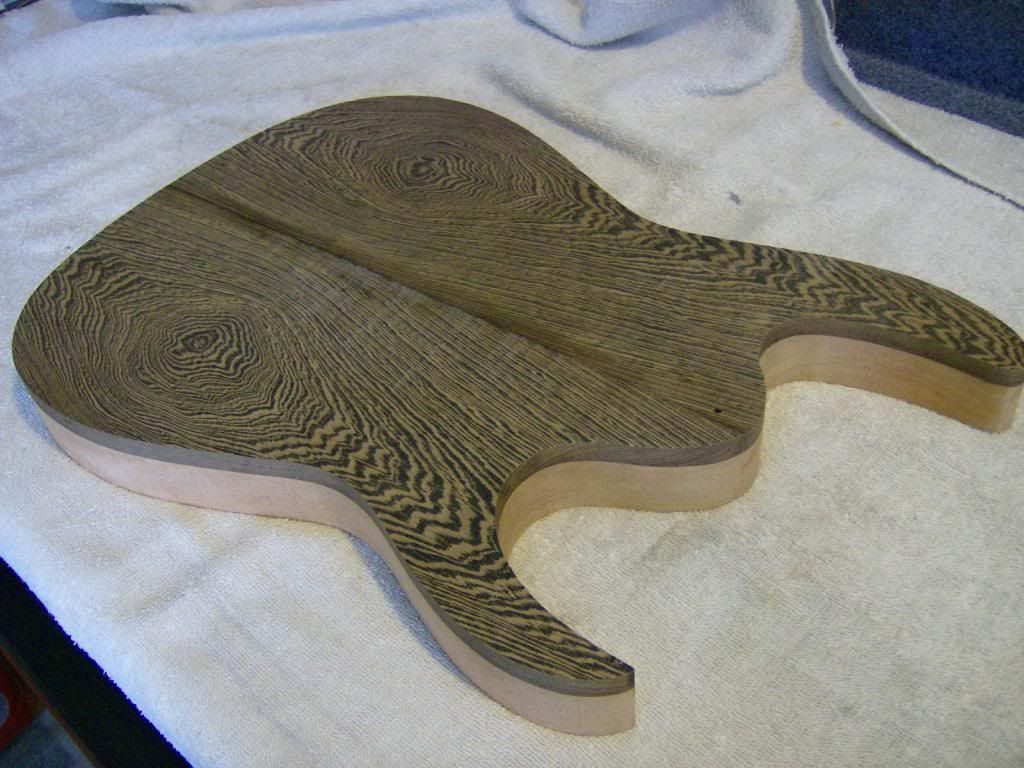
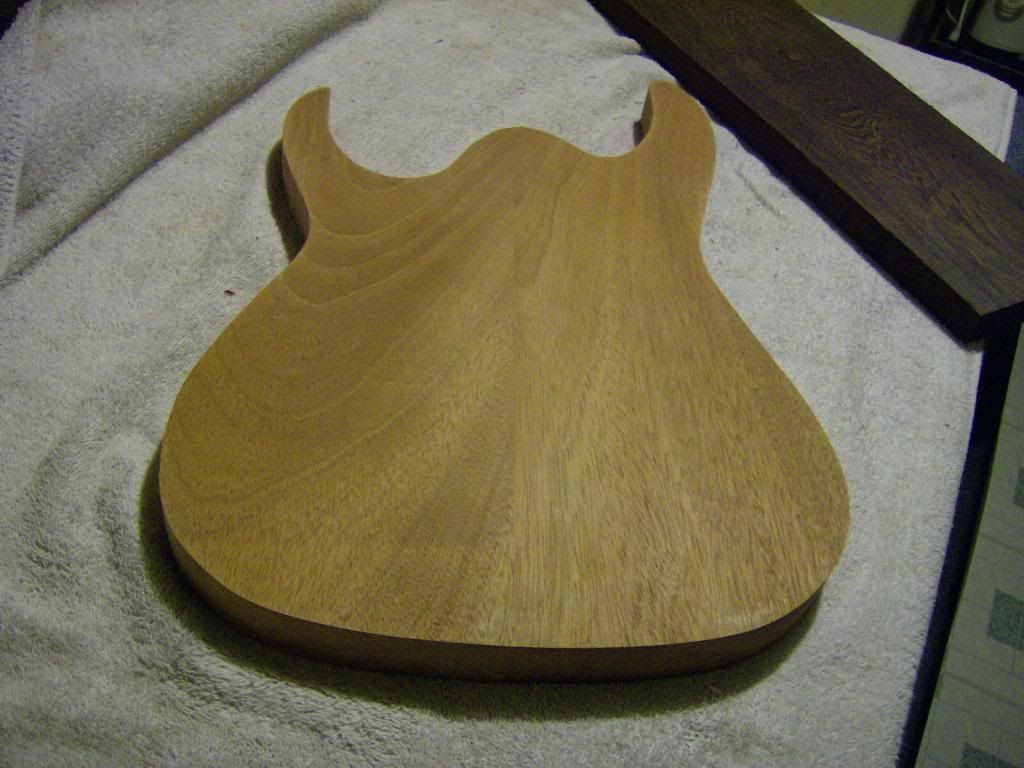
I got the top cut out, trued up, and glued on today. Since it likes to splinter so easily I made the top a little more oversized than I usually would so if the edges chipped they would be cut off anyway. Both pieces are oversized a bit. I'll trim off some of the excess with a bandsaw, then use my spindle/belt sander to take it down to the final shape...

This is what I use for sanding the two sides flat. A trued up piece of Bubinga and 3M Sandblaster Pro (awesome stuff) 60 grit and it's flat in no time.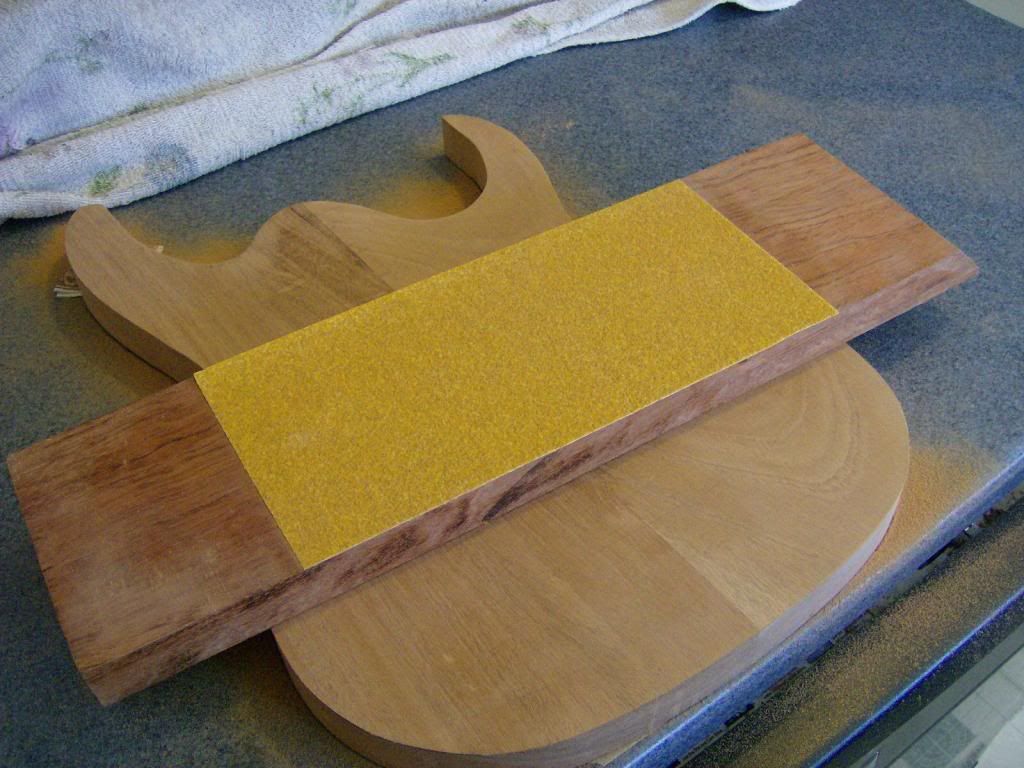
Both sides are trued up and ready to glue up. I clean the surfaces with naptha and let it evaporate off before spreading the glue...

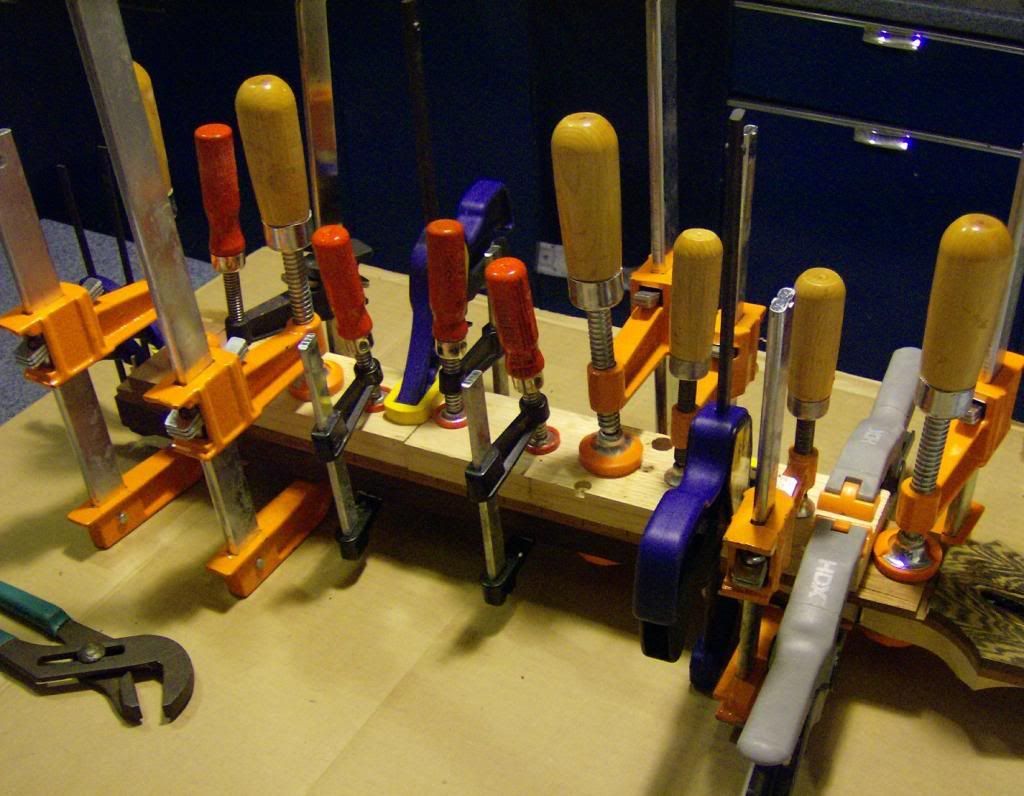
If you want a pro looking glue join you need to use every clamp you own

-
I'm not anywhere near as experienced as Wes, but routing out the initial shelf before radiusing the board has worked well for me on the few replacement boards I've done on a couple of my Ibanez RG's. I adjusted down with a file that's been ground down on the side so that it doesn't cut into the fretboard side... Good method for the mathematically challenged
-
This should be a great looking guitar, nice wood selection
If I don't screw it up it might
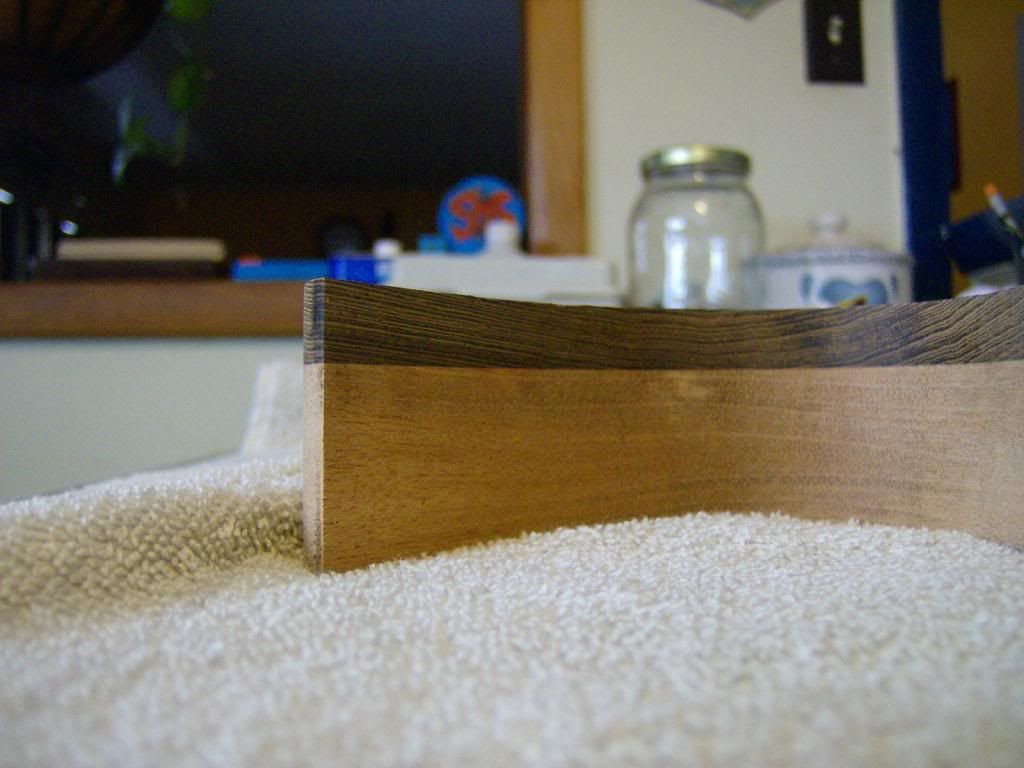
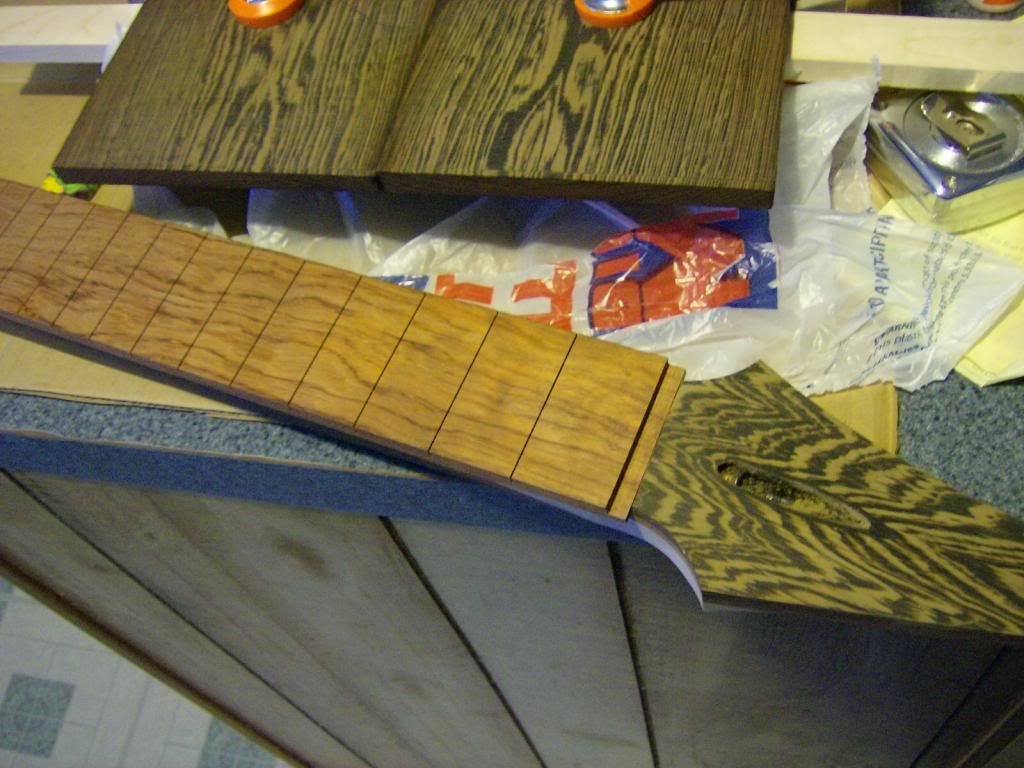
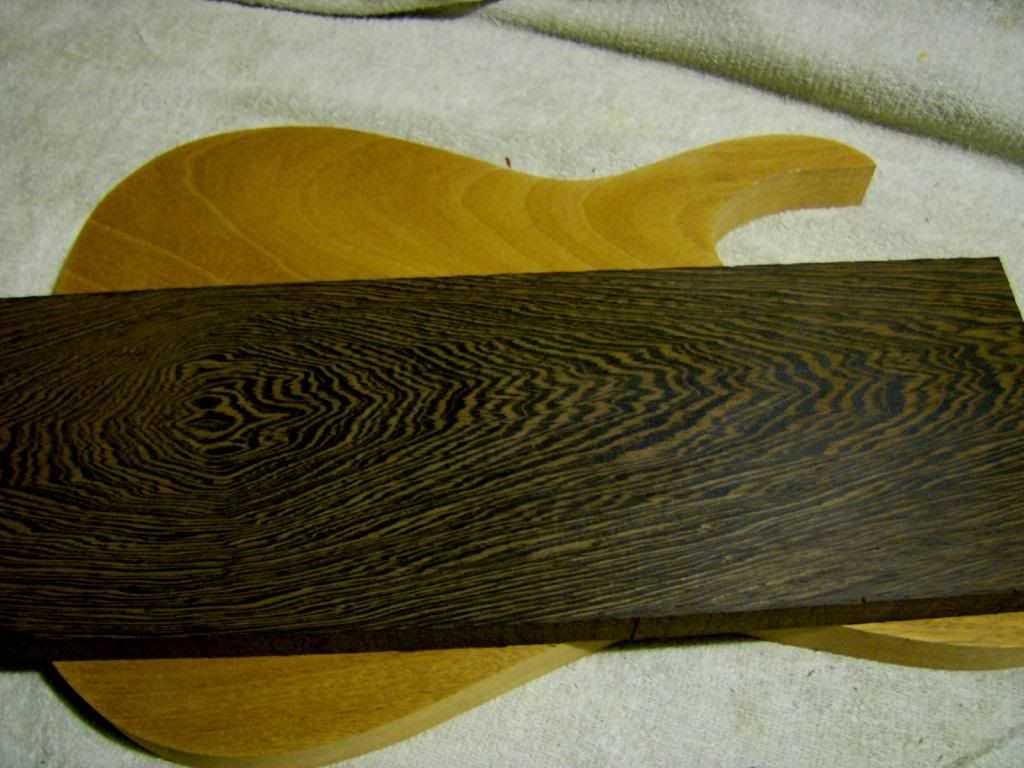
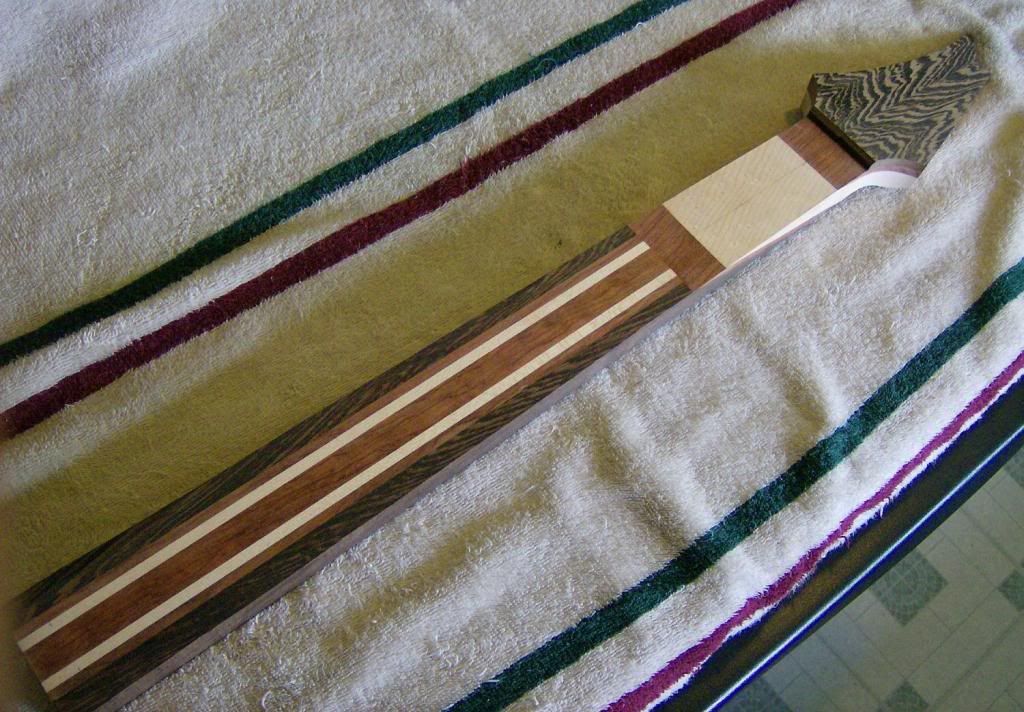
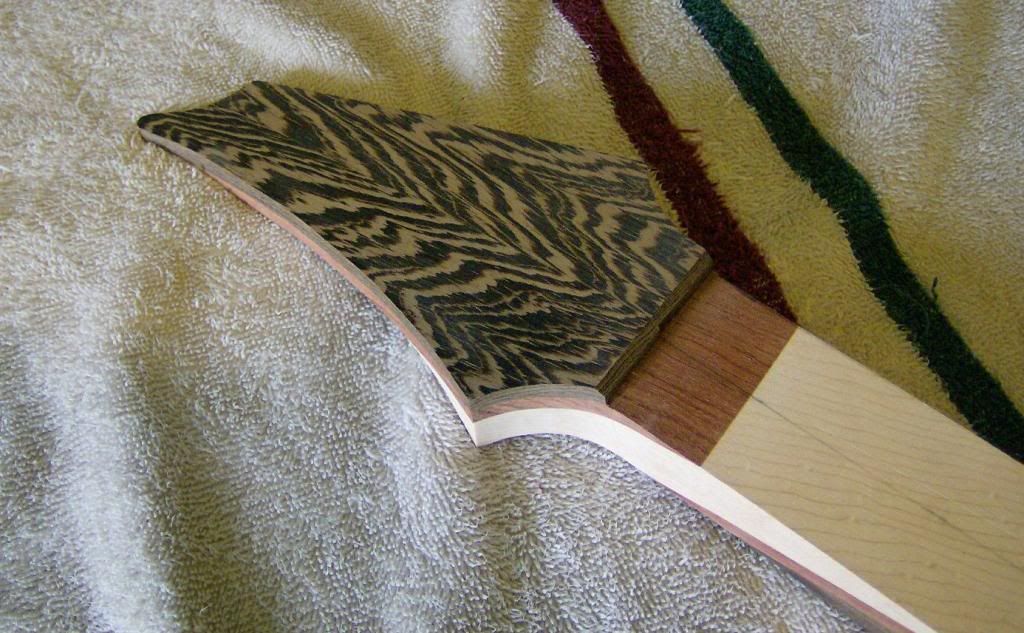
I got the top resawn and glued together, made the fretboard, slotted and glued on the neck. I ran out of clamps so I'll have to wait until tomorrow to glue the top on....
I did learn that Wenge likes to splinter off like crazy. When I drilled the cap for the truss rod it splintered really bad and I had to build it up with CA and Wenge dust. Also it's much easier to route for the truss rod before gluing the cap on... doh!
Any constructive criticism from you guys is more than welcome too

-
Now I like that head plate. That is right in my wheel house.
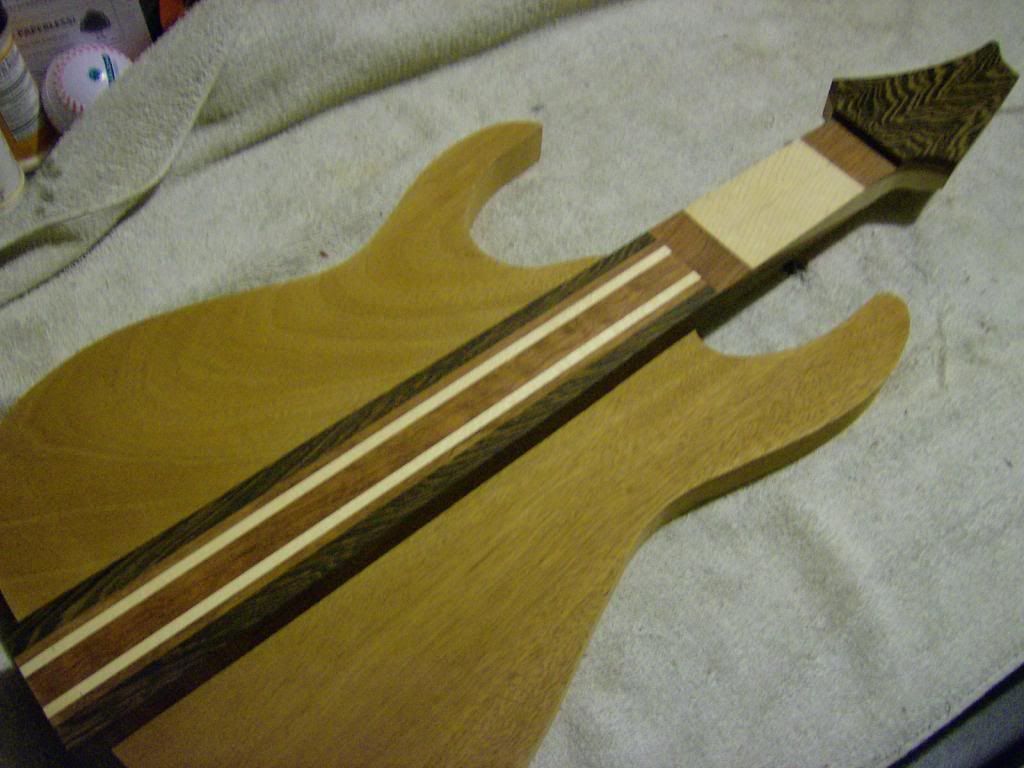
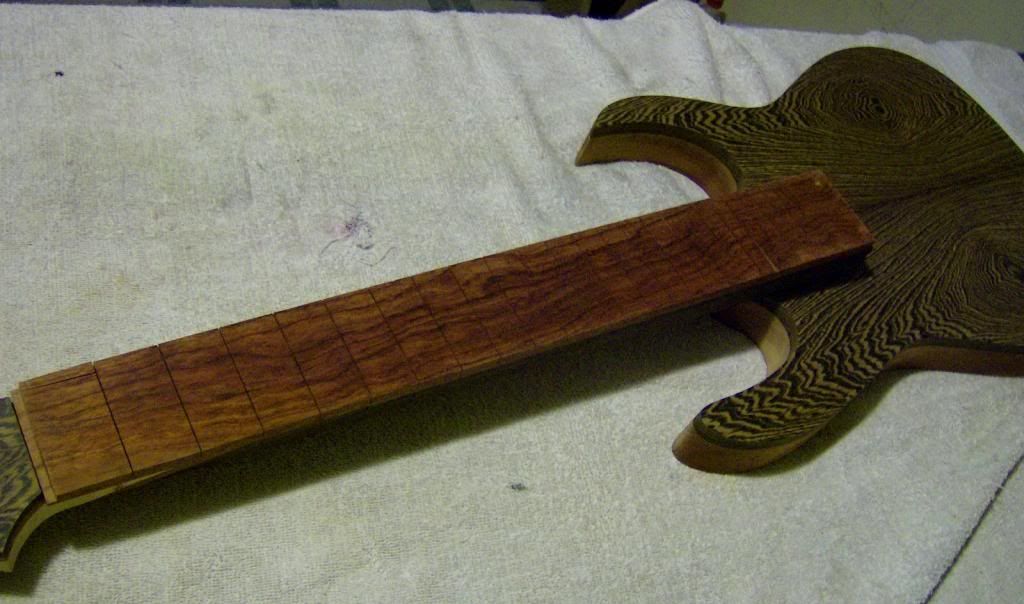
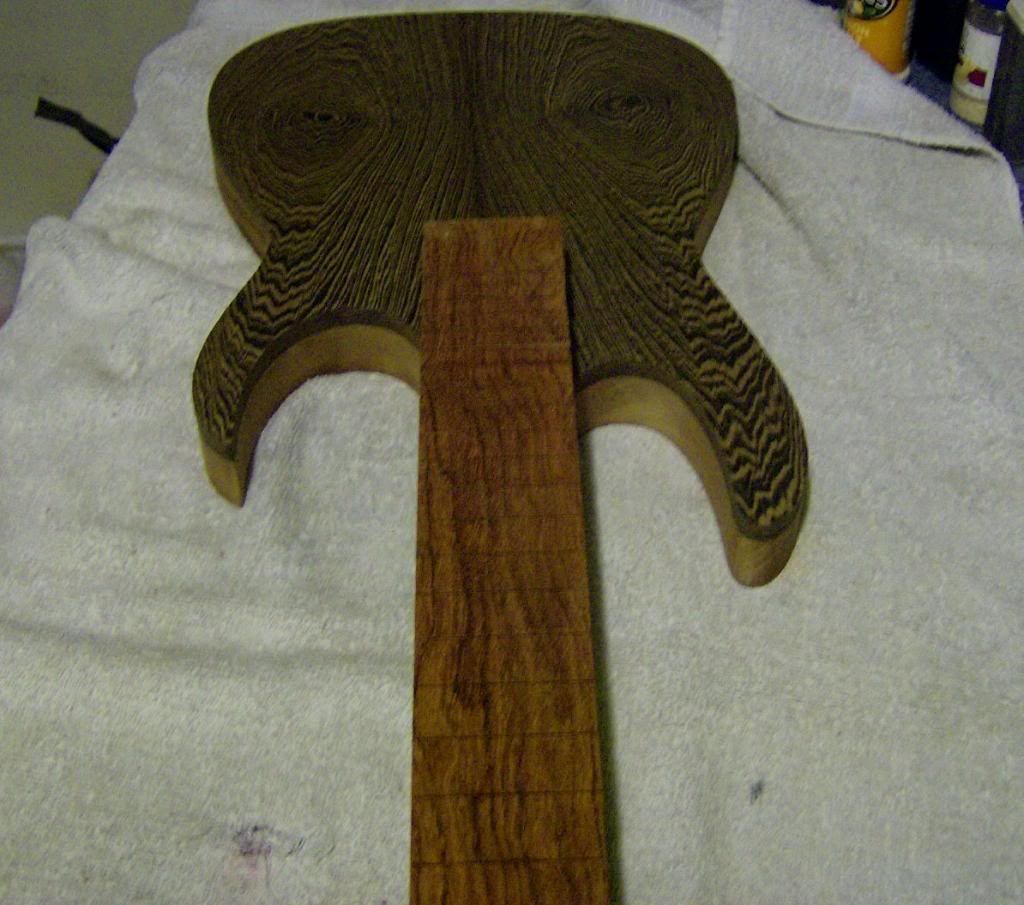
Thanks! I love matching headstocks.... I got the body cut out and ready for the Wenge top. I'm on vacation for the rest of the week so I'm hoping to get a lot done on this project before I go back... Should get the top on, truss rod cavity routed, and fretboard on tomorrow if all goes well...
I like the view from behind already
-
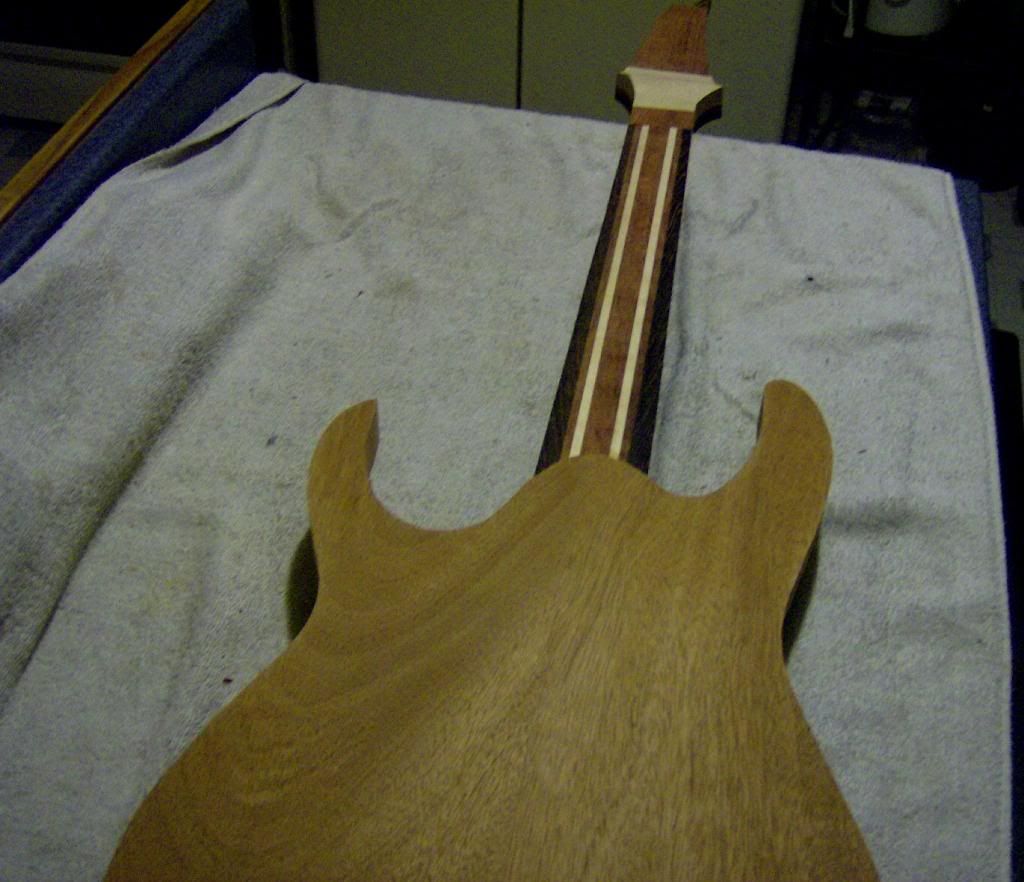
I love it man.. Like Scott said the way the ebony scarf blends into the fretboard looks sweet.
-
Decided it was time to post up my first build thread here after lurking for many months...
I've learned just about everything I know about building guitars from this site so before I go any further I want to thank you all for posting here and sharing your ideas and techniques for all of us noobs!
I've completed a couple builds with varying success. I got two really nice playing guitars out of it, but each of them cosmetically were off a bit... Here's where that's going to change
This build started with some offcuts I had that looked like they would make up a nice looking neck. Some Bubinga, Wenge, and Birdseye clamped up cut up and left to settle for a month or so while I was busy with other projects.
I have a 2-piece Mahogany blank glued up that's going to get a Wenge top shortly... Looking at an Ibanez type Super Strat shape... It's my favorite shape so I'm coping it...
So here's where I'm at with it...
-
For 80's hair metal you can't go wrong with Dimarzio Super Distortion, Evo's, or PAF Pro's... My favorite combos are Evo's neck and bridge, and FRED bridge, PAF Pro neck.... Hair metal all the way, the bridge Evo really screams in Alder, it's not ice picky like it can be in basswood...
Good job on the build so far.. looks to be coming along really nicely
-
Yes very creative man... looking forward to seeing this one play out. I hope you post a little more often now
-
 1
1
-
-
Love the cocobolo on the knife, but "Not the Mama" put it to shame man

NNNNNOT THE MAMA!!!! Talking dinosaurs

-
Branding your logo is a really cool idea... looking forward to seeing how it looks
-
I had to go with Hitone's... Loved everything about it

-
She turned out really sweet man... That carve is very original and pretty ballsy really. The nitro really made the back come alive also. I see you carved so much on the back her crack is showing
Beautiful guitar you've made Scott!!!
-
As long as the end results look like they should I don't see a problem with it at all. As Scott and RAD say, it's just another tool...
-
Oh wow man that bandsaw is wild... I can honestly say the thought of a wooden bandsaw has never crossed my mind
-
If I play just about anything other than an old Wizard profile my hand cramps up in no time at all. The wide flat area on back of the neck fits my problems as good as it gets....
-
"Poking voodoo in the eye"

This is an interesting build... looking forward to watching it come together
-
Very cool Scott... I really like what you did with the controls area, never seen anything like it before very nice!
I hope some day I can be as good a crafter as you

-
Hey Scott... Just got through #3, #4, and now this thread, learning so much my brain hurts man! Tons of great info and some beautiful guitars. Thanks for putting it all out there! Looking forward to seeing the carve on this one
-
I really like the laminated top... that line between the red top and natural back is very sharp. With all the self defeating coments I thought that the end result was going to be a hack job, but they are very nice looking guitars
-
Great thread and I thank you for all the pictures, I'm just starting out with the guitar building and I've learned a lot from this thread!!! Looking forward to some more updates
-
psikoT - This is one of the most beautiful instruments of any kind that I have ever seen. Stunning job my man... Stunning


Wenge Top 7-String Build
in In Progress and Finished Work
Posted · Edited by Sancho Marino
Hey thanks guys! So what would you recommend for a finish over Wenge? I was planning on 2K...
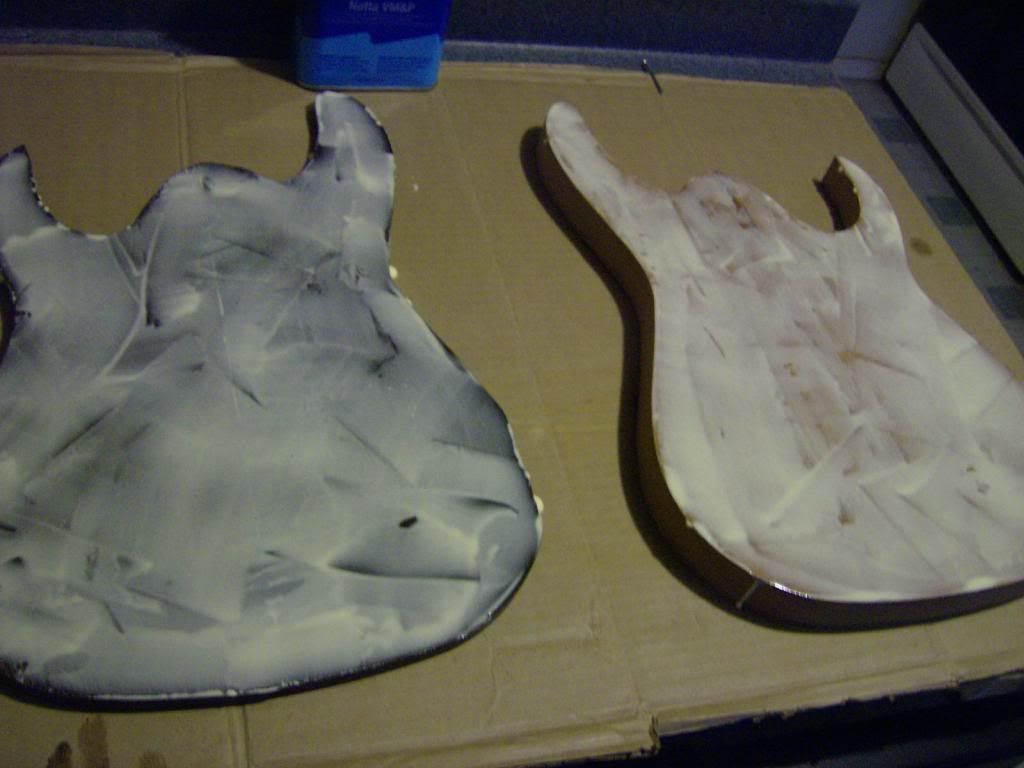
Finished sanding... the top and back are flat and the sides are free of flat spots. Should look pretty nice when it's done...


My favorite part starts tomorrow... Neck shaping