


Stu.
-
Posts
361 -
Joined
-
Last visited
-
Days Won
20
Content Type
Profiles
News and Information
Tutorials
Product Reviews
Supplier Listings
Articles
Guitar Of The Month
Links and Resources
Forums
Gallery
Downloads
Posts posted by Stu.
-
-
It's funny how that happens! The birch definitely looks like a stronger choice and has more character
-
 1
1
-
-
2023 is going to be a good year for PG users and guitars. We're all still here and that's what matters!
-
2
-
-
4 minutes ago, ScottR said:
That's some tasty timbers going into this. Looking forward to it Stu,
SR
Thanks, Scott! Fingers crossed the timber gods are smiling on me
-
1
-
-
I'm enjoying working with obeche so far. It's quite delicate though, so I'm trying my best not to knock it. I also had a tiny bit of tear out in the control cavity, which I patched up and will tidy later. Hopefully I can get the top glued on tomorrow! The plan is to clamp the edges and then put a stack of weighted plates in the middle - I alway forget to try that!

Main cavities routed:

Top rough cut and trimmed down to ~20mm. Still need to get it closer to 15mm:

That's a lot of chonk:

Meanwhile, our smallest cat was channeling his inner Jedi:

-
4
-
-
From thick and sleazy rhythm to glassy cleans! Was there something out of phase in the first solo as well?
-
22 hours ago, mistermikev said:
that's crazy clean... I haven't seen my garage floor in months... all purple and maple colored!!
Whatever you do, never have carpet tiles in a woodshop. It was such a bad decision! The dust doesn't come out, the glue stays in, and curls of wood get caught everywhere. It is soft on the old feet though.
-
1
-
-
On 8/24/2020 at 9:15 PM, Norris said:
Then when it's finished you can sit and practice your scales...
I've already got my coat

So glad I wasn't the only one thinking about scales. 2.5 years too late though.
All of the little details are great on these and I'm looking forward to seeing the flamed maple and purpleheart popping with finish! That's such a pretty wood combination
-
1
-
-
2 hours ago, ScottR said:
Man, that is so disgustingly organized, I'd be afraid of getting sawdust on anything. How do you keep it that with with the zombies?
Seriously impressive Stu. And I presume those great little projects were created right there....and everything was put back where it belonged? That's the part I struggle with.
")
SR
Yep, pretty much! It's just like being in labs - everything goes back in the correct home, ready for the next day/use. I find it's very helpful to have a space which I can control and keep tidy. Probably something in there for a therapist to unpack...

-
 1
1
-
-
5 minutes ago, Prostheta said:
Very very cool! I guess that the inlays were cast-in-place rather than the inlays being cast in HDPE and inserted into the board?
Yep! I think that I used some (pre-warmed) Z-Poxy PT39 and then filled the routs. It was too viscous though, so I won't do that again. I was actually thinking about casting a sheet in the future, cutting out, and then gluing into place. I think that gives less room for error, more options for removing bubbles, and sharper inlay shapes (thinking back to a tutorial on PG for making glow in the dark side dots).
-
It's pretty nice to have a dedicated space for general woodwork and guitar building. Obivously it's constantly evolving, but this is what I'm playing with right now:
Main bench, pattern makers' vise, dust collection, downflow box:

Woodworking sundries, hand planes, hand saws, CNC behind plywood stock:

Power tool cupboard, drum sander cart (with mitre saw on the bottom), bobbin sander, drill press, little bench planer, thicknesser: It's been amazing since making the drum sander trolley - so much extra space compared to the Axminster stand.

Bandsaw, table saw, clamps, hand tools, softwood offcuts, hardwood offcuts and stock:

Now that Christmas is out of the way, I need to get an electrician in to wire it up and sign it off.
-
3
-
-
Just a couple of small projects that I've completed recently to keep my brain moving.


-
1
-
-
- Popular Post
- Popular Post
Planning to get this finished soon too. The neck is getting trimmed down and lots of sanding on the bevels.


-
5
-
Trying to get this moving agan. I've been doing bits and bobs in the background, but haven't updated socials for ages because life has been mad.
Finally bought a drill press. After judging the Bosch for ages, I decided to give it a shot (thanks, Amazon sale) and it's pretty amazing so far. I love that it's compact, accurate, and has a digital depth readout.
Sticking points for this build are finessing the tenon shoulders to fit the body at an angle and needing to remake the fingerboard. I'm not happy with the padauk or how many bubbles were in the epoxy. I have an old ebony board to try next - it was saved from an ancient project, so no worries if it doesn't work out. Anything black from the previous board will now be white MOP and the gold will be medium/thick CA with mica powder, delivered by syringe.
Also, these Bosch brad point bits are wonderful. I've been using the Bosch professional forstners for years with great results too.


-
1
-
-
Still haven't finished the Tele, but I wanted to do something different at the same time. I'm trying to get the guitars moving again after finishing a couple of quick projects.
This will be a single cut inspired by a very famous guitar. I'm calling it the West Poole to avoid copyright infringement (I've probably only been to Poole once in my life).
The original plan was to use swamp ash for the body, however I decided it might be a bit weighty and didn't fancy relieving it. This will have an obeche body with a flamed maple cap, ovangkol neck, and ebony fingerboard bound with flamed maple. 24.75" scale, 12" radius, block MOP inlays, fibre headstock faceplate, EMG Het Set, other stuff TBC.


I've since changed the knives in my thicknesser and also rectified the snipe.
-
Wowzer, check out those shop tools! I hadn't seen the bandsaw, table saw, or surface planer before.
It's nice to see someone else with the Trend T11EK as well. I had one as a hand-down from my dad about ten years ago, which made life so much easier. I actually re-bought it at £350 when COVID hit, because the original was down in Gloucestershire and I couldn't get to it. I don't know what your router table set-up is like, but the Trend aluminium router table insert (with a hole for the depth adjustment) is amazing. They also sell a quick release kit, so you can mount/dismount the router in a couple of seconds if it's your workhorse. Amazing
-
1
-
-
On 5/4/2022 at 1:09 AM, ADFinlayson said:
First job was neck carving - I don't think I've talked much about carving lately but my method has changed a bit over the last 4 or 5 builds. I've gone back to using a shinto rasp and shaping a profile around the 1st fret and 15th, then I use a carving knife to shape the heel and volute transitions
I spotted this in a video from the ESP Japan custom shop recently! It looks like a great way to finesse the transitions.
It looks like a lot of people took advantage of that Axminster vice offer at £99!

-
1
-
-
My 3x3m space is looking very packed now:

After a bit of clearing out (some things to the bin, otherwise just consolidated, and a few sold), it's feeling very functional:
Lots of supplies:
.thumb.JPEG.fd826899fa2ca487c488ab7389fc3acc.JPEG)
Planes and good saws within reach:
.thumb.JPEG.0abad3838ec96ed1ebf301547c03c307.JPEG)
Clamp racks, wood offcuts, and the new table saw bench that I built a week or two back:
.thumb.JPEG.51a7a23009f62428535e52314f4eb977.JPEG)
And my main bench with MFT holes, Trend router table insert (with quick release kit), bench dog storage, and a downflow box. I like to have everything on wheels too, so the shop vac is no exception.
.thumb.JPEG.71255a920245233291973e54548dc658.JPEG)
-
2
-
-
After touching up the inlays and fettling the tenon shoulders for a while, I started on the body carve. The tenon is going to take ages to get the right perfect with abrasive strips, so carving was a nice change of pace. This is going to get a DiMarzio X2N in the bridge, because I've coveted that pickup since I was a kid and want to get the opposite of Telecaster tones from this thing.
.thumb.jpg.1796d440f4d6d577f10a78db07e082fb.jpg)
.thumb.jpg.bdd03c35179c278d170ad85a929b5e40.jpg)
.thumb.jpg.cf0a967da850a7deb5b33cac6db7de54.jpg)
.thumb.jpg.6cf54a1ac6bd95b0949dbebdedecc25e.jpg)
.thumb.jpg.7731129ba61813199137361cb89ce30c.jpg)
.thumb.jpg.48c019b8473307e0cc34eb49a3a5c4d7.jpg)
-
Followed by an angled neck mortise, tenon cut into the neck blank, and a little heel block added. I might have to repeat the side dots, but that's no bother:
.thumb.jpg.684f71890896d2457ff61297890bbf9f.jpg)
.thumb.jpg.4ef76db5862e1b8ad4bd45ef1fecde8c.jpg)
.thumb.jpg.95eea7da52cfa018e57dfe77d8bff8d2.jpg)
.thumb.jpg.426fa5520e1c2e12eaa76a3cf25d28b0.jpg)
.thumb.jpg.2b256e356c004cb83745c5c23386dd96.jpg)
.thumb.jpg.30dba437a33e040f63d899e3d4c359b4.jpg)
.thumb.jpg.e3bdd4a62094933dc53f276c326914da.jpg)
.thumb.jpg.7482af55c19a400332596cae8112c0b4.jpg)
-
Hi folks,
At almost one year since the last update, I've been trying to get this one moving again. The plan is to do more projects in the workshop, rather than the workshop becoming the project. First up was some work on the fingerboard and neck:
.thumb.jpg.43f125c3e752a783a856e3bc2811aebc.jpg)
.thumb.jpg.aa6715867dcf80842b14c337158b97aa.jpg)
.thumb.jpg.a8c02d6abd27e7a8c006859da49af4ab.jpg)
.thumb.jpg.1c3b0527443bacc47c998ccf58ca9e05.jpg)
-
How about using a drill guide instead? That way you should reference against the flat rear of the guitar. Still easier to tackle pre-carve though.
I've just bought one of these, because I don't really have space for a pillar drill:

-
Wowzer, so it's been over a year since I touched this. Between work and projects at home, I haven't really had time to progress anything guitar related.
On a positive note, I'm no longer tinkering in the conservatory. My big project has been constructing a 3x3m timber framed pent workshop at the end of the garden - there have been some delays due to timber availability (pandemic crap) and awful weather. It's basically useable now though, and contains (almost) all of my tools. I should be finishing a run of new fencing next week, allowing an electrician somewhere to run the SWA along for power.
Framing is all 2x4. Shiplap cladding on the outside, weather gap and membrane 11mm OSB3 sheathing, 100mm mineral wool insulation, and then 11mm OSB3 for internal wall lining. It even has a nice little window and a full-sized external fire door with British Standard dead lock and night latch. Roof is 18mm OSB3 with EPDM weather proofing.
-
2
-
-
Today has been a mixed bag, but I'm sharing in the name of transparency.
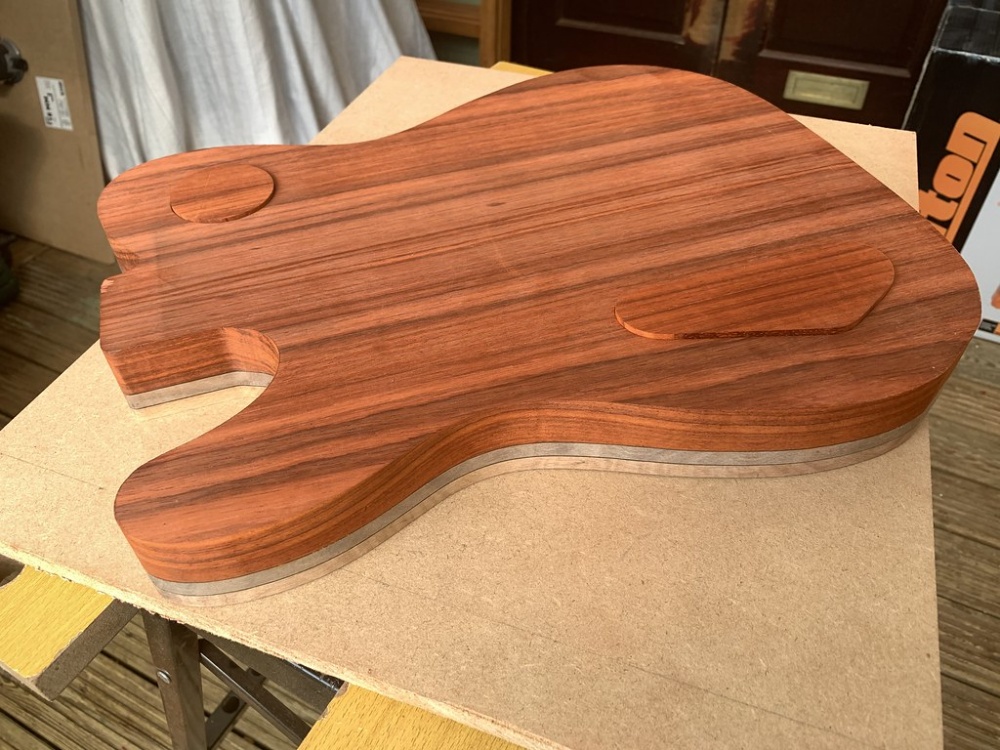
Cover rims routed down, and tops sanded flush:
Headstock partially routed from the rear:
This is when things went downhill.
I switched over to the router table with a trim cutter, which was apparently getting blunt (either that, or it just didn't like the wood). There's a big chunk of tear-out at the headstock end; the current thought is to route a circle out, and then glue in a circle of the spalted beech to make this a 'feature'.
The truss rod channel is alright though, despite a slightly wandering 10mm drill bit from the access hole. It'll all come out in the wash (finishing).
-
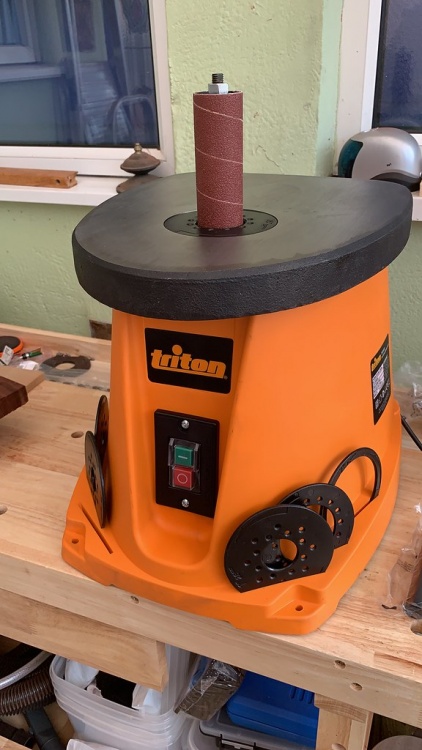
There has been some more minor progress this afternoon.
A new toy (I wanted to get a different colour, but the Triton was £10 cheaper than Vonhaus or Rutlands):
Cover edges sanded slightly to fit better. The cavity rim needs to be routed at 5mm to match:
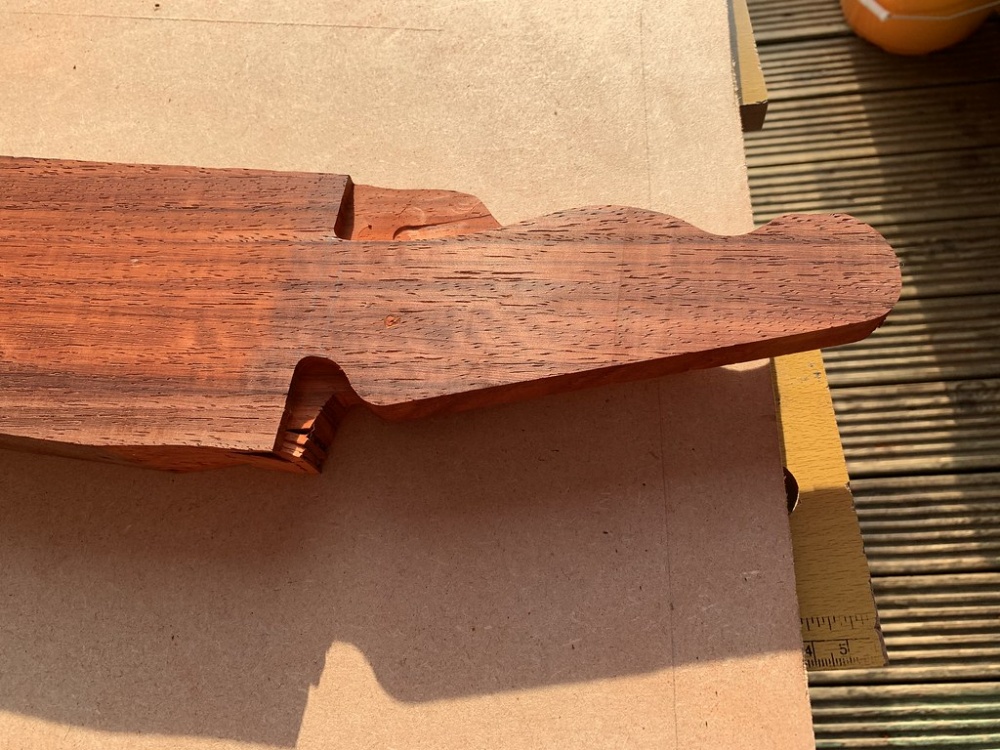
Body edges sanded to get rid of tooling marks:
I need to start looking at the neck now, so I can route the neck pocket before any serious body work.
-
1
-


.JPEG.c16b215fd973a6dd09f9d913b5e38fd2.JPEG)
.JPEG.8d9ce0455b163790143847f6f5f29e86.JPEG)
.JPEG.5feb93db2e4c95f0fd4e85b501ee0c58.JPEG)
.JPEG.5459e7173536d115b972be5ab803e547.JPEG)
.jpg.026faf6d005fbd5dc7ffd5903d3a010a.jpg)
.jpg.a58c77af38fefa461e480517adcf470d.jpg)
.jpg.d10c40b83a60dfb4848ea72f3afe5cc1.jpg)
.jpg.134360515e72427d44c28c3e97aff015.jpg)
.jpg.6261b5b93776c0d39bc717361d19dd2d.jpg)
.jpg.c7ff870014bbc8133d7a3cb63ab132fb.jpg)
.jpg.90b11874afc91d431838a42ca4147fd1.jpg)
.jpg.e7e6466e873c1d7b3b66f8656aed9597.jpg)
.jpg.0172becefc0abb14579e88e07fc5ee68.jpg)
.jpg.9d9097978d8fdca78c8c46b1208344a3.jpg)
.jpg.c537eb15ad3d9ca7bd50799a58bca17b.jpg)
.jpg.d579db7999a62baaebc740c175271b16.jpg)
.jpg.3de75ede4d816e7f64141e0f5125a7a6.jpg)
.jpg.8c31a6007ea16fcc88e61b7b55609652.jpg)
.jpg.1411f38fcce5c466f8d322576afa9db0.jpg)
.jpg.24ee660d08bcf496864a9669aa73cf63.jpg)
.jpg.ac698954ae3e85381d3deb5ac6b87fbf.jpg)
.jpg.4ae0a3ba0021d93a17335ffff45d6a84.jpg)


West Poole Build
in In Progress and Finished Work
Posted
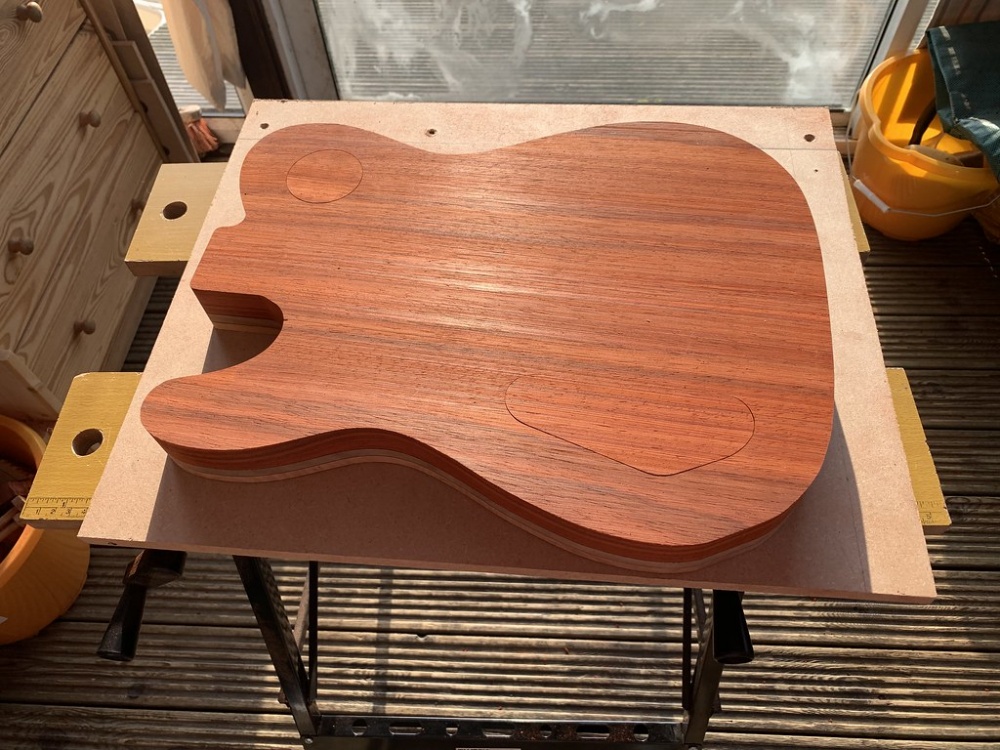
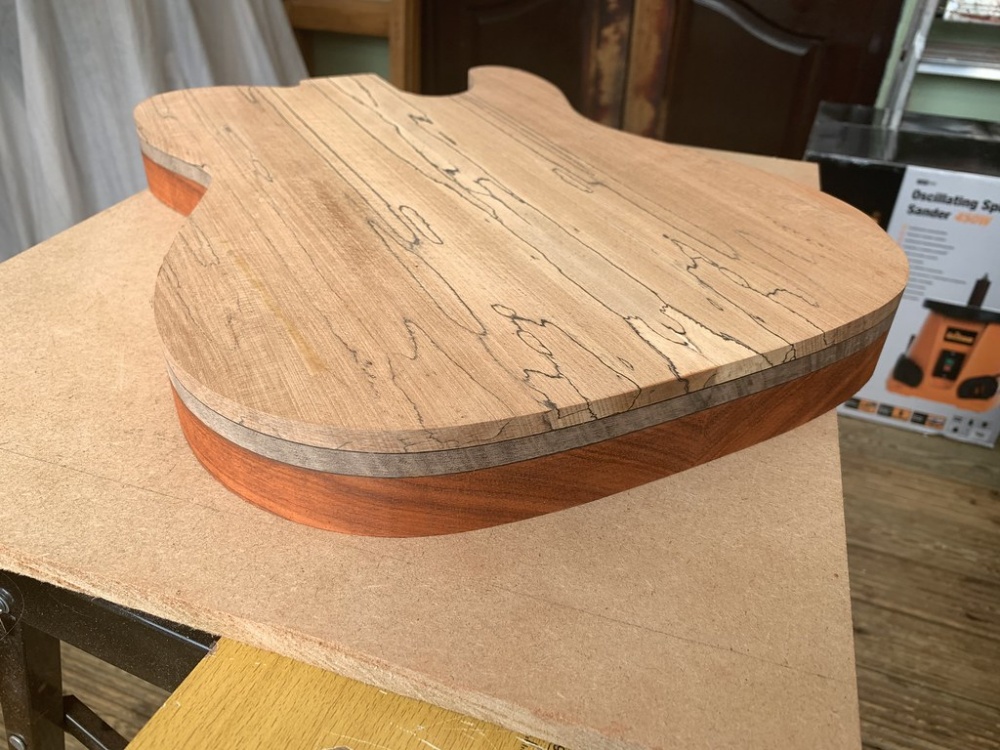
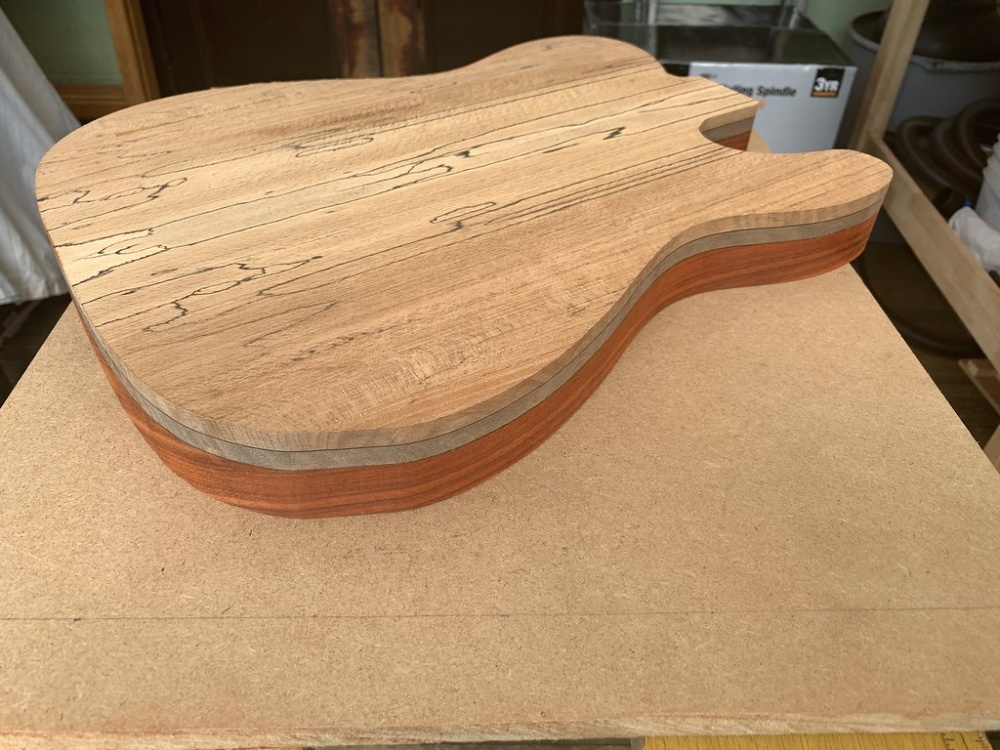
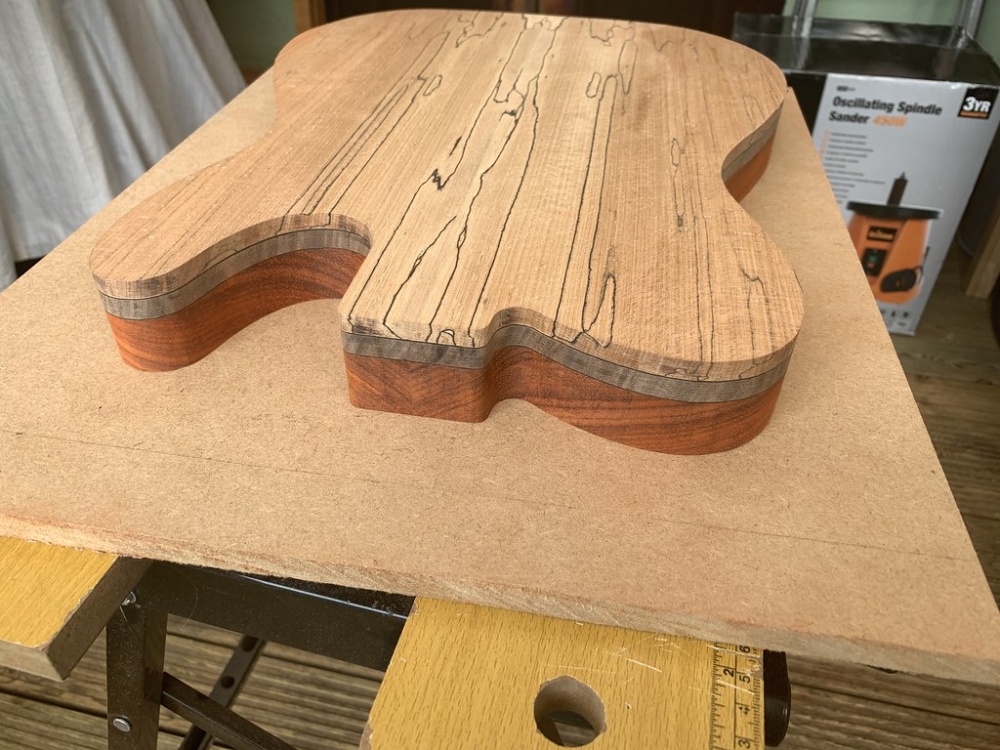
The top is now down to 15mm and the body is 41mm. I'm aiming for 6mm of the top exposed at the sides, so this should make the guitar slimmer than a normal Les Paul at the sides and the same thickness at the middle - with a marginally deeper carve.
I really can't decide whether to bind the body. The original plan was to use spare flamed maple binding for the fingerboard and then faux binding for the body, but I do also like cream binding on a LP (body and fingerboard). If the glue-up isn't great, that'll make the decision for me
Also, I need to get some nylon/PTFE/HDPE rod to cut down and use as indexing pins.