


Phaddie
-
Posts
40 -
Joined
-
Last visited
-
Days Won
1
Content Type
Profiles
News and Information
Tutorials
Product Reviews
Supplier Listings
Articles
Guitar Of The Month
Links and Resources
Forums
Gallery
Downloads
Everything posted by Phaddie
-
After I calmed down and took a closer look. It seems like the water did in deed pull all the timbermate out but did not mark the shellac. Looks like more grain filling. Yah!!! Thanx guys. This build is still progressing...
-
HELP!!! So I have been slowly plugging away at this. I planned do do a big post showing the steps to a finished body. I may still do that but I encountered a problem today. I was sanding off the last application of grain filler. It was going as well as that dusty mess of a process can go. My 5 year old daughter started playing with the hose and sprayed the guitar body. It left all these little blotches. I attempted to sand them off but they seem very deep and I am scraed that I will sand through the shellac protecting the dye I am also scared that the water pulled the timbermate out of the grain. Suggestions?

-
I have a few more test boards, I will try epoxy next. Thanx for the tip @StratsRdivine Now I need to read a bunch more tutorials. Could I grain fill with epoxy before I used water based dyes?
-
Cheers, I actually attempted something like this due to impatience but I tried to use a paper towel. It just shredded. I am going to take a few more shots at it. This time I really felt like I scraped off most with a credit card and thought the sanding would be easy. I just jumped the gun on timing. Thanx again.
-
I did some searching and have been unable to find more information about this method. Can you point me in the general direction? Thank you in advance
-
Lesson learned: Make sure timbermate is dry completely before you sand it. Pulled it all right out of the grain. I did use enough shellac this time! <--- Bright side
-
Update. I died the next 2 boards. I think I dialed in the red I want (Thanx @Prostheta for the blue tip!). I liked the red so much I attempted a burst on the last board. It sucks but I learned how the dyes mix with each other and such. Also developed a way better feel for getting the shellac on without running. These have not had the grain fill done yet, just dye. Weather has not been great so not able to grain fill. I sanded back the burst board and it looks a bit better. Going to grain fill it just to see what it looks like. I also decided it was time to start sanding the actual body. Man I wish I knew more about wood when I bought it. Whomever routed/cnc the body did not do great job, and the glue job was also poor. After 3 hours with 60 grit paper my hands and a 3m sanding block it is close to moving to a finer grit. I no longer have high expectation for the finished product and will attempt to learn as much as I can from this. Not sure how to sand this to prevent it from chipping. And this glue joint also is not good to sand There are some deep gouges that are slowly going away with 60 grit. Thanx for all the info so far! Phad


-
I am not sure this is what happened. I think what happened is that I did not have enough shellac over the red dye so when I put that water based grain filler on the light rubbing of my hands to get the filler into the grain was enough to get through the shellac. The grain filler then started interacting with the red dye. Next time more shellac, and maybe not sanding the shellac at all before I grain fill. This is a brilliant idea! Thank you. I am pretty badly colour blind so I was just shooting into the breeze and what I should do to give the red the right "feel". Cheers all.
-
Update: It turns out it was not enough shellac. This I know for next time. I could tell as soon as I started to sand the shellac before grain fill. 1 stroke of the sanding block and red started coming up. I went ahead and grain filled anyway to get that process down. The grain filling actually went really well. I used timbermate. After a couple of hours I sanded that down. Even though it was not that result I was looking for I learned a tonne and the board looks kinda cool. For next board: 1. The dye as I mixed it was to pinkish. Going to add some black and a touch of orange. 2. Will not use so much pressure on the tack cloth and may just skip it and go with compressed air. 3. Will use a lighter touch on the shellac spray to prevent runs, and do 2 additional passes. Thanx for all the help guys and wish me luck on the next board. Scott.

-
I actually have 2 more boards so i was thinking about just moving forward with this one and seeing how it goes. I might cut them all in half so I have more "learning" lee-way. Thanks @ScottR
-
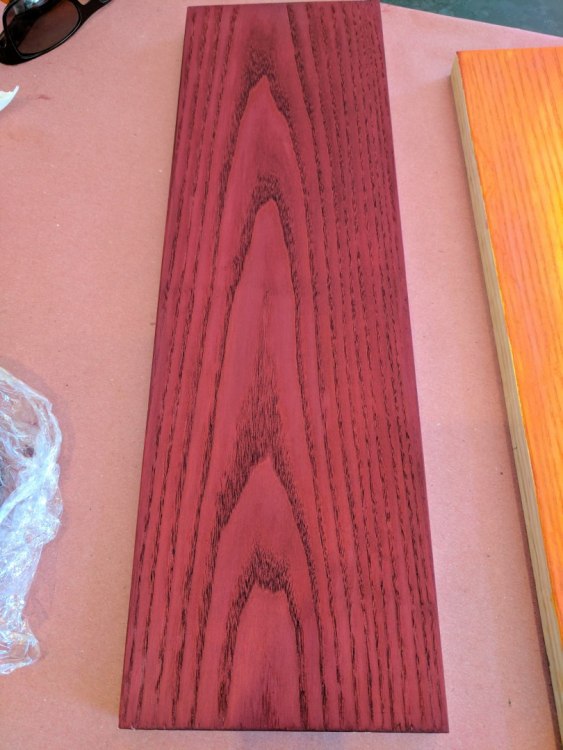
Update. Spent the last couple of days sanding, wetting and knocking back grain. Today I decided to dye of the the boards to see how strong I needed to mix the dye, etc. I think it went ok. First pic is 2 applications of dye, second is with 4. About an hour drying time between applications. Then I sealed with rattle can shellac. I was a bit confused here about how much I needed to apply. I wanted to seal but did not want to hinder the grain filling. I made 4 coats 2 passes each coat. About 45 mins to an hour between. It was going great until I moved too close on my last pass of the final coat and made a run. Another error I think I made was applying too much pressure on the tack cloth. I think I transferred some wax only the wood. Lesson learned. Question. What is the best way to take care of that run? Should I use 220 and sand it down? Or maybe alcohol? Any advice of how I can tell when the wood is sufficiently sealed but still able to accept grain filler would be appreciated.


-
Thanx guys! As usual I am overthinking everything
-
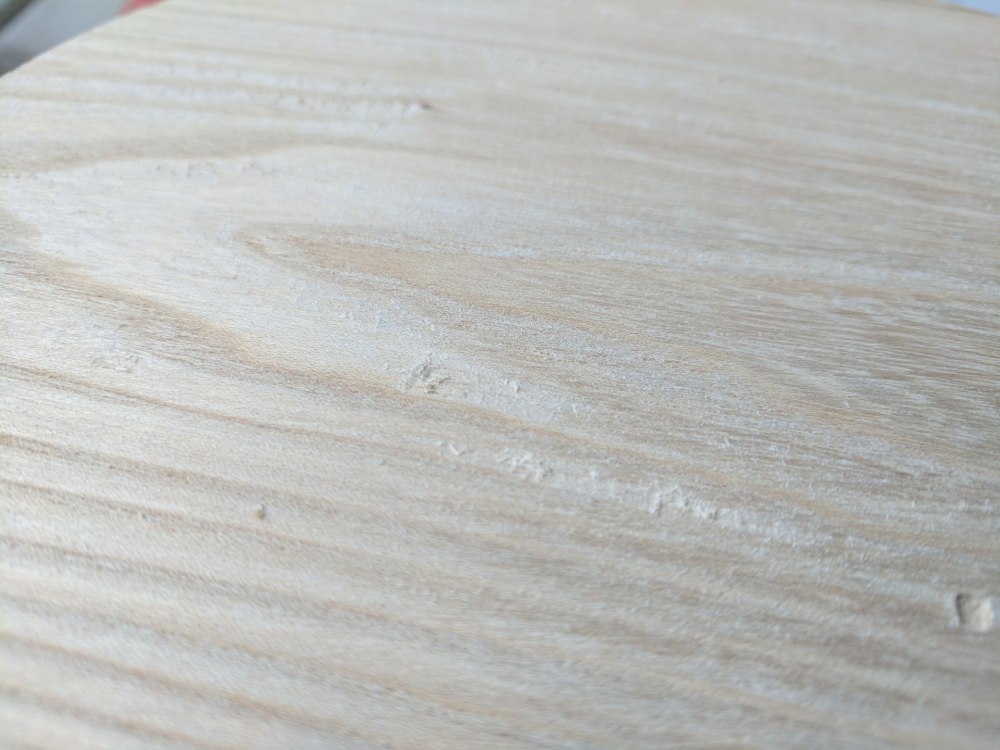
Sanded all three boards to 220. My arms were tired from the gym and now feel like noodles 2 hours later. It turns out the cheap sandpaper I bought from amazon was indeed cheap. Within 3 minutes on the 220 I had just a piece of paper with no sand on it. Gave all three boards a water wipe and will knock back the grain tomorrow. Question. Is naptha needed? I cannot seem to find it here in canada. If I just wear gloves from here on in will that be sufficient to keep oil off of the wood? Thanks in advance guys.

-
Update: I have been very nervous about finishing this guitar. It seemed like a better idea to practise on something other than the body. So i grabbed some ash pieces at a local place. Three boards 8X16x3/4. I figure I will divide them in half so I can take 6 runs. I have some powdered aniline dye , some tru oil, some zinsser spray shellac, (rattle can) some watco rattle can gloss lacquer. I think I will sand all the boards, raise the grain and knock it back. Then try some of the methods I have read about: 1. sand,dye,shellac,grain fill, shellac 2. sand, lacquer, grain fill, lacquer 3 Same as 1, but then finish with tru oil. 4. Sand, dye dark, sand, dye lighter, sand a little, dye lightest colour (seen this for maple and once for ash) Not sure what other methods to try, or to just try different amounts of red dye. Any thoughts would be appreciated. I really want a red finish with the grain very dark black or purple. Phad.
-
It is the only clamp I own at this point. They cost so much money!! I think I will keep the neck as is, I was measuring the neck and once it is shimmed to the right height there will not be a problem. Next project is to get a sample chunk of ash to practice sanding and finishing.
-
Update : Mistakes were made.. ok. So I was able to get the veneer glues into the neck pocket. The neck fit very tight and well now. First Mistake. Since the neck was finally in place i figured I would mount the bridge. I ran some floss in place of the e strings, got everything lined up, marked the holes. Drilled the holes. Went to mount the bridge. I drilled the holes too big! The screws can almost be pushed into the wood. I think this is not a huge problem, I can fill the holes and mount the bridge that way. Second mistake. I decided to not use the squire neck plate because I was not sure how to line the holes into the body. I marked and drilled the body, mounted the neck, marked the neck. Went to drill the holes, first three went perfect, 4th hit the truss rod. This I also think I can work around be either getting a shorter screw, although I am going to shim the neck pocket so that might give me enough room to get the screw in. Other than that everything went swimmingly. I am ready to start prepping the body for finish and make the neck shim.


-
That is my middle and probably 2nd middle name. It also comes from waiting for things to arrive and not being able to work on it, I think about it most of the time
-
All great options thanx! Hopefully the card/shims will arrive today and I can get the neck and bridge positions nailed down. A quick question. How do I keep the holes I make for bridge and pickguard visible after grain fill and dye? Phad.
-
Thanx, I just found these http://www.leevalley.com/en/gifts/page.aspx?p=32820&cat=4,104,53208,32820 Seem perfect for what I want.
-
Hey guys, I am having a hard time finding very thin wood veneer (~1mm) to shim my neck pocket. I have tried hardware stores and a couple of lumberyards. I am in Toronto Canada. Any suggestions where I might find this? Thanx in advance
-
Already planning the next one
-
Update. Was about to get a few hours in the shop today. Some of the cut outs were not deep enough in the body I had, so I had to make the bridge and switch cutouts deeper. Since I have never used a drill press or a router before I was excited and nervous. It all went pretty well, I nicked the body on the drill bit one time sliding it onto the press but I think it is shallow enough that it will be gone with sanding. I also drilled the hole for the plug and ground wire to bridge. Everything fits now! Next time I mount the neck. I was hoping to not use a pick guard but that hole behind the bridge pickup is gross. I was thinking I make a ledge all the way around and put a piece of nice wood, or make a logo or something. That way I can use my friends cnc machine. Thanx for all the tips guys. Phad


-
I decided I NEED a router (I assume you all know what I mean) I have about 300 CAD to spend. I have been looking at the Triton 2HP https://www.amazon.ca/Triton-Tools-MOF001-Precision-Plunge/dp/B00779NCPM/ref=sr_1_2?s=hi&ie=UTF8&qid=1490042307&sr=1-2&keywords=triton+plunge+router Dewalt 618 https://www.amazon.ca/DEWALT-DW618PK-Plunge-Fixed-Base-Variable-Speed/dp/B00006JKXE/ref=sr_1_1?s=hi&ie=UTF8&qid=1490042525&sr=1-1&keywords=dewalt+618 Porter Cable 693 https://www.amazon.ca/PORTER-CABLE-693LRPK-Fixed-Router-Plunge/dp/B00006411C/ref=sr_1_3?s=hi&ie=UTF8&qid=1490042556&sr=1-3&keywords=porter+cable+router Or Port Cable 892 https://www.amazon.ca/PORTER-CABLE-892-2-1-4-Horsepower-Router/dp/B0000DCBK0/ref=sr_1_2?s=hi&ie=UTF8&qid=1490042556&sr=1-2&keywords=porter+cable+router I assume these will do what is needed for body, pickup cavities, neck pockets, and maybe also planing. Are these too powerful for delicate work? Can they route bodies from templates no problem? Thanx in advance guys! Phad.
-
Update. I actually had time do some work. I used a business card to shim the neck and it made a HUGE difference. I can almost pick up the body with the neck with the card shims in there. I also went about trying to find the centre line of the body. This proved almost impossible until I remembered I really need to centre things around the neck. Which I think I did. Next I am going to make the shim to go in the neck pocket to bring the neck to the proper height. Then drill and mount the neck. Having fun already!


-
Thanx @Andyjr1515. I think if I bought more stuff my wife would kill me at this point. But I think you advice is sound. My plan as it stands is to treat the new ash body and full squire tele I have as a kit guitar. Then once I am done that plan my next build.


