


JGTay
-
Posts
329 -
Joined
-
Last visited
-
Days Won
18
Content Type
Profiles
News and Information
Tutorials
Product Reviews
Supplier Listings
Articles
Guitar Of The Month
Links and Resources
Forums
Gallery
Downloads
Posts posted by JGTay
-
-
Plastering job is delayed until Saturday, so got a bit more time this week.
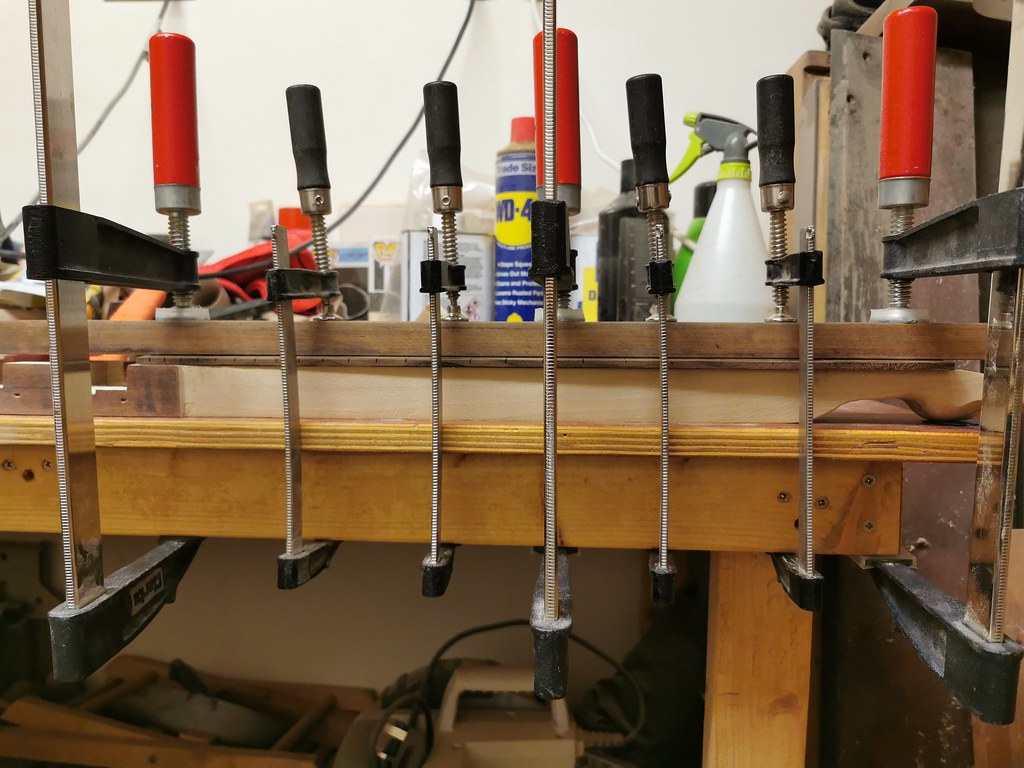
Managed to get the body glued and clamped up last night.
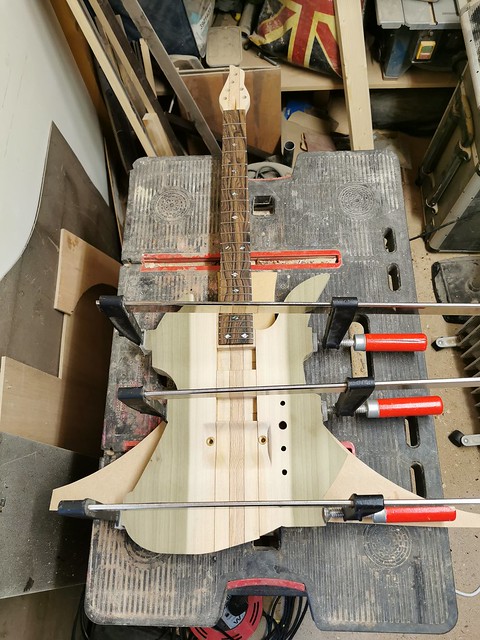
And clamps off this morning.

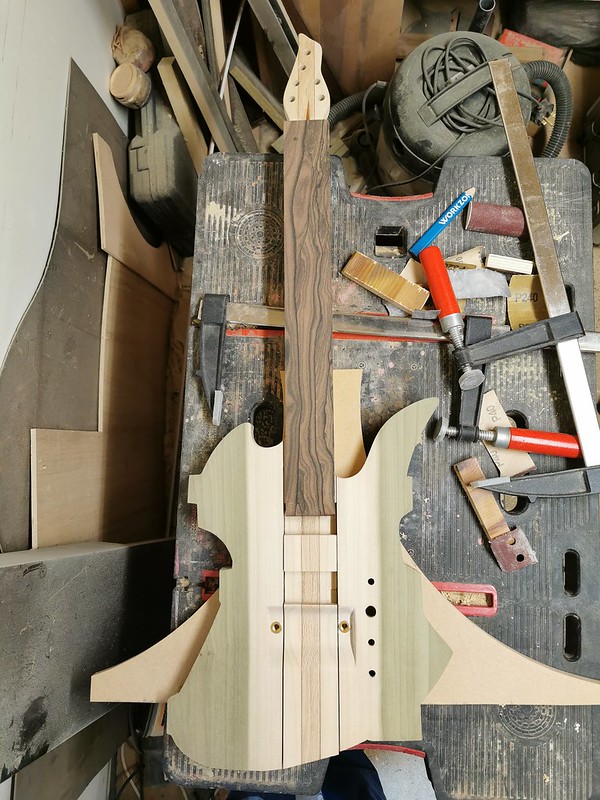
Then it was on with removing the clamping points.

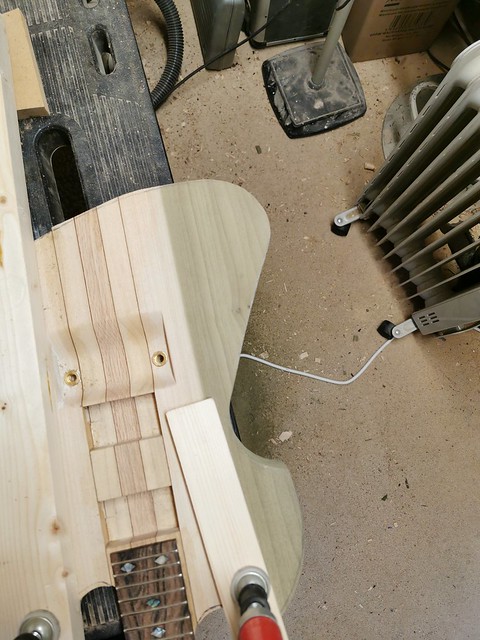
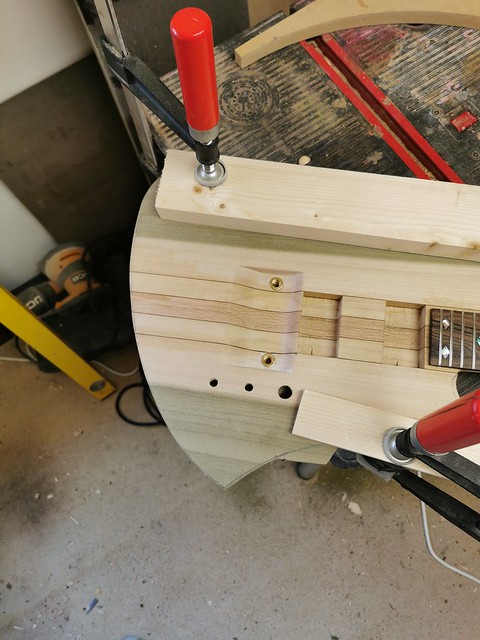
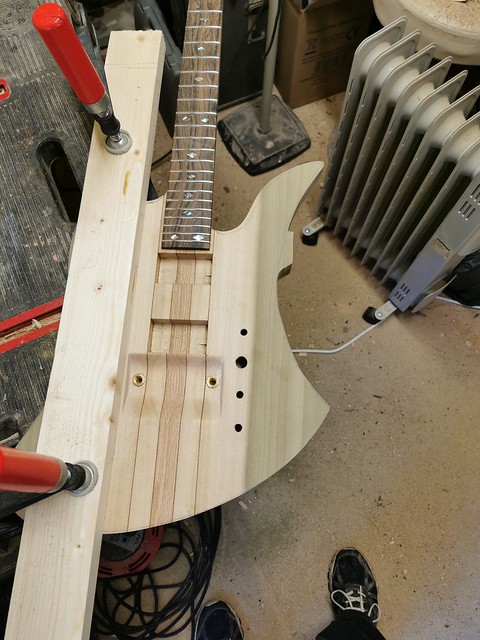
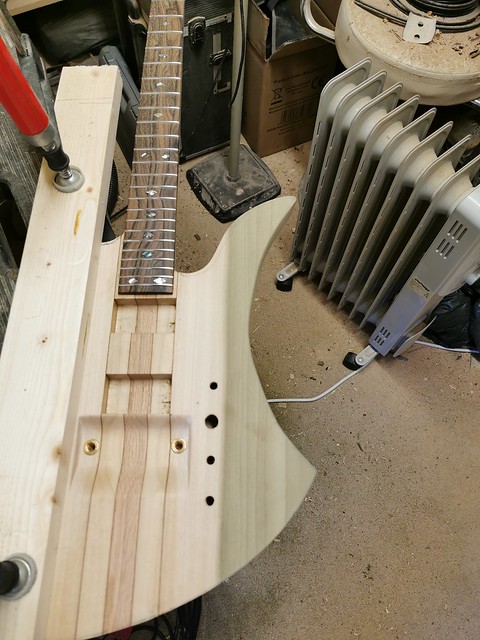
Lots of shaping and sanding to be done, but at least it is looking more like a guitar now.
")
-
 2
2
-
-
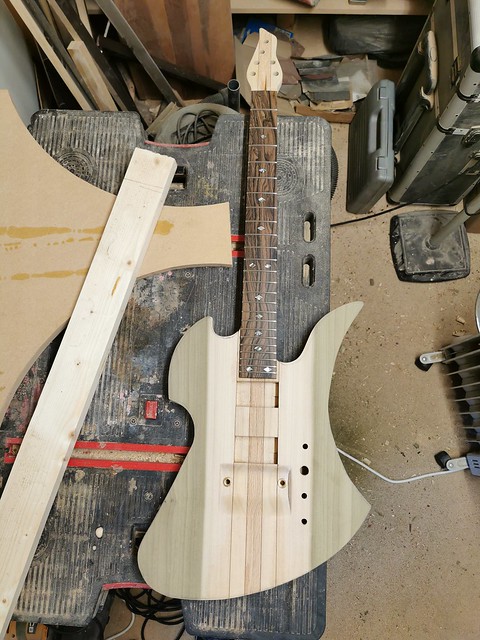
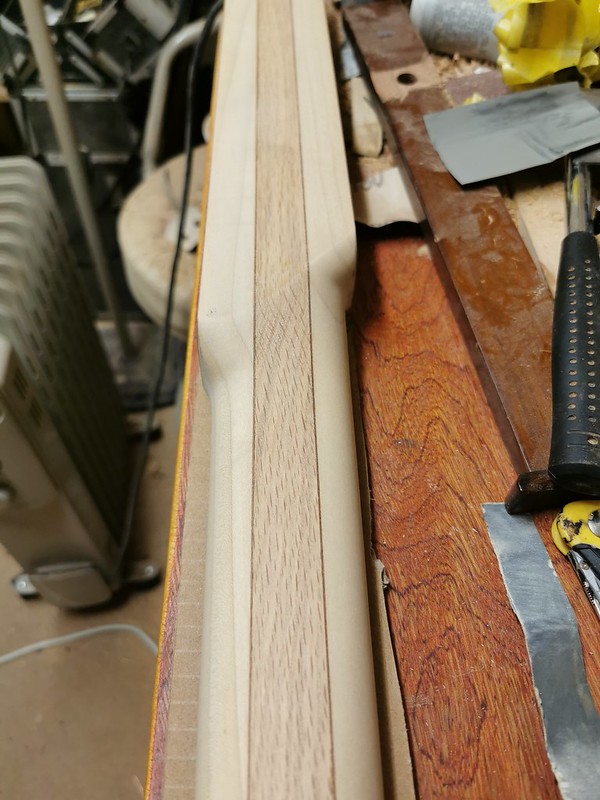
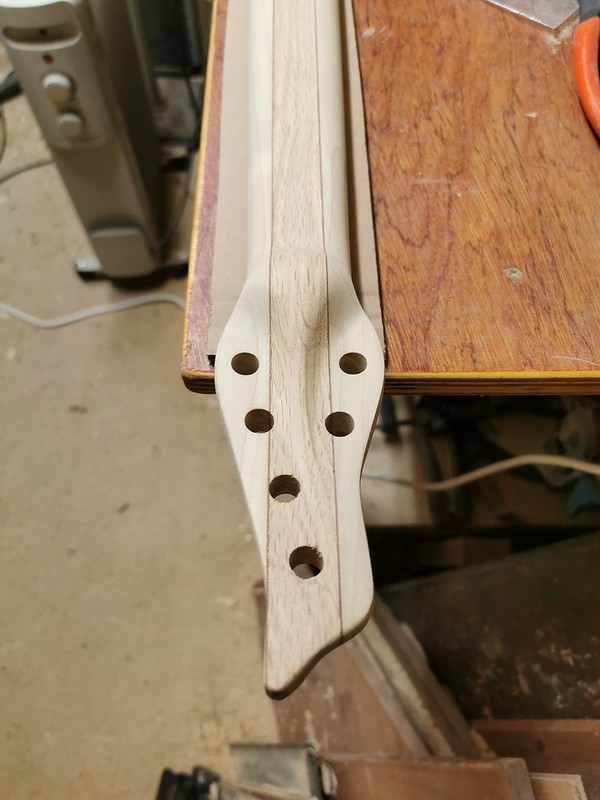
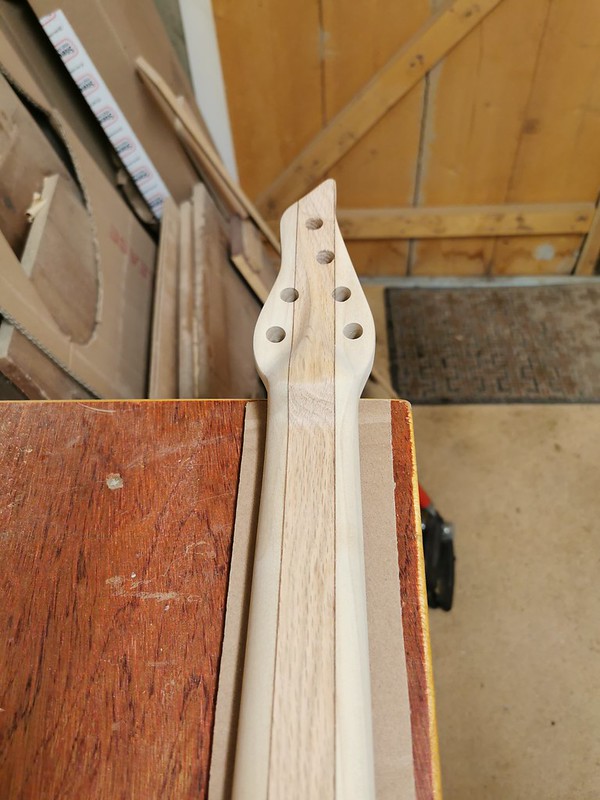
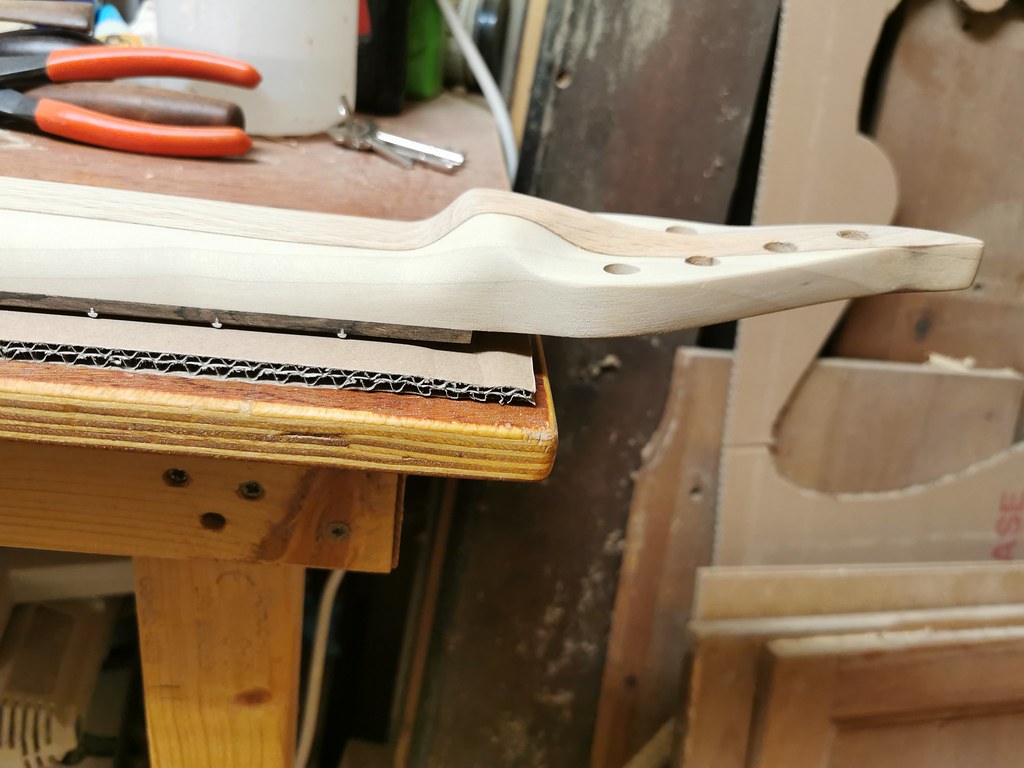
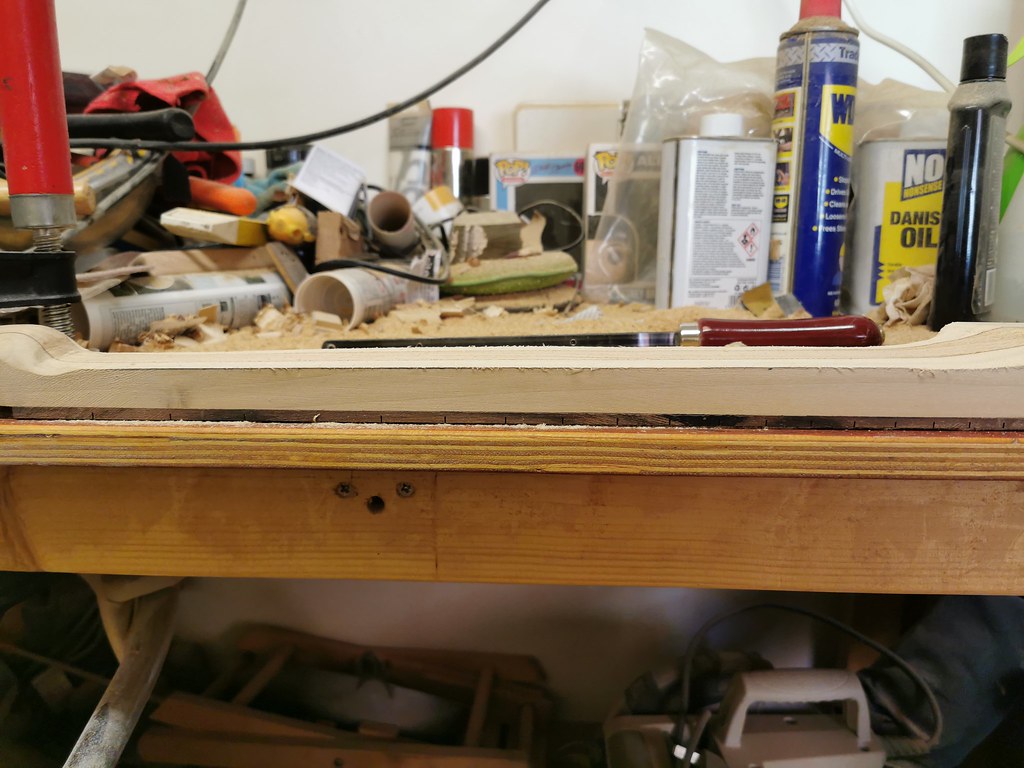
Managed to get some time yesterday and today to get some more done.
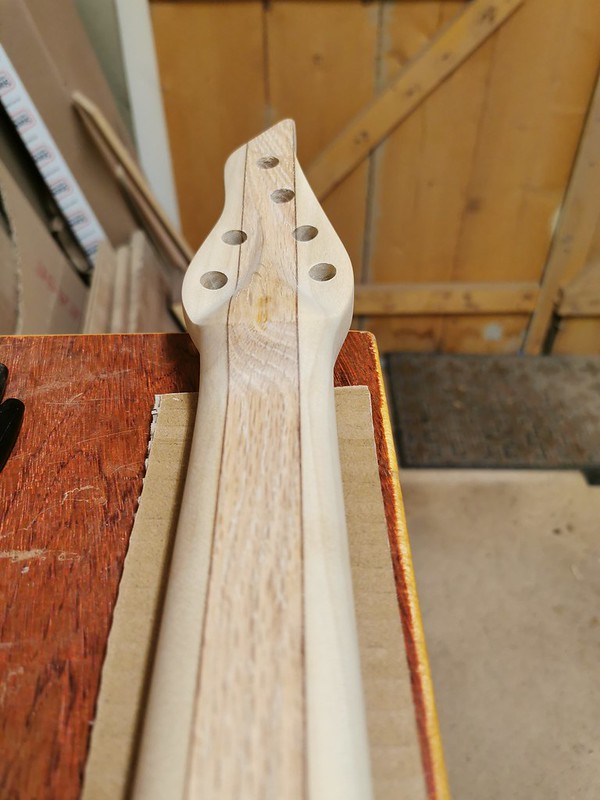
Neck shape finished, volute finished and heel shape nearly done.
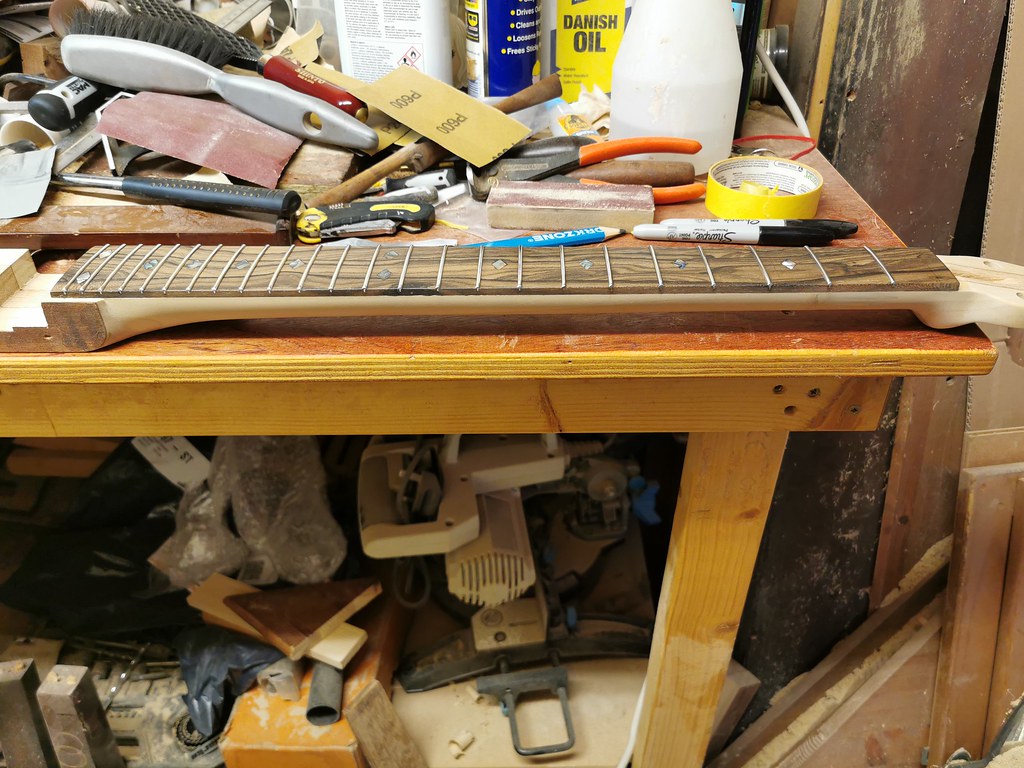
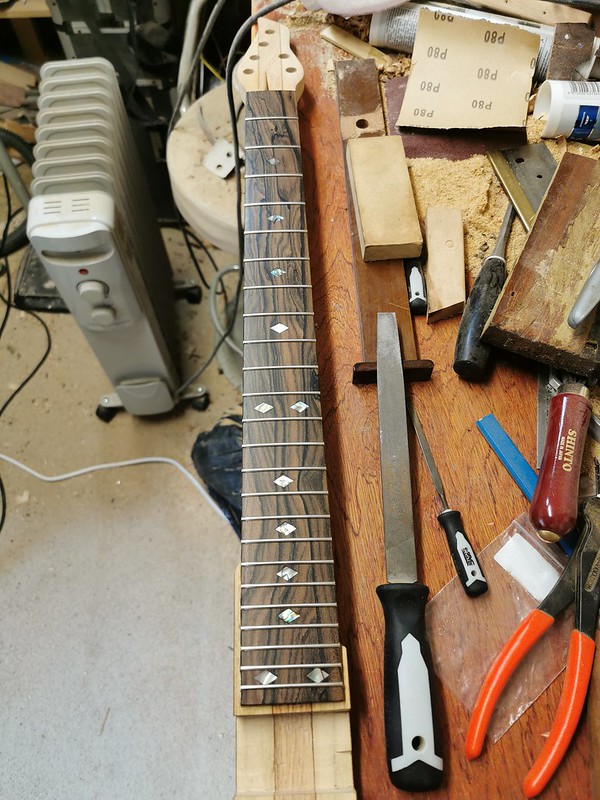
I then masked off the fretboard and got on with the frets.
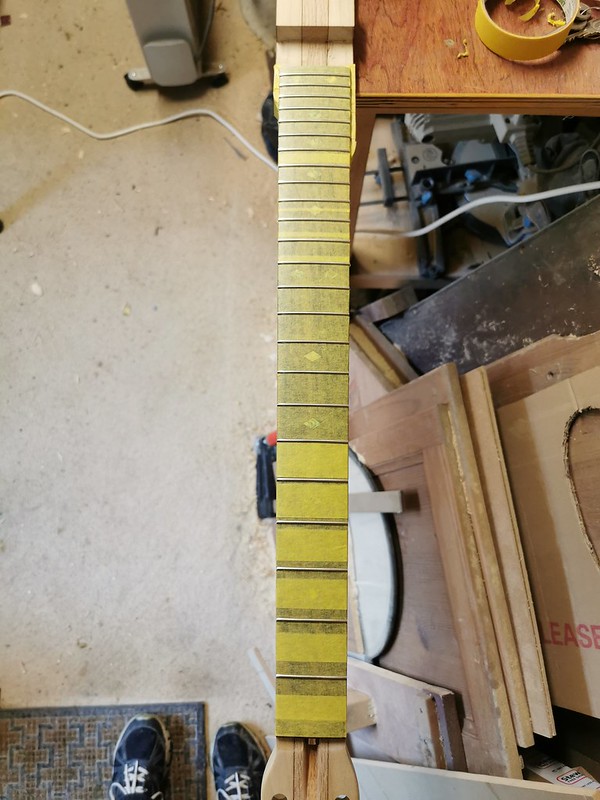
After levelling, crowning and buffing, the tape doing it's job.
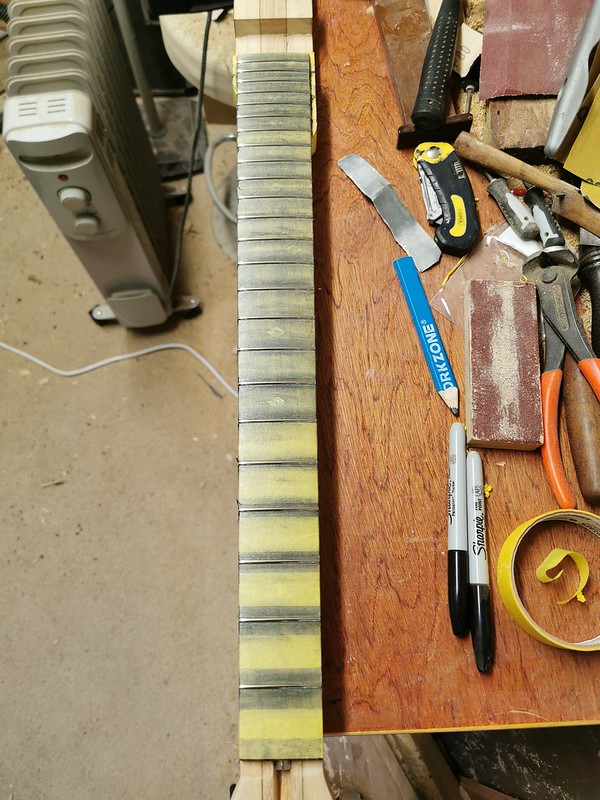
And then after removing the tape.

The heel shape, which may change slightly once the body is glued on.
Volute shape completed.
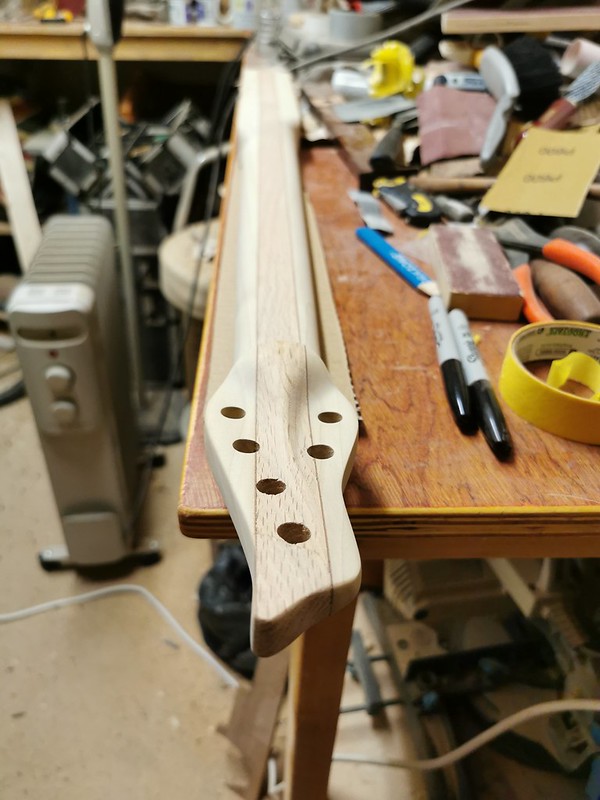

Next job is the gluing up of the body when I get a chance.
-
Had a very busy week doing roof repairs, electrical work and plastering, but managed to get some time at home for a few hours this morning and got on with shaping the neck to how Dan wants it and made some more progress on the volute.
Still got to do some more on the heel and a bit more shaping of the volute, as well as sanding up through the grades, but happy with progress with the time permitted.


Will have to see how I get on time wise over the next week as I have a big plastering job to get started and will not get much time at home.
-
Congrats on GOTM!


-
1
-
-
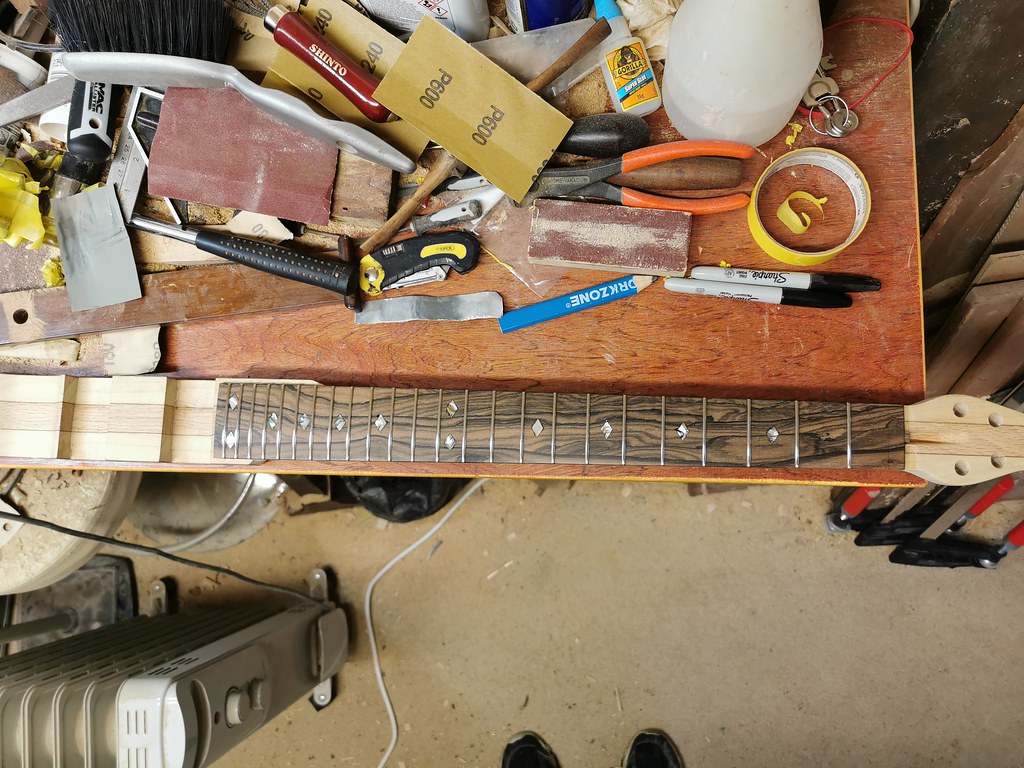
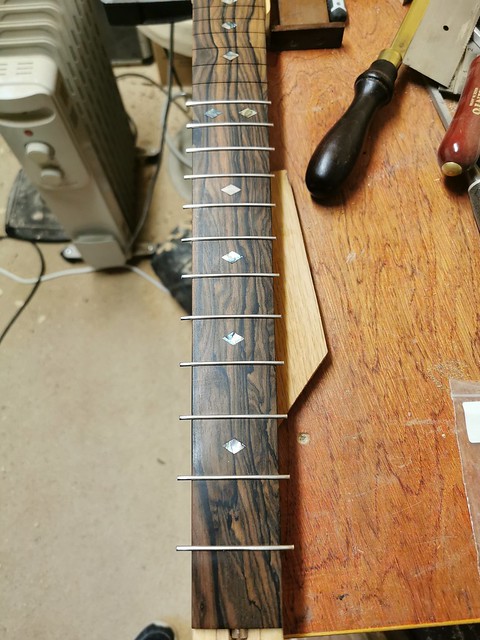
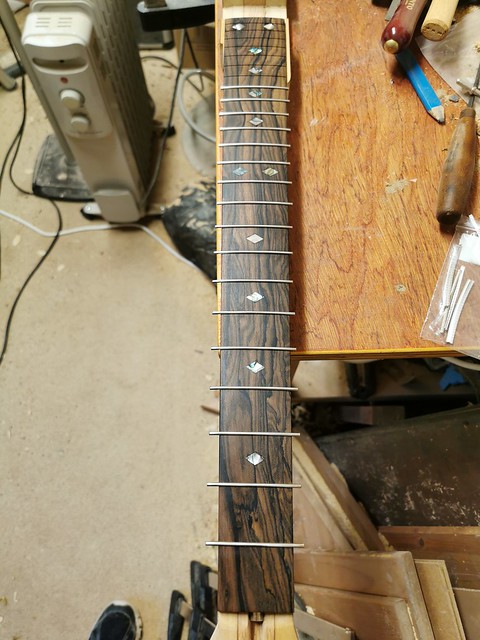
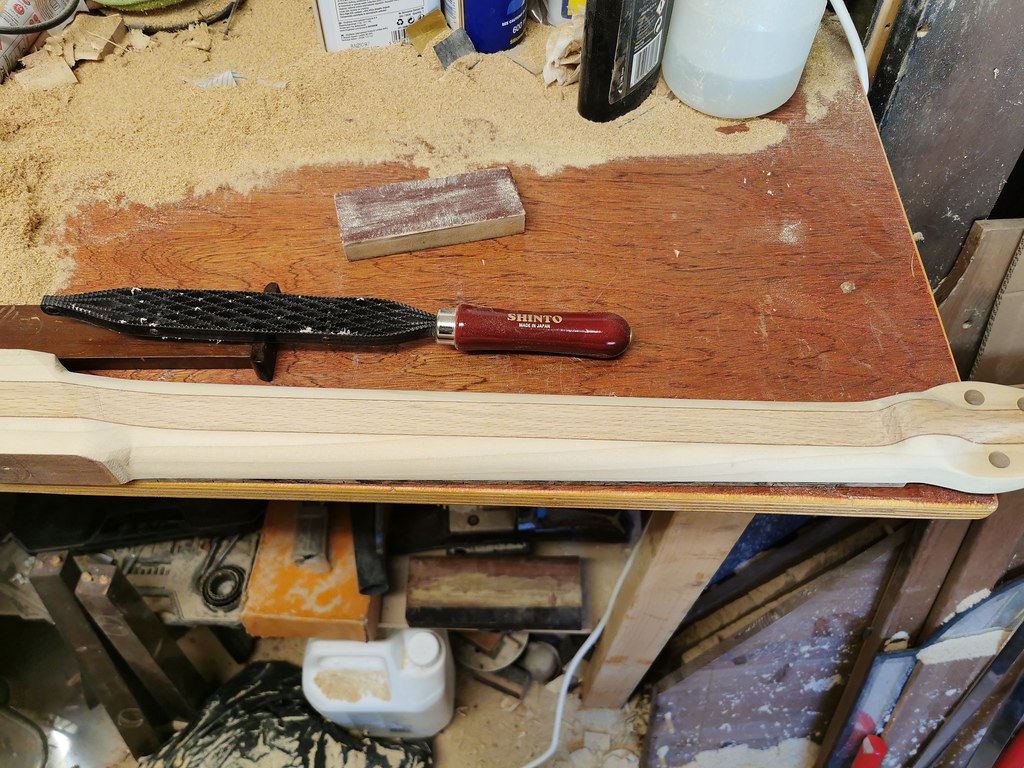
Finished getting the frets in.
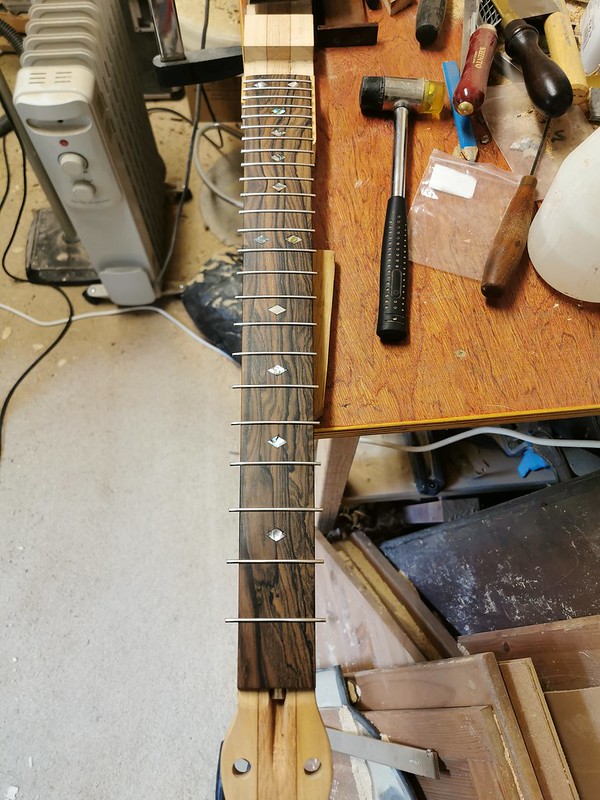
And then got to work on cutting them down and filing them level, one side...
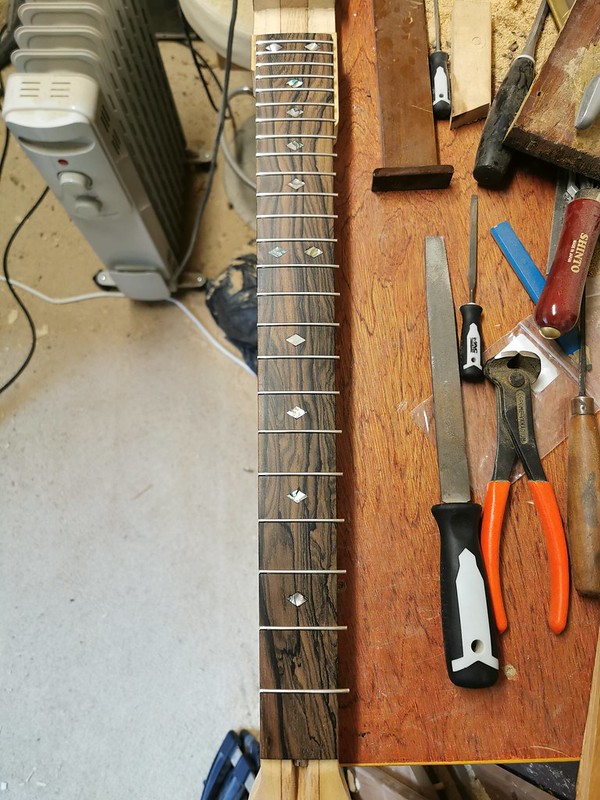
Then the other side
-
1 hour ago, Dward13 said:
I had some leftover balsa wood (saved from the time of the Reagan administration*) so I made a couple plugs and routed a 1/4 in. square channel.
I should be able to just drill a hole straight through for the bridge pickup as I did in the last build.
*Hoarders get a bad rap!
Looking very good.
I hoard as well, got so many wood offcuts I could probably make quite a few patchwork guitar bodies. The wife goes mad at me for my hoarding, but I always find a use for it all.
-
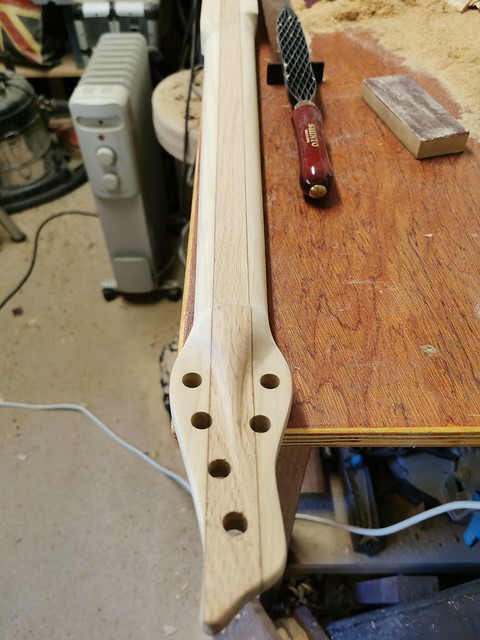
Made a start on getting the frets in earlier.
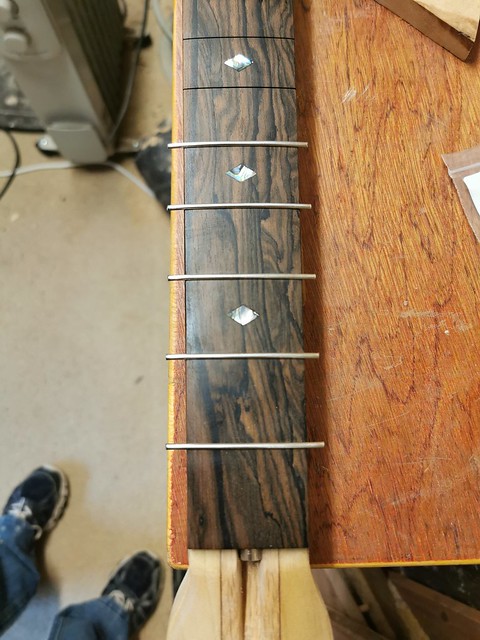
Seven left to go and had to finish for the night as it was getting late.
-
2
-
-
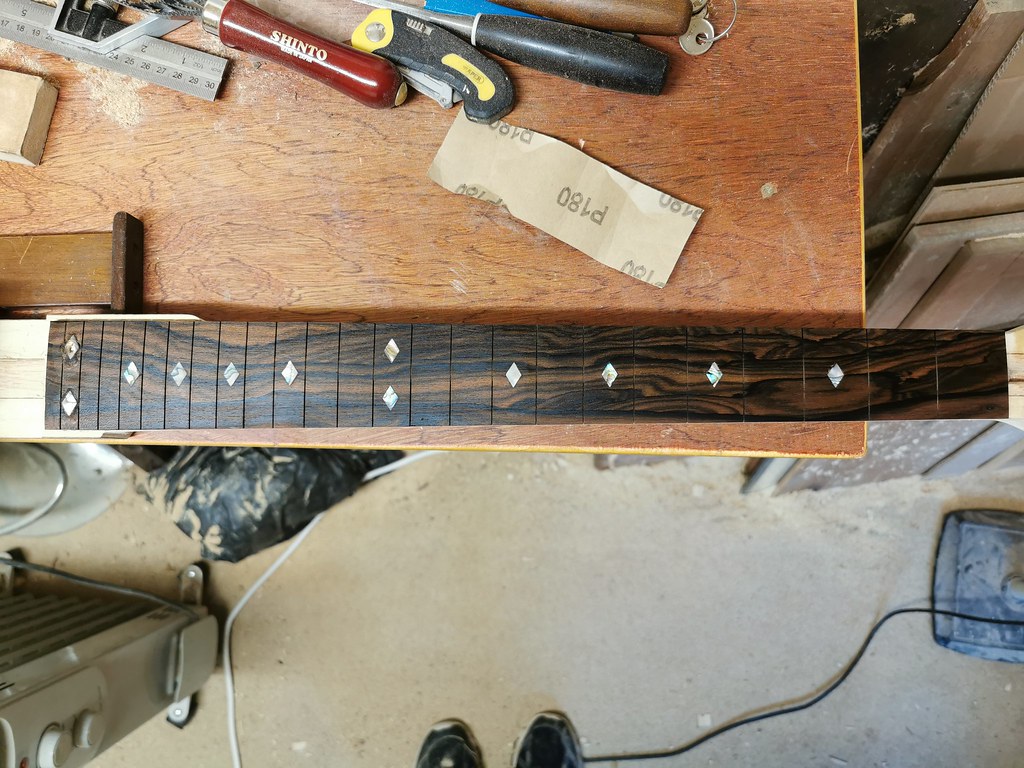
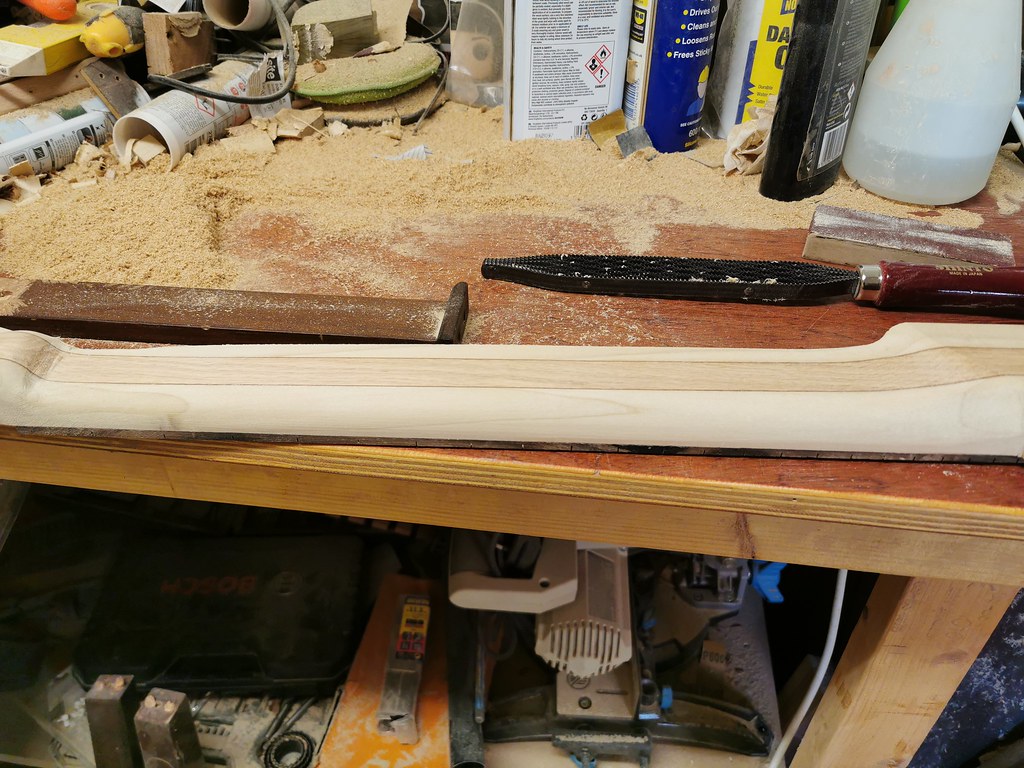
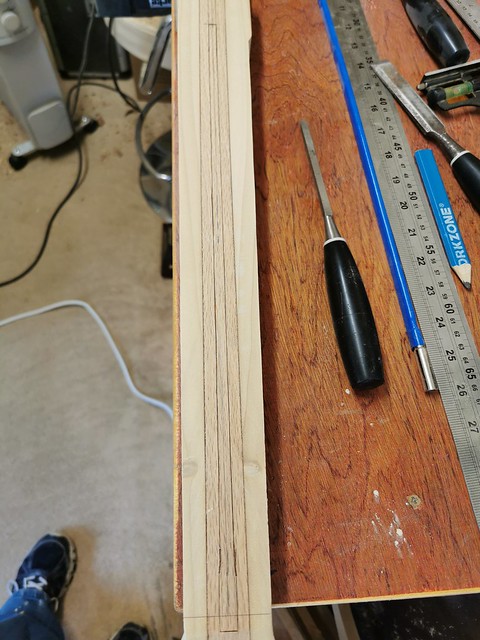
Fretboard radius finished up to 5000 grit and buffed.

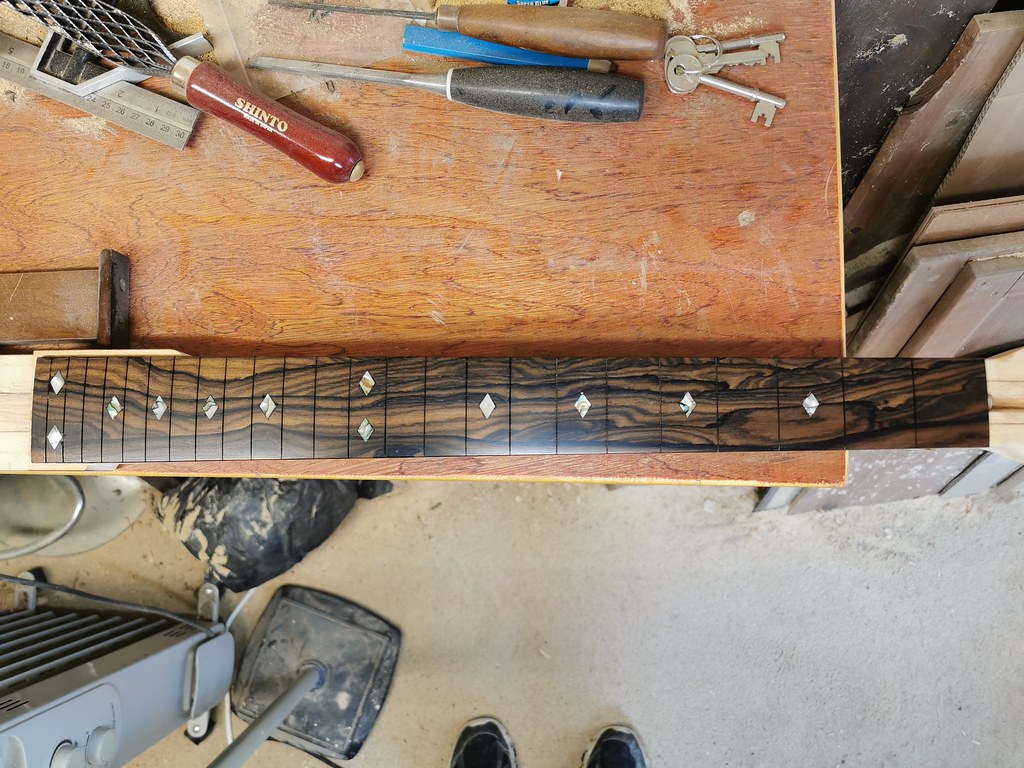
Next on the list is the frets.
-
2
-
-
Things never go to plan... had to go round to the father in laws this morning to fit a new concertina door, but managed to get back on with the fretboard inlays this afternoon. Just waiting on the glue to dry fully on the 24th fret inlays and then I can sand them level and get on with the radius sanding up through the levels.
Cleaned up with white spirit after sanding all the others level.
-
Made a start on the markers.
First one in and marked for the second.
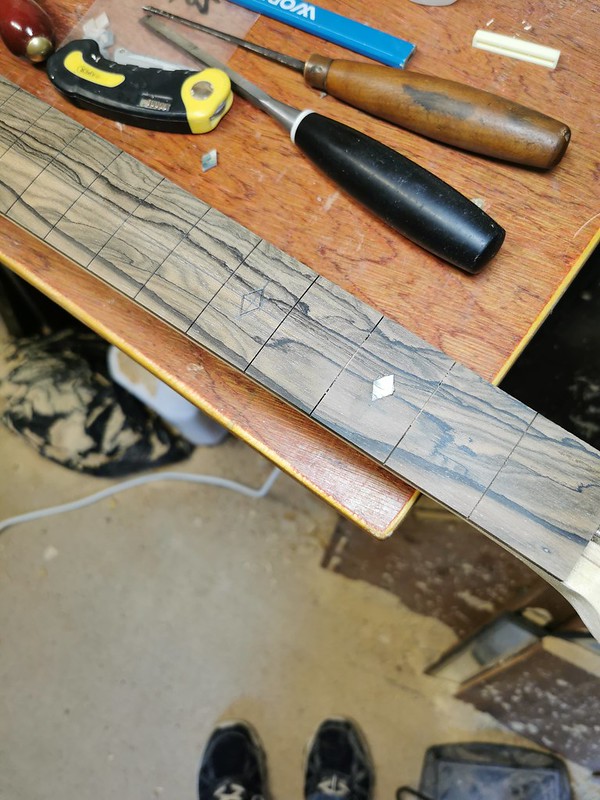
Went inside the pencil marks with a Stanley knife, then around the marks with a chisel and started taking out the wood.
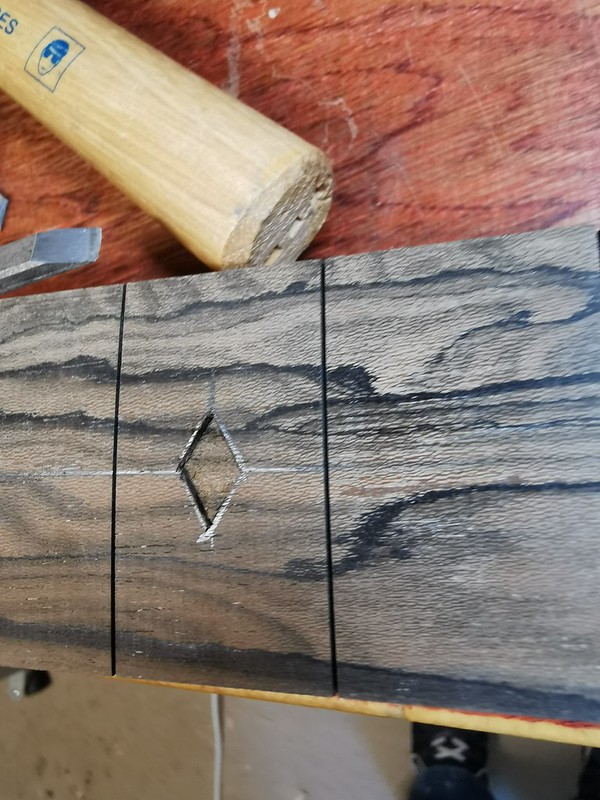
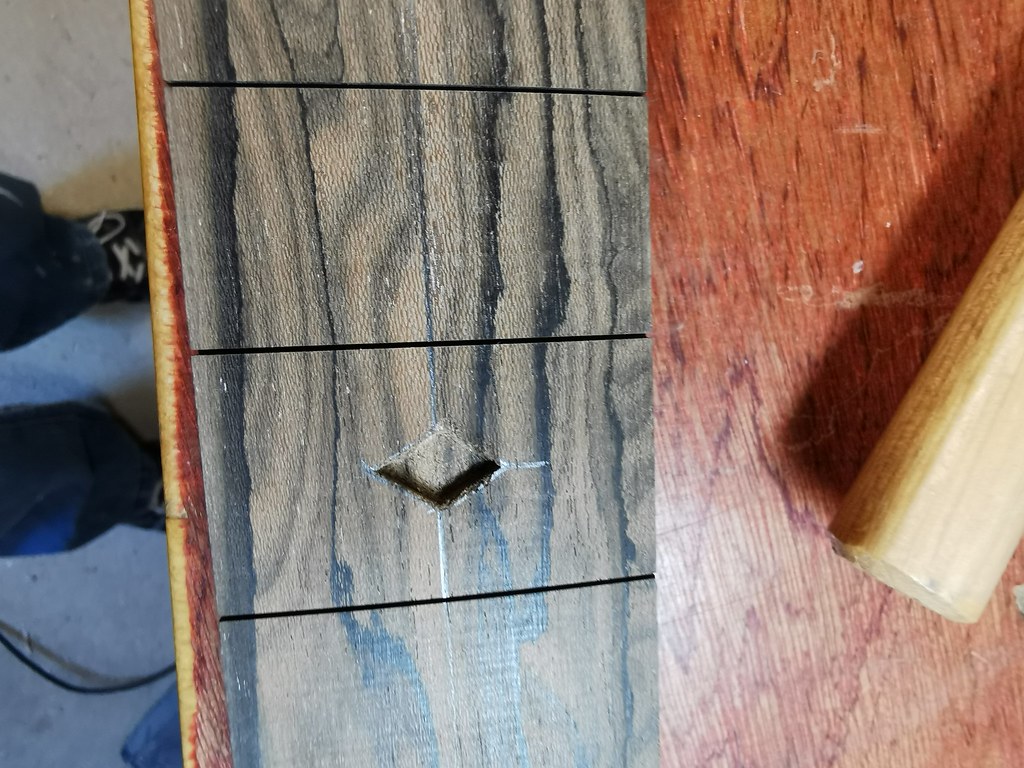
Once deep enough it was glued in.
A few marks around the edges, but they will go when I sand back. Then marked out for the third one and again went around the edges with a chisel.
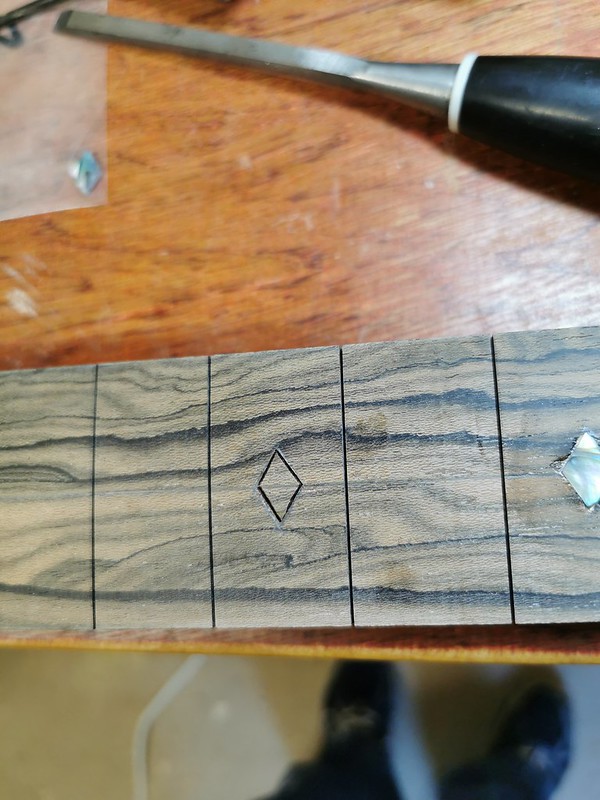
Had to stop there as it was time to make dinner, but back on it hopefully in the morning.
-
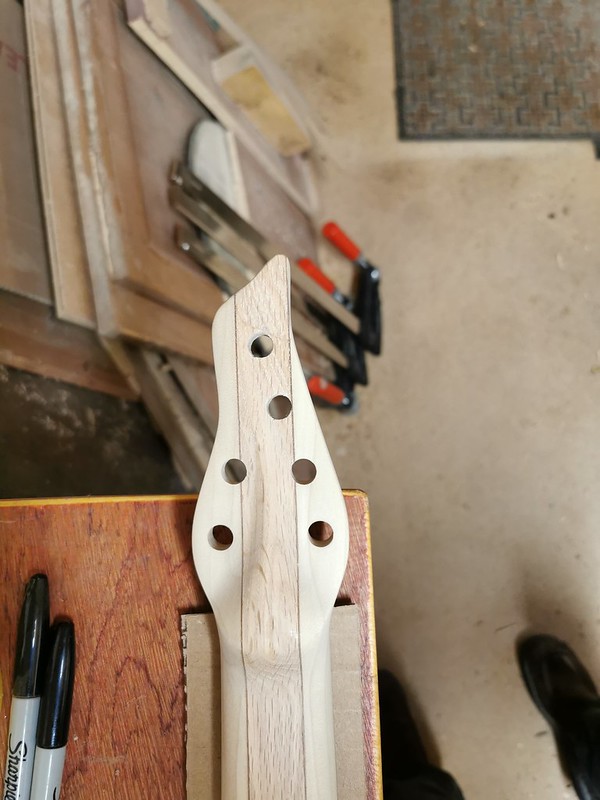
Have started doing the neck profile, just a rough shape until Dan brings round one of his guitars with his favourite neck shape. He said it is a flat C or maybe D shape and I have got it to a similar type shape with room for adjustment.
I can adjust it from here when I see the profile.
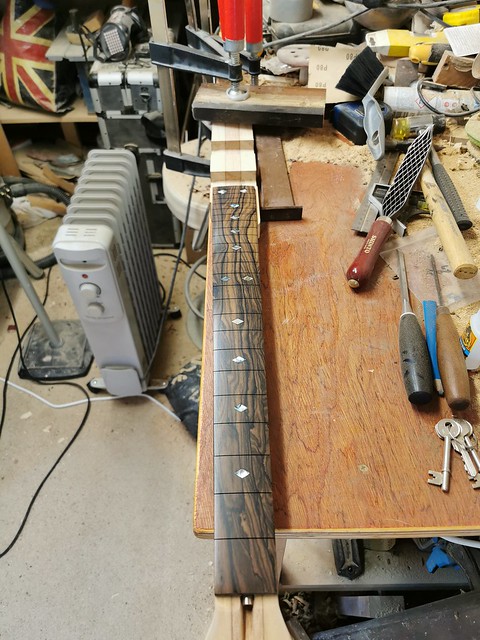
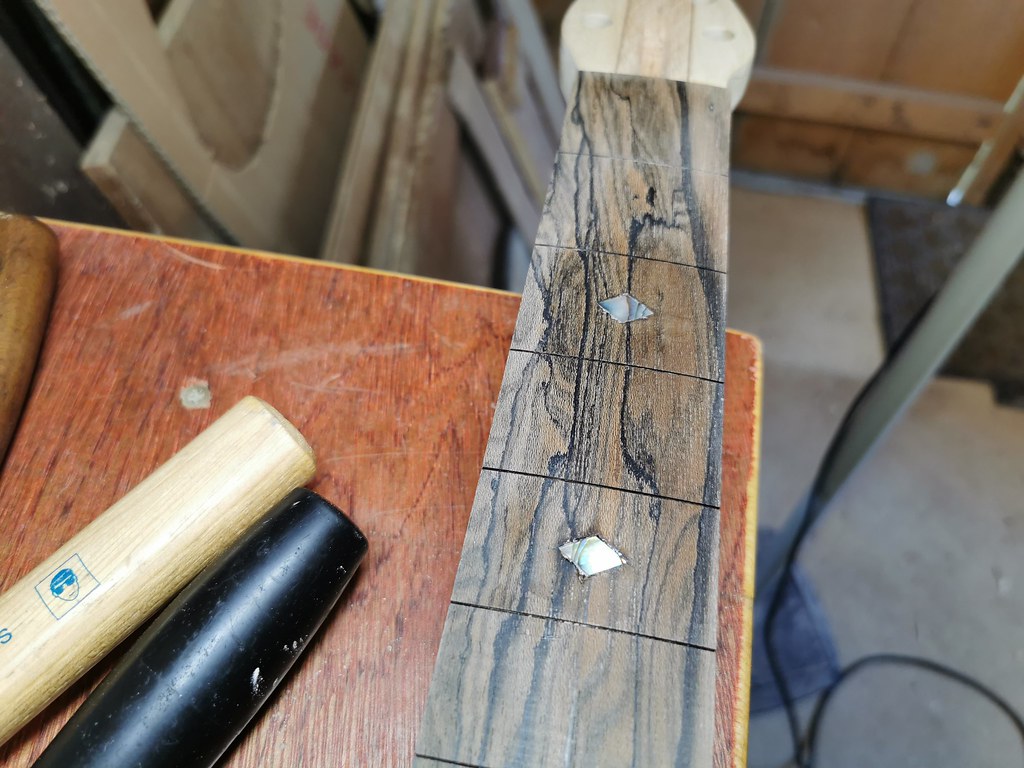
The abalone for the fretboard markers has arrived, so that is the next job on the list, then sand it to a nice finish and I can then get the frets in.
-
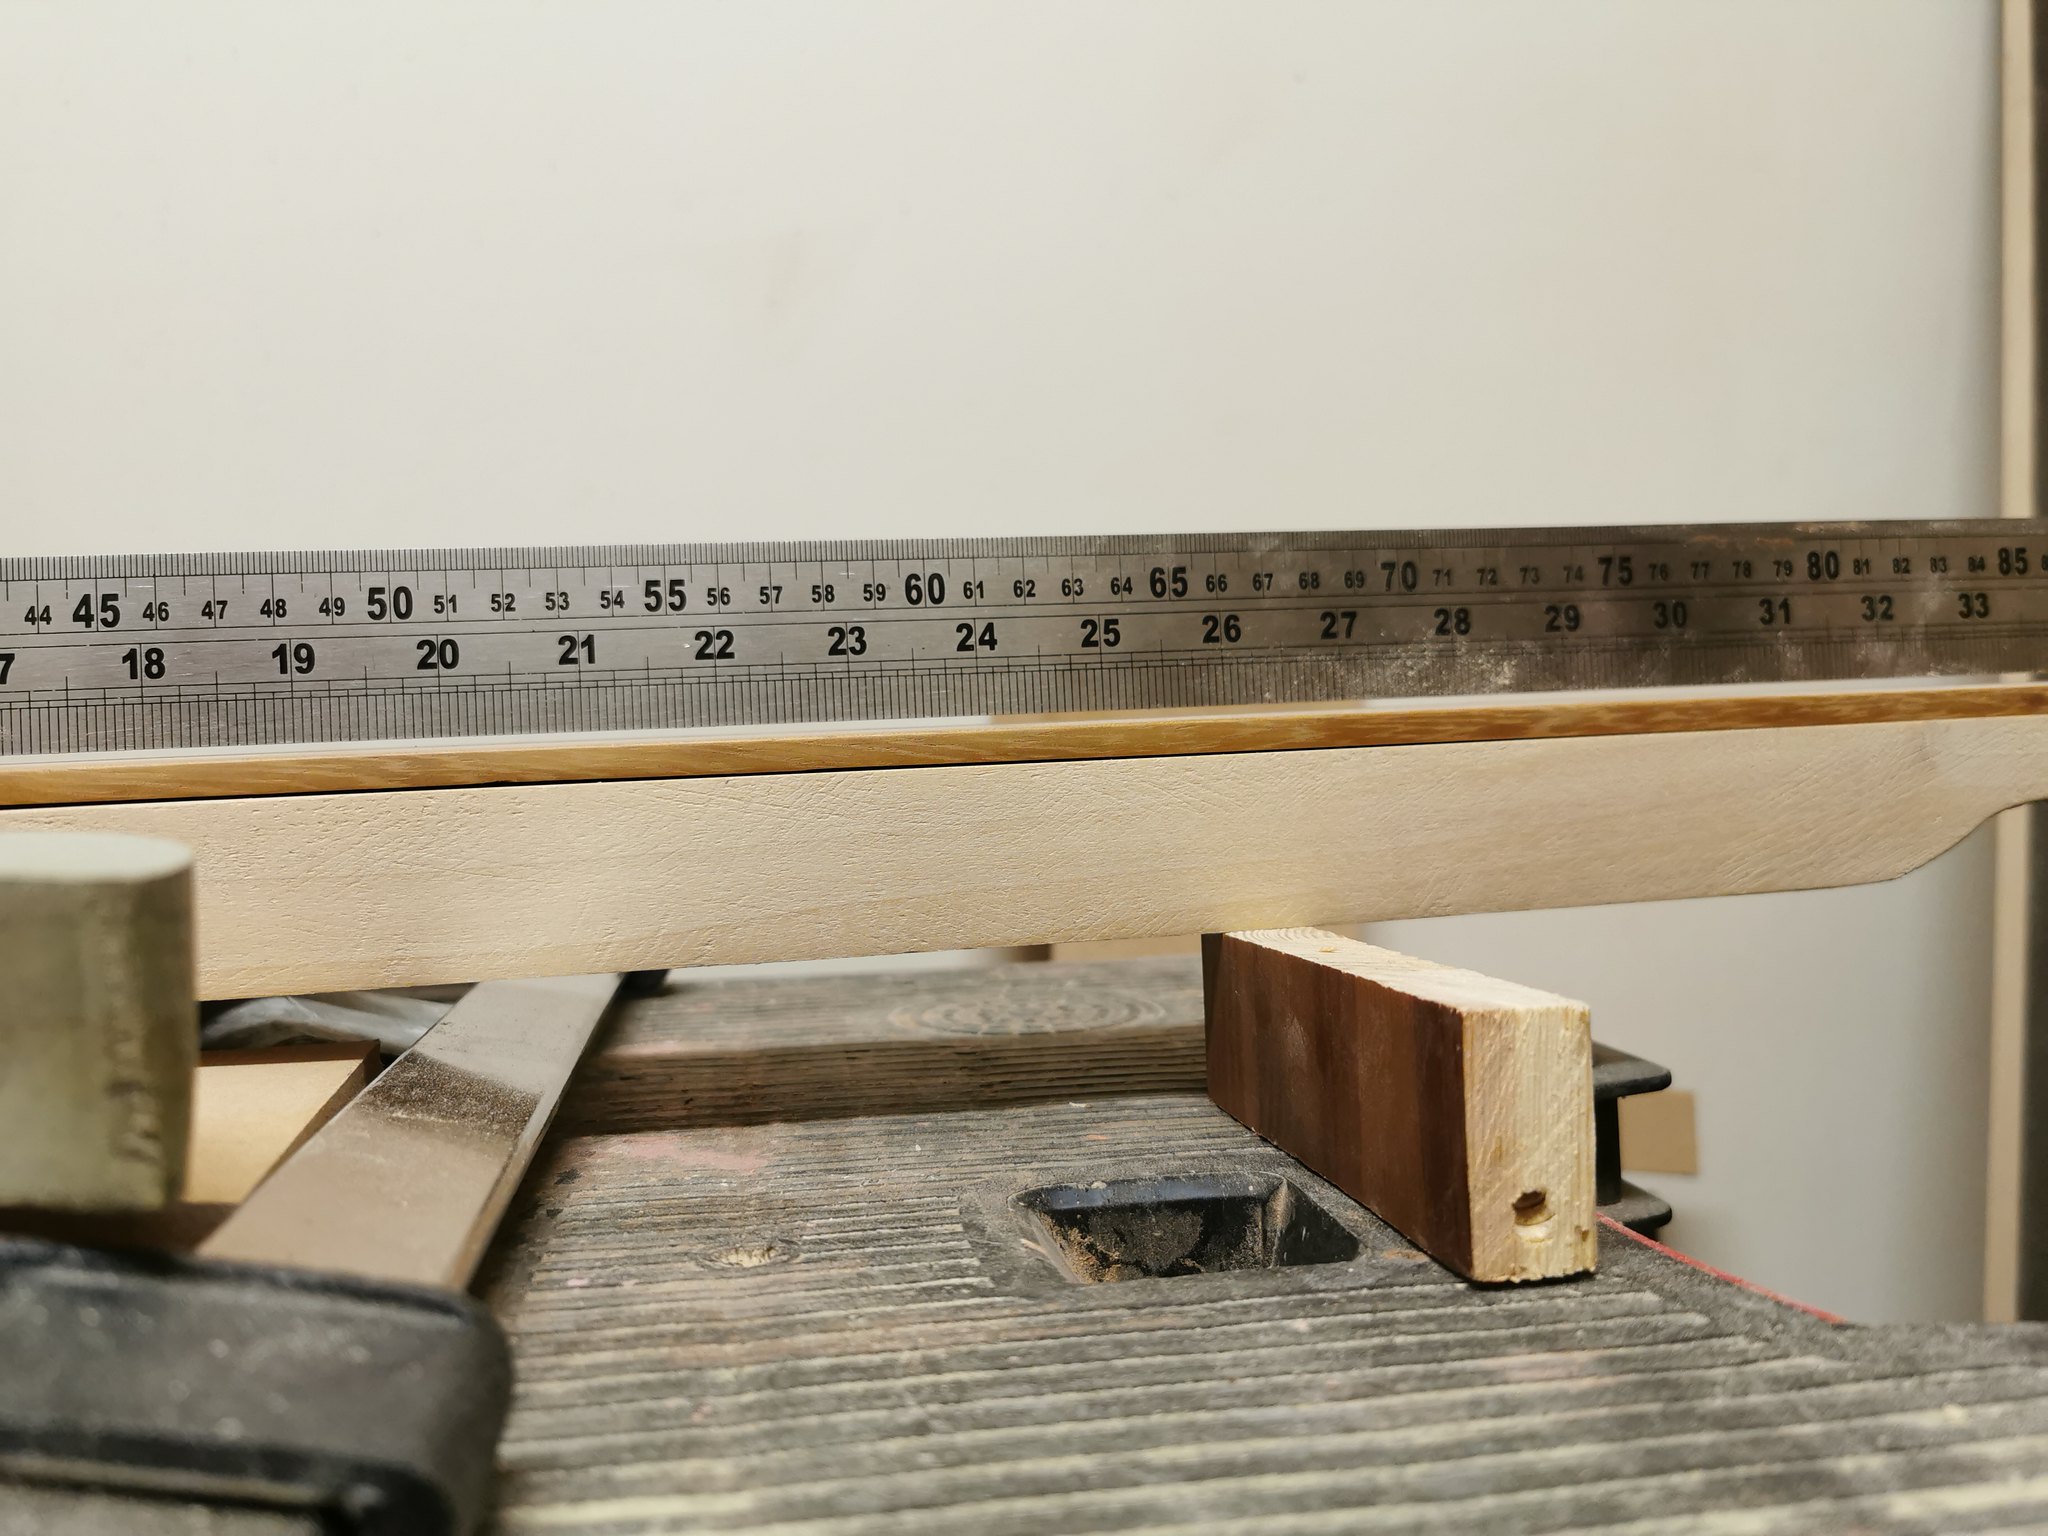
Got the 12" radius done up to 240 grit (will do finer grits after the fretboard markers are done) and then cut the fret slots.
Measured again to make sure it was in the correct place, then lined up and pins put in place to stop it moving before the gluing starts.

Then on with the glue and clamped in place. Think it is getting time to replace my smaller clamps, they are bending out of shape...
Then it was on with getting it close to shape, leaving a small amount of excess.

And tested back in place, all measurements correct.
Also saved some sanding dust for when I am doing the fretboard markers.

-
4 minutes ago, Bizman62 said:
Woo! A lovely lively piece of wood!
Isn't it funny how back in the day black ebony was the only acceptable choice for quality instruments, followed by dark rosewood?
It is such a nice piece of wood, love the figuring. Apparently it is in-between rosewood and ebony for hardness. Haven't used it before, but looking forward to seeing it polished up.
-
1
-
-
And it has arrived...
Nice piece of Ziricote
Looking forward to getting it in place. Things can get moving along again
-
1
-
-
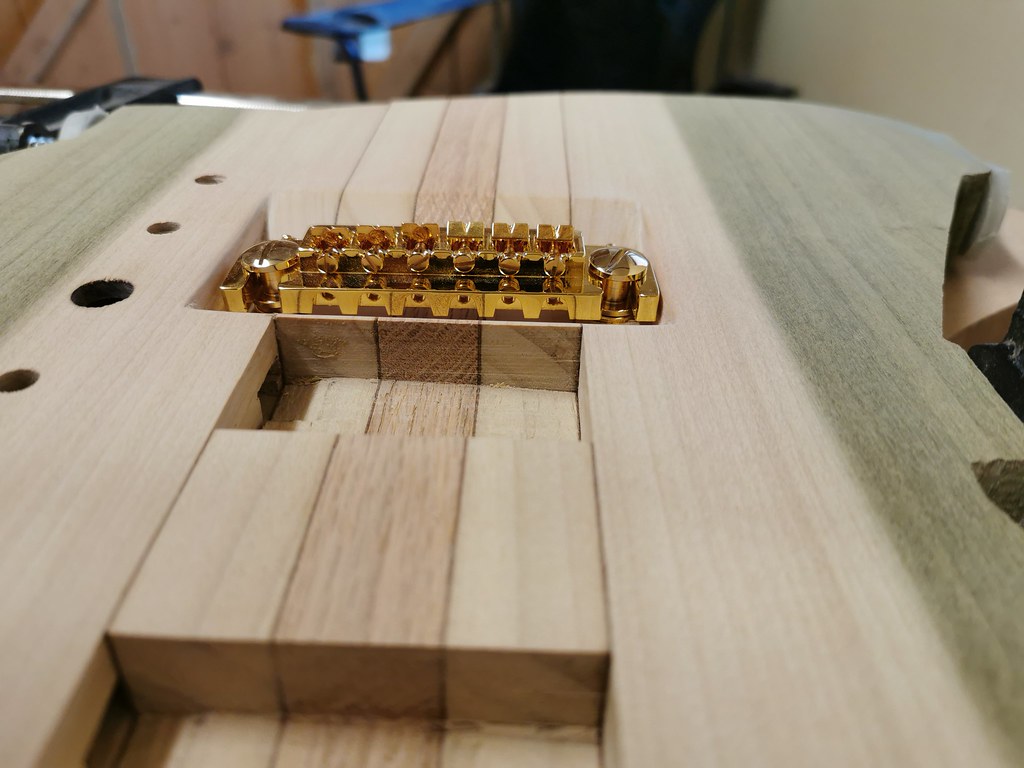
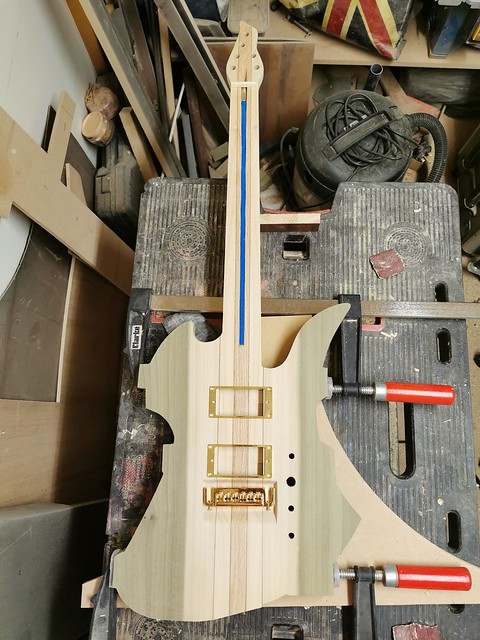
While I am waiting on delivery of the fretboard wood, I decided to get on with the sanding of the sunken area and get it as close to the finished shape as possible.
After a few hours sanding up through the grades and getting everything straightened up, I tested it with the bridge in position.
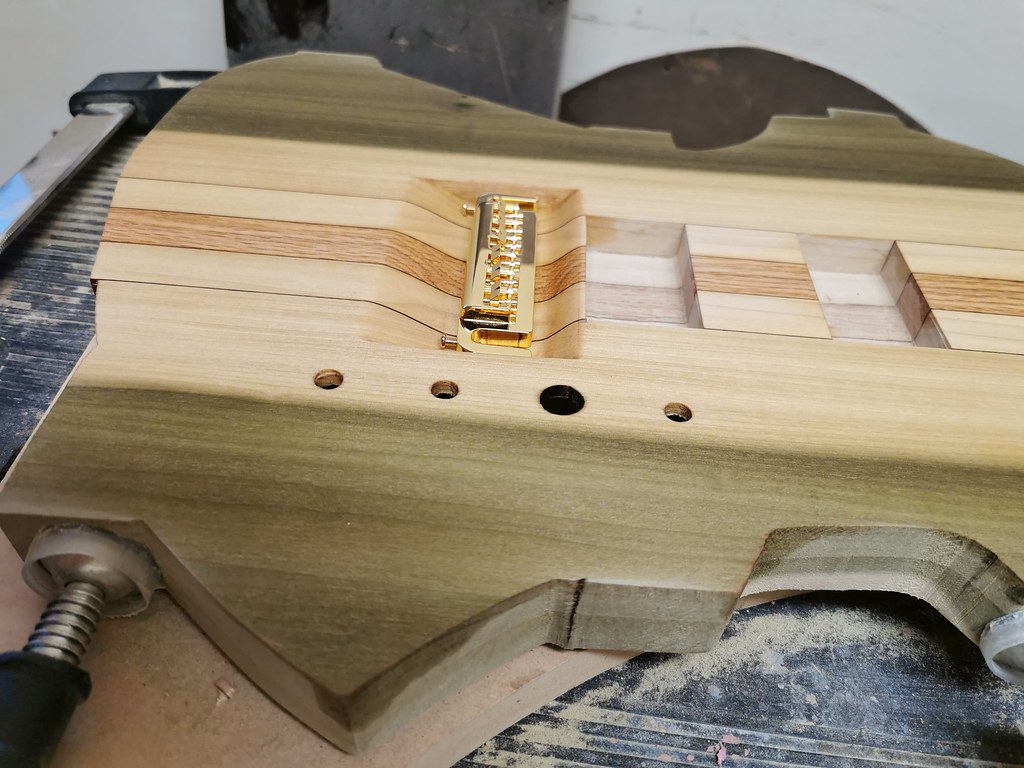
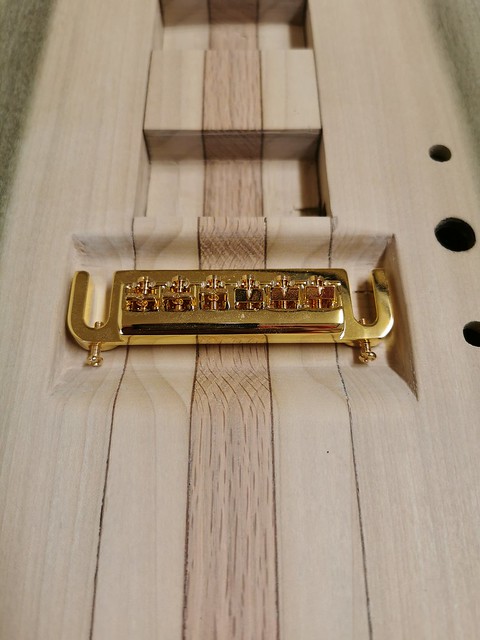
And then measured out the positions, drilled for the posts and got it all tested in place
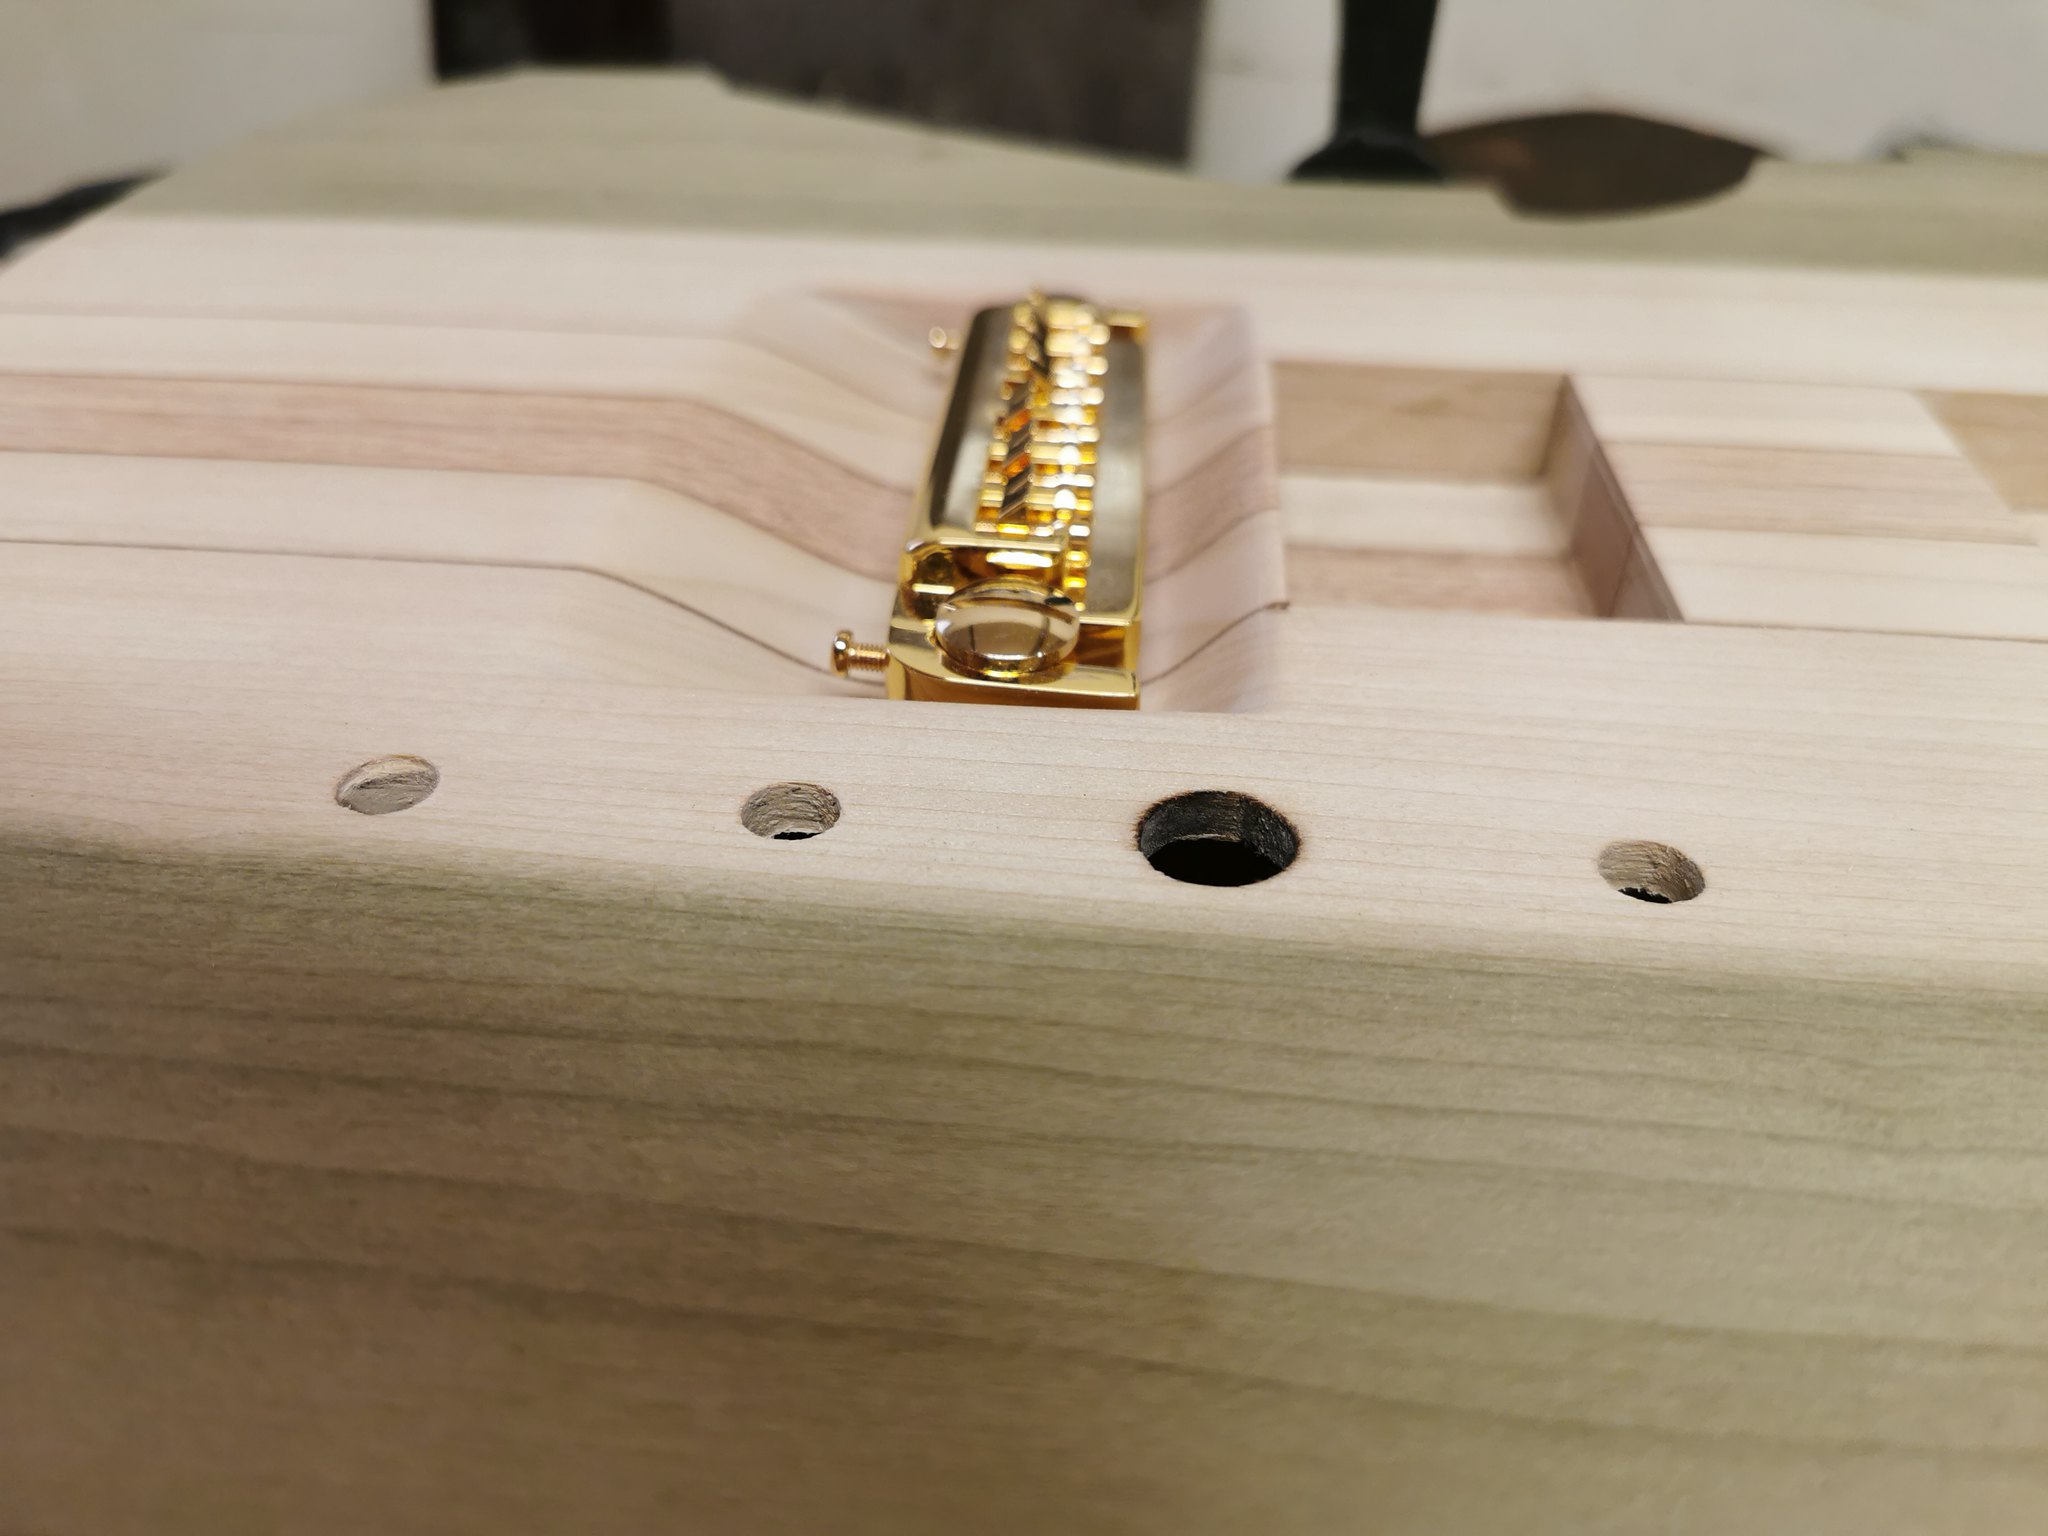
Hopefully the wood arrives soon, there isn't much more I can do at the moment until the fretboard is in place.
-
7 minutes ago, Bizman62 said:
But your method both adds an interesting detail on the top and keeps the lines straight
Thanks Bizman. The other benefit is that the pickups can stay nice and low, I don't really like it when they are stuck up 1/2 inch or more from the body.

-
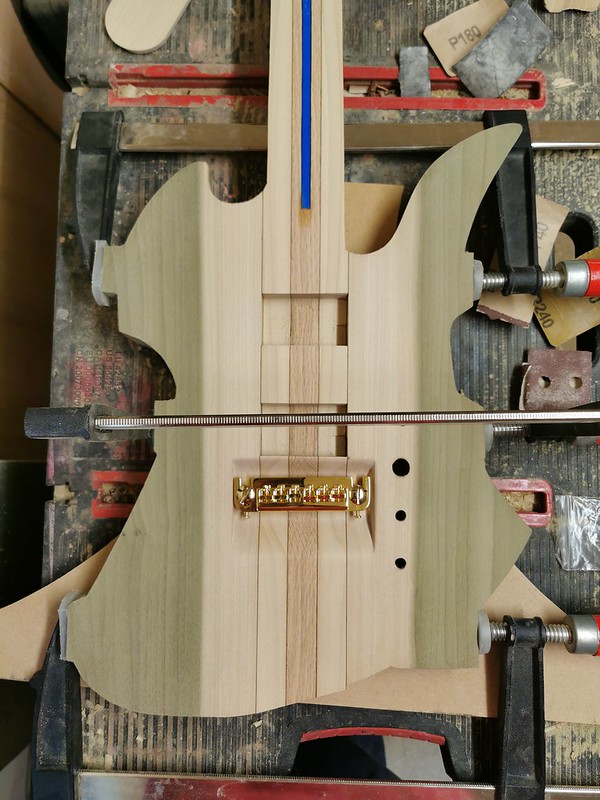
Next on the list was flattening the wings to the same thickness as the through neck. I put some pins in the wings, lined them up and clamped it all together. After a short while sanding they were level.

Sanded up to 240 grit and cleaned with white spirit

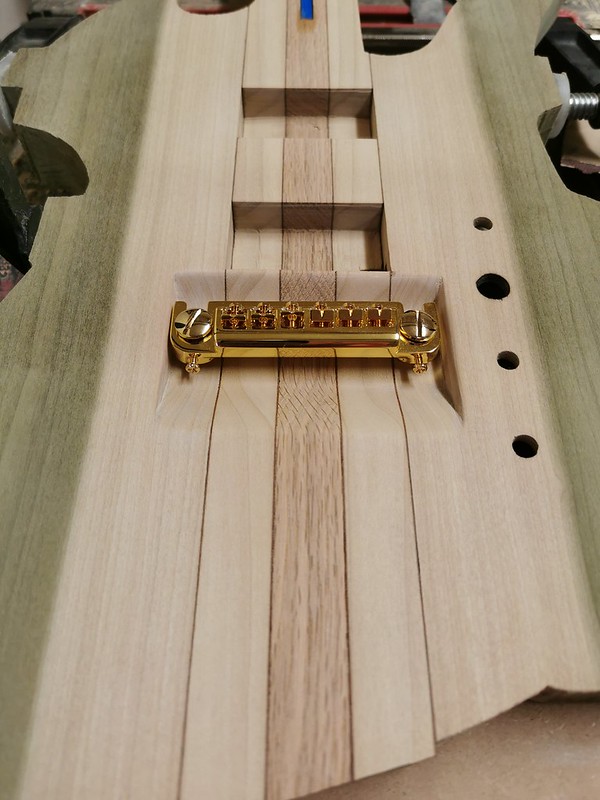
Then it was out with the chisels and I set about doing a sunken area for the wraparound bridge. This is similar to something I did on the Def Robot Flying V a couple of years ago, It means I don't have to do a neck angle, which on a through neck can be a pain and makes it easy to get the string height correct.
After a lot of chisel work and small amount of sanding it was ready for testing with the bridge.

And testing the string height with a spare piece of fretboard (which isn't big enough for this project, waiting on the fretboard wood to arrive)
There is a small drop towards the bridge, which allows for plenty of adjustment.
Testing with pickup rings
Plenty more sanding to be done, but that will wait until the wings are glued in place.
-
1
-
-
1 hour ago, Professor Woozle said:
with good sharp hand tools and the old rule of "measure twice, cut once" you can make whatever you want.
That is my way of looking at it, may take me longer, but so long as my measurements are correct and I take time and care it all works out. Patience is a virtue

-
3 hours ago, Bizman62 said:
You should make a short video/picture tutorial about how to carve simple slots with inexpensive hand tools!
Whilst I appreciate the sentiment, and agree it would be helpful for people, there are many more talented people than I.
Until last week I had never used a wood plane before (and to be brutally honest, don't even know if I have set it up correctly
, but it did the job! ). Wood chisels had only been used for basic joinery tasks until around two years ago. I look at what ScottR does in total amazement.
-
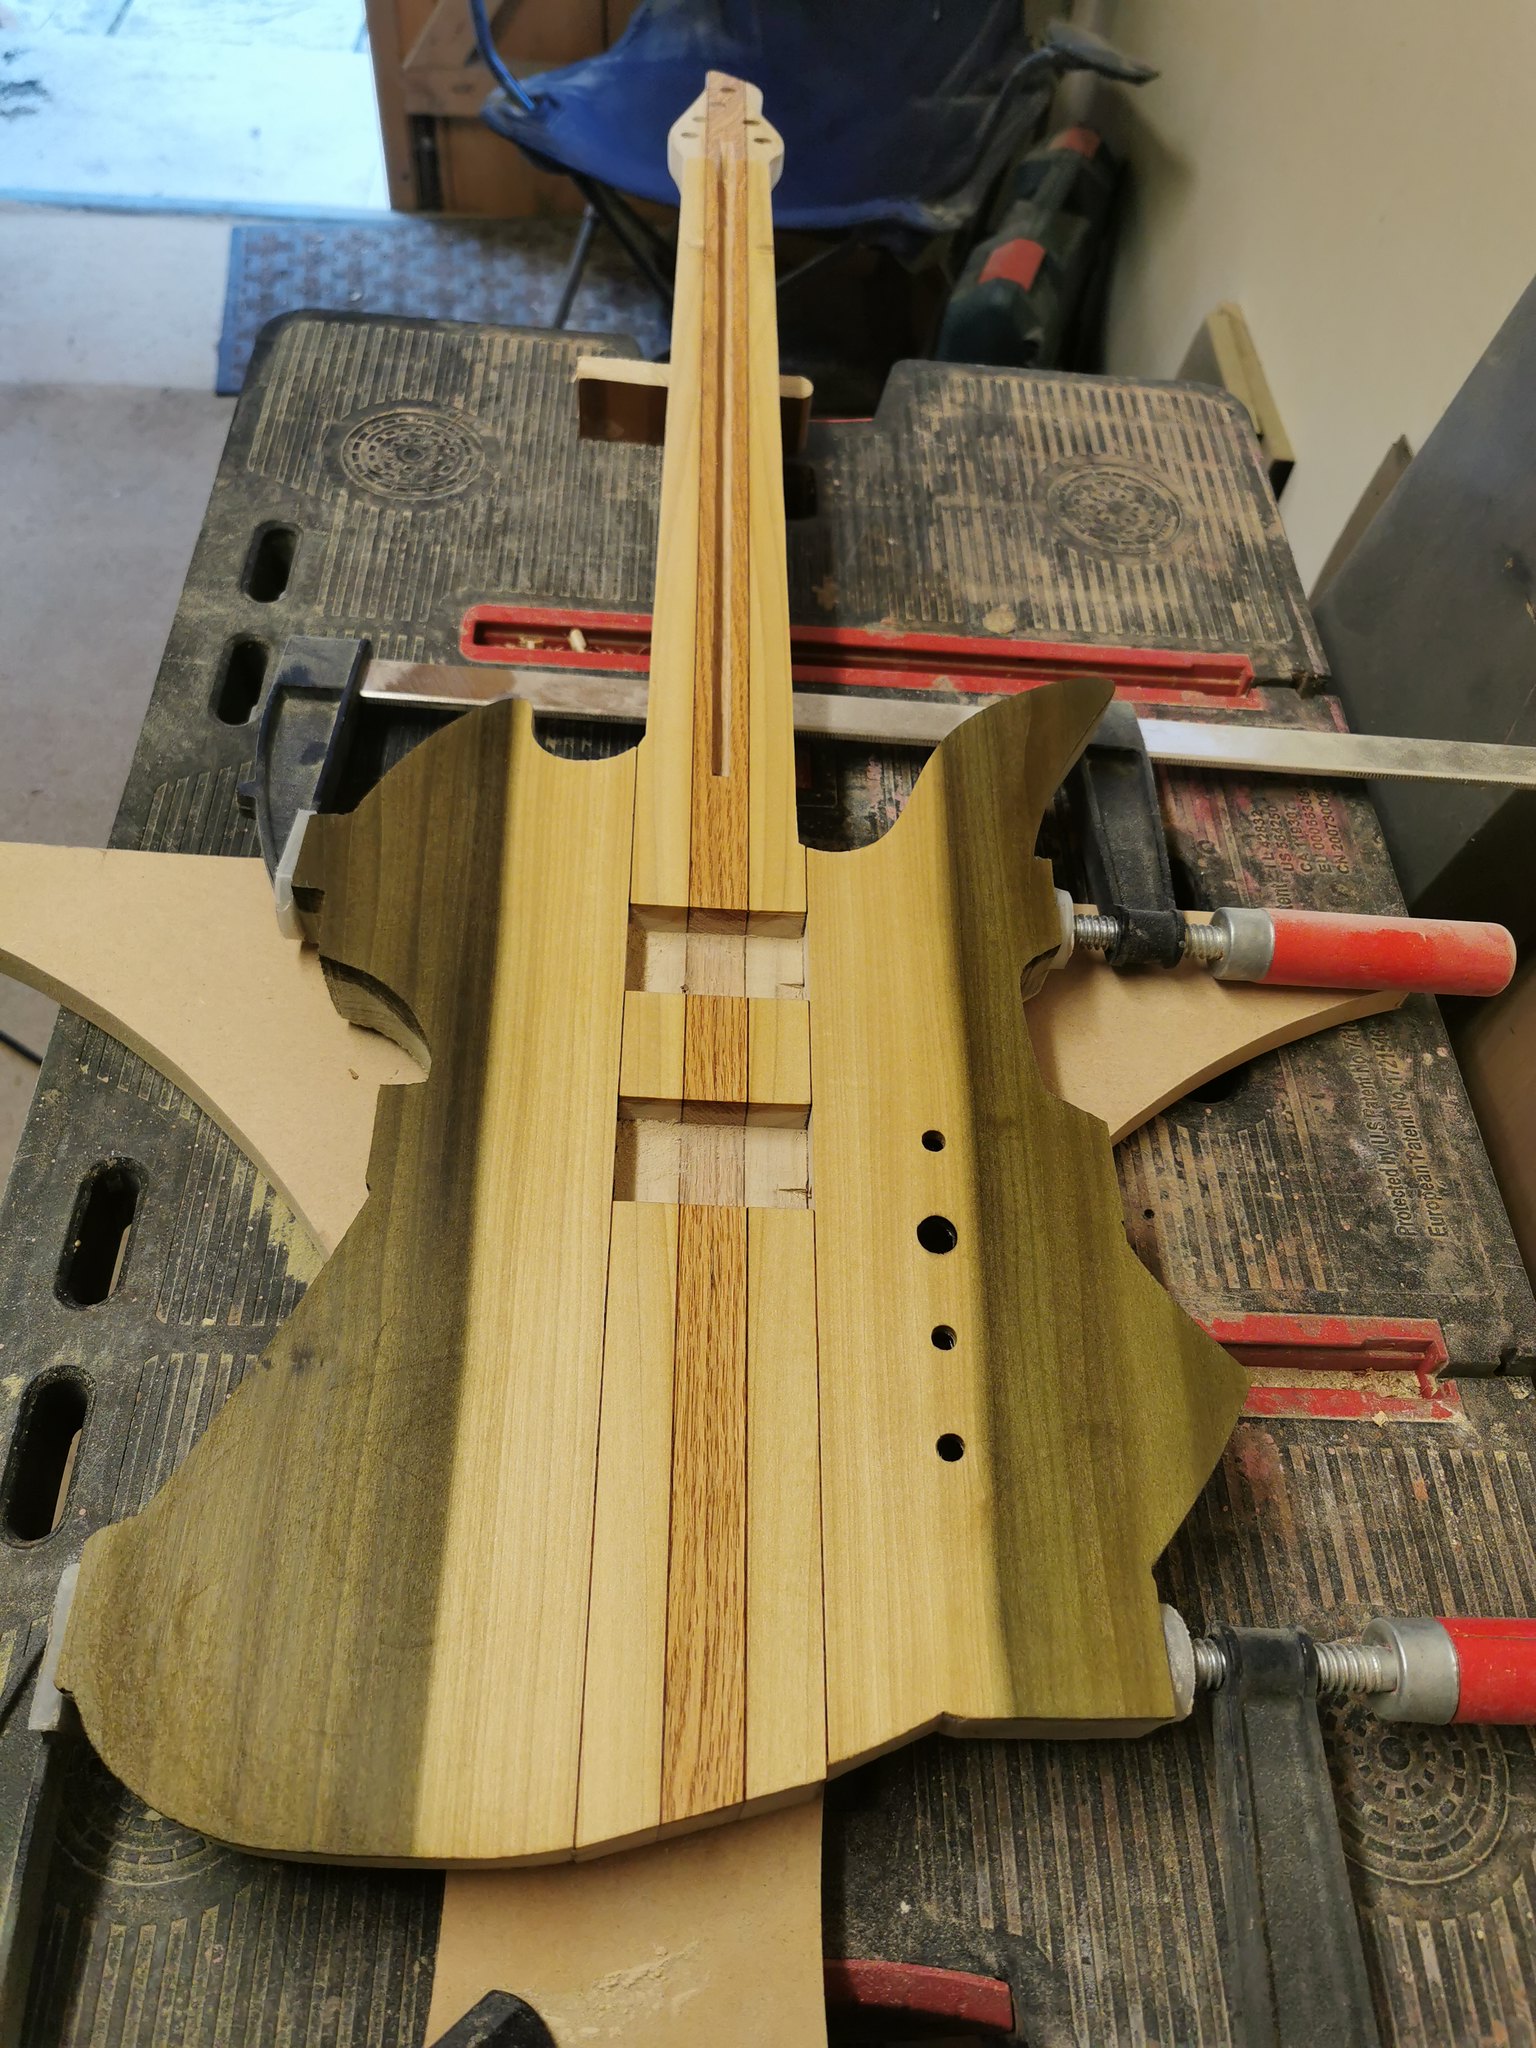
Truss rod arrived. Marked out the position and chiselled around the edges.
Then on with the chiselling...
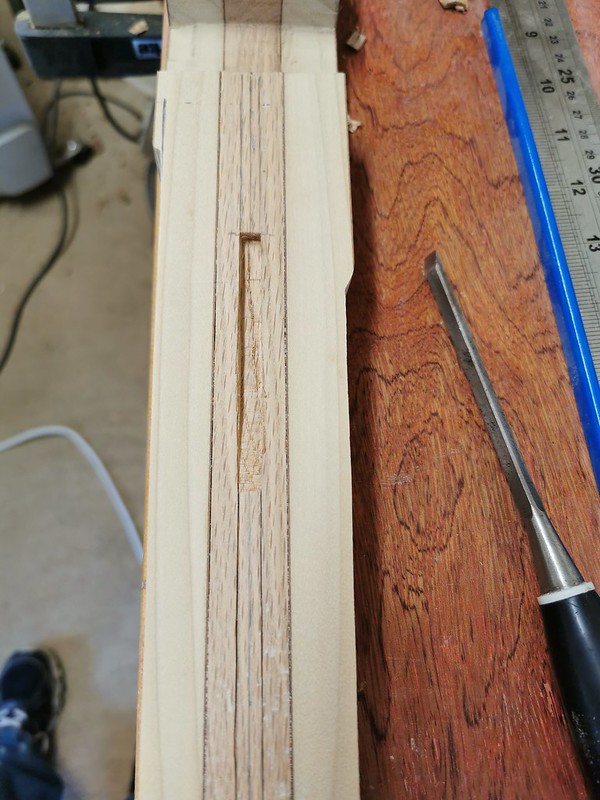
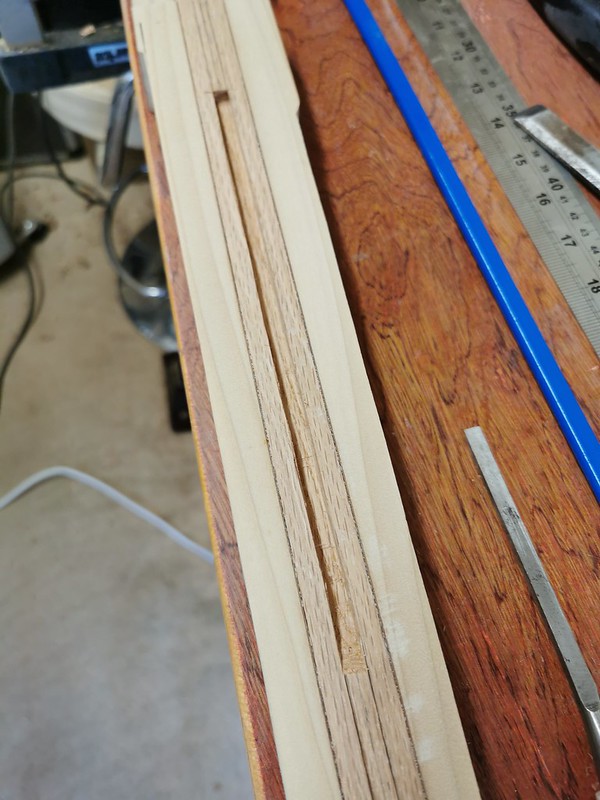
Testing in place. Almost there, just a bit more.
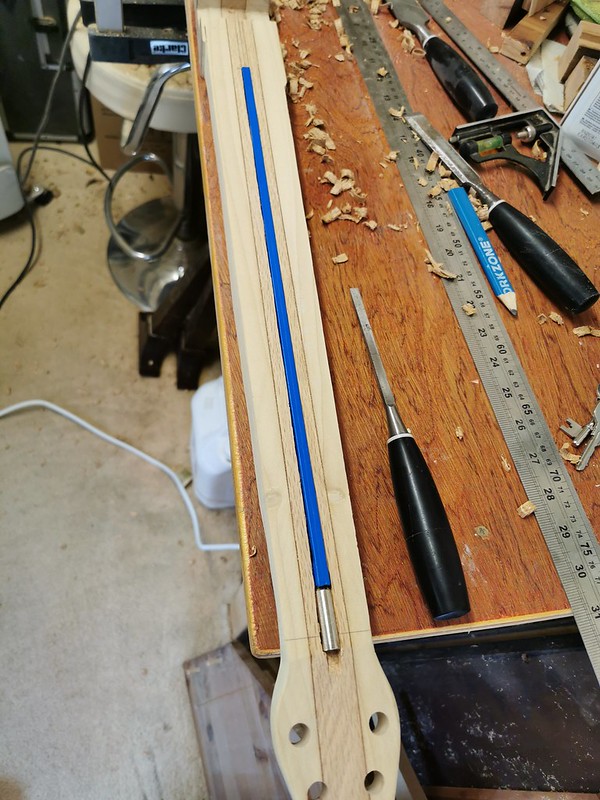
And it's in. Nice tight fit and access slot almost finished.
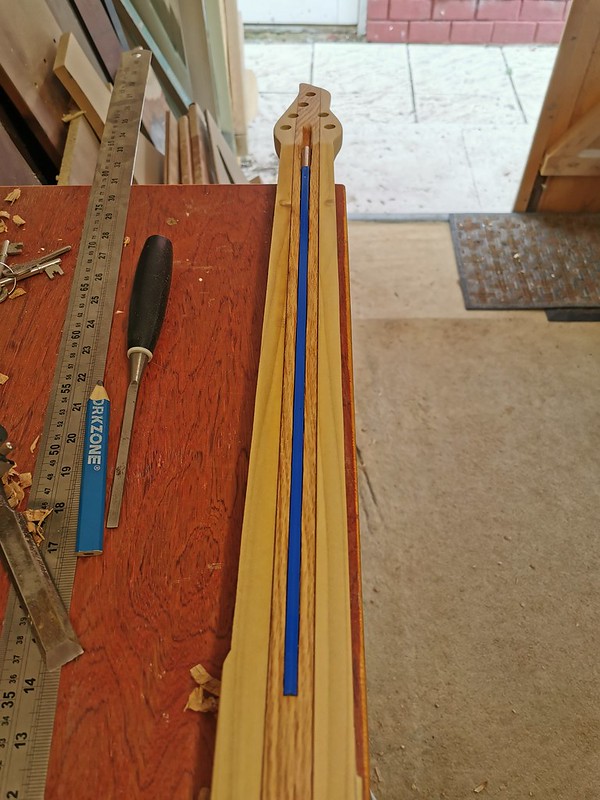
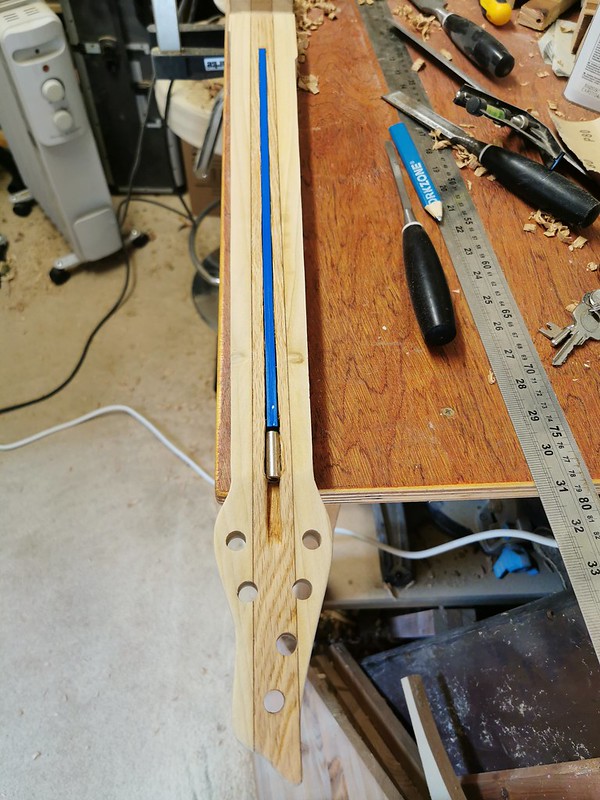
Just need to tidy the edges and finish the access slot.
-
2
-
-
First job is probably getting the tension out of those strings before it gets any worse... Proper ouchy
-
2
-
-
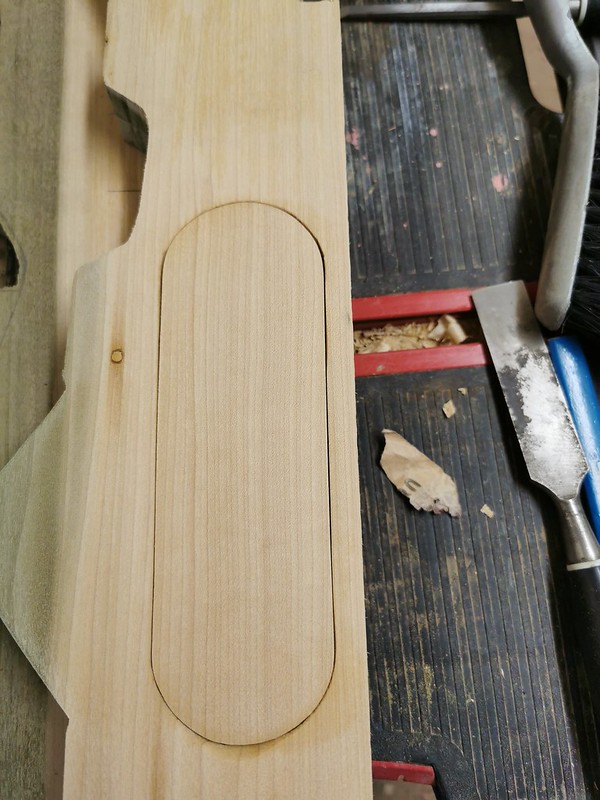
While waiting for parts to arrive, I decided to get on with making the control cavity cover. Cut a piece to the right size
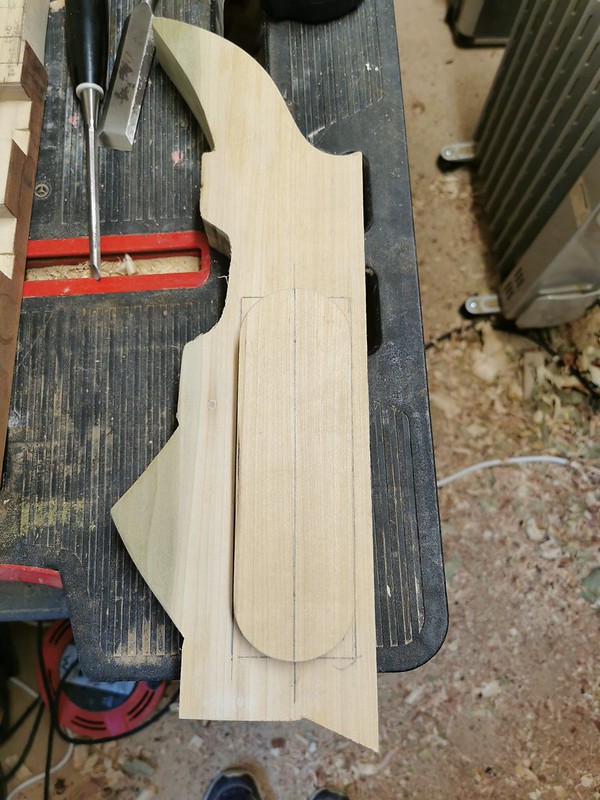
Then got the chisels out and started cutting out the ledge

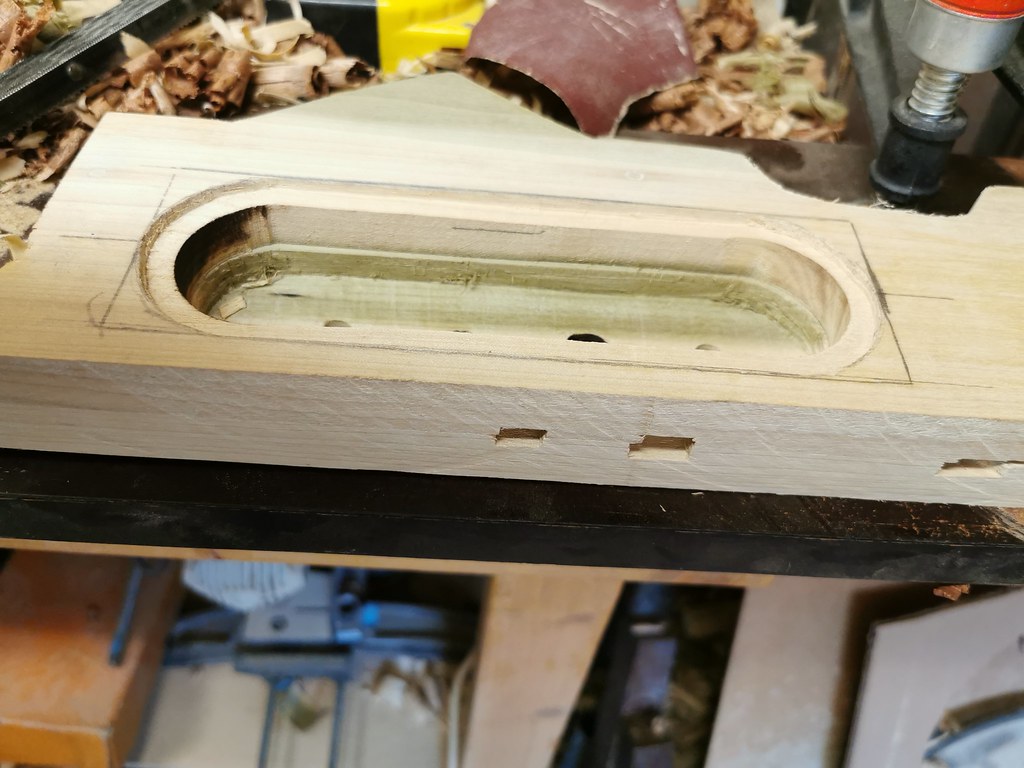
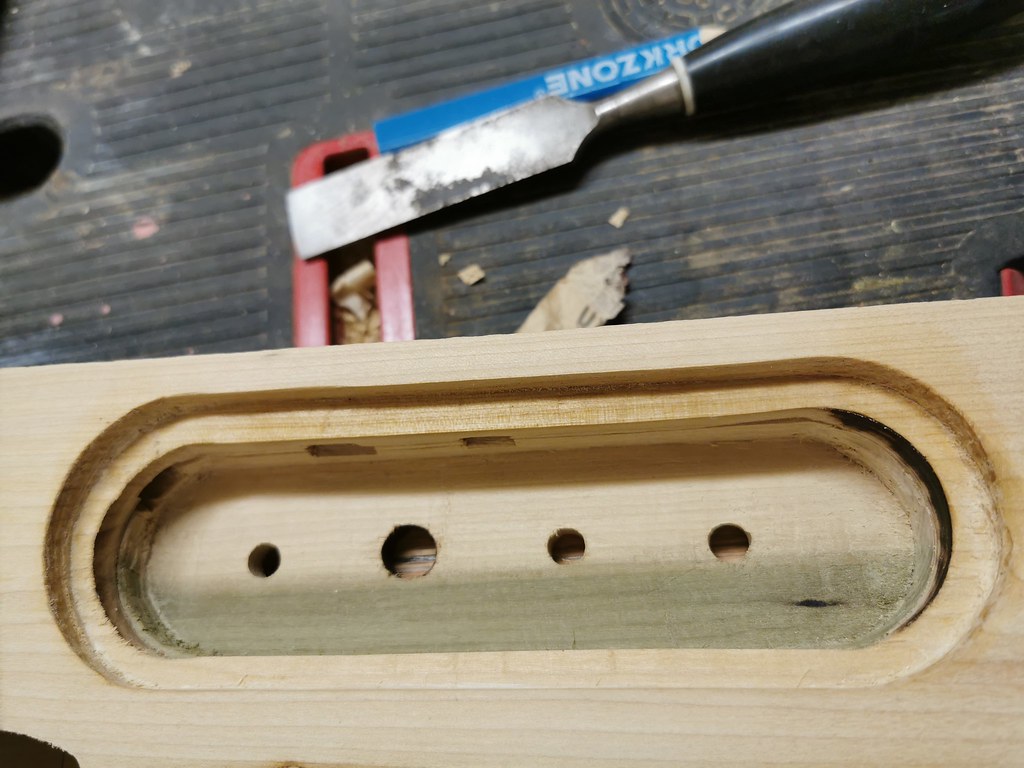
Once deep enough it was on with flattening the cover to fit correctly, testing in place and adding the thumbnail access slot (bottom of the picture). Still need to put the magnets in, happy enough with the grain matching, not perfect but close enough.
-
4
-
-
1 minute ago, Bizman62 said:
That greenish grey looks awesome, especially as the pale wood at least at this point matches with the neck.
Thanks Bizman, I totally agree. I may have to make myself another after this with the same wood combination. (although my wife will throw a hissy fit if I have anymore guitars
)
Dan, who this is for, was here yesterday making some decisions on the components, etc., and wants to do the finish himself. He has all the spray gear and is looking at doing a translucent blue finish, before it comes back to me for the hardware installation.
-
1 hour ago, ScottR said:
Be sure to double check that the spine doesn't interfere with the tuner bodies sitting flush on the headstock.
Thanks Scott. I have checked it with some spare tuners I have, but haven't got the actual tuners yet and there may be a slight difference in size. Hopefully it will be okay, but can soon change it if needed.

-
1
-

BC Rich Mockingbird inspired Through Neck
in In Progress and Finished Work
Posted
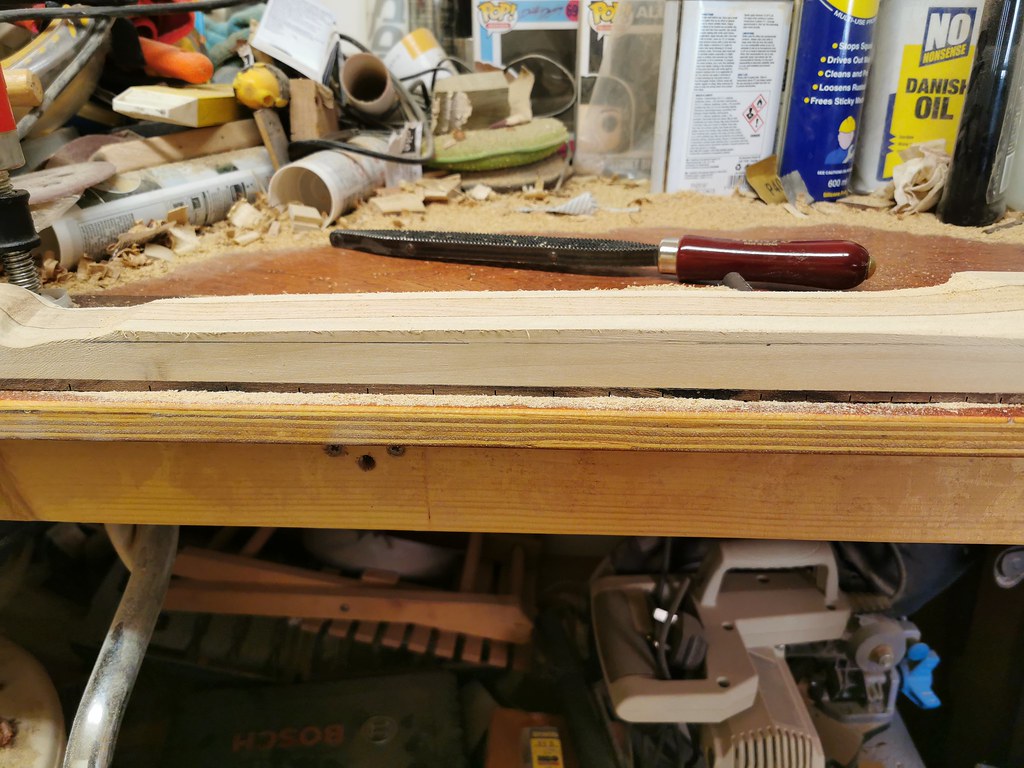
Started the sanding the back flat ready for the shaping. Still got to do a bit more and take it up through the grades, but at least it is level.
Then made a start on the heal shape into the body.
And then got the sides shaped and the front flat ready for the bevelled edges.