


al heeley
-
Posts
775 -
Joined
-
Last visited
Content Type
Profiles
News and Information
Tutorials
Product Reviews
Supplier Listings
Articles
Guitar Of The Month
Links and Resources
Forums
Gallery
Downloads
Posts posted by al heeley
-
-
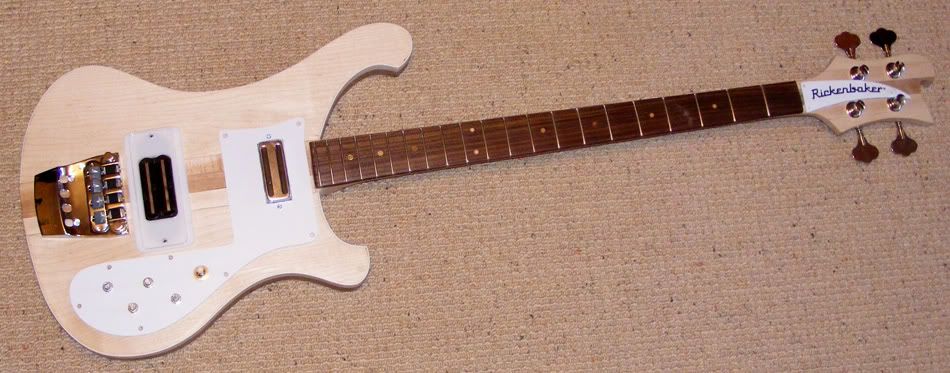
Real rics have only a 5 or 6mm centre stripe. I had a nice 20mm wide piece of cherry for the neck so as this is not a real ric Iwent for the thicker stripe. I guess the sound won't be compromised by this departure from authenticity.
the headstock should be pretty much on, there is the inevitable fore-shortening of the photo image.
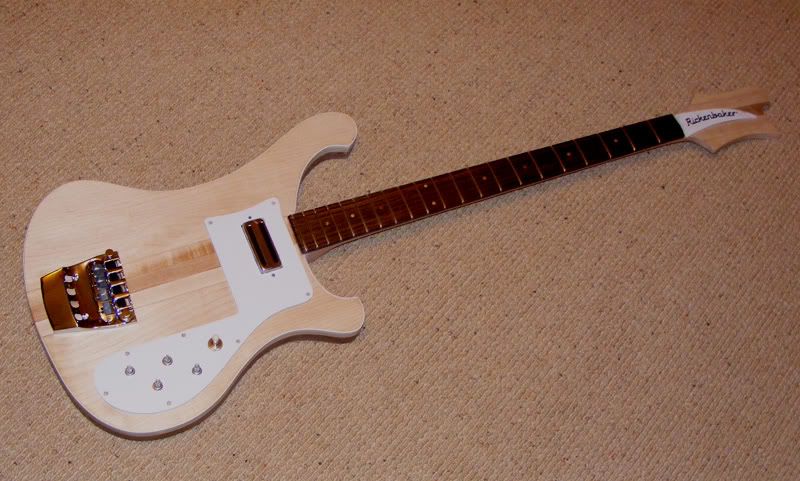
No new pics for a bit, been slowly building up the thin layers of Tru-oil. A touch of antique pine stain to the maple top gives it a warmer golden glow to take away the stark bleached white.
-
Oops, is that a knot in the wood grain or has someone dropped it on the floor and tried to fill it?
-
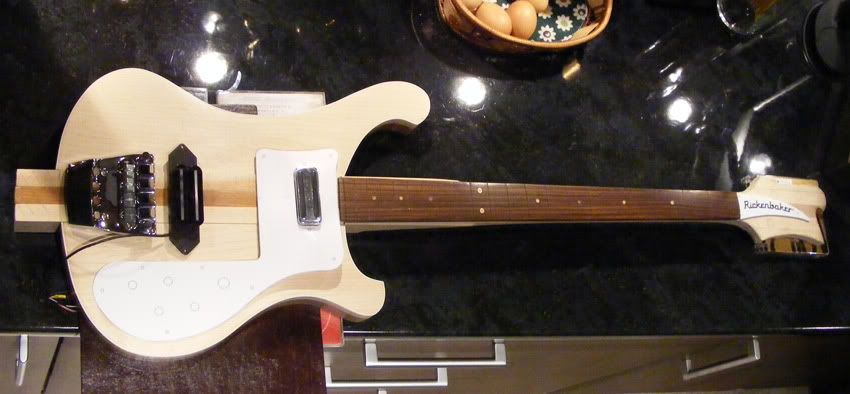
Pickguardian delivered today, machine heads from Gav's ebay shop. Here's all the bits in place - final sanding, tru-oil finishing and nut-cutting left on the agenda.
-
There's some cool variations on a theme, I like the A/B/C one in particular.
On question, though: since the LED power supply ground and signal ground are common, isn't there a possibility that you could get a POP when switching? I personally like to keep LED ground and signal ground seperate in passive devices like these to avoid that *potential* problem...
Cheers Paul, I built them all and tested them; i use a couple when gigging - they don't pop on switching. Maybe if an amp doesn't have earth lift switch, they would benefit from complete isolation on the power + LED's, but I've not yet heard any issues with any of these schematics.
My favourite is the A/B + X/Y - I use it at every gig - keeping 2 basses plugged in and the outputs going to either amp or tuner.
-
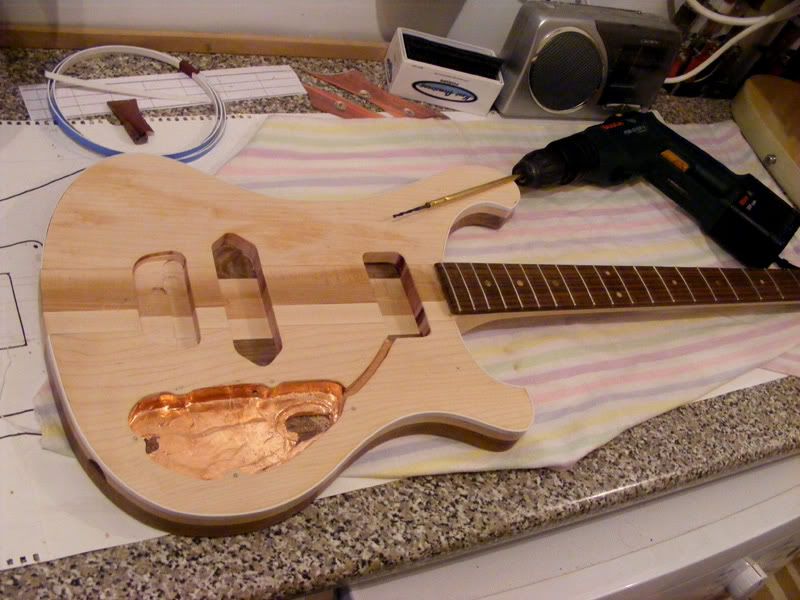
Final bit of routing - bridge pickup. Second use of the B&Q copper pipe, a little trick learnt on the forum for making the wiring holes from crtl cavity to bridge and pickup cavity easier to drill - always scares me doing that bit. The drill bit stuck into the end of the pipe with a blob of epoxy makes the job a lot easier and a lot less risky.
-
It's a fraction over one and a quarter inches so watch out when you're routing the ctrl and pickup cavities or you'll go right through!
-
Beautiful work, the wood combination is stunning!
-
Some more progress today - frets fitted & trimmed, ctrl cavity routed and electrics started.
-
Looking good Wez, I'm interested to see how the burl looks underneath your trans blue.
-
I'm not feeling at all slammed!
 It's an interesting point - I don't know if the original rics were shorter scale, I'm pretty sure in the books I have on classic guitars (and rickenbacker's website) that they all list them as 33 1/4", maybe anyone here with an authentic vintage ric can get a tape measure out for us.
Melvyn Hiscox book is also my reference bible to all the guitars I've built so far, coun't have made a start on this addictive craft without that book.
Made a start ont he routing this afternoon.
-
I'm quite excited. Wings are glued on to the core now and planed level. Here's a pic showing the walnut back. Starting to look like a bass now

-
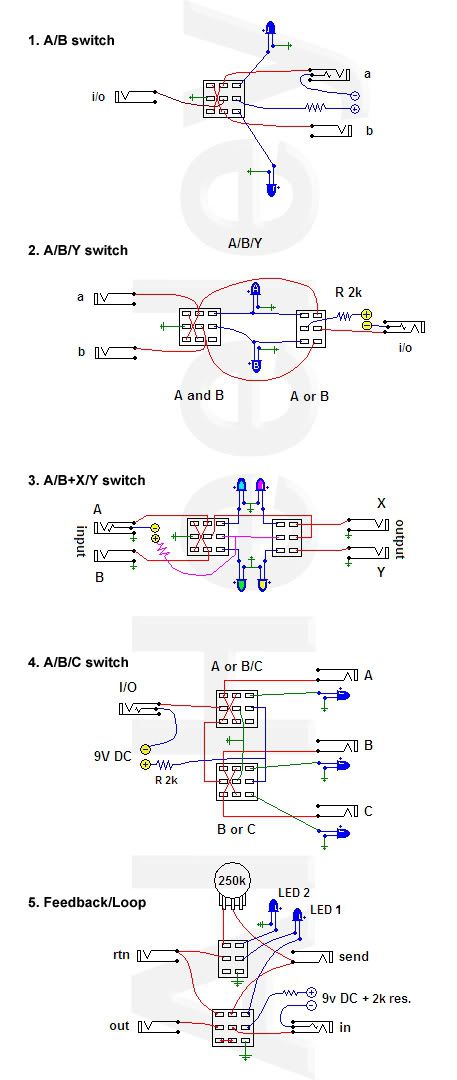
I've tidied up my collection of passive switch box schematics and pasted them all together, hopefully these may be of use to people who want to have a bash at wielding a soldering iron and put one of these incredibly useful boxes together themselves. Just need good eyesight to unravel my pixel-art.
Passive Switch Wiring
9V battery powers the LED indicators thru a 2k resistor
Uses combinations of 3PDT and DPDT switches
X-grounding for noise suppression where appropriate
Where not indicated, jackplug earths are grounded out together
1. A/B switch allows switching between 2 inputs into one output (eg: switch between 2 guitars in a gig without having to unplug) or use in reverse with one input switching between 2 outputs, eg: 1 guitar into either of 2 amps or amp/tuner, or select pedal chain or bypass for example.
2. A/B/Y switch allows AND/OR config: one guitar into either amp A OR amp B OR both at same time.
Note: Can be used in reverse as A/B box but not recommended for 2 inputs simultaneously into one amp - guitars will interfere and cause hum.
3. A/B+X/Y switch allows A or B choice on input and X or Y choice on output, for example, choose one of 2 guitars on stage into one of 2 different amps, 1 of 2 guitars into either amp or tuner (will mute amp)
4. A/B/C switch allows one of 3 guitars into 1 amp or in reverse, 1 input into either of 2 amps or a tuner for example. Switch 1 chooses between A and (B or C). Switch 2 chooses either B or C.
5. Feedback/Loop switch selects to either bypass or route signal thru an effects box with option to blend some of the 'wet' signal back into the effect loop (level set by 250k pot) or leave it 'one-pass'.
-
-
Standard Ric 4001/3 scale length is 33.25", = 845mm
Trust them to be quirky
-
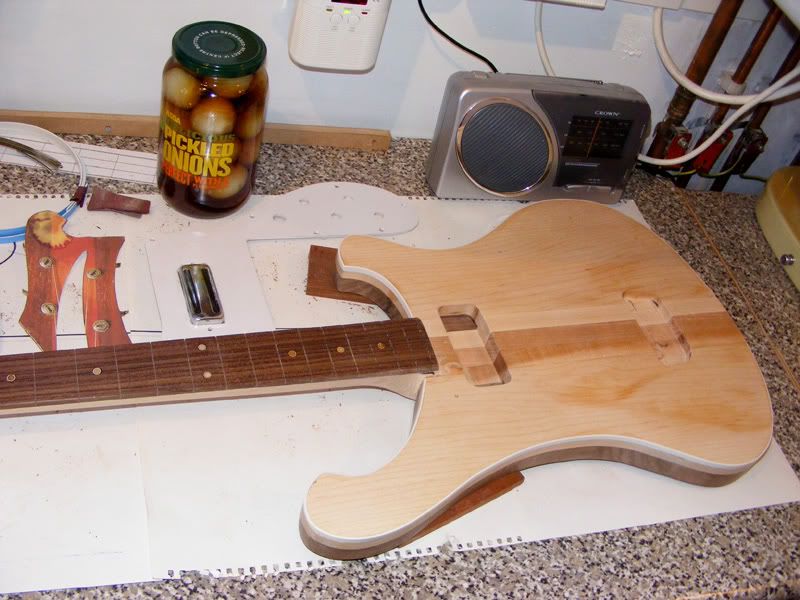
Neck shaping is just about done, fretboard is glued on and the upper body wing is being epoxied to the core section at the moment.
While that is curing I'm making a small template from a piece of MDF, for routing the under-bridge cavity into the body.
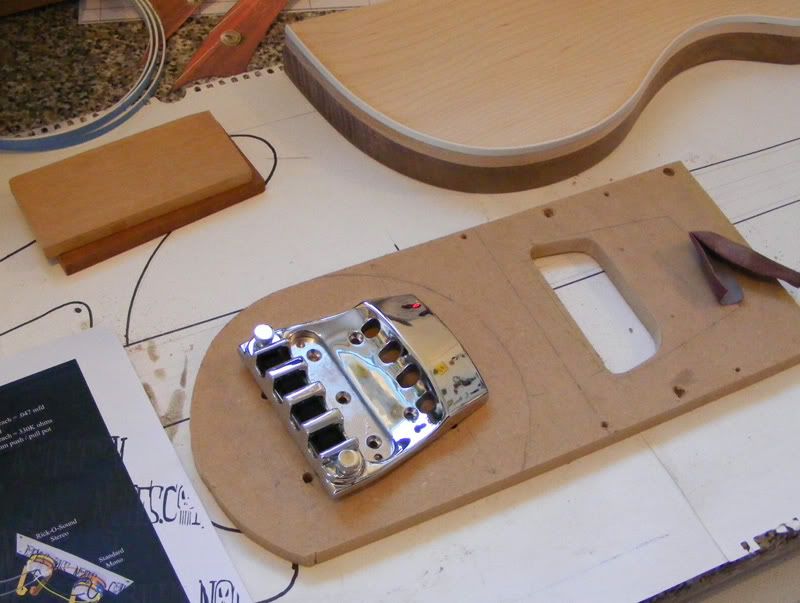
-
Wow! Outrageous! Love that first pic - the gloss makes it almost look sort of translucent. The horns are killer - what really spoils it for me is the red hot rod comic fire design along the back of the neck. If it wasn't for those it is a reall killer instrument!
-
Some more shaping on the neck and headstock. [Rolf]Can you tell what it is yet?[/Rolf]
-
That's perfect - many thanks!
-
Anyone know where I can find a schematic to add a low-battery LED warning light into a guitar or a stompbox? Either a separate warning light coming on when battery falls below a certain voltage, or ideally getting an existing LED indicator in the circuit to start flashing when critical voltage is reached?
(9V in this case)
-
I've done a few builds with Tru-oil, I'm just as impatient so i wouldn't wait, but then my impatience means I'm never going to get the really top class finishes some of the guys on here get with tru-oil guitars. I'm ok with that - they are for my own pleasure and I don't go fro the high gloss boiled sweet finishes. i like the natural oil silk look. Its down to your own preference
-
...remember to turn off the LED when your done with the pedal, or you'll run down the battery.
A Stereo jack is essential with battery powered pedals, the ring normally goes to the -, then when the jack is inserted, it makes the circuit from ring (and battery) to earth. Unplugged - the battery is saved.
-
And the easier way to do a headstock logo is to hire someone to do it for you.
Very nice, classy bass. Don't listen to dpm, get yourself some ink-jet printable water-slide decal computer paper (eg: crafty Computer paper dot co dot uk sells it) and print your own. Much easier and cheaper than hiring extra staff.
-
what about the Tubescreamer pedal? That uses diode clipping as well as a bit of overdriven IC op amp to produce a wonderful sweet tone.
-
very interstiing range of tone controls but maybe a bit too complicated for me in a gig - I like a simpler system all bunched together in one place, but Kudos to you for an original concept.
 It's an interesting point - I don't know if the original rics were shorter scale, I'm pretty sure in the books I have on classic guitars (and rickenbacker's website) that they all list them as 33 1/4", maybe anyone here with an authentic vintage ric can get a tape measure out for us.
Ric Bass Build Mark Ii: The Rickenbaker
in In Progress and Finished Work
Posted
Not posted up a prog shot for a while. body and neck have been tru-oiled and waxed. Bridge and rear pup fitted, some more wiring work needed then a good fret levelling and set up.