


al heeley
-
Posts
775 -
Joined
-
Last visited
Content Type
Profiles
News and Information
Tutorials
Product Reviews
Supplier Listings
Articles
Guitar Of The Month
Links and Resources
Forums
Gallery
Downloads
Posts posted by al heeley
-
-
I'll bear this in mind for the next neck - my mother-of-pearl inlays arrived today, I ordered them a few days before - and I don't have any copper pipe or access to a pillar drill, but I might see if I can rig something up later to have a play...

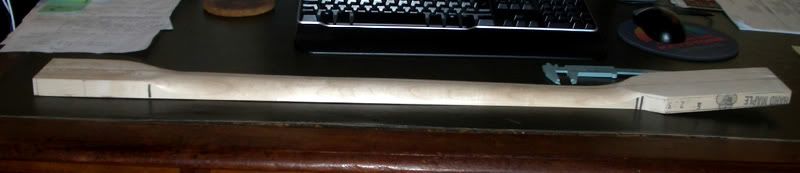
Today's work on the neck. Virtually all carved out with drill and sanding disks, which is a first for me (though this is only my third neck built from scratch).
I must say the results achieved so far are far more pleasing than the first 2 necks, and about 90% faster and easier.
-
Oooh, now that's a thought....bloodwood marker dots on ebony.....
-
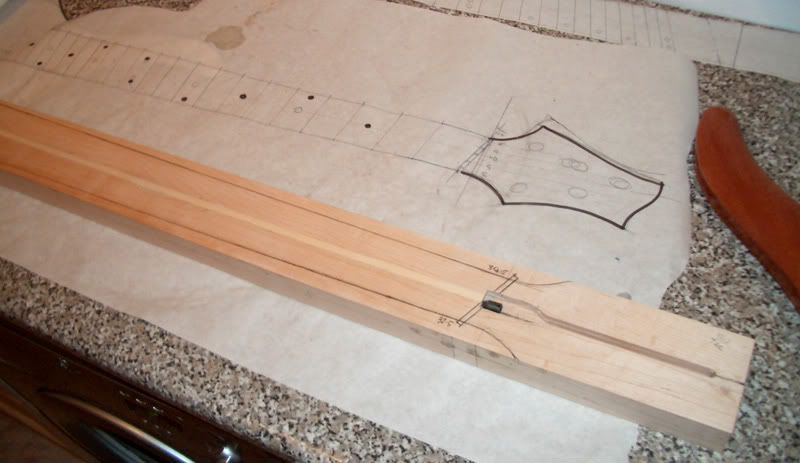
Work started on cutting the neck and head profile. The extra length of channel I stupidly routed for the truss rod (yes guys you were right!) has been filled with a strip of rosewood left over from trimming the Ricky fingerboard to size.
-
Hey thx P, fromy our pic the bloodwood looks the best match to the body - I pm'med you my email
-
Some stuff arrived today, here's an impatient mockup to check proportions and ctrl spacing.
-
Being original in itself is not enough, it also has to be well designed. And it has to look pretty. And it has to play well.
-
That looks simply stunning! You must be really pleased, thats a great looking paint job.
-
Beautiful - great work. More pics!
-
I tried some of these, they are so cheap it's worth a go but they are so bendy I could not get a good result. However, the cost of a set of nut files is too much for me and the StewMac ones with the rounded sides I hate using. I need straight sides and rounded bottoms. Get some of the Japanese type ones, they do a better job but they are still too expensive.
-
SwedishLuthiers link to the stewmac site has all that setup info if you scroll down to part 2: A Guide To the Great Setups: (great link!)
-
The headstock will be max 6.5" long - thanks for the offer, it would be cool to have a headstock veneer, in order to get the angle ok I'm in danger of leaving it a bit on the thin side. You have anything that might match the light honey-red sapele body?
-
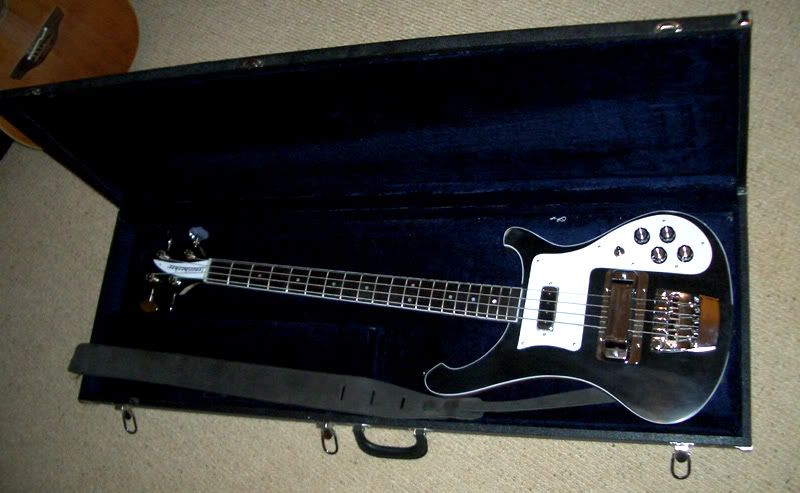
Tony on UK Guitar Forum kindly hosted my mp3 clip for me; it's a dry input into my multitrack, a simple bass riff starting with the neck pickup, fading into both together, then finishing with the bridge only pipckup switched in.
-
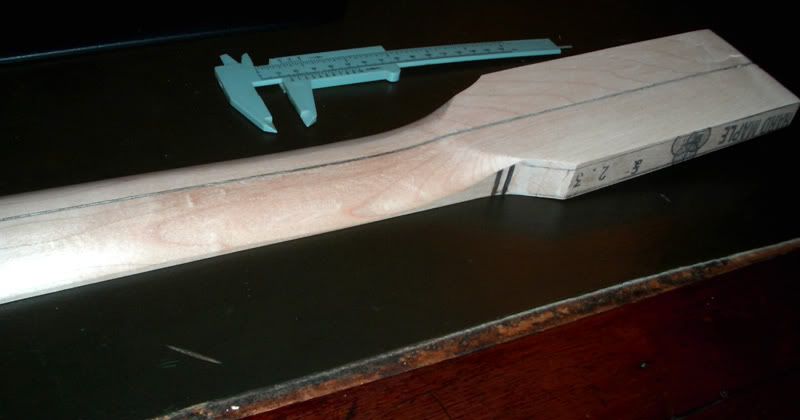
I just rechecked the dimensions. The channel rout is 12mm deep, this means it will run through just over half (maybe 9/16ths) the length of the headstock before the angle breaks into flat wood, if you get my meaning. If this looks bad, I may think about filling the channel with a piece of rosewood or wenge left over from trimming my last fingerboard down. Only then I would need to run it the entire length of the headstock. Hmm, I'll reassess this once the angle is planed.
-
You are on the ball, Prostheta - there's about a 10 degree angle on the headstock so once thats planed off the truss rod channel pokes out nicely so you can access for adjustment. I'll have a bit of a volute underneath to make up for the lack of wood and strengthen the area back up. If all else fails, I'll have an extra long trc screwed on to hide the channel!
-
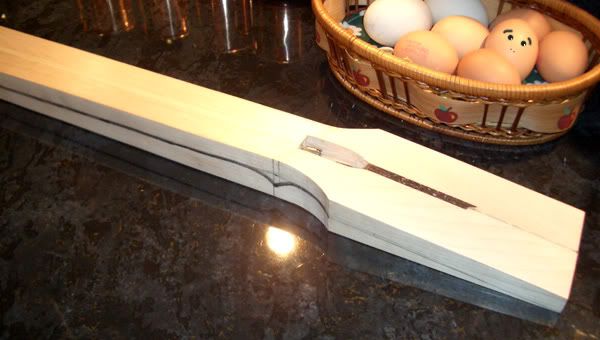
Progress started on the neck. Sorry, not a very exciting picture. Maple blocks glued together with a thin light wood veneer centre stripe to match the body.
Here the truss rod channel has been routed, truss rod installed and the wood fillet inserted over the top and and planed flat.
On previous builds I have really struggled to get a nice neat trim fillet after mucking about with planes and sanders.
This time I used a rasp and surform and got it flush and smooth in about 30 seconds. Marvellous! Never neglect those little hand tools, these silly little jobs can be a real pain with the big power tools and a small surform stands far less chance of taking nasty chunks out of your neck.
-
Thanks everyone for taking such an interest in this thread and for all the great feedback.
Here's a final shot;
Nut lowered, far better action now, headstock painted black, she looks a lot better and plays a lot better.
-
yes that is a gorgeous neck blank. Looking forward to seeing this build progress
-
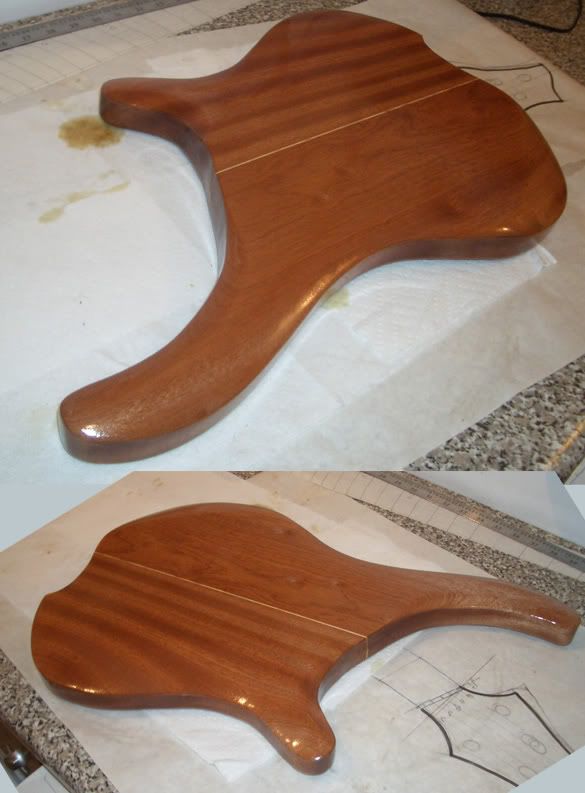
Quick progress shot on the body - curves and contours added plus a couple of rub downs with tru-oil and a fine sanding sponge.
The shape is now finished, awaiting neck pocket and pickup routing.
-
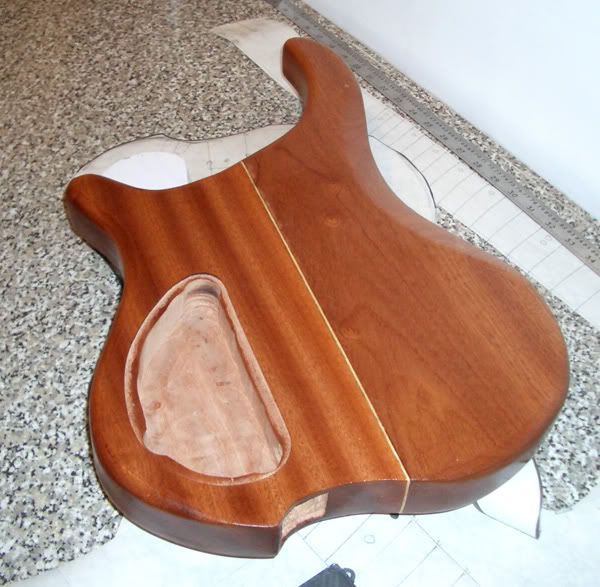
A little progress on the body today. Back edges rounded over, control cavity routed, sunken recess made in the tail cut for locking Neutrik jackplug. Since I seem to have got the Dingwall thing going here, I thought I'd make use of some of their really cool little design details.
-
Congrats, nice clean build. I really like the white stripes, how they shoot thru the control knobs.
-
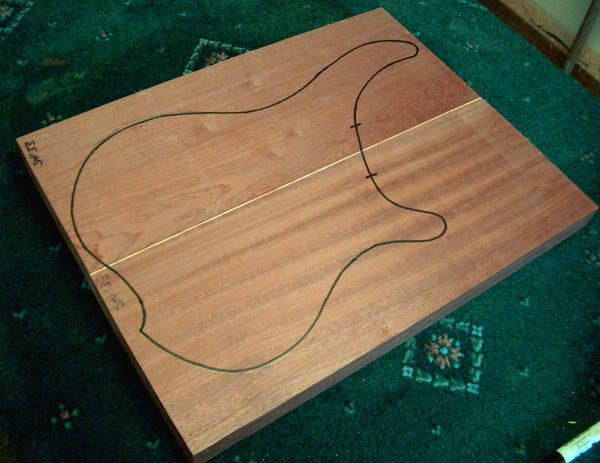
Started work on the fanned 5 body this morning. Here's the shape copied onto Simo's Sapele, I sandwiched a thin veneer of white wood into the join, which adds a nice centre-line mark and also helps to hide any of my bad jointing.
http://img.photobucket.com/albums/v609/al_heeley/body1.jpg
Here's the basic body shape jigsawed out, sanded smooth and some countouring started.

-
Thanks a lot guys! X: the pickups are Ric's standard 4003 bass ones, not the vintage. The hi-output I think are the humbucker versions they put on the 4004 models. These are the standard ones with the 4 studs above the pole pieces.
-
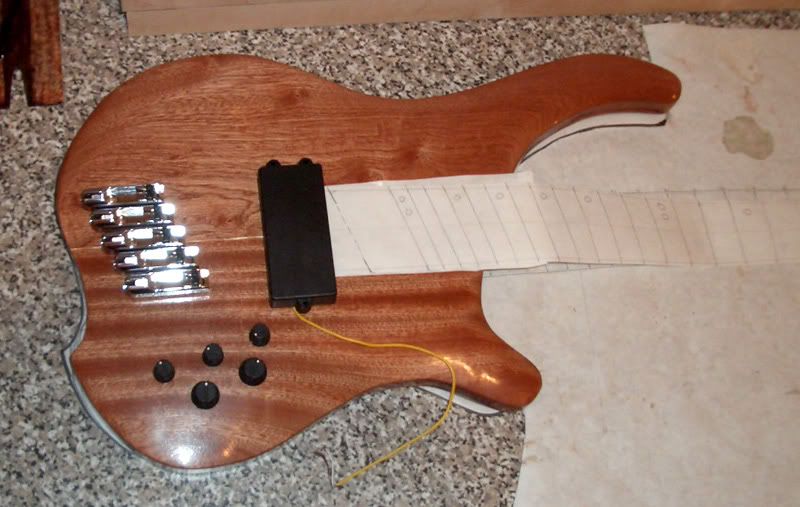
Here she is wired up and strung up for the first time. Not a great pic; you can see the black finish needs more work. the neck could do with another lb of wood off the back and the action needs sorting.
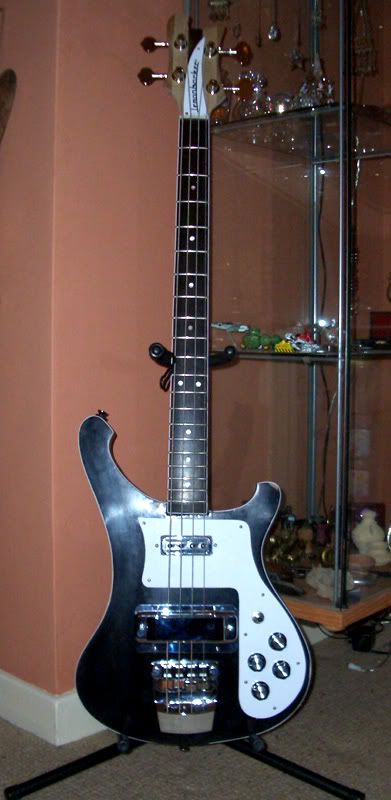
However, first quick checks thru the practice amp are very promising; great tone variance from neck and bridge pickups, that deep fruity ric bass tone is there in abundance, I just have to make her a bit more pleasing in the hands.
I decided to leave the back and the headstock au naturel. The neck will still need tru-oiling but I've got quite a bit of work left to do slimming it down a bit. I'm confident the authentic ric tone is bursting to get out, once I get a nice slim neck and a good fret levelling what she lacks in cosmetic refinements she will make up for in tone and feel
-
Hoping to finish the neck and electrics, seal the back and string her up at the weekend. Then I need to get the truss rod, fret dressing and nut cut right.
Thx all for the good comments and encouragement, it's been a tricky project for me and I can't wait to hear how she sounds.

First Post: 5 String Bass
in In Progress and Finished Work
Posted
wHAT AN ABSOLUTELY GORGEOUS BASS! I love the cream maple and black hardware, very sexy - and the ric-style horns. Lovely. More pics!