


oz tradie
-
Posts
365 -
Joined
-
Last visited
Content Type
Profiles
News and Information
Tutorials
Product Reviews
Supplier Listings
Articles
Guitar Of The Month
Links and Resources
Forums
Gallery
Downloads
Posts posted by oz tradie
-
-
Flapdisk on a typical 100mm angle grinder. finish off with an orbital sander and you're there.
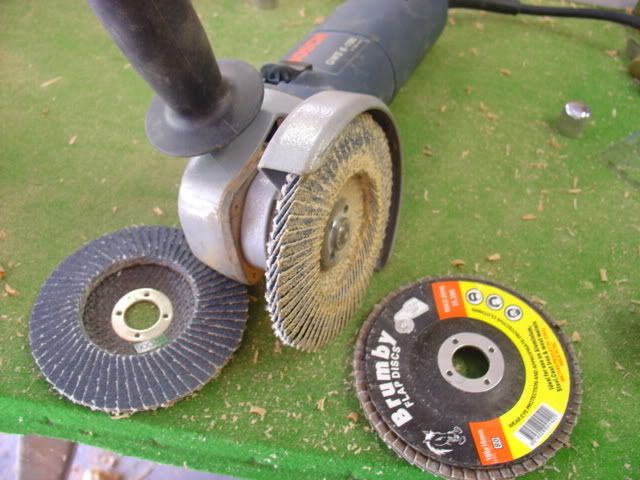
this was done using a flap disc and then orbital.
-
Msherman's Orion for mine.
I like a clean look and this build exemplifies that.
Well done all and I gotta say the builds just keep on getting better !!!
-
Good pick up jmrentis. I quickly read what RG wrote and instantly thought of neck angle complications.
Bridge offset angle also, Zeb.
-
How many times are you guys going to beat this horse? Its dead... bury it
Led, the last post regarding this was a month ago...it was buried until you dug it back up.

Anyway, moving on..............
RG is correct regarding the neck angle considerations, Zeb. You'll require a neck angle of sorts.
If it wasn't for the fact you're using a Bigsby, I would have suggested sinking your T.O.M. into the body.
Draw out your neck to body to bridge join on paper to a 1:1 scale and that should give you the good oil.
Either way you'll need to angle either your neck tenon or body mortice, otherwise you'll have a whoppingly high action.
Cheers, Stu
-
G'day Doug and welcome to the forum.
I like your lamination work on this one. Some nice ideas.
How many you pumped out now ? Any pics of your other creations?
cheers,Stu
-
Good to see you're at least making a guitar, instead of doing as many do and just talk about 'one day
getting around to it'. Thumbs up for that. Well done.
This looks like your headstock and neck you bought. Not that it matters greatly anymore,
I just appreciate honesty as most of us do.
Guitaraust.com.au (pre-made necks)
Don't stop with the building, Zeb. You're doing allright.
cheers, Stu
-
Tommy's great and......lo and behold he's also an Aussie !!!!!!! Well fancy that
-
The greenish hue on the surface is predominantly caused by moisture in contact with the surface.
The hue builds over time, the more contact you have.
No biggie though, as it's only on the surface and sandable and scrapes off.
A similar reaction can be found with Tasmanian oak, where the water or moisture will discolour the timber to varying degrees of black. Also fixable by applying oxalic acid to leach out the stains.
Cheers, Stu
-
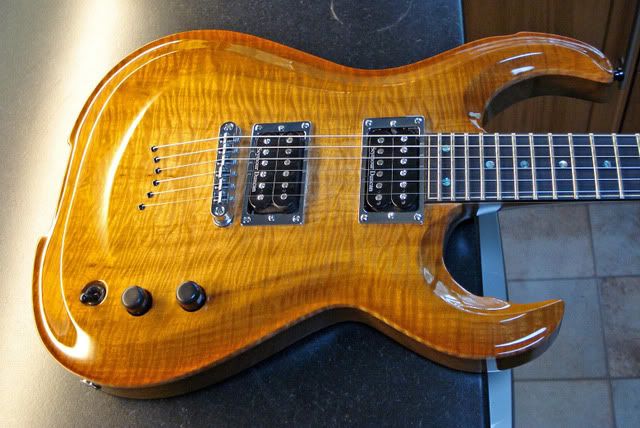
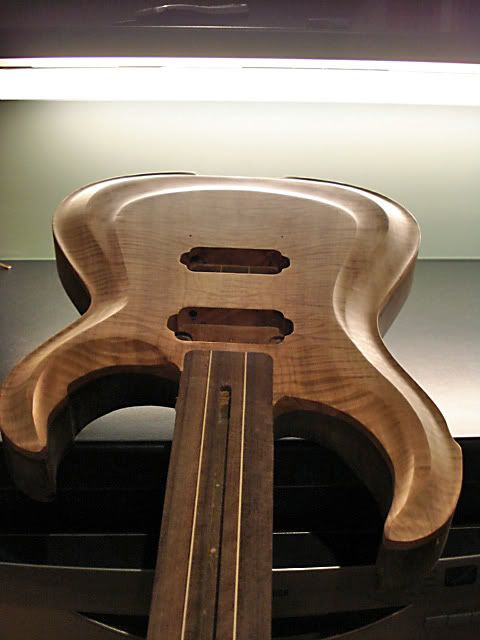
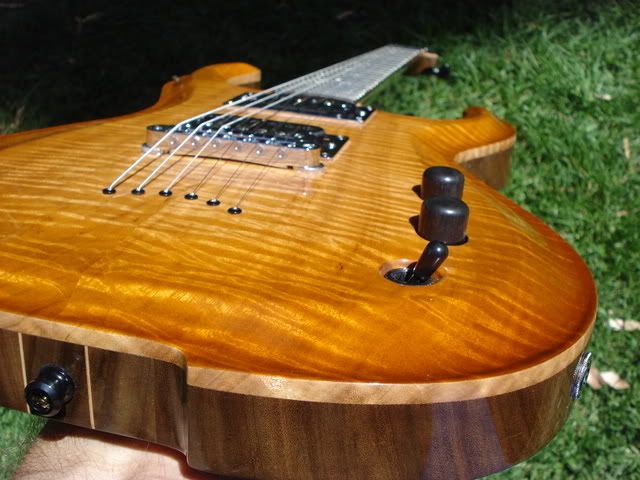
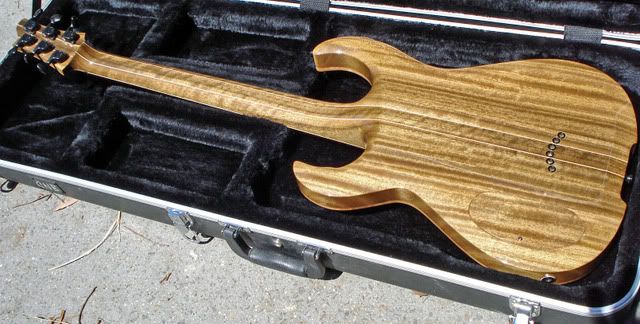
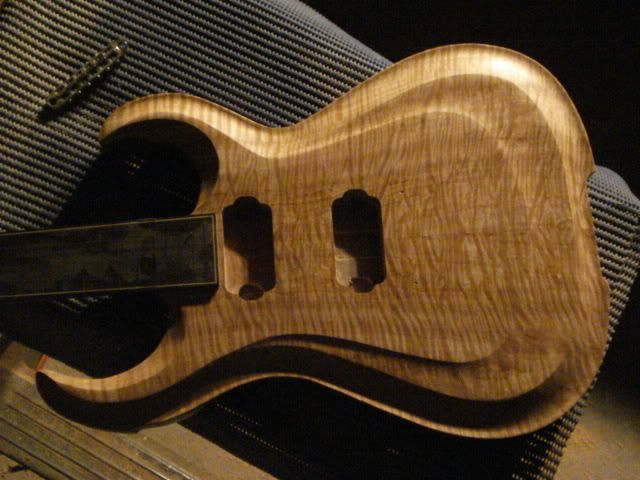
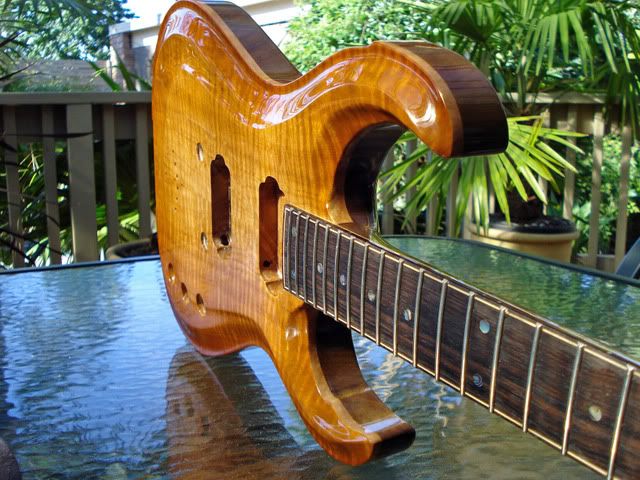
Aussie timbers neck-through carvetop
Queensland walnut body and neck (chambered body)
Tasmanian oak 16mm dual-carve top
25" scale ebony bound f/board with paua dots
Seymour duncan H/B's sh-2 & sh-4
T.O.M. bridge and string through ferrules recessed into back
many dyed maple laminations
Finished in nitro with a faux binding and a gentle top burst.
Click here for the Build Slideshow


cheers, Stu
-
Thanks for the comments fellas. Much appreciated.
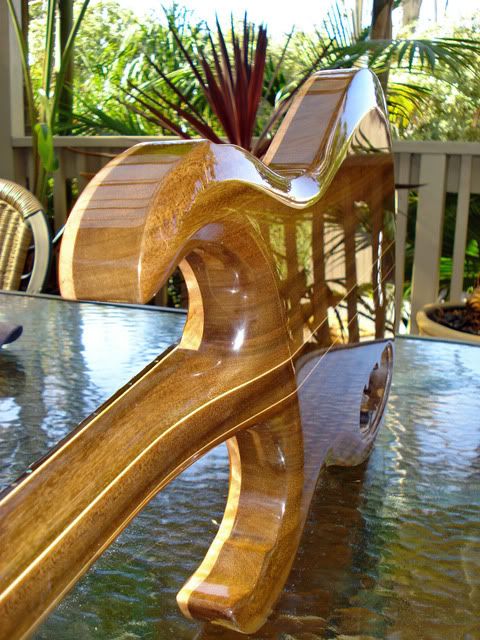
The dual-carve top was a really fun carve to do. I'll probably incorporate a few more of these on the right projects in the near future too.
The neck angle on this one was somewhere around 2.5 degrees, after drawing it out and getting my tom height lowered down as low as I dare get it without recessing the bridge. It's worked out spot on to my drawings to the
point of it bottoming out on the tom bushings at an unplayably low action, with the posts raised just a tad for the optimum buzz free action and still keeping it fast and low.
This one is still up for grabs and no doubt will take someone's fancy .
More pics later, photobucket is down at present.
cheers lads, Stu
-
This is the link to my build thread where quite a few regulars here (mainly aussies) also frequent.
And now the chambering.
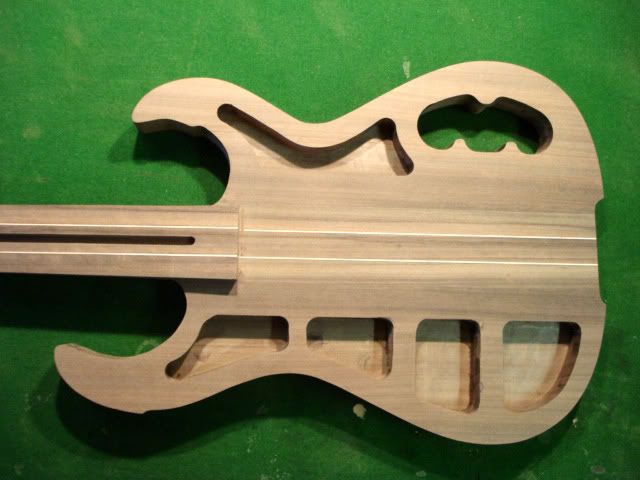
cheers,Stu
-
hey stu,
whereabouts do you get your wood from?
Cheers, ash
G'day Ash. The Tasmanian oak 16mm top was from Gerard Gilet's. Guitarwoods.com.au
Other than that, I go alot to Mathews' timber down my way.
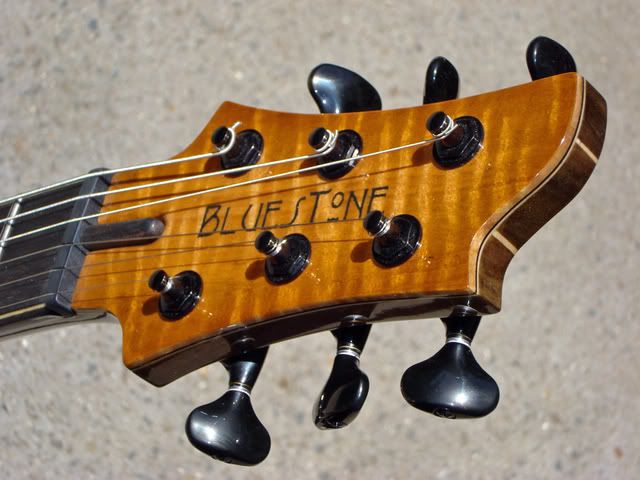
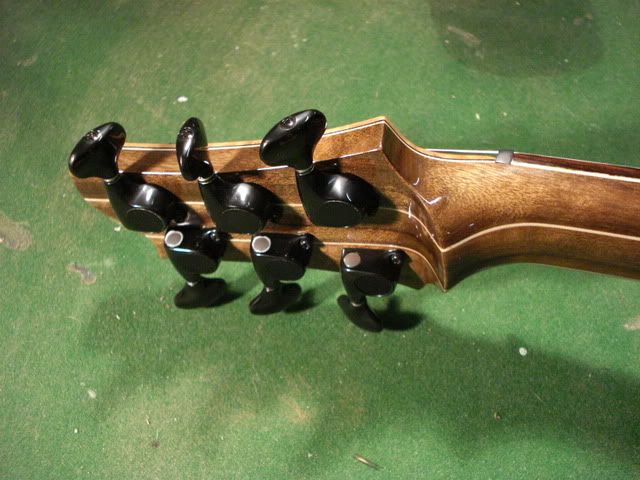
Headstock shots now.
cheers, Stu
-
Cheers Andronico. This was a fun one to build, it's a pity I'm a lefty though

Thanks also Muzz. What do ya think I'll get for the medal on ebay?
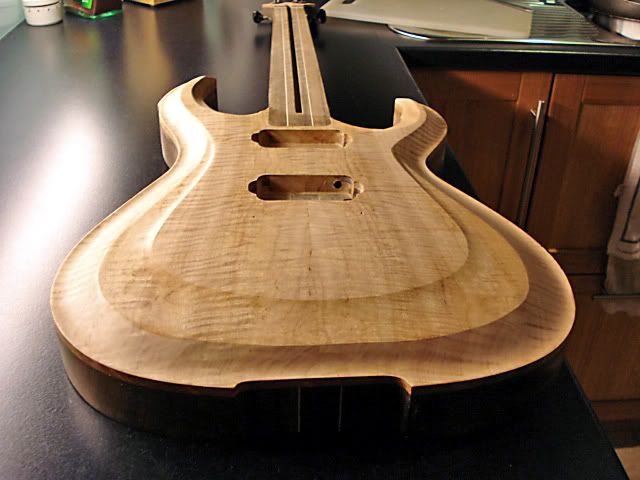
Here's a few of the dual-carve roughed in
cheers, Stu
-
That is magnificent. Very well done.
I love the look of all the timber, I didn't realise tassie oak could have such a nice figure.
Do you have more pictures of the top carve?
Also, where do you get nitro in australia?
Thanks Stewey. Lots of pics to put up, including build progress shots of the chambering and the dual-carve top.
I used pre-cat nitro made by Wattyl, called stylwood 95% gloss.
Any dedicated paint shop other than Bunnings should carry it or something similar.
Keep the questions rolling and I'll do the same with the pics.
cheers, Stu
-
-
This one's just left the workbench last week.
Neck through construction with 25" scale neck
Chambered body .
Queensland walnut neck and wings with maple accenting
Tasmanian oak figured 16mm dual-carve top.
Bound 24 fret ebony fingerboard with paua dots.
Tune-o-matic and string through body ferrules.
Seymour Duncans JB bridge and Jazz neck.
and a subtle nitro burst to the top.
cheers, Stu
-
i am missing this. what is the difference? i dont see a difference between that pic and any other fretboard.
The first pic has sharp f/board edges and the second has an arris rolled into it for comfort and feel.
It's all there.
cheers, Stu
-
The only thing to do with Dragonforce that i've even remotely found entertaining are the
youtube parody videos with them in it.
Now that's entertainment !!!!!
-
You could probably do the same thing with a stepped drill bit/hole reamer. I picked up a pack of 3 different ones for about $20 Australian...
Heggis
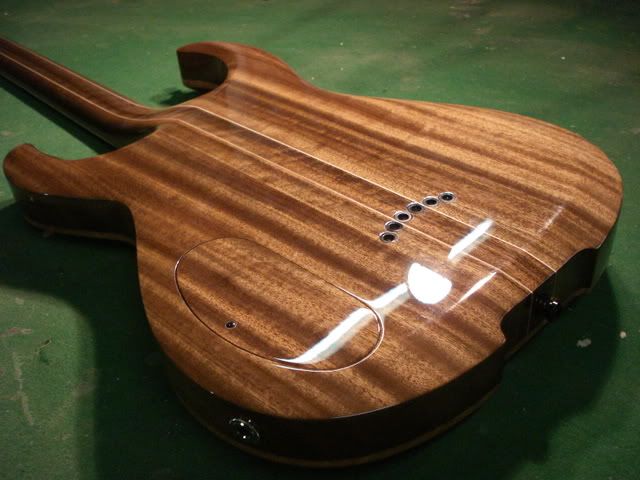
I use a Brad drill bit to recess my tele style ferrules.. Same result, just twice the drilling.
These are recessed flush with the body.
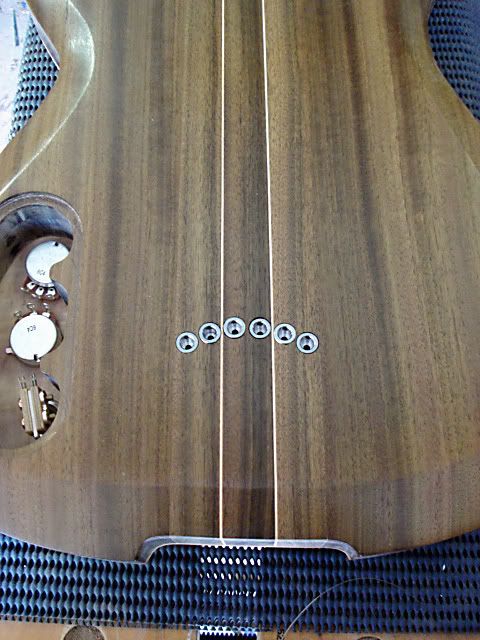
cheers, Stu
-
I've been watching your build with much interest and I must say congratulations on
the outcome. Very nice indeed and yes, a bit of a twist at that.
Gotta love that little twist on an original
Now it's finished, that top really does scream out ' tassie myrtle'.
HAMMERED, I got a Floyd original from Warmoth with black tuners and chrome finish.
Well done Stewey
cheers, Stu
-
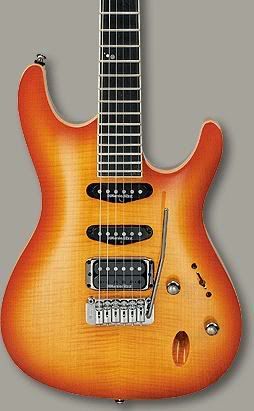
Anyone know how to do the Ibanez style jack input like on this guitar
 ? Regards,
Brian.
Howdy Brian.
Drill press is the go . clamp your guitar body to the drill press table and set it to the angle required for your hole.
(sounds easy when you say it quickly)
I'd tend to use a long shanked forstner bit with this one, although experimentation with a spade bit is worth trying too.
cheers, Stu
-
-1, for working in hurry.
I hope this "very special chick" likes disabled due to stupidity kinda guys.
cheers, Stu
-
So when do the rock star protests begin? Jimmy Hendrix, Keith Richards, Pete Townsend, the list goes on for destoying guitars.
The next vote will be to keep naked guitar pics off the forum.
i.e. guitars must be in a half zipped up gig-bag showing no more than one cutaway
What a crock.
-
I've been mucking around making a few of these babies.
I don't mind the 4 and 2 set up. We'll see how it works once built.
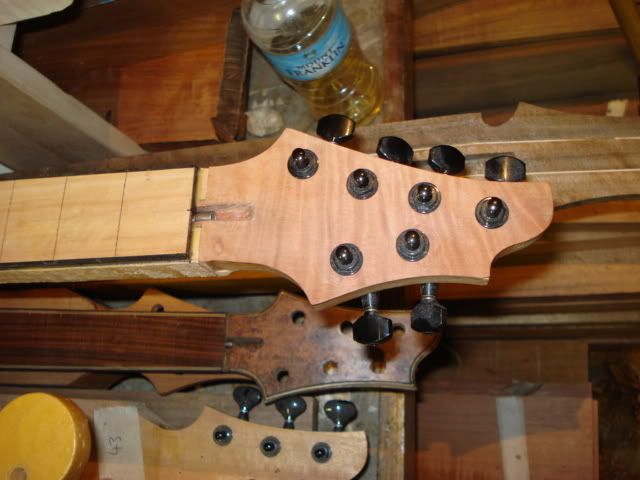
cheers, Stu


Any Body Tried The Trem King Out ?
in Solidbody Guitar and Bass Chat
Posted
Sounds great,but........All I truly give a toss about is whether they come in the lefty option.
If that's the case then I'm willing to smack one into the next lefty build I make and give it a real going over.