


CrazyManAndy
-
Posts
668 -
Joined
-
Last visited
Content Type
Profiles
News and Information
Tutorials
Product Reviews
Supplier Listings
Articles
Guitar Of The Month
Links and Resources
Forums
Gallery
Downloads
Posts posted by CrazyManAndy
-
-
That is going to be a stunning guitar, Rick! Awesome!
CMA
-
This is really cool. I'm definitely going to have to do a couple of these in the near future myself.
Can't wait to see them! It's a really fun project. And even if you screw one up, your only out 20 bucks or so.
Very nice job. I would love to do something like that, but I seem to stick with my cigars. I just never got a pipe to burn right. I've read up on it, and it definitely takes time to learn how to pack one right.Yeah, pipe smoking does have a bit of a learning curve. It took me four or five months to really get my technique down, and I still have trouble with some blends. The learning curve increases if you smoke many, many different blends, and different cuts, like I do. Many folks just stick to one or two blends and call it a day. Cigars are great though! If you decide to pick up the pipe again, come over to smokersforums.org. It's an amazing forum with some great folks who'd be more than willing to help you out.
A couple of years ago I made a pipe out of oak. I see why they make them out of briar now. I didn't make the stem, I used a stem from I pipe I already had, and made the pipe fit the stem.After I smoked it for a while, the grain started to split, (heat/moisture), and I had a long hole in the side that followed the grain of the oak.
It smoked really well, but only laster a short time.
I didn't take any pictures of it or anything, but it turned out quite well.
Awesome! Would've liked to have seen that one. Other woods have been successfully used in pipe making (maple, walnut, and maybe some others), but briar is probably the ideal wood.
CMA
-
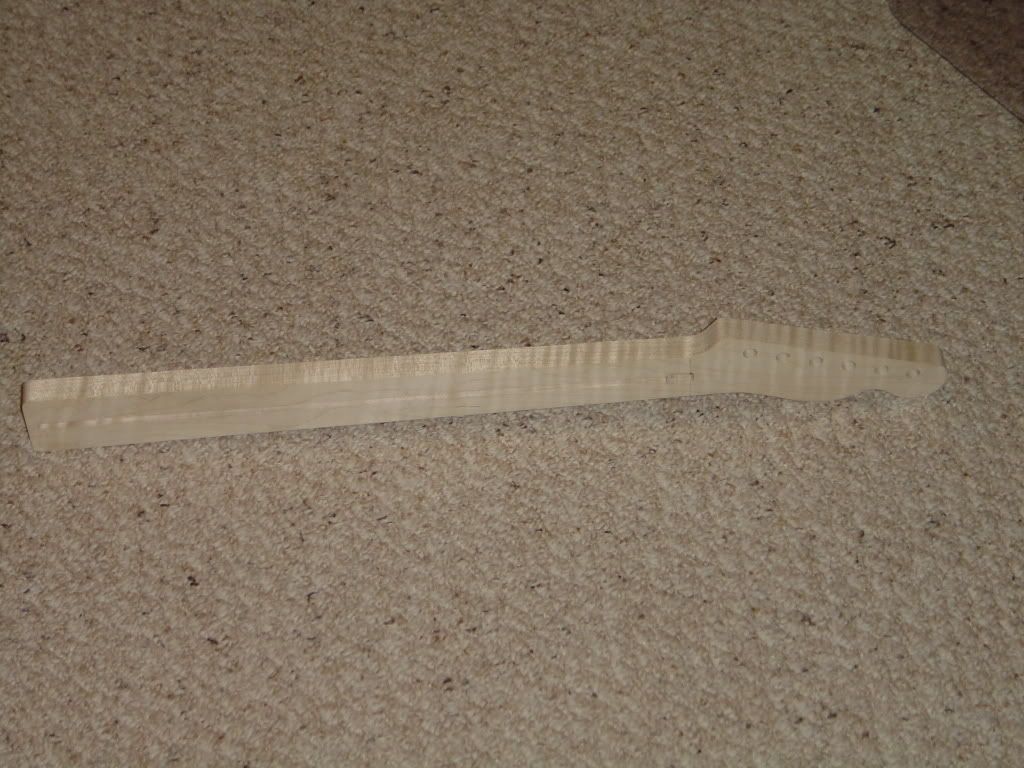
Welp. I'm officially PO'd at myself. The fretboard moved during glue-up, so I attempted to remove it using the tutorial on the project guitar page; however, I could not get it to come off! I spent a good while just sitting there trying to get the glue to give, but it didn't. I then decided to skip all of that nonsense and do it the easy way. I was simply going to cut the fretboard off, salvaging it, and just make a new neck for it. I wasn't completely happy with the neck in the first place. Already a bit ticked off after all of that, I should have taken a break and gathered my thoughts. Well, you know what they say about hindsight. Anyway, I ended up damaging the fretboard enough to make it unusable for this project! Every time I think about it I want to slap myself....
I learned my lesson after that disaster and decided to take a break. I took some time to finish up my pipe and then finally began work on a new neck two days ago. I've managed to bring it almost to the point where I destroyed the last one. I didn't bother documenting it, since I used mostly the same methods as before. I got a new fretboard from Erik and it's very nice, so I'm pretty stoked about that. Expect some updates in the next few days!


CMA
-
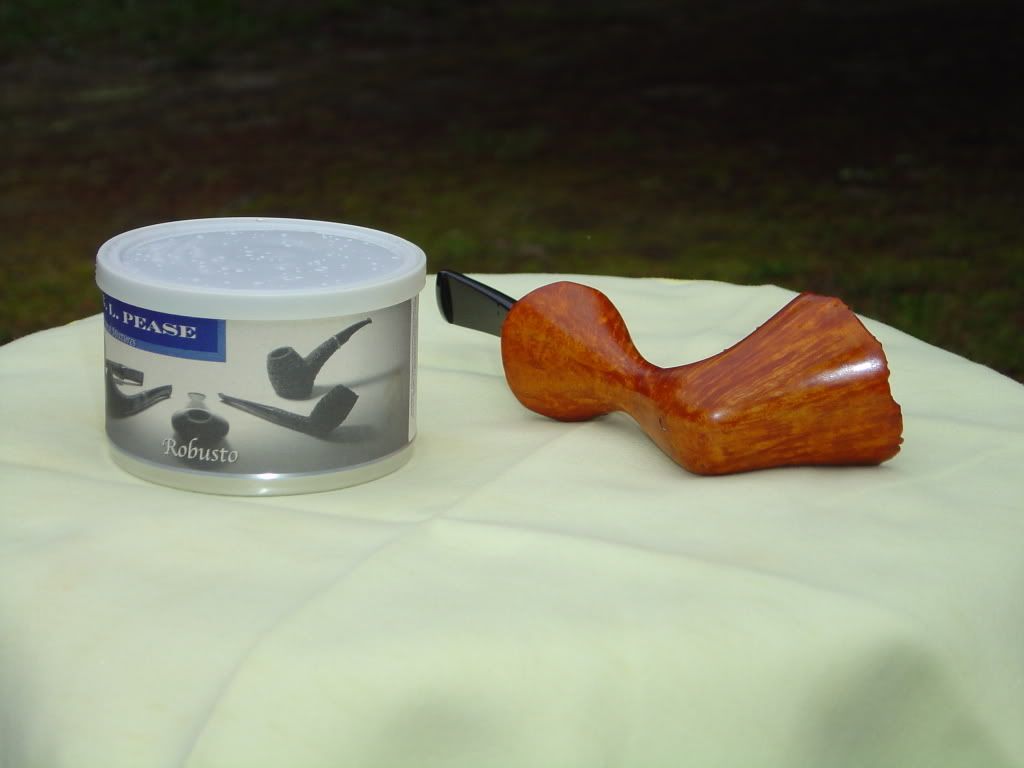
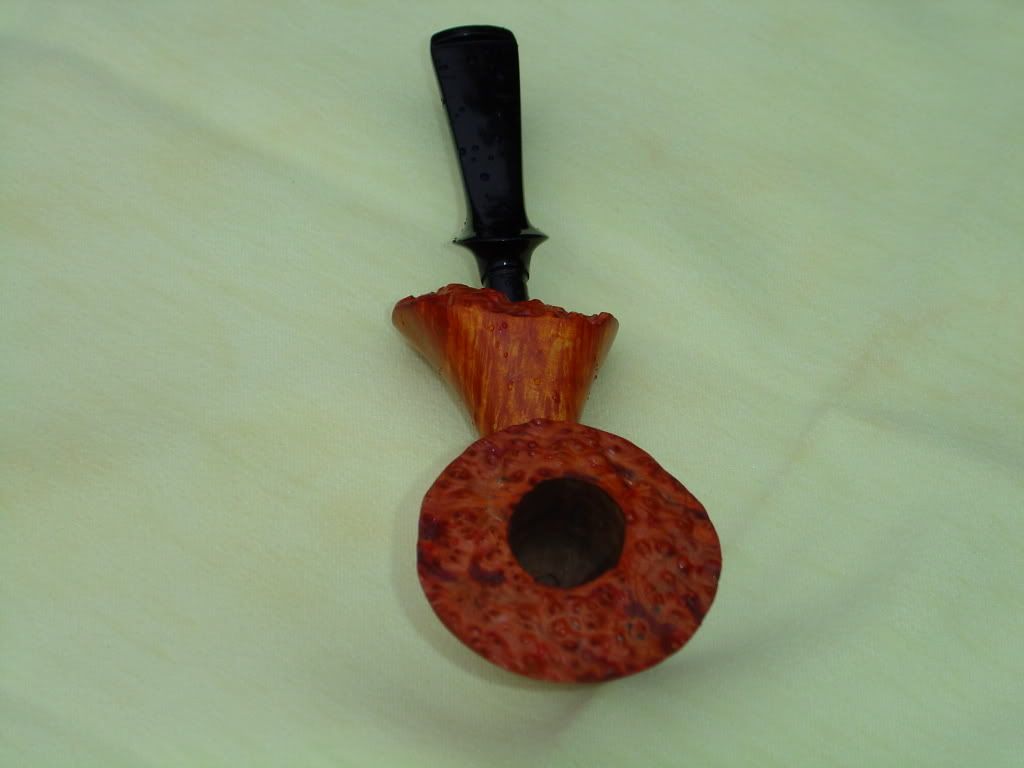
(Quick disclaimer: For some reason, the pipe appears much more red in many of the pictures than it is in person. I don't know why, but it does.)
Ok! Finally finished! Here we go:
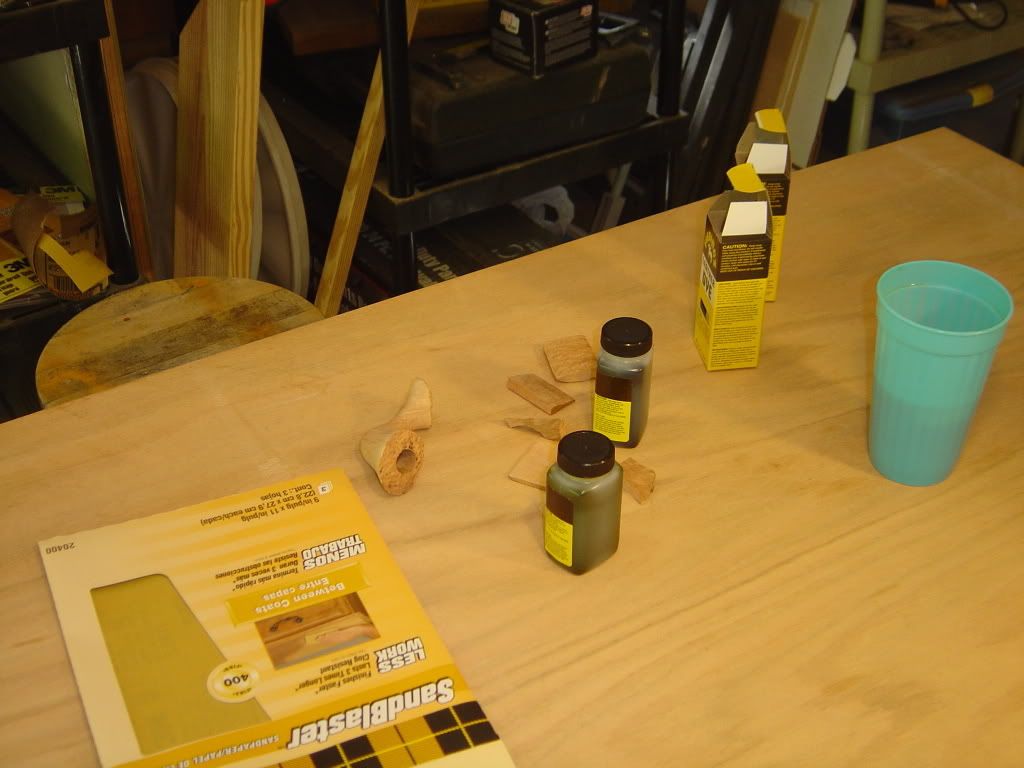
Staining and Finishing 1 - Setting up an area to stain the pipe.
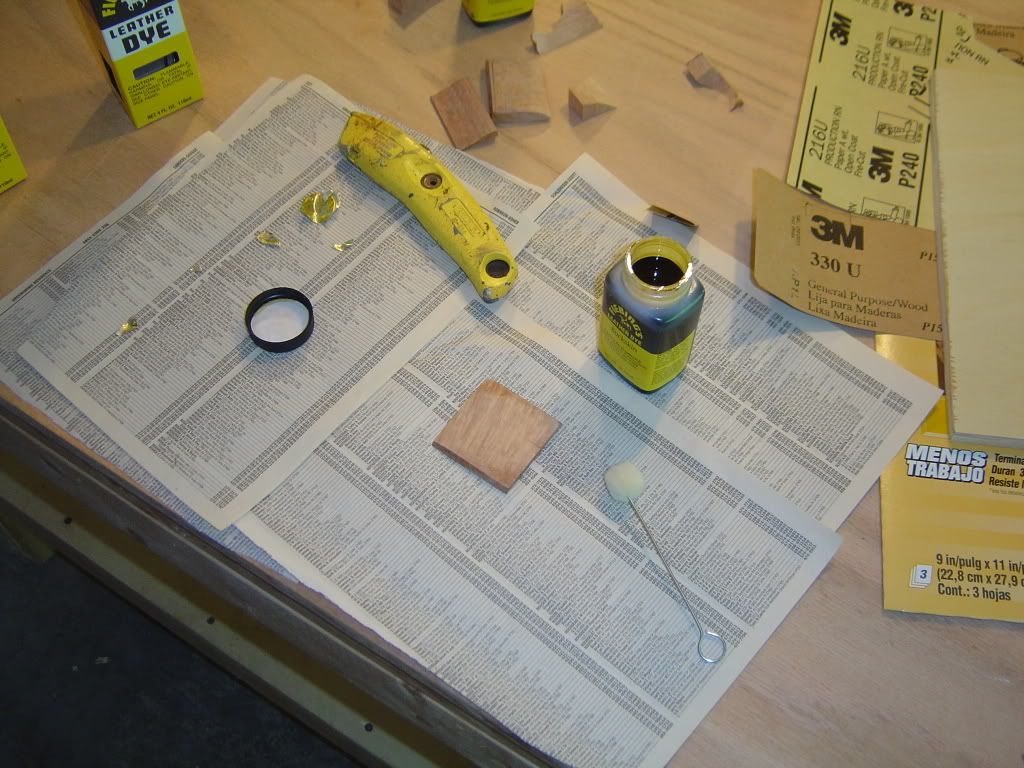
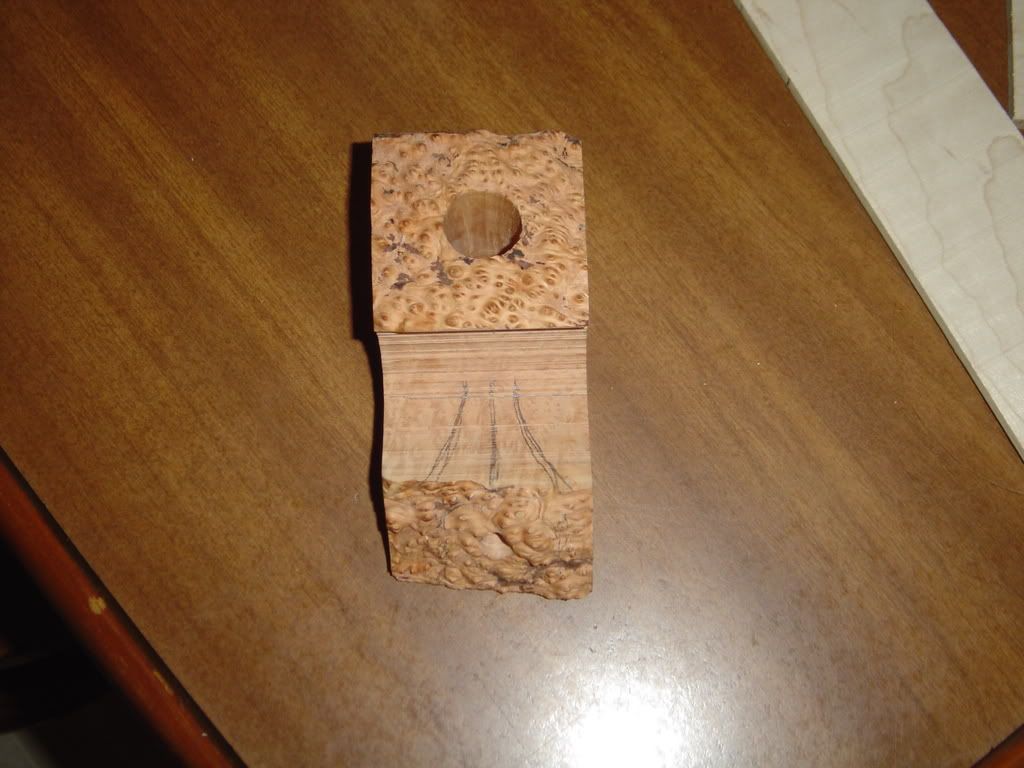
Staining and Finishing 2 - This is a slice of briar I'm using as a test piece.
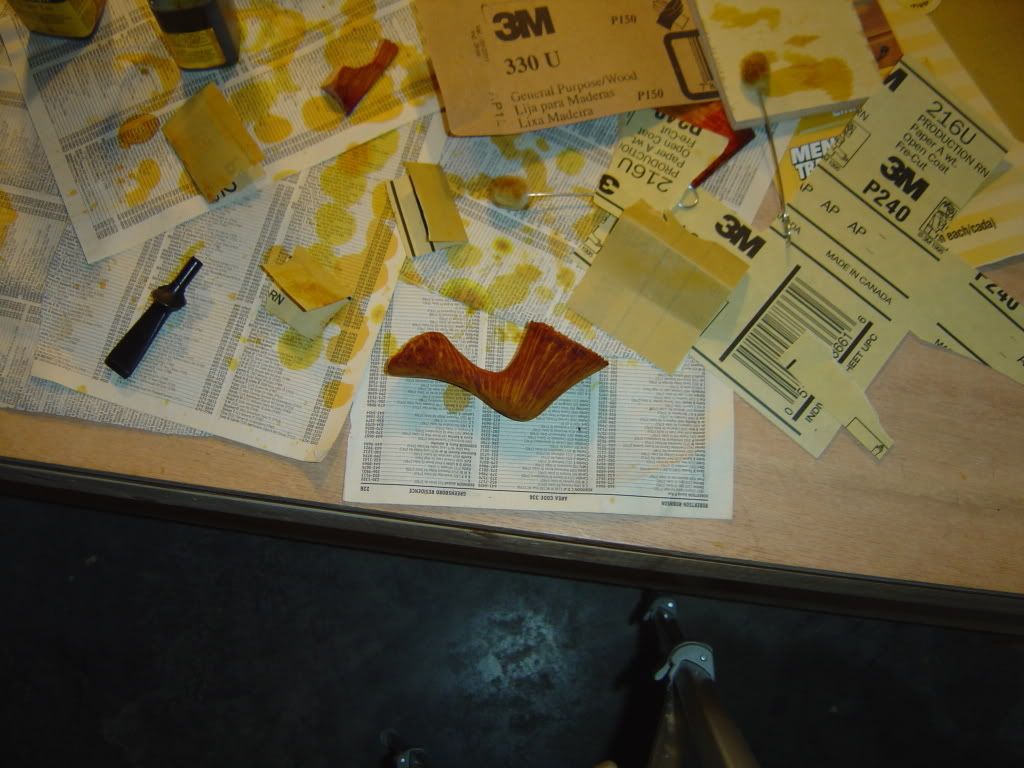
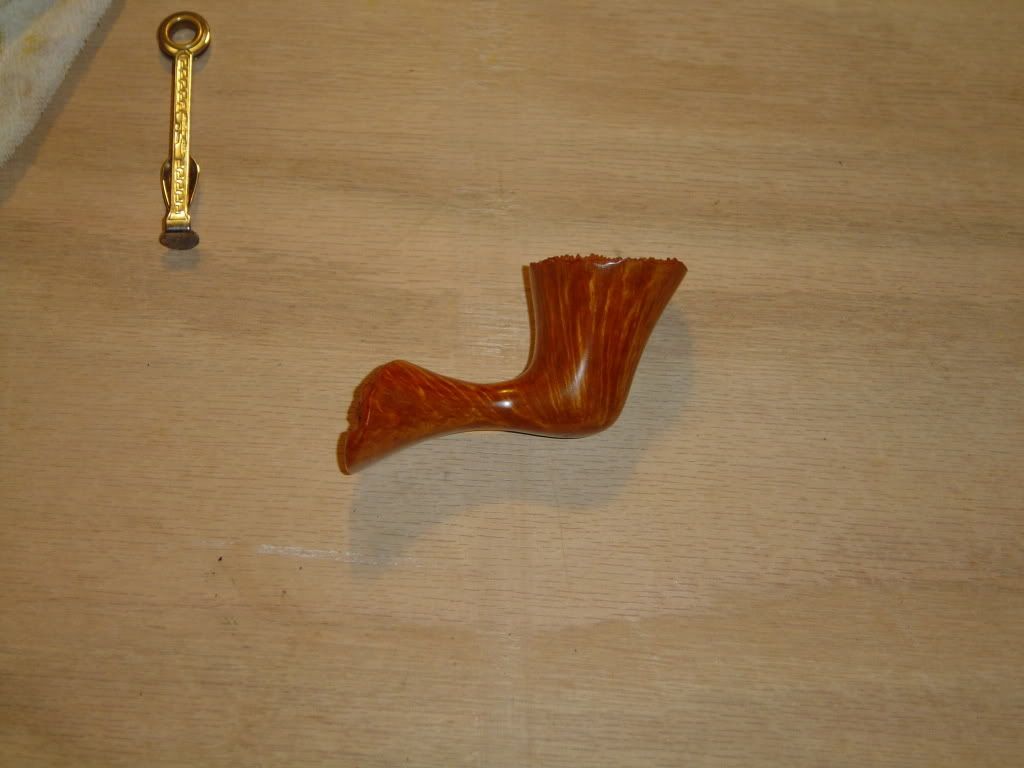
Staining and Finishing 3 - Once I decided on a color I liked, I gave the pipe several good coats of stain, with some light sanding in between each coat.
Staining and Finishing 4 - After letting the stain dry for an hour or so, I sanded it back to the amount of color I wanted.
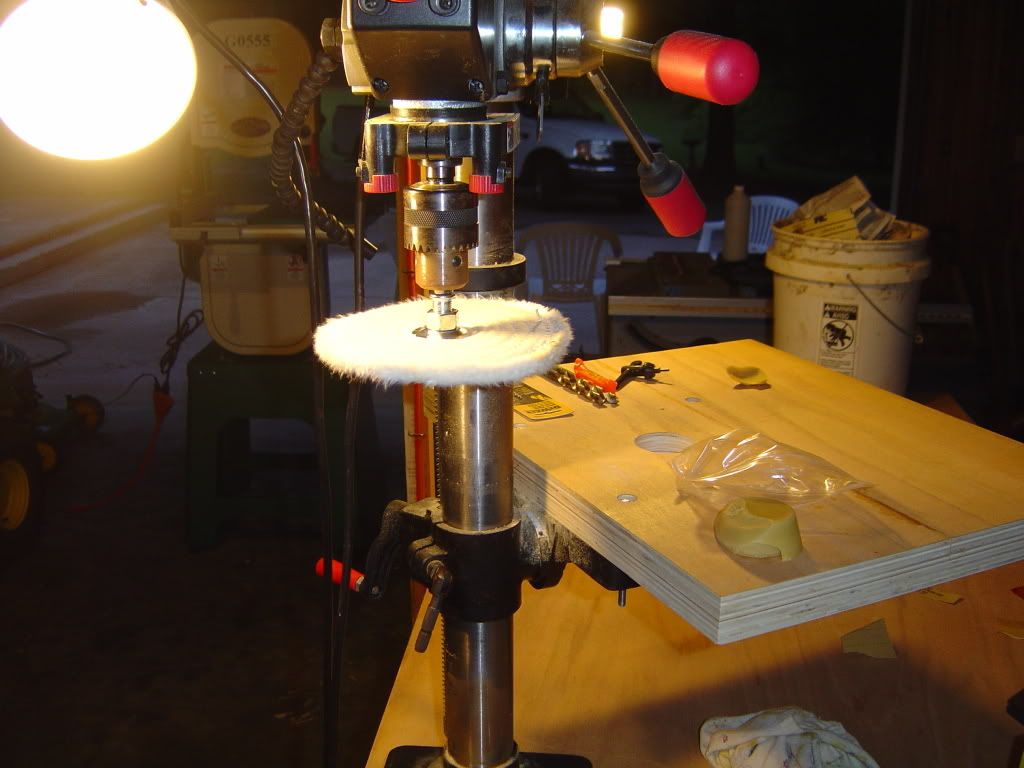
Staining and Finishing 5 - Time to apply the carnauba wax with a sewn muslin buff. This is my buffing setup.
Staining and Finishing 6 - Carnauba done. It was a lot easier than I thought it would be. Once you get a feel for it, it's smooth sailing.
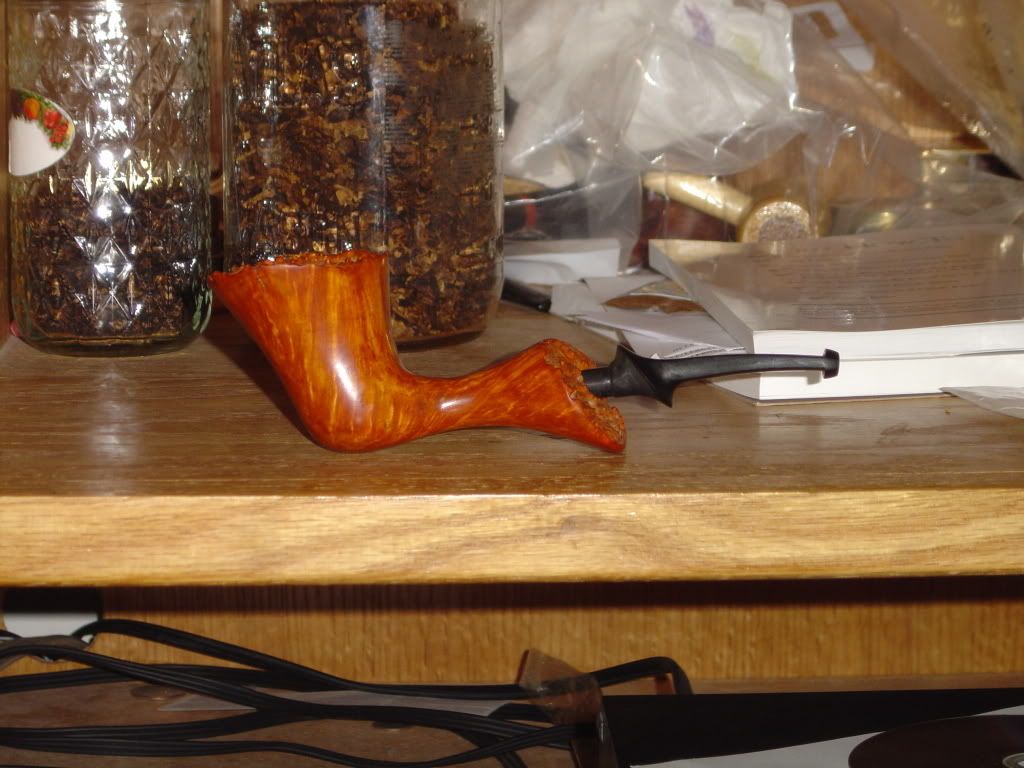
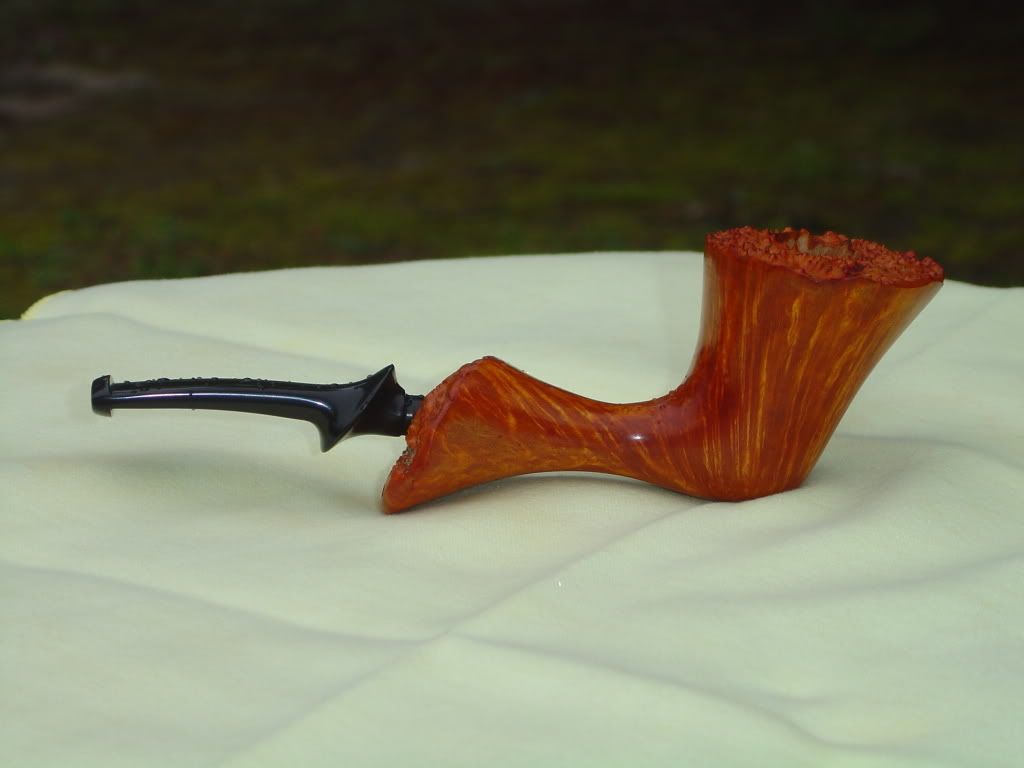
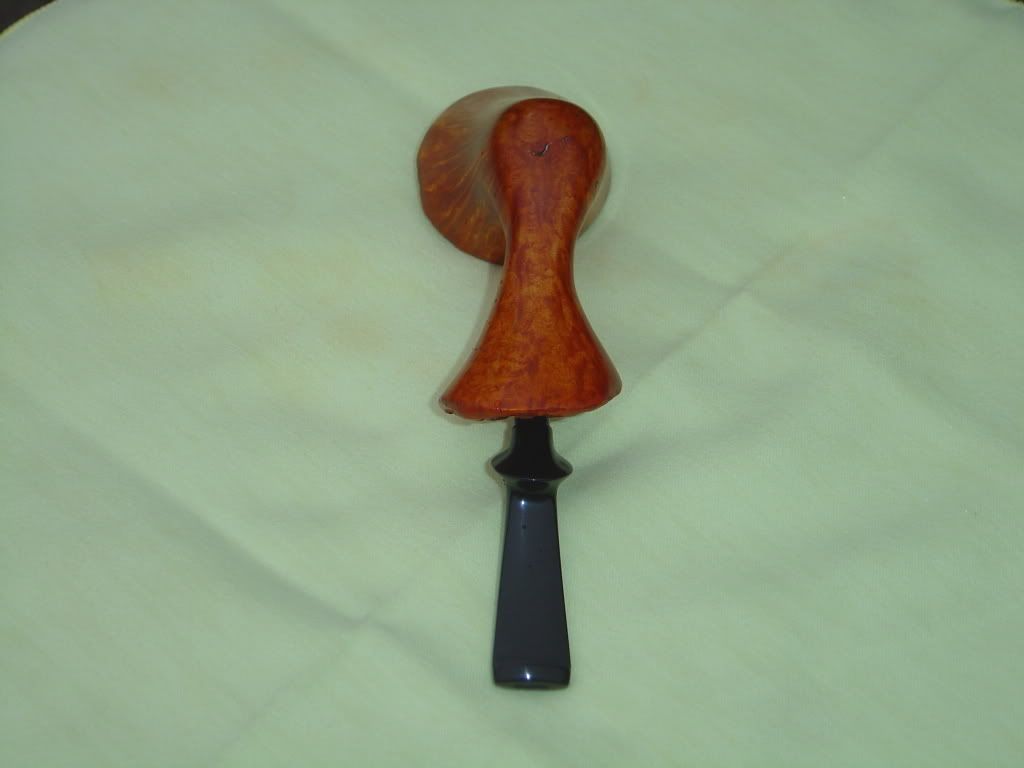
Almost Done 1 2 - I decided to take a couple of pics with the stem in. In these pictures, the stem has been bent, filed, and sanded up to 1000 grit. To bend it, I filled a pan with sand and heated it to 270 degrees. I took the pan out of the oven and put the stem in the sand for a few minutes. It was then pliable enough to bend it with my hands.
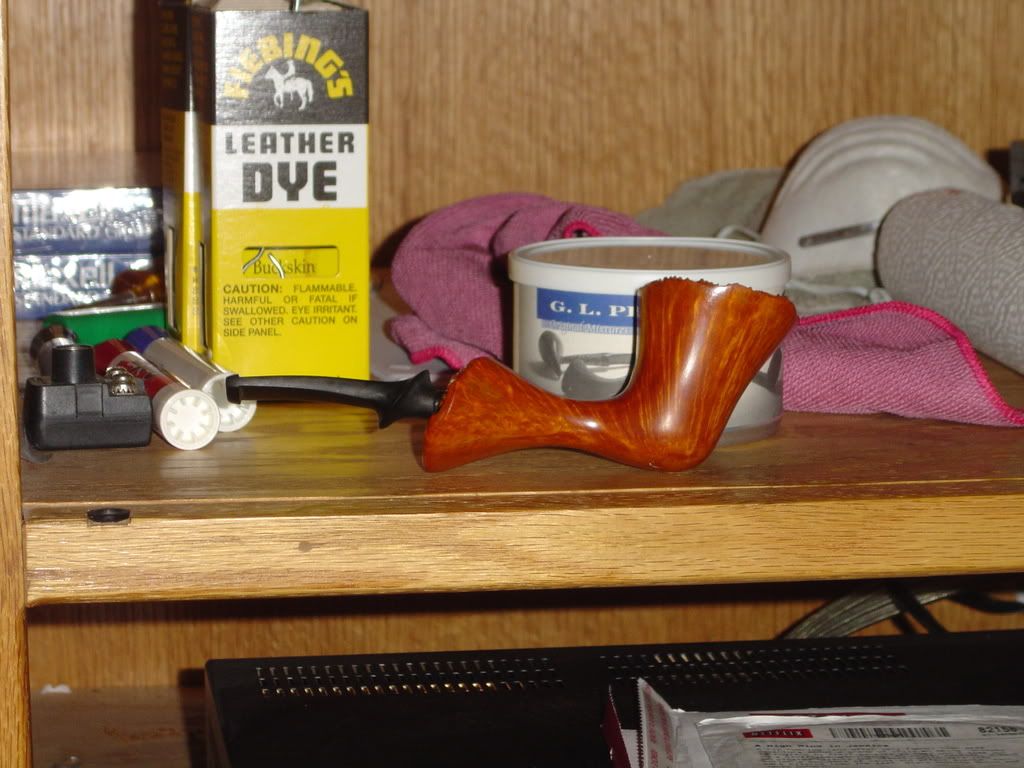
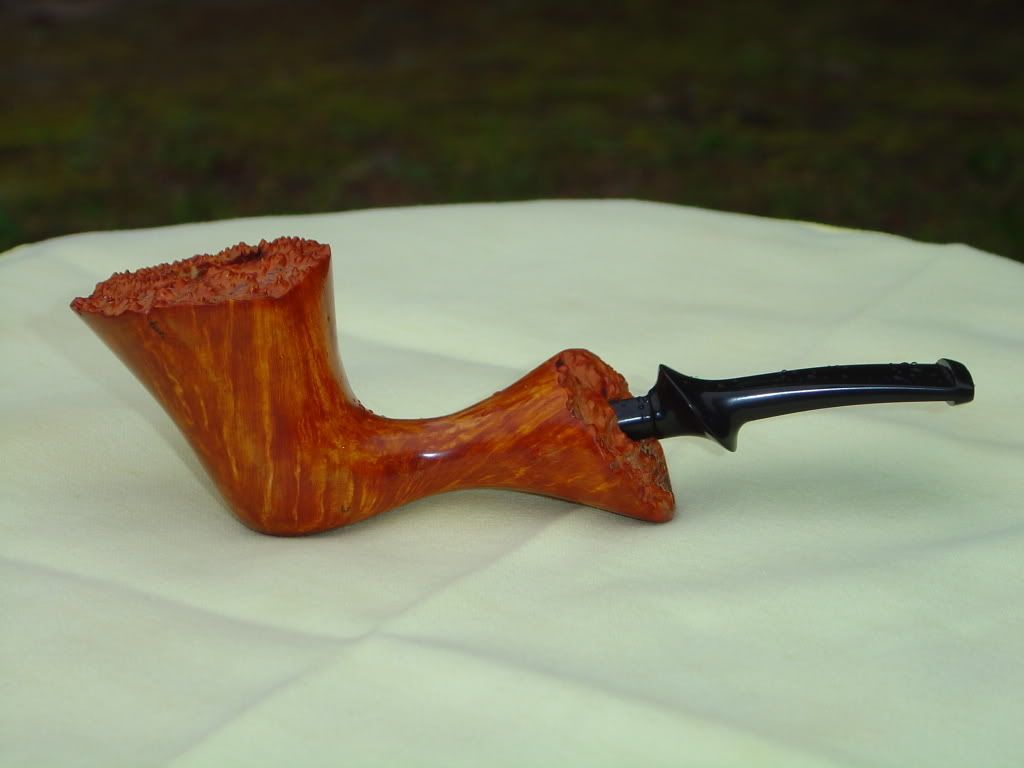
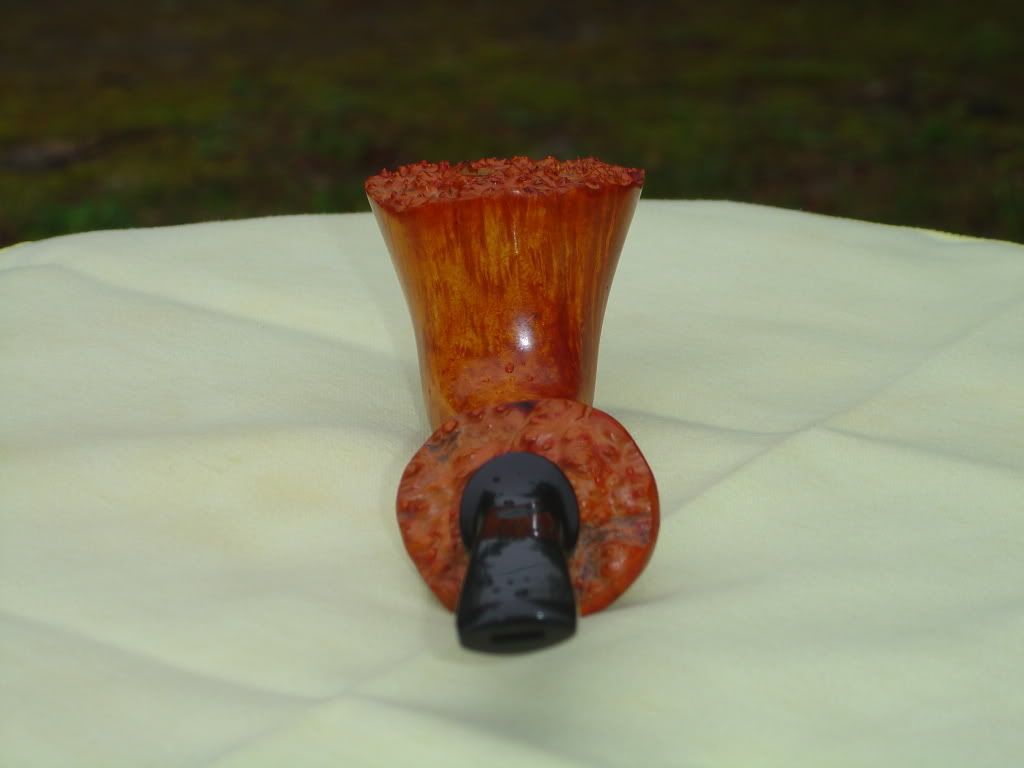
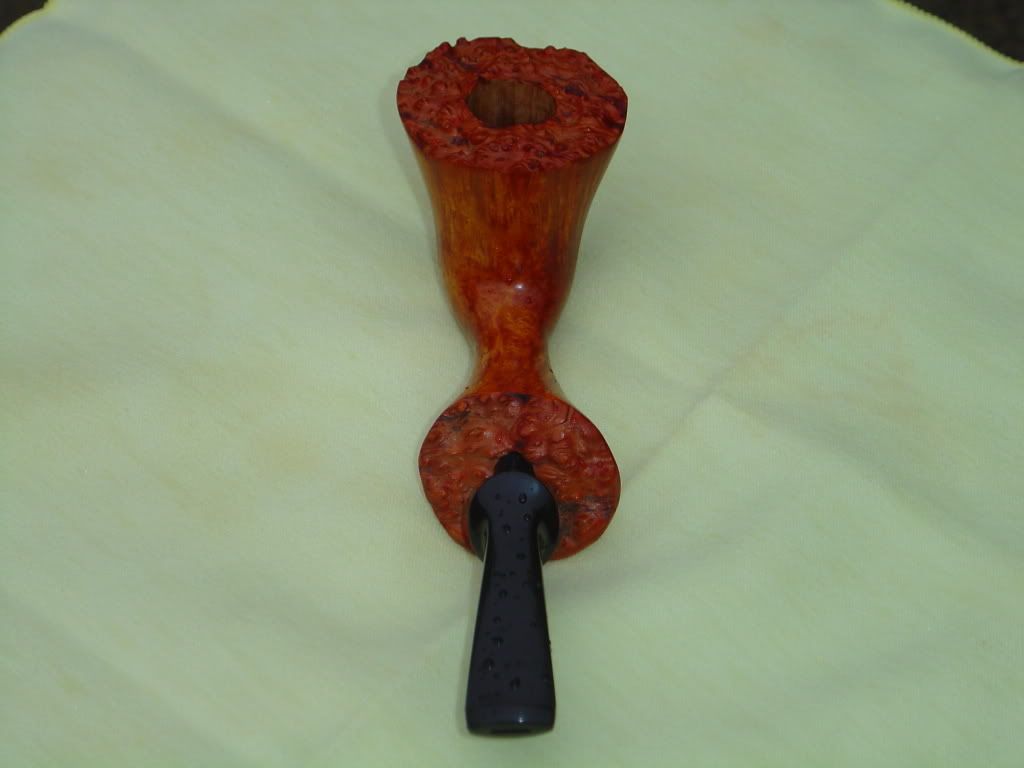
Alright then! Time for the final product. I polished the stem using tripoli (a sanding rouge) and a muslin buff. I love how it turned out. A couple of things I should mention though. I forgot to remove the damn bark from the shank plateau (the face of the shank). It won't affect the pipe's smoking ability, but it won't look too pretty once it starts coming off. I'm probably going to take a crack at fixing it before too long. Also, it doesn't look like the stem goes all the way in, in the pictures. It does, I just neglected to push it all the way in. Anyway, enough blabber. The pics man!
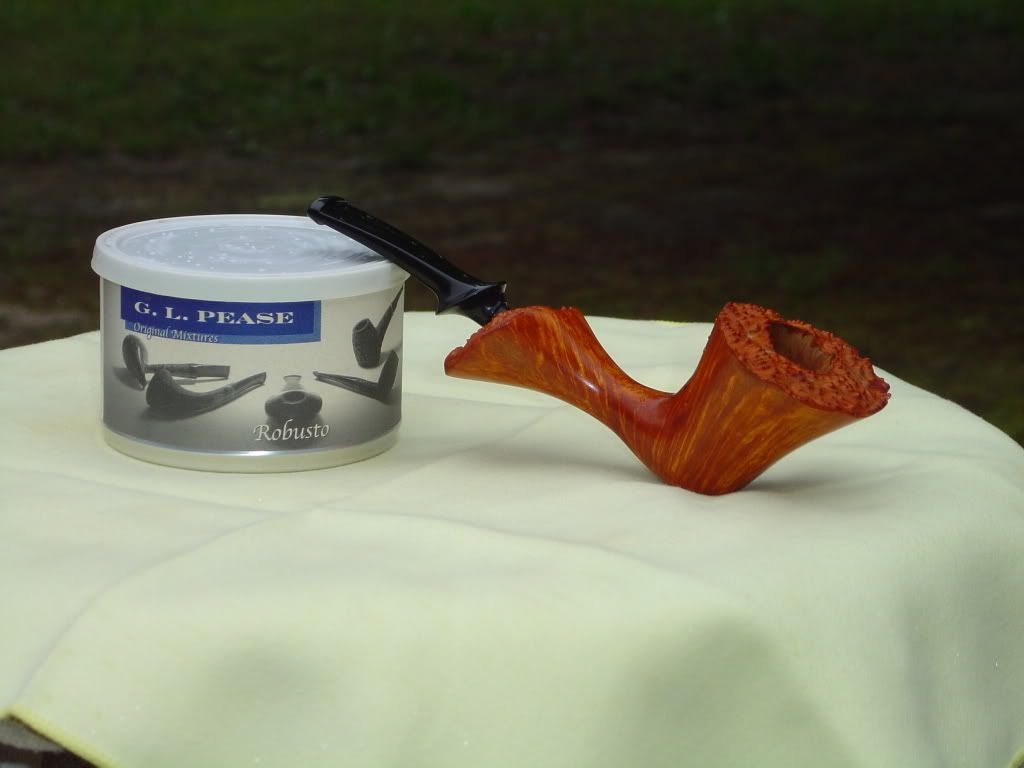
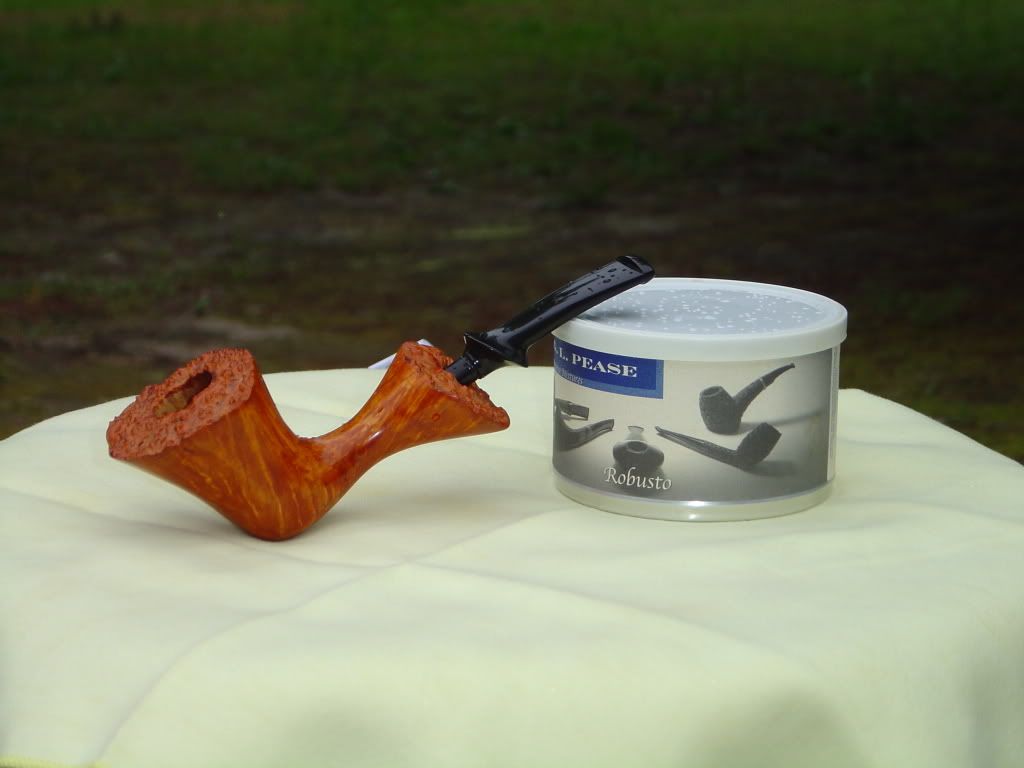
Enjoy!
CMA
(Here's a pic of me breaking it in. View at your own discretion!
) -
The standard body thickness is 1 1/2" as opposed to Fender's 1 3/4".
CMA
-
I would say an advantage of lacquer (nitro) is that, for a first timer especially, it is more forgiving (burns in and such) and it's easy to get a thin, super clear finish without having a bunch of equipment. And some folks like it's aging properties.
CMA
-
Their website states the dye can be used on wood. I don't see why not. You can also use leather dye on wood.
CMA
-
-
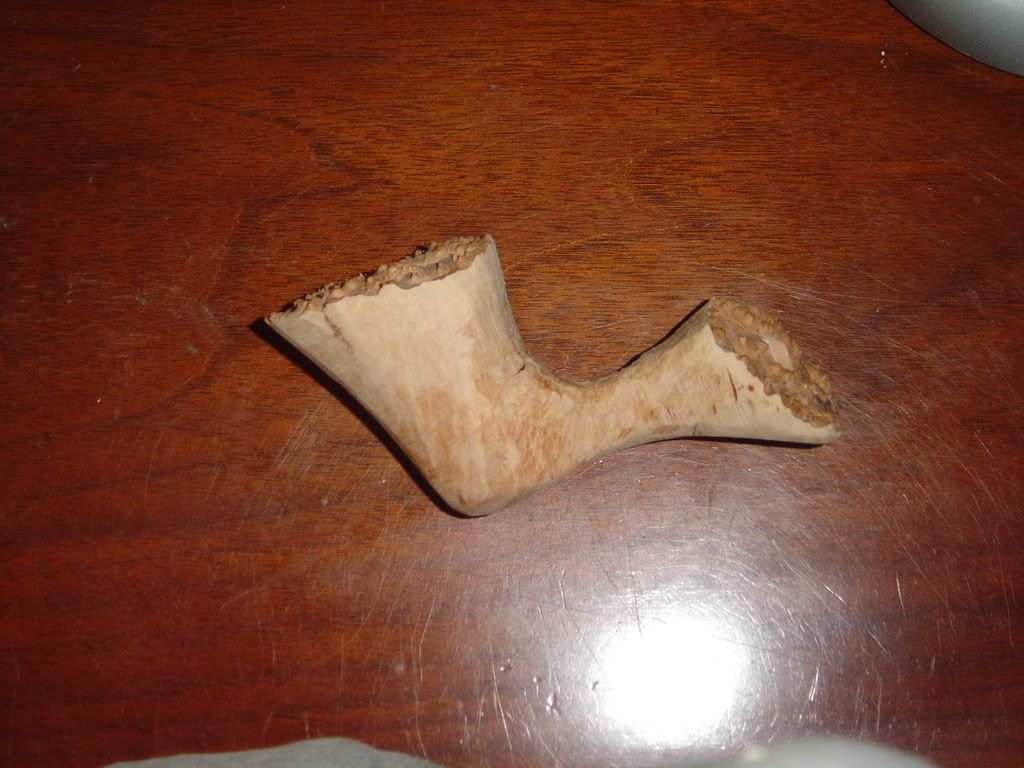
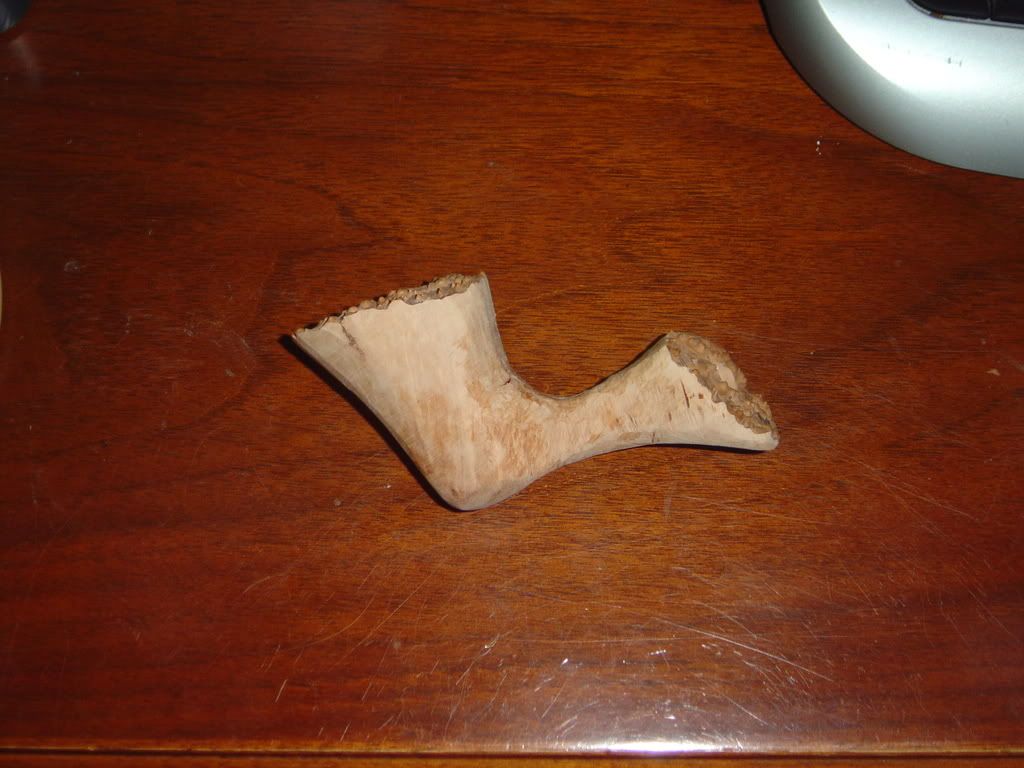
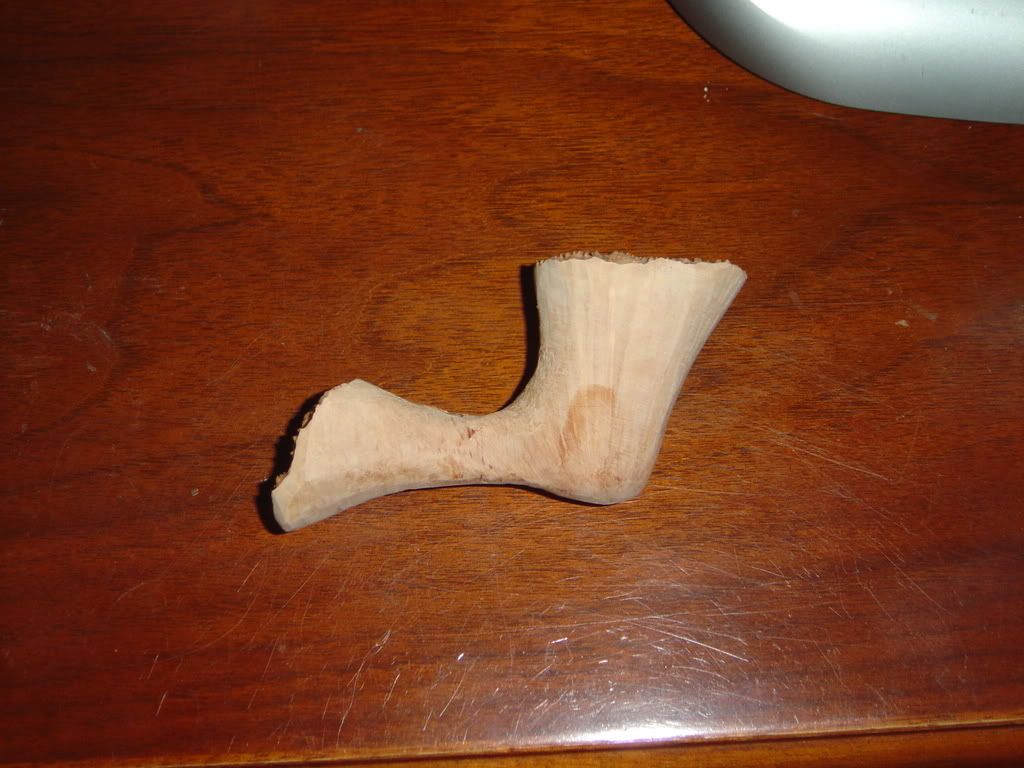
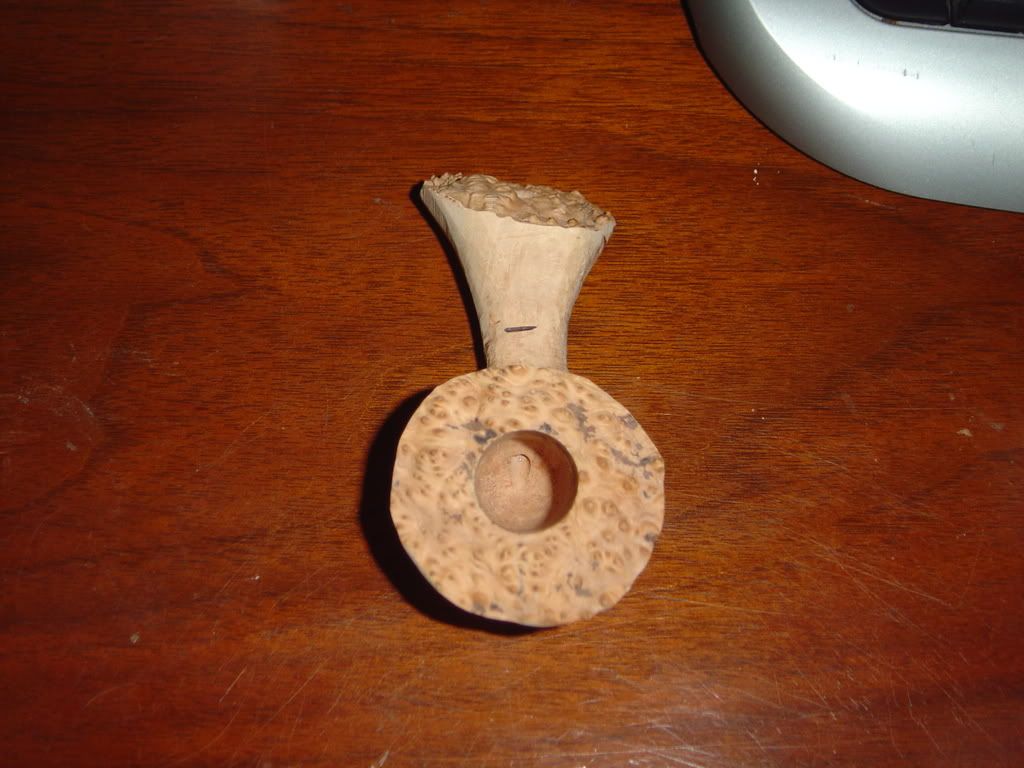
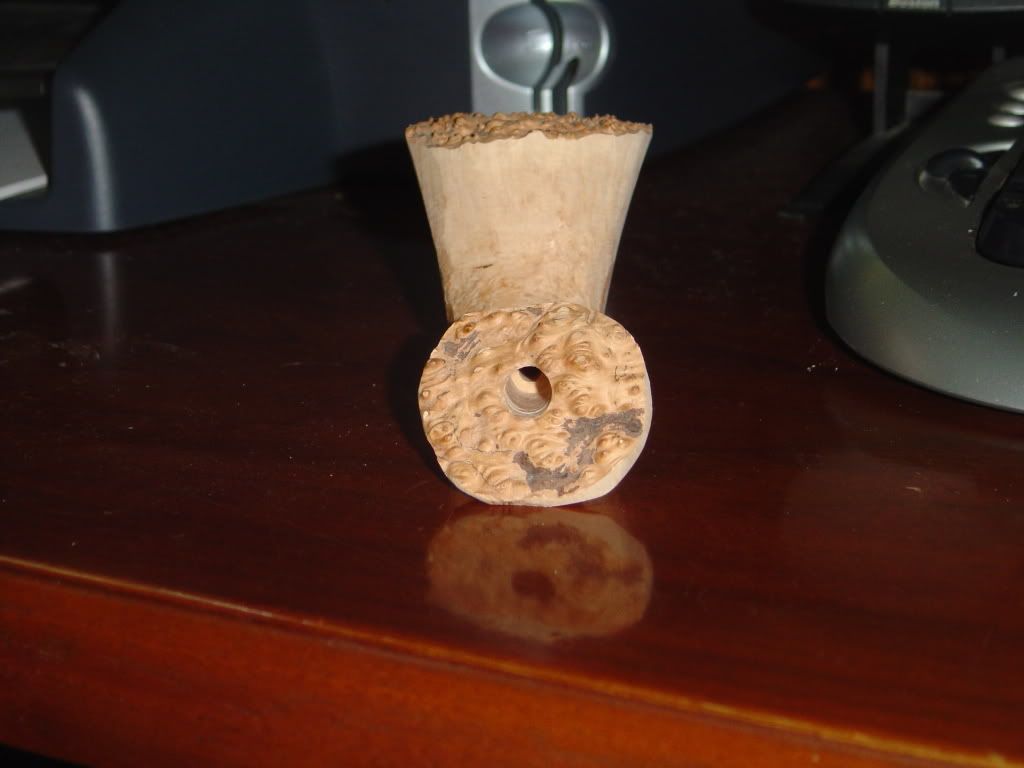
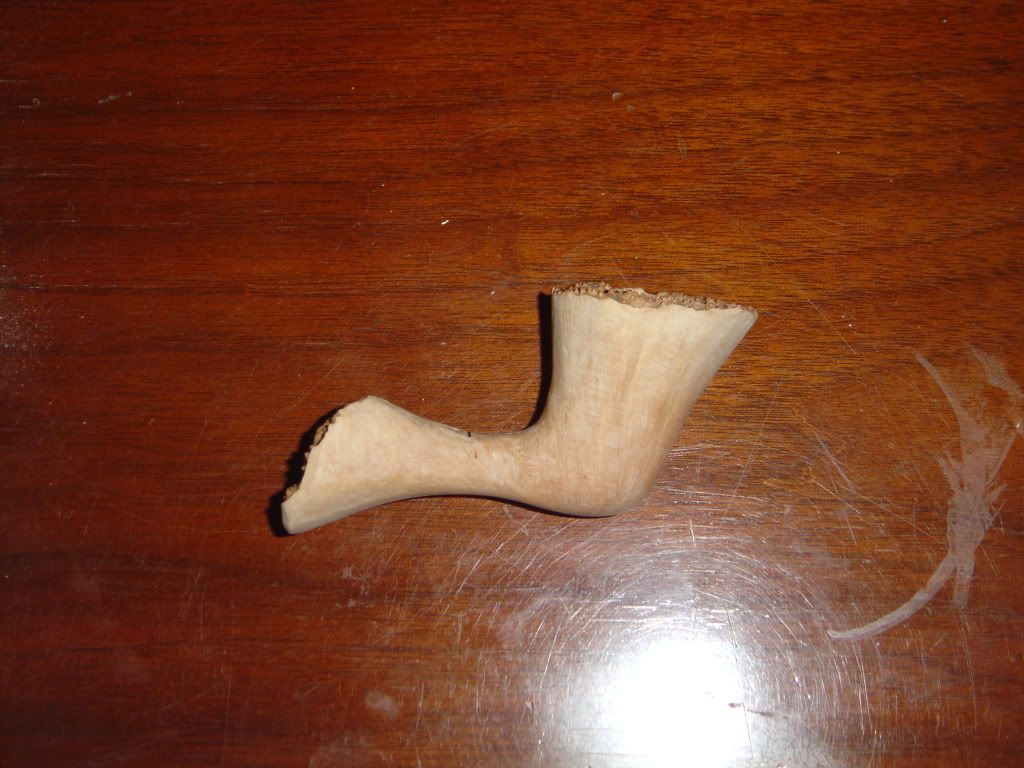
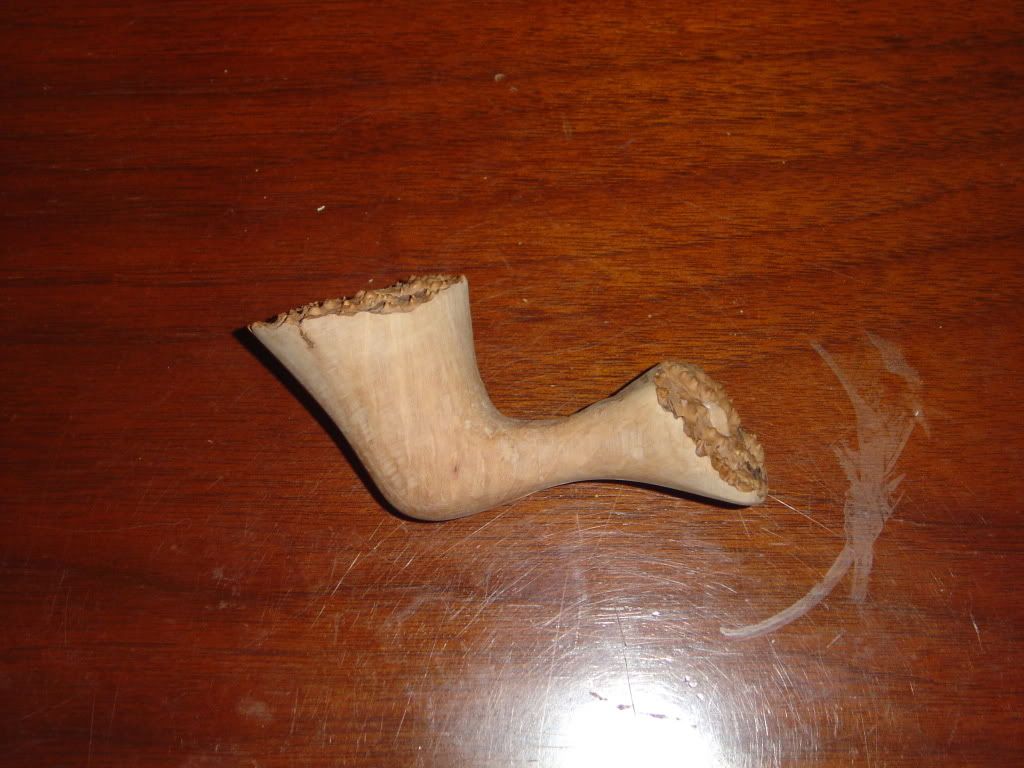
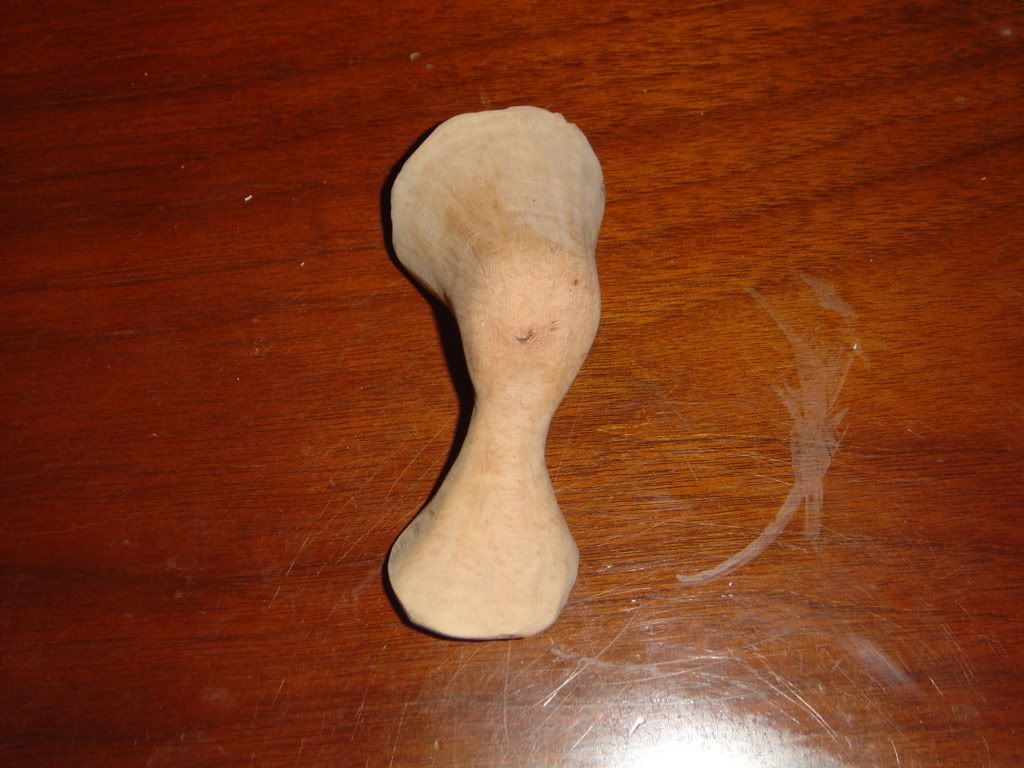
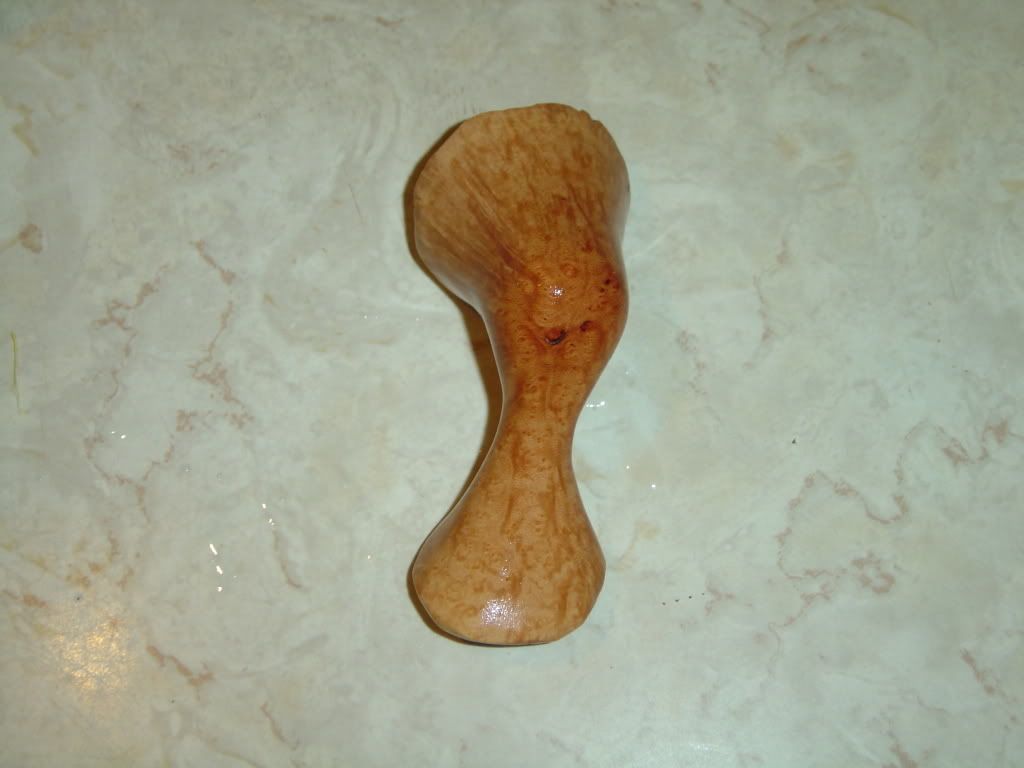
I made some progress on the pipe while I'm waiting for more wood for the Tele.
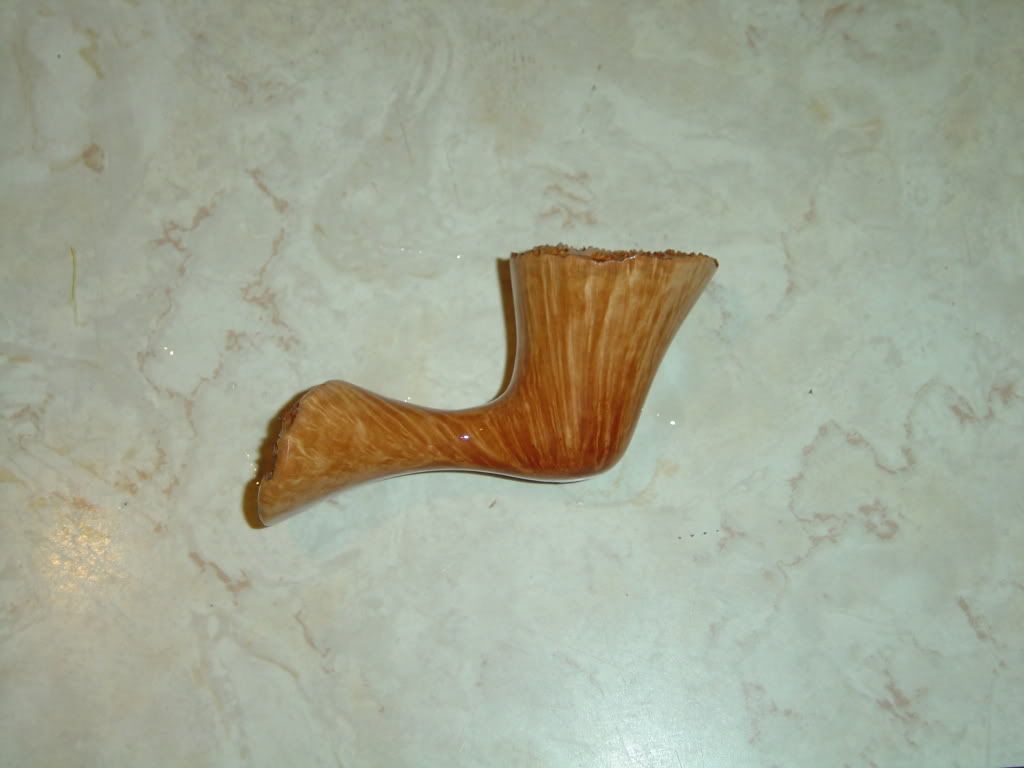
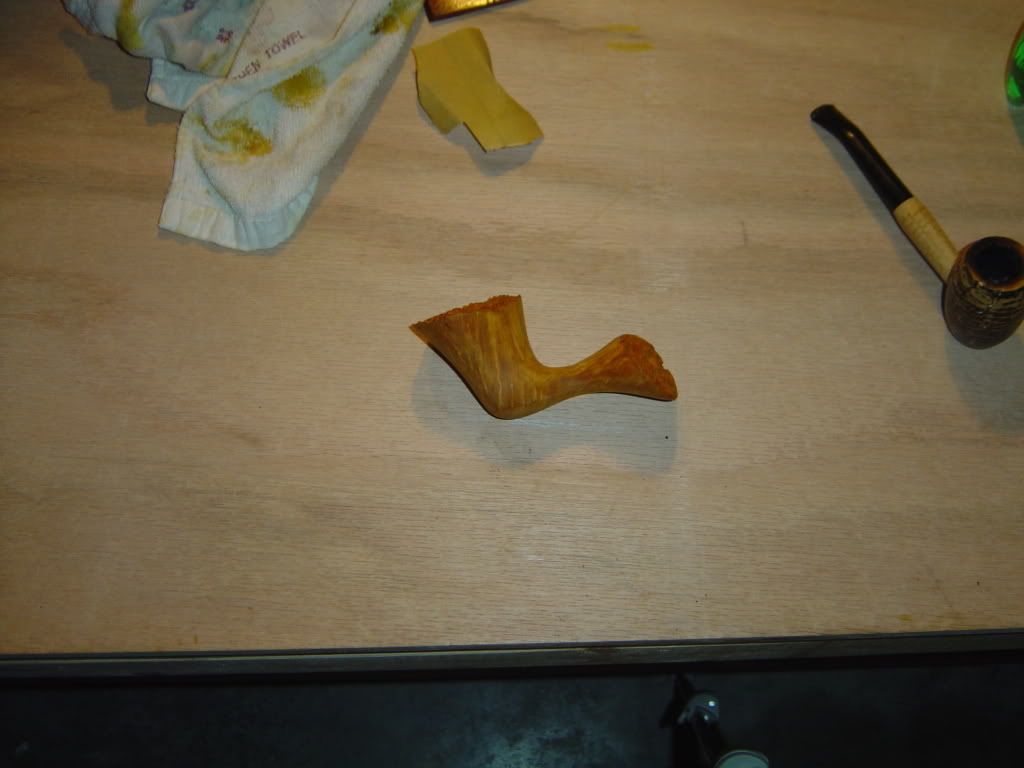
This is how the pipe is as of right now. That's just water to bring out the grain. It's sanded up to 400 grit in prep for the finish. Here are the progress pics:
Final Shape Done 1 - You can see here that I refined the area where the bowl and shank meet, and the bottom of the bowl.
CMA
-
Thanks for that link - those pilot holes look like an excellent idea! About how long would you say it took you to cut it with the jigsaw?
I don't recall spending too much time on it. Maybe an hour at most. Most of your time is spent setting up and moving the supports around to avoid cutting them with the jigsaw.
CMA
-
Yeah, I realized the same thing last night. It's not really "my" guitar if someone else cuts it out. Hmm.
I do have a jigsaw, but I recognize that those are less ideal than using a band saw. I suppose I should go find someone with a band saw? (It shouldn't be too hard, I bet the machinist has one).
Yep, I've been looking into making them for quite some time. I've borrowed my friend's (now-neglected) MIM Stratocaster for the time being, and I'm almost ready to transfer what I have to MDF. Thanks for the advice!
I've (check out pics "The Body 1-4") used a jigsaw with no problem at all, as have others. If you have a band saw, or access to one, great. But a jigsaw works quite well. Just be careful, the blade can bend. You can't cut as close to the line as with a band saw.
CMA
-
Well, as far as what makes it "worth it", I couldn't say. I'm not an expert on planes. And different people have different reasons for something being "worth it". The reason may have nothing to do with practical advantage. Who knows. Some folks have money, and like to spend it.
Maybe someone with more knowledge of planes could jump in here.
CMA
-
I know nothing about plane prices, but I'm going to go out on a limb. It's like most markets. If a brand or person has a excellent reputation for making something, their products can get quite pricey. In addition, products from boutique makers tend to be expensive by nature.
CMA
-
There have been quite a few topics on this subject of late. You probably won't get any results by searching for "tru-oil" or "tru oil". Try "truoil".
CMA
-
I just had some family drive up from the panhandle (of Texas) to Nashville, TN. I think they said it was a 16 hour drive. No stops. The longest drive for me is about 8 hours, when I visit family in Nashville.
Oh yeah, and you can smoke now! Want me to send you a pipe and some tobacco, or a cigar?
CMA
-
To drive of course. I've been putting it off the last two years. Evey time my parents would ask if I wanted to start learning to drive I'd just change the subject.
LOL, I did the same thing.
I turned 18 in August and decided to get my learner's permit so I could get some actual driving experience first.
Egg rolls and key lime pie, that sounds good! Happy birthday!
CMA
-
The shine comes from your clear coat, not the color. He has both satin and gloss clear.
CMA
-
-
Hey Erik,
Would it be possible to get a flamed maple board? I didn't see it on the order form, so I thought I'd ask. Thanks!
CMA
-
Thanks for the tips guys! Huge help. I'm going to give it a go today. I'll report back if something goes awry.
CMA
-
Titebond (the original version), a wood glue, is popular for many wood-working applications, including instruments. Hot hide glue is the traditional instrument glue but requires more prep.
In regard to polyurethane glue, I refer you to this thread: http://projectguitar.ibforums.com/index.ph...st&p=349982
CMA
-
I ran into an issue after gluing the fretboard to my neck. The fretboard moved slightly off the center line after I got it clamped up and left it to dry. I don't know how, I used pins to keep it in place, but it did move. In any case, I figure my only option is to remove the fretboard and re-glue it. I read the tutorial on the homepage and I'll follow that. It's a maplefb/maplenk neck and I used Titebond. I really want to avoid damaging the fretboard.
Tips anyone?
CMA
-
The bottom guitar reminds me a lot of some of Doug's guitars (soulmateguitars.com).
CMA
-

Building A Guitar
in Solidbody Guitar and Bass Chat
Posted
I have the tutorial backed up in a zip file (I saved them as individual html files). I can upload that until Matt gets the PDF file up, if you guys would like me too. I've been trying to convert them into a single PDF, but haven't had much luck so far.
CMA