


CrazyManAndy
-
Posts
668 -
Joined
-
Last visited
Content Type
Profiles
News and Information
Tutorials
Product Reviews
Supplier Listings
Articles
Guitar Of The Month
Links and Resources
Forums
Gallery
Downloads
Posts posted by CrazyManAndy
-
-
Step 1: Buy the Melvyn Hiscock book.
Step 2: Read the Melvyn Hiscock book. All of it. Cover to cover. Make notes whilst doing so.
Step 3: Read the Melvyn Hiscock book again. And again. Especially the bits you're not certain about.
(Notice how I haven't mentioned buying anything yet?)
Step 4: Start breaking it down, then come back with very specific questions. This will enable you to get the most out of the members here.
Hope this helps!
DJ
I just have to say, that post needs to be stickied! Best advice ever. And, tools are probably going to be your biggest initial investment.
CMA
-
Could you be more specific, i.e. your state? I'm only curious to know in case I know a place near you. And it helps other folks be a little more specific as well.
CMA
-
Poplar will do fine as a body wood, but you'll still need to find something for the neck and fretboard. Might I ask what your location is?
CMA
-
Ahh yes, I see what you're saying. My brain was going to sleep on me last night, as you can see in some of my other posts...

CMA
-
I like Mattia's point. I would prefer a baritone. Another string (or three) is just one more thing for me to fumble over.
I can certainly appreciate the desire for more range. But I'm pretty happy with six strings on guitars.CMA
-
jmrentis,
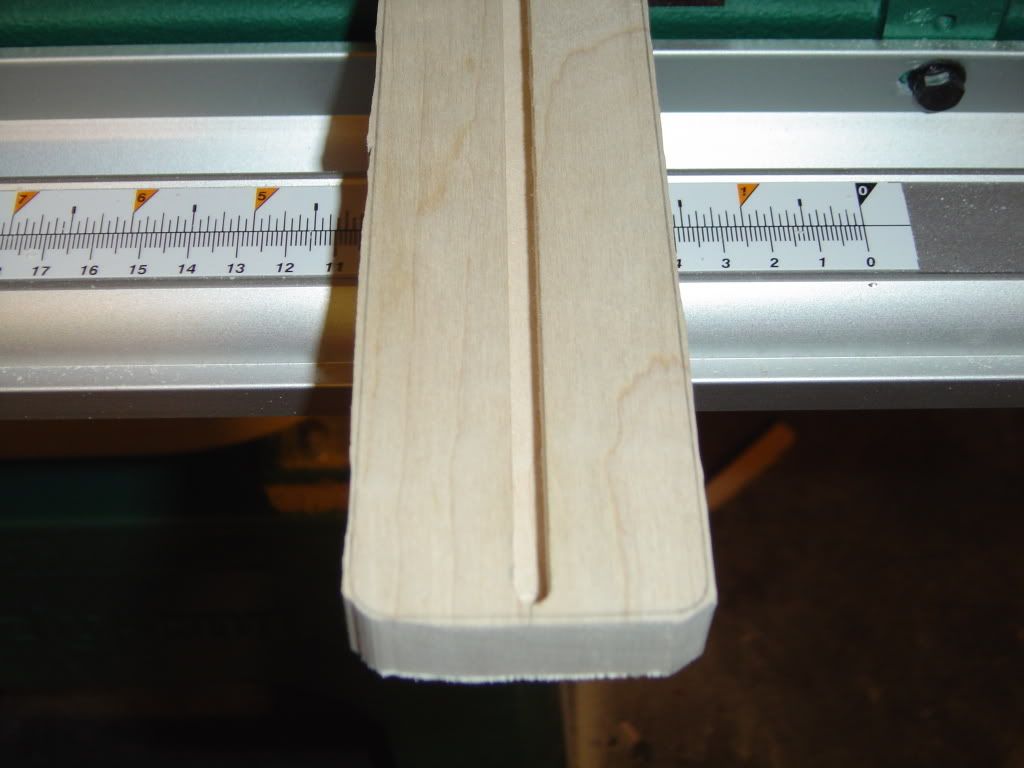
Thanks for the tip on cutting height. I don't recall reading that in the manual, but it sounds like a good idea. The piece does have some pretty nice figure, hopefully the finish will bring it out more.
Xanthus,
I'll be sure to address the truss rod slot issue just before I install it. That's a great webpage, bookmarked it! I'm not sure what you mean by running the "router bearing up against" the fretboard though. Why would I need to do that?
CMA
-
AH! Ok, now I understand. Geez, going blank there for some reason. I would avoid any kind of wood putty. Sticking with hardwood is your best bet.
CMA
-
I'm not sure I understand the problem. Most necks, where the fretboard will be, are only around 3/4" thick (before shaping). Add the fretboard and you bring it to 1" total. You've apparently got considerably more than 1" of thickness even without the fretboard.
Are you talking about width or depth?
CMA
-
How thick is it where the fretboard will be?
-
I got a little crazy with the table saw and accidently cut my neck
When I first read that, I didn't know whether to laugh or cry, lol.
So, you're saying that it only happened to the part of the neck that will be shaped? If so, you usually lose a little depth there anyway when you shape it.
CMA
(Edit: I assumed you were trimming it down to 3/4"? Is that correct?)
-
Finally! An update! I meant to post a quick note some time back but never got the chance. Out of the blue, I had to go out of town for a month which is the reason for the long silence. However, I'm back now, so I can resume progress on the build.
Good to see some work on this one! And always good to see wood that you can get two blanks out of. Now there's no excuse NOT to do a second oneYou bet! I'll definitely make another neck with it eventually. I'm going to wait until I finish this one, just in case I screw it up and need to make another.
 Just a note on Robosanders: the finish you get with a template bit and a router is much smoother and more accurate with respect to the template you've made.
You are correct, my good sir. I've taken your advice of using the robo-sander to bring the edge close to the line and finishing the edge with the router. More on that below.

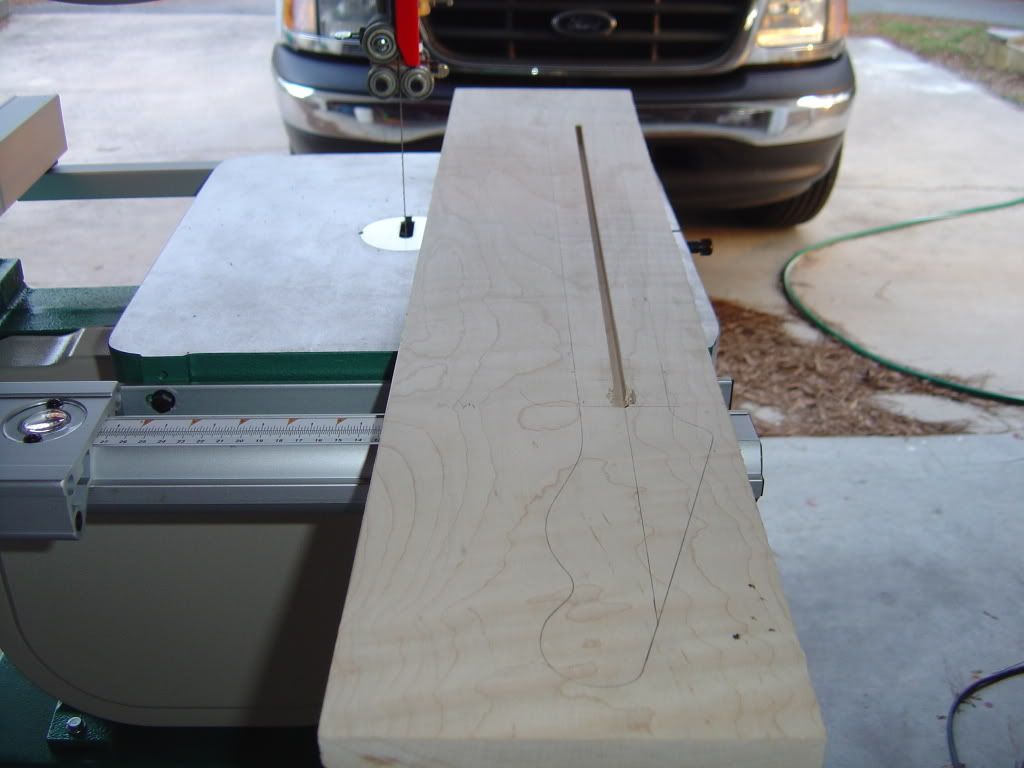
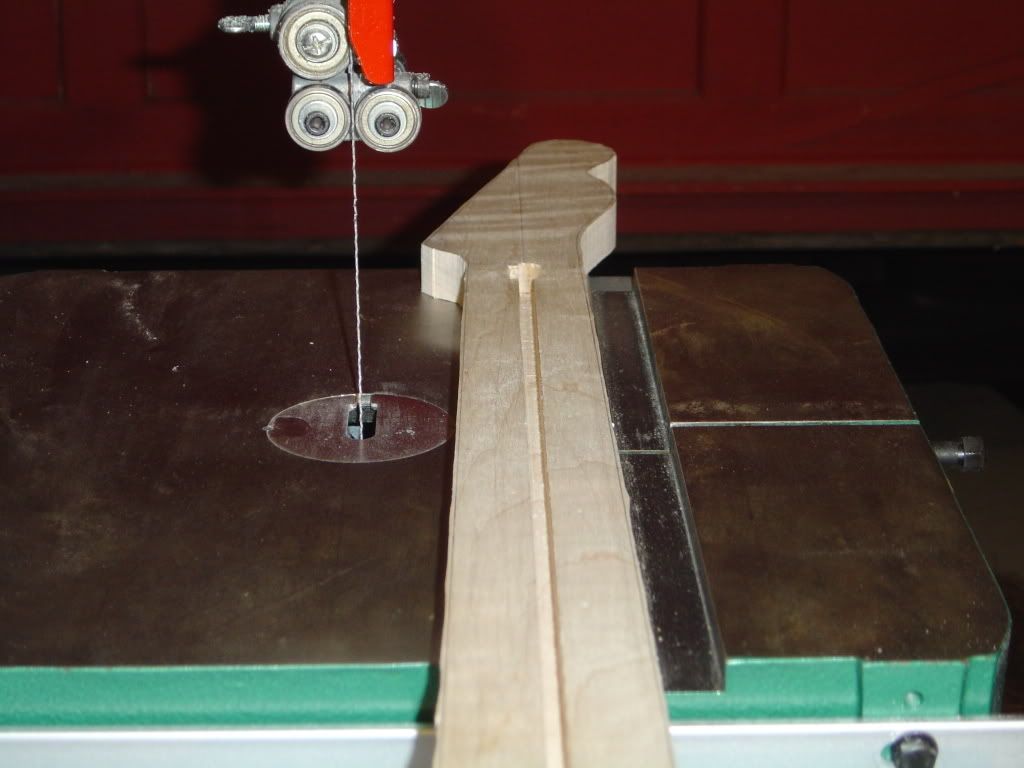
I'm going to use the band saw to cut the shape out.
The Neck 9 - Another view of the neck blank before cutting.
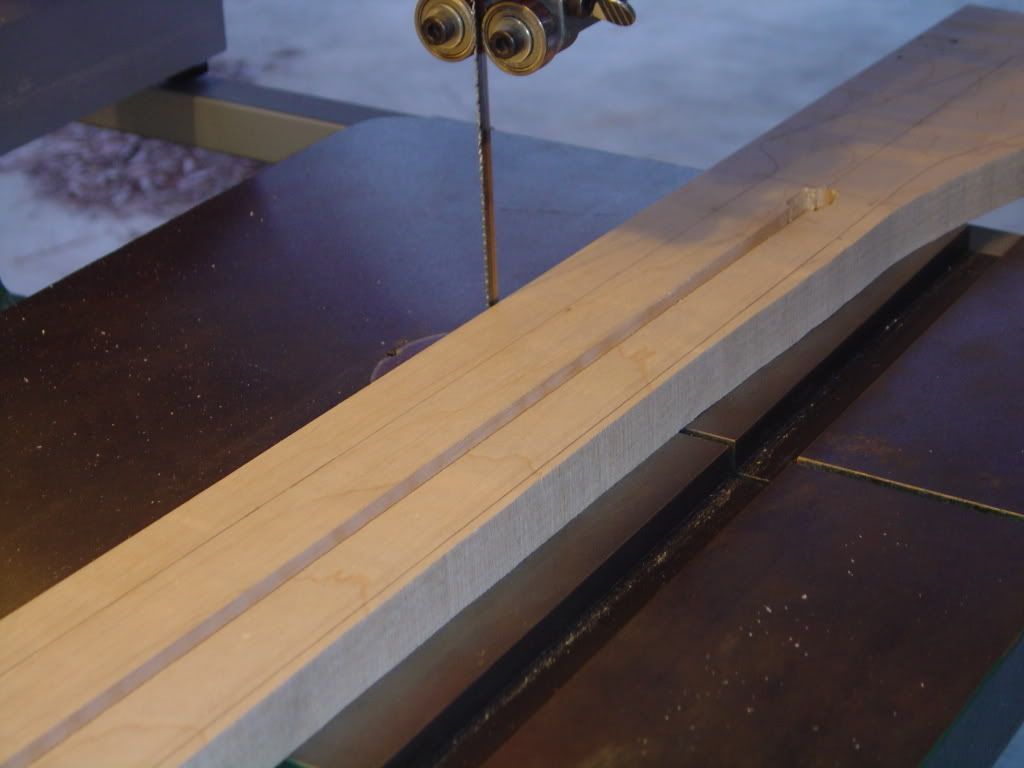
The Neck 10 - I've taken one side off. This was only my second time using the band saw, so I didn't want to chance it and get too close to the line (nothing the robo-sander can't handle, in any case).
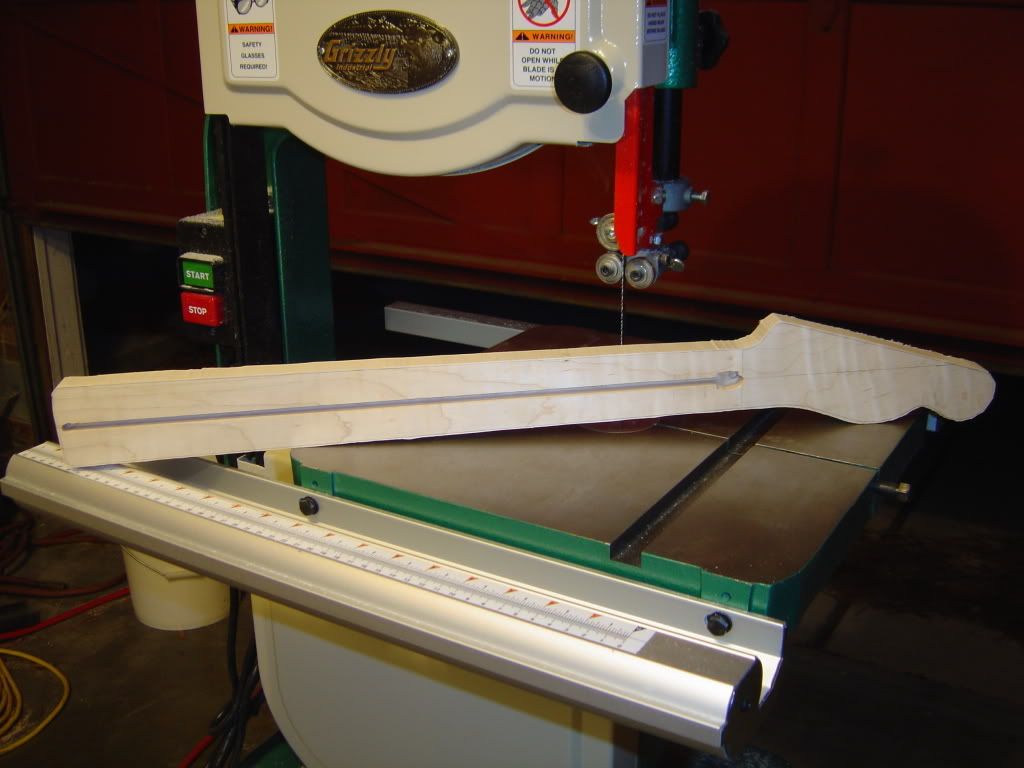
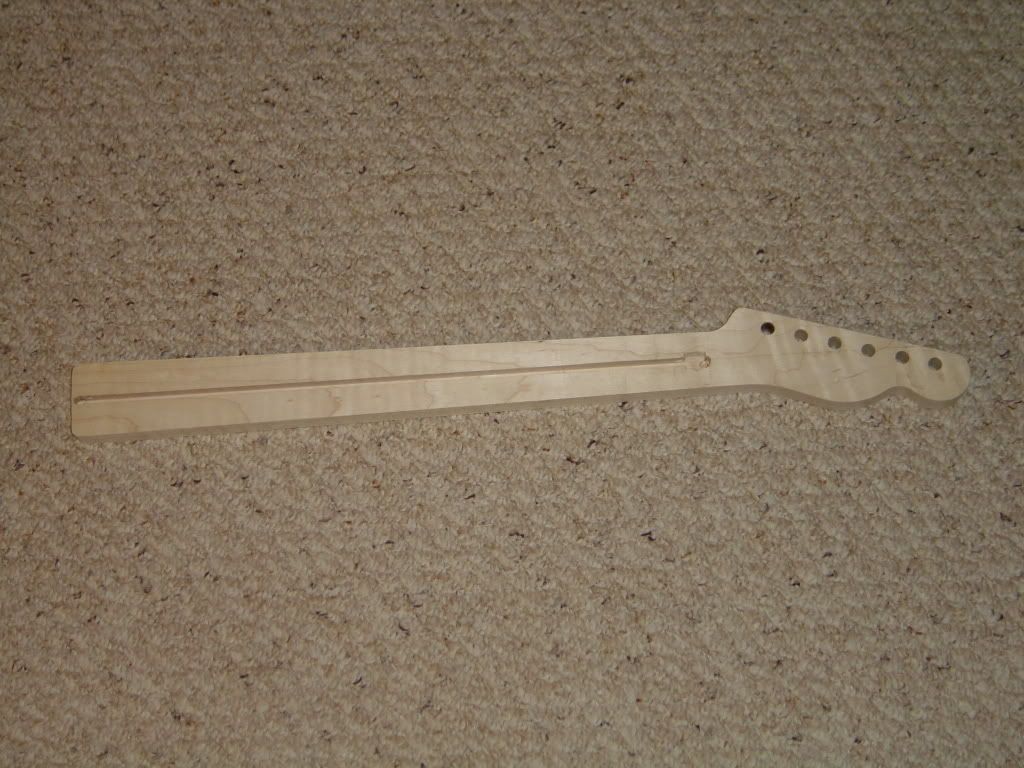
The Neck 11 - Finished cutting out the shape. Starting to look like a neck now.
The Neck 12 - Another view.
The Neck 13 - Another view.
The Neck 14 - Another view.
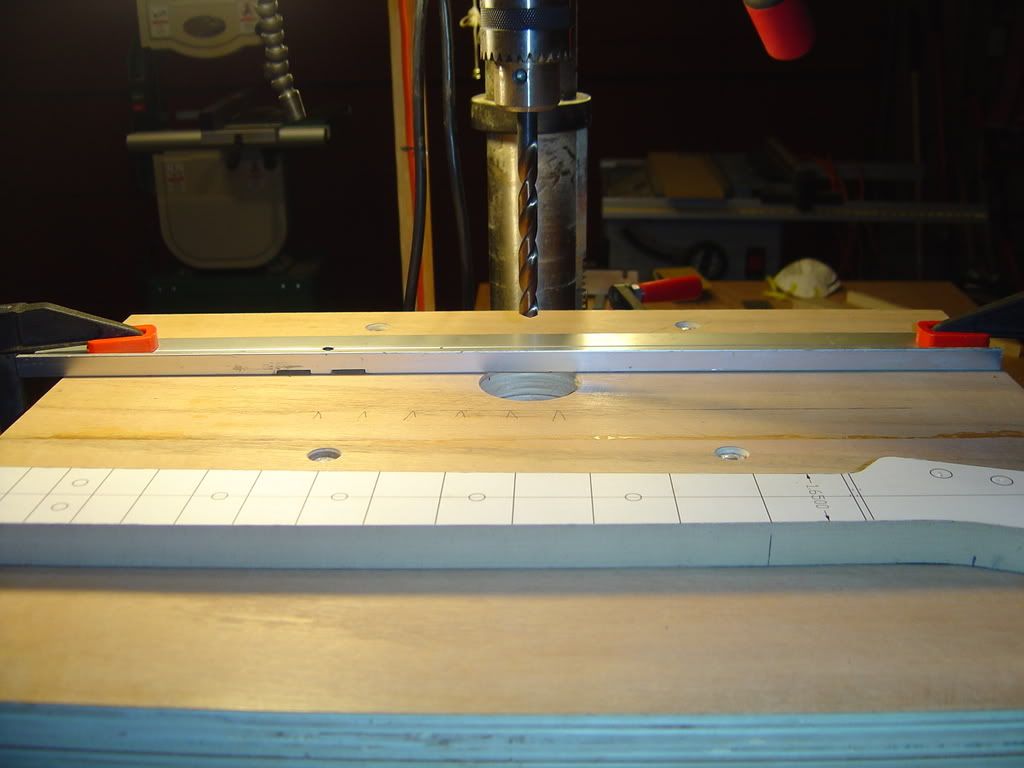
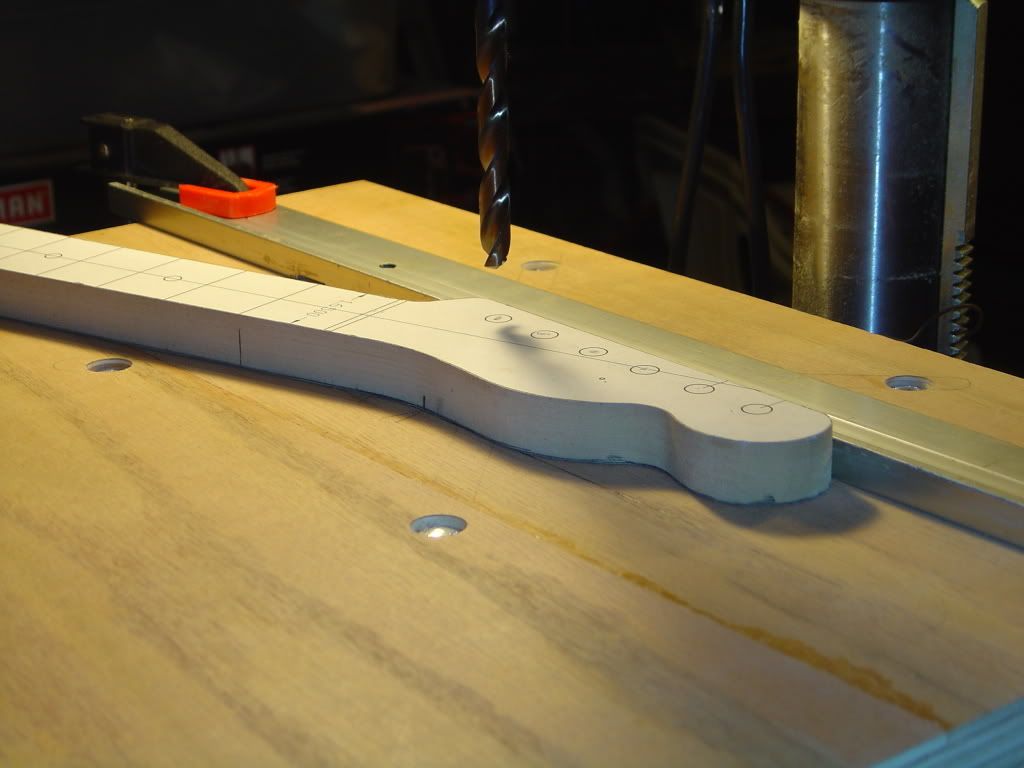
The Neck 15 - Now it's time to drill the tuner holes. I'm going to do as Xanthus suggested and drill them into the template first and then use that as a guide. My dad devised this method of drilling consistent tuner holes. Note the straight edge. The flat side of the headstock is pressed up against the straight edge, and the small tick mark on the bottom of the headstock is lined up with one of the arrows marked onto the table. The arrows are evenly spaced so the distance between the holes is consistent.
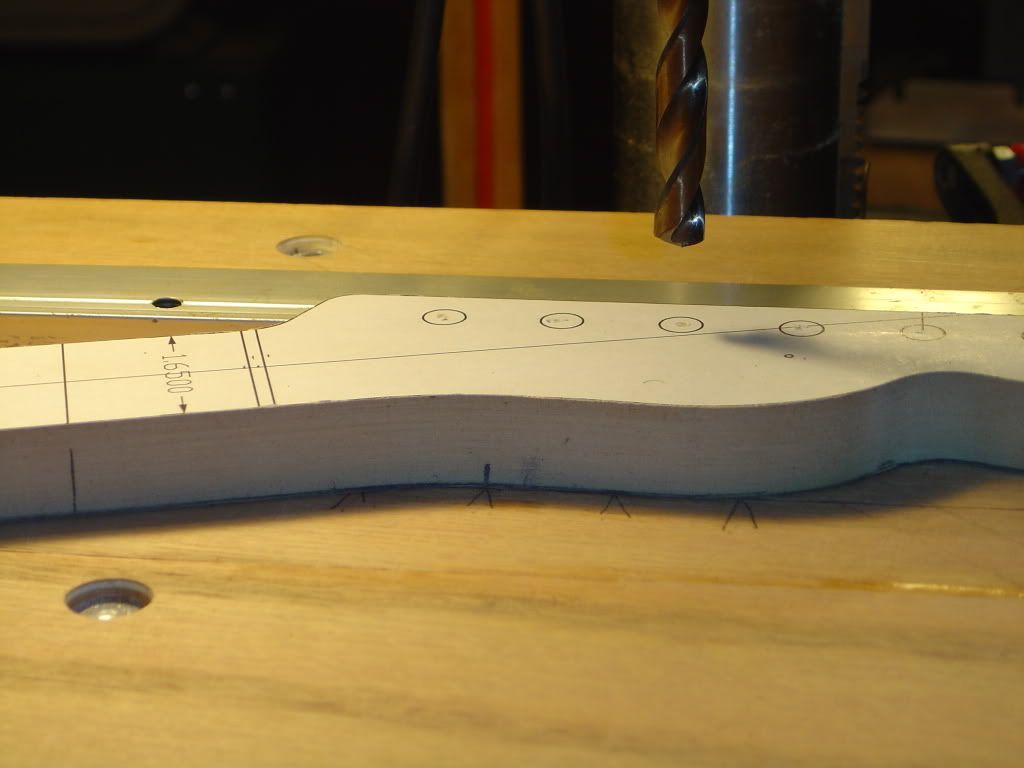
The Neck 16 - I marked each hole with the tip of the bit to make sure the setup was accurate.
The Neck 17 - Another view.
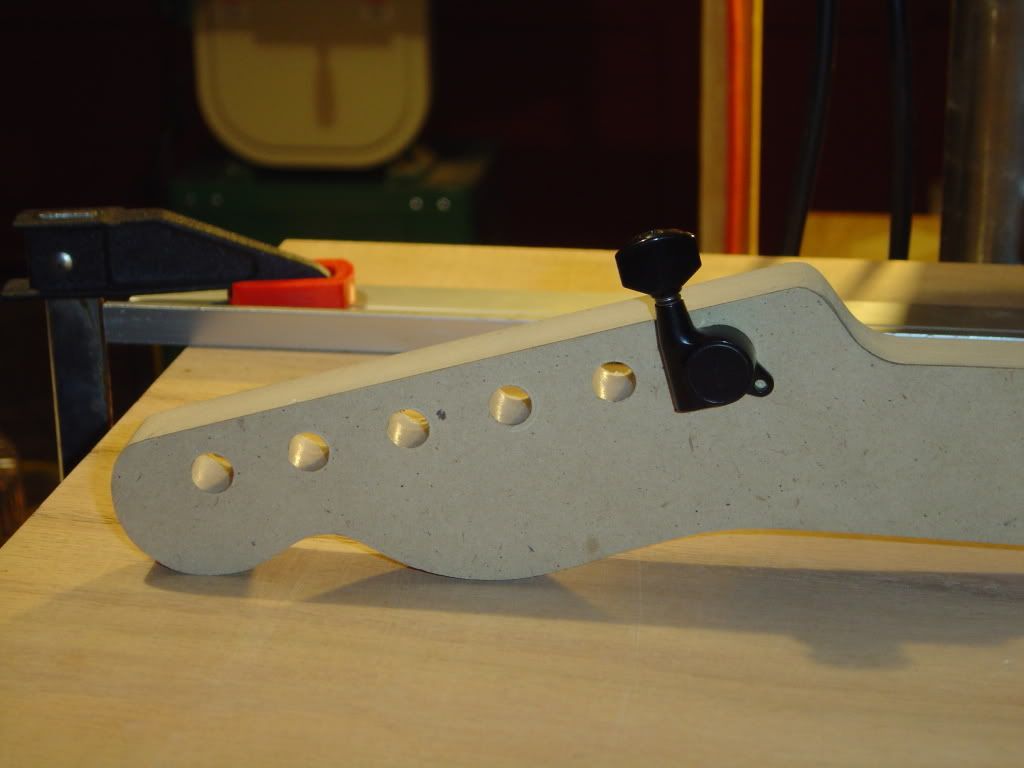
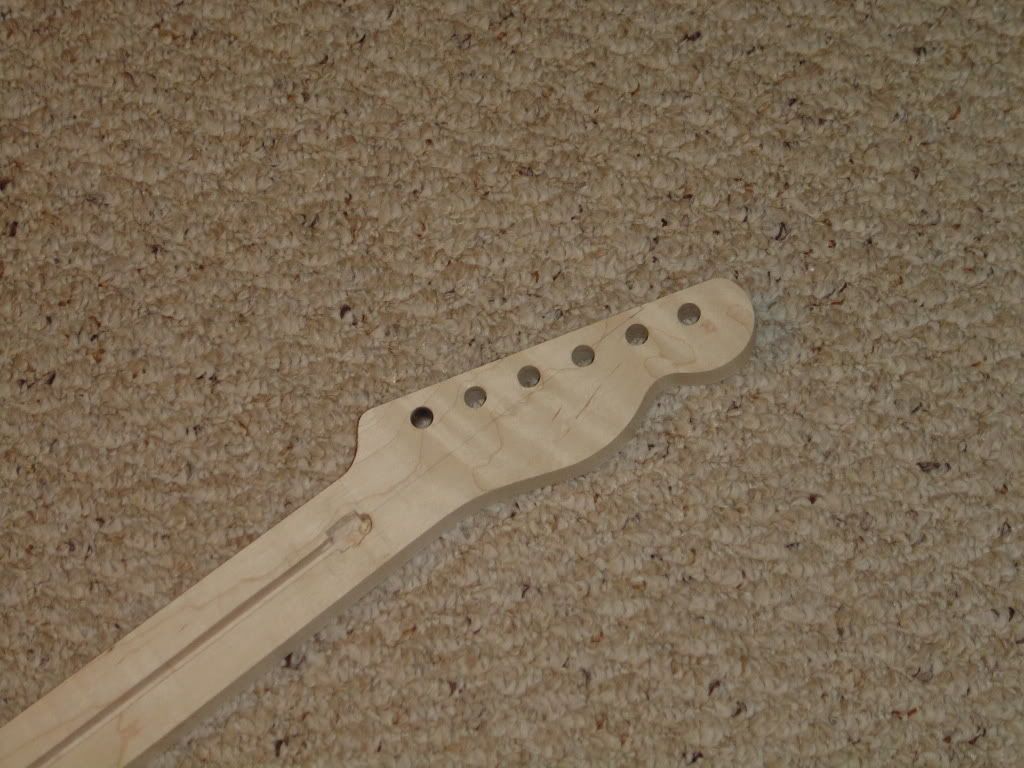
The Neck 18 - The tuner holes are drilled. Not bad. The tuners are supposed to require a 13/32" hole, but the first hole was a little too large, so I switched to a slightly smaller bit, 3/8". I don't know if it was the bit, the tuners, or maybe run-out from the drill press that caused the oversize hole. The tuners fit snuggly into place after switching to the 3/8" bit.
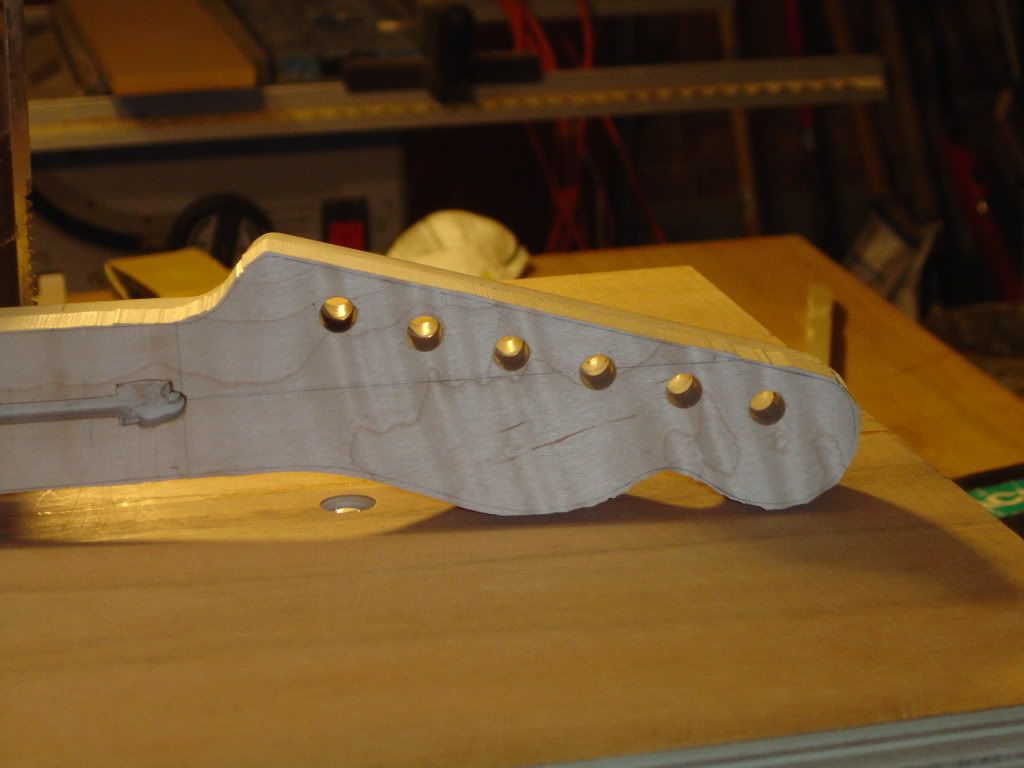
The Neck 19 - I reattached the template and drilled the tuner holes into the actual neck. I drilled from behind so that all of the splintering occurs on the face of the headstock. When I remove a 1/4" from the face, the tuner holes will be clean and crisp.
The Neck 20 - Tuner holes done.
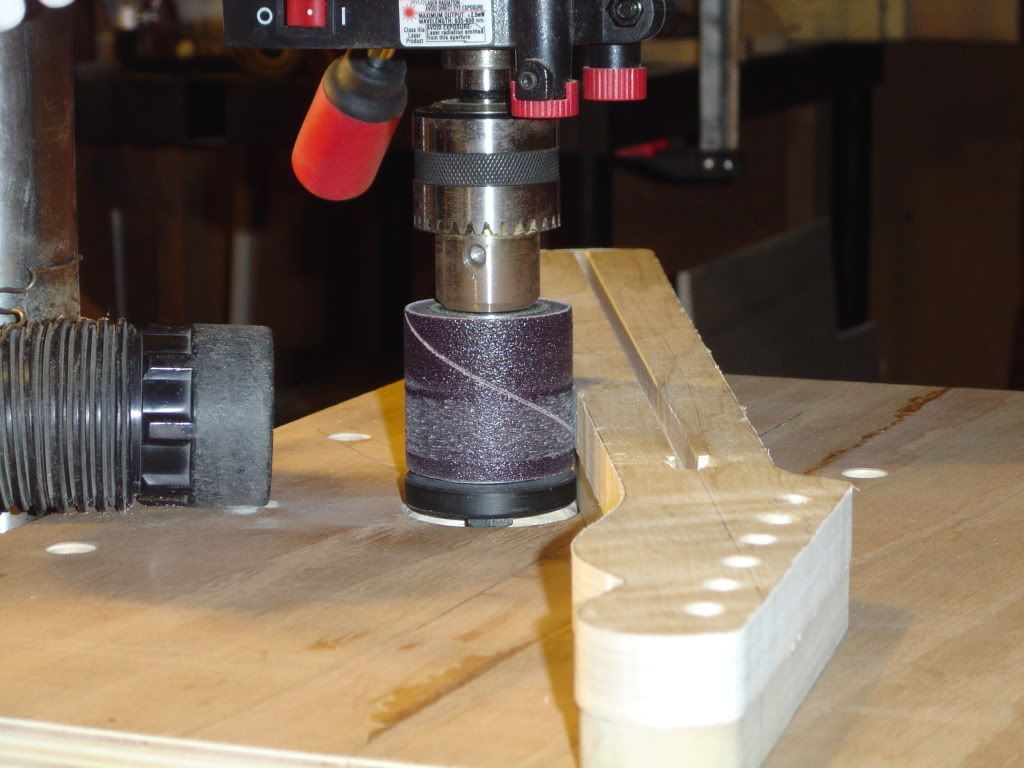
The Neck 21 - I used the robo-sander to bring the edges down as much as possible, leaving only a little bit for the router to remove. I also did a little hand sanding after finishing with the robo-sander, using the same method I used on the template.
The Neck 22 - Finished sanding. Note the lamp attached to the left side of the drill press. Great shop lamp! I picked it up on one my visits to the Woodcraft store. It has a magnetic base, so you can attach it to a variety of things and move it to wherever it's needed. It also comes with a couple of nice accessories. I think they were on sale too, so I got a great deal.
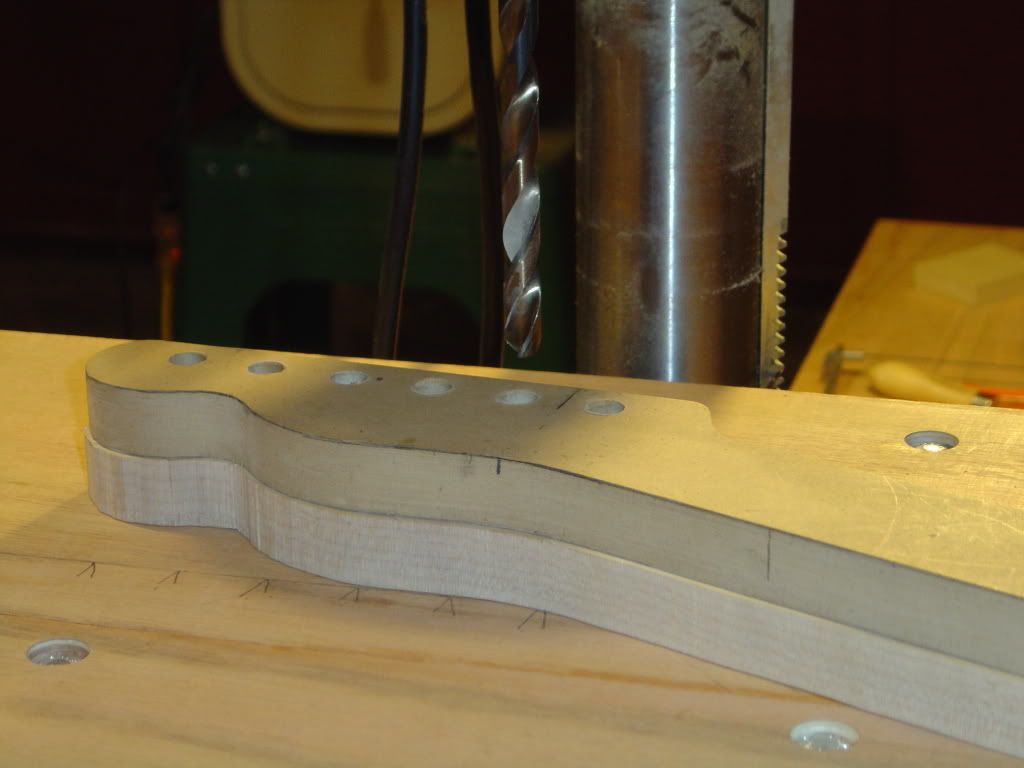
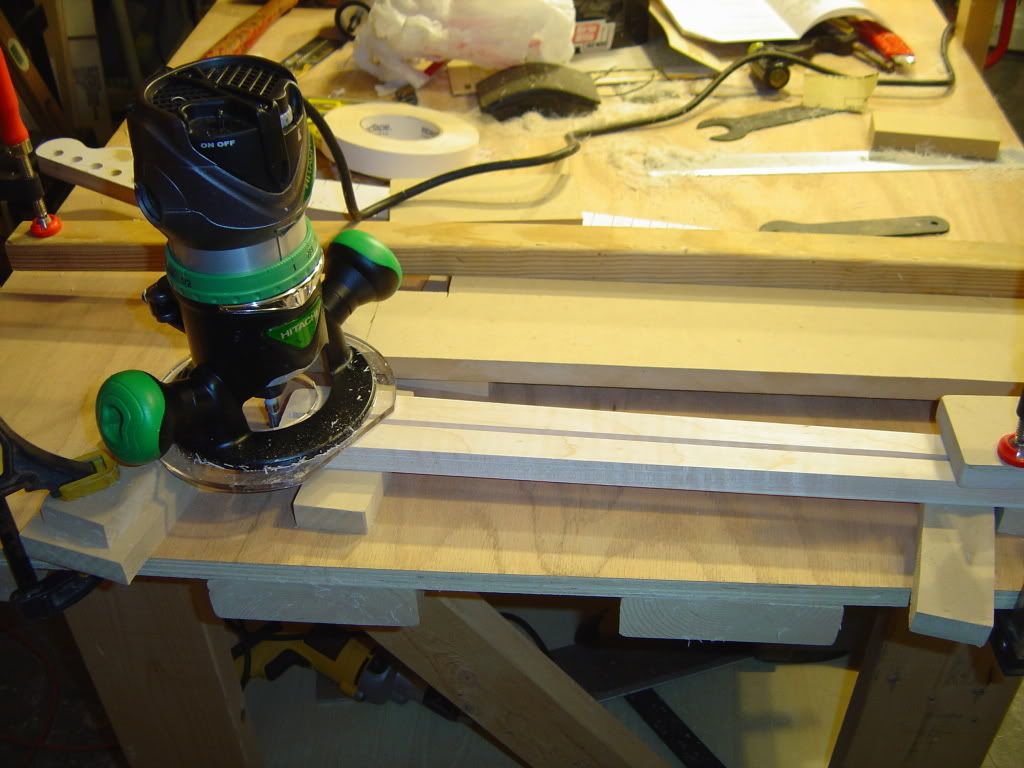
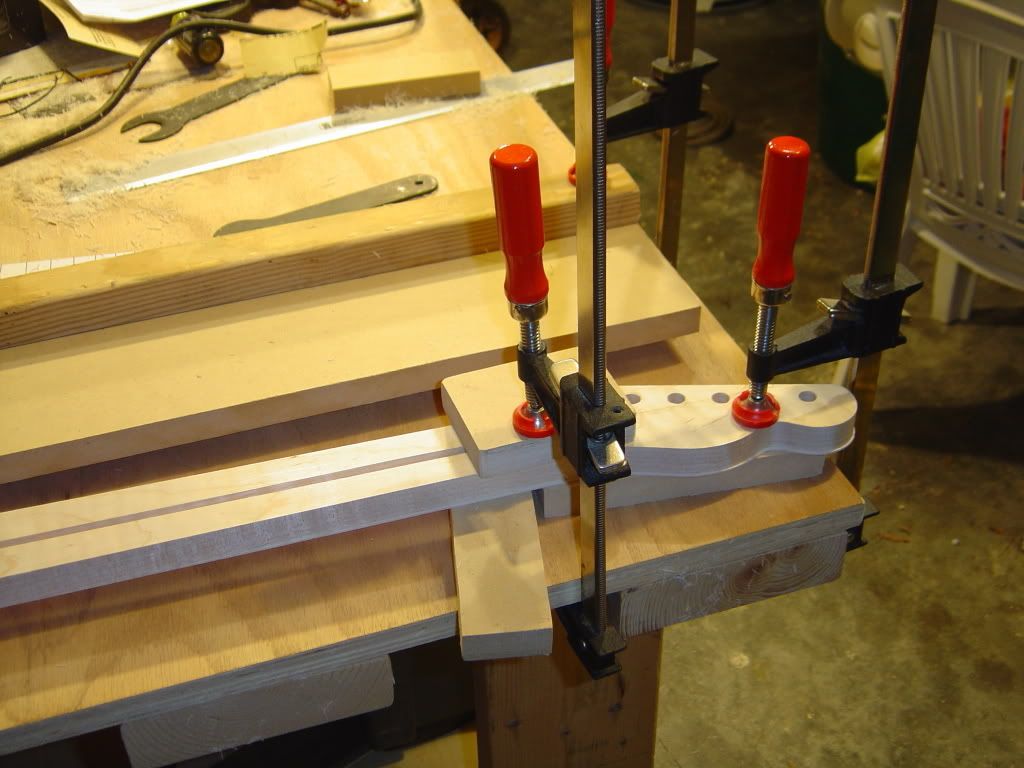
The Neck 23 - Considering what tools I had available to me, I decided that the best way to get a good edge would be with a router and a template bit. You can see here the setup I used to route the edge. Looks simple, yeah? Well, it was probably the most aggravating few hours of the build so far. I'm not going to bother re-telling the whole story, but lets just say I made some stupid mistakes. Thankfully, I managed to avoid screwing up the neck. Toward the end of the ordeal, I had streamlined the process quite a bit, so if I ever have to do it again, it won't be nearly as difficult. I'll go over the basic procedure. I did three passes total with the 3/8" template bit I got from Stew-mac. For the first pass, I attached the template, then removed it for the final two passes. As you can see in the picture, I basically clamp one end of the neck down and route the edge of the free end. Turn it around 180, clamp it again, and route the other side.
The Neck 24 - Another view. The thin strip of wood on the bottom will be taken off on the third pass.
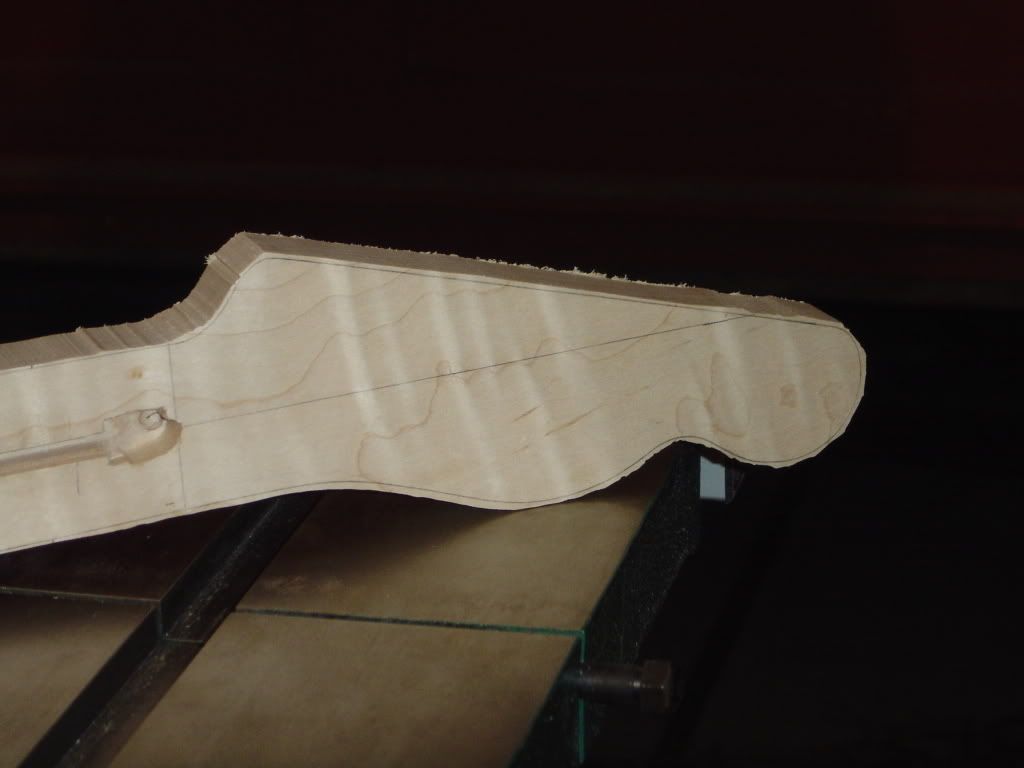
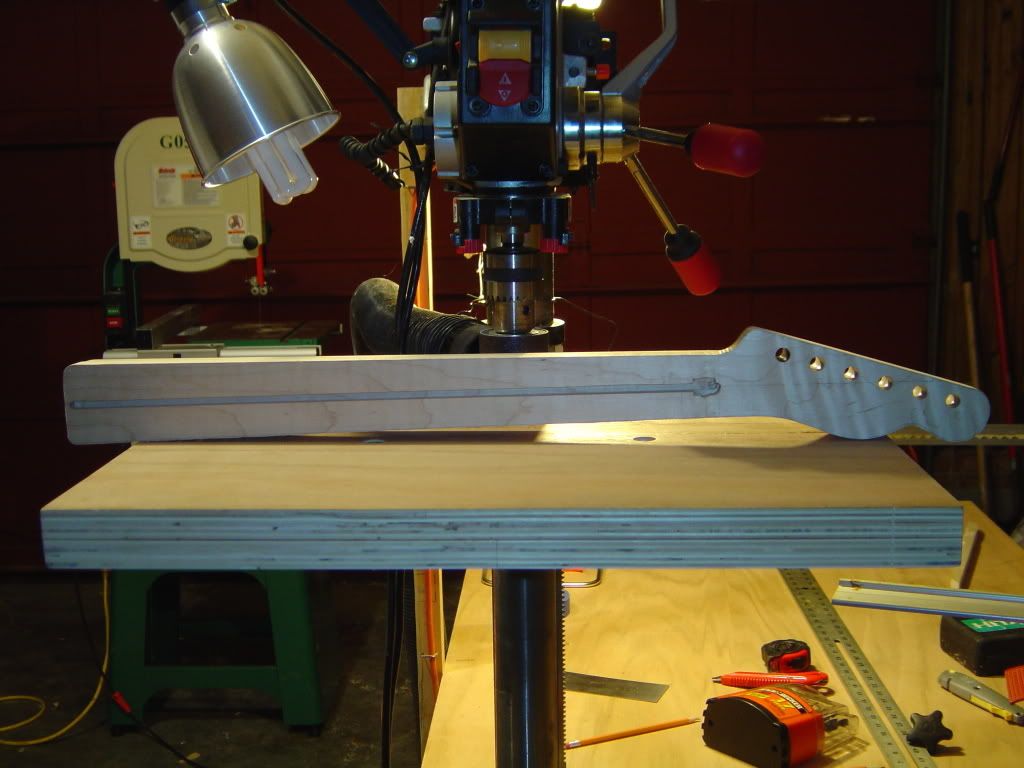
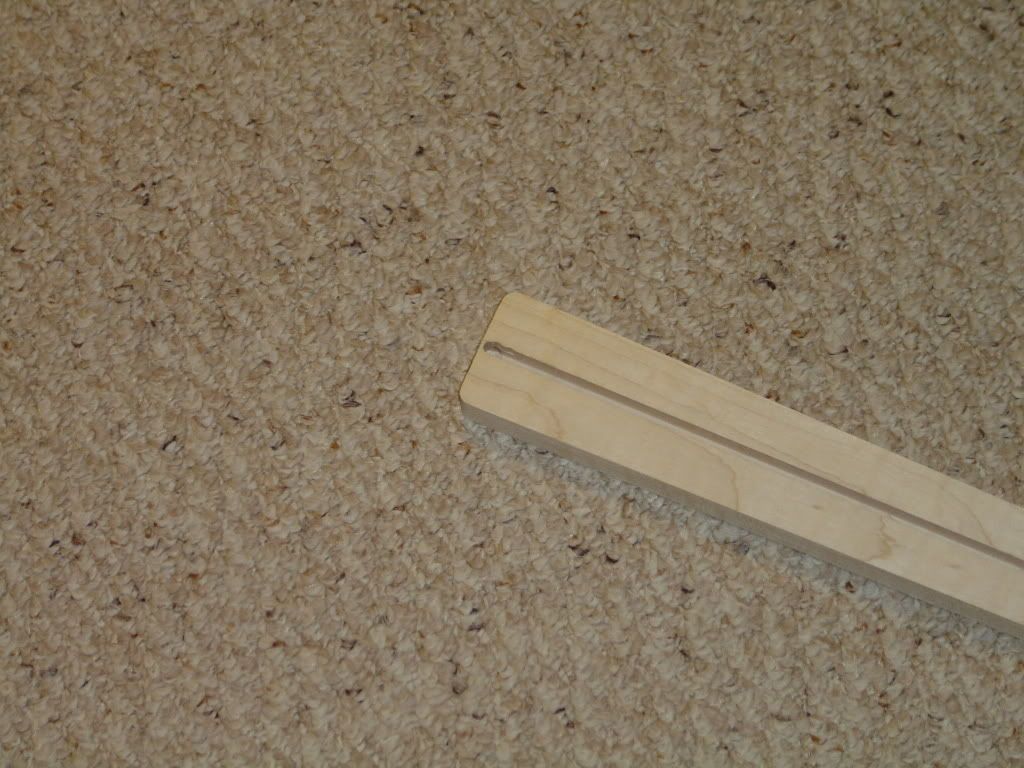
The Neck 25 - Here is the neck as it is now. Looking pretty good so far. I feel I may have placed the truss rod route a little too close to the end of the neck. I don't know. If I think it might be an issue, I can always fill it in a little.
The Neck 26 - Another view.
The Neck 27 - Another view.
Everyday I learn something new. Today, I learned how valuable a router table really is.
CMA
-
Some say you don't need overwound pickups if you've got an EQ and/or pedals.
I think active pickups have a really cool tone. Already contemplating a build with them in it. Actives and passives both have something to offer, so I think it's good to have a healthy balance of both! (another excuse for more guitars
)CMA
-
2 cans is pretty much the standard. That's around 12 coats or so (IIRC), depending on how thick or thin you apply it. Depending on how experienced you are, you may use less, or more. It might be a good idea to use a little extra if it's your first time, to avoid sand-throughs.
Can you tell us what brand/type of lacquer you're using? It's easier to give tips if one has the proper info. Oh, are you spraying the neck as well? If so, you'll want an extra can for that.
CMA
-
Honestly, I would think an ES-335 would be harder than a V. A V is pretty much like other basic flat-top solid body designs. Just a different shape and different features.
CMA
-
Sign up for a photobucket.com account. Upload your pictures there and post the links to them here.
CMA
-
Great job! That's a beautiful piece of wood and the finish suits it quite well. Another win for Tru-oil!
CMA
-
Great idea! I'll be keeping an eye out for your conclusions.
CMA
-
Woh, that's crazy! I'm glad you're not seriously injured. My father is a former contractor, and as such he has instilled in me a healthy fear of power tools. You can never underestimate those things! (I guess I'm preachin' to the choir though!
) Good job we all wear safety glasses around heavy woodworking machinery eh?CMA
-
And do not use a jig saw, they wander and can create a big headache
I disagree, I've used a jig saw with no problems at all. However, the band saw is a better option, since it's much simpler and quicker.
Yeah, see, I don't think I'm gonna end up making another guitar, so making a template, to me, would be kinda pointless.also,
I know it's too late, but you should have left the horns uncut until you routed out the neck cavity (I'm assuming a bolt-on neck). Gives you more meat for the base of the router. If you still have the parts you cut away, save them and put them back in place when you go to rout. If you do that, don't sand down the body yet as it will tip the router slightly and your pocket won't have a flat seat and you'll have a hell of a time trying to right it. Also, it doesn't look like you left enough meat for the neck. You may have to seat that neck deep into the body.^someone from UG. the bolded part is my biggest concern. Will that be a problem? i figure I could always make the neck pocket and then find where I should be placing my bridge.
Yeah, i'm a noob guitar maker.
Yeah, you'll be alright. Just make the neck (and neck pocket) and then figure out bridge placement.
CMA
-
A template would be ideal, with it you can use a router, plus you'll always have the template for later use. I would at least attempt to cut more off with the band saw, you should be able to get much closer than that. Use relief cuts in the tight radii so you can cut closer to the line.
CMA
-
It appears my attempt at humor failed...damn your eyes, internet!
CMA
-
*puts down the can of kerosene* Ahhhh....so that's it! Oh wait...that stuffs poisonous isn't it?....*ack!*
CMA
-
-
Mineral spirits is kerosene that has been chemically treated to remove certain chemicals to reduce the unpleasant smell.
I was cleaning with some kerosene the other day...I don't know about you guys, but I actually like the smell of fuels!
CMA


Need Help With Finishing.
in Inlays and Finishing Chat
Posted
There is a tutorial on Re-Ranch. One of the Re-Ranch forum members also made a tutorial. I can send it too you if you'd like. Test on scrap first, but I'm pretty sure the Rustoleum is compatible.
CMA