


pukko
-
Posts
247 -
Joined
-
Last visited
-
Days Won
12
Content Type
Profiles
News and Information
Tutorials
Product Reviews
Supplier Listings
Articles
Guitar Of The Month
Links and Resources
Forums
Gallery
Downloads
Posts posted by pukko
-
-
14 minutes ago, verhoevenc said:
Don't get me wrong, this is super cool. I love the color choices, everything comes together really well... however, the title got me more excited. I'd really like to see you do a true offset. Like in the jazzmaster, teisco, etc. style. Talkin' out-of-the-norm pickups, floating tailpiece tremolo, double-cut offset body. Challenge accepted?
Chris
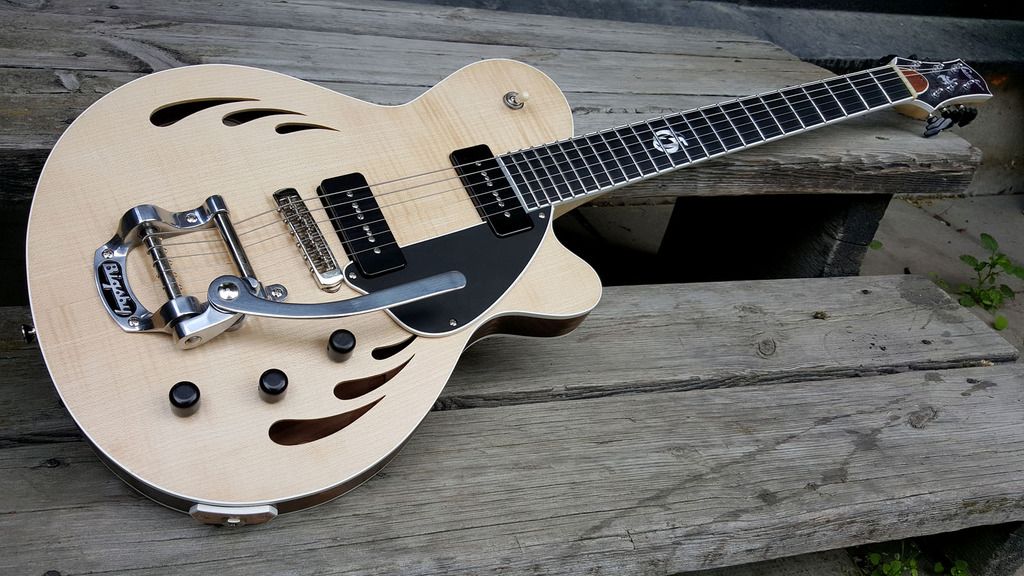
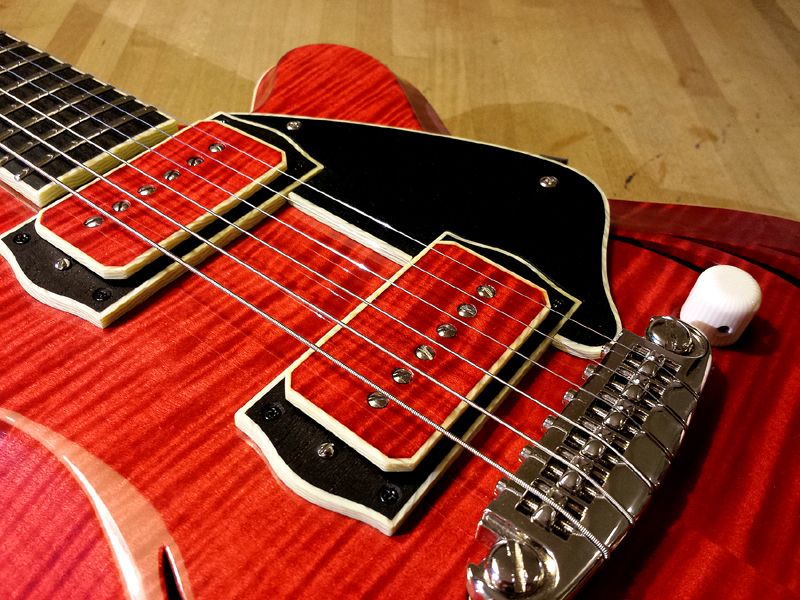
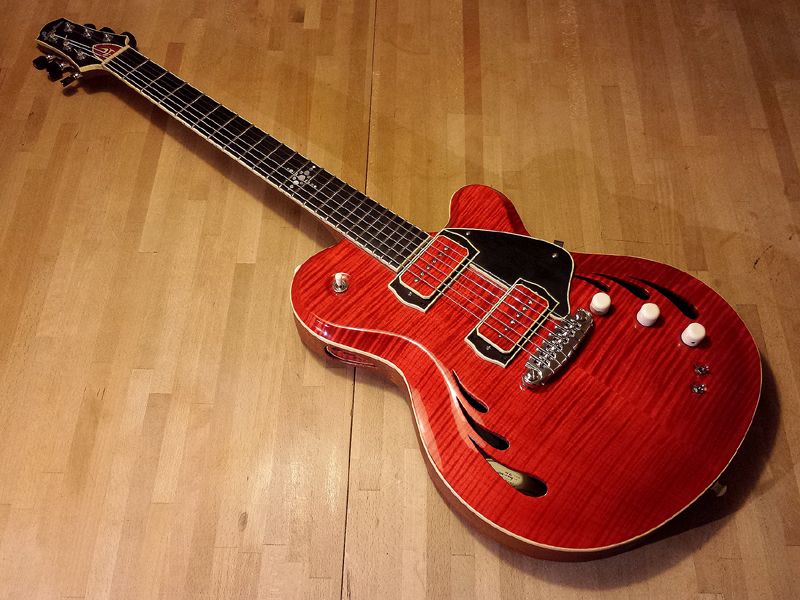
Yeah, the surf thing maybe isn't really appliable to this. I was thinking 50's, 60's, California, chrome, big cars,... I was actually thinking about modifying the half tele bridge to also be able to use a Bigsby B5 that I have laying around. That way I can choose between stringthrough or trem. These pickups are Mojo pickups Mojotrons. Marc builds goldfoils, Charlie Christians etc too so I have been inspired by seeing those. I love the look of them! Seems to sound really cool too judging by the clips I've heard. Might use something like that in the future.
-
Thank you all very much!
>> Scott
Sorry about the all-at-once approach, I just haven't been very active online at all lately. I think it is much more interesting to follow a build in progress too, I'll try better next time. Promise!
>>skyjerk
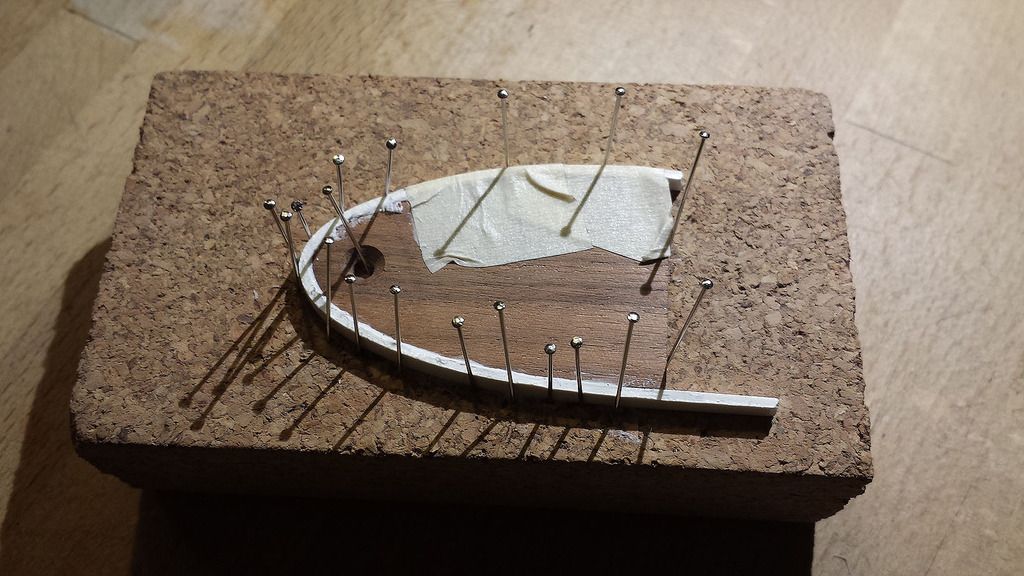
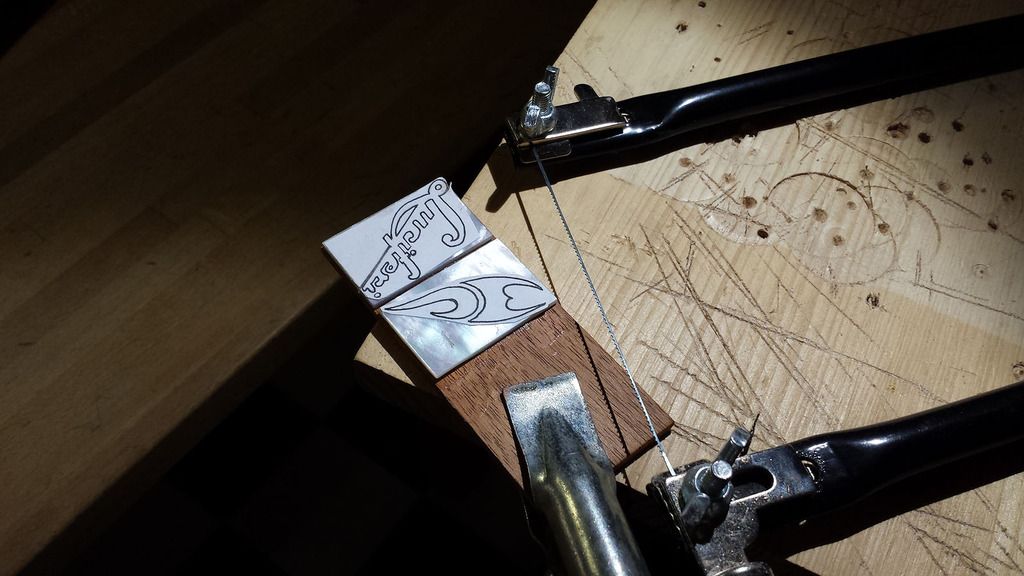
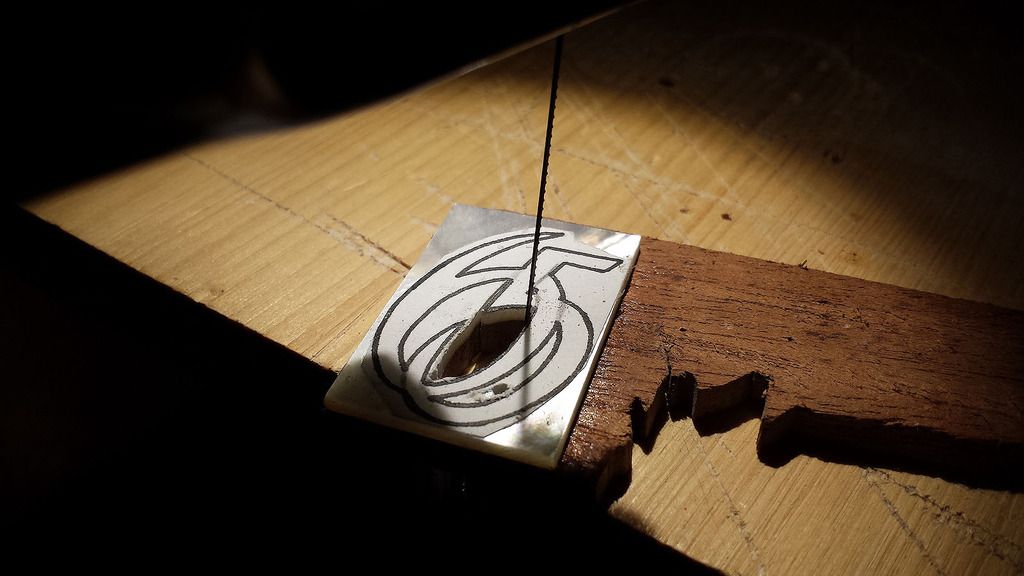
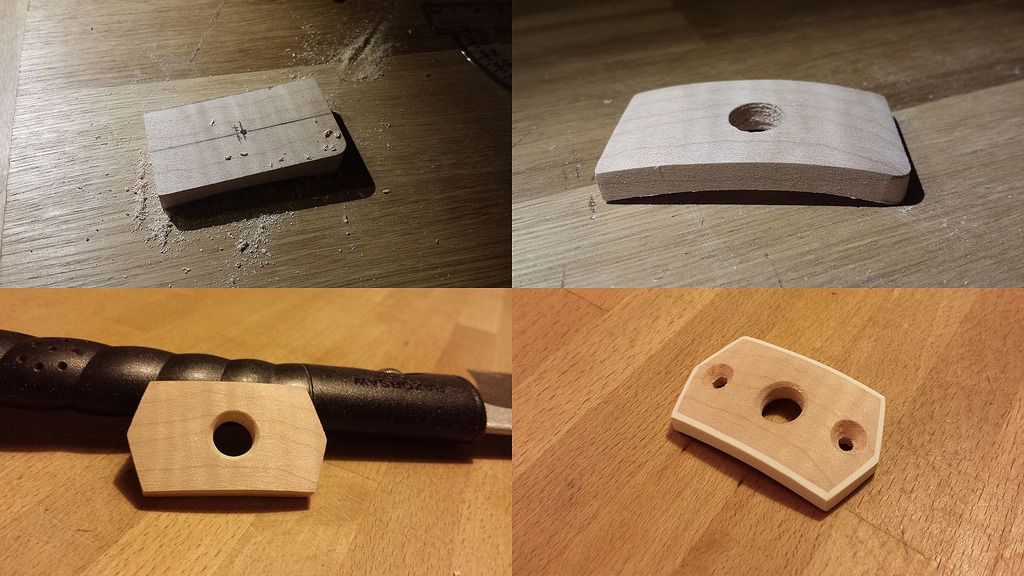
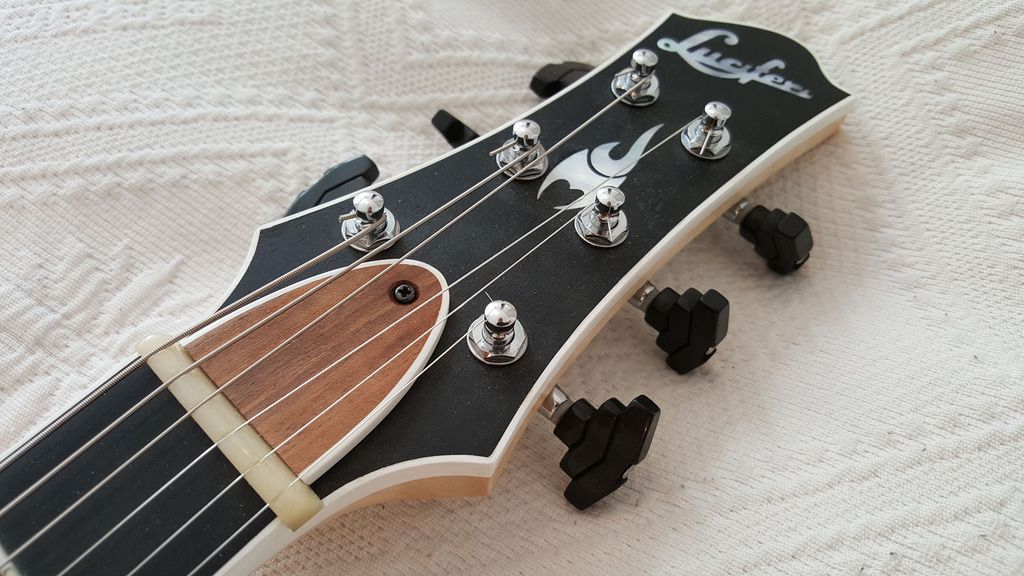
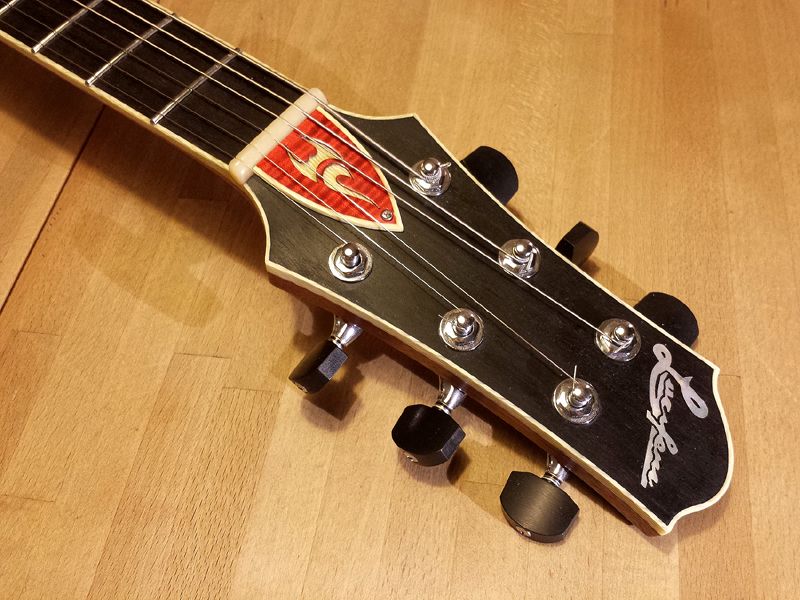
The logo wasn't going to be anything like this. I was actually planning on making a waterslide decal to kind of fit the overall 50's-60's vibe, but I couldn't come up with anything nice. It seems to be harder to design a logo for a six-in-line headstock... Then I tried to cut a logo out of aluminium (with the full name Luciferi which all my guitars have been called) but it looked a bit big and clumsy.
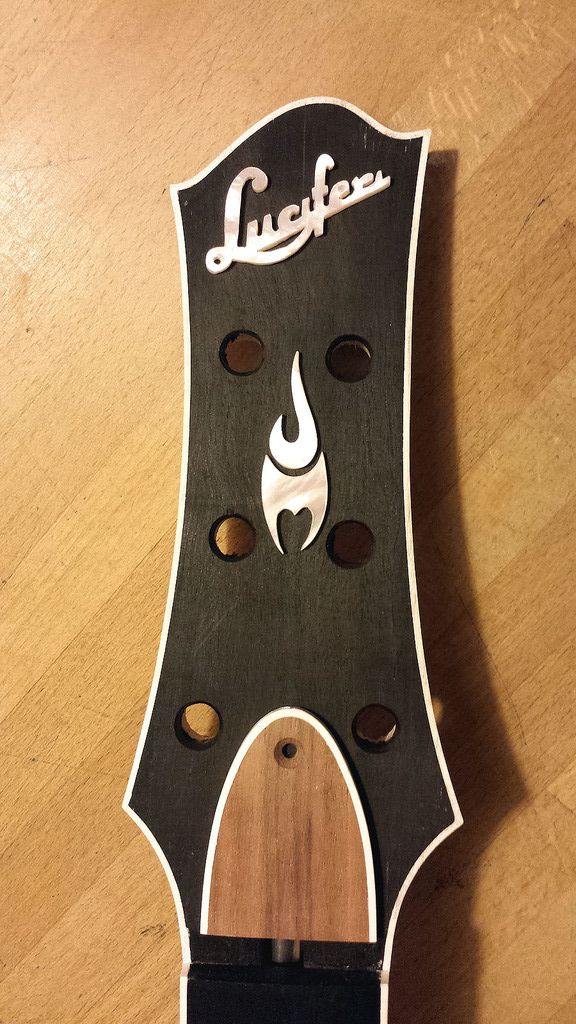
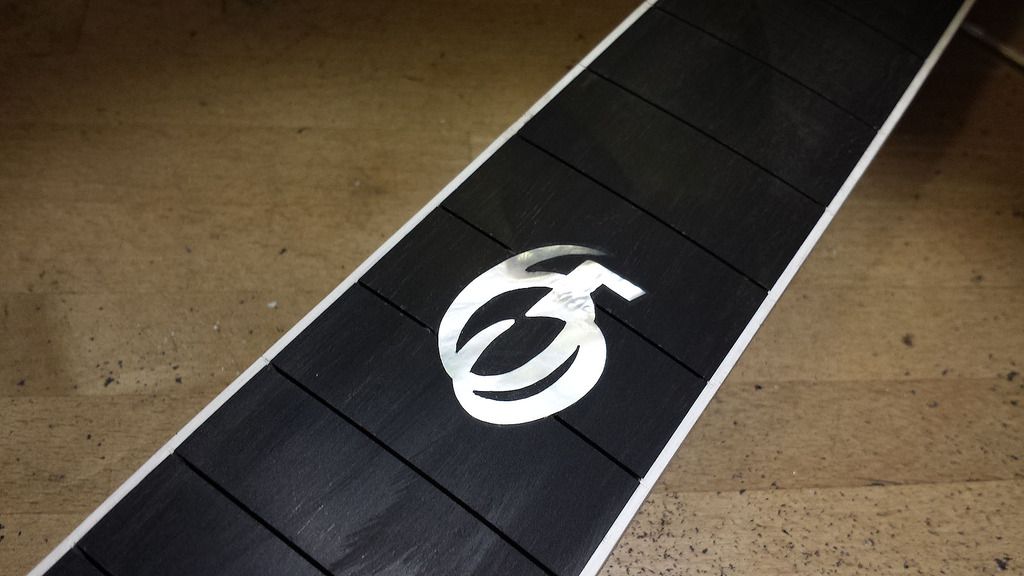
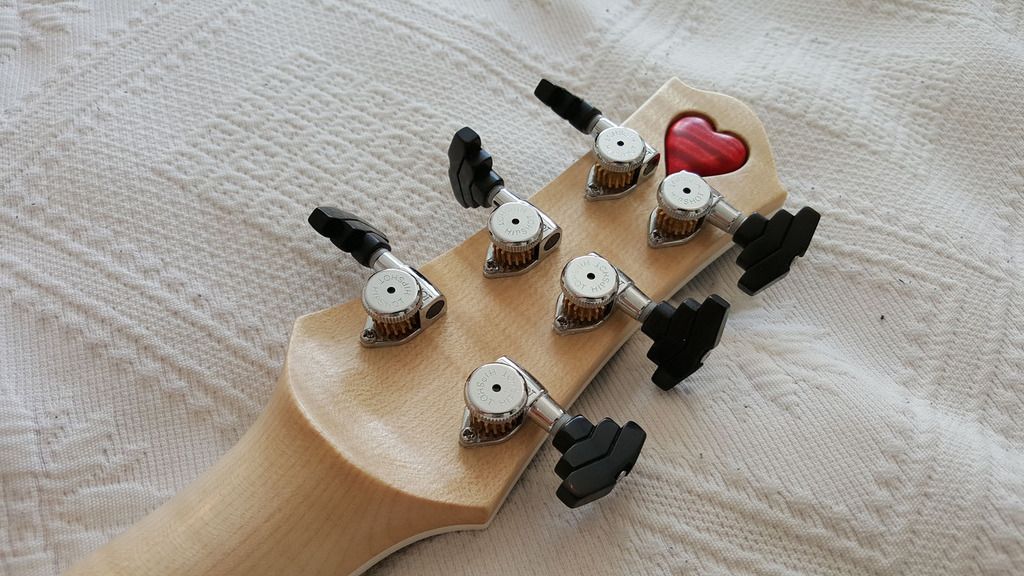
I then had the idea of cutting off the L from the rest. On my last build I inlayed a flame maple heart on the back of the headstock and I liked the 3D effect of it so I went that route again. I shaped a bit of flame maple into a circle and rounded the edges. After that I placed the L on top of the circle and scribed around it with a pencil, removed wood with a knife and Dremel until the L fit nicely. Dyed the maple red, oiled it (not the part where I was going to glue the L), and attached the L.
If I was to do it all over I might actually inlay the L into a bigger piece of maple and then make the circle shape afterwards. That would allow me to use the router attachment for the Dremel instead of freehand working it all.
-
I usually start building during summer holidays but this time it was a winter start I bought a swamp ash body blank at a guitar show in Stockholm, Neck and fretboard blanks were already in my possession:

No access to the band saw at my summer house, Japanese saw it is instead:

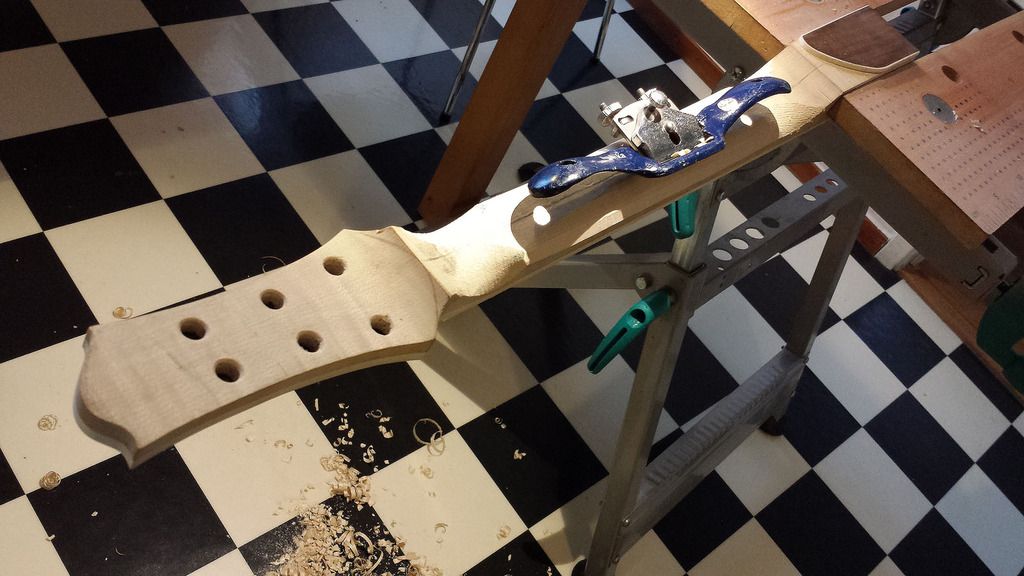
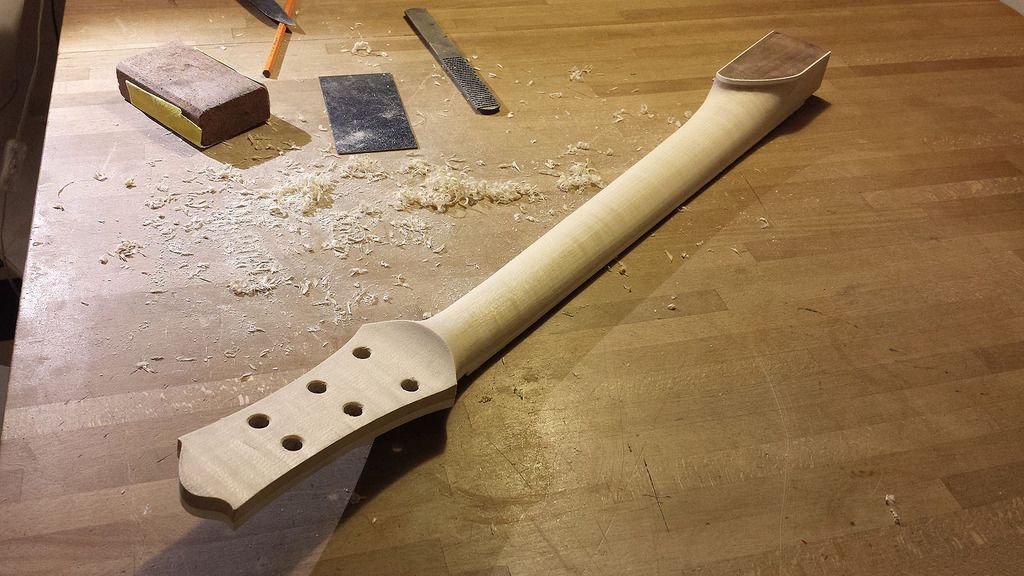
Routed the lines, shaped the headstock:
Fretboard gluing, clamps-r-us:
Well, there it is. No visible glue line:

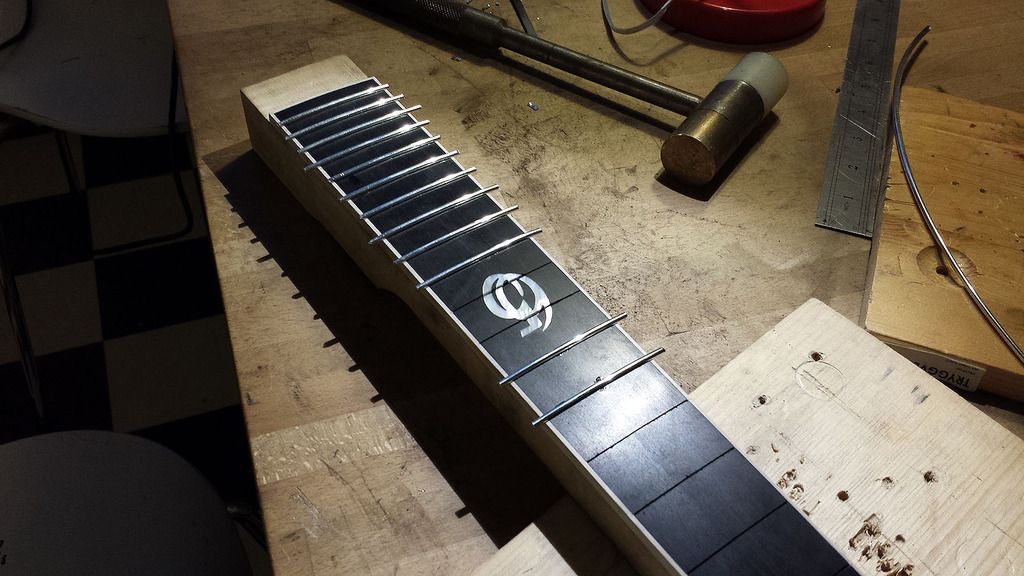
Ordinary dot inlays this time around:
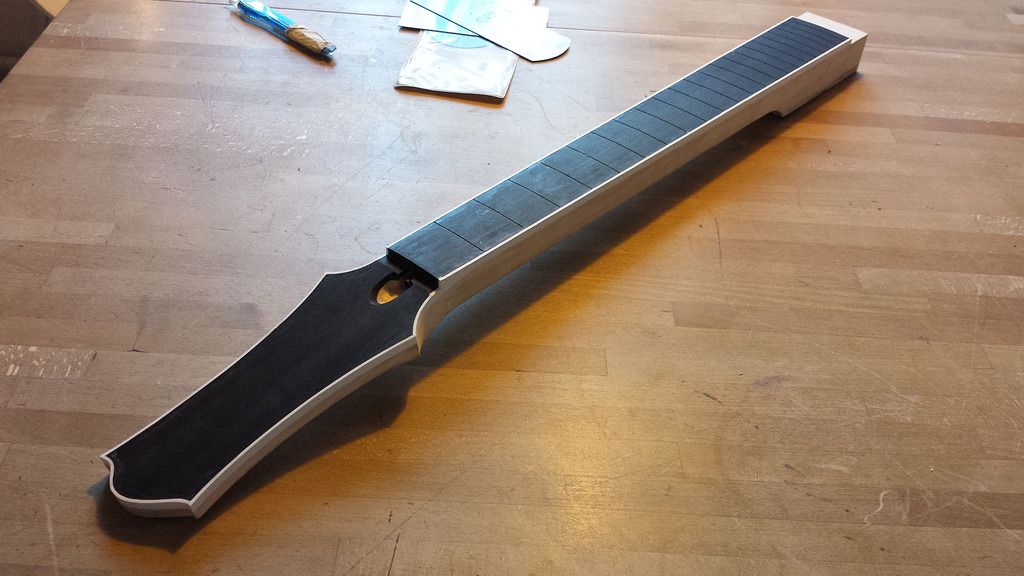
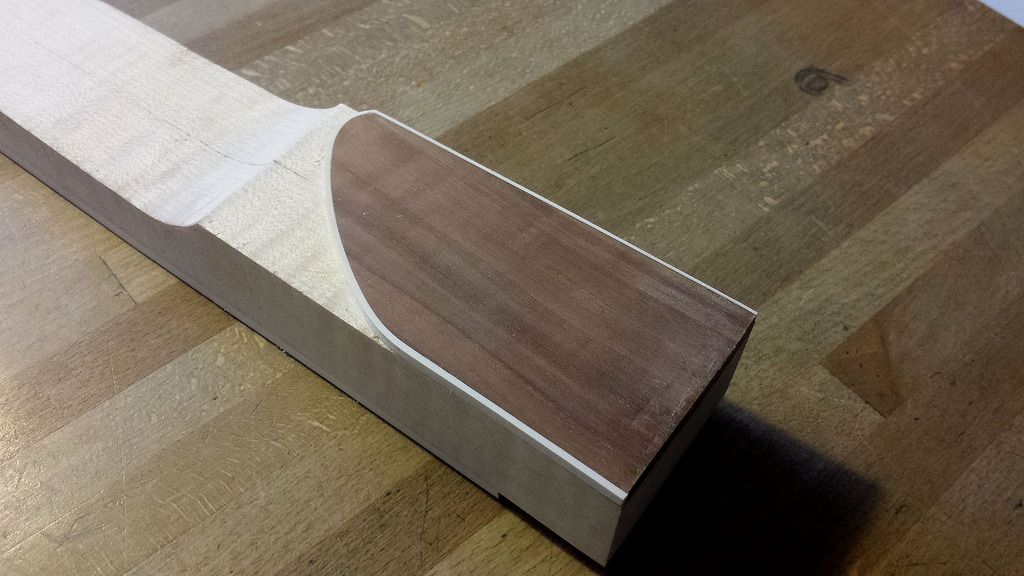
Shaping the curve between fretboard and headstock:
Starting the neck shaping with files, knives, spokeshave, scrapers...:


Headstock starting to look ok. The neck is also fretted now, forgot to take pics...:

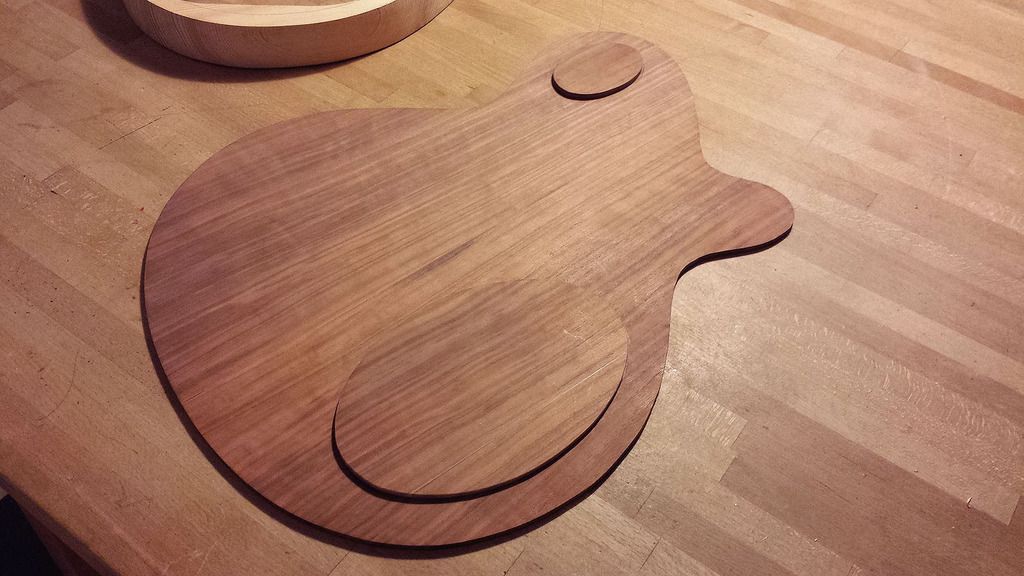
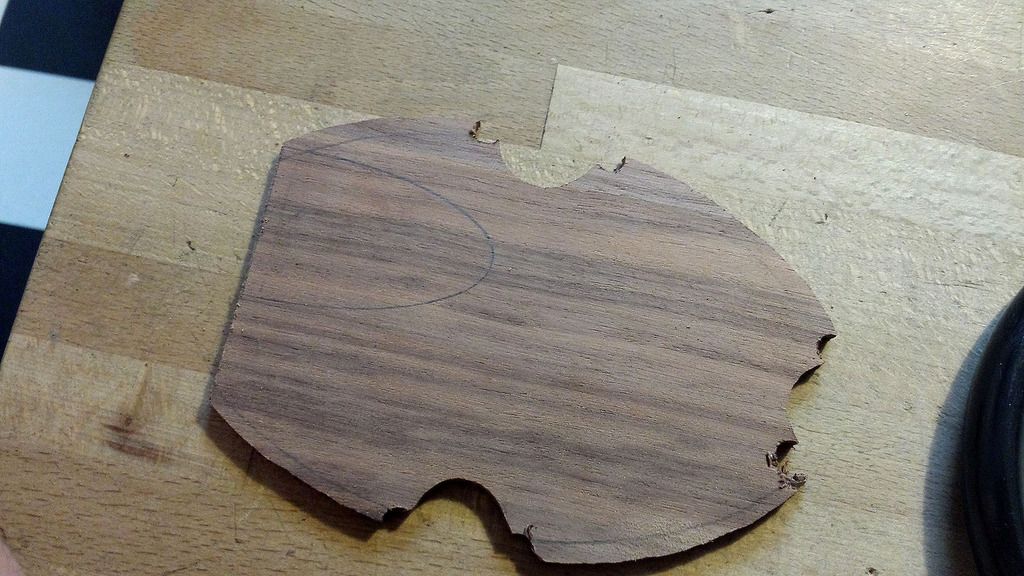
Swamp ash body blank and drawing of the body shape:

Cutting the body with an electric jigsaw (no band saw, remember?) and then sanding it to shape with sanding drums on an electric drill:

Rounding the body edges:
Rasps, knives, scrapers etc again, Body contours!:


Made two pickguard designs:

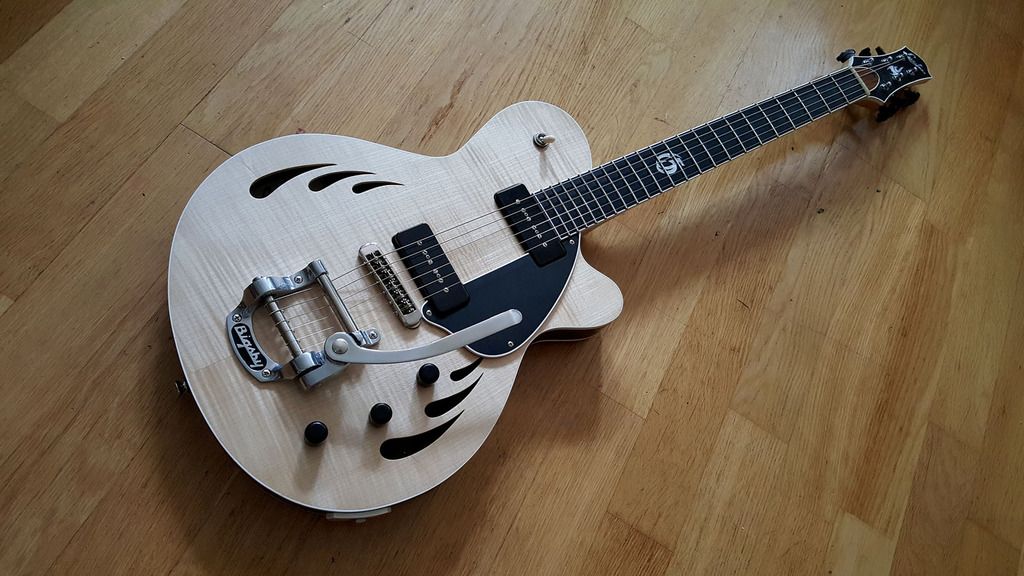
Chose the larger one, made a few in different materials. The metallic one is sheet aluminium that i machine turned with a brass brush attached to a Dremel:

Clear nitro as a primer/pore filler:
Mary Kaye white nitro from a spray can:
A little masking..:
... and Sonic blue nitro spray can:
I really wasn´t going to do the little fiddly details on this one... Didn´t hold my promise. Logo time. Aluminium, flamed maple, red dye:


Dying the neck:
Many layers of Tru-Oil:
Tuners on, not much left now:
And done:


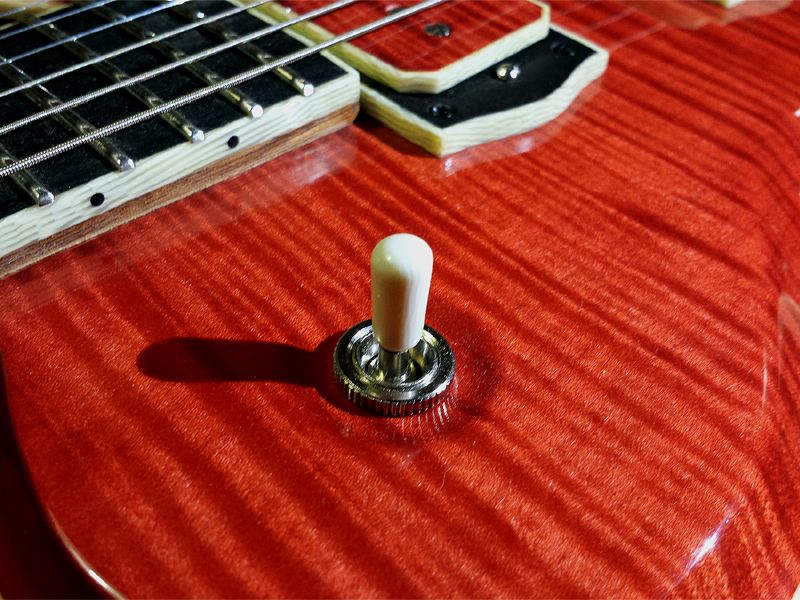
...and another little detail, a switch tip to match the body and pickguard:
-
 4
4
-
-
On 13 november 2015 19:10:04, killemall8 said:
The O ring is a great idea. I am not making them on the lathe though, so i cant think of another way to do that.
Are you doing the knobs with screws to fasten them to the pot shaft? You could use a drill (preferably a drill press or a drill in a stand) with a rod or drill bit mounted backwards to screw the knob onto and then use needle files of varying diameter to file grooves in the knob. Start by cutting a thin groove with a knife to let the files have something to hold on to in the beginning. Another way of getting a contrasting black stripe would be to laminate an ebony veneer between two layers of whatever wood you're going to make the knobs from.
-
This is looking great psikoT! The ebony fretboard/light stripe/black binding is so classy looking, I want to do that on a whole guitar! Regarding the truss rod cover, did you consider making one that doesn't go all the way to the end of the fretboard? The adjustment hole doesn't reach all the way to the fretboard, you could make a cover with a rounded bottom and still cover the hole. An oval/drop shape?
-
That one will be fine. If you are on a tight budget I would suggest spending less money on the actual router and more money on good quality router bits. There are cheaper routers than the Bosch one that will do the job.Speaking of... i need a router, i saw the Bosch POF 1100 AE, is this one good enough for starters?
Thanks!
-
I have an Amazonian Rosewood fretboard on a neck with white binding in the works and it seemed to work just fine. From what I understand the logic is that the acetone roughs up the plastic's surface giving the titebond a little bit to mechanically bond to. Meanwhile, the acetone and titebond also work fine together for a chemical bond as well.I did test pieces before doing my first plastic bound guitar and found it held a little better than acetone alone.Just tried Duco for the first time yesterday though and am thinking that might be even better.Chris
Ok, I understand. Have to try that method, although I have to say I've never had problems with adhesion with just acetone and white plastic binding. On my last build I used ivoroid binding which in itself seemed a little harder in feel and it was also a little harder to attach using acetone but it worked. I don't think Duco is available in Sweden, what is it?
I see an opportunity here... We have to plan our builds well in advance. Then we can order stuff from them, get the wrong wood, contact them and get the right wood/keep the wrong one and still be on time. In a while we'll have wood for two builds...
I had exactly the same problem with them in my last order. They sent a guitar sized maple neck instead the bass size neck I've ordered. After a week or so, the call me and sent the neck blank and no need to return the wrong one.www.madinter.com Bought stuff there a couple of times, last time I bought a flame maple neck through blank and got an ordinary blank instead. After contacting them I got the neck through blank sent to me for free and got to keep the other blank as well. Good of them to correct their mistake that way.
-
Similar to that, but after brushing with acetone, also throw some titebond in there.Chris
Never thought of that. Does the Titebond stick to the plastic enough like that? There is no problem with the Titebond being yellowish in color, no reaction with the bright white binding? In that case I can see an advantage of using that combination. Maybe even brushing the binding channels with glue first. When using porous woods like the spruce body core in this build I've noticed that if you use too much acetone it will draw some plastic into the wood pores which is bad if you want to dye the wood darker later. Or vice versa if you're using dark binding I guess... Applying a thin coat of glue might stop that from happening. Would shellac do the same? Never worked with that.
-
The question in Swedish is where do we Swedes buy our wood. The answer might be of interest to other Europeans as well so I'll answer in English:Vart köper ni svenskar ert virke?
www.holmtravaror.se Swedish lumber seller. Only open for the public on Fridays which makes it pretty hard to go there and select wood.
www.madinter.com Bought stuff there a couple of times, last time I bought a flame maple neck through blank and got an ordinary blank instead. After contacting them I got the neck through blank sent to me for free and got to keep the other blank as well. Good of them to correct their mistake that way.
www.stewmac.com Only bought smaller wood items there, fingerboards and headstock veneers. Nothing to complain about, shipping to Sweden is expensive of course and you'll likely have to pay the customs fee. Only bought there because I needed other stuff as well.
-
Thanks/tackar!Love the detail work on this one, riktigt bra jobbat!
No Titebond for the binding, just acetone brushed on with an ordinary artists brush. What's the trick you're referring to?Ah, so you're just doing the acetone/titebond plastic binding trick too?Chris
-
Cheers Pukko!
I always love watching your builds......this one went by way too fast!
 Excellent reason for that, I presume your father had a wonderful 65th?
The one thing that always impresses me about your builds Pukko, is the attention to even the smallest details. All the lining up of grain and the multiple inlays, and the binding of the small parts is so very well executed. And yet, when you see the finished product the effect is so clean and tasteful you almost wonder where all the decorations went. I love the glamour shots too.
Very well done!
SR
Thanks a lot, Scott! It does feel kind of strange to post it all at once and it felt strange building without getting feedback from people watching. I missed that, the sharing of thoughts while actually creating something. Dad seemed pleased with his birthday though...
Well, this is just awesome... the father must be proud of his son.
Love the care on details, as well the overall look. And the heart in the back side of the headstock is really cool... ^^
Congratulations!

Thanks a lot! I'm digging your current build too, let's see some more!
I love the way you bind EVERYTHING. When some companies do it it comes out bleh, but with your stuff it is always so classy.What's the glue you're using to stick the binding in that one picture? I'm always curious what others use for the various plastics.Chris
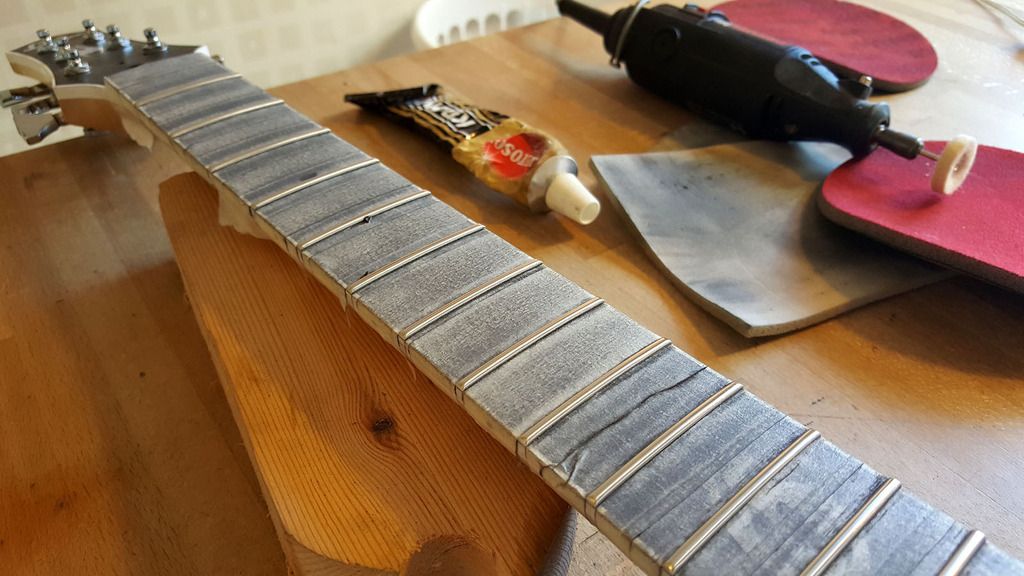
Thanks Chris! How's everything going with your building and company? If you mean the white bottle with the red label that's just pure acetone, the small bottles available at supermarkets. Nail polish remover I guess... If it's the black and gold tube in the fretwork pic you mean, that is a metal polish called Autosol. Shiny frets...
Aj då, får skärpa mig då...I have some serious issues with this one. First we need pictures with the walnut pickup topps installed. Secondly I cannot believe you didn't inlay a 3D-carved walnut heart on the back of the head, you are slipping my friend...
Seriously a stunning guitar. As usual. Bravo!
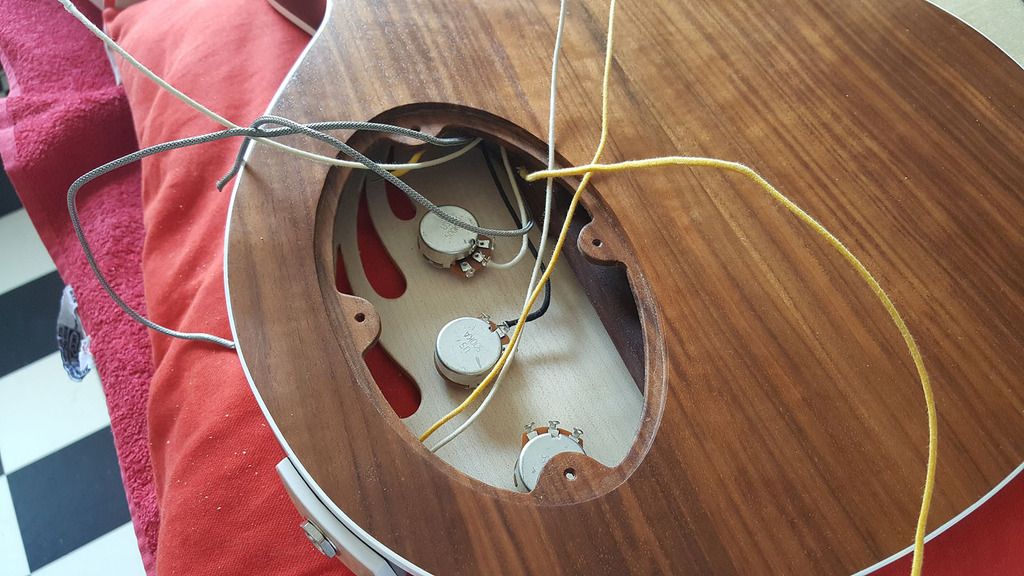
 Well, I only have one pic with the pickup tops:
Thanks!
-
I usually post progress pics while I'm building but since this one was for my dad's 65th birthday I didn't want him to accidentally see anything from the build. This time, everything at once!
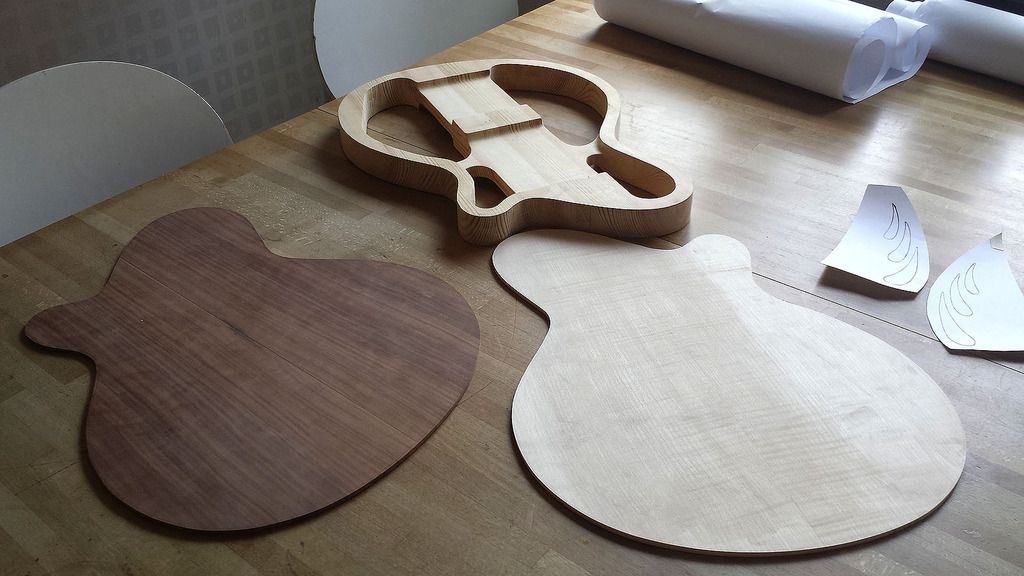
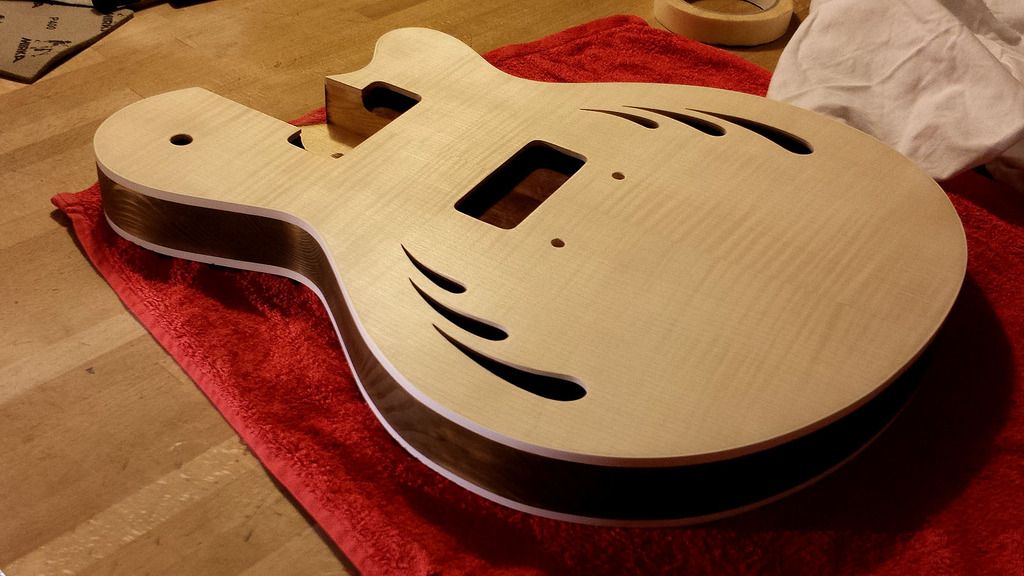
It started with a flooded kitchen at our neighbors house where our summer house is. The floor was ripped out of the house, it was made from thick, wide planks of really old spruce. They weren't all water damaged so I grabbed a few of the planks. Later I saw an ad on a Swedish guitar forum, someone was selling a maple and a walnut top/bottom, probably meant for an acoustic build. I bought them really cheap...
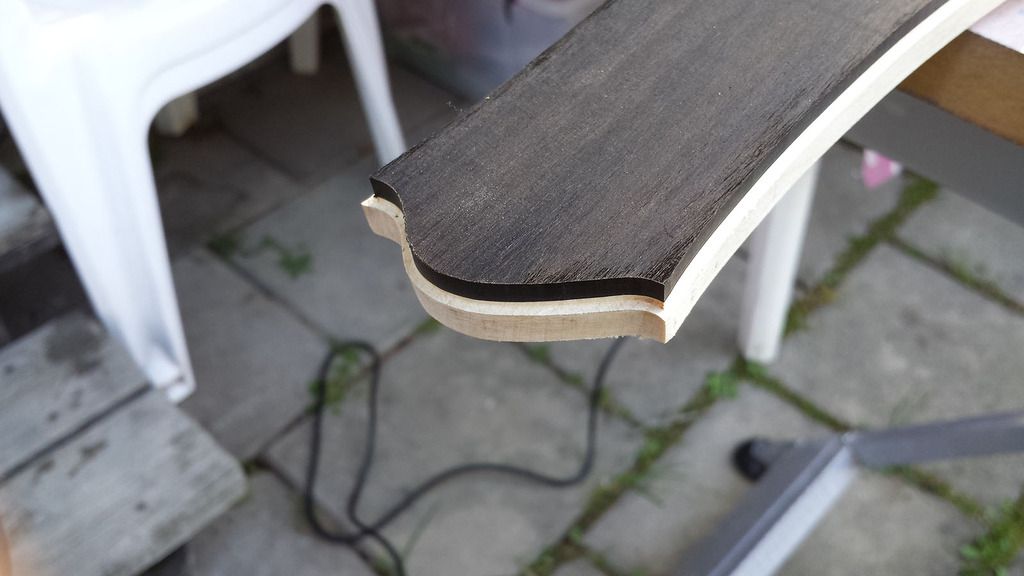
Here's what they became. The spruce body core is like a frame that is connected all the way through but not touching the top and bottom except around the edges and at the bridge.
Headstock angle cut, glueing the ebony headplate:
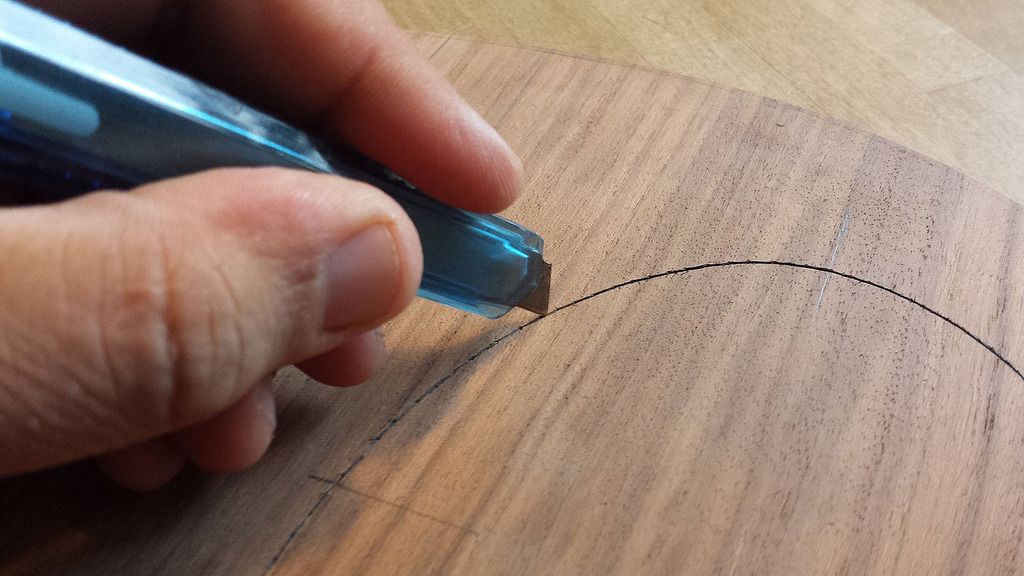
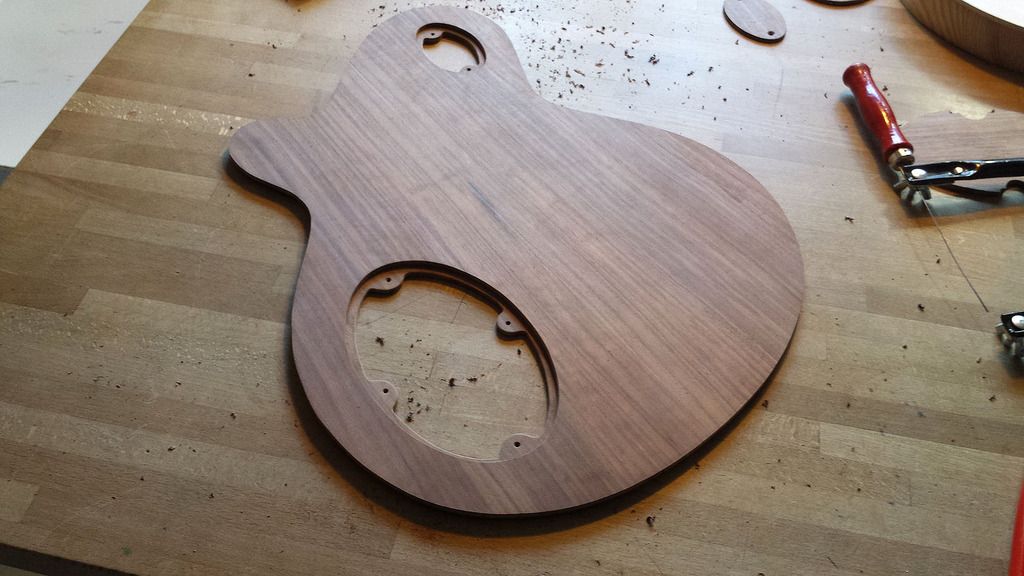
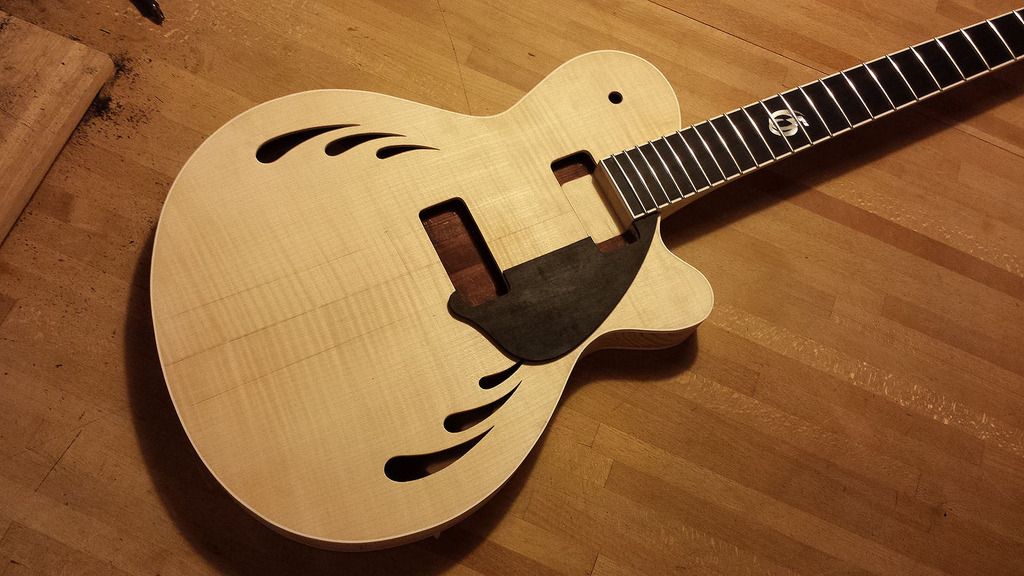
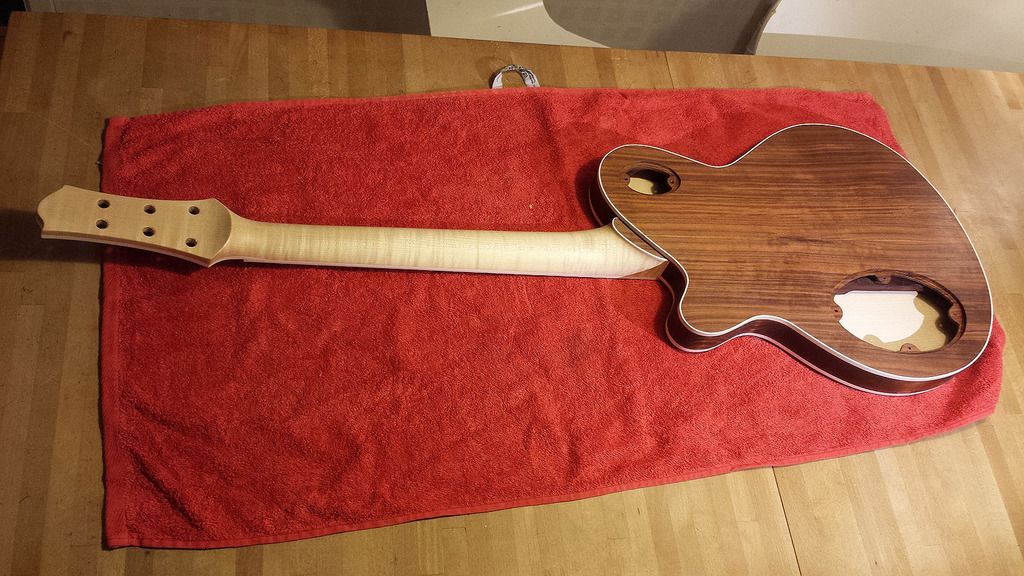
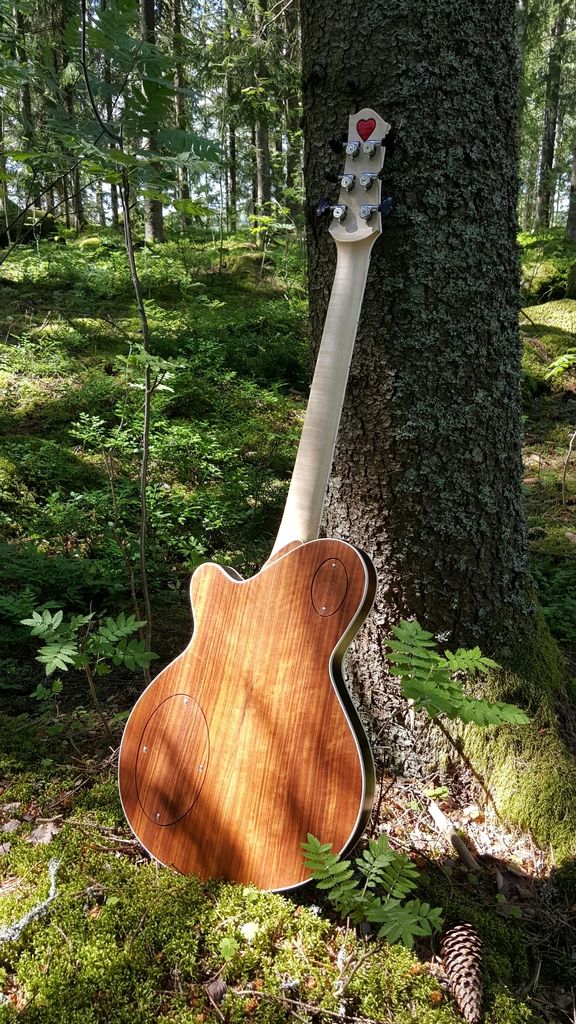
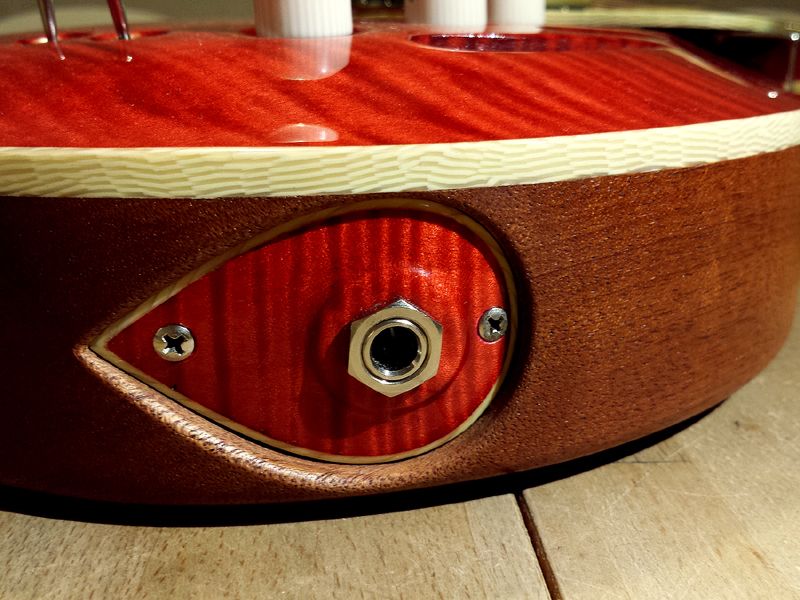
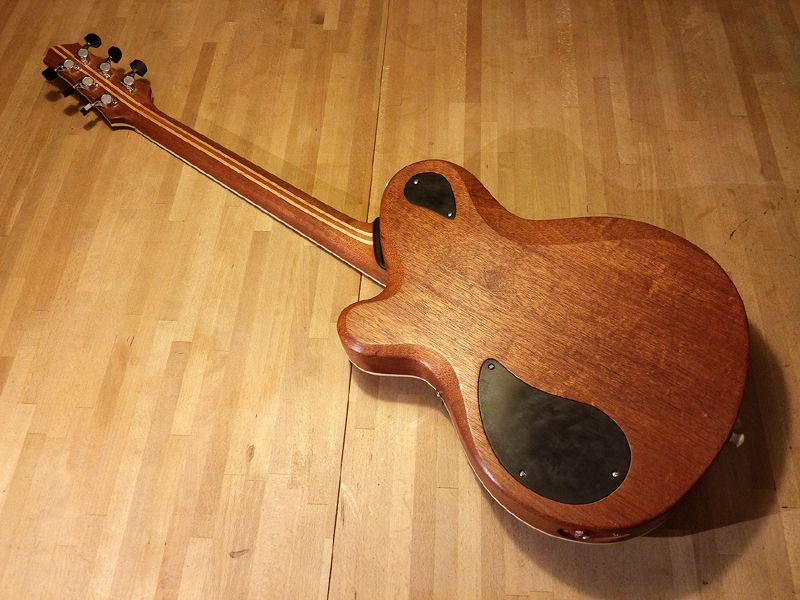
I cut the control plates out with a knife so I can have matching grain all over the back:
This is how it turned out:
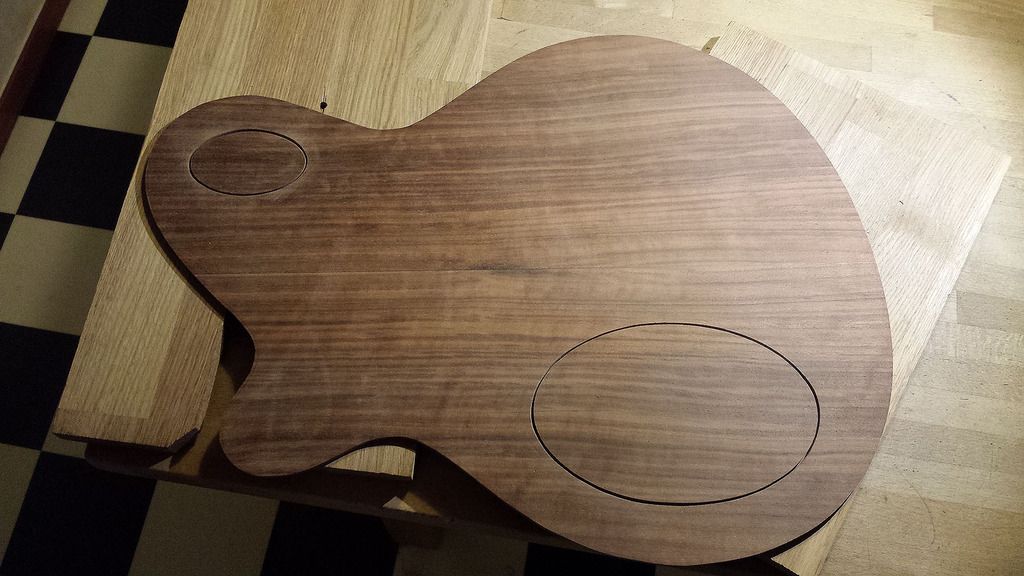
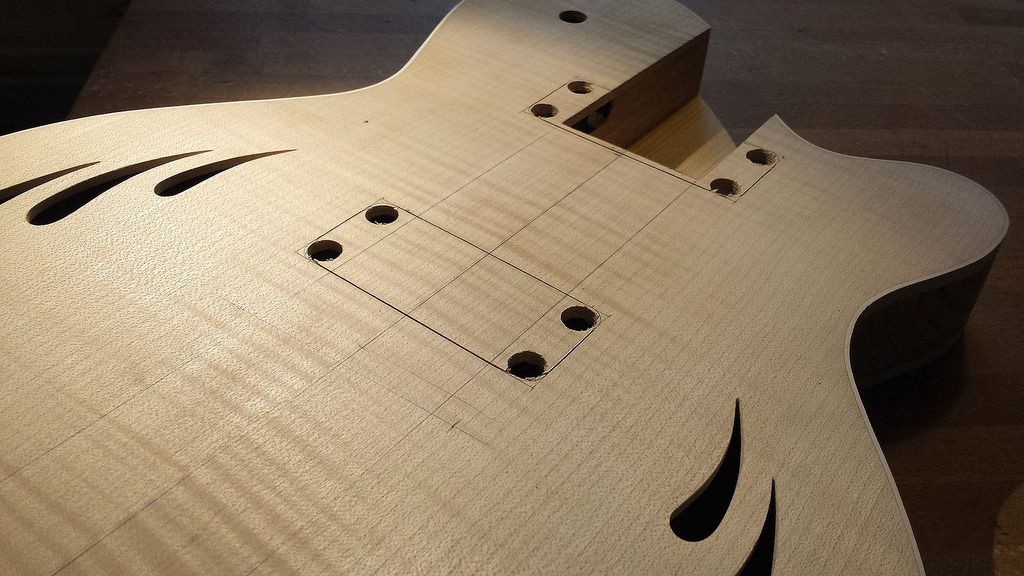
Well then, how do I attach the plates? I had some leftover walnut, cut oval pieces out and glued those to the inside of the back. I sawed holes and left ears to screw the plates into:
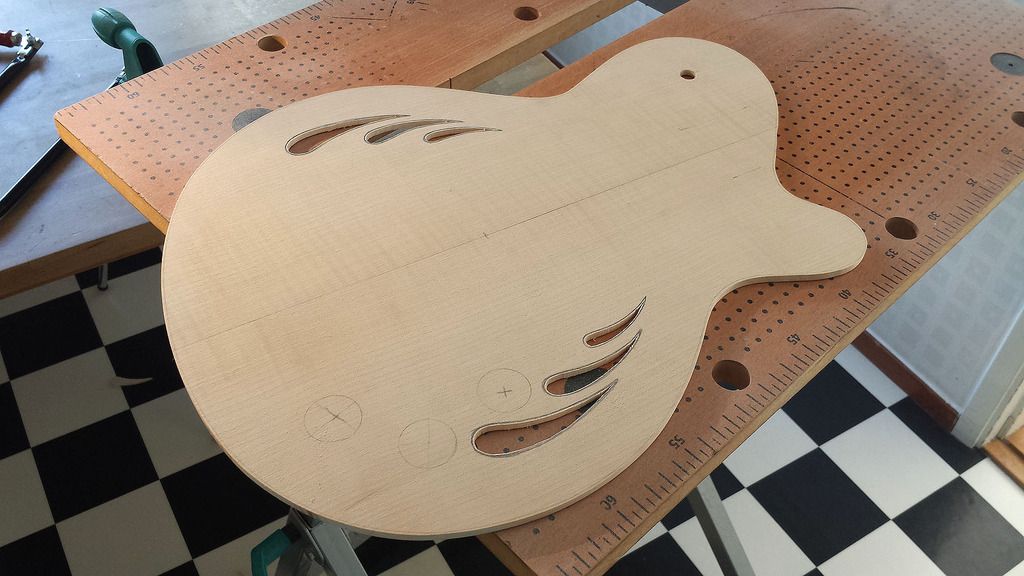
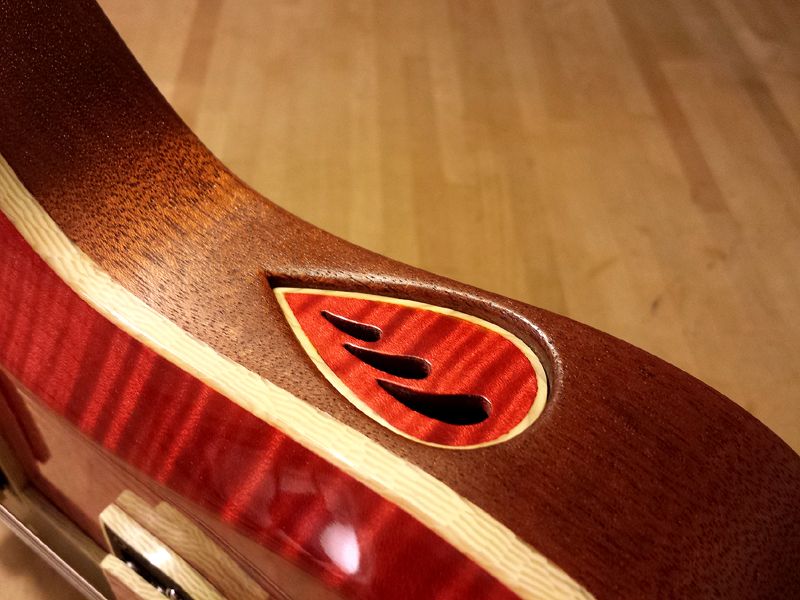
Soundholes are of the same design as on my last build:
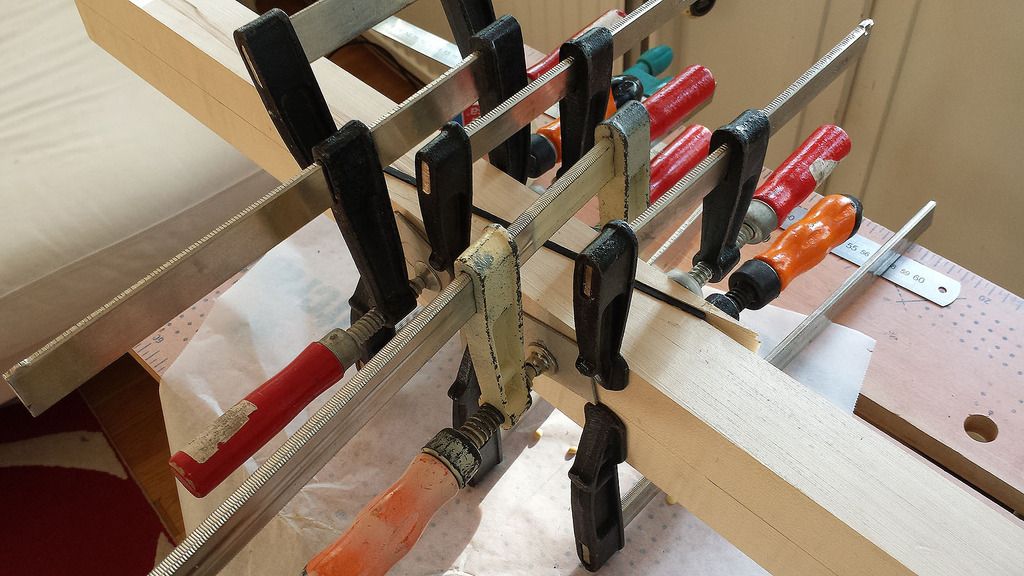
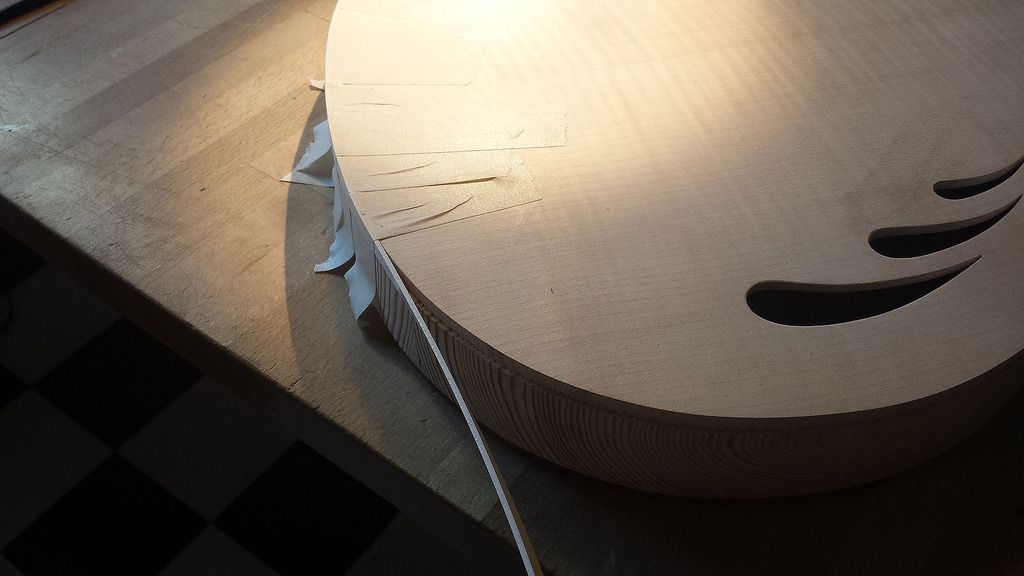
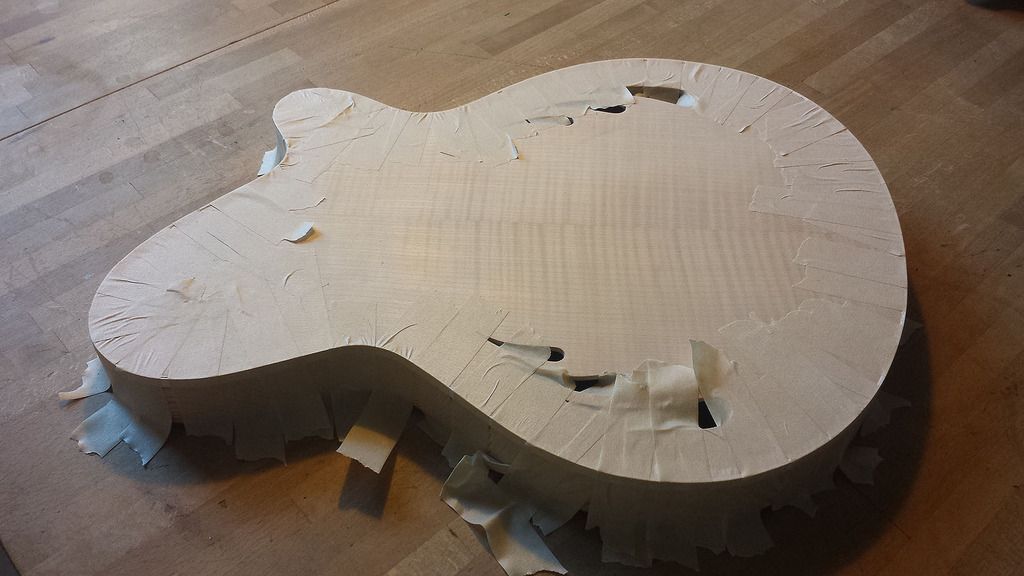
Routing for binding on the headstock (and everywhere else too) and then attaching the binding with acetone and loooooots of tape:
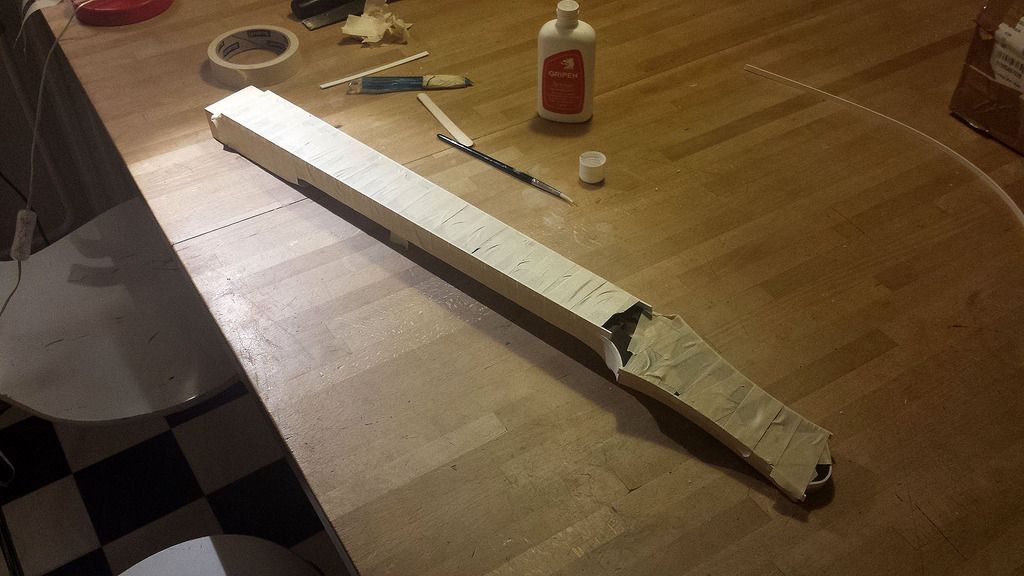
Neck is looking ok:
Truss rod cover made of walnut and binding:
The neck heel gets some walnut and binding too:
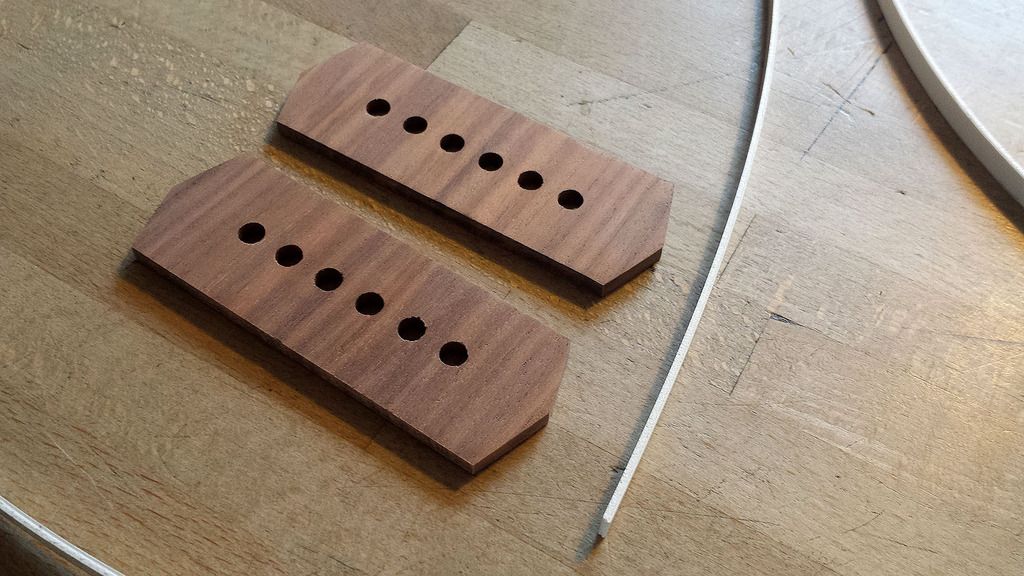
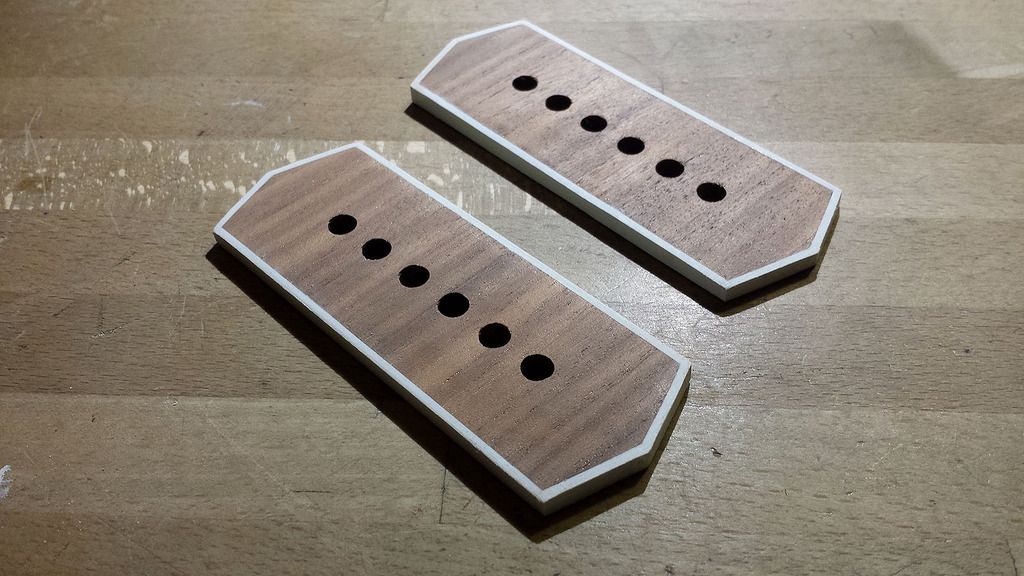
I'm putting P90:s on it, I made some bobbin tops out of walnut and binding. Later on I decided that the guitar would look better with ordinary black covers so this work was unnecessary...:
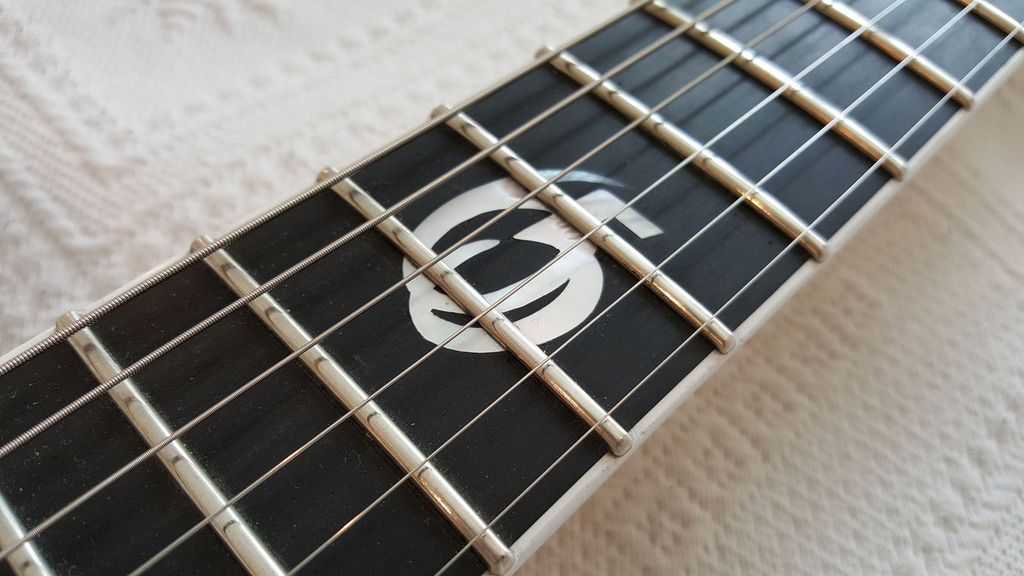
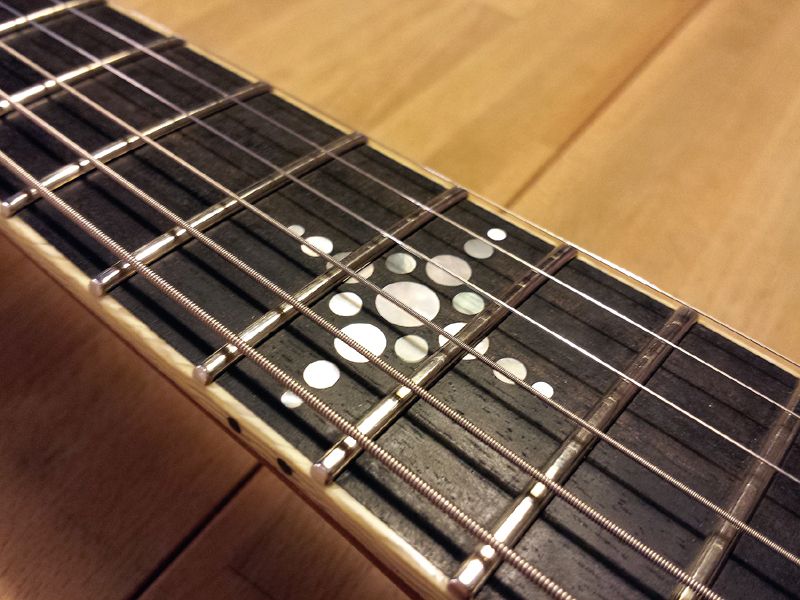
Cutting the pearl inlays. I glue the pearl blanks to a thin piece of wood, easier to saw it that way:
Testing:
Made a 65 inlay for the 12th fret:
Fretting and carving the neck:
Starting to look like something...
Pickup holes being made:
Pickup holes done, made an ebony pickguard that will be bound as well:
Jack plate made of flame maple:
I dyed the spruce to match the walnut back:
Oiling everything with Danish oil:
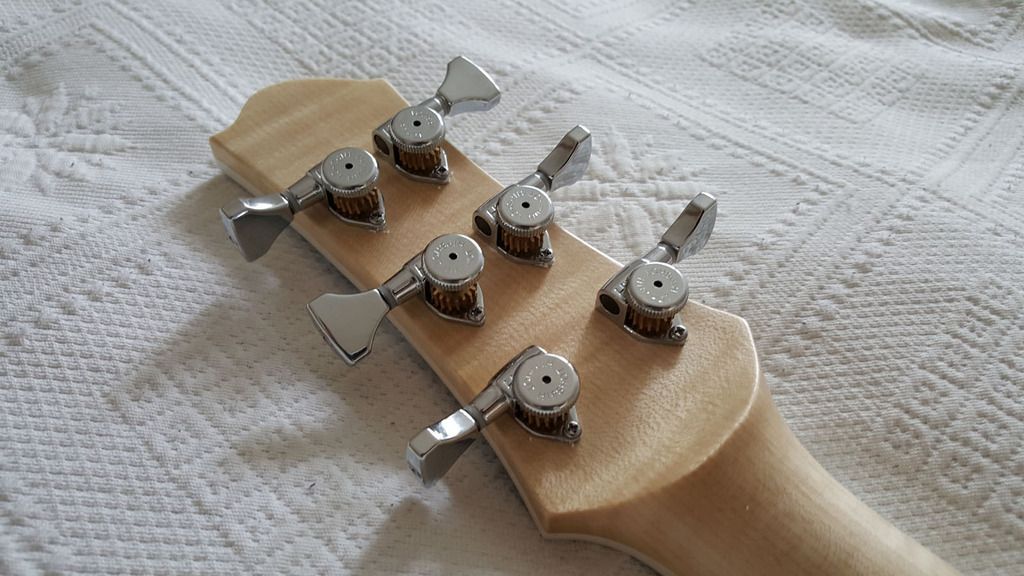
Hipshot locking tuners mounted, they will get ebony buttons later:
Fixing frets and electronics:
Hey, it's done!

-
4
-
-
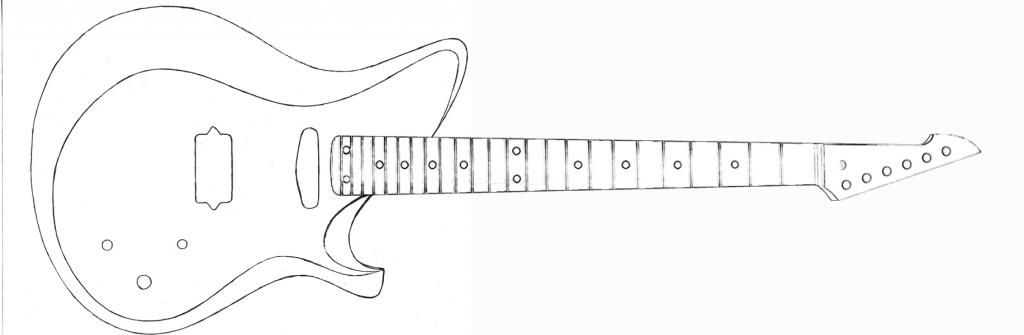
I've been trying to come up with a Tele-esque variant of this design, but no luck so far. As Prostheta says, it just becomes a single cut. Back to the sketchbook!
I had to try and see how a singlecut version would look, not very Tele-esque but anyway.. Hope you don't mind me fiddling around with your design, let me know in that case and I´ll remove the pic. I made the cutaway meet the body a little closer to the headstock end to make it meet the upper "horn" a little.
-
2
-
-
Perhaps donating tools and other shop related things would be an option as well, at least for members living relatively close to Indiana? Just a thought..
-
Ok, then I won't worry anymore! Looking forward to more updates.
-
I read that too, what a horrible thing to go through. I think this should be shown on the first page of Projectguitar, please remove the Guitar of the year thing and put a notification of these awful news there instead. Someone started a GoFundMe to support Shad: http://www.gofundme.com/ju5f28 A link to that page should also be included in that case. Let's all help out in any small way we can!
-
1
-
-
I like your design! It does look a bit like SwedishLuthiers design and both your designs borrow some lines around the horns from the 80's Larrivée shred guitars.
I assume you are doing a bolt-on neck joint? If that is the case, have you thought about that thin piece of wood on the high E side of the neck joint? I would be a little worried that it might snap off if and when you are taking the neck off a little too quick and careless, and also if the neck for some reason would shift a little, for example if it would take a dive when leaned against something.
-
Thank you very much! Unfortunately I'm one of those who can make any guitar sound bad... Maybe if I can get someone else to play. Probably won't happen though.Amazing guitar ... Something to aspire to.
Could you upload a recording? Just to see if she's a beauty that sounds good too ...
-
Good show, Pukko. So when's the next one on the table? ;-)
Ha ha, the only thing on the table in the near future is julskinka och öl... (that's Christmas ham and beer to you non-Swedish). As for new builds... nothing planned. I have drawn some designs but nothing more than that.
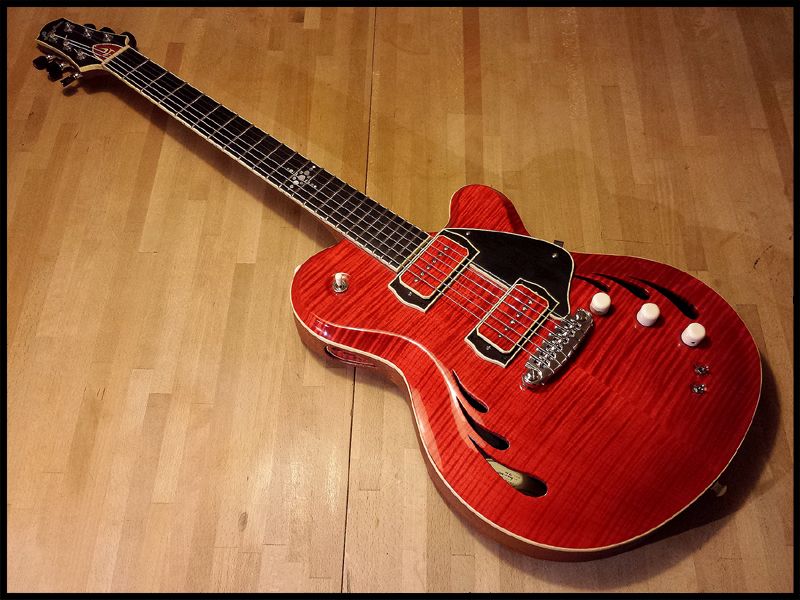
Nice work! I like the details. I hadn't seen this thread before. I really like the red.
Thank you!
Imprecionante, work was very beautiful.Congratulations!Thanks to you too!
-
Absolutely WOW!
Completely stunning!
All the added details are just spectacular.
Very inspiring!
Thanks for sharing.
Ciao,
Garth
Thank you so much!
And very nice and elegant looking!
Well, at least that's good. Thanks!
very inspiring work of yours, pukko! strong gotm candidate in my opinion

Thank you! I put it up in GOTM now, Hitone needs at least one more person to compete against. Can't have a one man GOTM right?
-
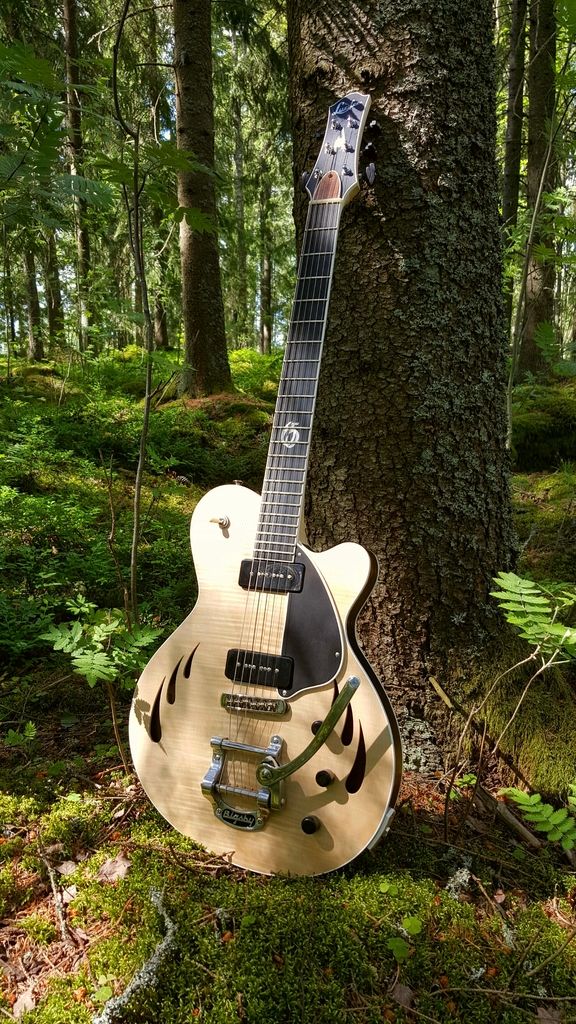
Hey, we need more contestants, right? Here's the:
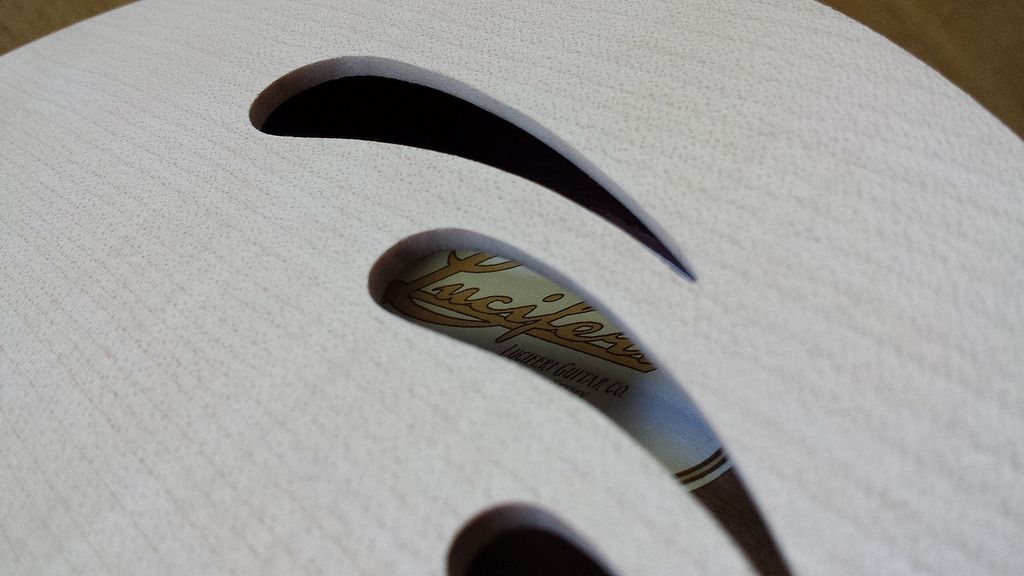
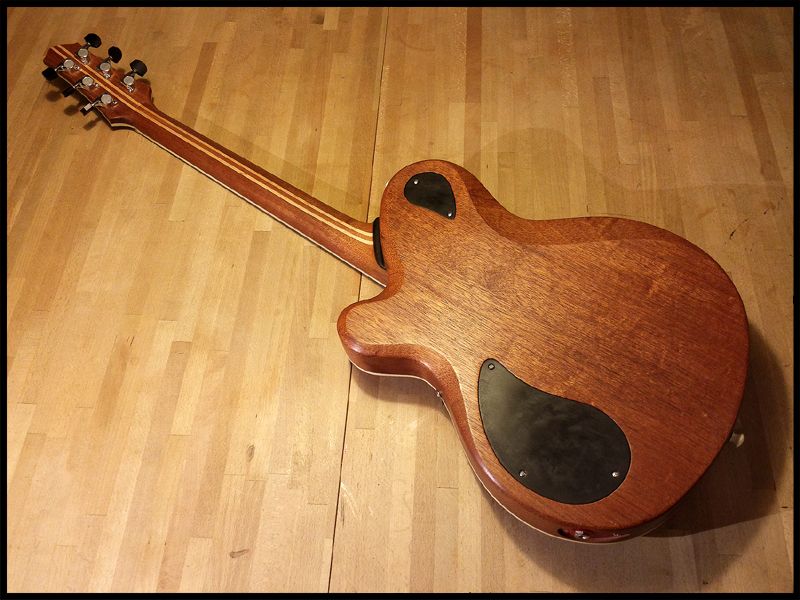
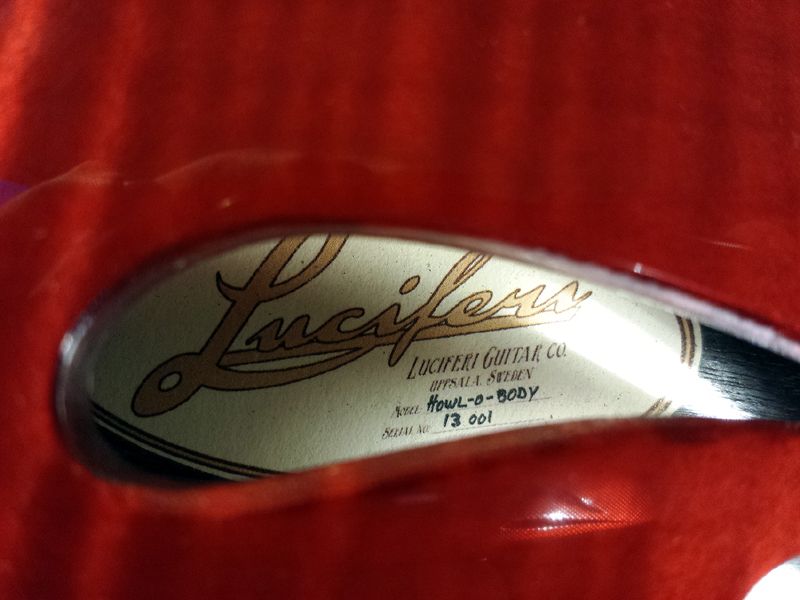
Luciferi Howl-o-body (I wrote the name on the sticker inside the body and then decided not to use the truss rod cover with a wolf on it that I made previously. Not such a clever name anymore then...)
Link to the build thread: http://projectguitar.ibforums.com/topic/46880-build-6-hollow-singlecut/
Anyways, here's some specs:
Body: Mahogany (hollow)
Top: Curly maple (carved inside and outside)
Neck: Mahogany with birch accent lines
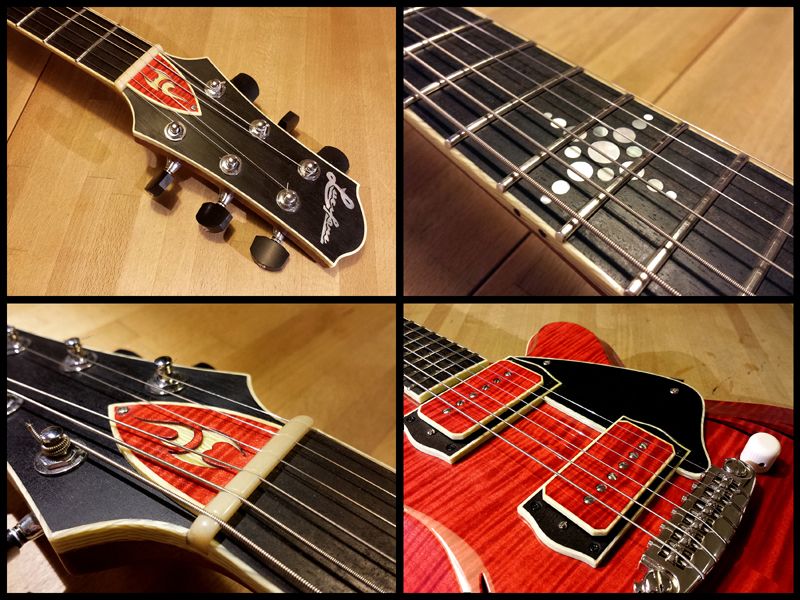
Fretboard: EbonyScale length: 25"
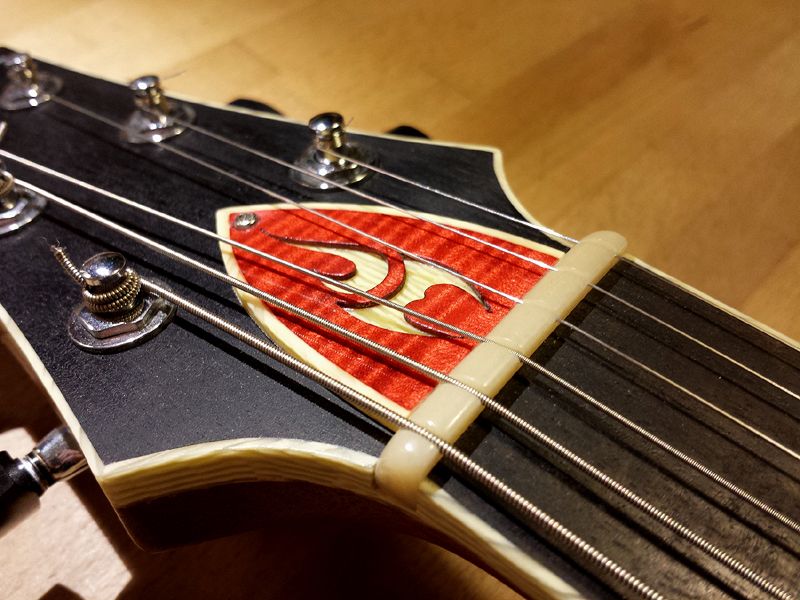
Nut: Unbleached bone
Headstock veneer,cavity covers, pickguard: Ebony
Pickup covers: Grain matched curly maple (wood from cutting out the pickup holes)
Binding: Grained ivoroid on everything
Pickups: Seymour Duncan P-rails
Volume/tone knobs, switchtip, strap buttons: Grained ivoroid
Tuners: Gotoh 510 with ebony buttons
Bridge: GraphTech Resomax wraparound
Electronics: Two volume, one tone 3-way switch, two 3-way mini switches to select humbucker/p-90/rail for each pickup
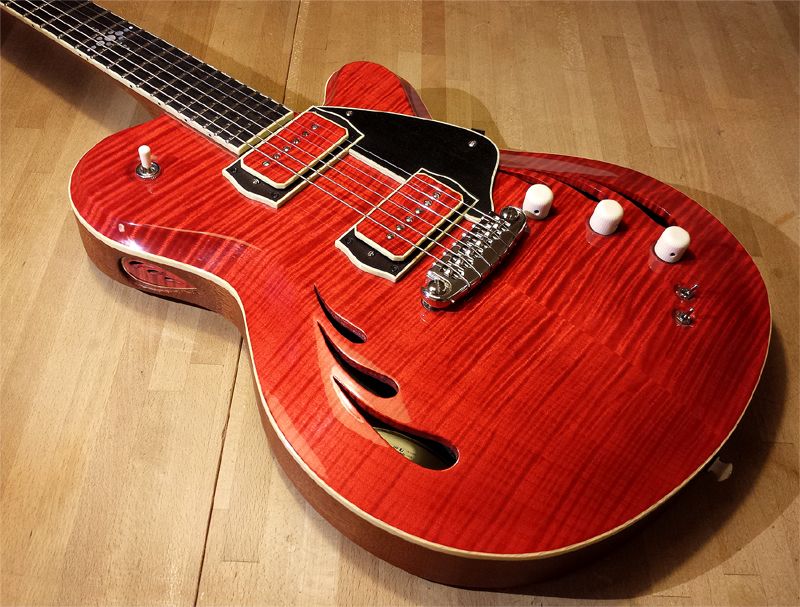
Finish: Nitrocellulose lacquer on cherry red dye on the top, everything else Danish oilAnd some pics:

-
>>madhattr88, Mr Natural, sdshirtman, HCRoadie, Osorio
Thanks a lot for the kind words!
>>SwedishLuthier
Ha ha, Fylking quoted on ProjectGuitar... I never thought I would see that.
The side sound port is a resounding success, I almost have to tape it over because it's so loud... or not. It makes no audible difference whatsoever when in normal playing position. It's a little louder when I'm putting my ear close to the hole, like when you're tuning in a noisy room, but it certainly isn't worth the extra work. But it was fun doing it...
-
>>MAGGOTBRAIN, ScottR
Thank you very much!
-
Thanks a lot demonx, ScottR, DC Ross!
Well, I guess it's complete then...


 Excellent reason for that, I presume your father had a wonderful 65th?
 Well, I only have one pic with the pickup tops:
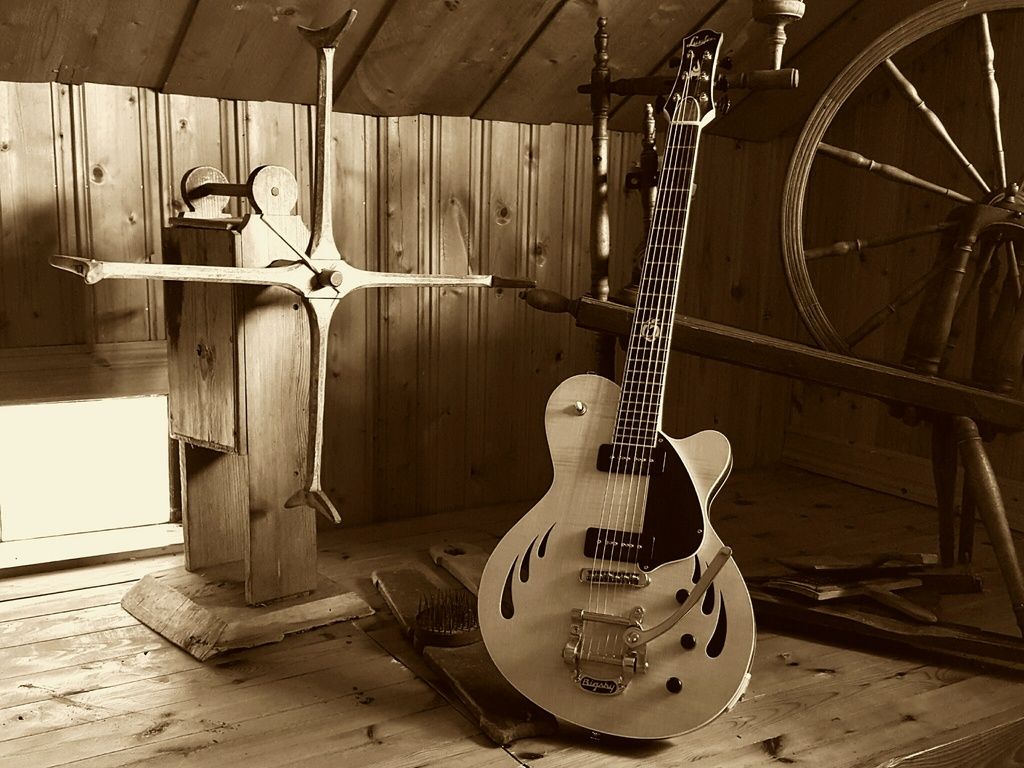
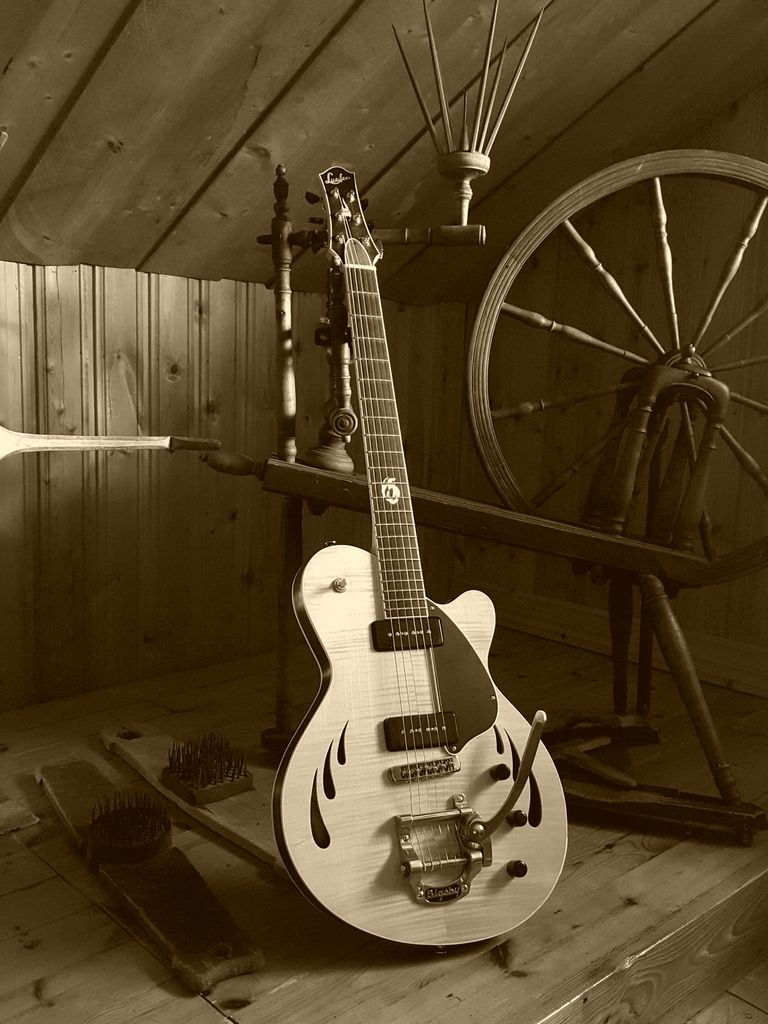
Build #8: Offset-ish, surfy-ish...
in In Progress and Finished Work
Posted
Thank you very much!
Well, it went like this:
I bought a sheet of 2 mm aluminium to make one of the (unused) pickguards. I took a scrap piece of that, drew a logo on it (full name, remember?) and proceeded to saw it out with an ordinary jigsaw (with a blade made for sáwing metal, many small teeth...). It didn't look too great so I just put it on a shelf and forgot about it. When I had this new idea for a logo I cut off the L with the saw and used various needle files to reshape it and to round off all the edges. After that, just ordinary wet sanding papers and metal polish paste applied with the Dremel and a buffing wheel that came with it. Done!