


pukko
-
Posts
247 -
Joined
-
Last visited
-
Days Won
12
Content Type
Profiles
News and Information
Tutorials
Product Reviews
Supplier Listings
Articles
Guitar Of The Month
Links and Resources
Forums
Gallery
Downloads
Posts posted by pukko
-
-
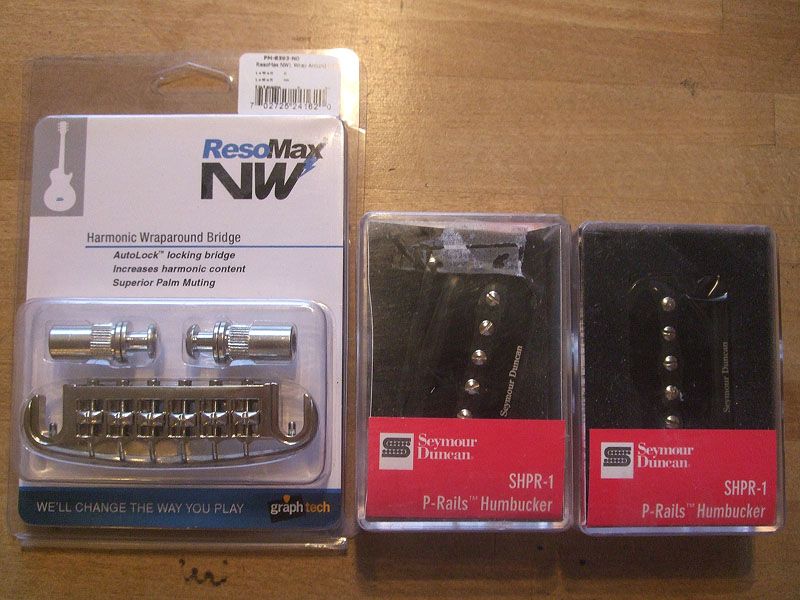
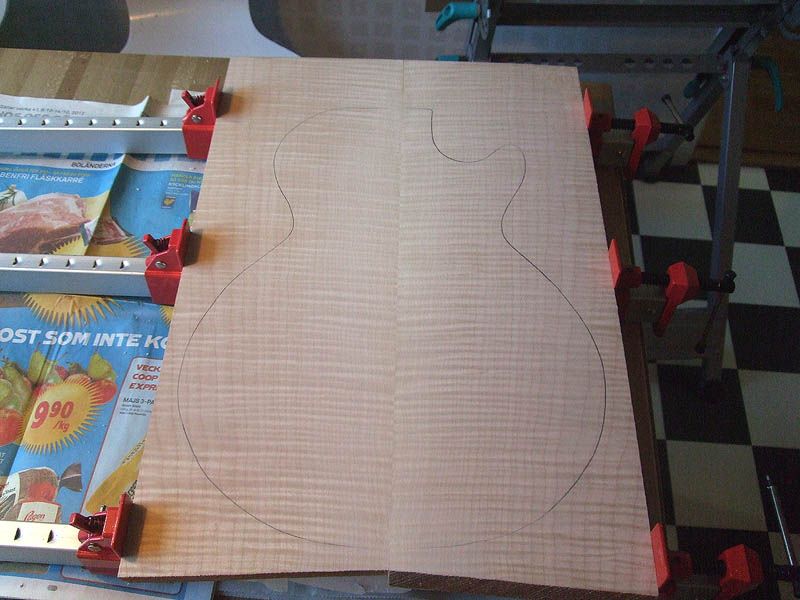
Well, the building itch got me again... It all started in Chicago. I was visiting relatives and bought a set of Seymour Duncan P-Rails just because they were so cheap (half the price compared to Sweden...). I didn't really have any use for them at the time but I figured they would be cool to have just in case...
Later I went to a Swedish guitar show and bought a Graphtech Resomax wraparound bridge. Liked the way it looked... I definitely didn't have any use for that on any of my guitars. I guess I had to build one for this stuff then...
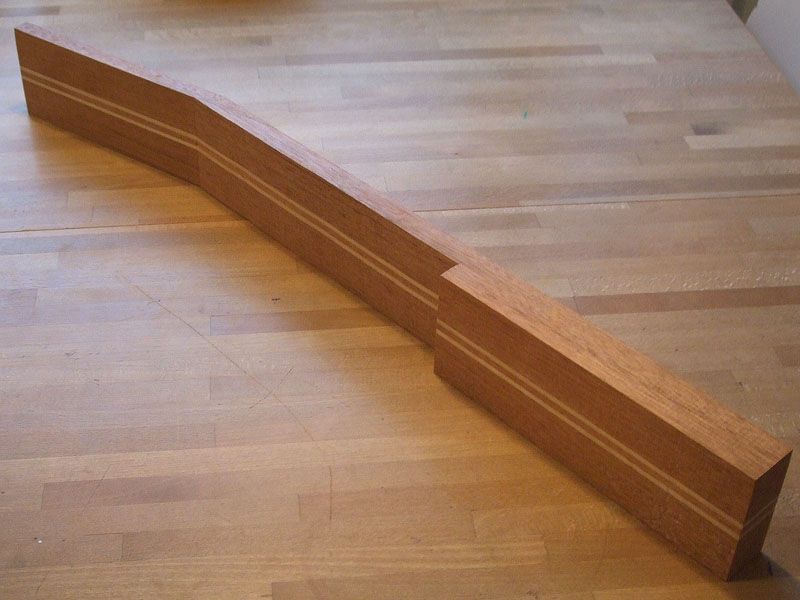
I found some mahogany and birch lying around and made a neck blank out of it. It wasn't long enough on it's own to make a neck from so I cut off a piece and scarfed it on for a headstock.
After that the combination of late night whisky and credit card in hand resulted in buying this:
I bought a mahogany body blank from a fellow Swedish builder, no pics of that though. Forgot about that... And an ebony fretboard.
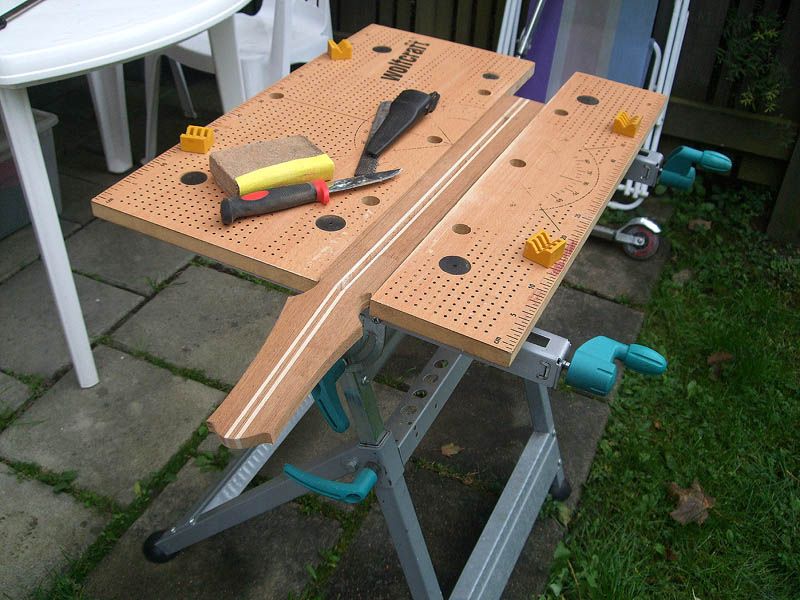
Here's a pic of the neck. I've routed the truss rod channel and here I'm shaping the headstock. I haven't routed the straight lines on the neck yet:
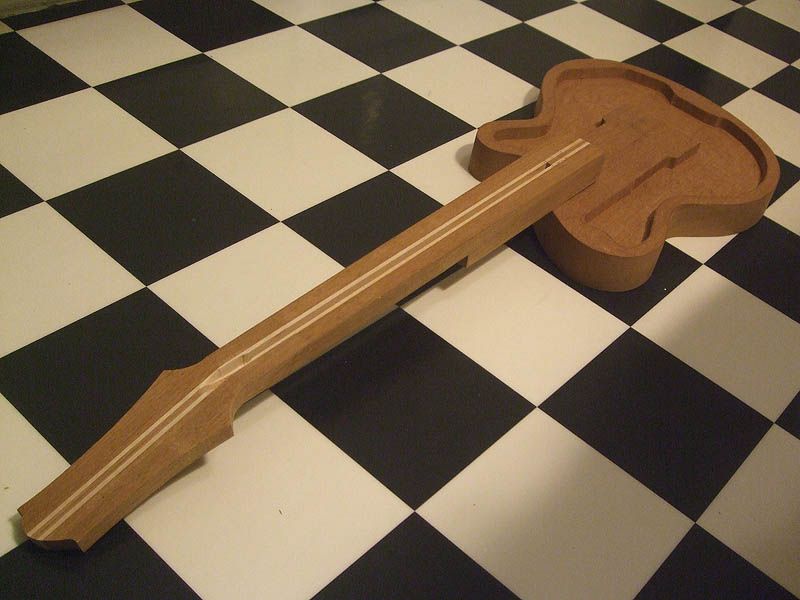
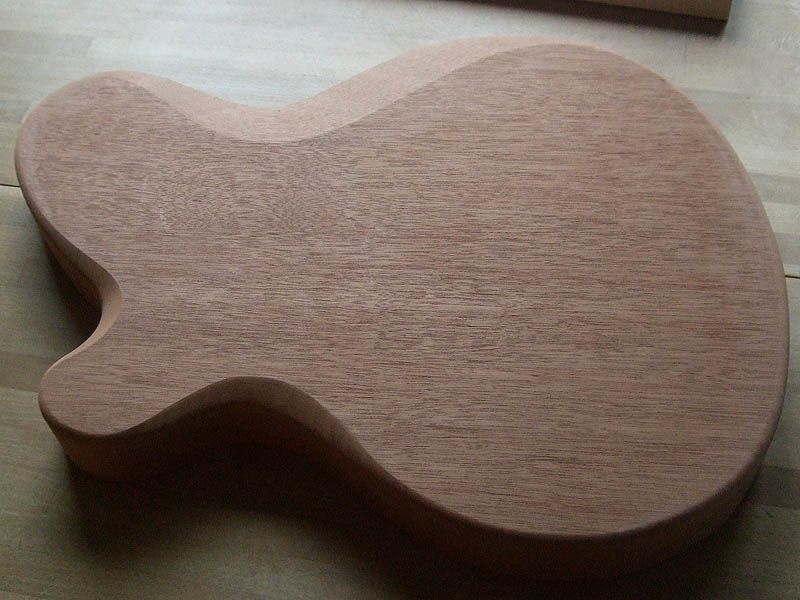
Body (still not hollowed out) and neck together:
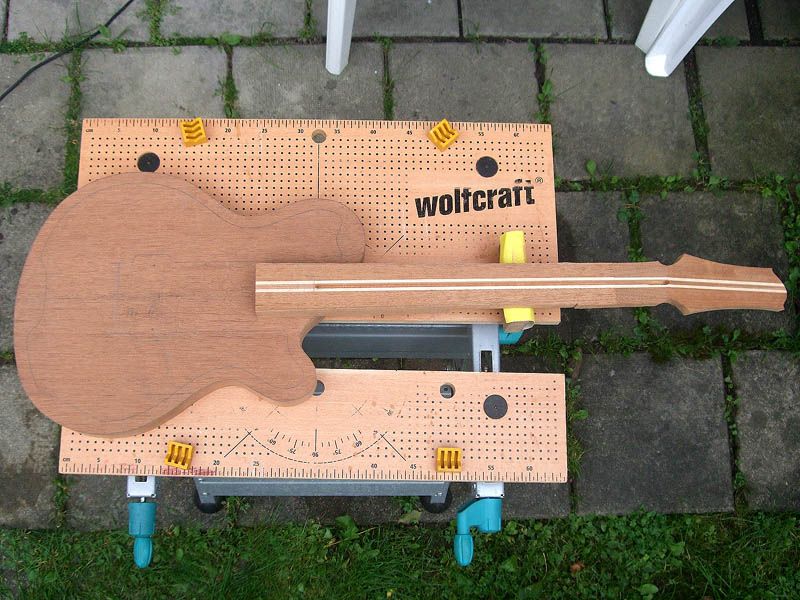
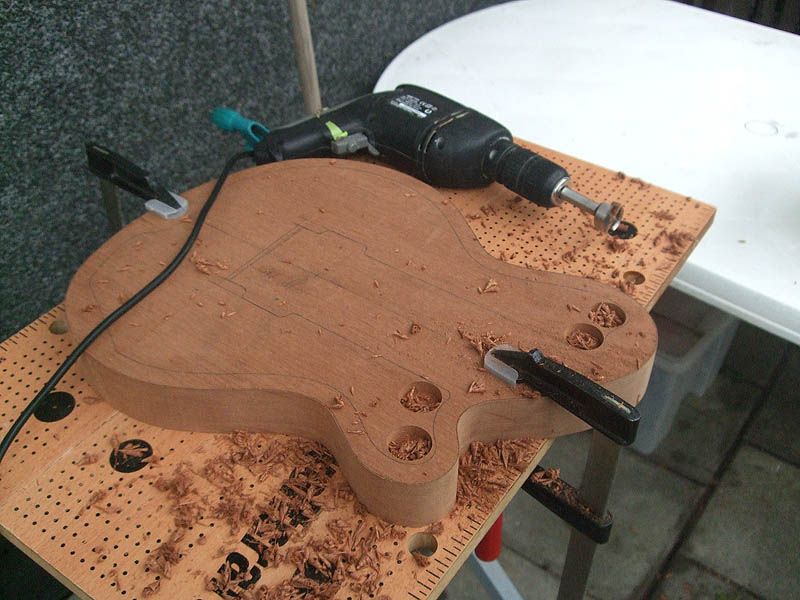
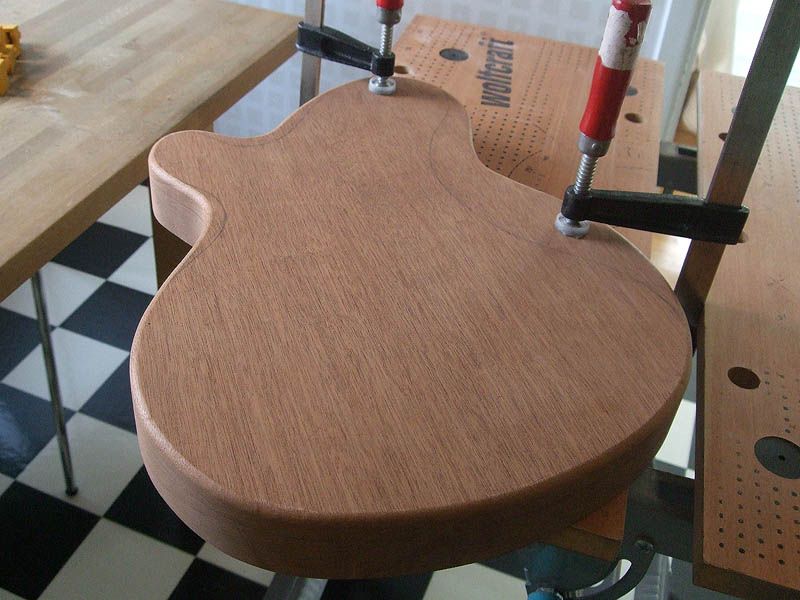
Here's another pic of the body. I cut it out on the band saw and shaped it with sanding drums in an electric drill on a stand. The pic shows how I drill out most of the wood with a Forstner bit:
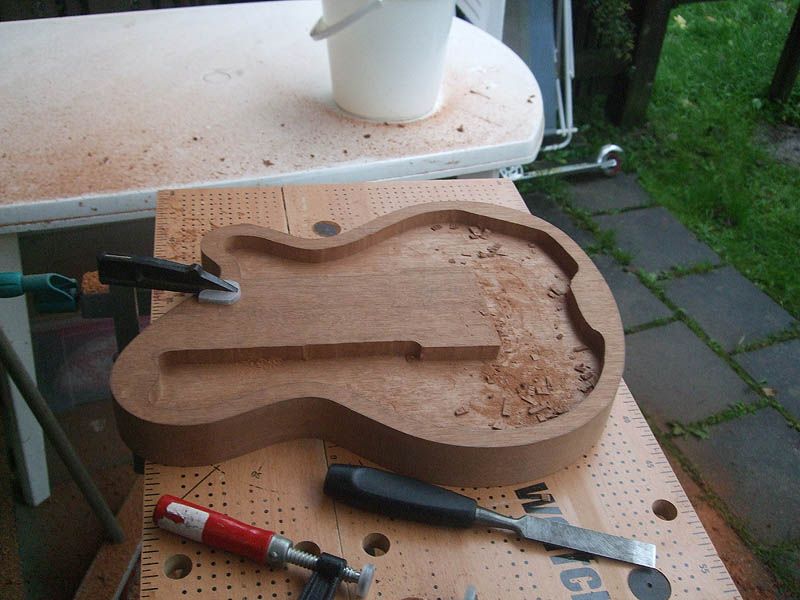
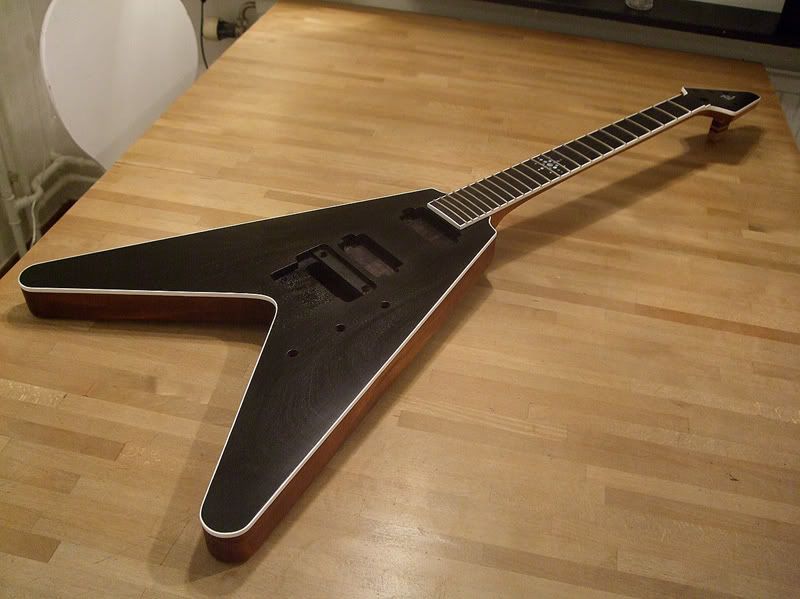
I then routed out the cavities at a shallow depth. I did this for two reasons: I routed it freehand so I only took out enough to be able to sand the inner edges smooth and then use them as a guide for the router bit. I also didn't want to go too deep since I was going to put contours on the back of the body. You can see that I'm leaving wood where the bridge is going to sit, I'm going to remove some wood between the neck and bridge later on when I figure out how to mount the pickups.
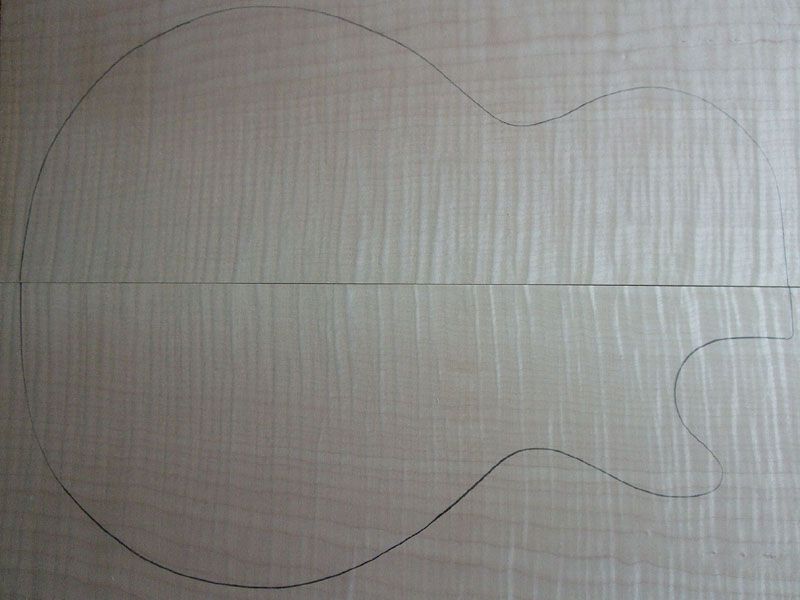
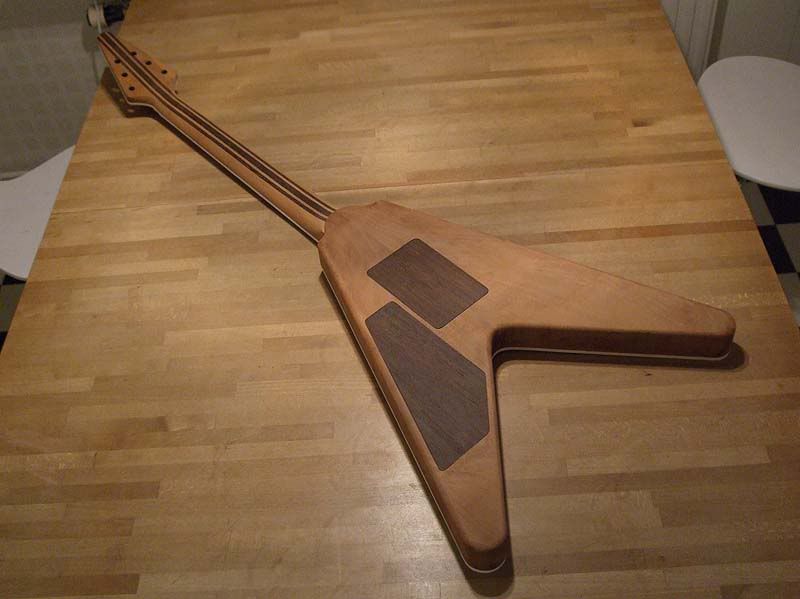
Gluing the maple top:
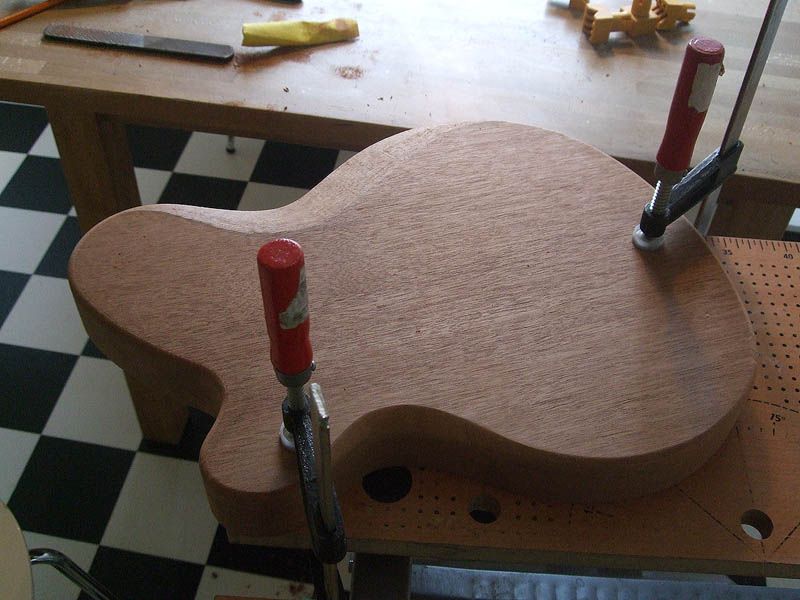
Shaping the back of the body. First I rounded the edges with the router:
Out came my trusty Morakniv (classic Swedish allround use knife), files and sandpaper. Here I'm carving the bellycut with the knife. I already shaped the other side of the waist to make it comfortable for the leg:
Sanded smooth:
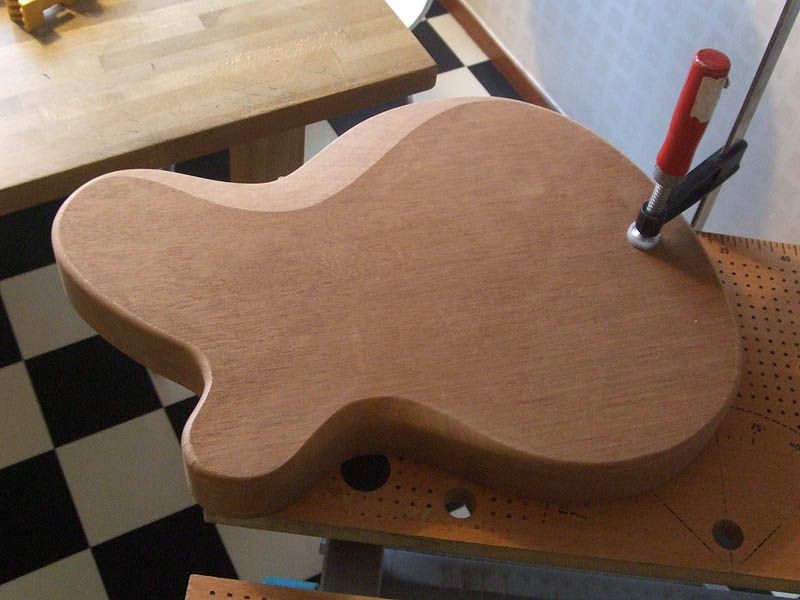
And finally some shaping of the cutaway:
That's about as far as I have gotten right now...
-
Another boo boo - I bought a quarter sheet of black perspex the other day to make cavity covers, nice thick ones. I cut into it, shaped the cavity cover, peeled back the paper and found out its clear black not solid black! Guess it's too late to take it back now I've hacked into it. I'm going to have to make sure my electronics cavities are super neat from now on! No hiding stuff!
Paint the back of the cover, use that metal grate pattern! Or is the cover too dark to do that?
-
Doug Kauer wrote something over at Thegearpage about cutters that he thought worked for SS fret cutting. Check it out here:
-
Cheers Pukko!
90SEK/€9.80 shipping to Finland, about €21 for the rod. Expensive shipping. Still, they are in stock which is great. I could do with not having to pay so much to Postman Petter. Would it be worth emailing them querying the shipping, or is that a realistic charge?
Well, it says 50-90 sek, did you get the actual 90 sek quote when trying to buy it? You should definitely try mailing them anyway, they're good guys with a great customer service so ask them. They won't rip you off. I checked posten.se (swedish postal service) and the price quote is somewhere between 36-92 sek depending on size and weight of the package. That is ordinary shipping, I don't know if they want to send with some kind of insurance or tracking... Check with them.
-
And an aluminium section truss rod! Those things are like hens teeth right now.
What kind of truss rod is that? There's a Swedish webshop for guitar parts that has U-section aluminium bass truss rods. I don't know how much the shipping is but it might be an alternative to ordering from England or USA... Check out www.gitarrdelar.se.
http://gitarrdelar.se/product_info.php?cPath=85_139&products_id=1520&language=en
-
David Myka is a bit of a hero to me and many others here, so any similarity between anything I design and something he's done I'm going to choose to view as a sign of progress on my part. His is still a little different than mine.
I'd wonder where Yamaha was sourcing those tuners, except they're Yamaha. I definitely dig that design.
Thanks for point those out, pukko.
Yeah, he builds some amazing instruments! The tuners on this Yamaha model were Sperzels. I read somewhere about some other guitar maker (I think it was Ron Thorn but I'm not sure) who ordered Sperzels with longer whatever they're called to achieve a similar effect as on the Yamaha.
-
The first version looks a bit like Myka's:
There are ways to achieve straight string pull without having a narrow design on the headstock, anyone remember the Yamaha AES820? I guess it had longer whatever they are called in English, the thing that connects the tuner button and the gearing on the tuner...

-
>>westhemann
Uh... thanks!
>>Neil Beith
Thanks a lot!
>>Prostheta
Yep, and don't forget to mention all the blondes too! Soundclips and video? You like the guitar now, I don't want to ruin your view of it with my lousy playing. Kind of like seeing a hot naked girl and then a present day Ron Jeremy pops in and tries to do his thing without really getting it... done. It kind of ruins the experience, right? Maybe if I can get someone else to play it.
>>avengers63
Yeah, it's a pretty big step away from my previous build styles I guess. I like to try different stuff...
-
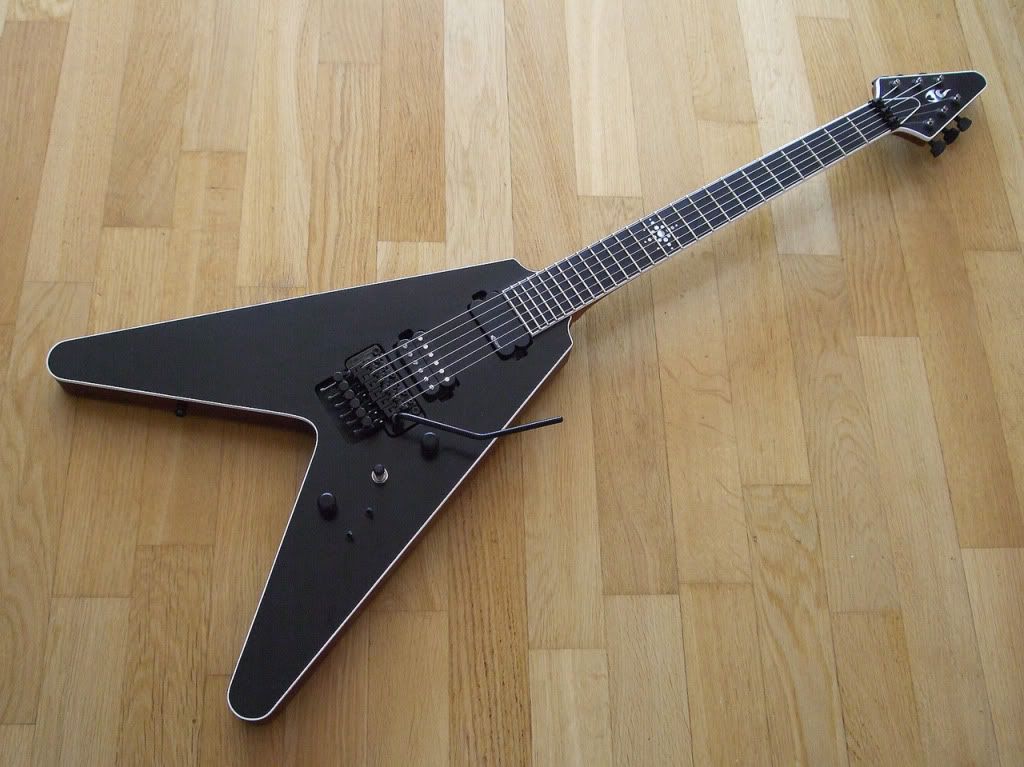
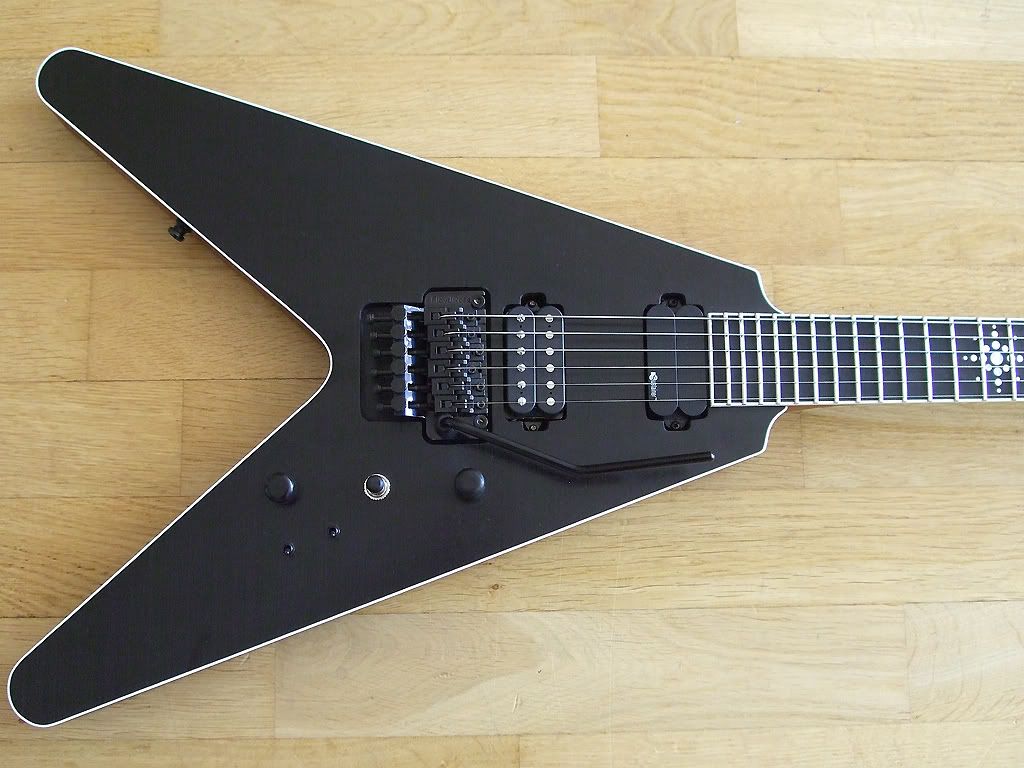
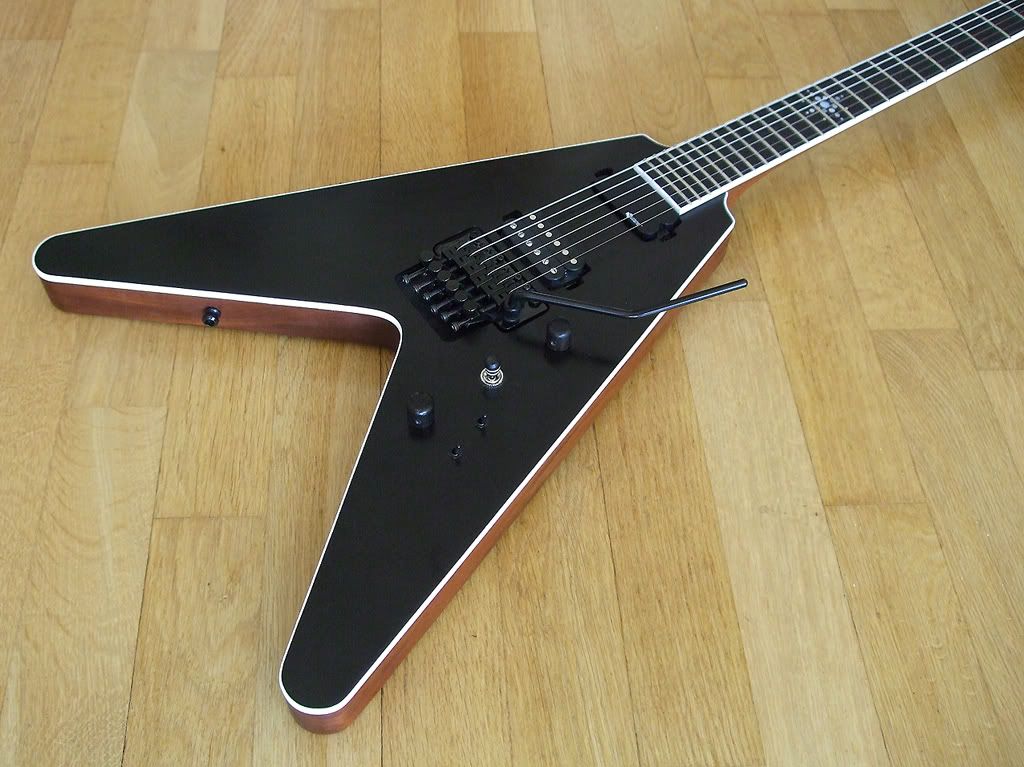
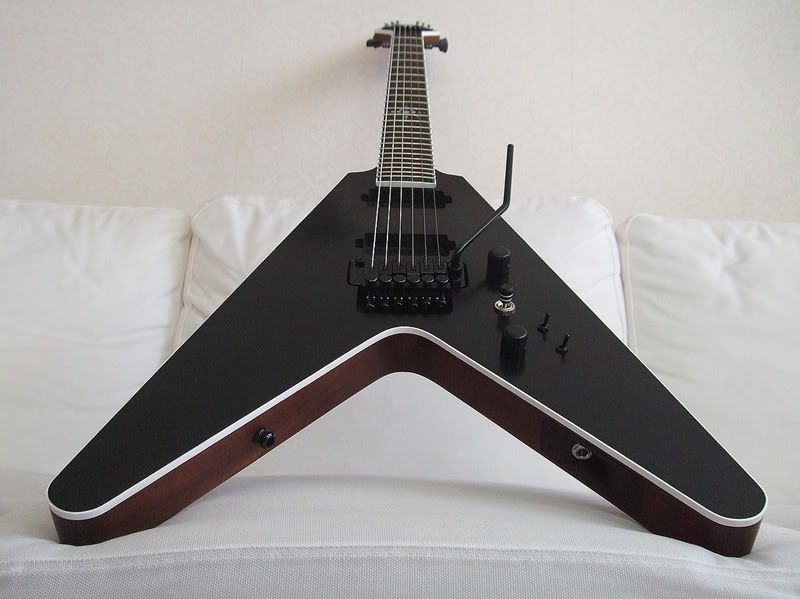
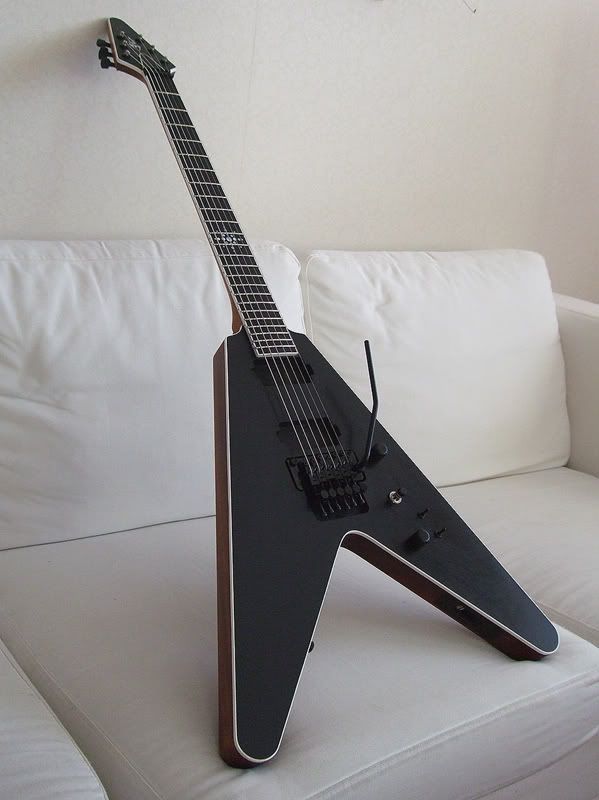
Pretty much done, just some setup stuff left.
-
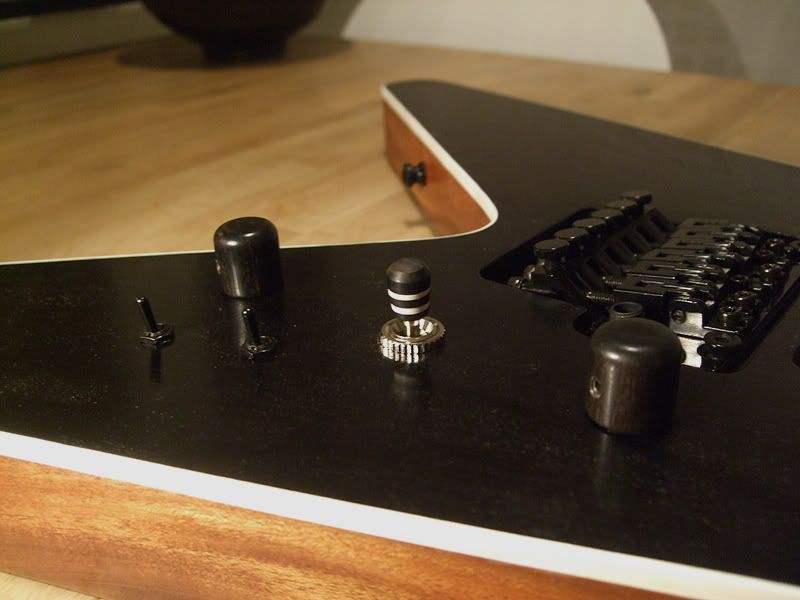
I had another idea for a switch tip. I figured I would make one to match the body look. I took a piece of mahogany, a piece of white binding and a piece of ebony (instead of dyed black mahogany) and glued them together. Then I shaped it into a switch tip.
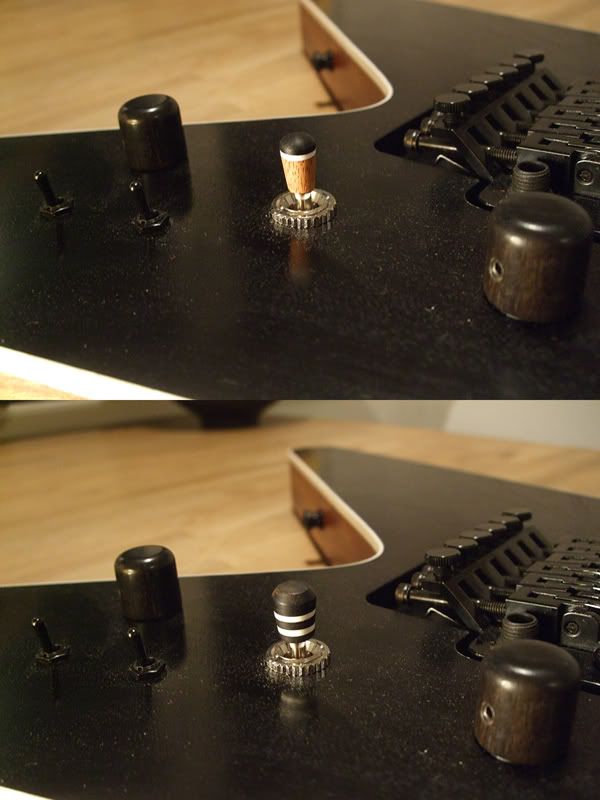
The first comment from my family was: It looks like a fishing float. And it does...
-
Thanks a lot everyone!
>>Prostheta
Thanks for the kind words! Yeah, removing a little wood from the nut area won't be too hard. I don't want to use those metal shims if I can avoid them. The pickup is not too wide that way, the tabs fit. It's the sides running parallell to the polepiece rows that would need to be ground back and that's not a good idea... Anyway, it's just less than 1 mm that has to be taken away. I won't even have to rout it, I could use coarse sandpaper or a file and get it done. I could probably get the pickup in now too, but getting it out again would be interesting...
-
>>eddiewarlock
Yeah, I suppose we have a good dental care system here. It's free for everyone until you're 18 (I think) so that might be a good start for people's teeth... You'll have access to some pretty cool tools for inlaying anyway!
>>CrazyManAndy
Thanks a lot!
I put some strings on to see how it would work. It turns out I'm going to have to remove some material from the locking nut shelf since the nut is too high now. And I'll have to enlarge the pickup cavities ever so slightly since the Dimarzio pickup is a hair too wide. Not so with the other pickups I have, why can't they make them all the same size?! And the frets haven't been leveled so that's left to do too...
Funny how the strings make it look almost done...
-
Thanks everyone! Eddie, sorry but... root canal specialist?! Do you like inflicting pain to people???
 Nah, just kidding. I just hope I'll never have to meet you when you're at work.
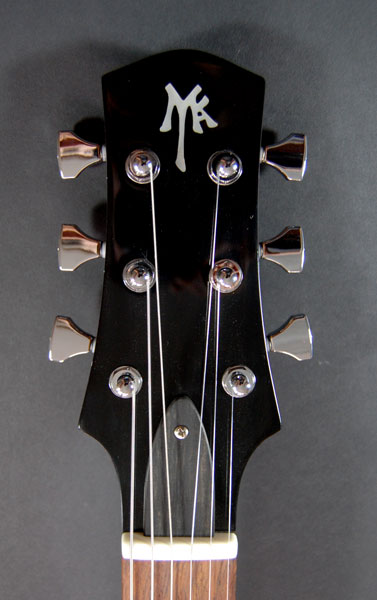
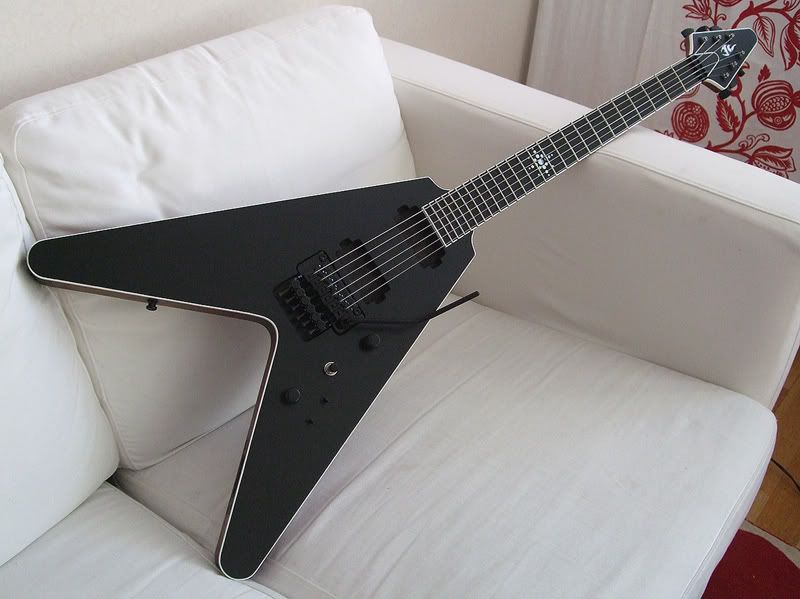
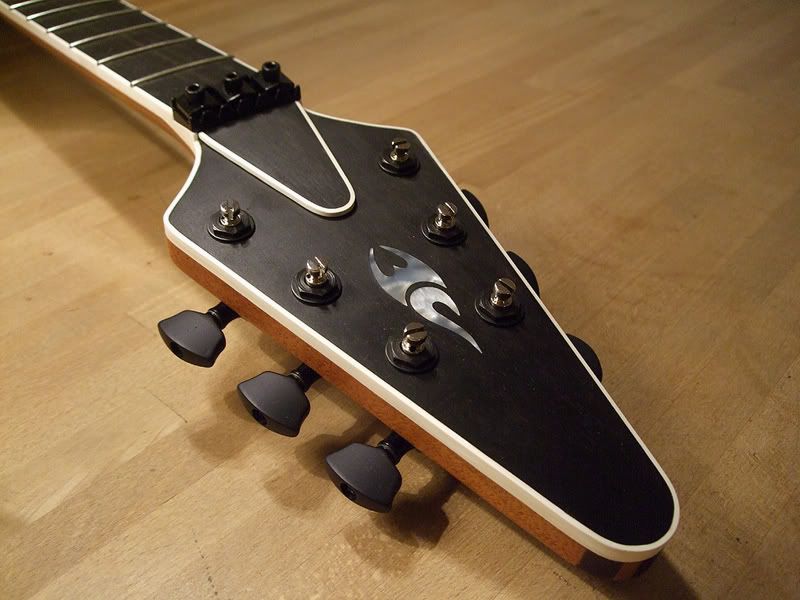
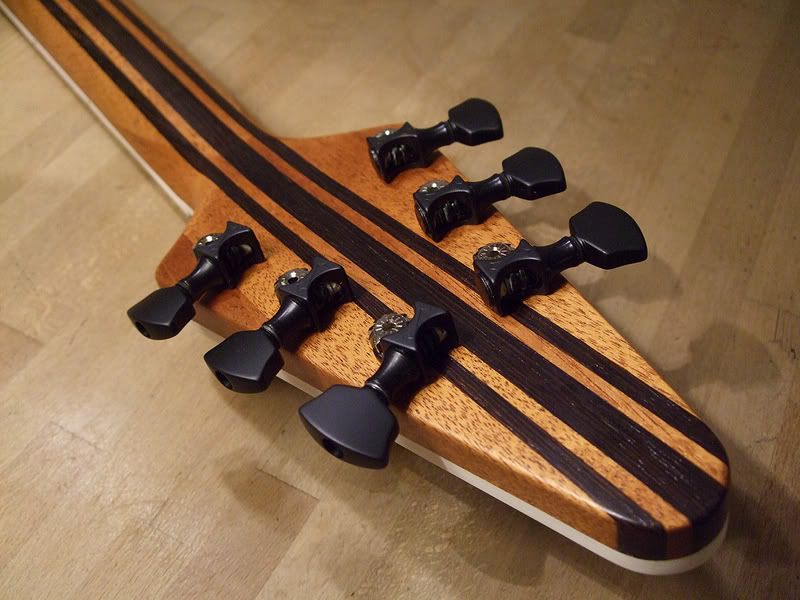
Here's a couple of pics. I made a switch tip out of ebony and binding material. Knobs are ebony too. Sperzel Sound-Loks for tuners.
-
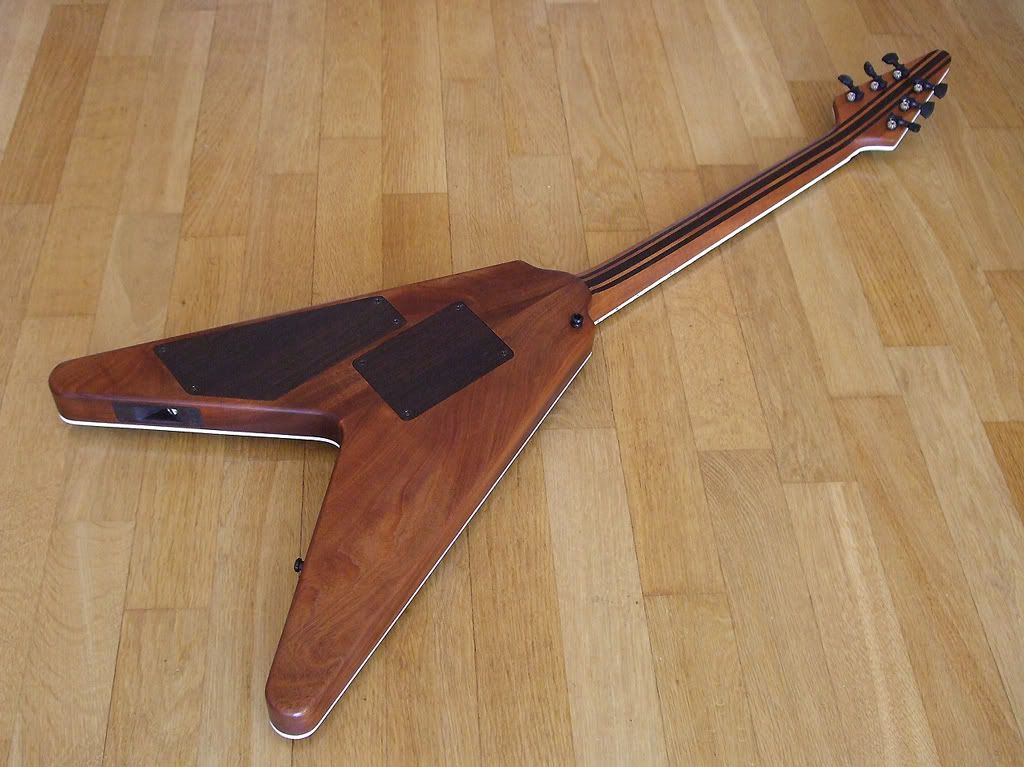
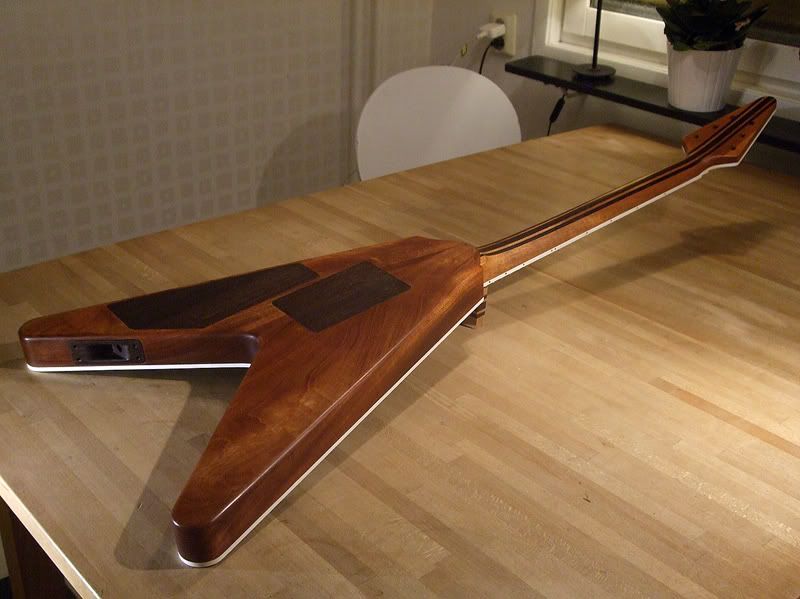
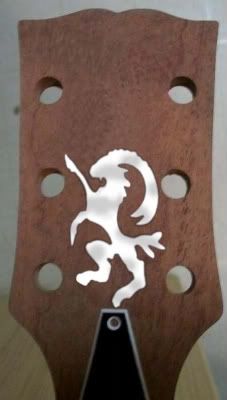
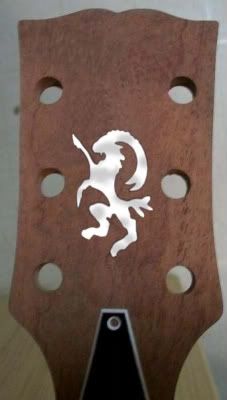
...and now it is dyed and oiled. I didn't do the dragon carve. I did some more testing and just came to the conclusion that it wouldn't look good enough.
Pics:
Javla bra!! Snyggt gitarr!! Master Pukko, you've done it again! I am impressed!!! I love flying v's
Man, i like the dragon, but as someone said, as an outline, although that test carve looks fantastic!I have been busy with my speciality ( I wanted to study it a Goteborg University, but alas, 30.000 euros a year, i don't have that kind of money) so i am studying it here in Venezuela. But anyways, i will have to check out your fourth guitar.
Keep up the good work! this V looks AMAZING!
Tack som fan! Thanks a lot! No dragon though as you can see. Yeah, studying can be expensive I guess. What's your speciality?
-
You could try looking for drum wraps, they seem to be available in a variety of pearls. I have no idea what those are like though, maybe you'll have to glue it to some other pickguard material?
Some examples:
https://www.drumfoundry.com/p-15576-purple-pearl-wrap.aspx

-
>>Prostheta
Yep, them nails will do it! I could route a little deeper for the jack and covers to increase the illusion of a mahogany "shell" with holes to show the wenge. The easy way would be a guitar with double tops and the "top" top being routed away in some kind of pattern to show the "bottom" top. Hmmmm...
>>Neil Beith, Linny
Thanks!
>>Cam
Thanks! I made the recess by first drilling out most of the wood and then routing it with my Dremel on a router base. That one is small enough to operate inside the V and it's actually really easy to control when routing in mahogany.
-
Routed for the jack plate:
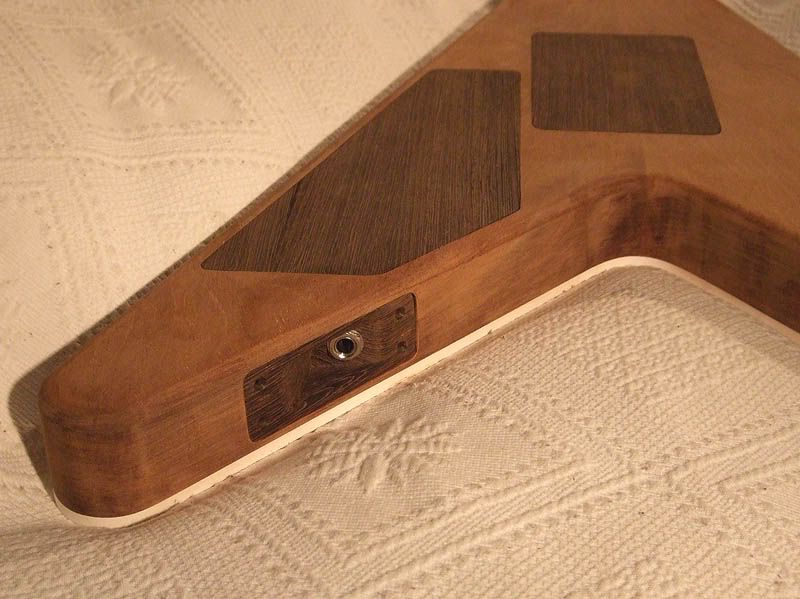
It fell out a bit when I took the pics, that's why it looks a little weird. .
-
>>westhemann
Yeah, that would work I guess. Still nerve wracking though...
>>Osorio
Thanks! Let's see the tattoo!
>>guitar2005
Thanks! That's a great way to have the jack, the cable goes around the strap naturally that way.
-
Pistachio. I seem to remember this from a thread on thegearpage.
-
>>verhoevenc
Thanks!
>>westhemann
Yeah, I thought about those too. I just didn't think I could drill a good looking hole at the proper angle with just my electric hand drill. The angle of the V makes it a little hard... I would have had to make some kind of drilling jig for that and since my workshop=my kitchen during winter I didn't want to do that. I suppose an oil finish will make the scratching a little easier to avoid or at least fix. Can't avoid the drunk playing though! Where will I put the first dent, headstock or one of the V points...? Great looking Explorer by the way!
>>RestorationAD
Yeah, I asked people that plays V:s a lot and they said the inside of the top horn is the best place. i just didn't see how I could drill a hole for it without having a heart attack... The angle of the V means I would have to drill the jack hole into the Floyd cavity or drill a little straighter along the body and then drill into that hole from the pickup cavity. I would probably make a mess out of that...
>>WezV
Thanks!
-
I've been thinking about where to put the jack as I don't want it on the top like on Gibson V's. I'm going to put it on the inside of the lower leg of the V. That calls for an angled jack to avoid having the cable sticking out too much. People have suggested that a Strat jack plate works well, but I think those look kind of funny on a V. The angled jack is however a good idea, so I decided to try and make one out of wenge to match the covers. Here's what it looks like now, lots of sanding left but you get the idea:
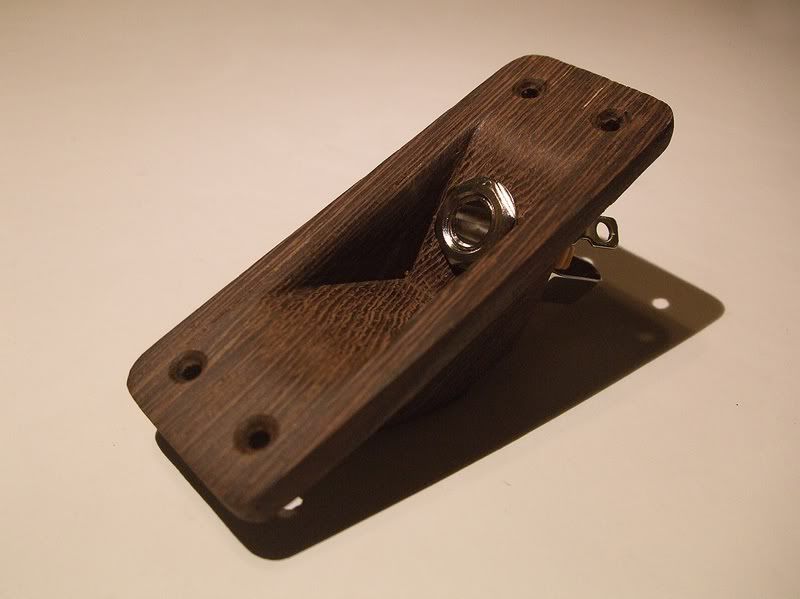
It will be routed flush with the mahogany to make it invisible from the front.
-
I made the wenge cover plates a while ago, routed for them today:
-
Just a quick Photoshop test to see what it would look like. made the goat stand up a bit more to make it fit better, gives it a Ferrari logo kind of vibe... Il capretta rampante? One a little bigger standing on the TR cover, one a little smaller more in the middle of the headstock:
-
You should work up a logo of a very stylized goat.
SR
Yeah! There's a part of Sweden called Hälsingland (pronounced Hell-sing-lund, go figure with the goat and all..) that has a goat as their symbol. Looks like this (sorry, bad photoshopping...):

Something like that could work on a headstock, just work the shapes to fit the shape of the headstock better. Bring the legs closer to make it stand on the truss rod cover...
 Nah, just kidding. I just hope I'll never have to meet you when you're at work.
Build#6: Hollow Singlecut
in In Progress and Finished Work
Posted
>>hooglebug, eddiewarlock
Glad you like them!
Got some work done this weekend...
Ebony headplate:
Headstock shape cut out and glued:
There we go:
Edges trimmed:
And with the ebony fretboard cut and trimmed (not glued yet):