


jay5
-
Posts
1,100 -
Joined
-
Last visited
Content Type
Profiles
News and Information
Tutorials
Product Reviews
Supplier Listings
Articles
Guitar Of The Month
Links and Resources
Forums
Gallery
Downloads
Posts posted by jay5
-
-
What are you using to carve the top?
-
I am really interested in the white stain. The mockup is cool, cant wait to see the real thing!
-
Looks good man. I think the bansaw was a good idea, you have plenty of surface to hold that tenon. It looks like you should be able to make that joint flow really nicely now.
-
Oh, ok, like violin c-bouts. A bandsaw or a jigsaw would be my suggestion, bandsaw coming first. You could also use a chisel to carve those areas out as theyre not that large. Either way I would strip the body first.
-
Like I said, it will be tough to inlay an already radiused and fretted board. I wouldnt do it if I were you, especially if you have never inlayed before. You would need to pull the frets out to do it correctly. Laquer is not the answer, epoxy maybe but if you inlay it right all you need to do is sand them down to match the radius of the board. There really isnt an easy way to do what you want to do.
-
We better get some pics tonight

-
By violin cuts I imagine you mean f-holes. Unless the body is a semi-hollow you wont really be able to do them. You could refinish it and then use an f-hole decal to get the look. To answet your question, the easiest way to cut f-holes IMO (in a proper body) is with a router and template.
-
If they are thicker than the fretboard, then you can put them in and radius them flat against the fretboard.
What
Thicker than the fretboard? Generally you dont laquer a fretboard unless its maple. Ideally you want to start with a flat fretboard, rout out the inlay cavities, inlay them and then radius the whole thing at once. How deep depends on the thickness of your pieces. If they are really thin you will probably want to rout deeper so you can raduis the borad without taking too mutch off the edges of the inlay. Likewise, if they are thicker you can inlay them shallower as there is more material. -
Whilst we're on the subject, can we *please* remove Jeff Litchfields positively dangerous tutorial on adding a skunkstripe to a neck?
Come on Setch, there's no reason why you shouldnt blindly rout into an unstable, curved surface searching for a steel bar with a razor sharp cutter at 25,000 RPM. Whats not safe about that?
-
The gap between the tuning pegs looks a little off
They're supposed to be like that, it was a concious design decision,..................
-
Ahhh, I think I found it. Here is a thread where a few are already bashing his "instruction booklet".
-
What's the "tele thread"?
-
You'd better feed the tele to WOD before that thing finds it
Don't give him any ideas
Plus, that tele is gonna be bitchin'. Remember, everyone has different tastes in guitar design. Perry's guitar is excellent but don't be intimidated out of entering your own work, that type of guitar doesnt appeal to everyone, just like a tele might not be everyones thing. -
-
I see your shoes
-
it's the craftsman spinsaw
hmmmmm
, make sure you hog out as much wood as possible before you start routing. -
How much do you plan on carving with that thin a body?
-
I just got a Craftsman rotary tool off ebay and I want to get a flex shaft attachment as well. The tool looks identical to the Dremel variety. I figured I would see if I could pick one up cheap on ebay but all I can find are Dremel brand attachments. Does anyone know if a Dremel flex shaft will work on the craftsman multispeed rotary tool?
-
Nice job my friend! Looks well thought out and well excecuted. I have a similar design drawn out in my sketch book. It doesnt look like you have a table saw with the standard 3/4" miter slots (neither do I) so Im curious as to what you used as runners? I was planning on milling some standard 3/4" UHMW down to size. How do you plan on cutting the nut slots?
-
YESSSS! Its about time. I remember you promising to do a tutorial of sorts on all your cool tele mods. As we never got to see them until now I had to figure some out myself
Heres a pic of my modified neck heel that you inspired. Can't wait to see what you come up with!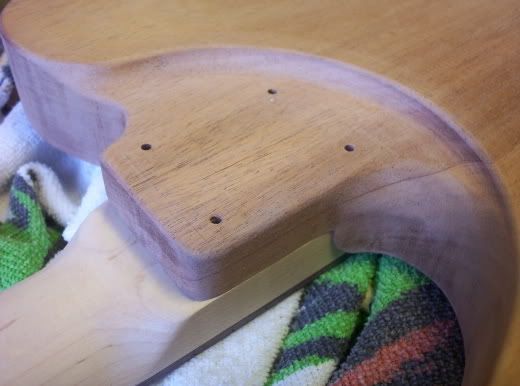
-
How can i make 1/8" or 1/4" passes with that?
You can, but your template will need to be an inch thick, or your first pass will have to be 3/4" deep (with .25" template).
-
What an ass! I am going to put my template up and when he pulls it I'll get on his ass too. Maybe a full frontal assault is in order.
-
A 1/2" diameter bit will work fine, thats what I use. You can make your templates just as balzooka said, I have done it that way in the past. In all honesty, its a pain in the ass though. I spent more time lining everything up and messing with little pieces only to have somthing shift ever so slightly. Instead I bought a set of the 3/16" acrylic templates from stewmac and couldnt be happier. They are clear and have a centerline and only cost $5.55 a piece. I only really use them as "master" templates as I find the 3/16" thickness a bit limiting. What I do is attach them to a piece of 1/2" ply and transfer the rout for a working template. Works great and you know the template will be perfect.
-
I'll tell ya after I get the piece I want jay !
Hahahaha, fair enough
Why not make a cool lap steel?


Jv-1 Project..
in In Progress and Finished Work
Posted
Cool, I plan on going a similar rout with the PRS project I want to do. I am going to use a cove/raised panel bit to do the edges and then fire up the Drak-carver (angle grinder) to rough in the shape. Then on to scrapers. I would really appreciate any/all pics you take of the carve process.