


YetzerHarah
-
Posts
132 -
Joined
-
Last visited
-
Days Won
4
Content Type
Profiles
News and Information
Tutorials
Product Reviews
Supplier Listings
Articles
Guitar Of The Month
Links and Resources
Forums
Gallery
Downloads
Posts posted by YetzerHarah
-
-
I wouldn't use hide glue unless you're planning on doing something that's made to be disassembled later like a violin, for a permanent repair I'd choose just normal Titebond. The right epoxy is fine also, but not not a necessity. On whether you should just glue & clamp, it's hard to tell w/o seeing it.
-
Cool beans, the only thing missing is a cool track like on the old Dan Armstrongs

-
I wasn't trying to challenge your or anything Paulie, you do what you do & you do it well. I was just trying to answer Shaikoski's question. You are right about how large a piece & how important grain orientation is in project like that.
-
I don't see any reason that you couldn't do it like an angled neck through with a shim from the 16th fret (± depending on the desired angle/scale) calculate the appropriate neck drop, & plane it to spec w/ a #6, #7, or #8 plane.
-
When do we get to see an explorer?!

-
I've played a few one piece guitars from by a few different builders (well not really one piece, they all had some wood removed & glued in to put in a truss rod, & most of them had fretboards that even if they were from the same piece were sliced off then glued back on, & often have fretboard shims). I find it to be diminishing returns compared to neck through or even long tenon set necks.
-
Cut it into 2' sections, slap a piece of glass on top, & sell 'em as coffee tables!
-
 1
1
-
-
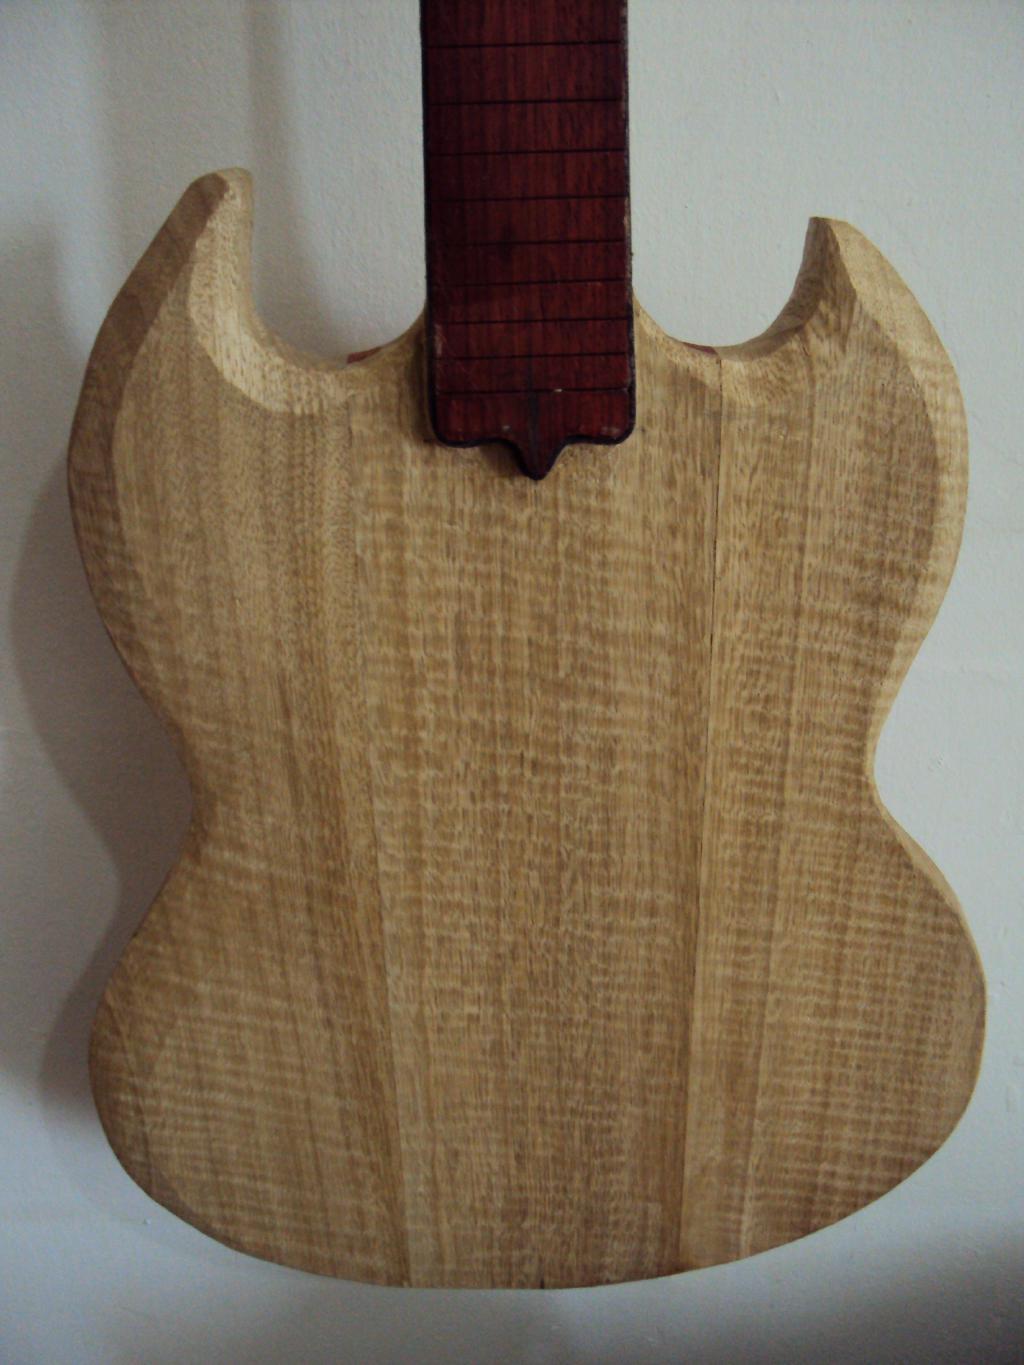
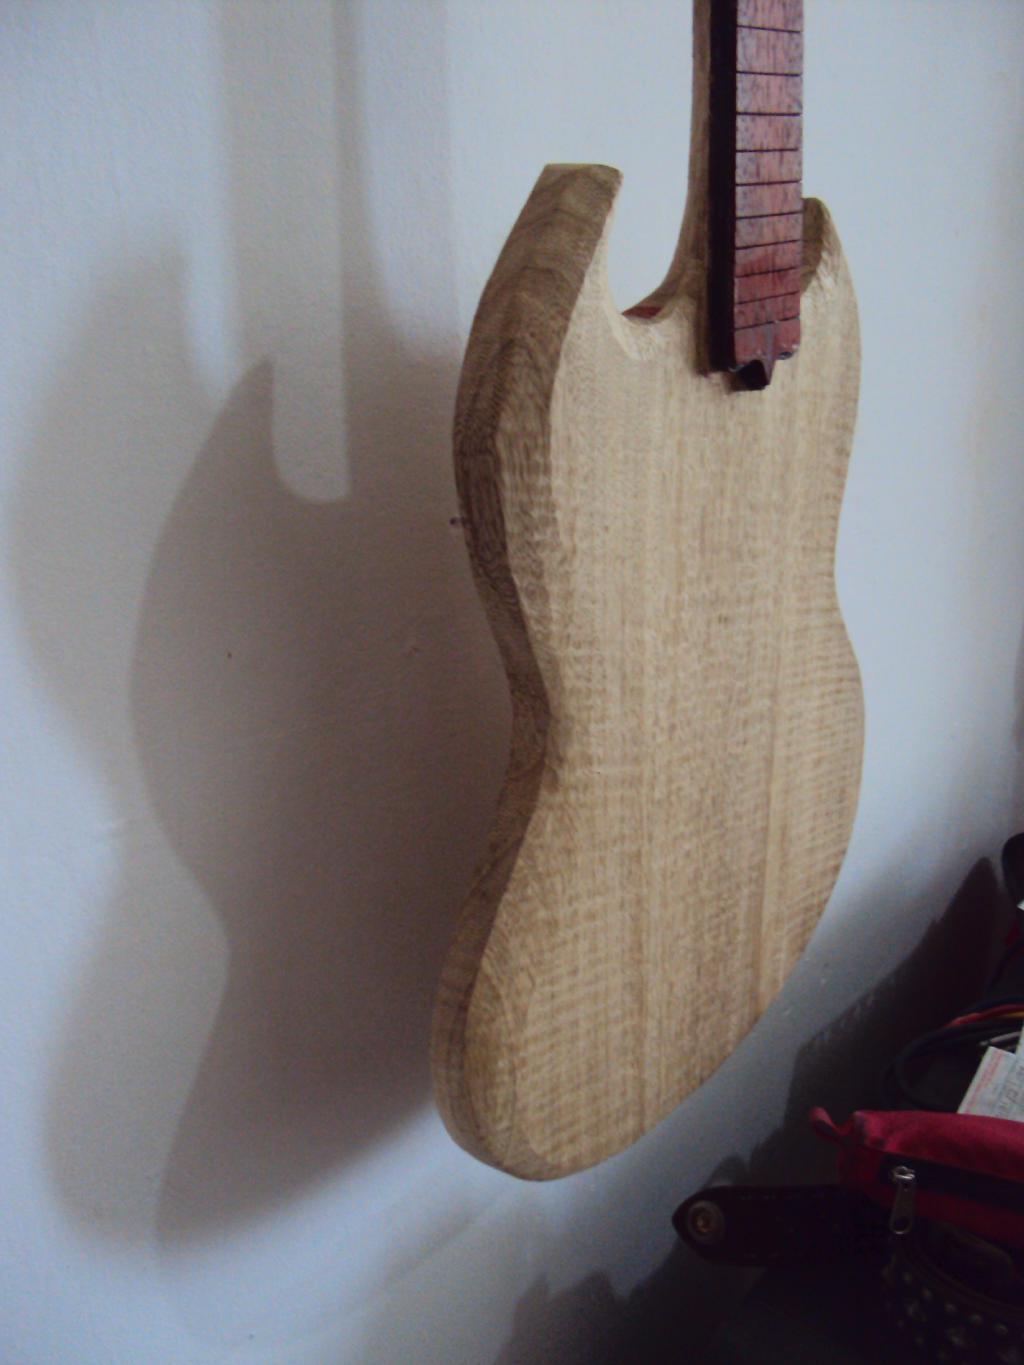
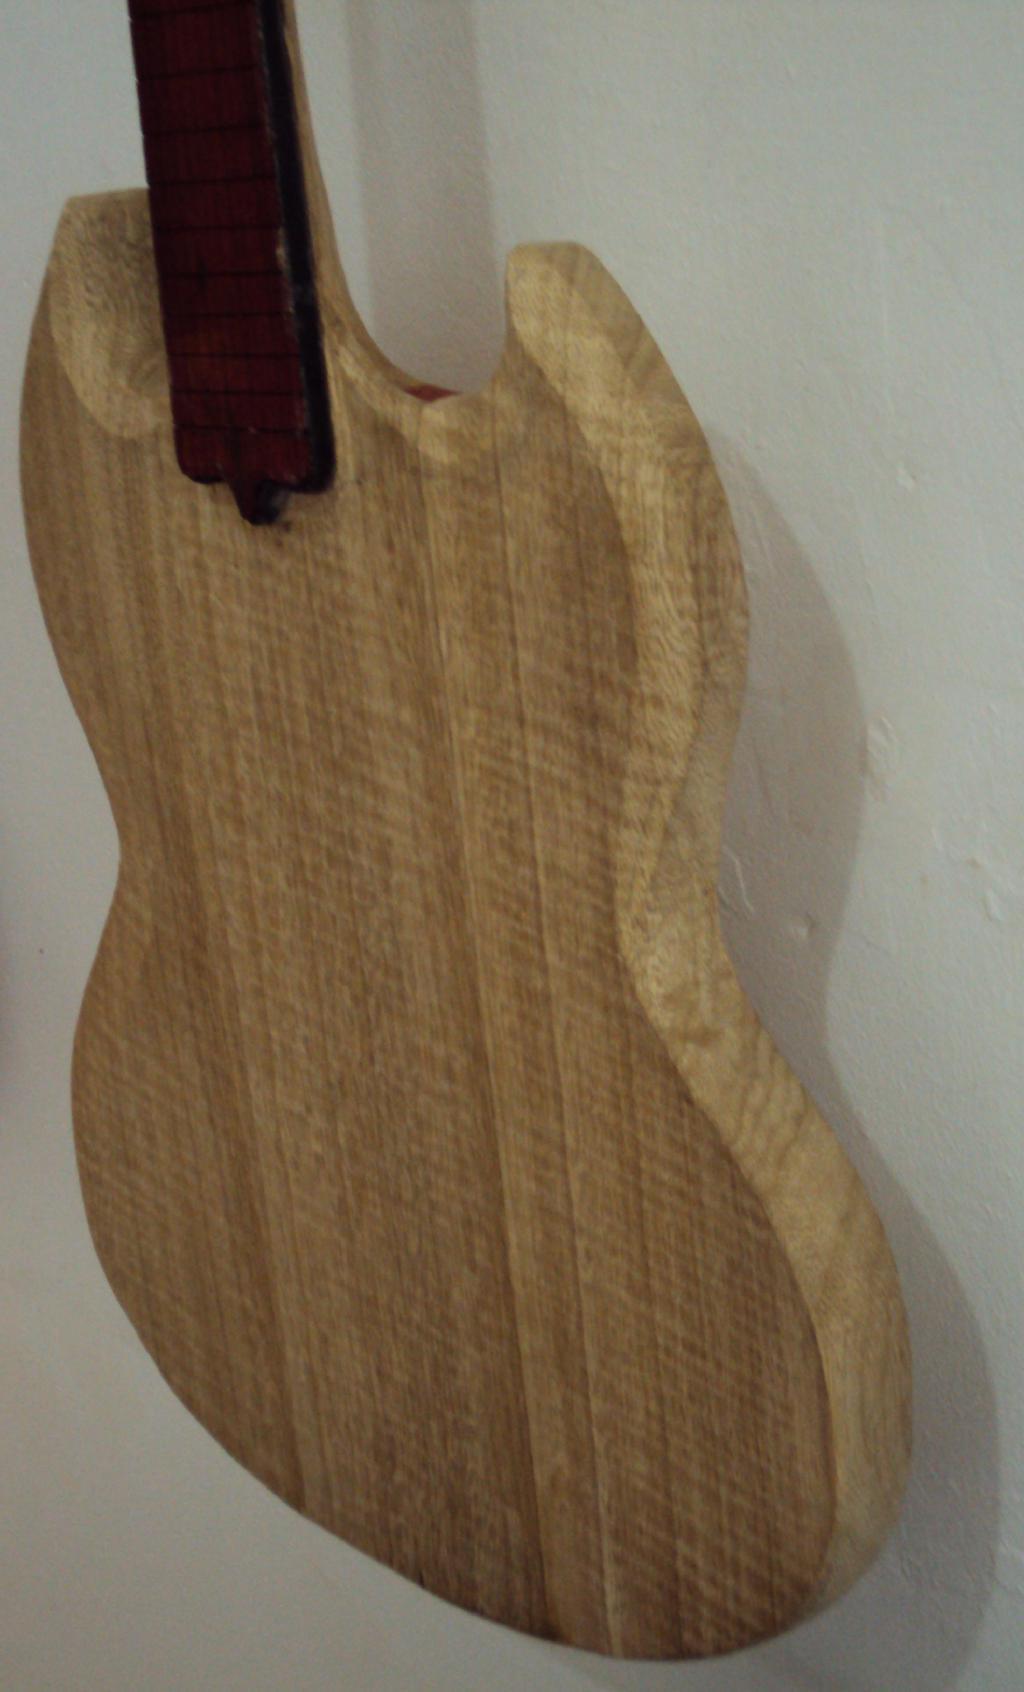
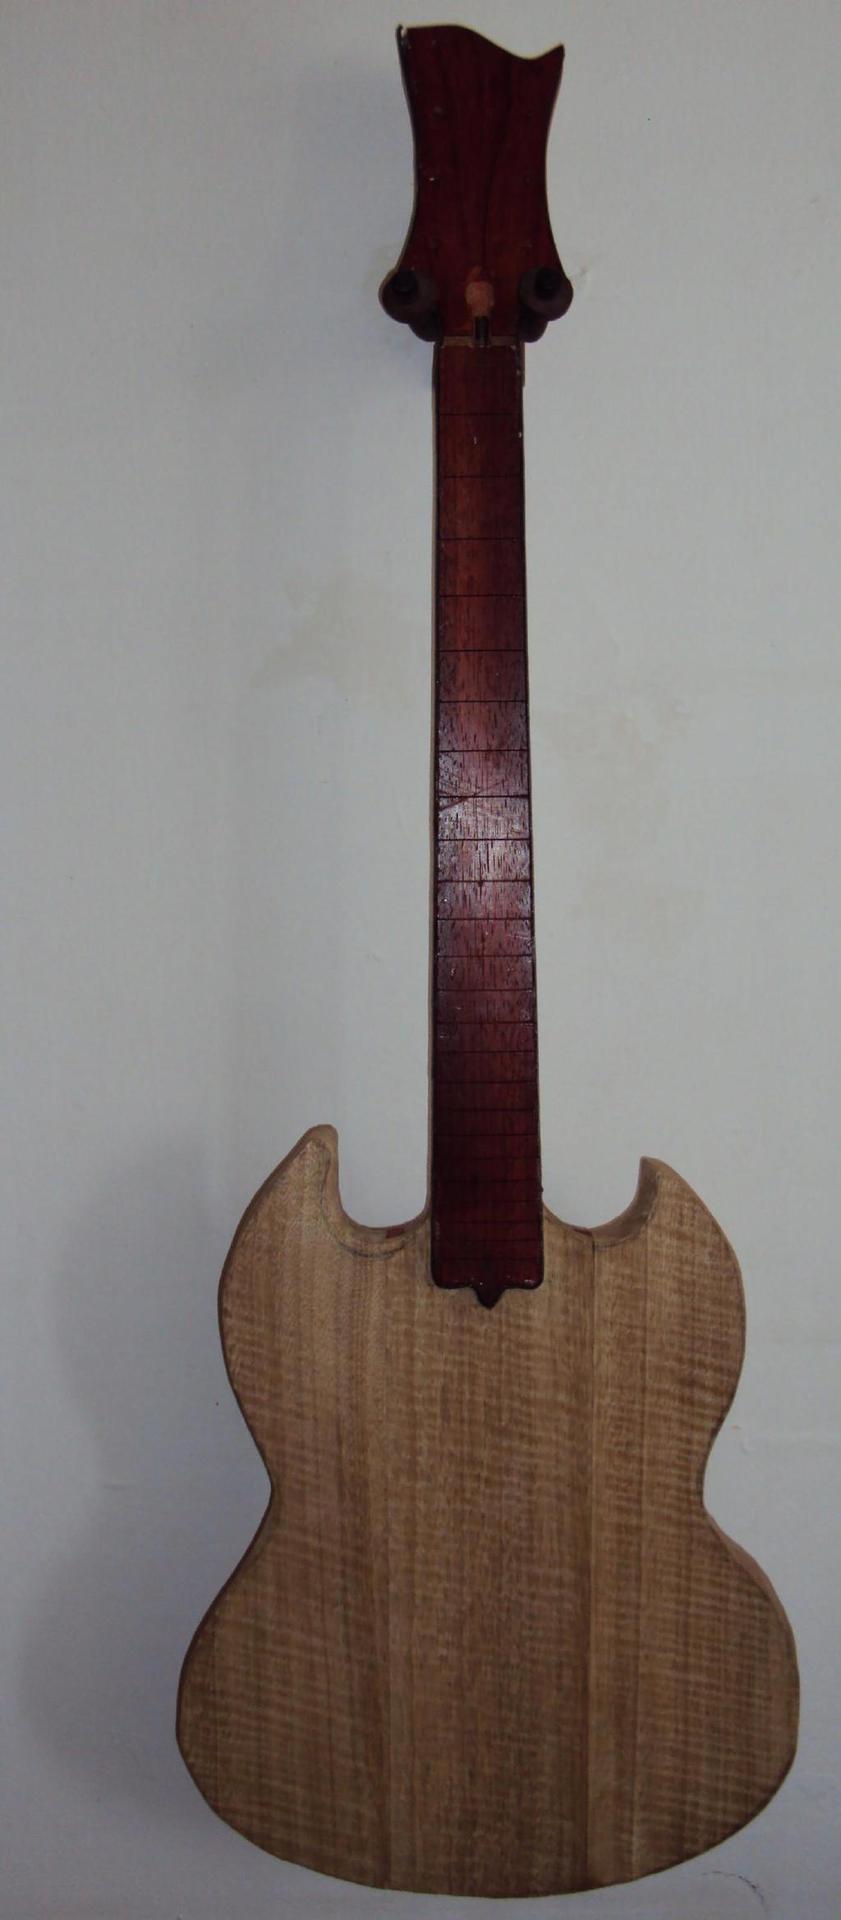
Some more carving done, the cutaways still need to go in a bit, more so on the treble side. I did the front based on a '63, the back is just whatever feels comfortable.
-
1
-
-
Just to throw out an idea:
What about epoxy? I bet if you inlay=>radius=>epoxy=>slot=>glue (I know gluing after radius is a pain) you could get nice looking & more durable than paint finish. I guess you could do it in the normal order & use those helpful teflon strips assuming whatever epoxy you're using doesn't stick to them (but I bet it'd be a lot more cleanup).
-
That's a lot of work with very few tools. Anyone that cuts a body out with a coping saw has got my respect. Your colors are very nicely balanced and look good together.
This is a nice start--do carry on.
SR
Thanx, every cut on this was done w/a coping saw except for the headstock scarf which was leveled w/a rip saw, & the slice for the top which was cut from both sides w/ a table saw, then leveled w/ my No 6. I really want to upgrade to one of these (god knows I use it enough), but $. Maybe after I get those palm gouges you recommended, & a ryoba.
That looks nice. I lke the fretboard end.
Thanx, it's not hard to do, just a little extra work w/ binding & cleaning up the shim. If you are going to do it & bind it, you should save the offcut to use as a caul for the binding.
Good to see you making a build thread here mate.
This is very reminiscent of my very first guitars, following the old Mexican Method and using stuff all tools and zero templates!
To anyone not familiar with the Mexican Method. Dont bother researching it, the jyst of it is a large block of wood and a carving knife and start carving till a guitar pops out! The old mexicans are some of the best luthiers in the world!
Cant wait to see the finished product.
Sounds about right. The Mexican Method is also sometimes called the Paracho Method (which makes sense since it's the guitar capital of Mexico), Thanx.
-
I've been working on this for a while. It looks really messy at this point, hopefully it'll look better as I get everything dialed in.
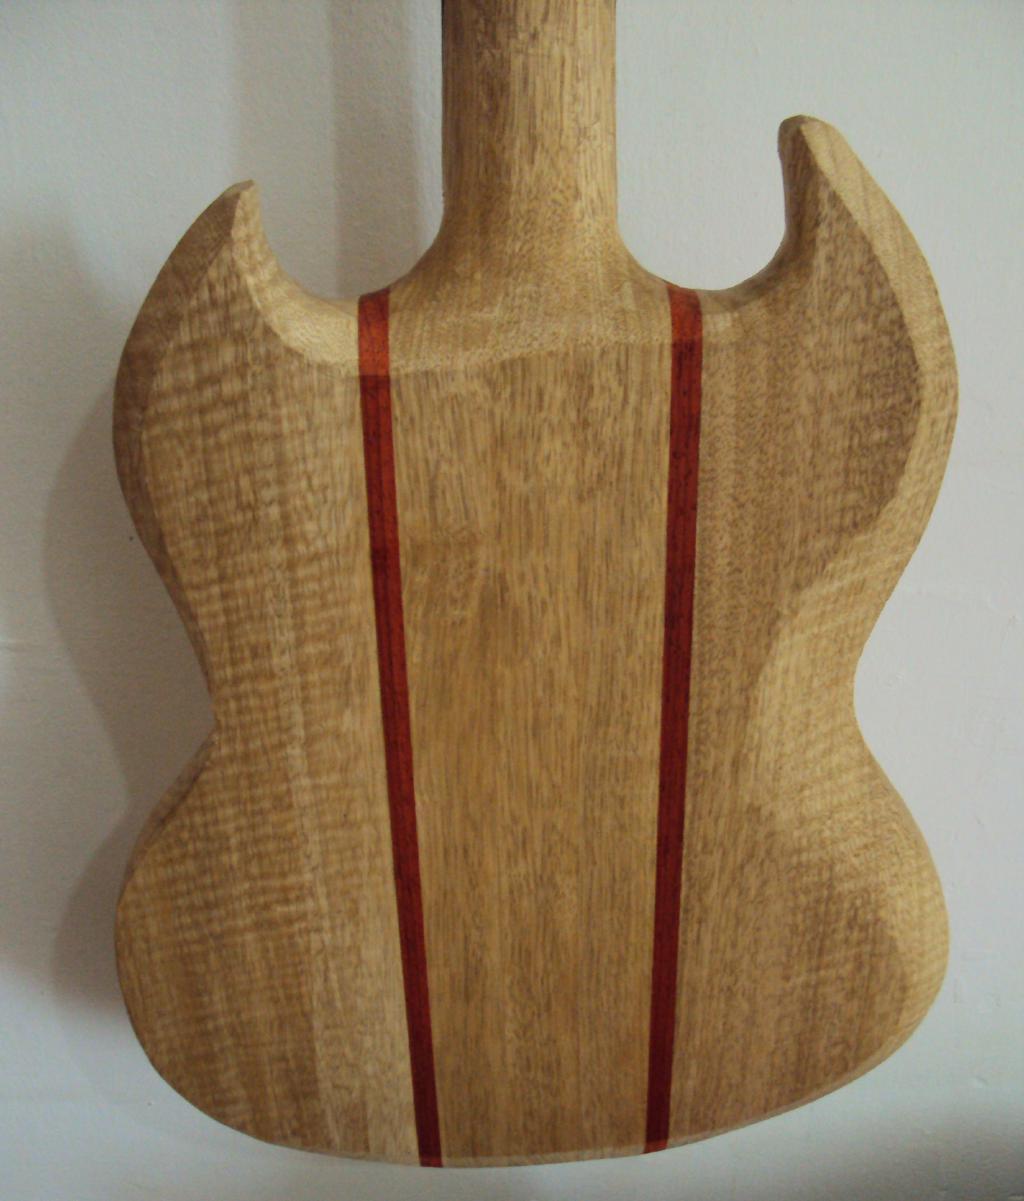
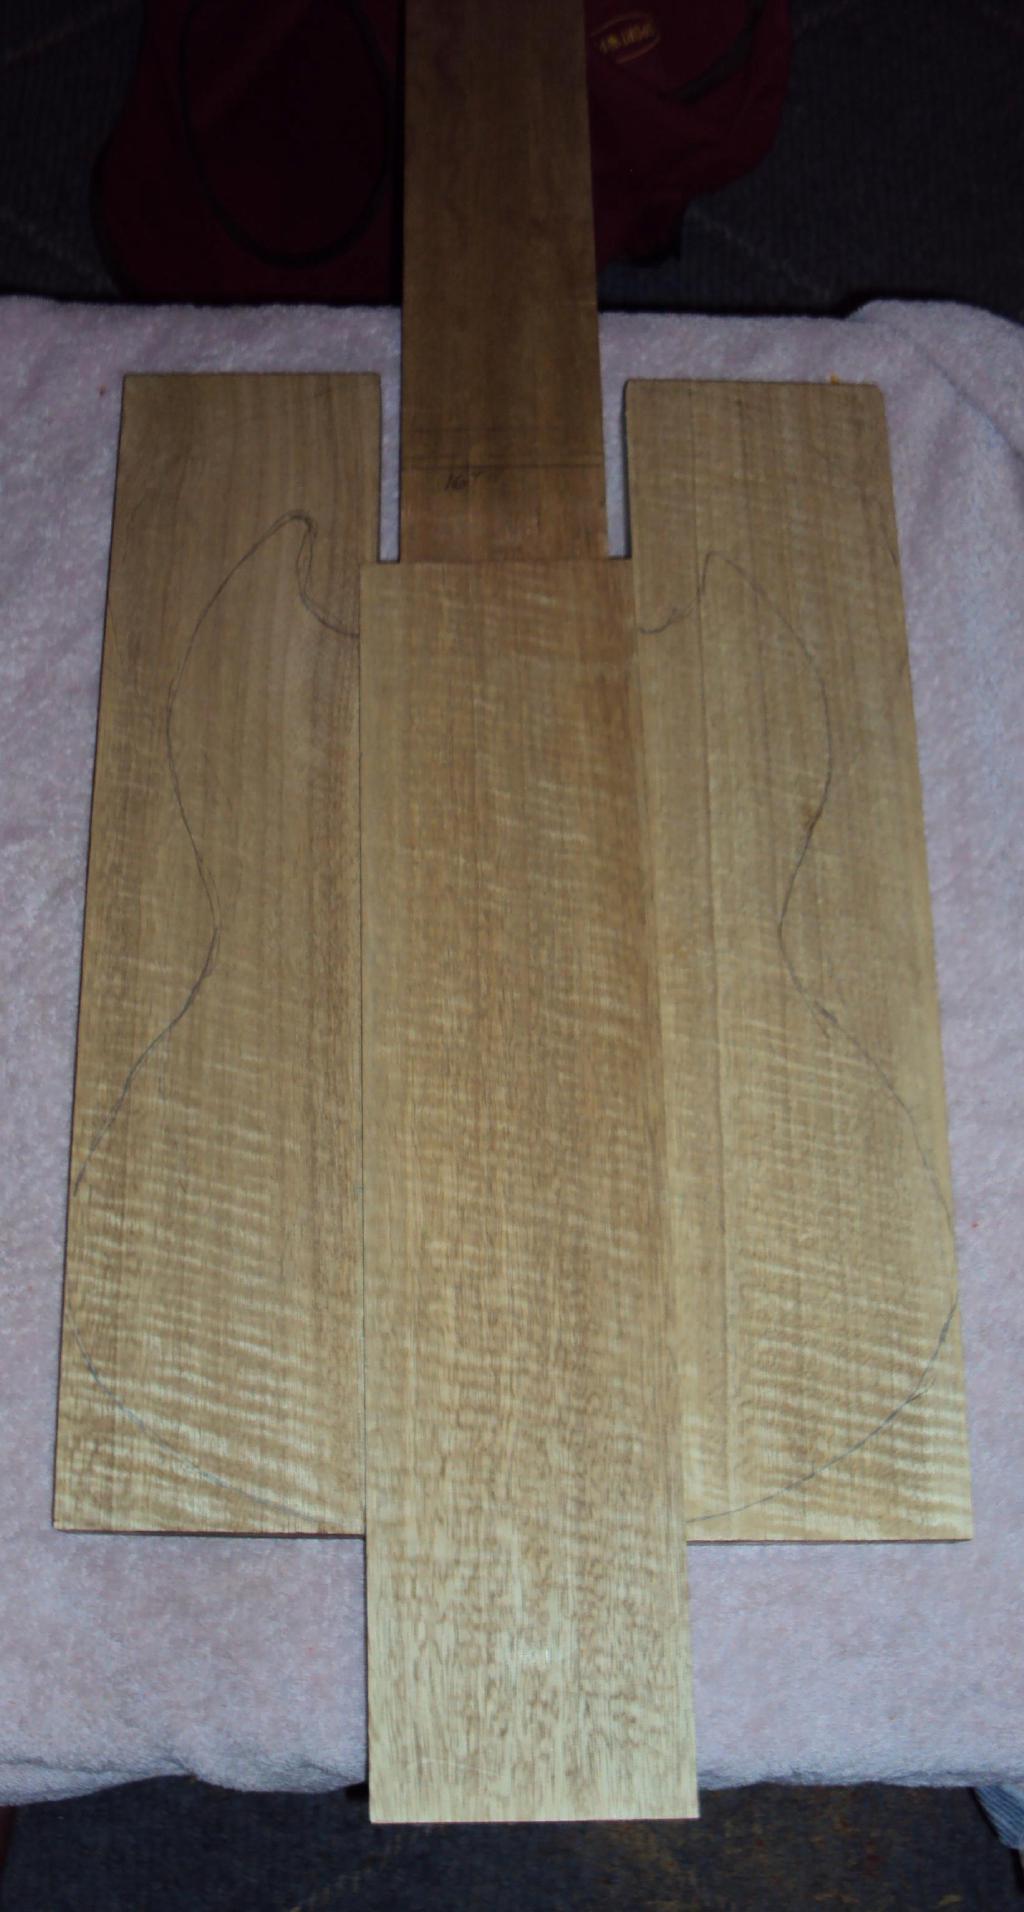
So I have these 2 really pretty pieces of limba that aren't wide enough to make a body (I guess I could make a 3 piece body if I had 3) so I decided that it would be a good excuse to do a scrap build with some other limba & paduak offcuts (the only thing that wasn't a scrap is the fretboard).
I don't think I realized when I started this how much a pain a project w/ this many laminations (& all the grain direction changes at every joint) is when your main tools are a No 6 jointer, a No 151 spokeshave, miniplanes, & scalpels.
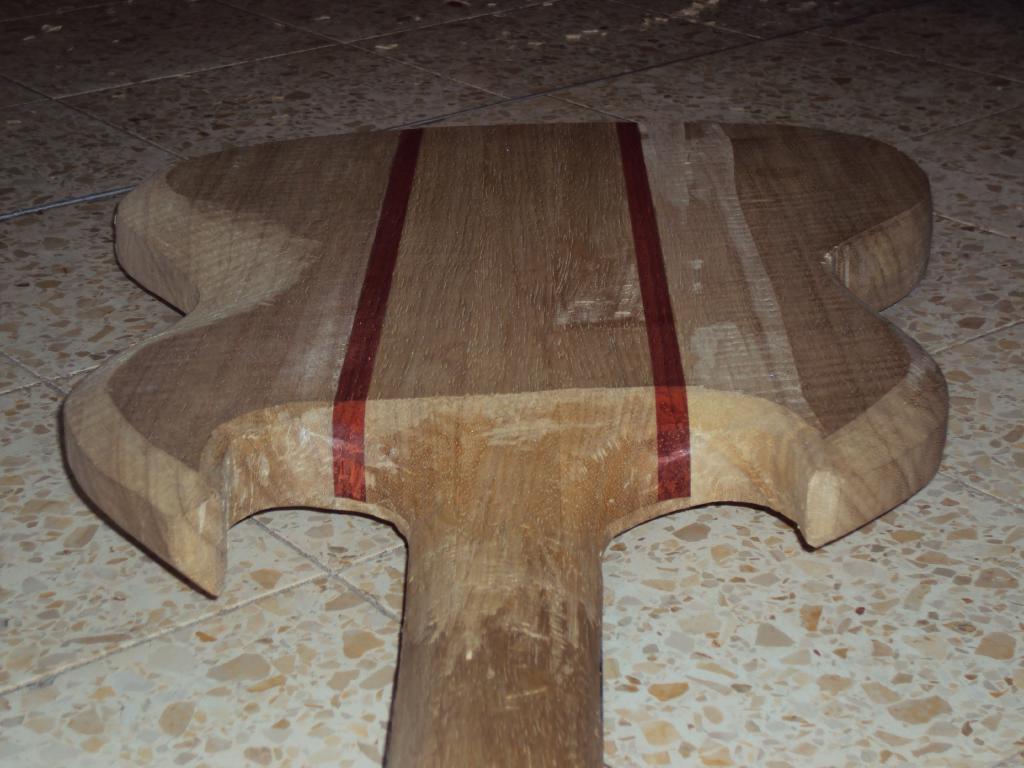
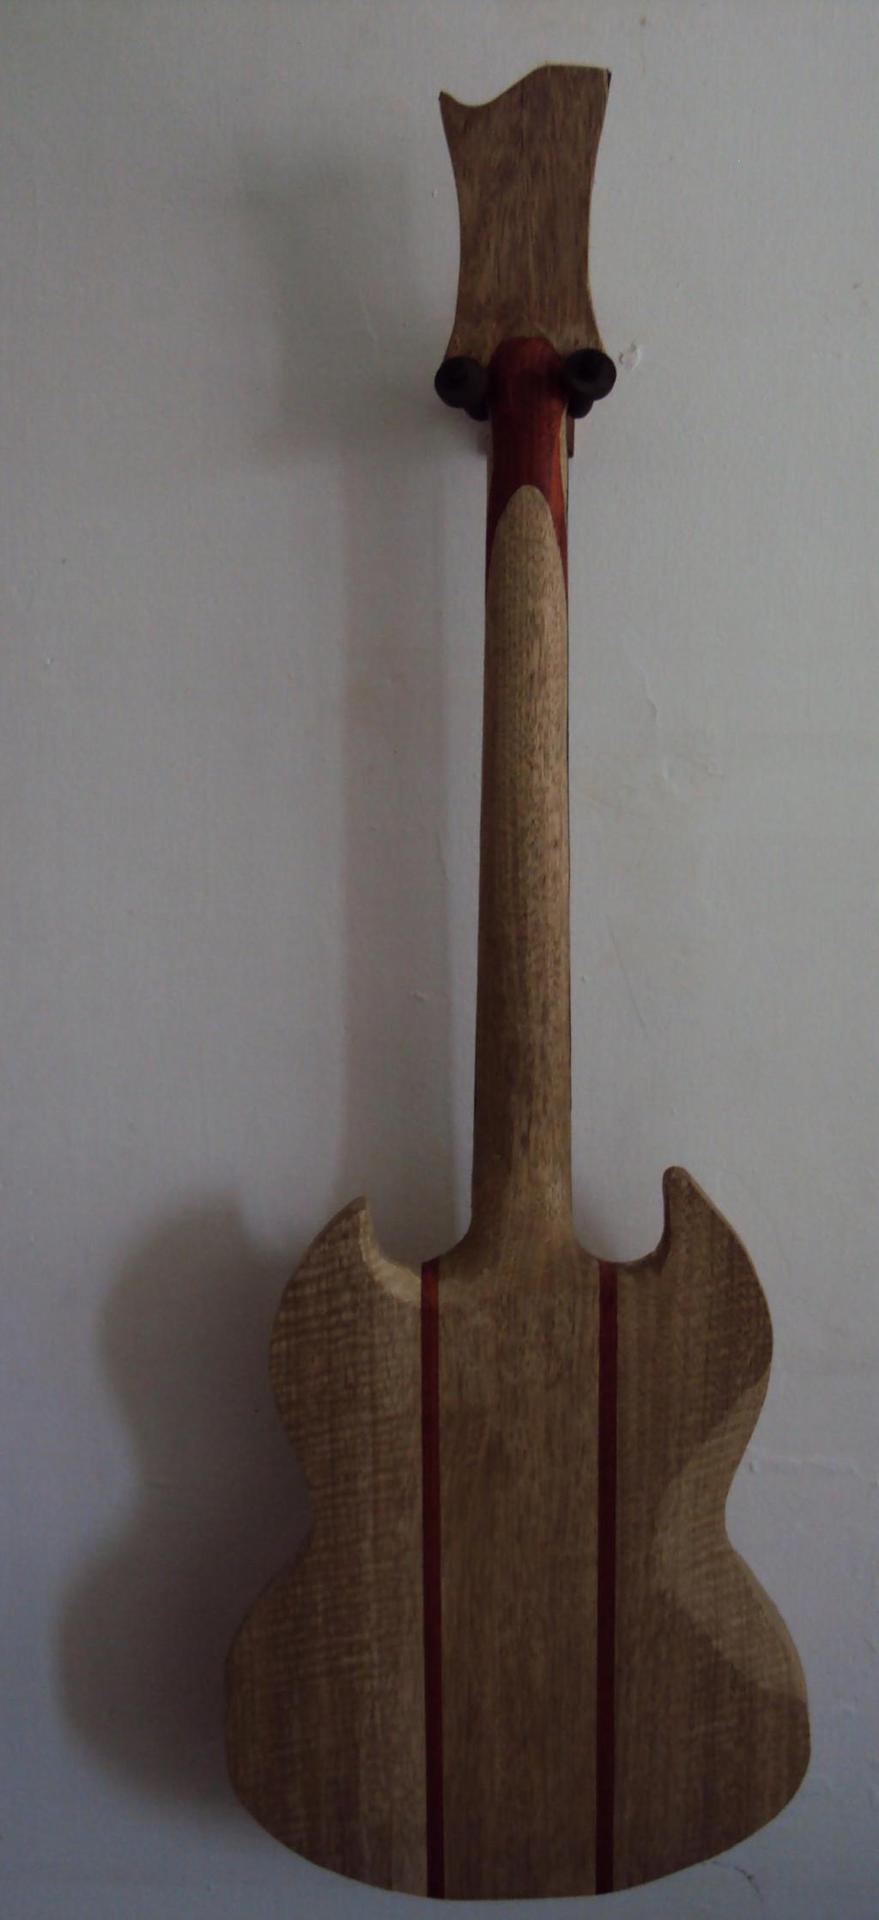
3 pieces of limba already glued up, gluing on 3/8" paduak "stringers," to build up the width

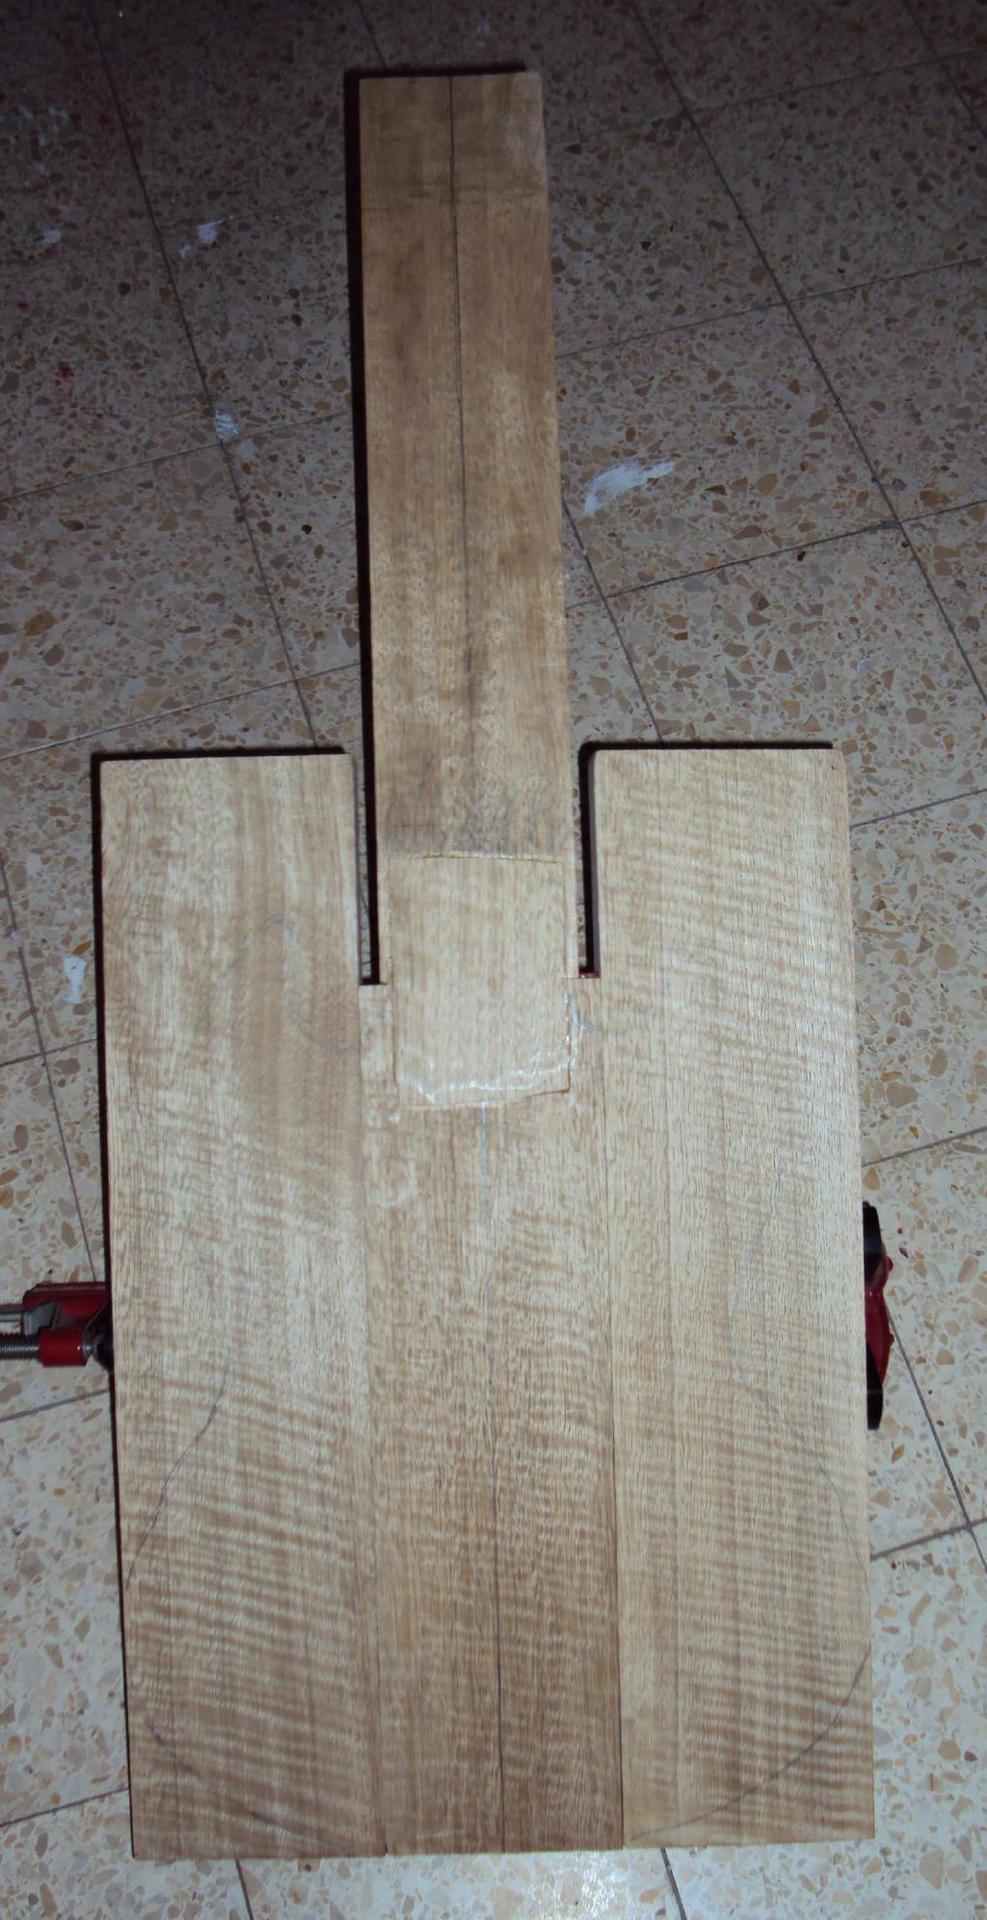
glued together
from the side, neck profile cut out & angled back

3/8" routed out for the top

mock up w/ the top on (the top is a 3/8" slice off one of the wings). I don't know I'm not really in love w/ the 3 piece top, maybe I shouldn't have capped the neck (in fact I wouldn't have if it hadn't been such an unusually wide neck because of the not-really-wide-enough wings)
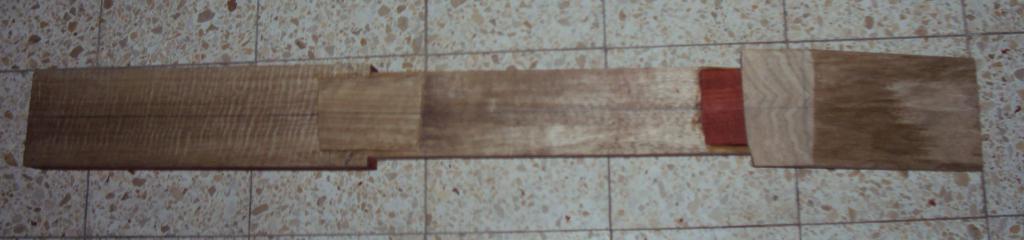
Mock up w/ the angled shim, & headstock joint angle roughed in
headstock glued together from 2 flatsawn scraps & paduak accent/reinforcement glued on

oversized headstock blank messily glued in place
mock up w/ the headstock cleaned up, headstock veneer slip matched & rough cut
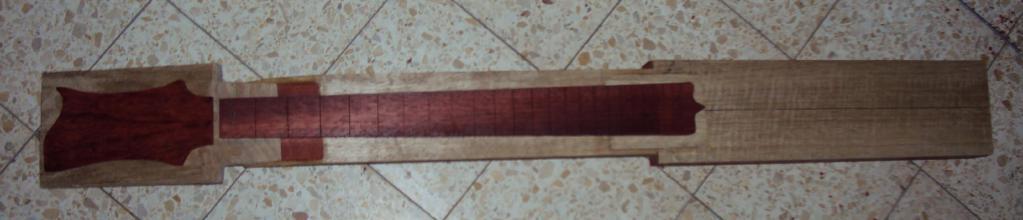
from the side

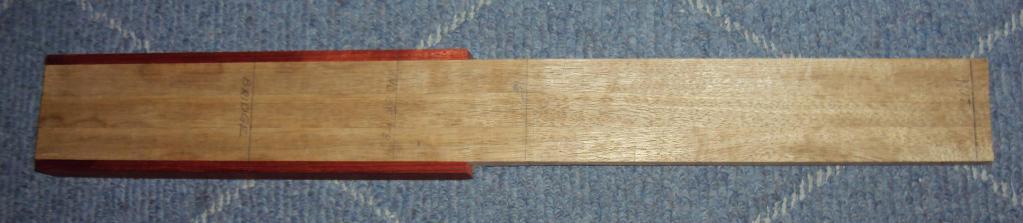
Truss rod slot routed (WD double extending), gluing on the fretboard, one side of clamps on, one to go
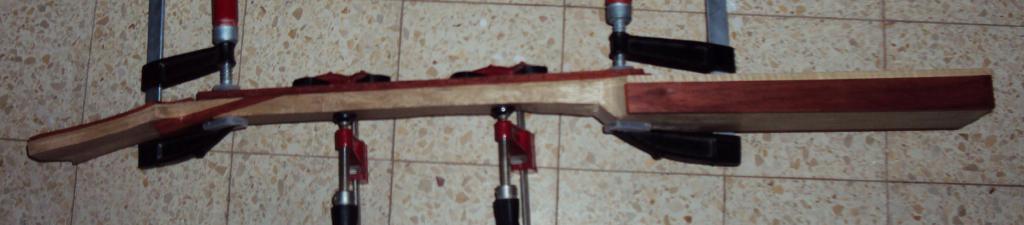
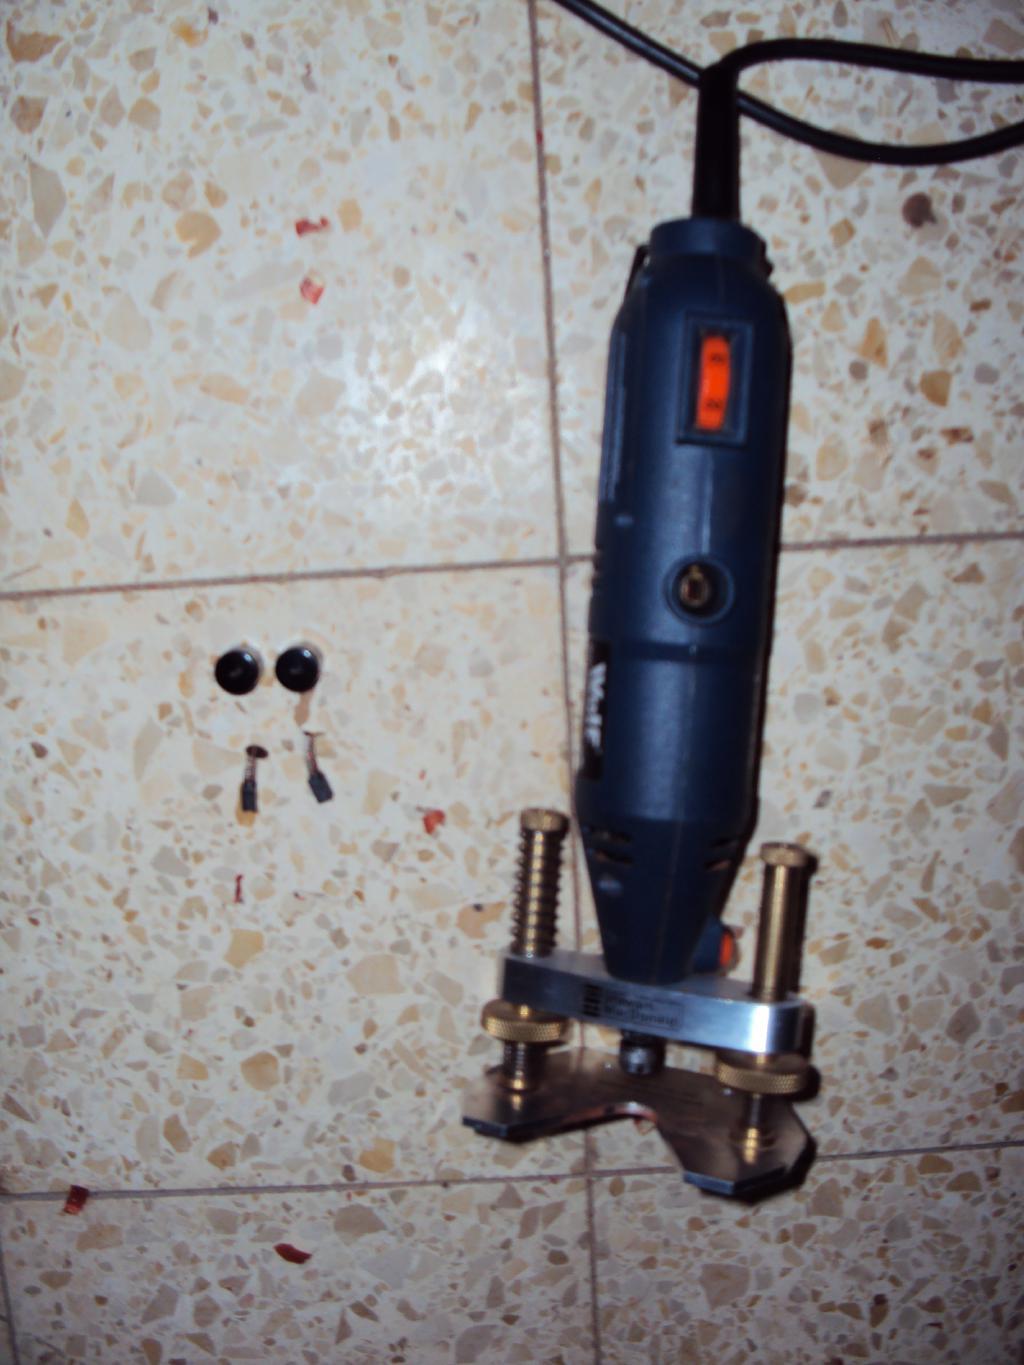
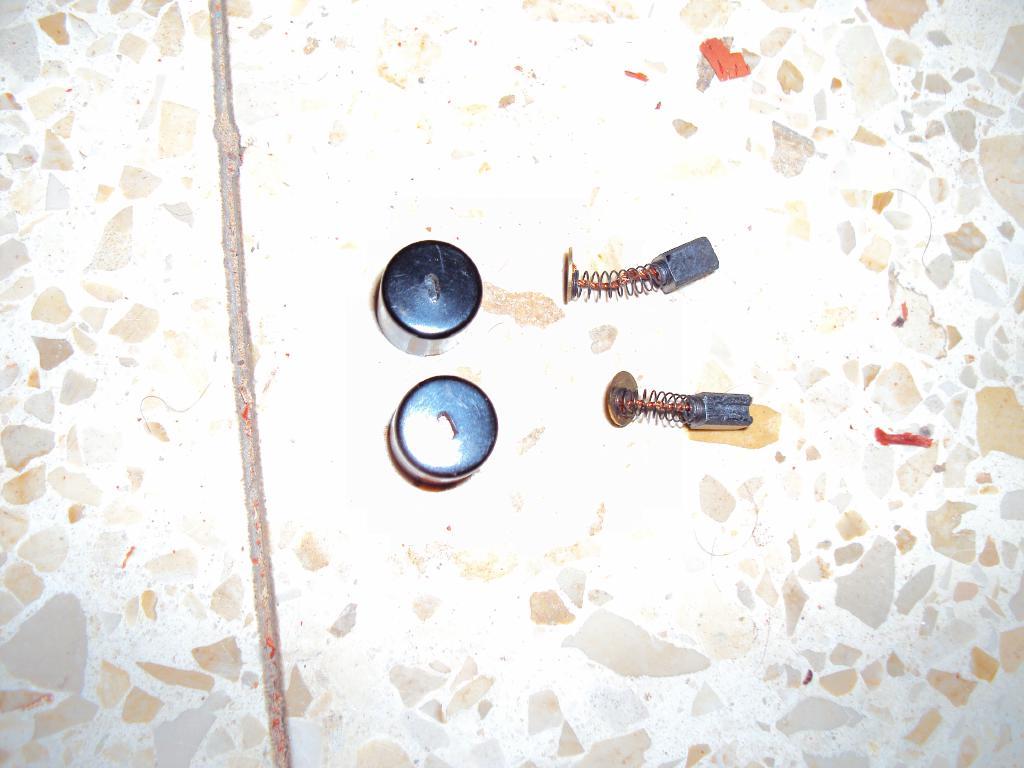
I had some trouble routing the binding channel on the headstock, I think the brushes are fried on my cheapo 220v router, anyone have any experience w/ these? I have no idea where to get a set of knockoff dremel brushes (also one of the caps that holds them in place is cracked).
closeup
neck rough cut out
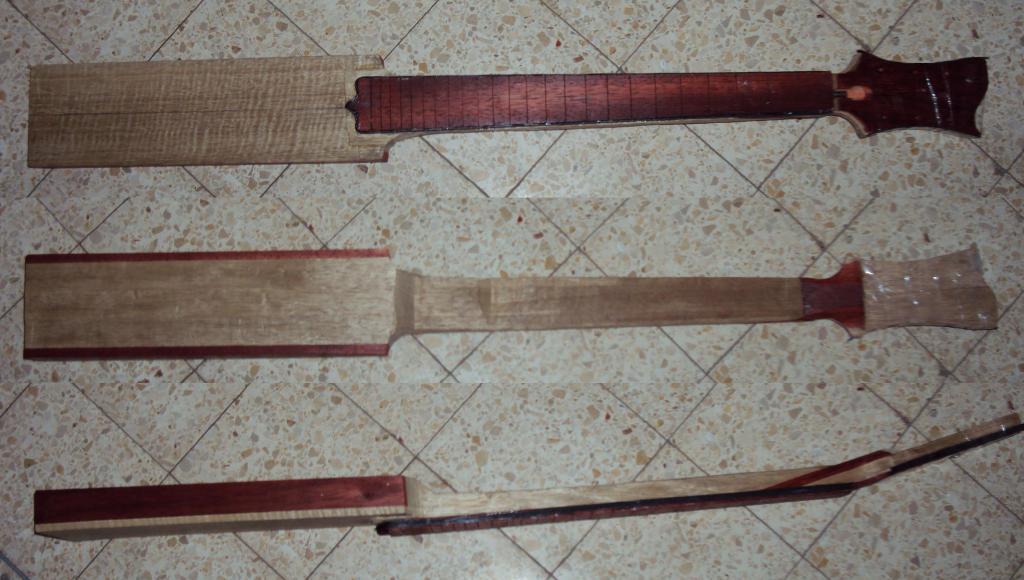
fast forward a bit, sides & neck jointed, glued together, shape coping sawed (sawn?) out, outline mostly dialed in (other than the cutaways), neck rounded but not really carved yet, started carving the heel in, back cut roughed
-
Haven't tried that stuff, for CA I always use Zap-A-Gap, mainly because years ago in high school physics we did a lab to find out what was the strongest superglue & out of the 20 or so we tested, Zap-A-Gap won.
-
That bevel bit makes a huge difference.
-
Sorry, I've already sent it. I have no desire to berate or call you out, personally. I'm sorry if that came across as my intent.
-
Anyway, I don't want to detract from ScottR's amazing work, by turning this into a thread about anything else.
Wes, I'll PM you, but I would like to say, that if you're selling snake oil, you're either a horrible person profiteering off other people's suffering, or you've been duped by one.
-
Jenny McCarthy's smart?

-
I would go w/ bell shaped knobs that match the pickup rings, but that's just me.
-
I don't disagree with you guys that it was purely a short term financial decision, but they did admit guilt:
The settlement says a Gibson employee learned during a 2008 trip to Madagascar — the source of some of the ebony wood that was seized — that it was illegal to import unfinished wood and sent a report about it to his superiors, including company President David Berryman. -
It figures, all the cheats on wall street & in the banks manage to make deals where they admit wrongdoing, but the rest of us never get that kind of sweetheart deal.
-
Glue contrasting veneer strips in, put it aside for a later fretless guitar (or shortscale bass) project, slot another board.
-
The new LPs are chambered to reduce weight. Same specs as the old ones (so I'd start w/ a 3/4" maple cap), but I think you're going to want to slim your mahogany dimensions down from 8/4 to 1.75" (standard LP if I'm not mistaken) or thinner, unless you're going to chamber the hell out of it, & then you might as well make an archtop.
You have a lot of leeway with how you chamber it, depending on the balance, weight, & sound you're looking for.
-
I wasn't trying to be snyde or anything, I haven't used one (new or old), I just figured that if I had one, that's the type of job I'd want to use it for. It's shame that they (at least the new ones, possibly also the old ones), don't live up to their potential.
-
Good to know.
-
Q: Why aren't you just putting a flat board under the marlin & setting it to the height that you want?


Scrap Build Sg
in In Progress and Finished Work
Posted · Edited by YetzerHarah
Got the inlays in from Andy DePaule, I was a little worried that there wouldn't be enough contrast, but that's apparently not a problem. I guess it's time to radius the board so that I can inlay these, but they look pretty good just sitting on top:
I like them, but do you guys think the lotus flowers are too girly?