


Dirge for november
-
Posts
309 -
Joined
-
Last visited
Content Type
Profiles
News and Information
Tutorials
Product Reviews
Supplier Listings
Articles
Guitar Of The Month
Links and Resources
Forums
Gallery
Downloads
Posts posted by Dirge for november
-
-
Hmm thanks!! Never thought of that.. wonder why. I'll use that method!
-
Nice build! Just wondering, how do you rout straight cornered pockets? (as a router bit has a radius)
-
Thanks, exactly what I was afraid of
 . In that case I'll stick to the color and use a 'normal' method.
 -
Do you guys have any ideas on what finish was used on stoves and such like the one in my first post? I'm not sure I will go with the real deal eventually, but it might be a nice addition to the feel of the build.
-
I glued some pieces against the fretboard while it was dry clamped, so while glueing the fretboard would stay in position.
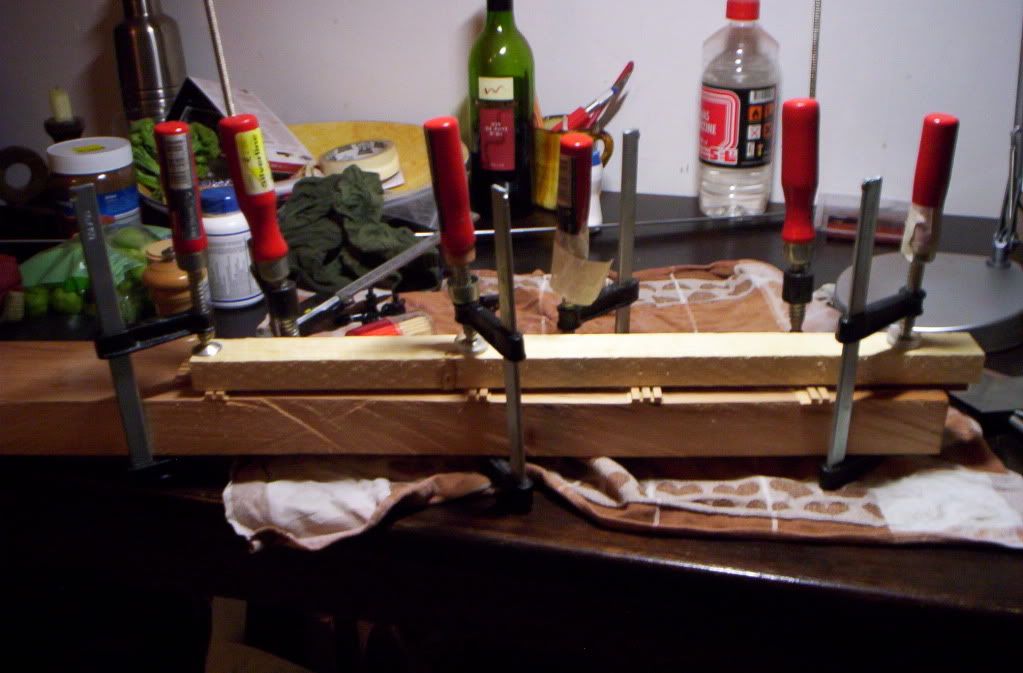
I unclamped this morning.. I took no pic though, because it would look exactly the same as the dry clamped version (first pic)
-
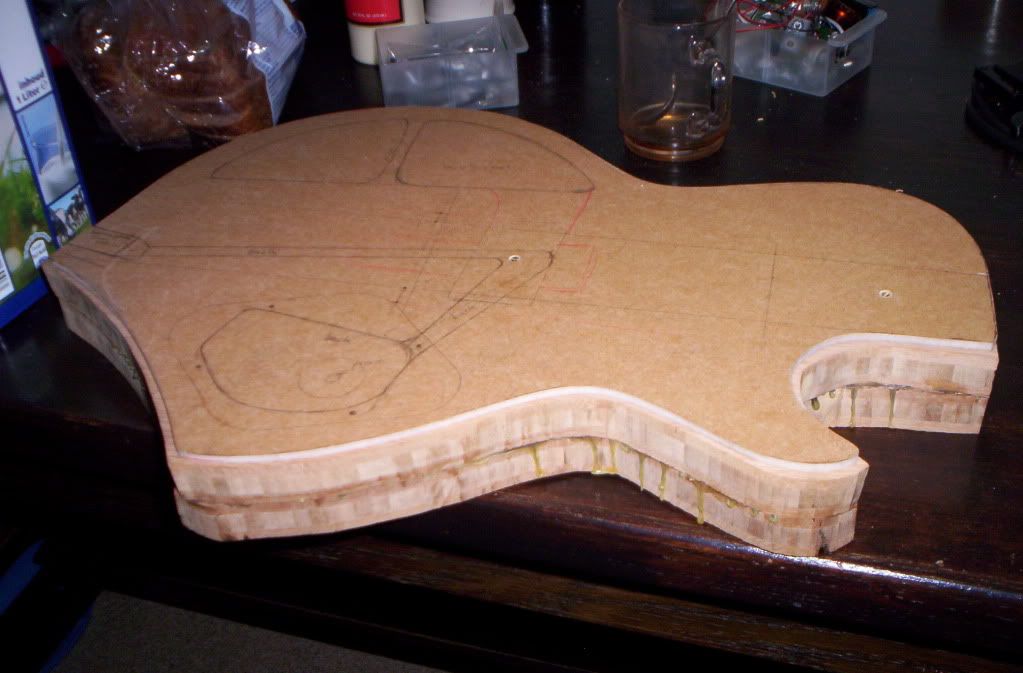
Routing the channels
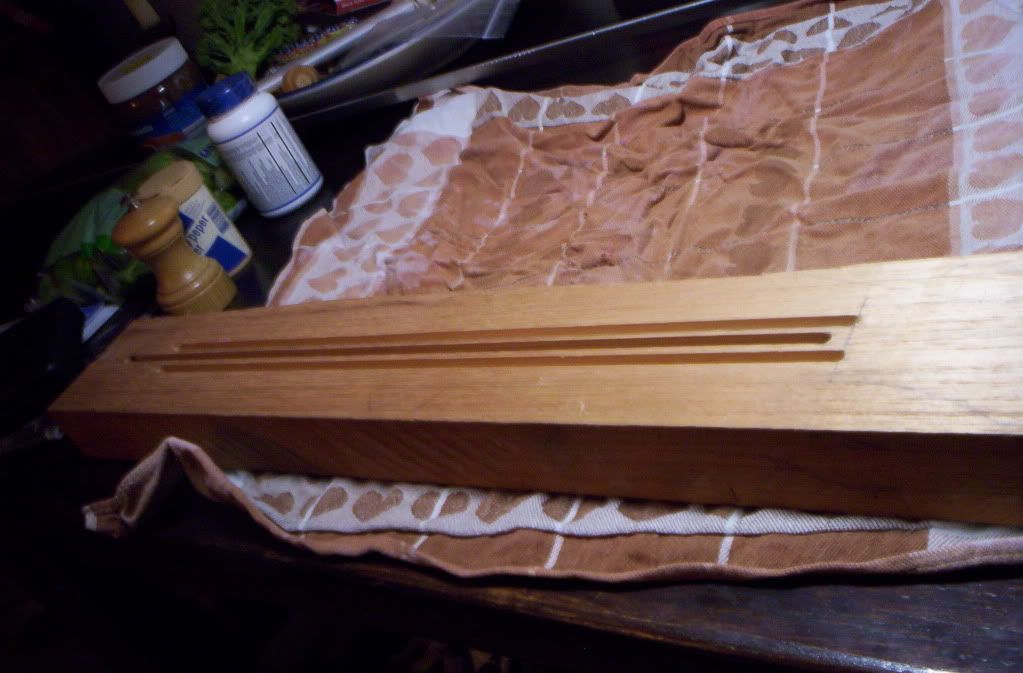
The channels
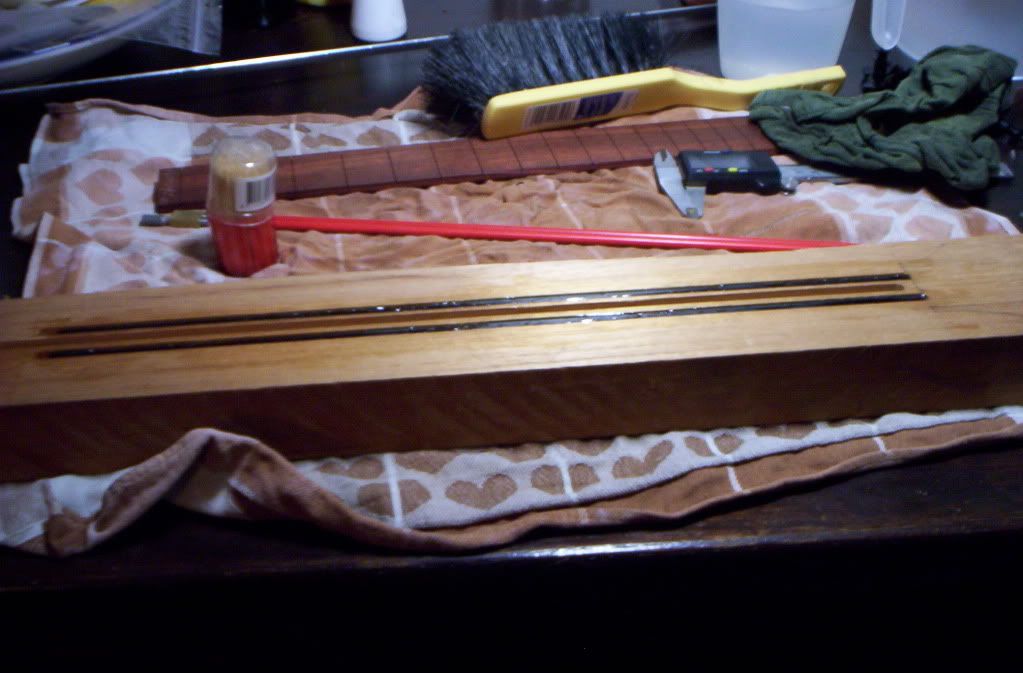
The rods glued in
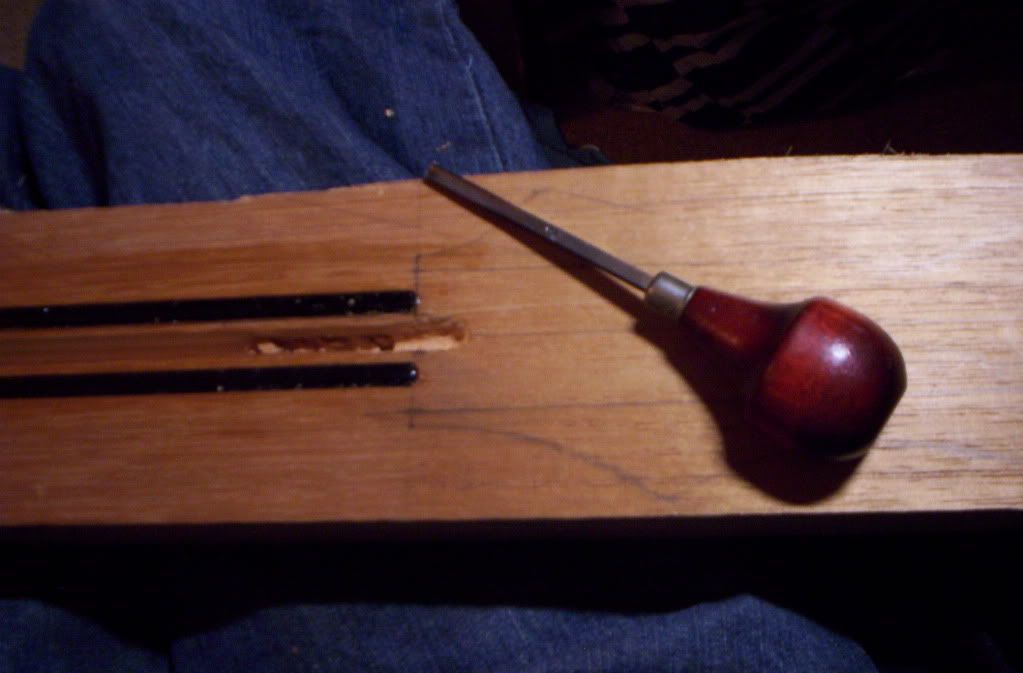
Hand carvin'
-
This topic keeps on disappearing to the second page, let's do something about that A.K.A.: Progress
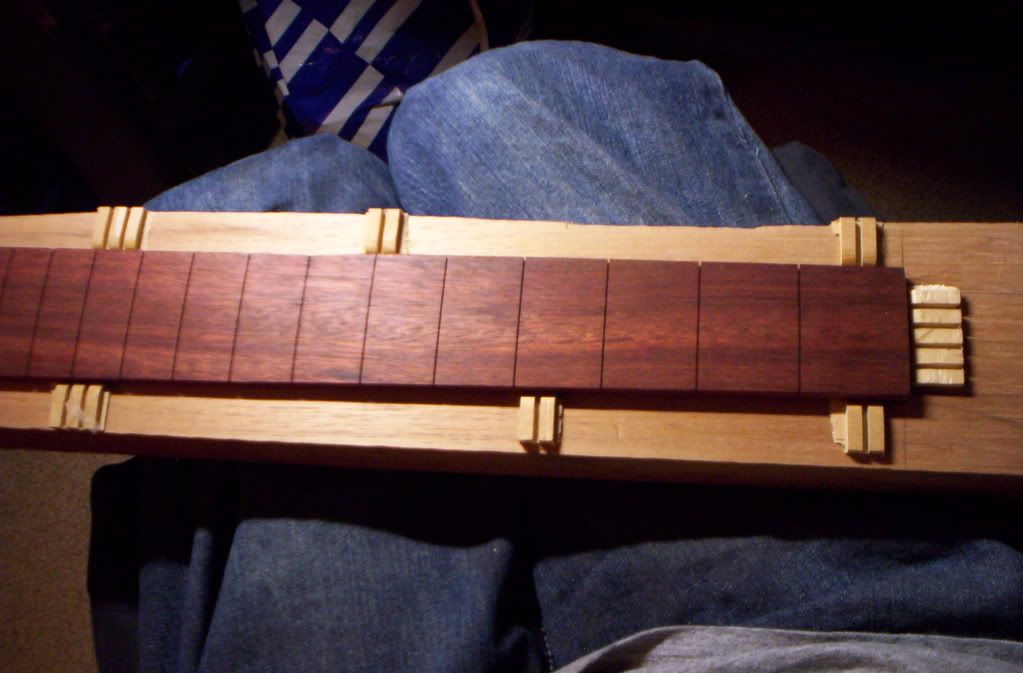
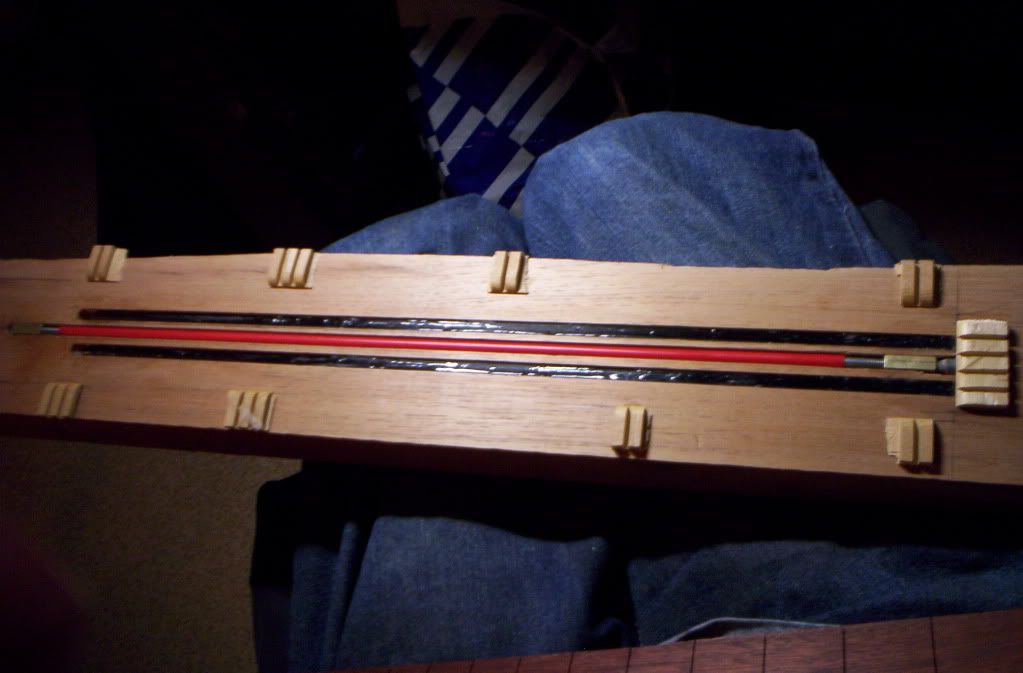
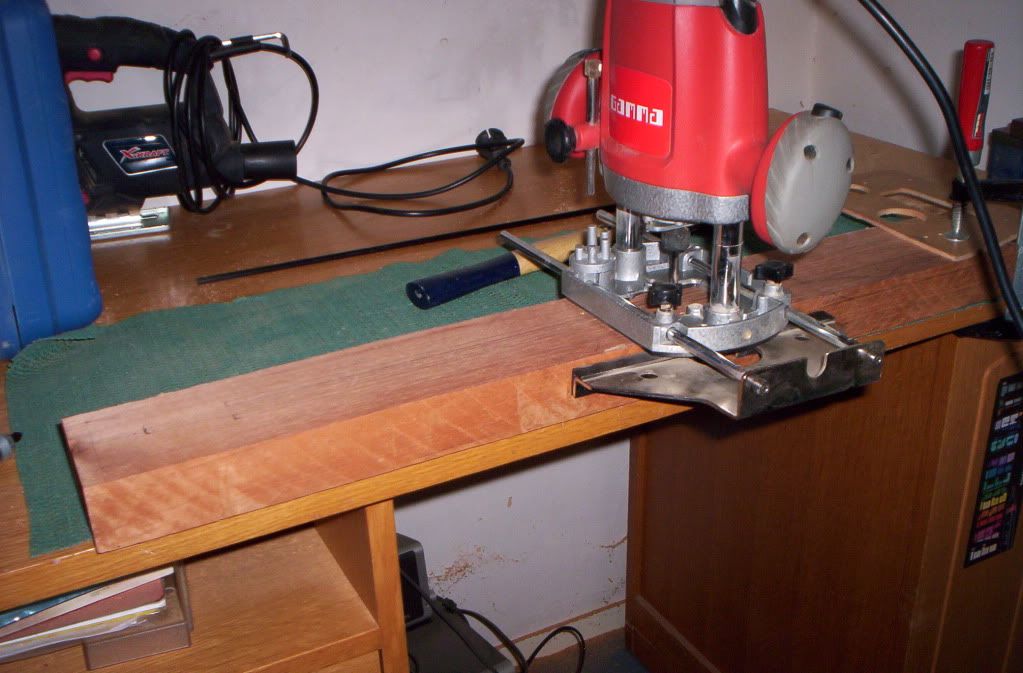
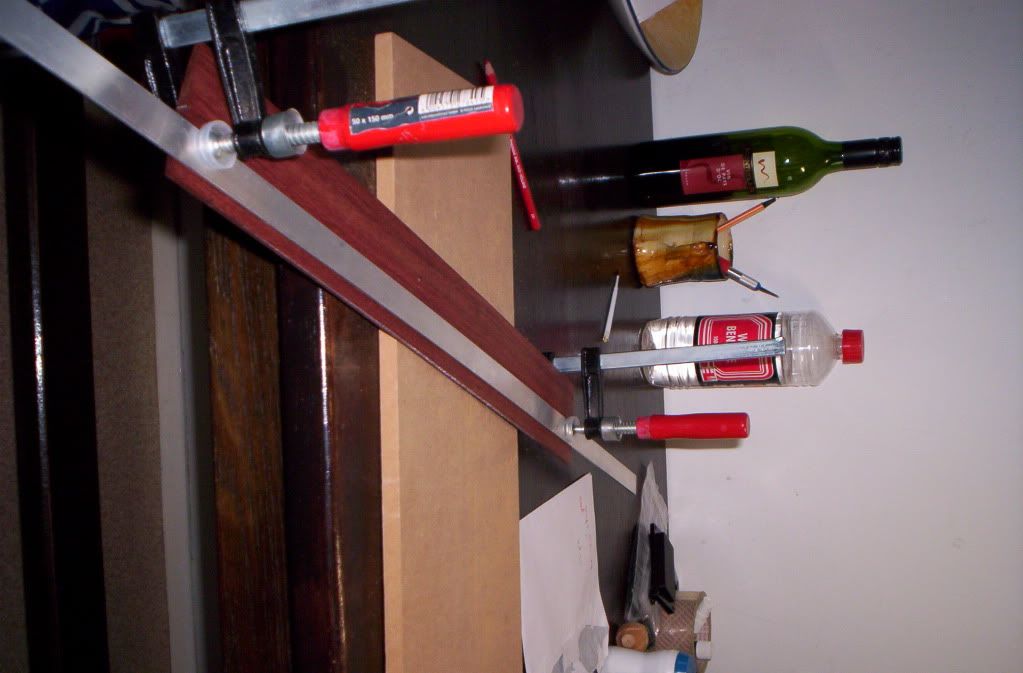
I did quite a lot by my standards yesterday. I sawed a neck blank from a to large body blank for a future project. I routed the slots for the carbon reinforcement rods and the trussrod. Then I glued in the carbon rods with epoxy, hand carved a recess for the allan head of the trussrod and glued on the fretboard! Not everything went without scratches. Step by step:
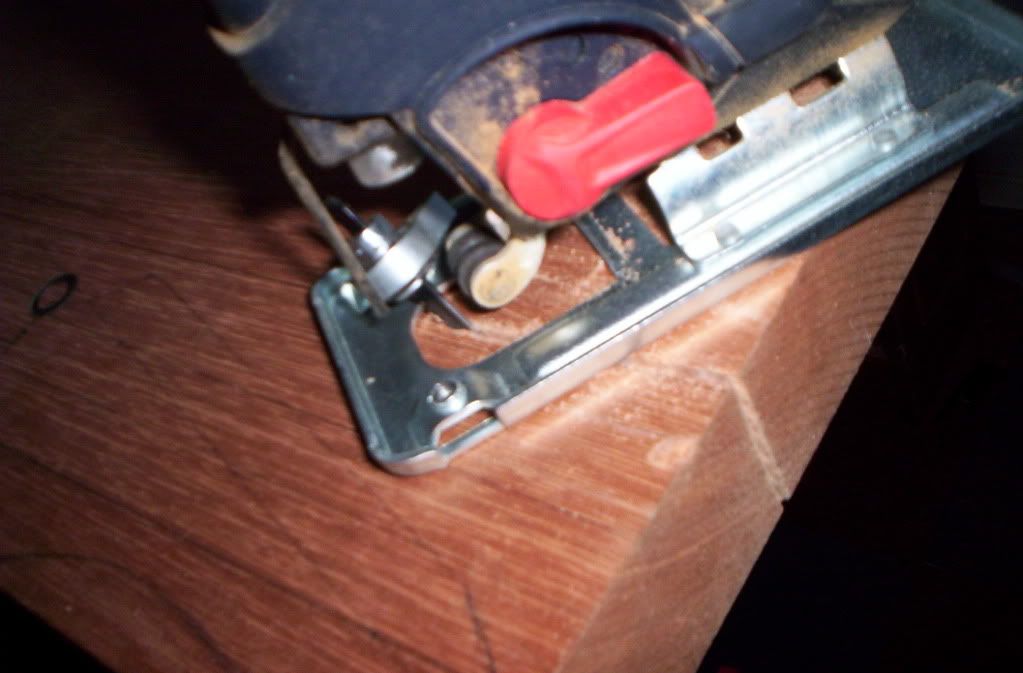
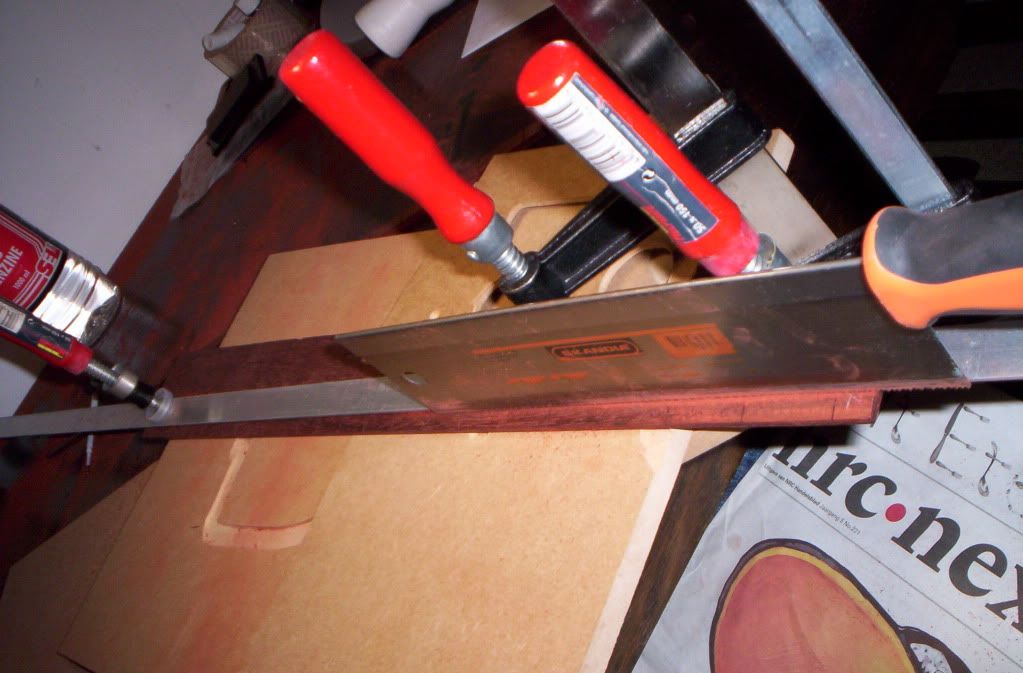
As you can see my (whatchamacallit) saw machine practically fell apart. There are some springs and rings lying a bit further out of the picture. I rushed to the store to get a handsaw:
This worked surprisingly well and fast, especially since I'm in a wheelchair and can't exactly lean over my work.
-
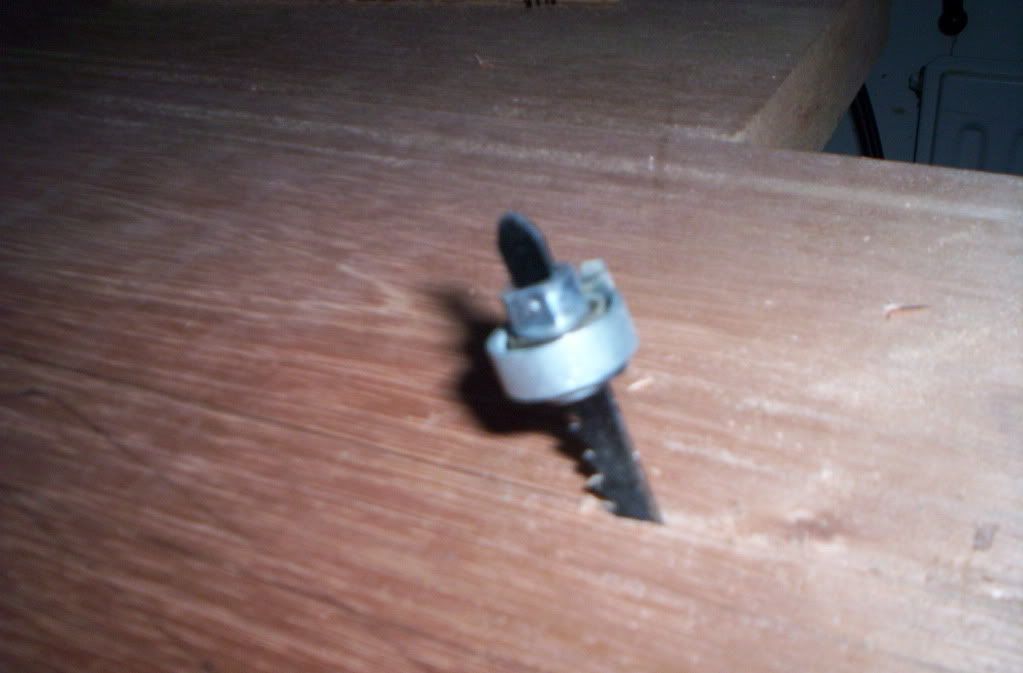
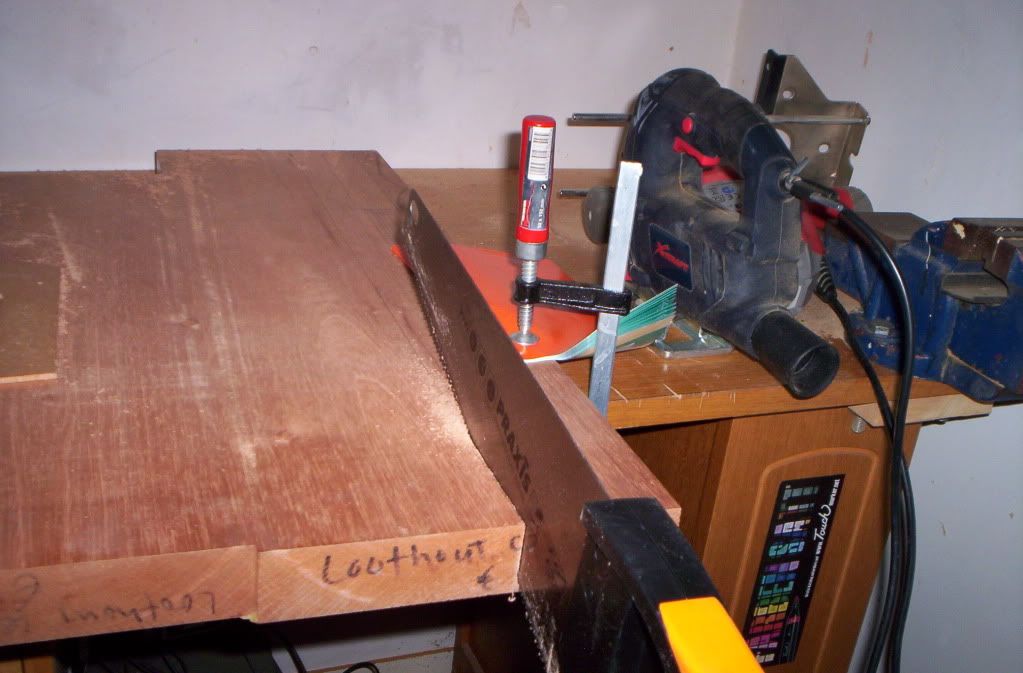
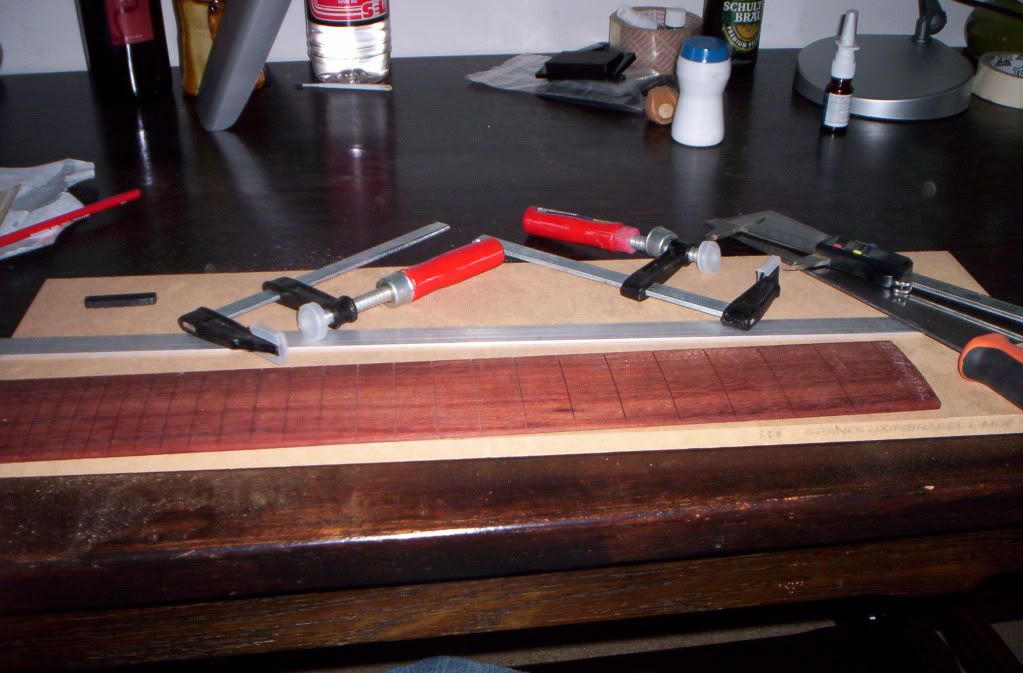
The next small step has been taken.. I sawed the bloodwood fretboard to a taper by hand. It took about 1,5 hour to complete one side, though the second side went a lot better. I'll now think twice before sawing the neck blank by hand...
I sawed the first side from the back.. Wrong way to go about it as I learned. There are one or two tiny spots where there's a chip missing where the fret slots are. Second side I sawed from the top, the result is beautiful, it couldn't be straighter!
Also I bought some carbon fiber reinforcement rods. I think I have all the gear except the finish.
-
Shait, the filler option aint working.. It crumbles when I sand it.. Could this be because the filler I use is to old? Any other ideas for solving this problem?
-
Some progress which had already been made, but of which I just took some pics:
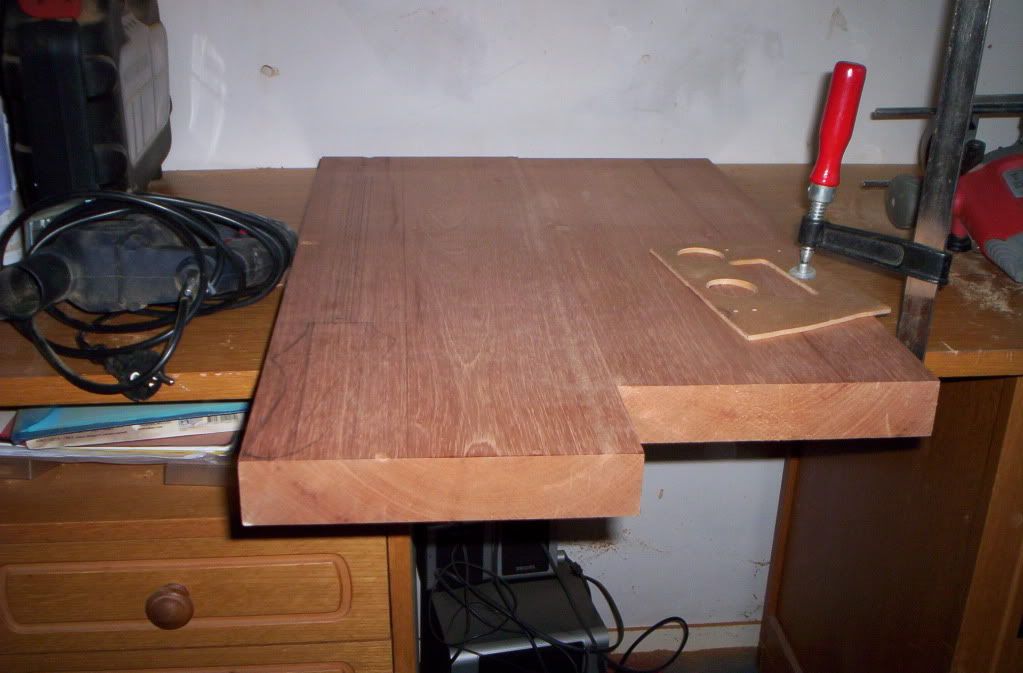
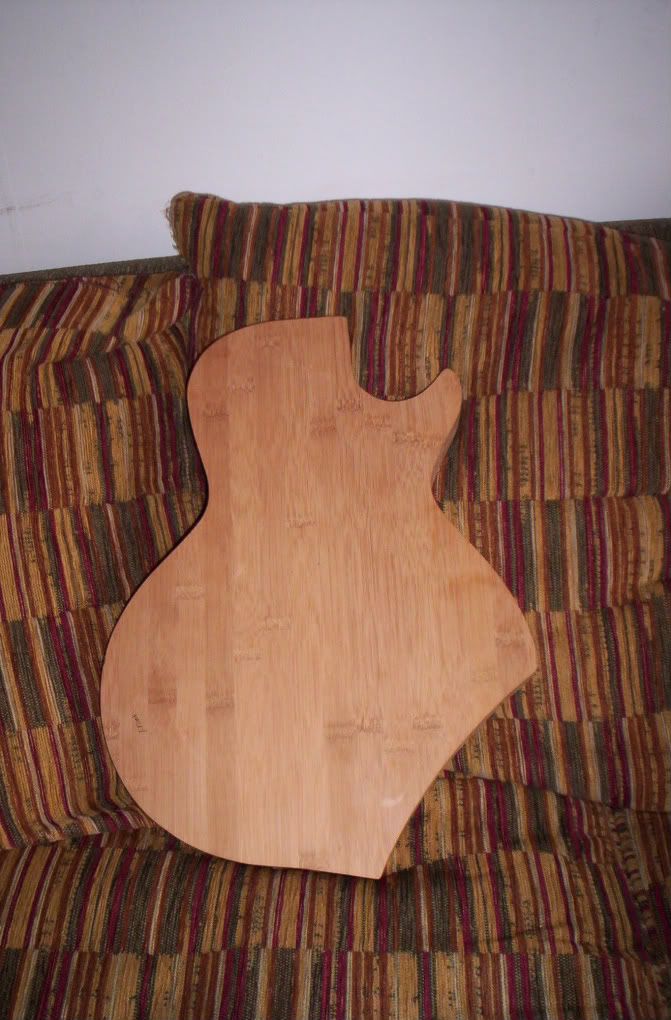
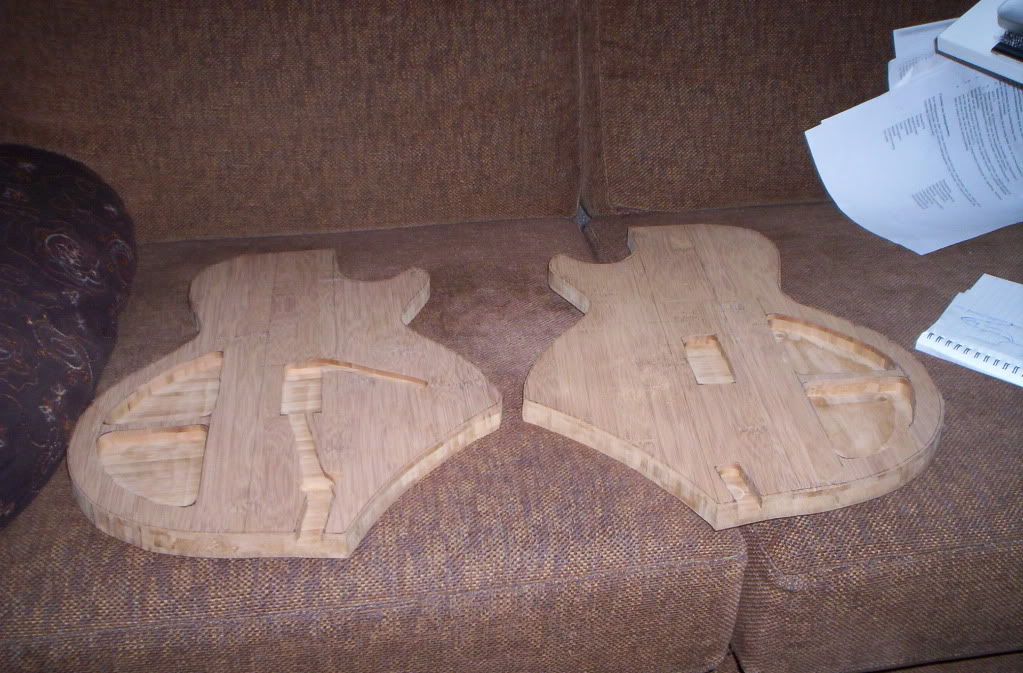
The body routed to the template:
The second pass I took routing (to get the full body thickness, using the upper part of the body as a template) went a bit wrong at some places. Sometimes my router took a bit of a dip. Some unclear pics of the result (the front is tight, the pics are of the back):
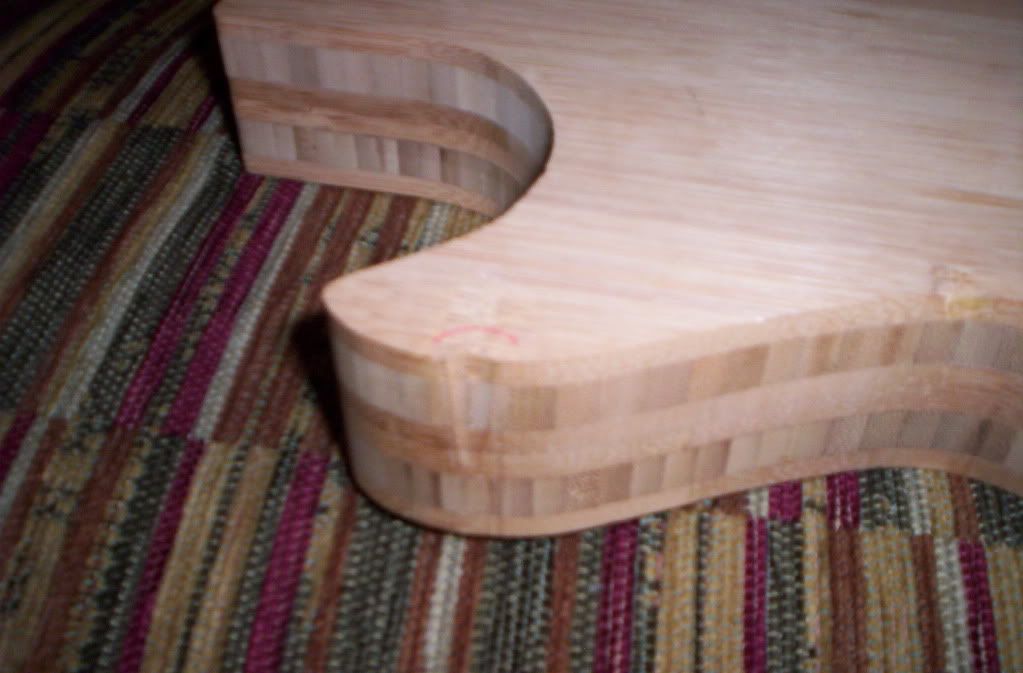
This last one shows how dimwitted I can be somethimes
The router bearing ducked into the hole...
-
Not even a bad idea
-
This won't work with a graphtech nut i guess? (as I believe they are nearly unglue-able?
-
Love how you did the headstock with the extra bit of fretboard! Great build!
-
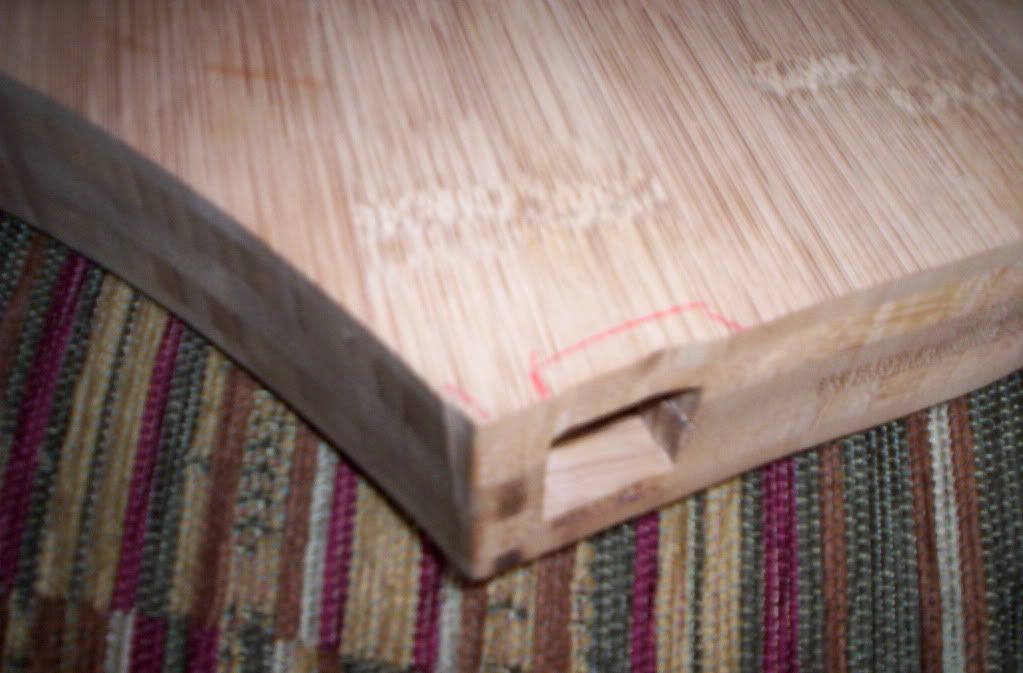
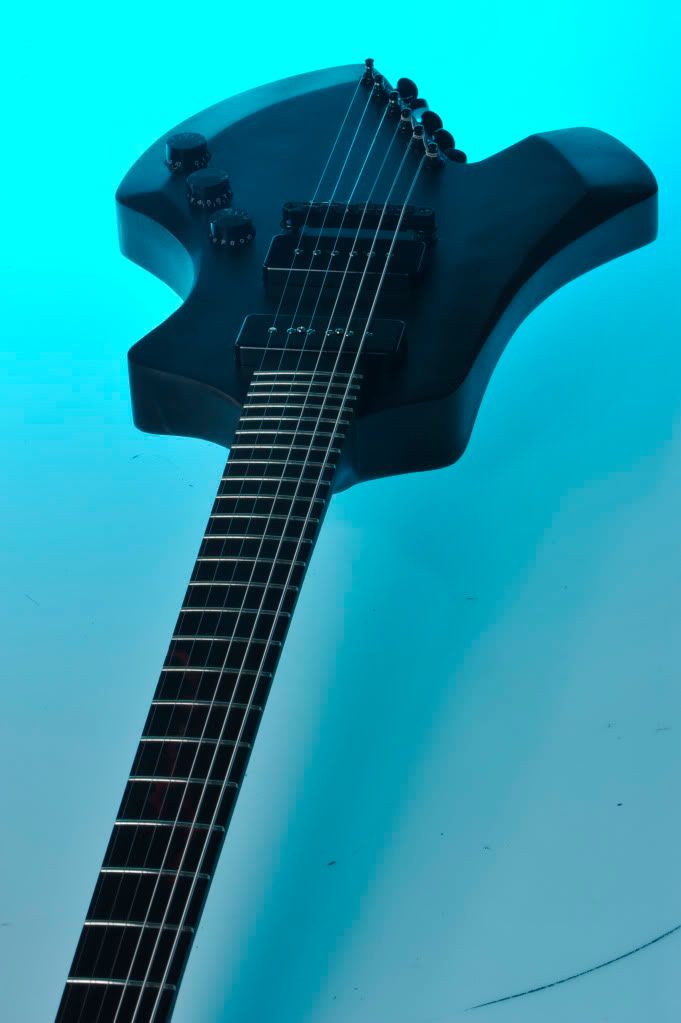
Haha, puzzle puzzle. See the small cavities connected to the square jack exit? They are positioned under where the bridge is going to be. And connected to where the pickup cavity is going to be. I know it's gonna be a small hassle to change batteries, but this ones for myself, so it's not a prob.
The cavity drawn on the template was the initial plan. I routed a channel in that direction so in case I want to do a cavity I can just rout it from the back and be done. The channel connecting to the pickup cavity will already be there then.
-
-
-
Hi guys,
It must have been ages since I last visited this forum. The reason: I had a guitar building overdose doing my final project for school. I lived, ate, dreamt and played guitar for half a year. As a result I simply had a guitar builders block. In fact it stopped me building and even reading about building guitars. Well, now I'm finally getting some inspiration back and thought I would start of with a 'leftovers' project.
I got some black DR strings as a present from a friend of mine, but I didn't want to waste them on my vintage sounding guitars. A dilemma you all probably had at least once: Something small that just begs for a guitar to be built around it. As so happens I still had some EMG's laying about from when I changed them for vintage pickups in my first build. Also I have a black Wilkinson Wraparound and some black tuners. Gotoh I believe (to lazy to get up and check). Woodwise I still have some bamboo leftover from my final project, and I figured the wonderfully clear (bright) sound would fit well with an EMG and a wish for clear metal tones.
For this interpretation of my first design I was inspired by the LP junior. I want to make this guitar as plug-and-playable as possible. I'll use just one of the EMG's in bridge position. Then I figured I would carry the simplicity further: no knobs whatsoever. Then even further: no back plate whatsoever. How i do this you'll probably figure out by checking the pics.
Edit: All the stats in a list:
- Bamboo body
- One EMG 85 in bridge
- Wilkinson Wraparound bridge
- no knobs
- Color: Green
- Neck: Spanish cedar (leftover) reinforced with carbon rods
- Fingerboard: Bloodwood 24 frets
- Bolt-on (most likely)
The color I'm going for is going to be a green. Something like the color they use on old stoves:

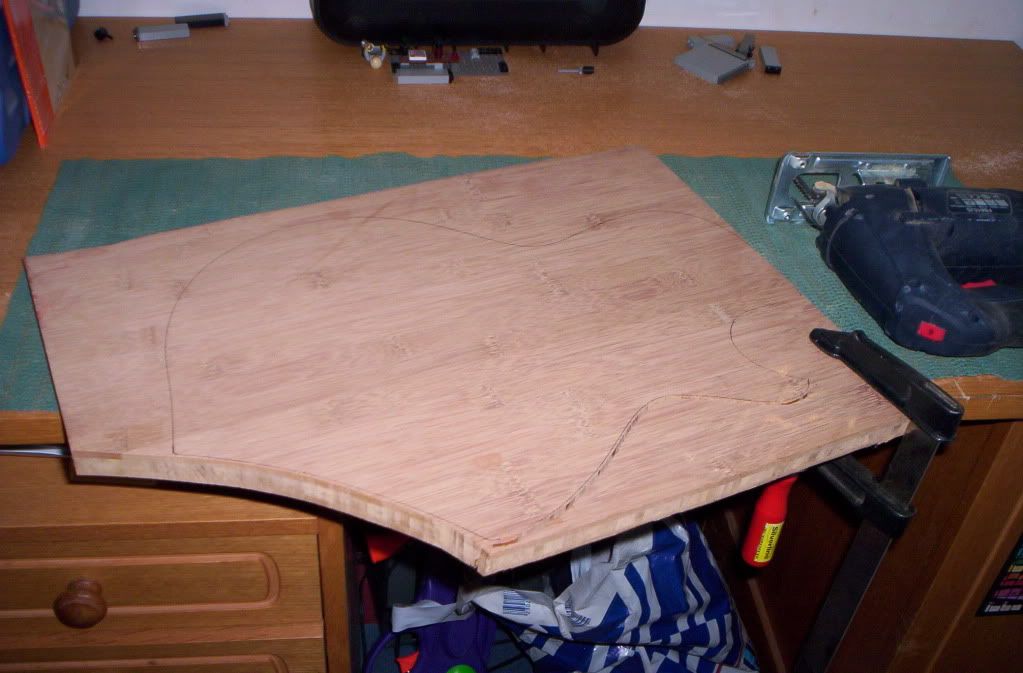
The first picks: I glued the halves together, after which I went around the template with the router.
-
I built a bamboo guitar for my final project at school. We did the neck maple though, as we found the bamboo we had to flexible. The guitar has great tone on the brighter side of the spectrum. Good luck with the plans!
-
I agree with that! Looks pointy but nice anyhow!
-
Thanks guys! I guess the polls will be online tomorrow?
Cheers!
-
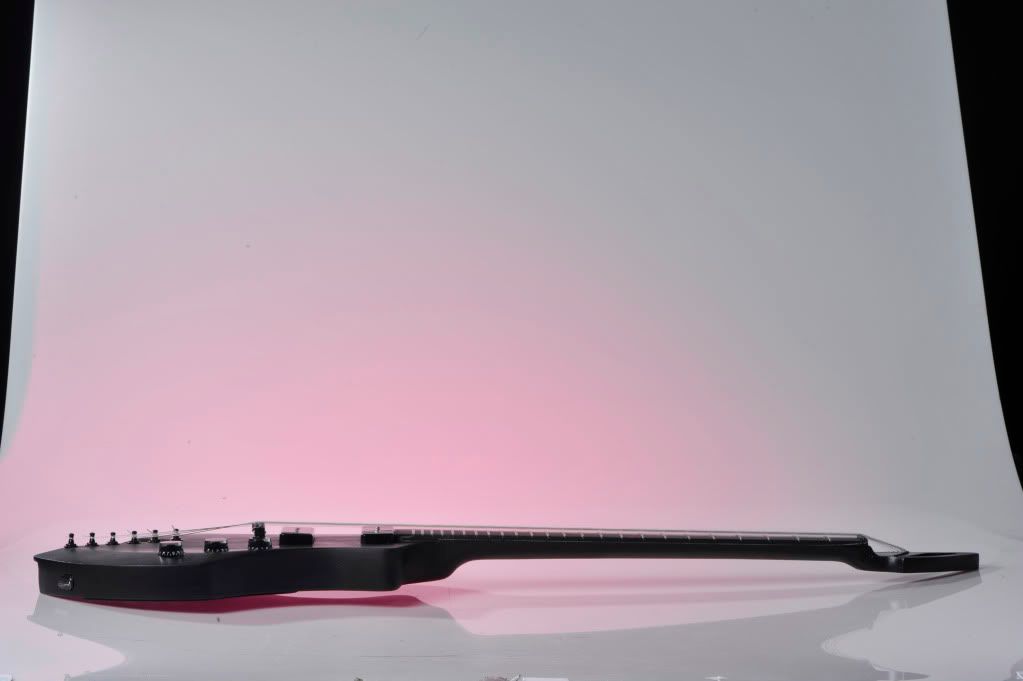
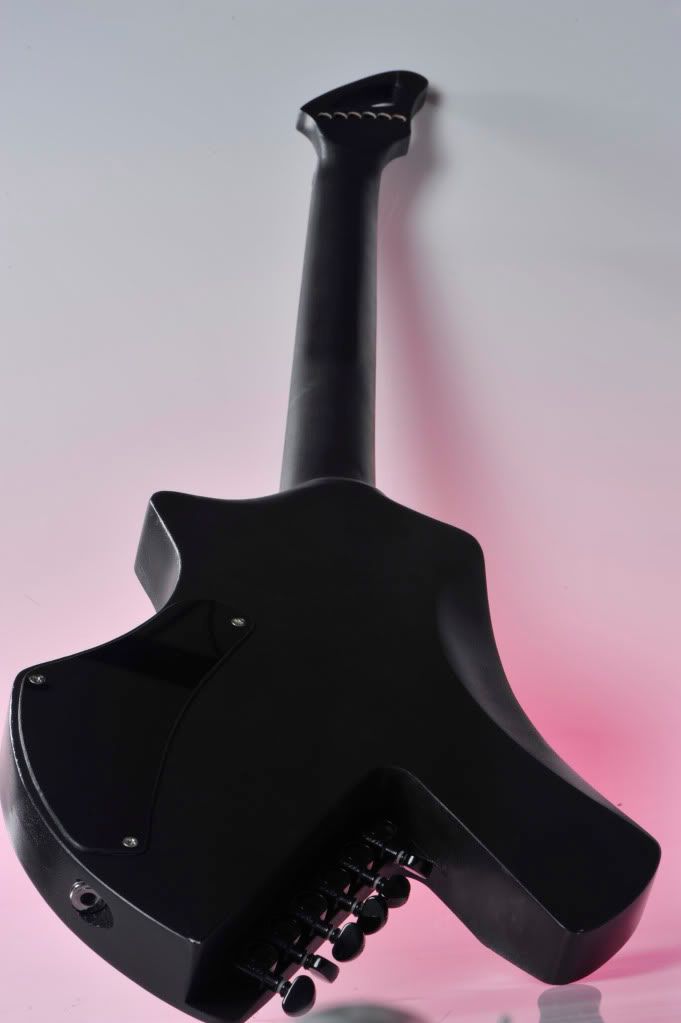
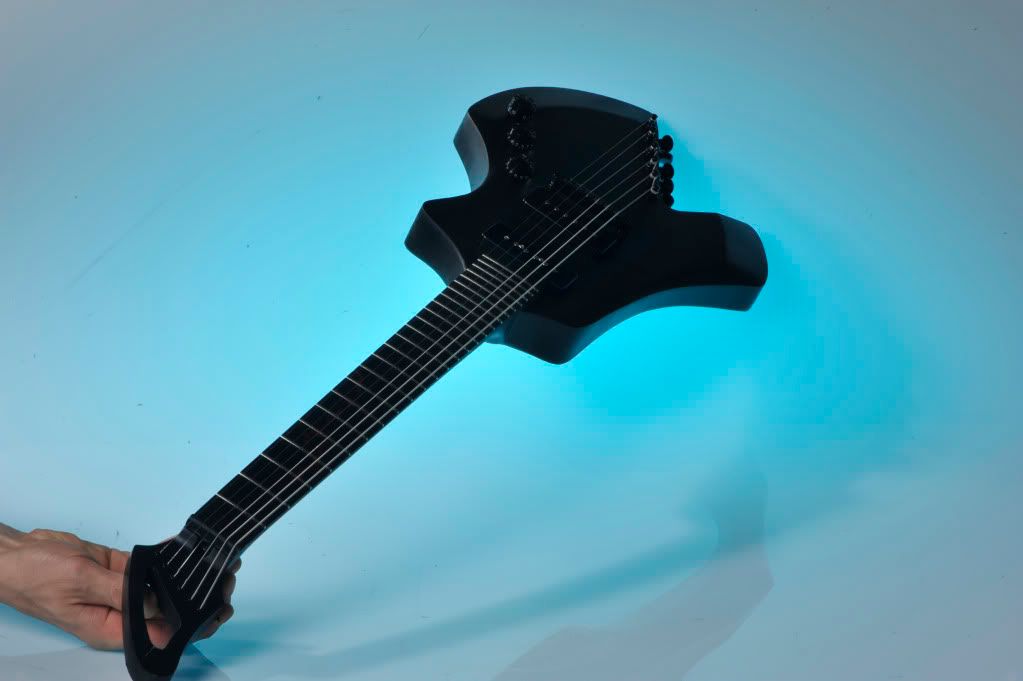
She's here!
Background
Meet "Miss Flora Bannerworth", an elegant lady who was bitten by sir Francis Varney (the Vampyre). To find more information on what I'm talking about, these are characters from the book "Varney the Vampyre" dating 1847, and predating even dracula by quite some time. I'm not sure anymore how much time. Officially this is the first "fantasy" novel on vampires ever written. The book is pretty tough going at times, but after I finished it I must say it was pretty enjoyable.
This is the first guitar I did myself fully without help, including fretting, inlay, neck shaping etc. It was a great learning experience for me, and hope to make more and better guitars in the future! (and in a much smarter way
)Specs
woods
Black Korina body.
Maple Neck
LMII ebony fretboard
Flamed maple vineer inlays
Electronics
2 Tonerider H-90 soapbars
1 Vol.
1 Pickup switch knob (not the prs kind, but one that doesn't have three positions, but (I'm not sure if it's the right word) a smooth transition between pickups, with a noticable mid position.)
1 Tone
Sunk jack
Neck joint
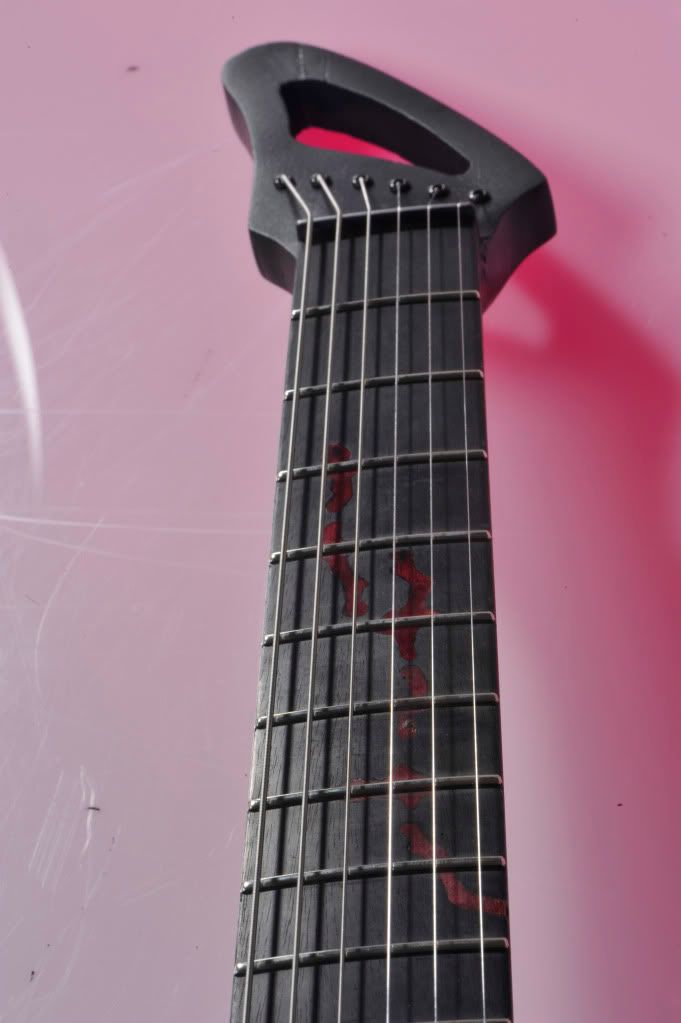
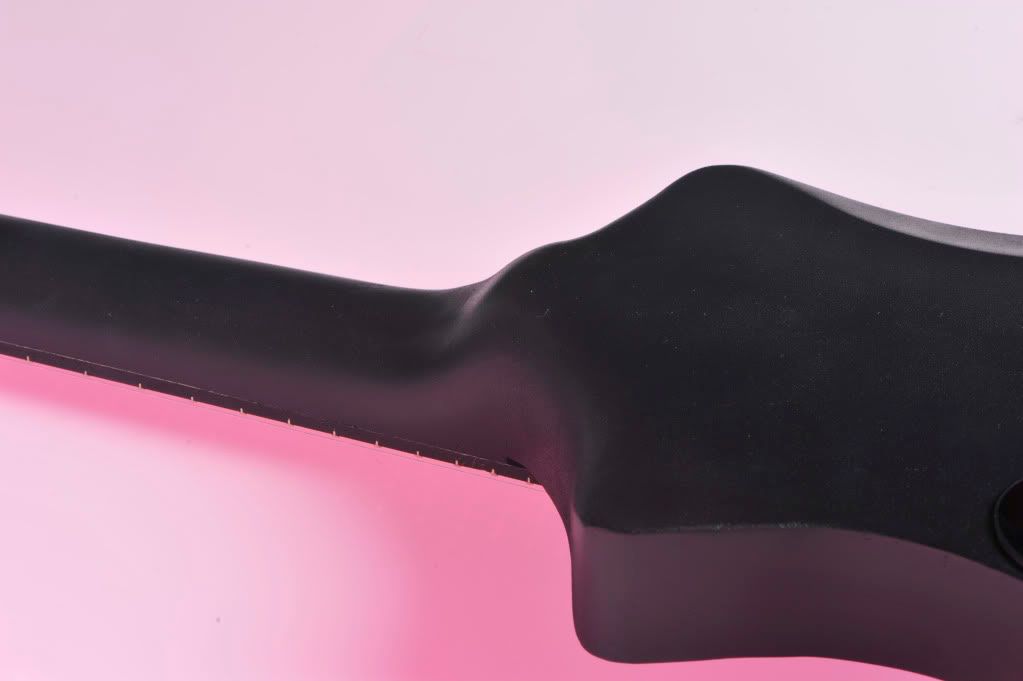
Set neck, with ergonomic acces. Basically I can play 24 with my hand in the same sort of position you normally have at lower positions. Normally this would bring down the balance, and the guitar wouldn't exactly qualify, but because of the rear tuners...
Misc.
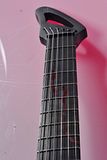
Flamed maple vineer inlay, stained red. This symbolises the bitemarks and blood drips in the "neck" of Flora. The 3rd and 5th are bitemarks, 7 is recognisable for me because of the drippers. The dripper leaves the neck in a gravity correct angle while playing at the 9th.
Pictures
The back:
http://i602.photobucket.com/albums/tt110/d...ov/_DSC3652.jpg
Front/side:
http://i602.photobucket.com/albums/tt110/d...ov/_DSC3629.jpg
The guitar:
http://i602.photobucket.com/albums/tt110/d...ov/_DSC3698.jpg
The guitar:
http://i602.photobucket.com/albums/tt110/d...ov/_DSC3708.jpg
(Small edit) It was one huge vampire in my case, at least he had a big mouth
-
Thanks!
I can imagine you don't, I used to hate the look, though like dogears. Somehow I've started to like them, and their sound.I forgot one pic.
-
Fire away!
. It's done for now! Though who knows I might return to this project one day, so keep an eye out for the topic! Thanks for all the support on the way! -
The frets are in! And leveled, and crowned and polished and shining so much I can see myself in them! It took me all day yesterday, with help/instructions/supervision of a proffesional. I will show the results later!
Cheers!
 . In that case I'll stick to the color and use a 'normal' method.
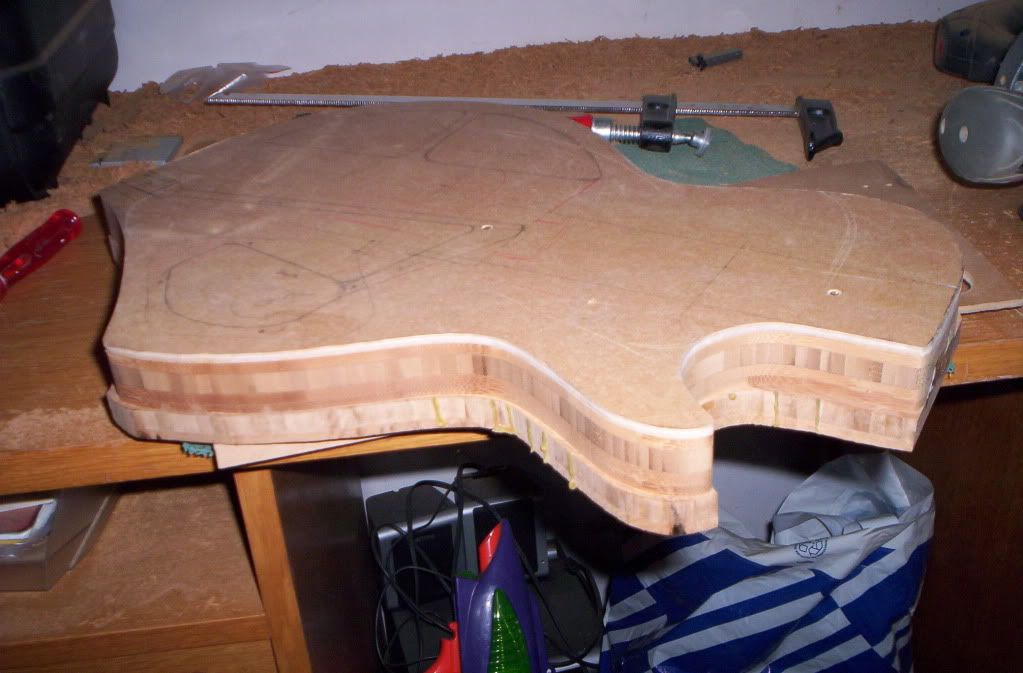


Linny - Third Build
in In Progress and Finished Work
Posted
I love the way you did the neck. Real tight! I kinda stole your method as I nearly lack powertools, the chiseling went a lot better then I expected. I'm at the level I want now, and i'm wondering this: How did you get from the roughly chiselled headstock to the smooth (and wonderful) headstock in the next pic? Thanks in advance!
Cheers.
Willem